Search the Community
Showing results for tags 'Mask'.
-
There is a repeating wish that people would like to use the full scale of editing tools on masks, and handle them as grayscale layers. They are usually told that masks only have the alpha channel, and they are mistaken to think that values of alpha are considered shades of gray. I think this is not the full story. One can use a regular pixel layer as mask, and the alpha channel (transparency) of the pixel layer will be used for masking, while ignoring the RGB channels of it. Furthermore it is possible to put a live Channel mixer adjustment on top of a pixel layer which makes it transparent based on it's luminosity. Combine these two tricks, you get a mask, where you can do every aspect of grayscale editing. Here are the steps: You have pixel layer A you would like to mask, and pixel layer M you would like to use as mask. You nest a Channel Mixer adjustment inside M, choose LAB channels, Alpha channel, make contribution of input Alpha 0, and contribution of input Lightness 100% into Alpha. Layer M should be above layer A. Right-click layer M, and choose Mask to Below. Bam, you have a mask pixel layer to do any edits and it's luminosity is used for masking. (beware of a GUI limitation that nested children of masks are not shown on the layers panel) What do you think?

-
 Trying to replicate the process (link) to blur (bokeh) an image background and use a mask to retain sharpness of foreground. Desktop version seems to work fine. Ipad version mask requires precise tracing of foreground vs the general masking (black) and having image show properly per the desktop version. How can the ipad version behave like desktop version? Using an Ipad Air2. Does Affinity Photo run differently on iPad Pro?
 -
In AP 1.6.1 I have a live Curves adjustment with changes to the Alpha channel, nested inside a mask. This does affect alpha channel of the mask, and indirectly what the masks makes transparent. I would like to destructively merge the adjustment into the mask it affects. Clicking on the Merge button in the Curves Adjustment does nothing other than adding a new entry to the history. Please implement the feature to be able to destructively apply live adjustments to masks. To be clear I am looking for a way of getting a mask, with identical behavior as my current combination of mask with nested adjustment. As a separate feature request, please make the Merge button in the adjustment dialogs disabled in cases when it doesn't make sense, and won't actually merge anything.
-
 I know how you can place an object into another in Affinity Designer from the layers panel. Can this be done via the menu or via a keyboard shortcut upon selecting the two objects? thanks!
 -
 In AP 1.6.1, I have a mask with a Curves adjustment in Alpha channel nested as child layer of the mask. How can I merge the adjustment into the mask? For example clicking the Merge button in the dialog of the Curves layer does not seem to do anything other then adding a new entry to the history.
 -
 Semi-automatic masking / masking guide tool for Affinity Photo Here is best example i can find (youtube link) - Zephyr's Masquerade tool is semi-automatic masking tool, user paint guide lines which help algorithm to solve alpha channel. Its very fast, i don't know for sure how it works, but i would guess that those guide lines descrip to the algorithm textures and colors which are wanted (or/and unwanted) for mask. This come to my mind when i saw Adobe's new automatic subject selection demo, where user don't have any control, just some kind of lucky button, so i thought serif could make better, and i think this kind of tool would be much better with better flexibility and control. And it should be non-destructive, it could be based on editable splines/vector paths (like freehand pen tool, or affinity design's Pencil tool) for example? Maybe Affinity Photo should have "Mask persona" (all masking tools in same place, with lasso selection, mask bursh, guide brush, some procedural masking tools? vector tools, refine tools etc. with easy to use possibility control and edit multiple mask channels for same layer, if layer has multiple mask/alpha channels then mask persona would be great way to control the complexity, at least it would be nice to have way to control multiple alpha layers like separated hair mask, head mask, etc. for detailed and flexible workflow)
 -
 Hi, I want to resize a layer mask I have created before by dragging an image-layer below. The mask layer is just a vector rectangle. When selecting and scaling the mask layer I always scale the masked image as well – and that's what I don't want. The only ways to achieve that seems to be dragging out the image of the mask layer... but I hope that there's a more effective way.?.
 -
How do I access the ‘Mask to Below’ function in Affinity Photo on iPad?
-
 Hi, I'm quite a newbie to AD and really love it but I do encounter a few challenges along the way and wondered if you could help me? I've searched for this question but can't seem to find the answer. I am clipping this illustration in AD with fold lines onto a patterned background but I'd like to retain all the fold marks and regular drag and drop clipping seems to hide them. Any ideas on the solution? Many Thanks!
-
 How do I use a pixel layer containing a greyscale image as a layer mask so that white pixels show the current layer and black pixels hide the current layer, and grey shades in between represent partial transparancy? In the screenshot (attached) I want to use the black and white picture of the skull to mask the green square so that I end up with a green skull where the white is, and the black are would be transparent. any grey pixels would be different levels of transparancy. I really need step by step instructions as I just don't understand how to do this in AP as I am so used to doing it in Adobe Photoshop. Thanks
-
 Hi everyone! I want to know how I can export to EPS format (to impression) with transparent background. I have a image (with (Pixel) type in the Layers panel, not (Image) type). This layer have a mask. But when I export to EPS format, the mask doesn't work. I did the same thing into Photoshop, export to EPS and import into Affinity Photo to see what's happened. The only difference that I can see is that the image have (Image) type and not (Pixel) type. I don't know if it is the key, but if it is, I don't know how I can change the type of the layer (Pixel to Image). Someone can help me? PS By the way, I'm a French guy, so I'm sorry for my english (correct me if you want, I learn)
 -
I would like to request that if I want to add a mask layer that it does a couple things automatically considering this is a conventional workflow for most: 1. When I select a layer to add an empty reveal all mask I would want it to be auto-selected and ready to paint on. 2. Change brush color swatches to be black and white, but black to start since I created a reveal all mask in the step before.
-
Steps to reproduce: 1) Have a pixel background layer. 2) Create adjustment layer with a very visible Levels adjustment, such as heavy lightening 3) Nest a Live Gaussian blur filter layer with high radius as child of the adjustment layer. Intended purpose is to blur the embedded mask of the adjustment layer. 4) Activate the adjustment layer, switch tool to a large paintbrush, black color to erase from the mask of the adjustment layer. 5) Move the mouse over the layer without pressing the mouse button, and observe a trail left over by the preview of the brush 6) You can clean up the view by disable and then enable the adjustment layer. Please see attached screenshot
-
 I'm a brand new potential user who's currently trialling Affinity Photo. I like a lot of what I see, but have two key features I am looking for. I've done some online research, but cannot find clear answers. Is there any way to have a layer mask displayed as an overlay (e.g. semi-transparent red). I know I can use the quick mask feature, but would love to be able to just paint directly onto a blank layer mask and then check for missed patches using a red overlay. Can this be done? I have seen some references to brush size and hardness being adjustable using CTRL+ALT and then dragging the mouse, but I can't replicate this with either left click (goes to colour picker) or right click (does nothing). I know I can adjust the brush size with [ and ], but really like the size and hardness adjustment to be in the same motion. Is this possible? I'm really hoping to move from Photoshop to Affinity Photo, but would need to find a good workaround for the above to not have it significantly affect my efficiency.
 -
 Hello, I use a iMac 2017 with 16 G of Ram memory and Affinity Photo 1.5.2. I have a few questions. -When I use bruhses the brush size is unstable and changes with no reason. Any idea why? -Furthermore when I crop an image in developing persona and then make a selection, the selected area goes beyond the image as shown in the first image, and this create unpredictable border of the image if copied and pasted. any recommendation? -After I make a selection like in the screen shot, how I blend the background (the gray area) without having the color of the selected image bleeding into the background ? I tried creating a mask, inverting the selection but no luck as shown in the orange beeding in the second screen shot. The blue paint stokes do not seem to go in the mask area. Your help will be greatly appreciated.
 -
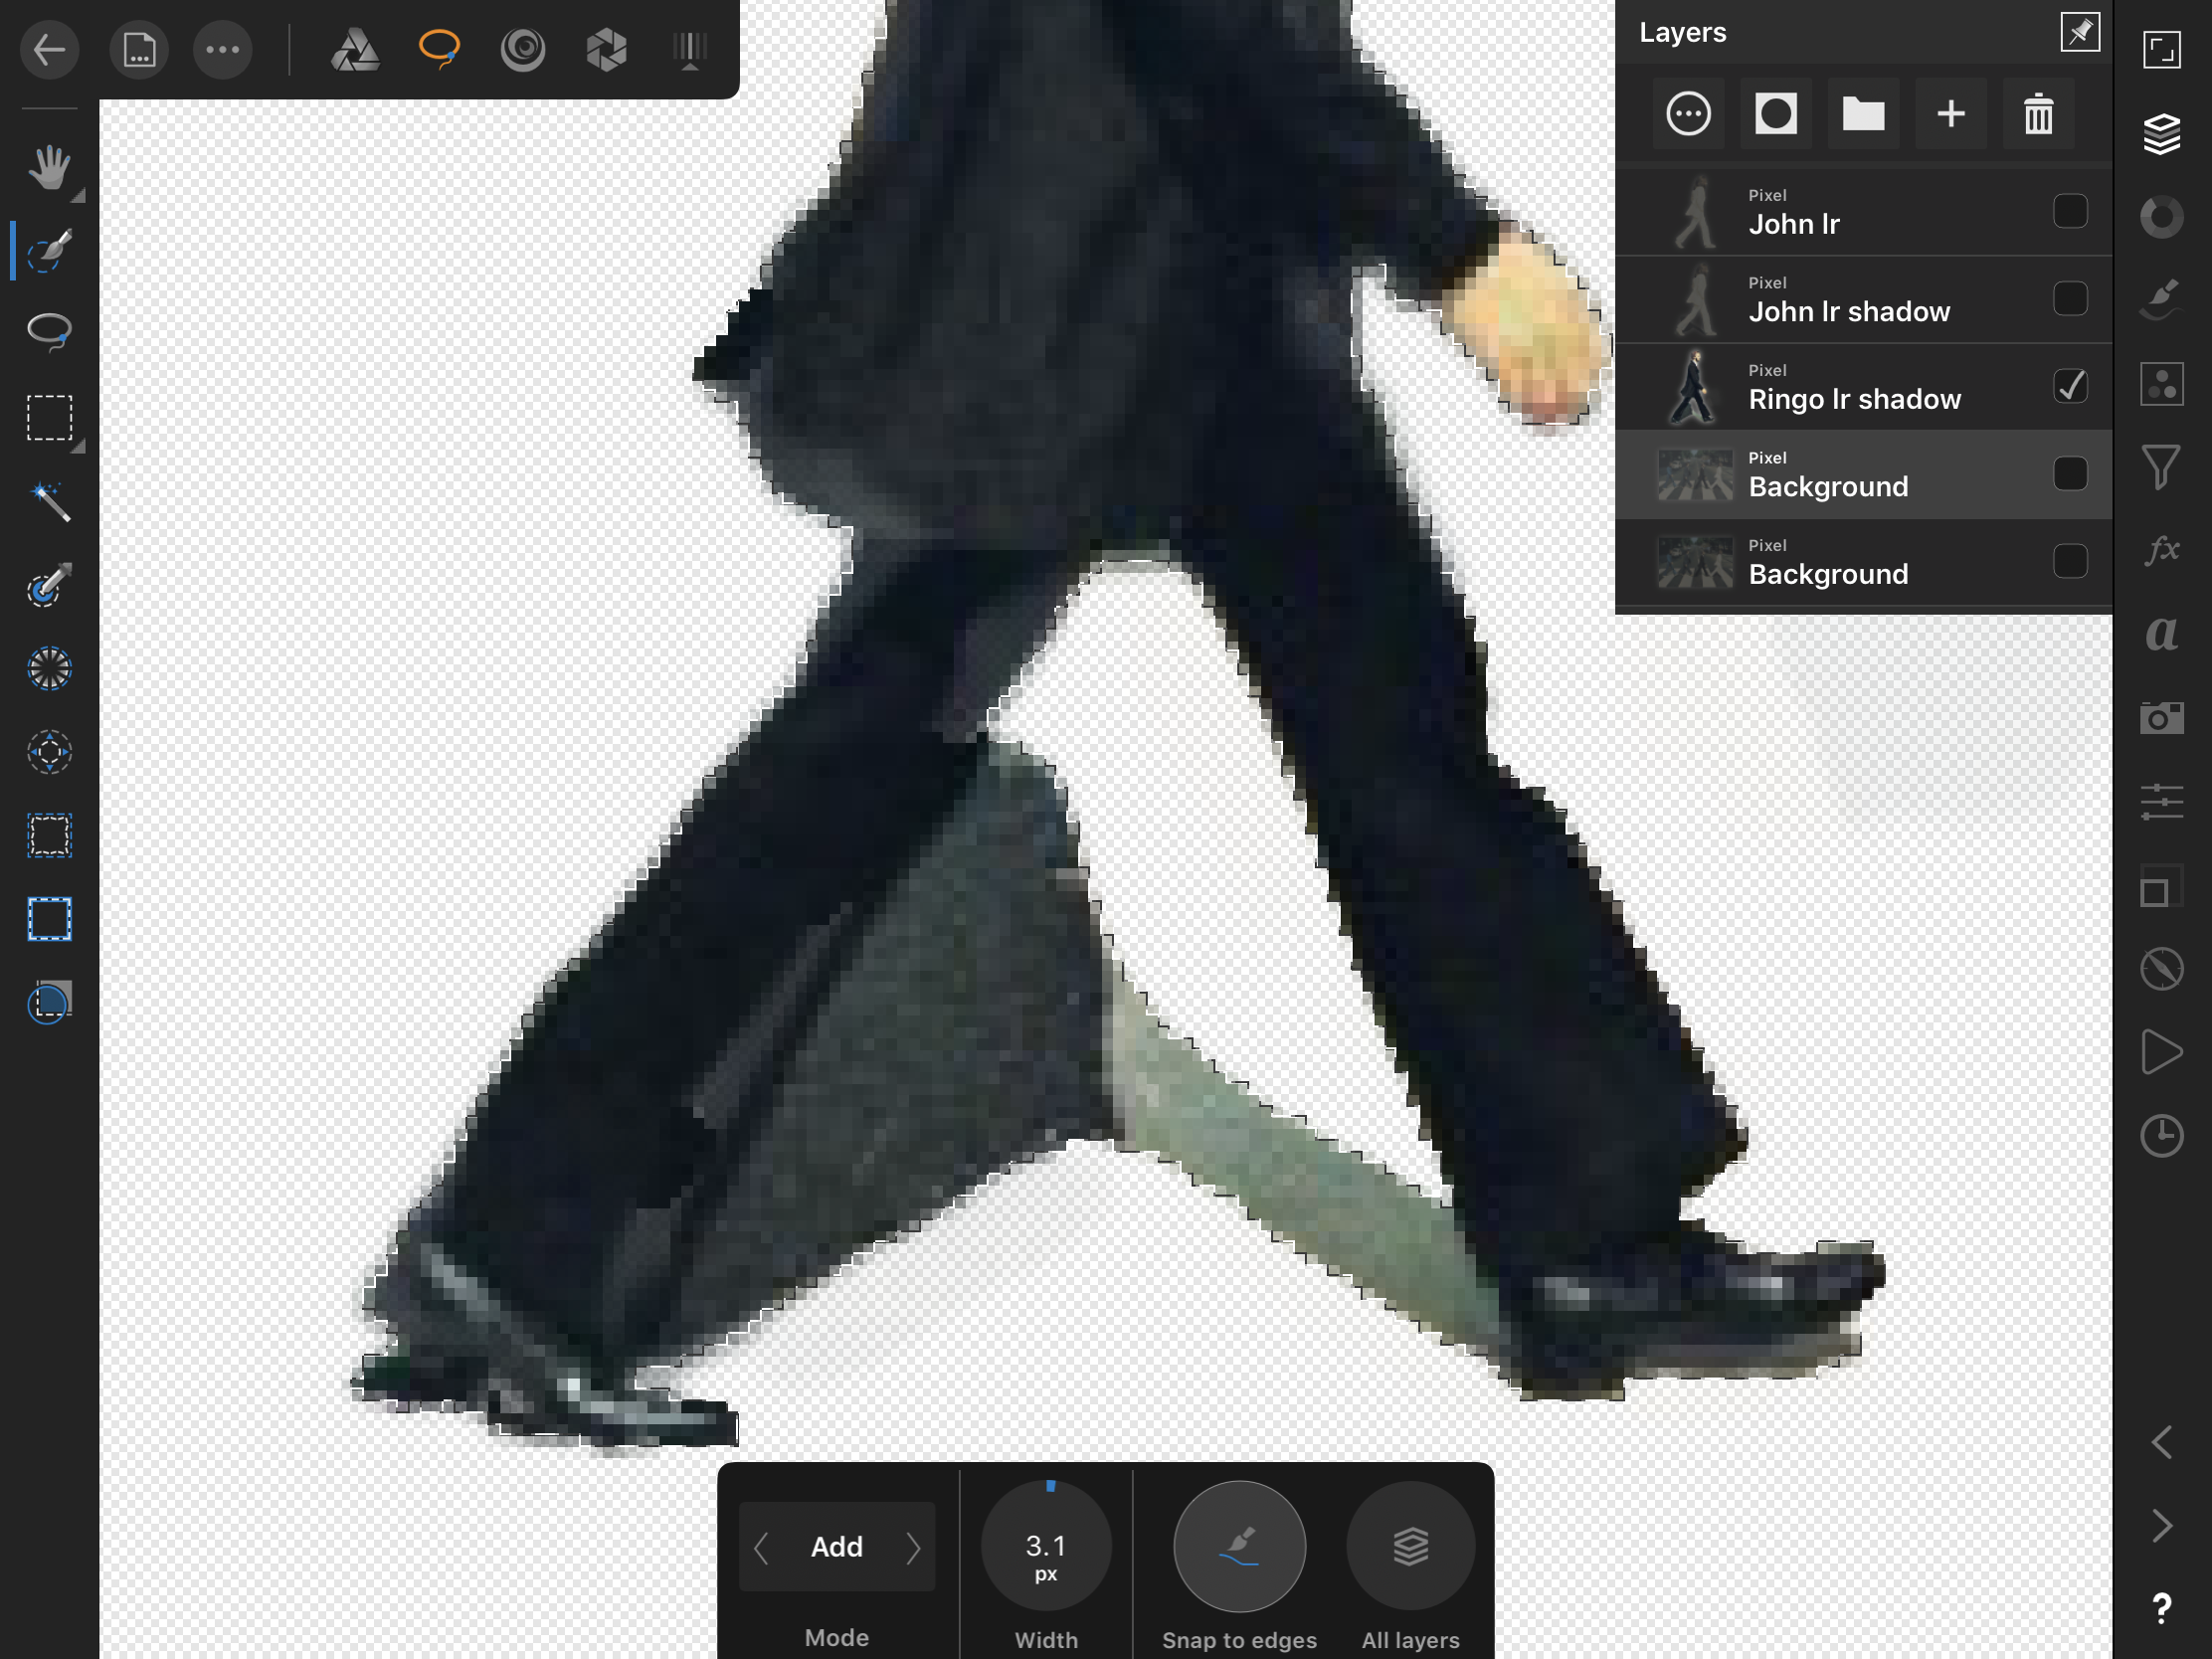
Here’s some of my photo manipulation done in my love: affinity photo for iPad dont challenge me here, because I care less if your work is better than mine, rather I care if you yourself like your work as well as mine to share with me and all who feel the same describe your techniques, how long it took, anything original about your workflow... leave SE your raw assets if you want, let’s create a discussion about improving how we use affinity
-
- 2
-

-
- layers
- photo manipulation
- (and 6 more)
-
 Hi, On the layer of the slice of bread I have a layer mask selected. With the paintbrush I did a stroke. The brush is set at 100 % Opacity, 100 % Flux and almost 100 % Hardness. The bread under the stroke disappear but not completely. After several times, it stays some pixels of the bread. What is it happening?
-
 Hello, in an adjustment layer I painted in a mask. Later on I wanted another adjustment layer to have the same mask. Since it is not a simple mask, i would like to copy the mask or even better to extract the mask from the existing adjustment layer and paste it into a normal mask, which I can then move around in my layers as I need to. Is there a way to do so? I did not find anything on that. Greetings Matt
 -
Long time Photoshop user. One of the things I was able to do in Photoshop that I would like to know how to do, if possible, is use a layer mask to produce a selection. For example, if I have a layer with a mask of a person, like in the tutorial on selections and masks, is it possible to take the layer mask produced and turn it back into a selection? Thanks in advance for any help.
-
 Well in Affinity theres one very important shortcut missing, which would improve working speed a lot. I Talk about the possibilty in the layers menue to strg+lmb klick on a layer mask and select the mask, but not to be able as in photoshop, to "shift"+"strg"+lmb. klick several masks or layer one after the other to select increadibly fast all the stuff you need and get a additive pixelselection.. of course as already discussed you could save the different masks in the channels tab, and ad them (this is by far slower then the shortcut approach) or, as a workaround, create a new pixellayer on top, strg+lmb klick the layer you want the pixelselection from in the layers tab, the new pixellayer stil selected and just press shift+f5. this would give you a new window to decide how to fill the selection.. Well.. is there a way to just fill in the frontcolor of your colors, or white or black without every time to tell the programm... yes. take the color.. just one shortcut without the need to confirm that realy you need the color.. would improve much the workaround.. thanks
 -
Thank you for the Quick mask tutorial. it really makes some selections much easier. I do have a question though, for some reason I am getting inconsistent color of selected item. Could it be that when I select the white brush I am not at pure white? It seems that there should be easy way to go back and forth between black and white rather than ever to use the color wheel each time.
-
 I'm now tinkering with converting a mask to a selection. Here's progress: Turn mask into pixel layer. Channels panel, right-click Mask Alpha then click Create Greyscale Layer. (thanks, MEB) Select/Select Sampled Colour. Click on white. Tolerance 100%. Selection created, so delete pixel layer created in 1. I took an image, selected and refined an area (to get a good feathering). Cut and paste to create reference layer. Use above to recreate selection. Cut and paste again, then compare the before-and-after cut/pasted selection layers. Looks identical, even at the feathered edges. Any improvements on this?
 -
I'm currently puzzling over the simplest way to convert a mask to a pixel layer (and whether this can be made into a macro). Currently I'm at: Release mask if it is attached to any layer, or drag to top level of layers Invert mask Put black pixel layer below mask Select mask layer Merge down Put white pixel layer below this layer Select merged layer above white layer Merge down Any improvements? The attached macro does steps 2 to 8, but I can't find a way to include the release into a macro. Still, it seems usable -- you just need to do step 1 by hand. You may also need to ensure nothing is selected. Dave's Mask to Pixel Layer.afmacro
-
If I have a normal image in black and white and paint black on it with the brush set to overlay, only the darker areas are affected. Similarly with white, only affecting lighter areas. In PS, this is used in a handy trick for refining masks (yes, I know there is a refine mask command, but . However, in AP, if I set the brush to overlay and paint black on a white area, it still darkens it. Looks like a bug? Digging around, it seems masks are held as alpha rather than mono. Perhaps this is the problem, but the incompatibility remains and may bluff other ex-PSers. Related, it seems a bit of a faff to convert masks back to pixel layers. The above problem (and others) would be eased if this could be sorted. Tx
-
I often use geometry layer to mask (clip) other layers. Unfortunately there seems to be no possibility to mask/clip everything inside the geometry. It would be great to be able to invert geometry layers without rasterizing them.