Search the Community
Showing results for tags 'Affinity photo'.
-
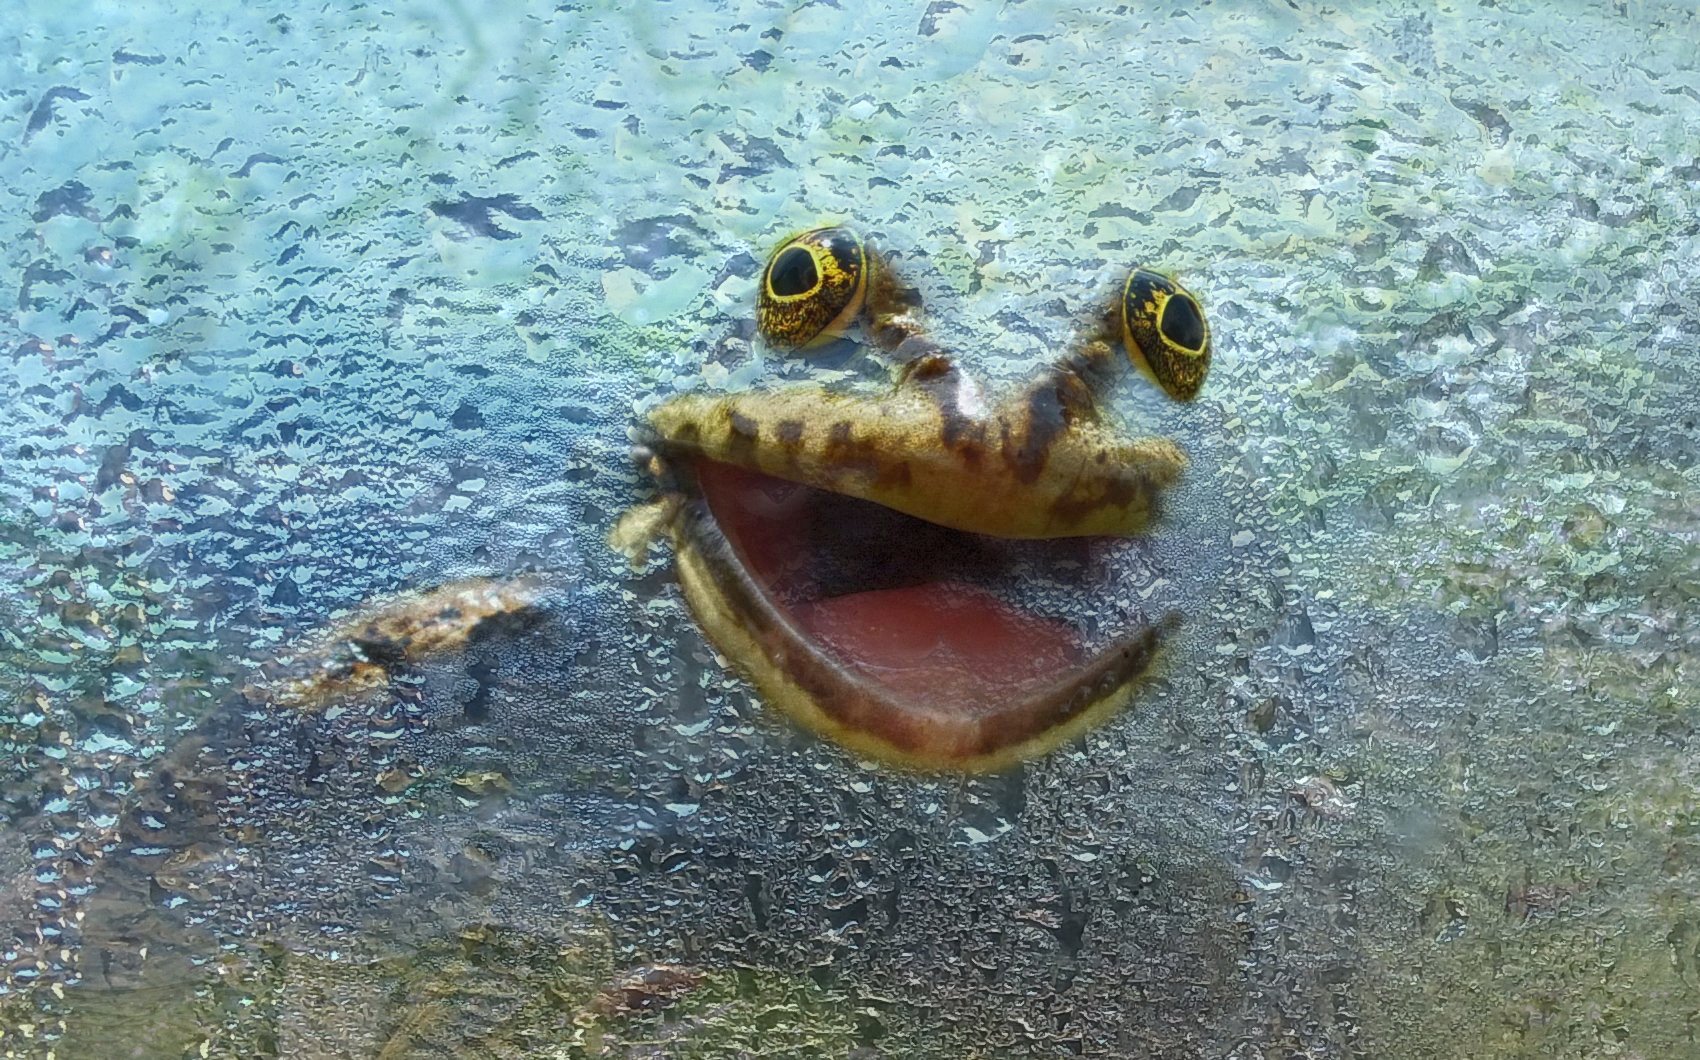
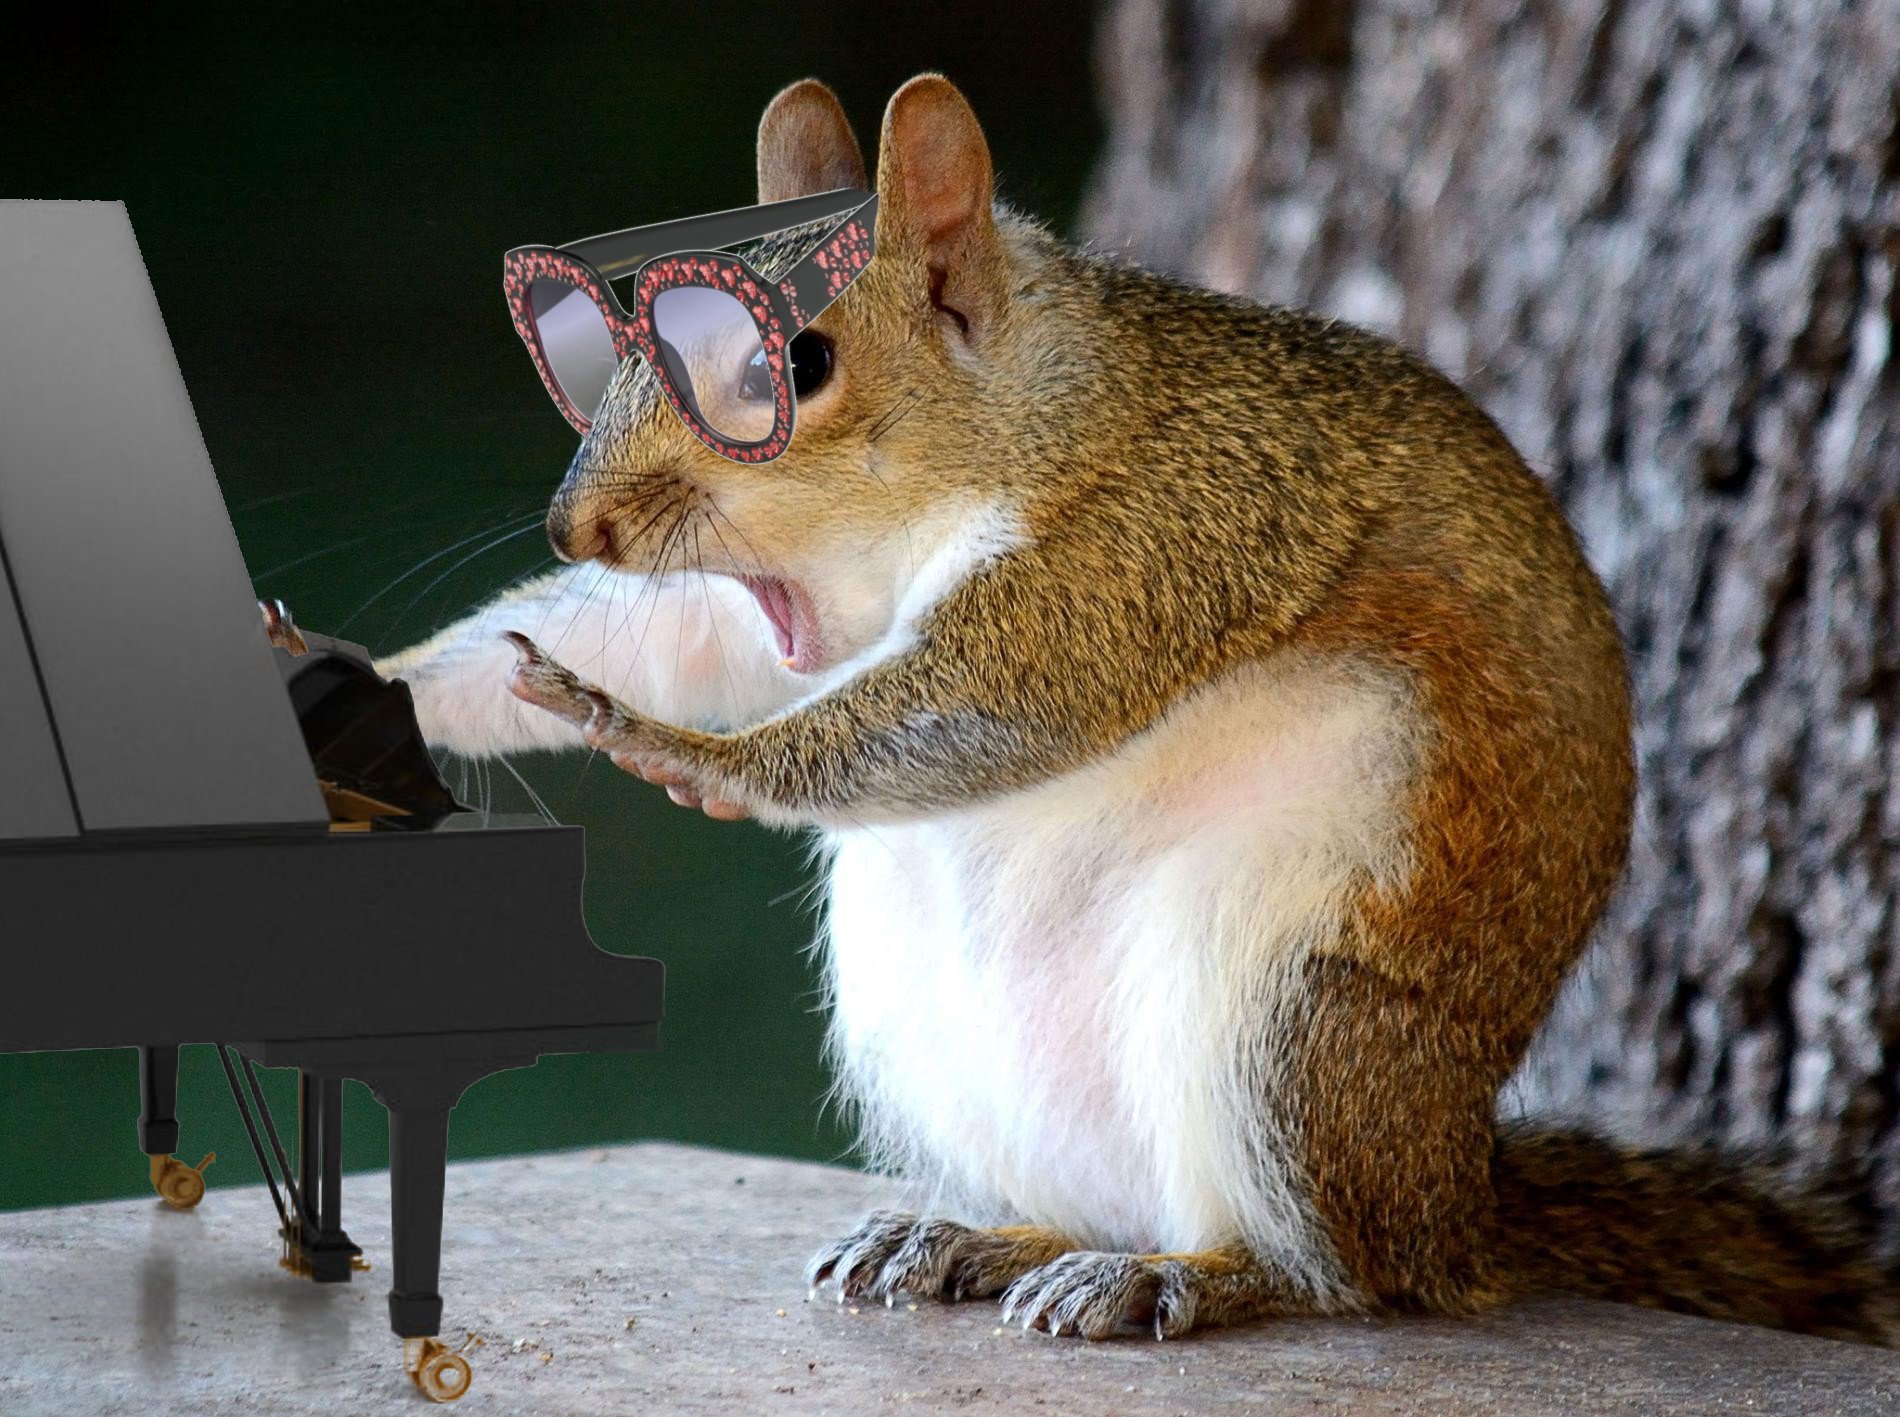
I watch most of the tutorials by Piximperfect on Youtube. He recently referred to a site called PSD Battles (http://www.psdbattles.com) where you can make fun edits to others' images and share them. I hit a funny bone with me when I saw what others were doing, and thought some here might like to have a go at it. It's currently in beta, and I'm not sure how it will eventually work but have a look. Here are a couple of images I submitted: A frozen frog and Squirrel Elton John

- 1 reply
-
- 3
-

-
 It's in Chinese because I made it for my grandparents in China. They know I'm studying games engineering so I thought it would be a fun twist to my annual traditional postcard Aside from the lack of indexed color mode when editing, my experience with Pixel Art in Affinity Photo has been a blast. Coming from Photoshop, I love the infinite zoom, the pixel tool and the snapping to whole pixels. Placing the colors feels very smooth and accurate as well. Anyway, here's the upscaled postcard, hope you like it ^^
-
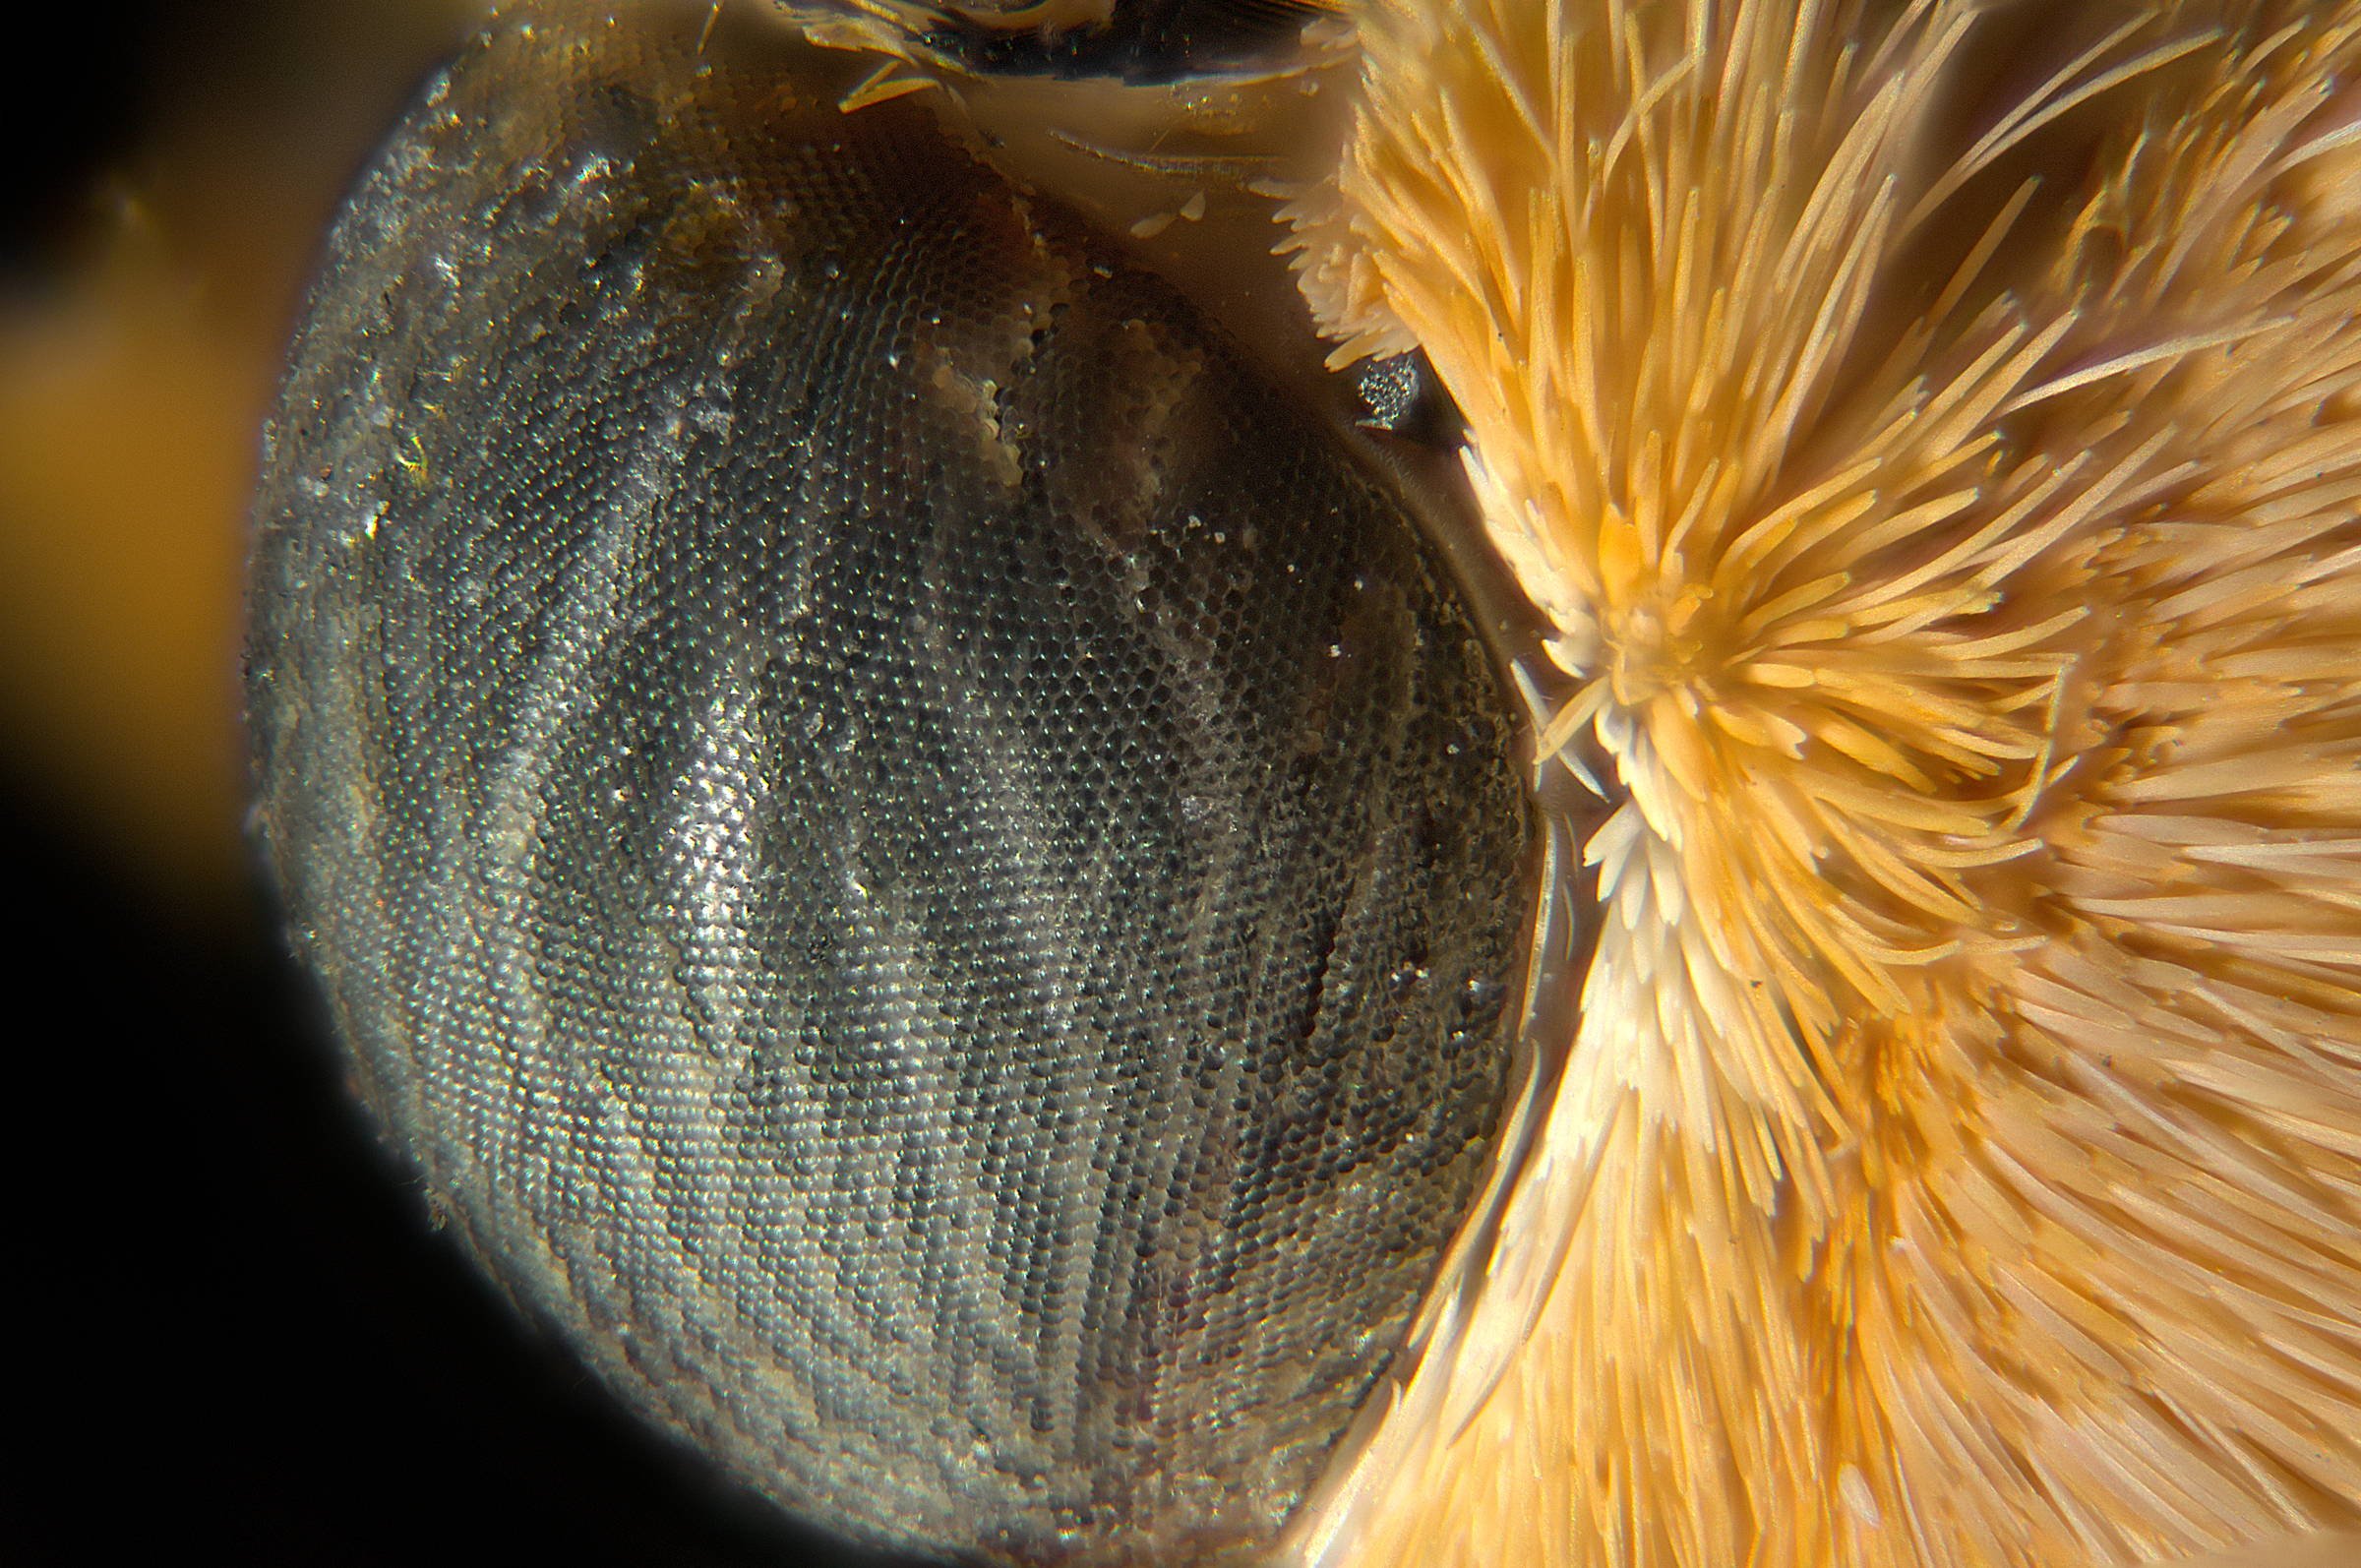
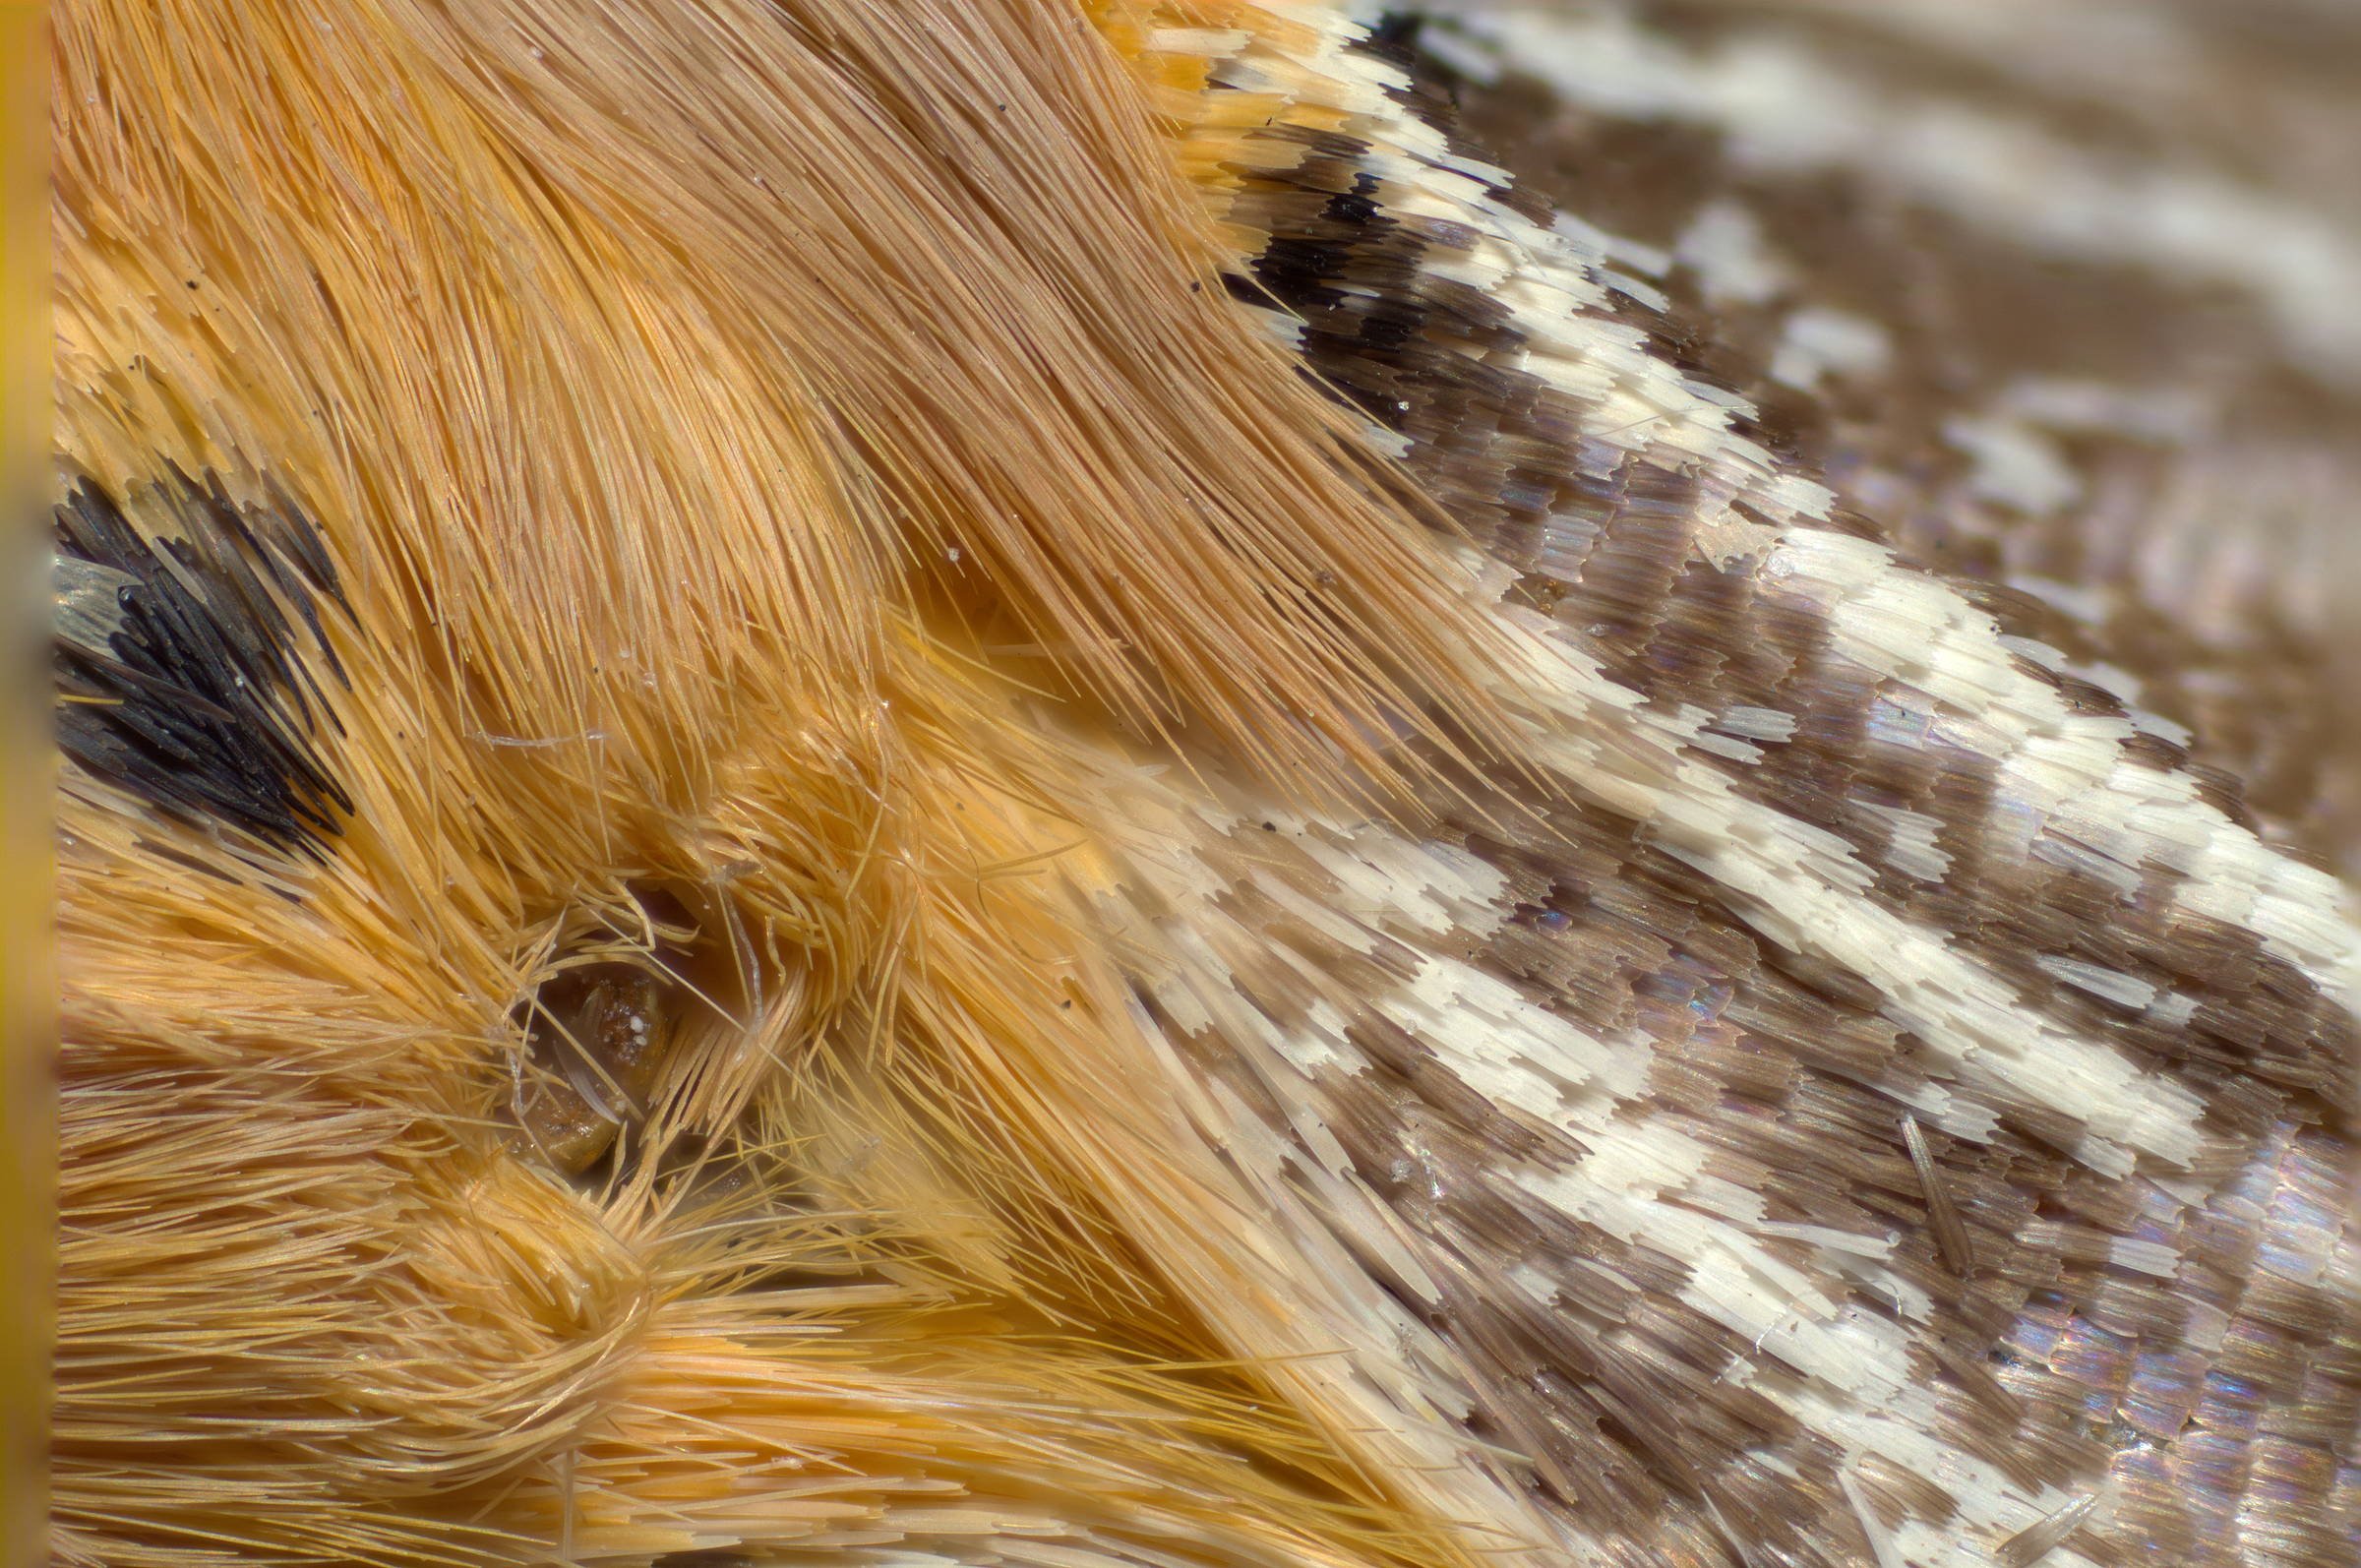
Focus stacking with AP. It took about 30 mts for each image. No cropping, only small trimming of borders. Minimal editing like enhancing contrast only done. Subject: a dead moth which I accidentally came across in the stairway. Magnification: The field of view for 5X objective is around 5mm X 3mm and 10X about 2.5mm X 1.5mm. From internet I see that the length of one scale is about 0.20mm and width at tip 0.035 mm and distance between the fine longitudinal lines on a scale about 0.001mm. So the smallest feature just visible is about 1 to 2 microns (0.001 to 0.002mm) and 5 micron features are clearly seen. Camera: Nikon D3100 with 5X and 10X Plan achromatic metallurgical finite objective. Lighting: One flash Godox TT600 triggered by hotshoe mounted wireless trigger Godox X1N. Powerlevel 1/128, no diffusers. step movement: Milling machine table , each step was about 15 microns, manual turning. More details of setup: https://forum.affinity.serif.com/index.php?/topic/70721-flame-of-the-woods/ 10X objective, 95 images stack( eyes) 5X objective, 47 images stack(hair and scales of wings) 10X Objective , 40 images stack(scales on wings)
-
Hi all, please add the option to create a brush from selection, I really can't see why we have to export a brush shape only to import it back in, it seems a very convoluted and needless process. Brush from selection would streamline the process of brush creation substantially.
-
- 3
-
-
- affinity designer
- affinity photo
- (and 3 more)
-
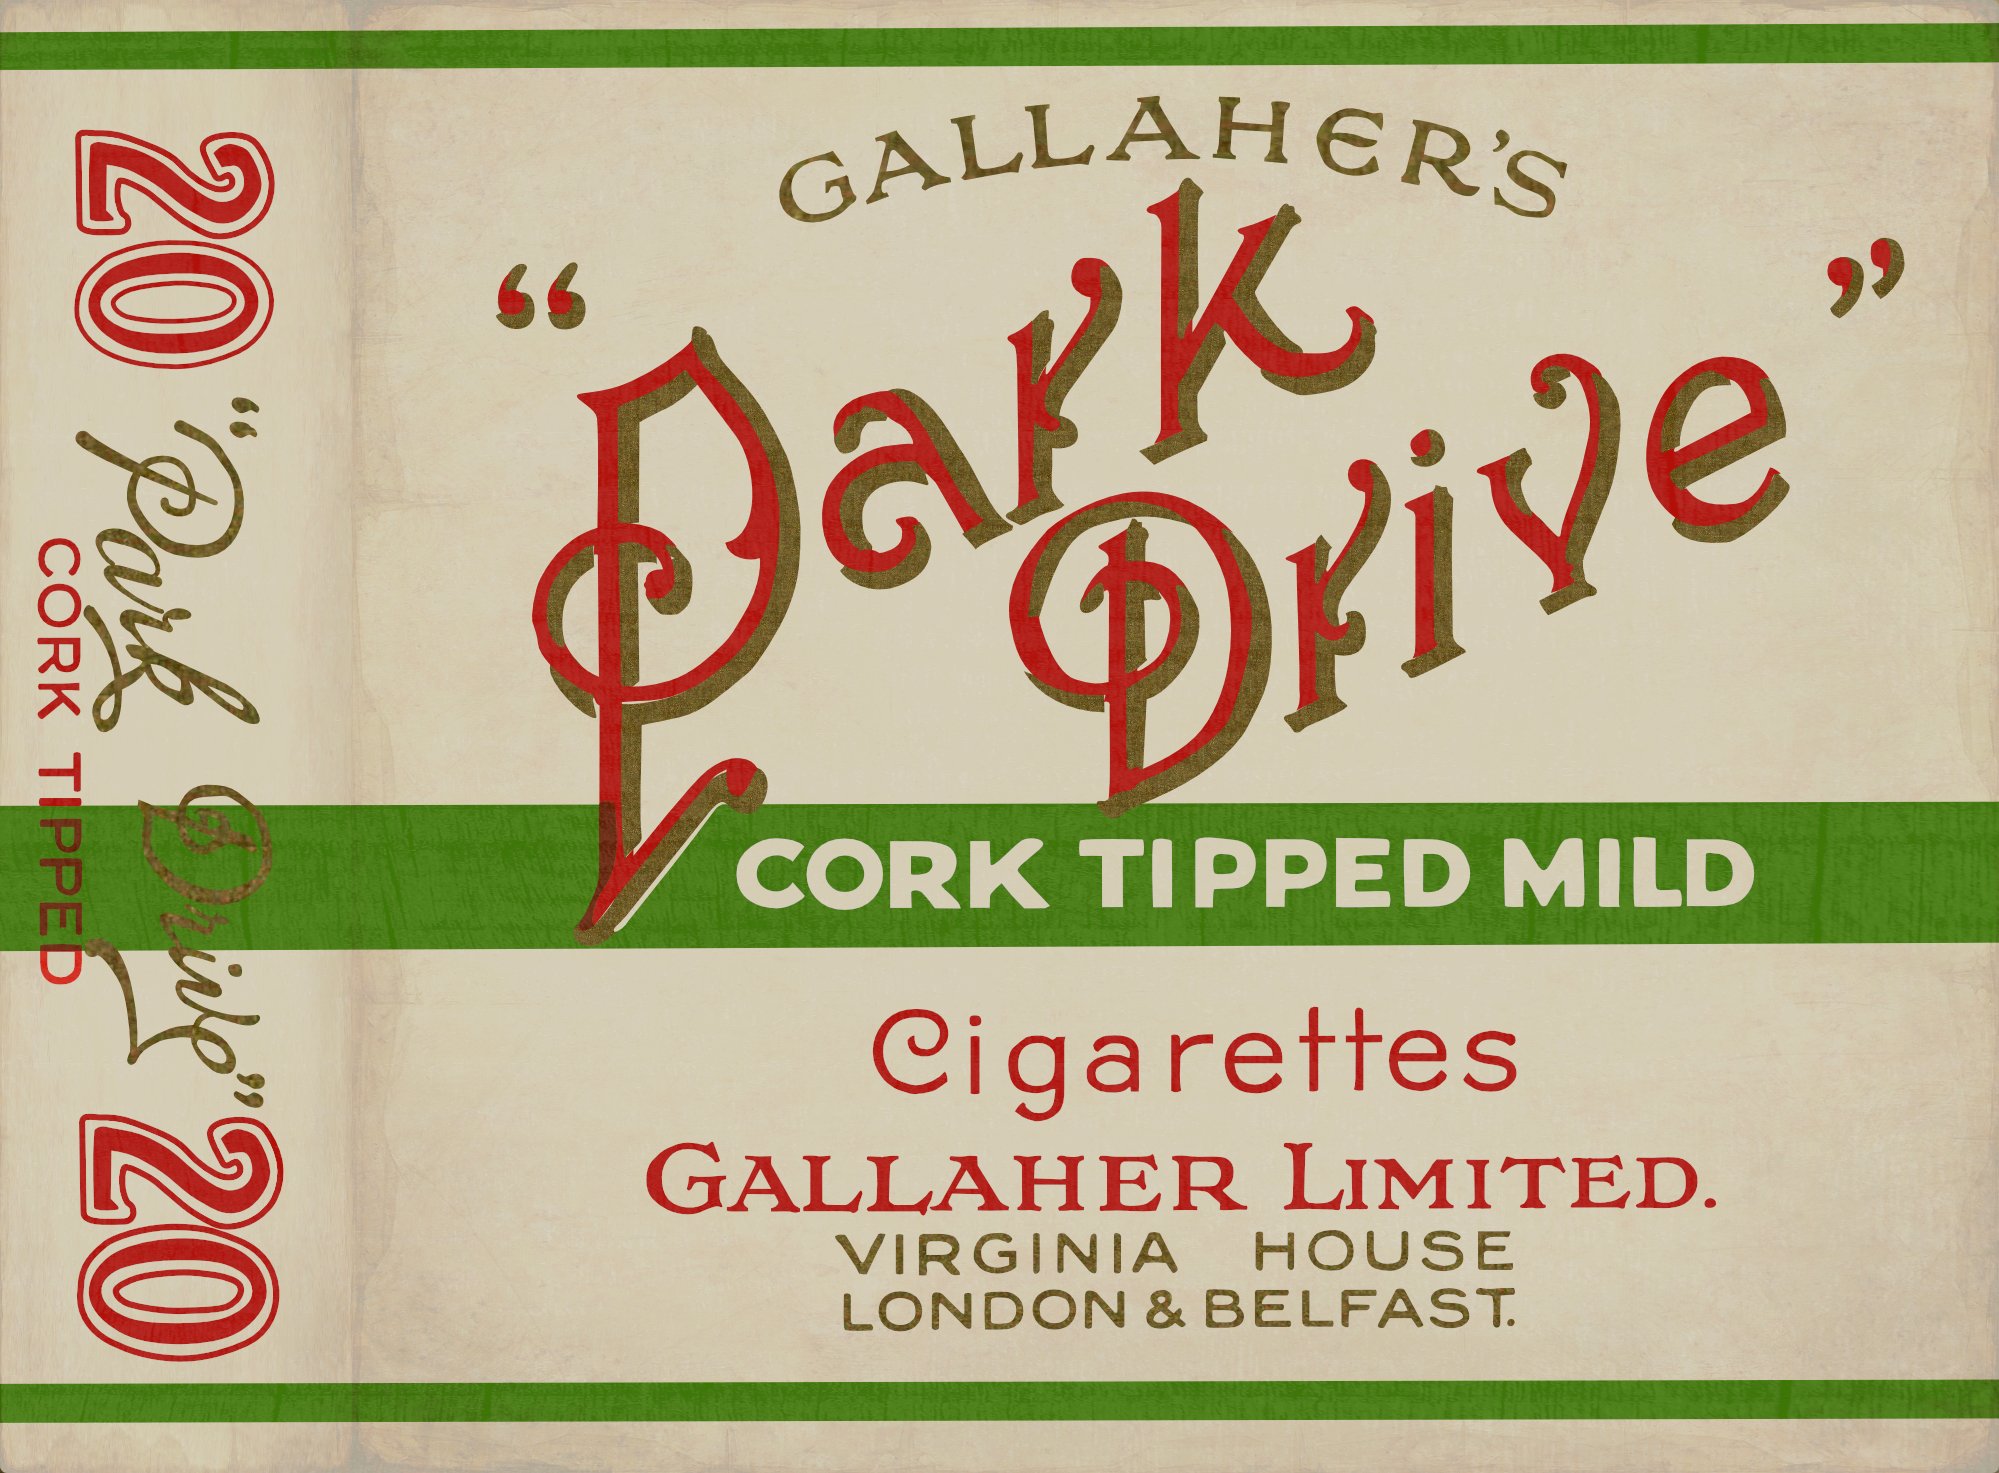
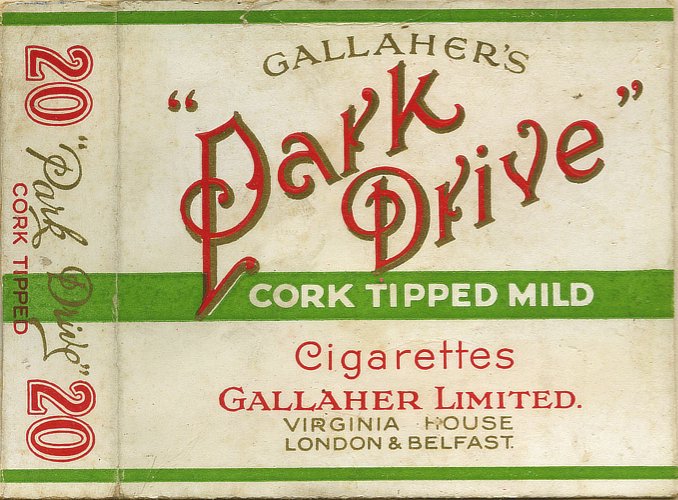
I said in an earlier post (https://forum.affinity.serif.com/index.php?/topic/75089-vintage-cigarette-packets/) I'd started a little project to reproduce some old cigarette packets (or packs, if you're on that side of the Pond). Here's another: Park Drive. Once again, I've used vectors to make the letter shapes, with a bitmap fill for the gold shadows, made by sampling the original image, and I've finished off in Photo with Merge visible and a couple of pixel textures to make it look a bit 'lived-in'. This time I thought I'd be a bit more ambitious... and try a twenty instead of a ten! And the original looked like this:
-
- 2
-
-
- vector
- affinity designer
- (and 1 more)
-
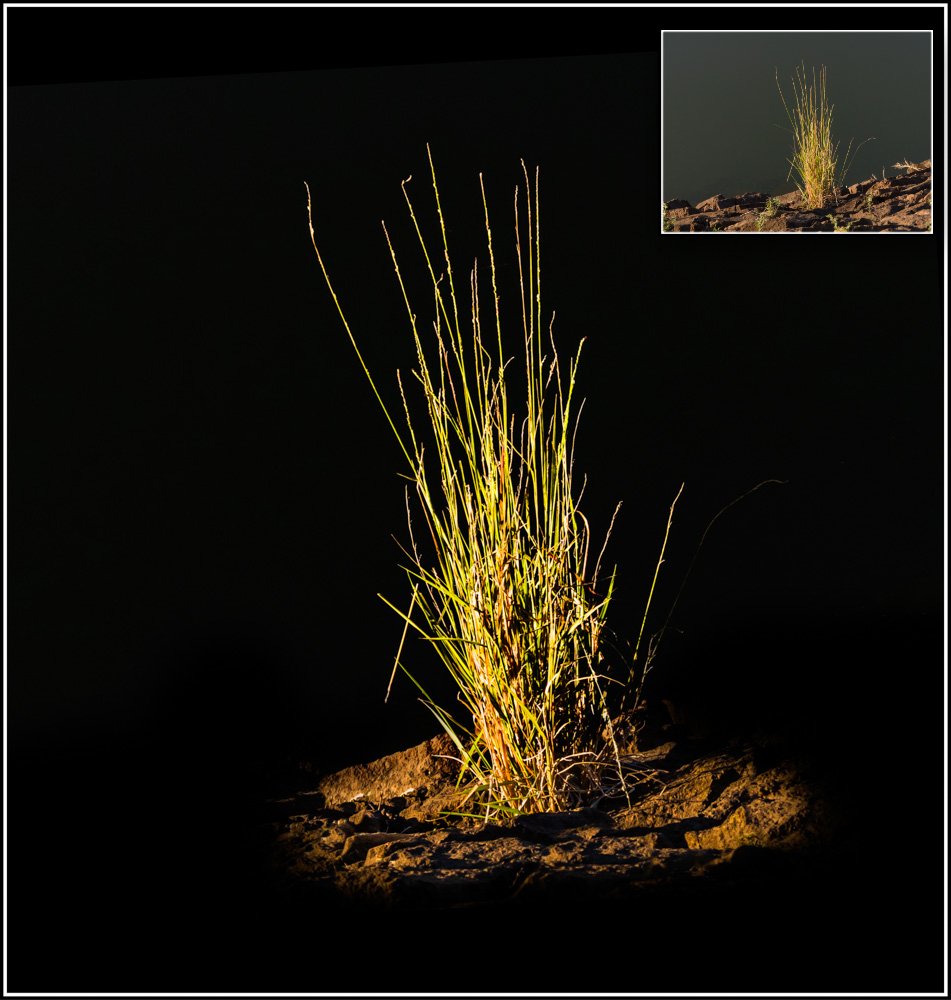
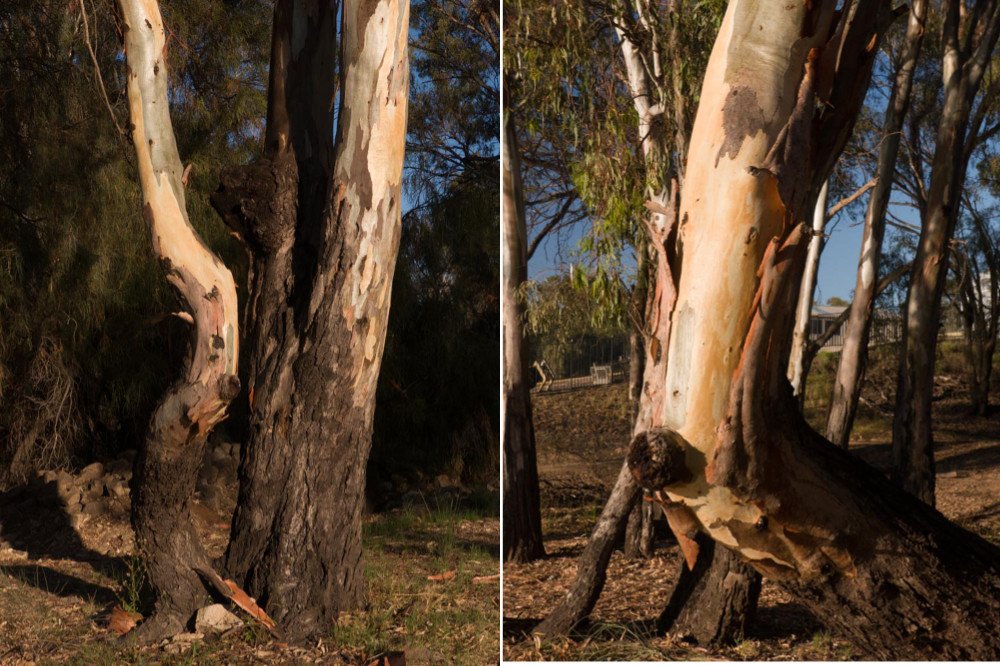
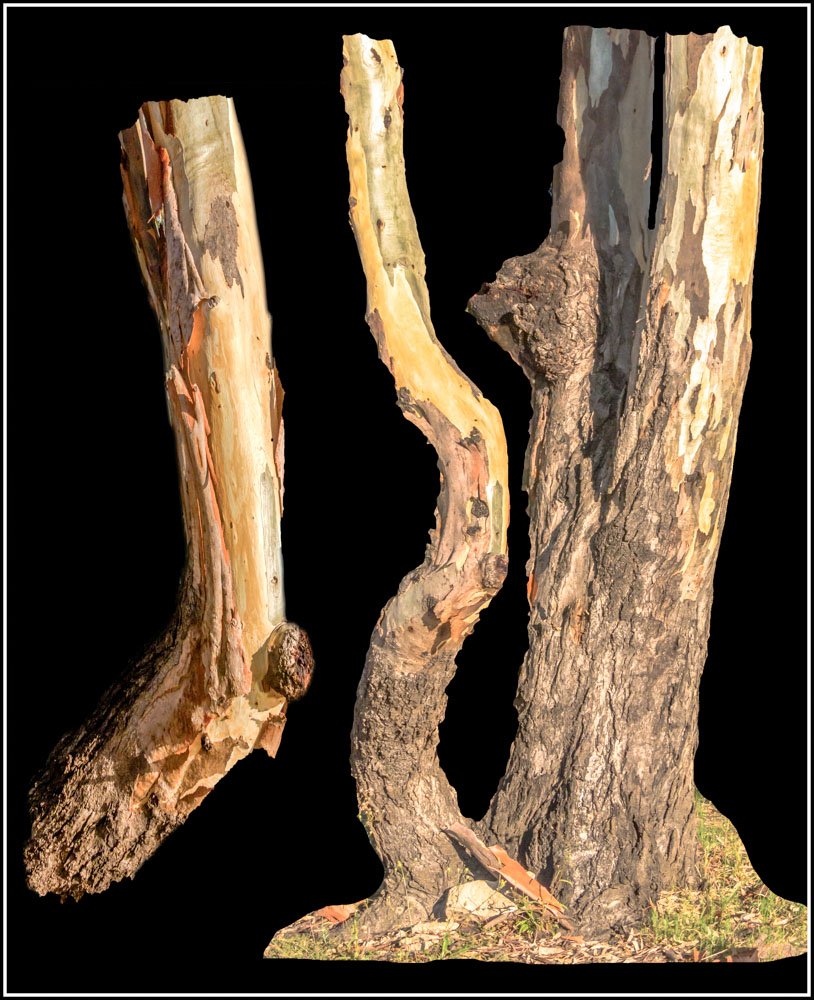
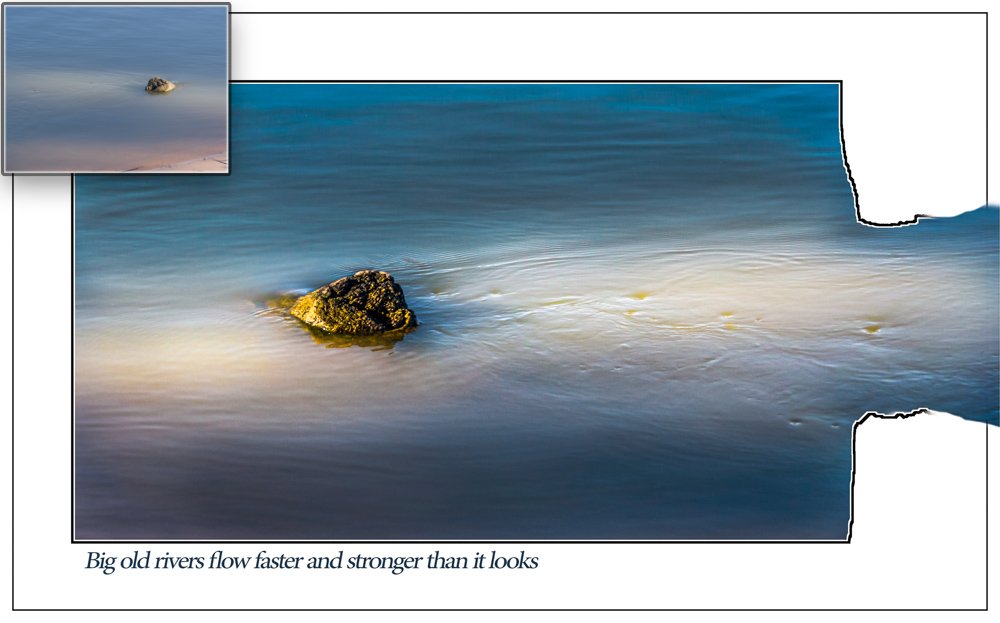
before and after -- these are the more advanced edits, however there are other new basic edited pics on my Fb page; photos by ian browne -- or Flickr how does it look with the original pasted onto edited photo? What is better ; one photo per thread or several as here? Pana Fz300 Questions welcome Grass in front of the river water The same tree
-
For printing or to set desktop wallpaper
-

affinity photo iPad caricature with affinity photo
‚Markus Einspannier posted a topic in Share your work
I made a caricature with the ipad it was a really funny experience what do you think?
-
 Is their a way to link Affinity Photo and have it working with Adobe Bridge 6.2??
 -
No wonder there is nothing on TV ---- it's broken free and the driver is still asleep .Talk about a magic carpet ride!! Not sure about elsewhere; but in Australia there is a 2-3 month non-rating period, so basically TV is really **** from November to late February This pic is far more complicated than it looks because of the big blue sky . This the original file --- "easier" to swap an Australian blue sky than match it
-
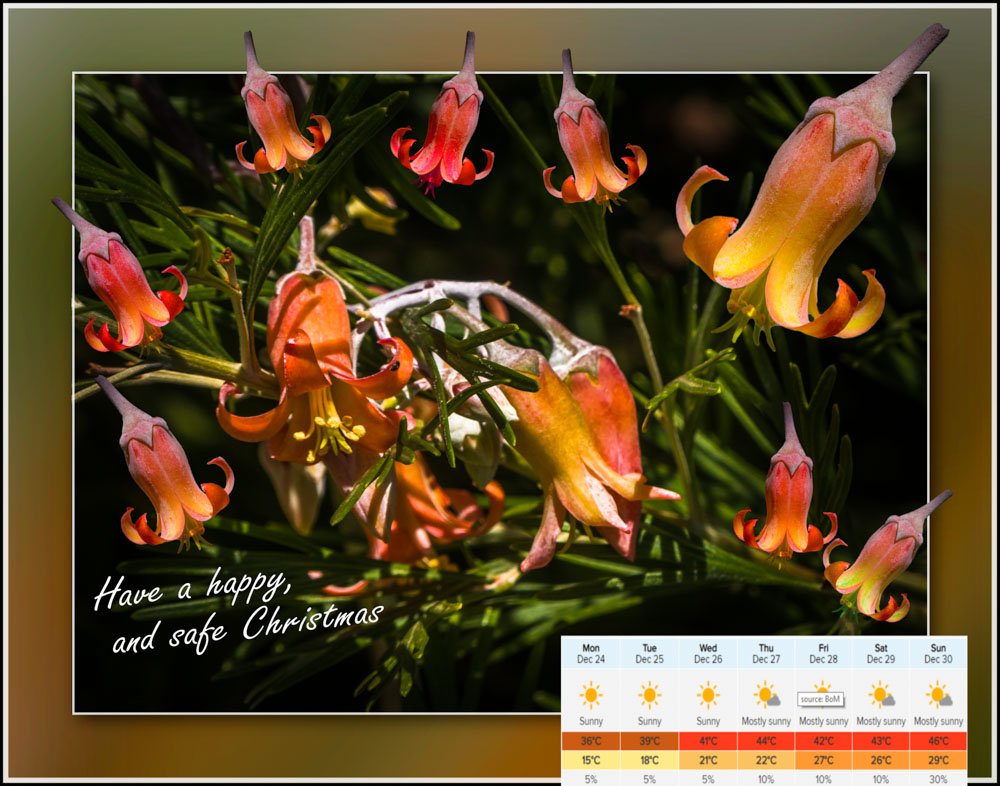
Christmas day might be ok; not too sure about after that !! Two file used, including the background -- another that evolved as I fiddled around Thanks for your help to understand the Affinity way
-
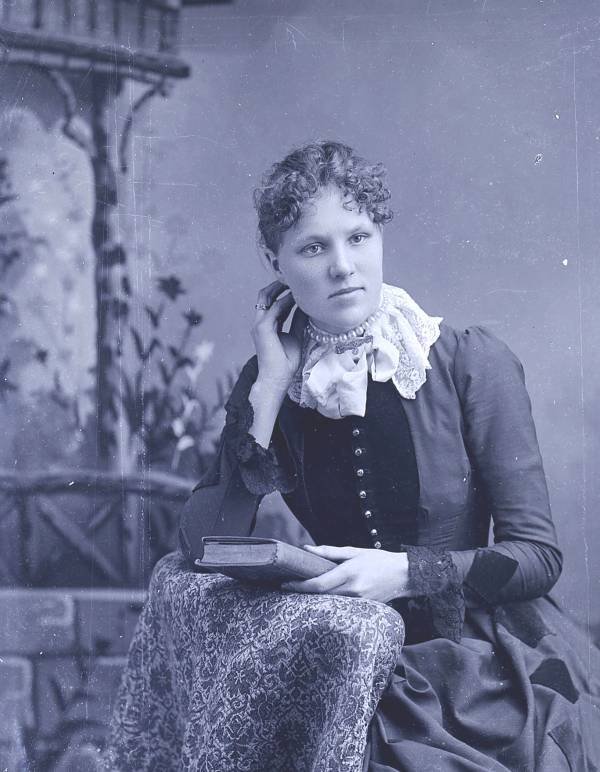
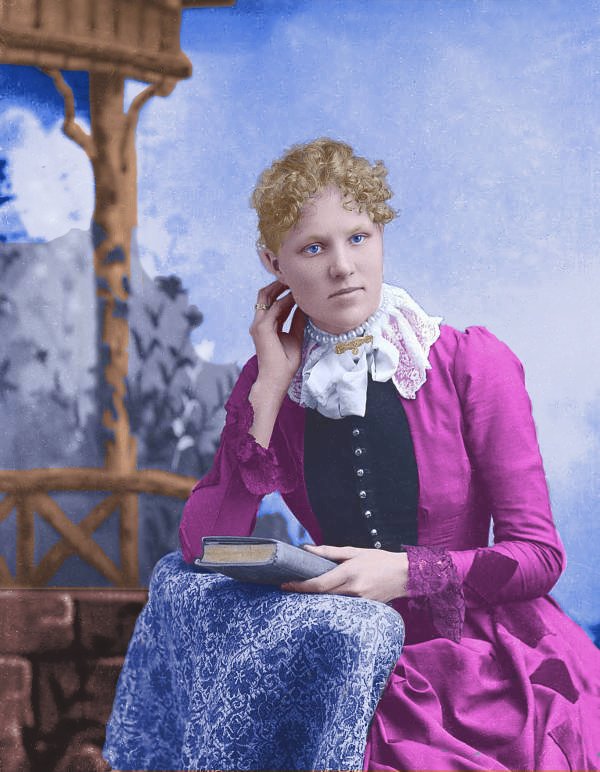
Still learning by experimenting, but think I'm getting better --- thanks to Ability Photo. I had been using Corel Paint Shop Pro 2018, but it has been cast aside because I can come closer to the results I want. I definitely prefer the workflow with Ability. I found a site where someone saved a bunch of glass negatives from a photography studio that went back as far as the 1890's (possibly earlier). Here is the original image and the incomplete colorized image. I wasn't able to complete it today ... separating the sky and the foliage is going to take some extra time. I liked the result I got with the lace on her left side - both around her neck and especially at the cuff of her left arm. It was surprisingly fast and simple.
-
 Hello Everyone ! Would ask for more Non-Destructive capabilities to be added to Affinity Photo. There are great initiative taken with certain tools using a blank pixel layer but i believe more needs to be implemented and documented. i'm first thinking about : The Tone Mapping Persona: this is a great place for making our work better but it's only works in a destructive way (maybe i don't how to do it) but it would be great if a tone map can be added to a mask or a blank pixel layer then we can chose from there to map only a certain area/object etc of our photo/picture/ Development Persona: Great place to spend time working on better picture but also everything there is destructive, here i propose that one applied, our development to appears on sub or top layers similar to filter or mask or whatever dev's may find then from there we can mask this or that or simply make it possible continue where we left it in case we click the development persona again. Same thing should be applied to Liquify persona too. in fact, more Non-Destructive is okay and will be well received. if anyone knows how to do deep Non-Destructive works and/or know where to find tutos that talks about, please share ! Blessings !
-
- 1
-
-
- non destructive
- destructive
- (and 5 more)
-
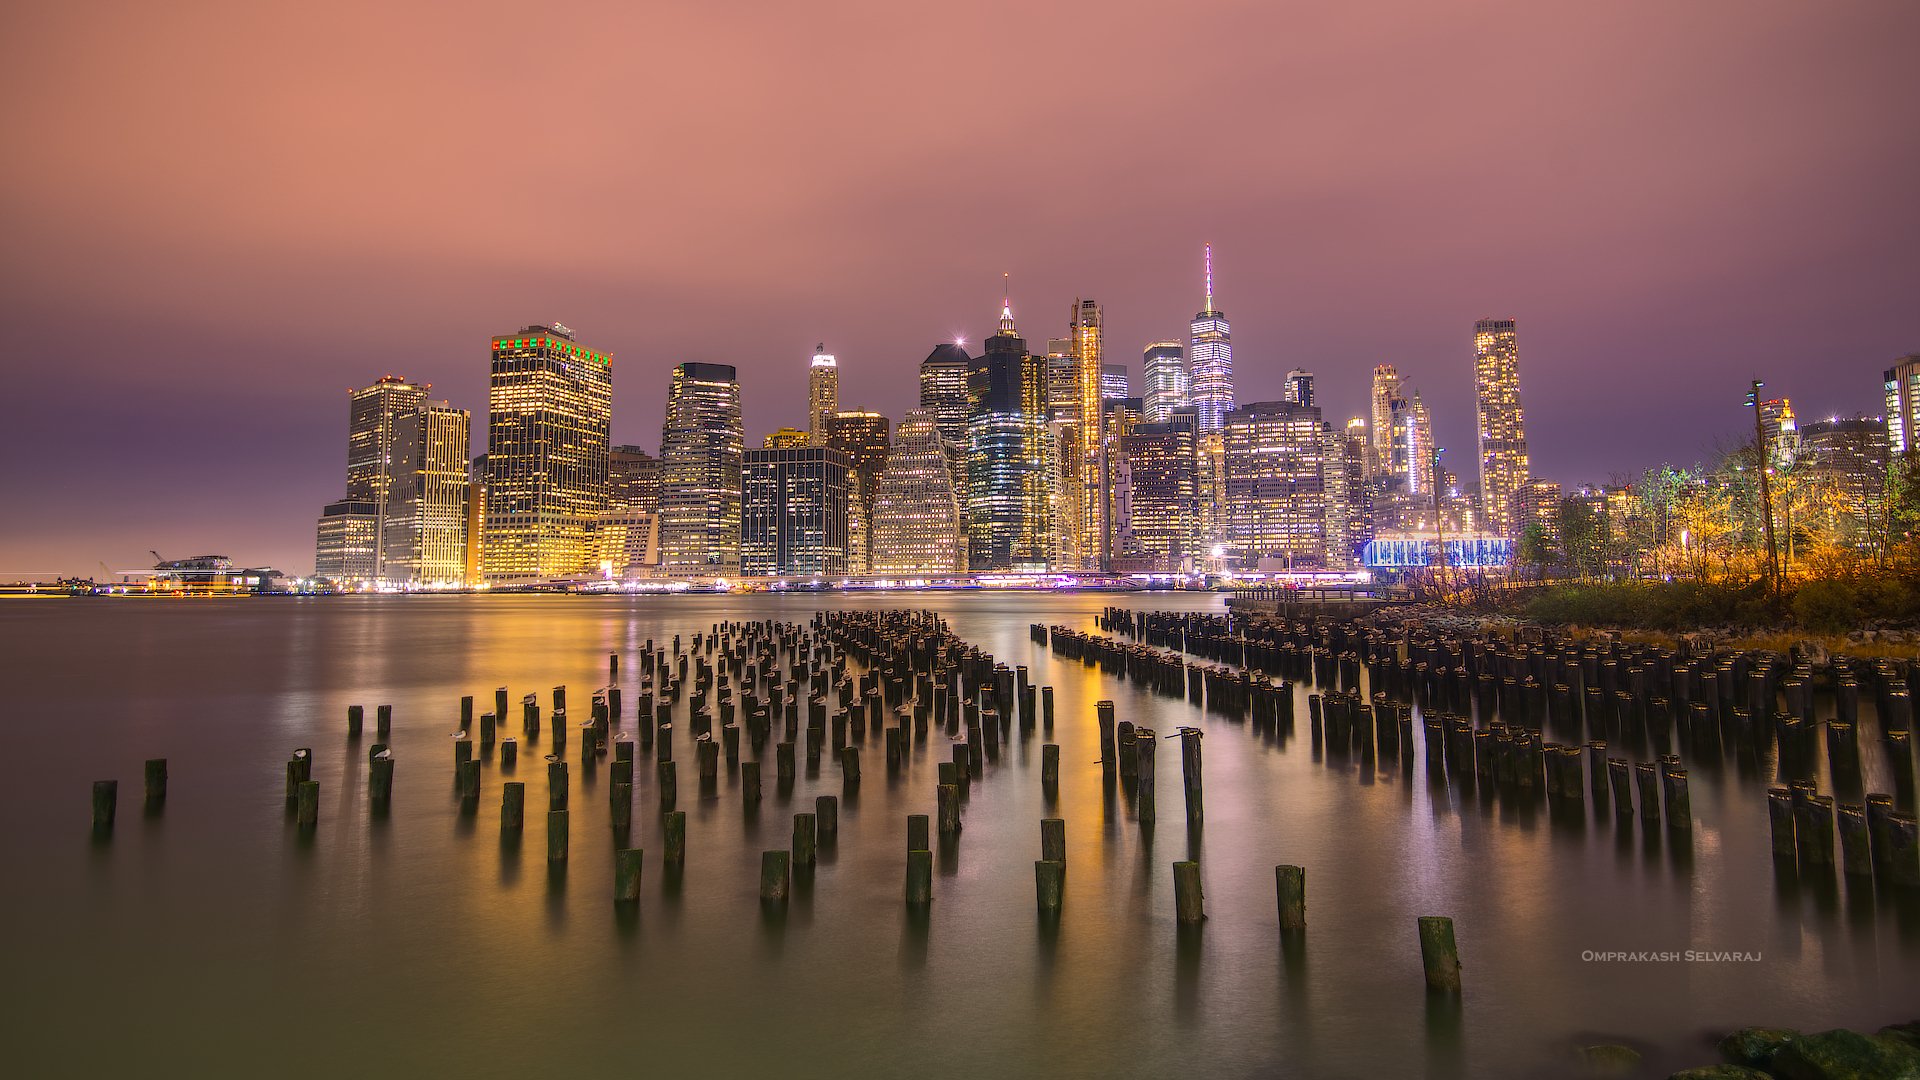
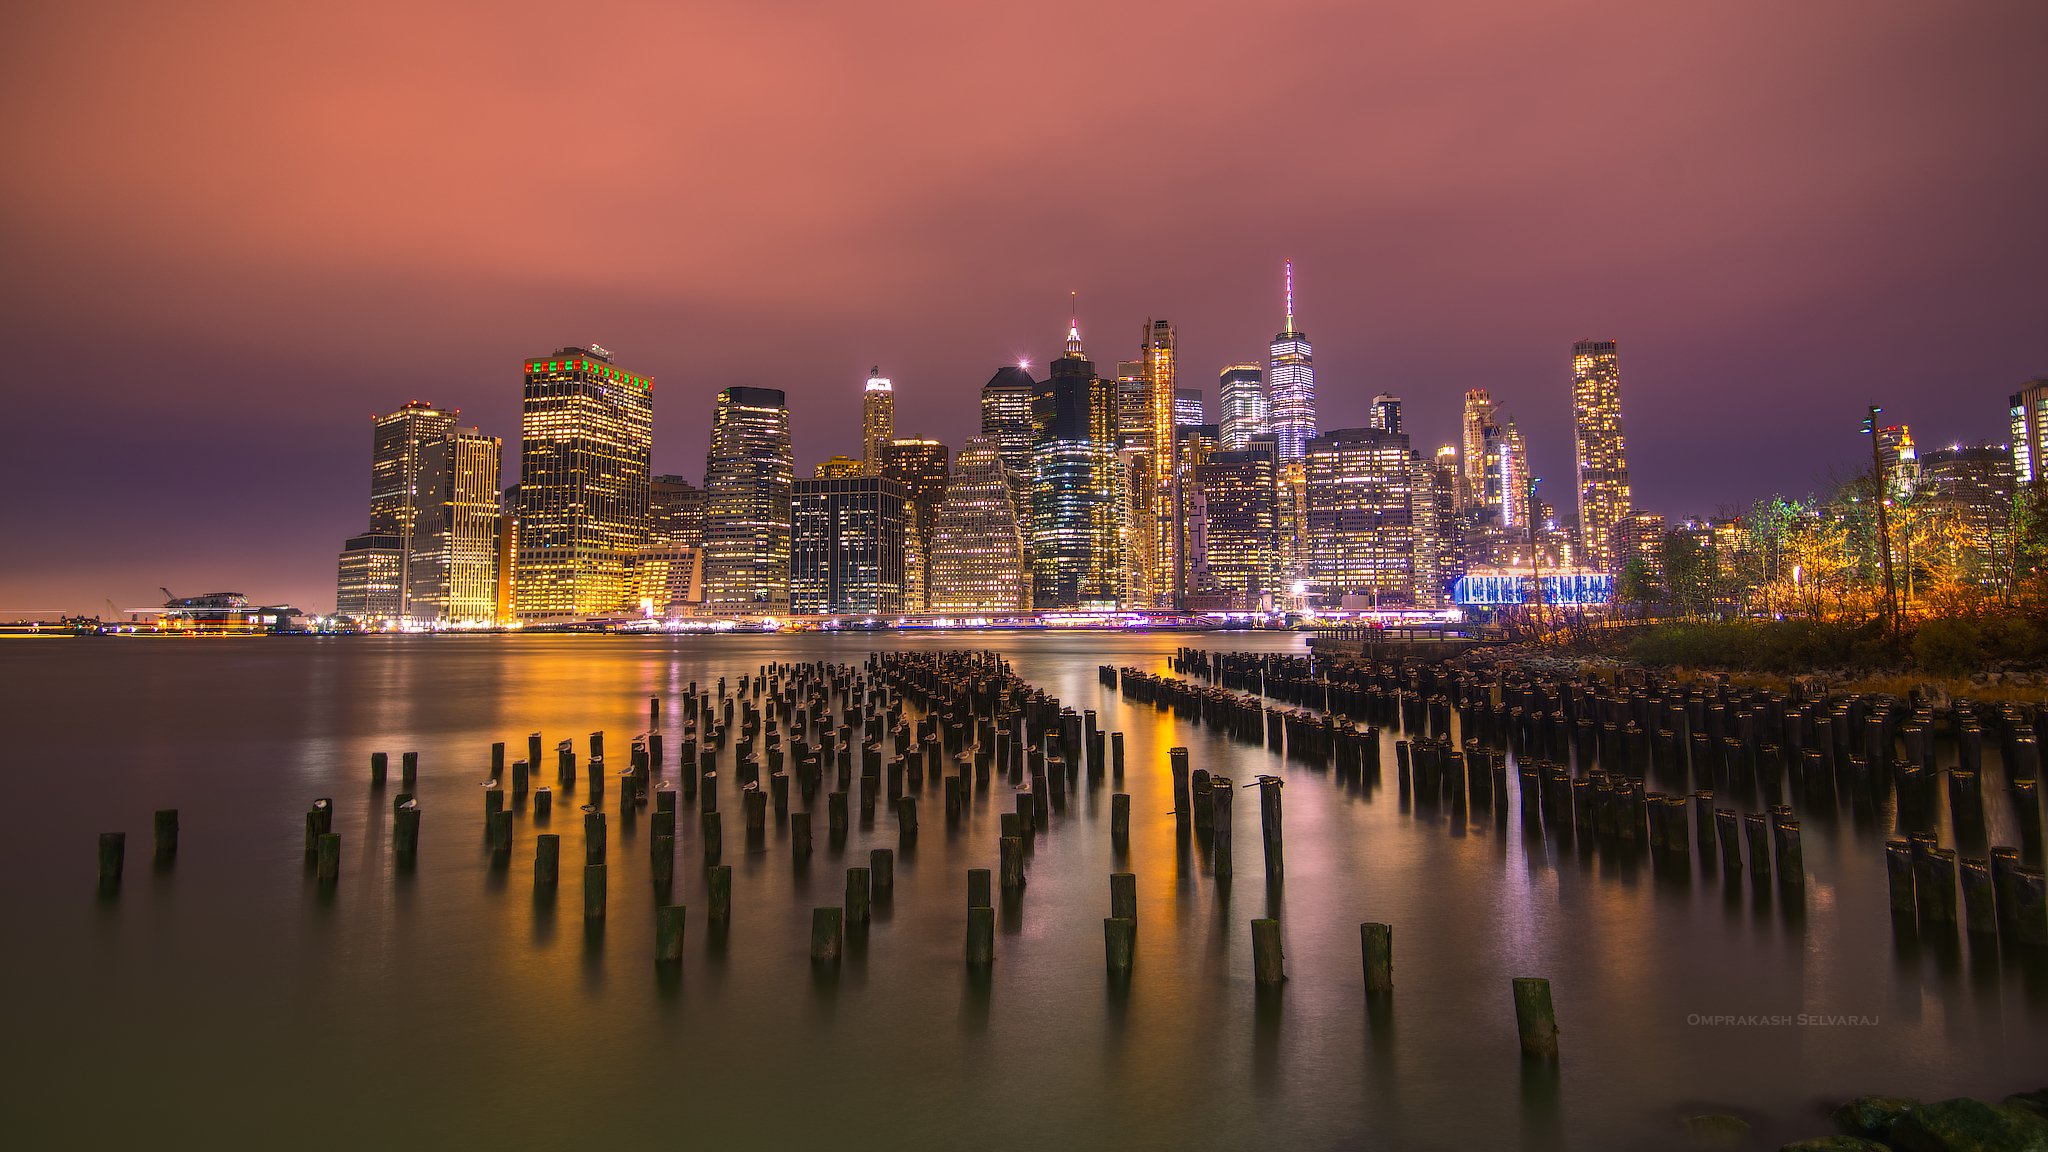
Check out my night scape shot processed with Affinity Photo. Check who are on pier.
- 11 replies
-
- 12
-
-
- nightscape
- nyc
- (and 2 more)
-
Addicted. That's how one of my customers describes my relationship with AP First image multiple textures, blend modes, and a bit of "blend-if". Second image composite using blend-if and masking.
-
Yes, it's that time of year again. My Christmas video is made with a 'borrowed' image, chopped up and manipulated with Affinity Photo, animated with Anime Studio (a third-party package marketed by Serif a few years back) and brought together in Serif MoviePlus X6. Merry Christmas!
-
started from here and it was at a church --- we better not mention the WB lol And we finished here just by fiddling with buttons and sliders Honest thoughts and question welcome, although I have no idea to how possibly just as much about noticing an object that could be a photo to practice editing
-
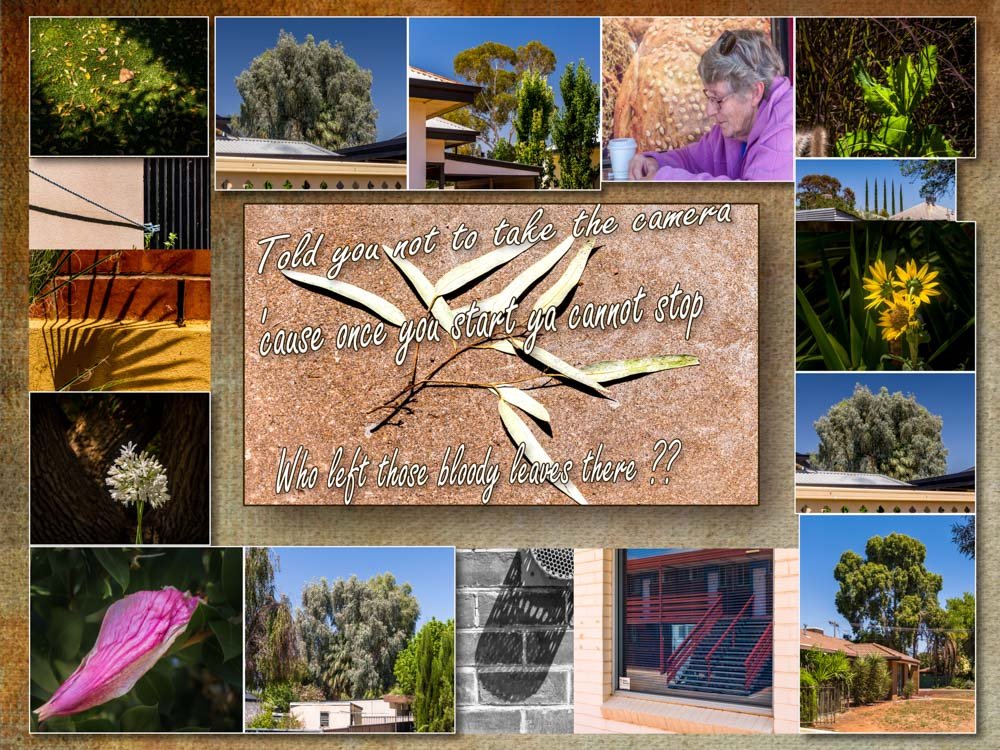
So I walked down to the city to sign a bit of paper and although I knew I shouldn't; I took the bloody camera! . 30-40 minute walk there was no drama -- saw subjects but left the camera in old canvas backpack -- signed the paper and bolted for home until idiot left some leaves on the footpath . The photos eyes were open, so that was the end of the "bolting" home . Took around 90 minutes and about 30 subjects LOL!! However; most subjects do follow themes of my urban photos -- light and shadows >abstracts >minimal >contrasts >seldom people - but I caught the lady having a cuppa >reflections/urban trees but I have decided to include more ugly roofs in the frame All just because a idiot left some leaves on the footpath!! It is amazing what is there that can be made into a photo. Some of these, like the 1/2 edited "twins arguing" will be shared later as a seperate photo. But that's after I get through ALL the others on the waiting list Panasonic Fz300 and slapped together with Affinity Photo The problem with a very versatile camera --- too easy to take far too many photos!! Cheers
-
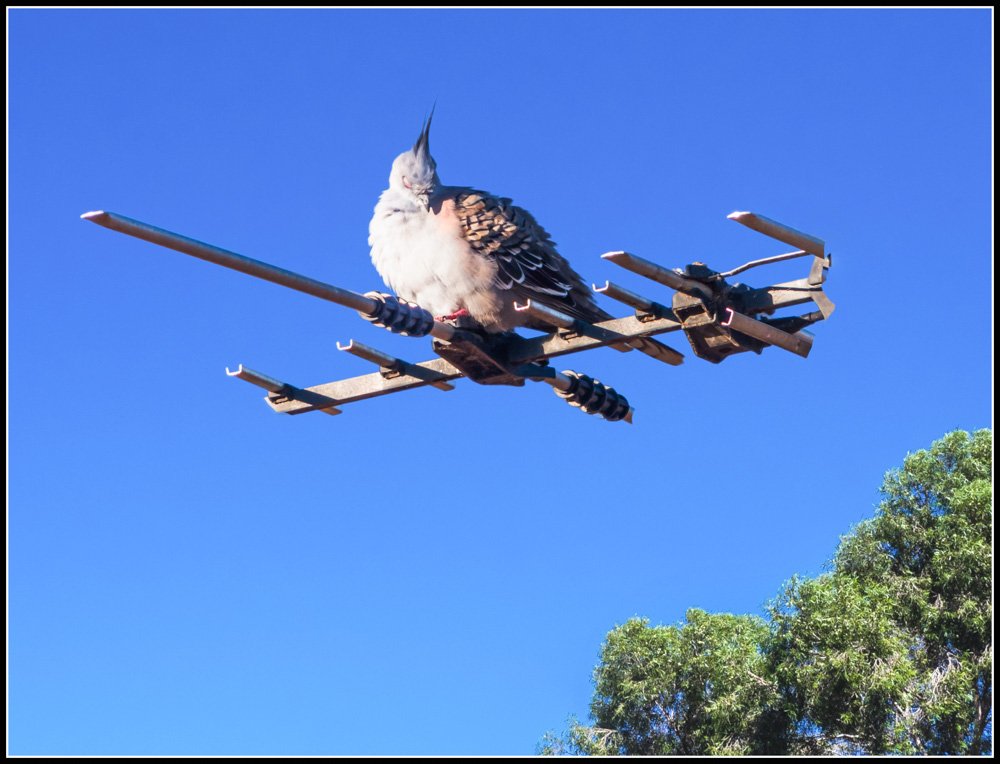
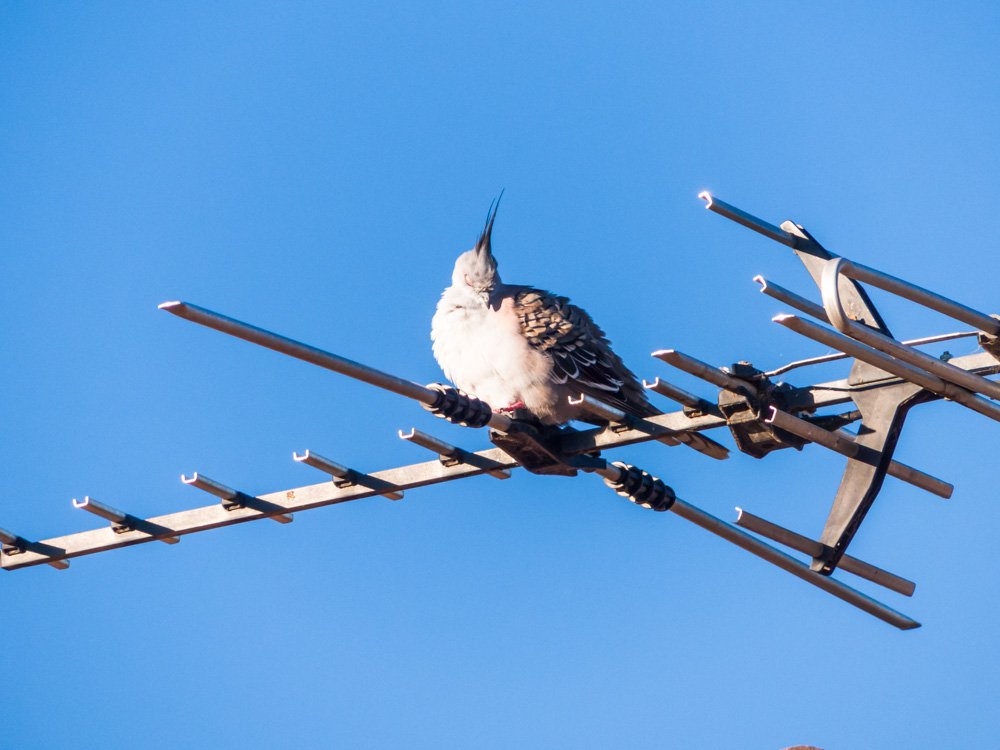
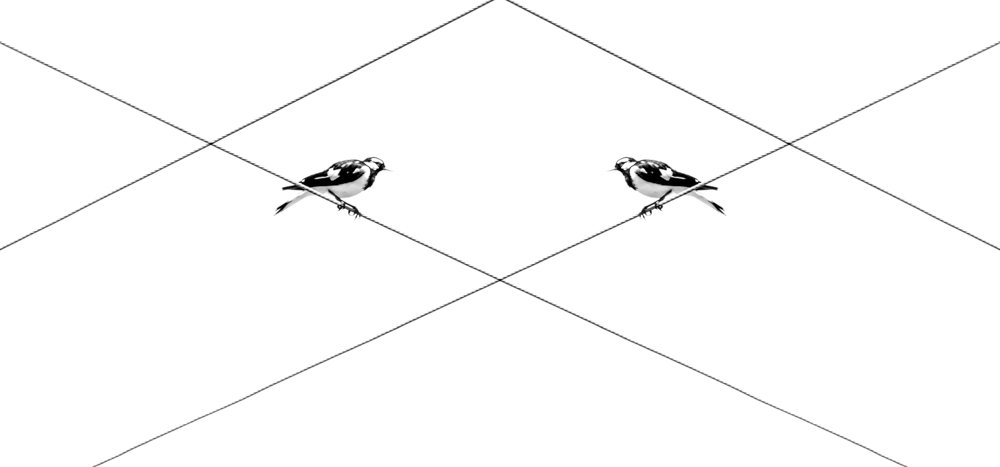
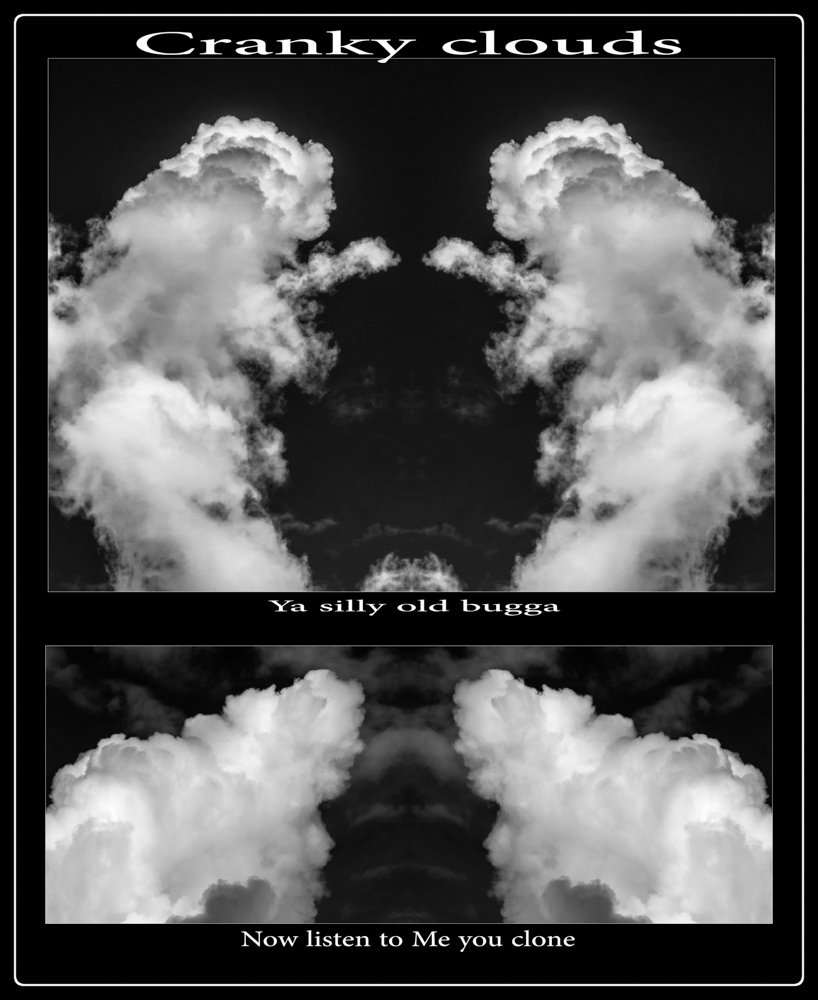
cranky clouds "ya silly old bugaa" "now listen to ME you clone" crested pigeons in the morning sun
-
 Hi, i am new to Affinity. First problem, if i load a pic into affinity it is coloured with a purple tone. I dont know why, because i cant remember that i have done any finetuning in the general settings. Second is, if i choose "save as" i cant save a jpg. I only can choose .afphoto . Anyone an idea? Regards Daniel
 -
Hope this is Ok to post here Nothin' on Tv so .... I'm very open to honest CC --- just don't feel I have this "right"; whatever that is . 2nd is the original The main effect made with the perspective live filter Any links/tips/advice or even show your photo/s or edit mine Cheers
-
 I bought this program during the Black Friday sale, and everything was going just fine until the 14-day return period passed. Now the program no longer works. The image (ironically edited in Photoshop) shows what I see-- there are no live tools and the program no longer does anything. If I can't get hold of somebody who can fix this, I have no choice except to charge back the price I paid for this program since I can't use it.
-
couple of happy snaps of a little backyard mate -- background was basically painted in/mask out until it looked Ok. As usually, no particular workflow and done for something to do so i don't have to do the many things I need to do Pana Fz300 honest comments/cc/questions welcome. . I still owe someone an answer -- will get to it when I work out how I did it LOL!!
-

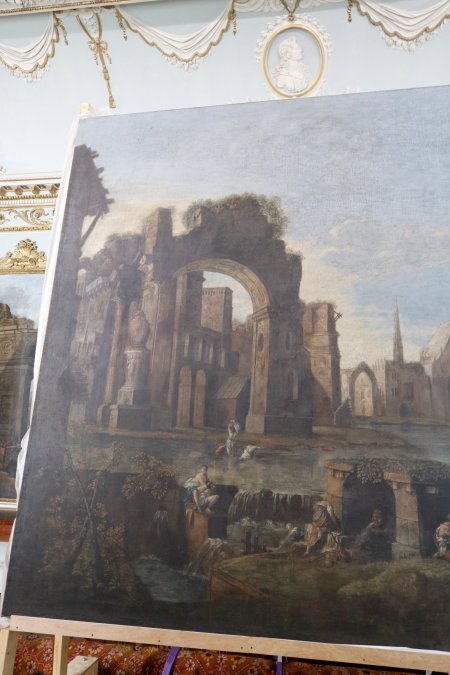
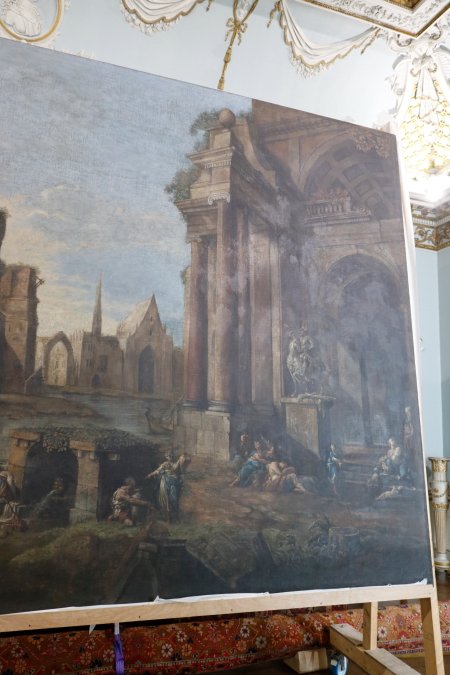
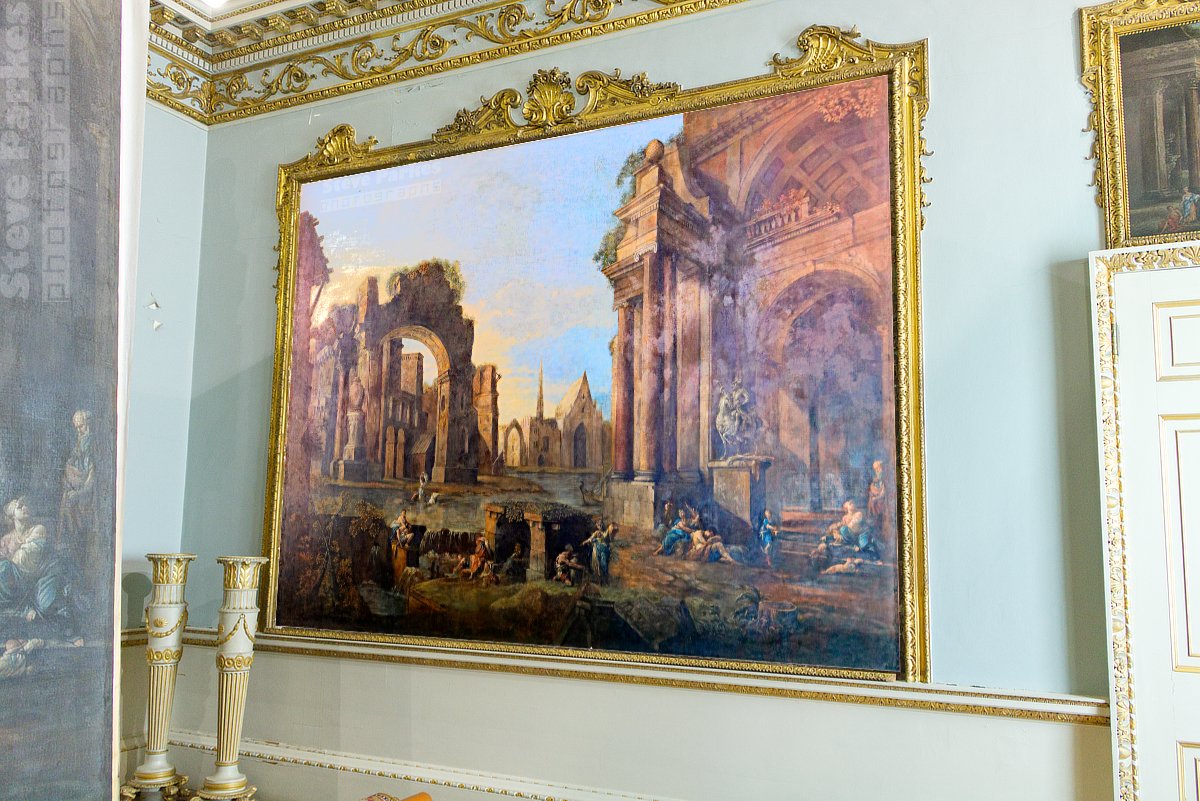
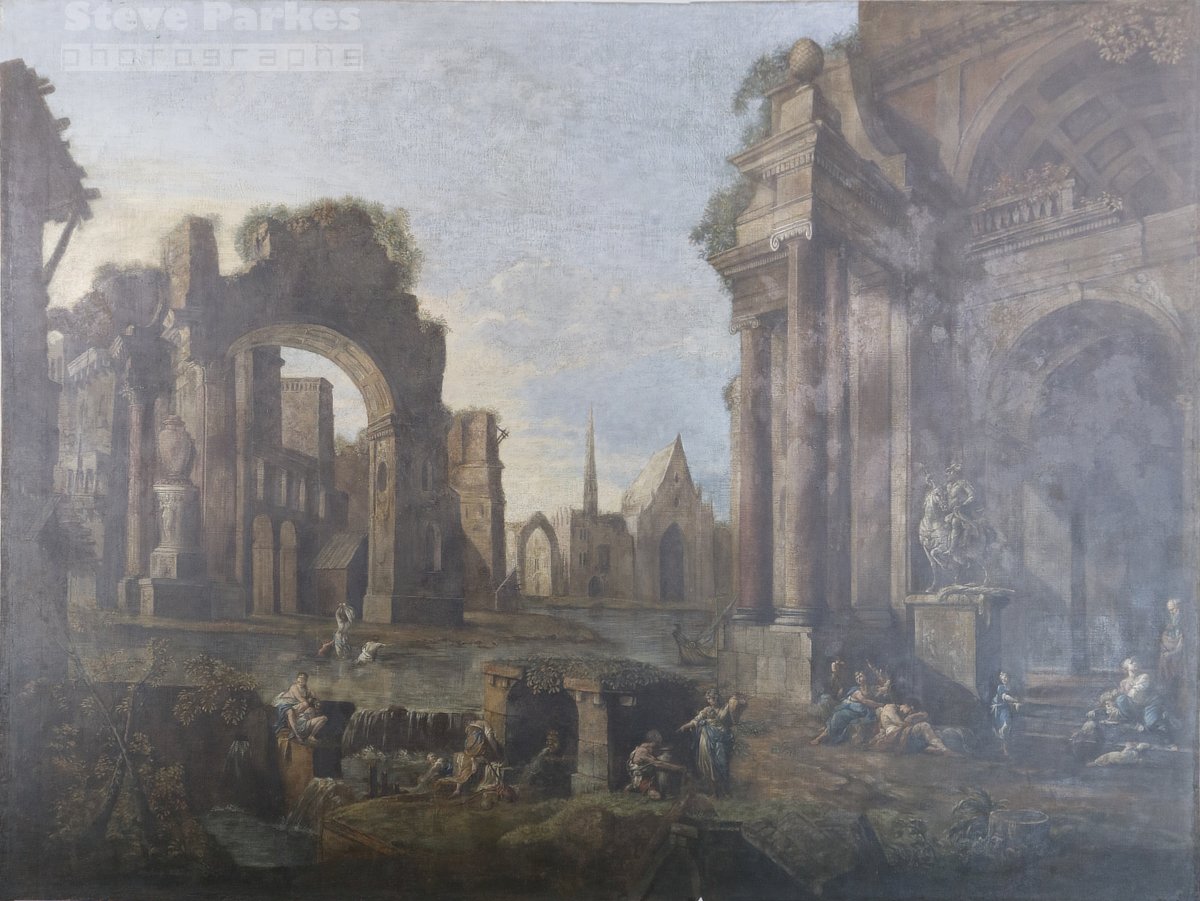
affinity photo How to cheat at conserving an old painting!
Kasper-V posted a topic in Share your work
Empty space ... ... filled! Last week we paid a visit to Shugborough, Staffordshire, an eighteenth century house and former home of photographer Patrick Lichfield, owned by the National Trust. The Room of Imaginary Landscapes has several enormous paintings fitted to the walls depicting, well, imaginary landscapes. The paintings are being taken down for conservation and cleaning; they are well over two hundred years old, after all. One has been removed from its mount and is resting on a stand while it waits to be taken away, and I took the opportunity of photographing it ... which was easier said than done! At about ten feet by eight, and with only a small space to work in, I had to take three photos and stitch them, then do my best to restore the result to a straight-sided rectangle with the Mesh Warp Tool. Next I cleaned up the result by increasing the saturation and contrast and one or two little tweaks; if I had the patience, I might have done a lot more and fixed those water stains, for instance. Here's 'before' and 'after' ... And all that remained was to distort the finished image to fit the gap in the frame, using the Move Tool.
- 7 replies
-
- 6
-
-
- painting
- restoration
- (and 5 more)