Our response time is longer than usual currently. We're working to answer users as quickly as possible and thank you for your continued patience.
Search the Community
Showing results for 'feature request'.
-

Lock files not deleting
jcreative-design replied to Grotesker's topic in Affinity on Desktop Questions (macOS and Windows)
Hi Walt, First of all, I want to thank you for all you do in the Affinity Forum. I tried to message you directly, but I guess you do not have that Affinity Forum feature enabled. Your efforts and knowledge does not go unnoticed by me. It's really awesome that you help so many people, like myself. Thank you for your response. I understand that Affinity applications are designed to manage data integrity by preventing simultaneous access to files, which helps avoid data corruption. However, my concern extends beyond file access issues and delves into potential security vulnerabilities and unauthorized access that might be affecting the integrity of my system and data. Here are some additional comments for the Developers to hash out and for those interested to think about. By the way, I have purchased and registered all Affinity software for BOTH WIN and MAC. I have also had to reinstall multiple times due to computer issues - not fun. Clarifications Needed: Data Integrity vs. Security: While I recognize that Affinity applications manage data integrity, my concerns involve whether there are additional security implications or vulnerabilities that might be exploited by unauthorized access. It's crucial to ensure that data integrity measures do not inadvertently expose security gaps. Evidence of Unauthorized Access: I am actively investigating potential unauthorized access to my machine, including anomalies and irregularities in software behavior. If Affinity applications are involved or affected, it’s important to understand how this could happen and whether there are safeguards or logs within Affinity software that could help in identifying or preventing such issues. Responsibility and Collaboration: Although you indicate that Affinity applications do not have functions for managing system-level security or unauthorized access, it’s important for me to know if there are known issues, best practices, or recommendations related to Affinity software that might help in securing my system against potential risks and/or features they may consider adding due to this issue. Key Points: Nature of the Issue: The resizing of my files appears to be the result of a script or similar mechanism, given that it only affected specific documents that I reopened. This suggests a targeted change rather than a widespread system issue. If it were a system-wide problem, all files would have been affected simultaneously, which is not the case here. Software vs. System: The fact that not all files were altered and the issue is limited to documents that were reopened leads me to believe that this is more likely related to software rather than a broader system issue. A systematic attack would typically impact all files at once, whereas my situation involves selective changes as shown by the dates in the screenshot. Potential Script Involvement: The nature of the resizing points to a need for advanced knowledge of file export processes and script creation. This isn’t something that would typically occur through normal software use but rather through deliberate manipulation. Request for Further Insight: Given these specifics, I believe the issue might be linked to how the Affinity software handles file management or interactions. If there are known vulnerabilities, bugs, or specific scenarios within Affinity software that could cause such behavior, it would be helpful to understand them. When troubleshooting issues related to simultaneous access controls in software, developers can follow several strategies to identify and resolve potential problems. Here’s how developers might approach troubleshooting the issue described: 1. Log Analysis: Examine Logs: Developers should review application logs to identify any anomalies or errors related to file access and modification. Logs can provide insight into whether multiple access attempts are being handled correctly. Audit Trails: Implement and review audit trails that record file access and modification events. This can help determine if unauthorized or unexpected changes are occurring. 2. Concurrency Handling: Check Concurrency Controls: Verify that the application’s concurrency control mechanisms are functioning as expected. This includes ensuring that locking mechanisms prevent simultaneous modifications by multiple users or processes. Review Locking Mechanisms: Ensure that file locking and access controls are correctly implemented and that they prevent data corruption or unexpected behavior. 3. Testing Scenarios: Simulate Concurrent Access: Perform tests to simulate concurrent access scenarios. This helps identify how the software handles multiple simultaneous users or processes trying to access or modify the same file. Reproduce the Issue: Attempt to reproduce the specific issue by mimicking the conditions under which the file resizing occurred. This can help in understanding the root cause. 4. Code Review: Inspect Code: Conduct a thorough code review focusing on file handling, access controls, and any mechanisms related to concurrency. Look for potential bugs or areas where access might not be correctly managed. Review Recent Changes: Examine recent code changes or updates that could have introduced new issues related to file access or modification. 5. Security Analysis: Assess Security Vulnerabilities: Analyze the application for potential security vulnerabilities that could allow unauthorized access or manipulation of files. Check for Malicious Scripts: Ensure that the application is not susceptible to malicious scripts or external tools that could alter files in unintended ways. 6. User Access Management: Verify User Permissions: Check user permissions and roles to ensure that they are correctly configured and that users only have access to files and functions appropriate for their roles. Monitor Access Patterns: Implement monitoring tools to track and analyze access patterns, which can help in identifying unusual or unauthorized activities. 7. Software Dependencies: Evaluate Dependencies: Review any third-party libraries or dependencies related to file handling and access controls. Ensure they are up-to-date and do not introduce vulnerabilities. Check for Conflicts: Look for potential conflicts between the application and other software that might affect file handling or access controls. Thanks for discussing these exceptionally invasive and destructive issues. I have reached out to appropriate channels to provide info regarding this. Have a great day, Walt. Just so you know, one of my goals is to learn that Pen Tool some day. -
 Is there any way to stroke a path using the eraser tool? I'm trying to apply a rough, woodcut-ish edge to shapes. Ideally, I'd like to replicate the following Photoshop workflow: - Make a path from a current selection - Apply "stroke path" with the eraser tool I see that a number of people have asked about adding "stroke path" functionality, and it looks like there is sort of a technique for doing this for brushes. I need this for an eraser tool, though, since the roughening process has to be subtractive, rather than additive. (I'm applying this to some intricate shapes, and adding a rough stroke, rather than erasing the edges, results in the lines being too cramped.) I'll be happy to submit another feature request if there's no way of doing it. Sounds like a small thing, but the stroke-path-based technique is core to my illustration style, and it's the number one thing that keeps me from fully switching away from Photoshop.
 -
 Zoom In keyboard shortcut does not work while having text cursor active, using either Art or Frame text tools. At the same time Zoom Out keyboard shortcut works just fine, and Zoom In also works when you select it in the menu, so I don't think this is by design. If it is, then it would be a feature request to be able to Zoom In also while having text selected or text cursor active, and also centering on the active cursor at the same time. The problem occurs across all the Affinity apps using the latest version of the software (2.5.4) on macOS Sonoma 14.5.
 -

Zoom In does not work while having text cursor active
walt.farrell replied to Juhani's topic in V2 Bugs found on macOS
That seems more like a Feature/Feedback request, than part of a bug report. In the meantime, as a workaround have you considered the alternative Zooming methods? Help: https://affinity.help/publisher2/en-US.lproj/pages/GetStarted/zoom.html For example, if you do not have scrubby zoom enabled in Settings, Tools, then you could press Z for Zoom Tool (though probably not while you're in a Text Frame), and draw a marquee with the cursor to zoom to that selection. In a Text Frame, you would need to press Esc once or twice. If you do have scrubby zoom enabled in Settings, Tools, then Z and dragging the mouse right or left will zoom in or out. Double-clicking the layer thumbnail in the Layers panel will zoom that layer "to fit". -
 When you select multiple objects with different colors and then "Add to swatches", right now it only adds one color to the swatches. I would like to be able to add all colors that are in the selection. Also, this may be a different feature request, but I'd like to be able to select multiple swatches in the Swatches Panel, and then be able to mass delete them or mass 'Make Global'. Right now you can only select one swatch at a time.
- 3 replies
-
- 1
-

-
- feature request
- swatches
- (and 2 more)
-
 I've done a couple of sessions of curve editing in the last few days, and have a request for enhancement for joining curves. When working rapidly with already trimmed curve segments, I do not want to have to zoom in on nodes and painstakingly drag one node over another to join two curve segments. I want to quickly box select both nodes and weld the two nodes together. Bam. Done. Move on to the next joint. Repeat. Bam. Bam. Bam. Bam. No fussy business, no delay. Just efficient work. What I get right now with the "Join curves" Action of the Node Tool (A) is an additional line segment between the two nodes. This segment is usually hidden by its tiny size, until I apply an operation like a boolean or the new beta contour, or apply a wide stroke. Then the insanely high curvature of a curve doubling back on itself twice makes it clear there's a little glitch that absolutely must be cleaned up before I can go on to the next step. Slowly, and painstakingly. So I would like to see another toolbar Action for the node tool, where selected nodes are not joined by a line segment, but merged into a single node. Adopt a rule that the highest (or lowest, I don't care) node in the layer stack is moved to the position of the lower, so if you are working with a precise design, you can reliably preserve known locations. Moving both nodes to an average location is much less useful than keeping one readily-identified node in a fixed location. Please do not base the rule on selection order. The node visual indicators are usually overlapping, and having to select the two nodes in a particular sequence would be a huge pain in the patoot, and require more of that slow, zoomed-in, painstaking work. Box select, weld, done, repeat. That's what I want.
 -
 Adding points to a path is quite easy in Affinity Designer, but removing them can be quite tedious. Even cursory removal of unnecessary nodes would really be helpful.
 -

When can we finally expect RTL support?
AliMu replied to -TR-'s topic in Feedback for the Affinity V2 Suite of Products
I got you, thanks. I'm wondering, are the devs using forums as their main tool to track feature requests? And why should someone duplicate their request when they got an official response anyway? :). -
 Nice job on Affinity 2.0. I already purchased all apps. FEATURE REQUEST: It would be nice to see a type of VECTOR ERASER in Affinity Designer 2 that would allow us to quickly erase INTERSECTING LINES. This can dramatically increase productivity with illustrations. See attached video. Thanks!!! I am enjoying 2.0 !!! vector eraser demo.mp4
- 15 replies
-
- 8
-
-
- eraser
- vector eraser
- (and 4 more)
-
 Then maybe Affinity ought to make a version for Android Tablets as well. That would be within those people's area of expertise! Have you made a request for that feature elsewhere in these forums? No doubt someone has if it'd streamline the problem. Aha - that's HERE. Add your voice to those who want this feature!
 -
 Hi, Apologies if this has already been requested - I did search around for a while for this, but there were a lot of varied results. I would like to request proper vector brush support. I feel like this is probably quite a fundamental feature for a lot of people and would be a highly valued addition to the Affinity suite (which I really like, by the way!) Thanks, Jack
- 13 replies
-
- 6
-
-
- feature request
- vector
- (and 1 more)
-
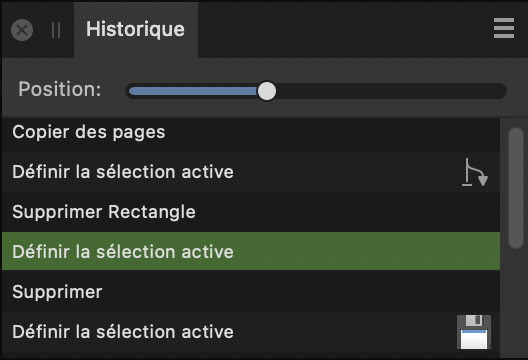
 Feature request I'd like to have a mention recorded in the History panel of the last step performed when I last saved an open file. How could it be presented? I imagine it could be a small icon (perhaps a floppy disk, for example) in the right margin next to the last saved modification/action, kind of like the bifid arrow used when we create a new fork of a file. (But just a line with "Save" should already be better than as it is…) Why this wish? It happens often that I do some trial and error work on a file, then I want to close it without saving these last changes 😇, but I also often have made previously some changes I want to be kept… Usually, I do a Save file (⌘-S / ctrl-S) at each turning point of my editing work, so I should be safe but I'm not entirely failure-proof! Or I'm distracted, I begin to do something else and when I come back to my file, I don't know anymore where I left my workflow. Thus I sometimes have scrupules before closing a file without saving it… If in the History panel (overcrowded and not always very explicit, but that's not the point here…), there was a line or a sign indicating when I last saved my file, it would be much easier than performing a Save As under a new name, opening the new file and comparing it besides my old version to check what changes were saved or not.
-
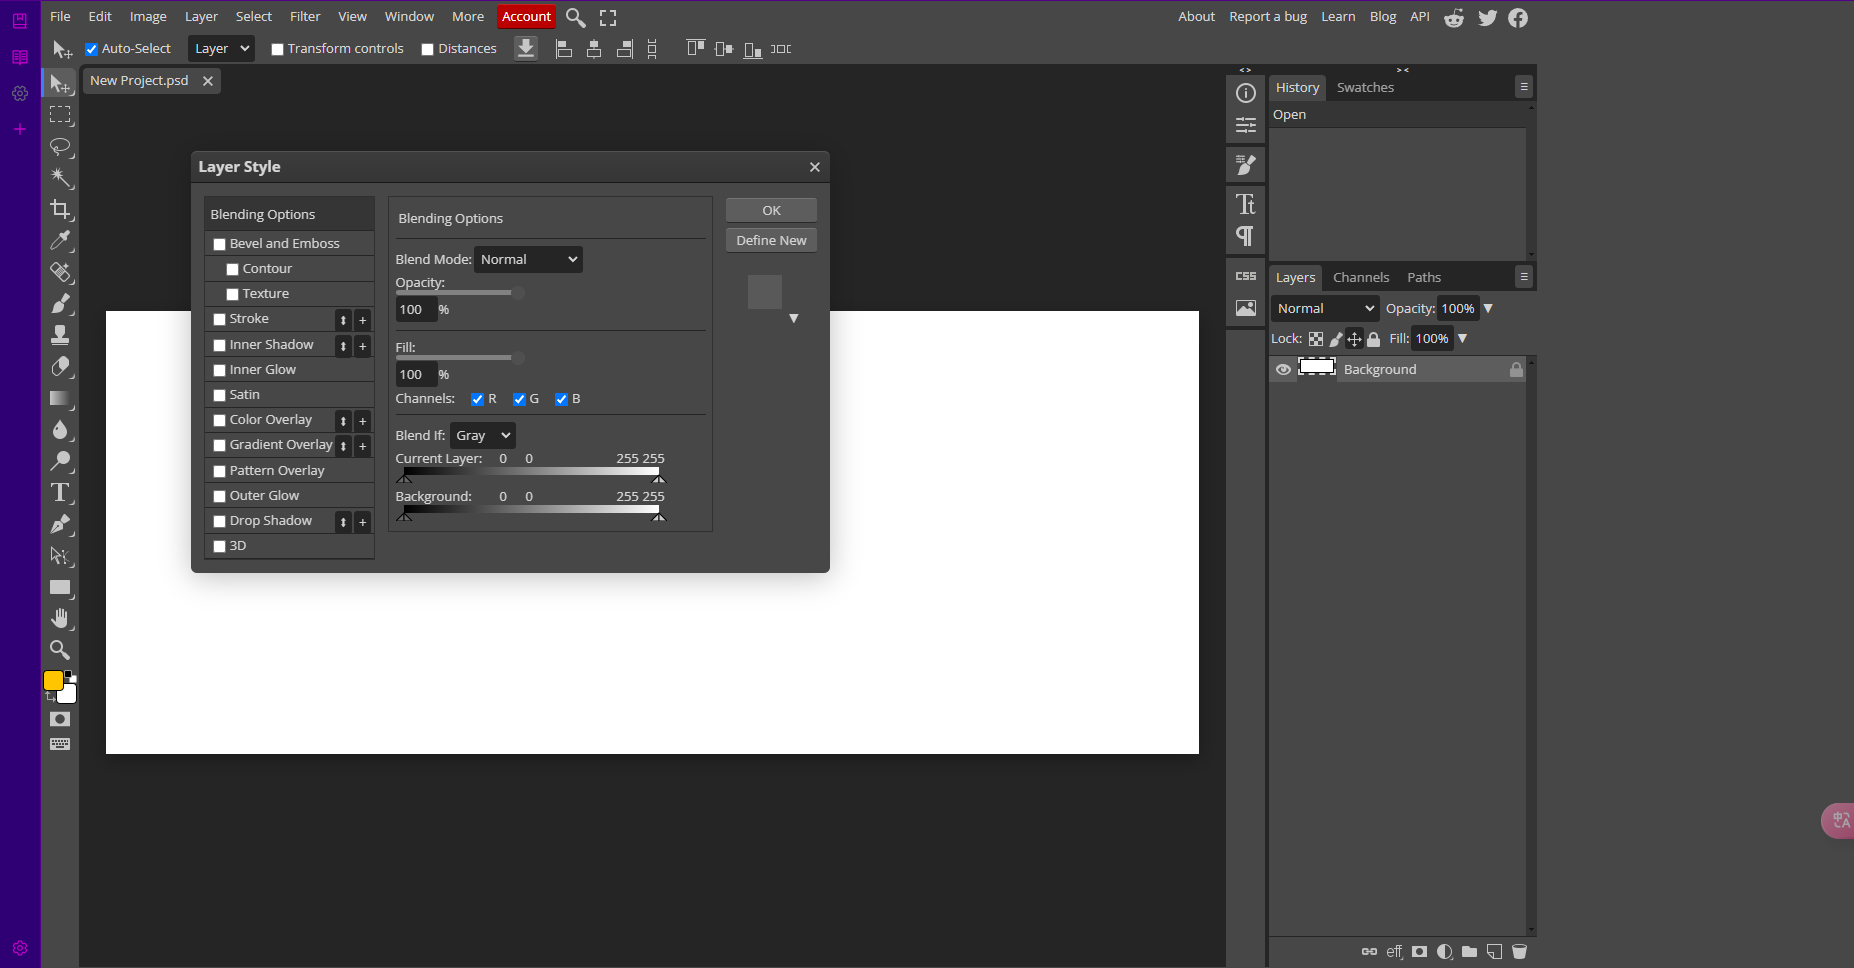
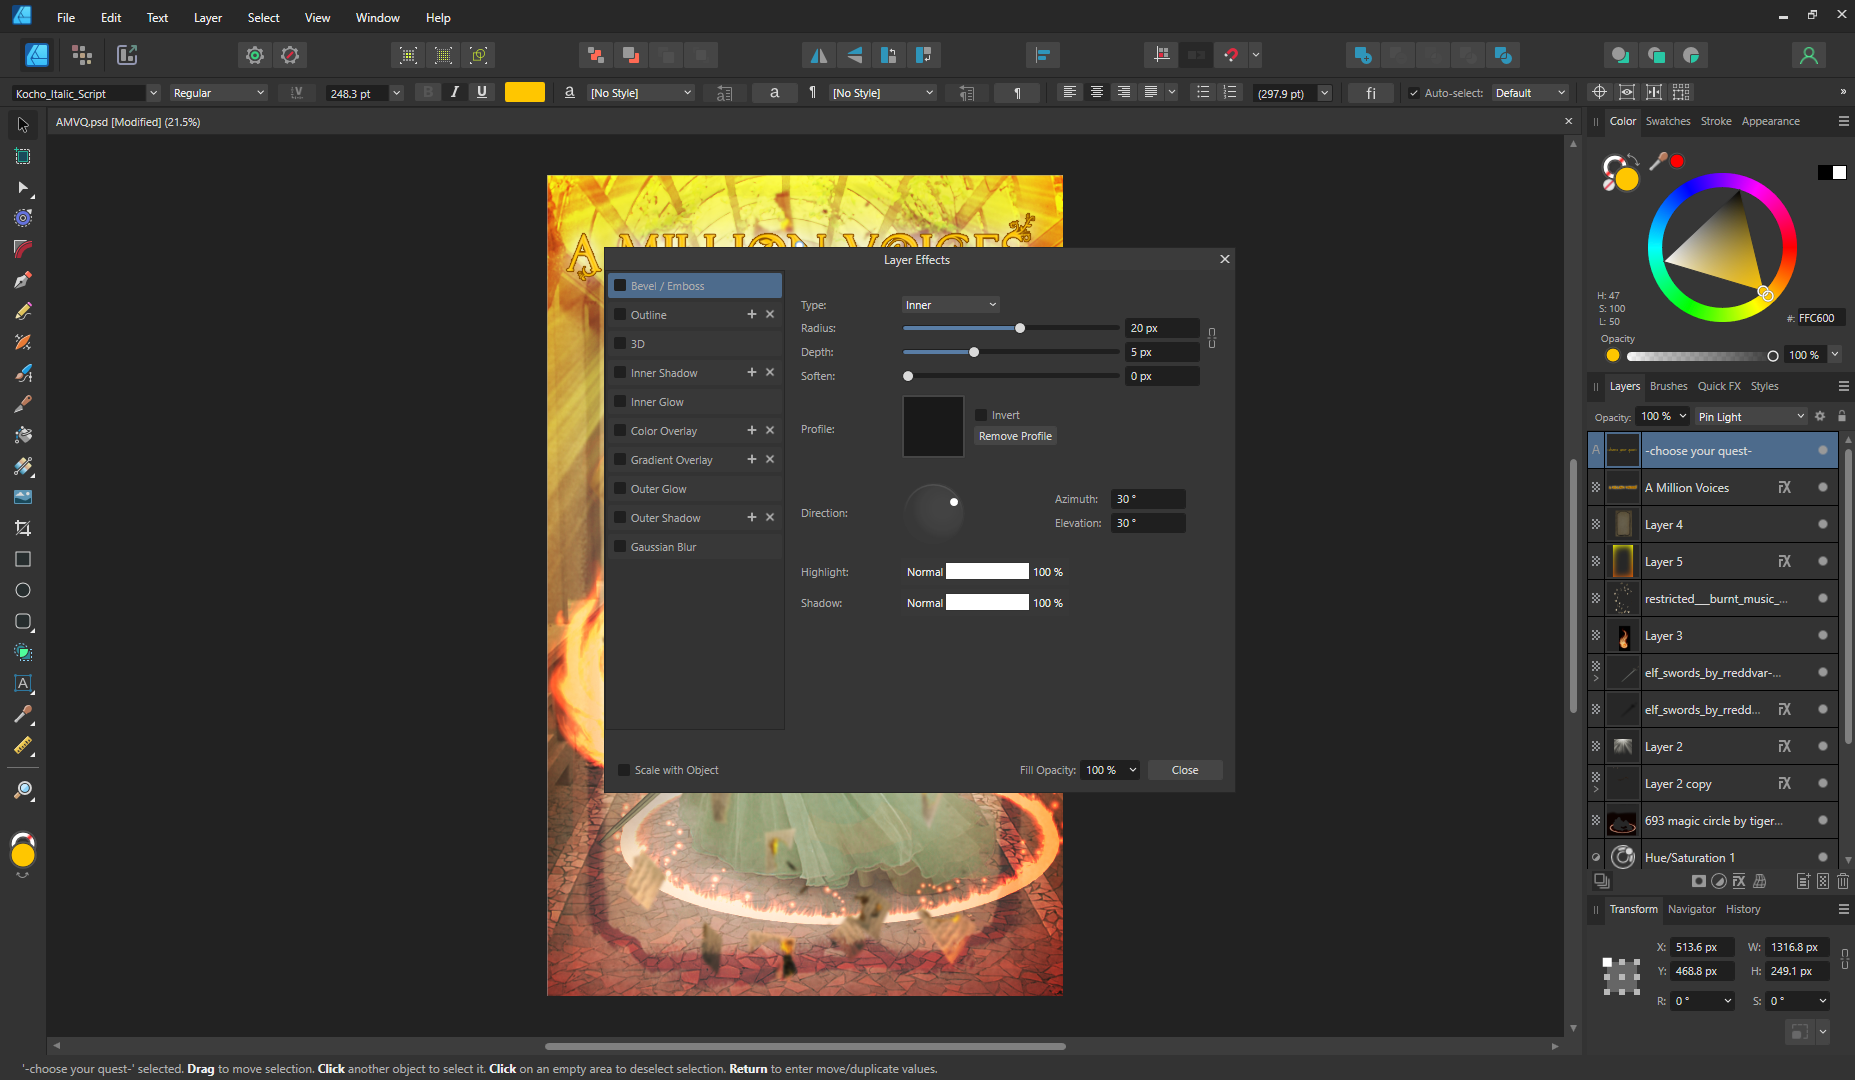
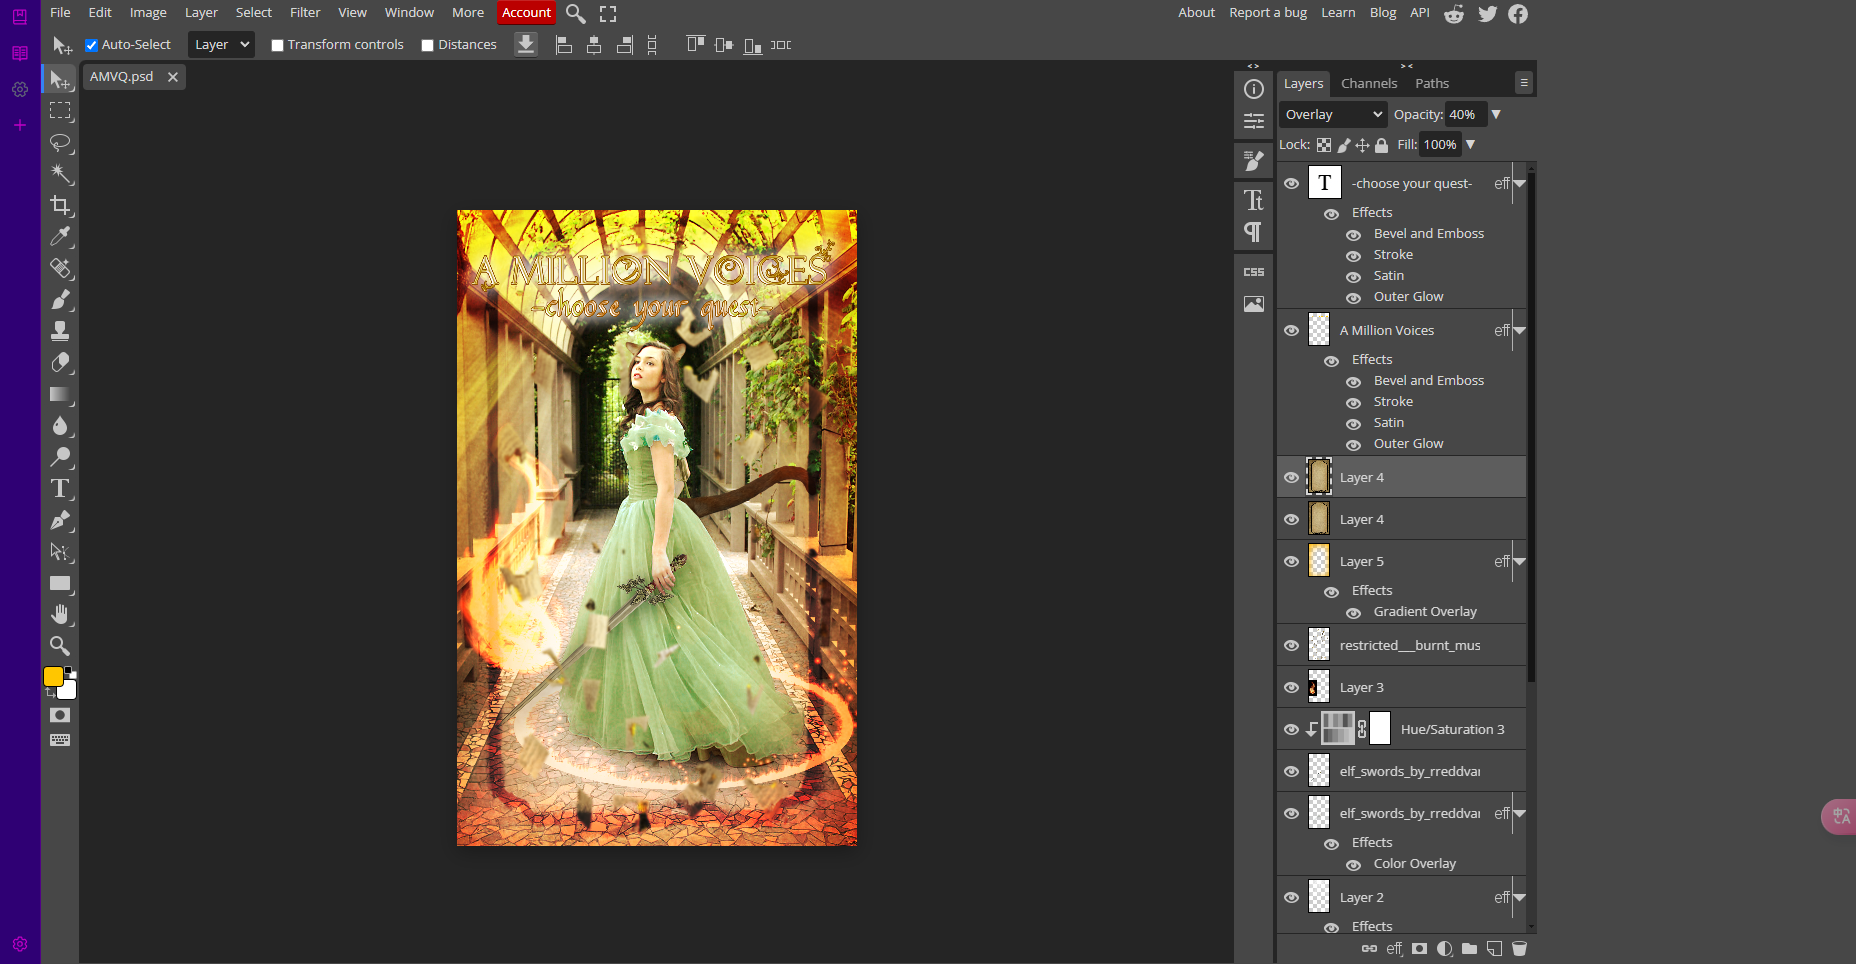
 One of Photoshop's features I would rely on the most was its layer styles, and while I'm glad to see Affinity Designer and Photo includes some, there are a few notable omissions (contour, texture, satin and pattern overlay for example). Comparing the same PSD file in how it appears in Photopea in (a feature-for-feature Photoshop clone that faithfully replicates all of these layer styles) in attached images 2 and 4 vs Affinity in attached images 1 and 3, you can see how differently the image looks because some features that were used when creating it in Photoshop are not there in Affinity. If Photoshop's layer style feature could be completely replicated in Affinity, then I could confidently switch over there from Adobe for good
-

Find and Replace panel improvements
tcdaly replied to MikeTO's topic in Feedback for the Affinity V2 Suite of Products
+1 Feature request: after a find operation, a button or menu item to completely clear the search terms and results, resetting the panel back to a blank, default state. -
 I'm using Affinity Photo to make pixel art. I used to use Photoshop but switched to Affinity because of the AI debacle One feature I'm really missing is the ability to turn off text/font smoothing. I've made some custom pixel fonts so I don't have to place every single pixel but it doesn't work in Affinity Photo because of font smoothing At this point, I'm not really sure how to work with text in pixel art in affinity photo because of this issue
 -
 All the way in 2021 @yitzaklr asked for something similar as feedback to Affinity Designer 1. I just posted there not realizing it's an old thread so I'll copy that here. It depends on the Color Space model used to interpolate the gradient. Ideally we'd have an option to choose from multiple color spaces and newer Color Appearance Models (CAMs) such as OKLAB and CAM16, but even just CIELAB would be a great improvement over RGB. This should also be an option for transparency interpolation. Also Adobe has offered this functionality for a while.. The steps to compute this from an RGB base are roughly: Convert the gradient RGB colors into the new CAM space Linearly interpolate between the CAM colors to fill in the gradient Convert those new CAM colors back into RGB space Affinity already has HSL sliders so it should be easy to at least implement HSL gradient interpolation. Hope to hear back about this!
-
I can't find anything on this other than a feature request in V1. I'm assuming the “Balance ragged lines” feature hasn't been implemented? If it has, where can I find it?
-
 Currently, the intended behavior (as noted by @NathanC in this post) for the continuous export function within the export persona is to reset every time a user closes and reopens a document. This is ludicrous. I'm proposing the intended behavior be changed to remember the previously chosen setting, as well as remember the export file path that the user has set for those continuous exports. That way, when a user exports slices in the export persona and checks the continuous box, even after they quit and relaunch the app, their continuous export setting will be remembered and the file path they chose will also be remembered. Reference topics:
-
- 1
-
-
- feature request
- continuous export
- (and 5 more)
-
Thanks for your report @adam1762 & our apologies for the delayed response here! I originally moved this thread to 'Bugs' based on your initial description as I was uncertain where this belonged, therefore I've since spoken with our team further to confirm the expected behaviour here. I can verify that Gradients can't be selected from the 'Swatches' selection when editing a 'Stop' in the Gradient Map editor - as your active selection is one colour 'stop' within a Gradient, only singular colours are supported, hence the Gradient swatches do not show in this dialog. As I understand it, this is expected behaviour when editing a Gradient 'stop' directly and therefore not technically a bug. However I certainly understand your desire to apply a saved Swatch Gradient to the Gradient Map Adjustment, which is logged as an improvement request with our team internally, I'll be sure to 'bump' this request with your thread now to add your vote for this feature. I'm not seeing this behaviour here with 'basic colour' swatches (ie singular colours), these appear in the Gradient Map Editor from either Document, Application or System palettes, though as above none of the Gradient Swatches appear, and this is expected behaviour. Unfortunately macOS 'System Palettes' don't support Gradients at all , therefore when saving a Gradient as a System Palette, only the first colour 'stop' in the Gradient will be saved. Again this is expected behaviour. I hope this clears things up
-
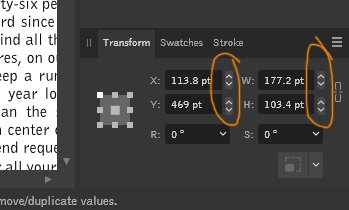
 I found it very useful in Indesign, to have increment arrows on the control panel, especially so that I could increase the width and height of any object in uniform increments by simply clicking (especially when the aspect ratio of the object was locked). Please add the increment arrows to Publisher (as shown in the hypothetical screenshot)
-
Publisher is a very nice program, indeed. I have just recently purchased the Affinity Photo 2 program, as well. It is taking a while to learn all of its features. Consequently, when I need to edit an image, and I am in a big hurry, I would like to use an editor that I am much more familiar with, such as GIMP, Photoshop, etc. Consequently, I would like to right-click on the image, then find a context menu with an item that would allow me to open that image in an external editor (rather than in Affinity Photo 2). That item might say, "Open in external editor," for example. But, better yet, if that menu item included a tick-box that would allow my choice as the "new default" image editor (until further notice). This is common behavior in many programs, as you know, but not in Publisher. Otherwise, to show you how unproductive it can be, and how much time is lost, allow me to tell you what I currently have to do in the meantime (in addition to purchasing Affinity Photo 2, which I have already done, but which has not helped the issue of the learning curve): 1. Make a note of the sometimes complex image name in question (e.g., boy_girl_hi-res_cropped_no_background_7835710.tif vs. boy_girl_hi-res_cropped_INCLUDED_background_7835710) 2. Find the sub-folder containing that image, among twenty folders on the desktop with similar names, with things misplaced here and there, 3. Finding the image itself from among many with similar names, such as in the example above 4. Opening it in the separate image editor 5. Editing the image, saving, closing 6. Returning to the original Publisher document and hoping the image will be updated. Now, please tell me that you have already added this feature somewhere, and that I have simply overlooked it.
-
 One absolutely critical workflow feature that I use all the time in Adobe Illustrator is: Non-Destructive Transform Effects, found in the Appearance Panel. This allows the user to apply an editable Transform effect to an Object or Group; including move, scale, and rotate. It is further enhanced with a "copies" option; allowing the user to create complex arrays using simple shapes. This is an easy and nondestructive method for doing all kinds of things that currently necessitate using many copies of Symbols in Affinity Designer–a much more laborious, tedious, and error-prone method. This also allows simple and easy duplication of the object for further versioning without having to recreate with new Symbols. Would save immeasurable amounts of time in user workflow, and continue pushing Designer toward being a viable alternative to Adobe Illustrator. See: attached. Image 1: A Group containing a square and triangle. Image 2: A nondestructive Transform effect rotates the Group 20 degrees around object center, making 17 copies (18 total, 360 degrees). Transform effect is easy to apply, and remains editable.
-
 I really miss a way to easily change and adjust brushes while drawing without having to open panels and move around the screen, especially when using a tablet and pen. Like the options window that pops up when you double click a brush in the Brush panel, or something similar to the context menu in Photoshop. Please include some sort of shortcut in the future? Most other drawing programs have this…
 -
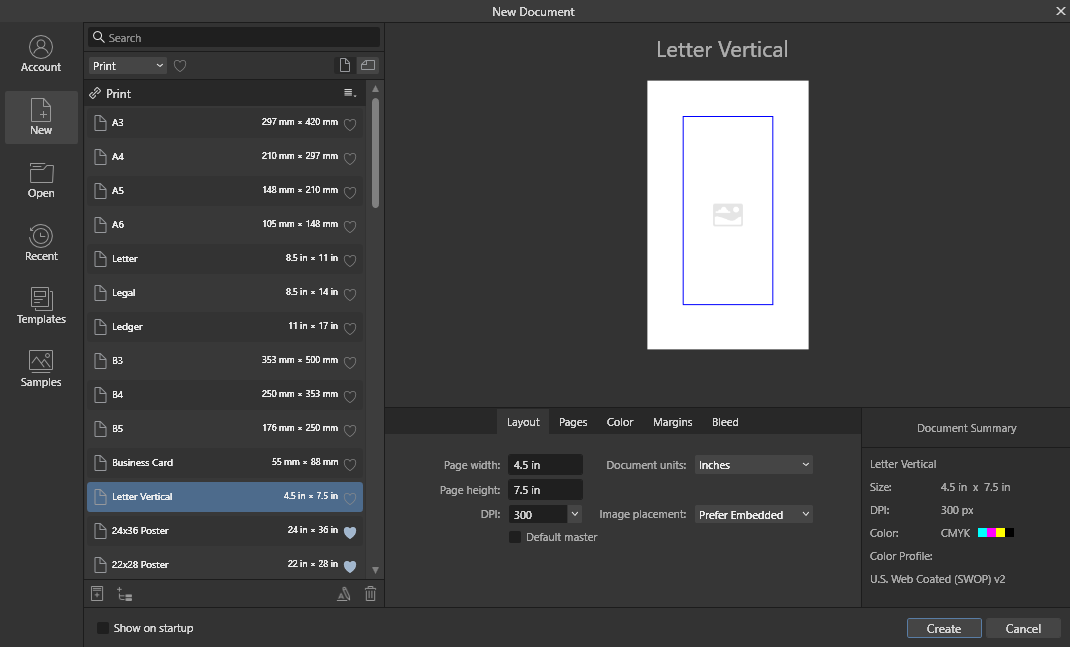
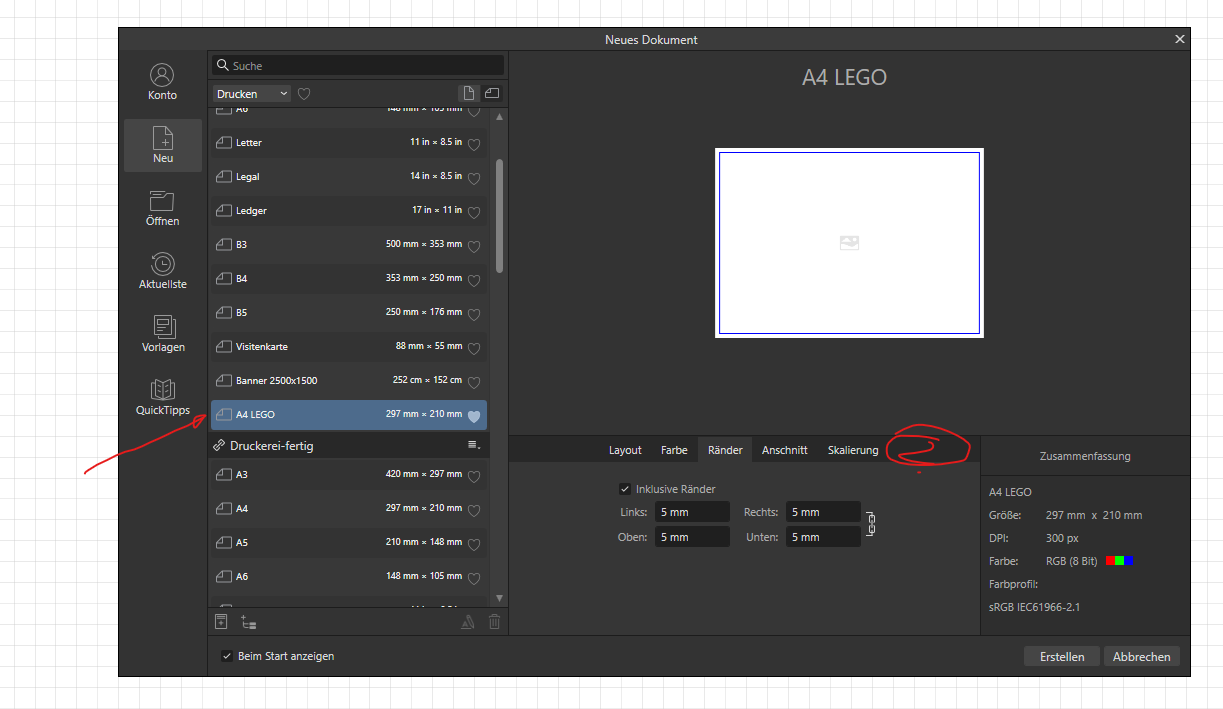
 My use case is creating custom sticker (or print) designs for LEGO(R) Elements. I work with heavy duty laser labels from Avery in one case. However depending on the type of LEGO element I use different grid settings. The grid-setting is in general an not possible to preset over a template. A4 landscape with a 7.8mm grid is one type. I want to suggest the possibility to set the grid in the page setting and and use the setting if starting with a new document chosing the template. Also this would make it easier to share a template including the grid setting with others.
-
Object selection annoying
walt.farrell replied to Xytraz's topic in Affinity on Desktop Questions (macOS and Windows)
Just tested, and this bug (and a related feature request) have not been implemented yet. Tags: A feature request to add the ability to reverse layer order: https://forum.affinity.serif.com/index.php?/search/&tags=APL-1591 A bug report, that Move Outside reverses the order of the layers: https://forum.affinity.serif.com/index.php?/search/&tags=AF-2256