Search the Community
Showing results for '"text wrap"' in content posted in Affinity on Desktop Questions (macOS and Windows) .
-

Wrapping text round grouped objects
MikeTO replied to DebSki's topic in Affinity on Desktop Questions (macOS and Windows)
Deb, note that: Text wrap can be applied to individual objects and to groups If you ungroup a group you lose the text wrap applied to the group If you group objects their individual text wrap settings will not be lost but they will be overruled by the group's text wrap settings. This point can be difficult to see if the individual objects and the group have similar text wrap settings but if you do a test with two ellipses, one of which has Text Wrap set to Square, the other to None, and then group them and set Text Wrap to Tight you'll see what I mean. Good luck -
Text wrapping in Affinity Publisher
MikeTO replied to mdesigns's topic in Affinity on Desktop Questions (macOS and Windows)
If the image is pinned inline, the image will be on the text's baseline and the second line of text will be below the image. Text Wrap won't make a difference. If you want to have multiple lines of text to the right of the image, and for the text to start at the top of the column, pin the image with Float instead of Inline. Then you can use Text Wrap. Good luck -
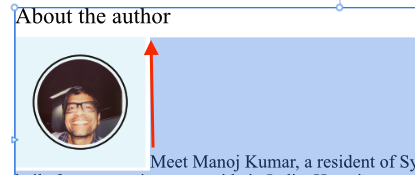
 Please see the screenshot attached. How do I get the text to start right from the top of the image? I tried to use the text wrap feature, but I was not able to move the image properly using the Move tool.
-

Working with wrap around?
benged123 replied to benged123's topic in Affinity on Desktop Questions (macOS and Windows)
Hi Old Bruce, I opened your document. I see we go from 'Text Wrap' to 'Broken Link'. I Google Affinity Publisher 'Broken Link' and get all kinds of unrelated stuff. Excuse my slowness. Are you saying 'create a broken link to the next bunch of text'? And then how do we go back to 'text wrap' after the pics? Or am I not getting this? Right now where I have a picture on a single page I want to keep otherwise blank I've done the 'Return return return' to move the text to the next page. I AM applying your other direction (adding spacing) where the pics are stacked in between wrapped text -- working perfectly. -

Working with wrap around?
Old Bruce replied to benged123's topic in Affinity on Desktop Questions (macOS and Windows)
Take a look at how I have set the text distance in the Edit Text Wrap section. I also include a file made with version one of Publisher that shows how to skip the text frame so no wrap needs to be applied. Untitled.afpub
-

Wrapping text round grouped objects
thomaso replied to DebSki's topic in Affinity on Desktop Questions (macOS and Windows)
Apart from your failed screenshot upload: I can reproduce a grayed-out Text Wrap menu option if the TW dialog window is opened already and currently 'activated' (on mac: traffic light icons are coloured). Clicking somewhere to de-activate the TW dialog enables the menu option. (while I don't see an advantage to use the menu if the dialog is opened already I also don't see a need for the menu to be grayed-out)
-
 Thanks everyone. I am using the latest update and it doesn't have Text Wrap under Text, so guess I'll have to open it in Publisher and do it that way.
 -
Welcome to the forums. Text Wrap is available in Publisher.
-
 Normally under Text > Text Wrap > Show Text Wrap Settings... ...and also via icons on the top menu.
-
I am trying to flow text around a photo but can't find the Text Wrap feature. Where is it hiding?
-
Wrapping text round grouped objects
Old Bruce replied to DebSki's topic in Affinity on Desktop Questions (macOS and Windows)
Regarding the greyed out options, do you have anything selected? Meaning is the picture selected? Check your layers panel. I wouldn't group the pictures, but that is just me and I don't actually know why you have grouped them. Apply the text wrap to the pictures and the text will flow around the pictures individually, apply the wrap to the group and the text will go around the entire group which may not be what you want. -

Best way to add captions?
anto replied to benged123's topic in Affinity on Desktop Questions (macOS and Windows)
Yes. But you have to group Picture frame with text and add text wrap to group.
-
I am guessing you have a Text Frame with Ignore Text Wrap checked underneath the image.
-

Text wrap not working in Publisher?
Hangman replied to Godzilla's topic in Affinity on Desktop Questions (macOS and Windows)
Hi @Godzilla and welcome to the forums, With your image selected could you upload a screengrab of your Text Wrap Settings... -
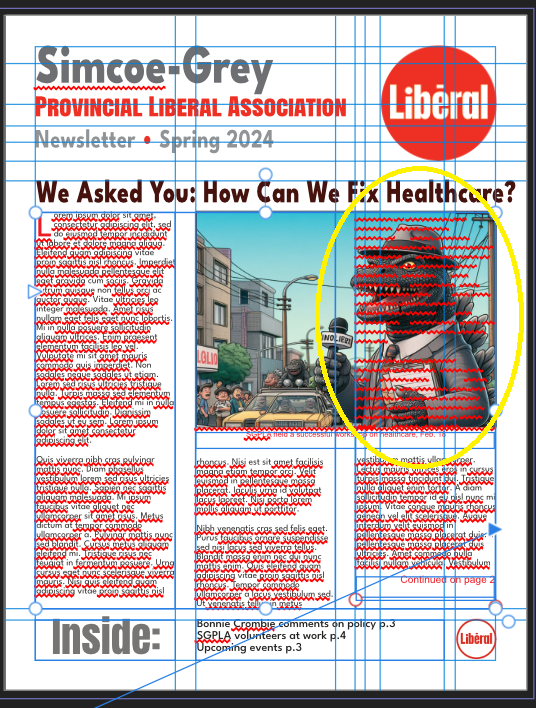
 Here are two screen captures of a demo newsletter I am working on. The one on the left is in working mode (guideliens showing), on the right is in preview mode. I'm using generated pseud-Latin Lorem Ipsem text for my sample. That causes the spellchecker to flag almost every word (the red underlining). You can see that the image does not force the text in the rightmost column below it like it does in the middle column. An entire paragraph is hidden by the image but it should all be forced below it. The text in the article is linked to flow/continue on page 2, by the way. There's also a small cutline below the image with a frame and wrap to push the article text away further. Again, it doesn't seem to affect the rightmost colum. Is this a bug? If not, how do I correct it?
-

Text doesn't wrap around PNG image
GarryP replied to Hussard64's topic in Affinity on Desktop Questions (macOS and Windows)
Try this: Add the image to the document as an Image Layer (use Place); Set the Text Wrap to the required settings to the image layer; Use menu “Layer → Convert to Picture Frame”. That seems to work. -
Text doesn't wrap around PNG image
GarryP replied to Hussard64's topic in Affinity on Desktop Questions (macOS and Windows)
I think the problem you are having there could be that the image in inside a Picture Frame and you have set the Text Wrap for the image, not the frame, so the text is wrapping to the frame. Try changing the Text Wrap settings of the frame too. No, sorry, that’s not the answer. I just tried it and it didn’t work. I wonder why. -
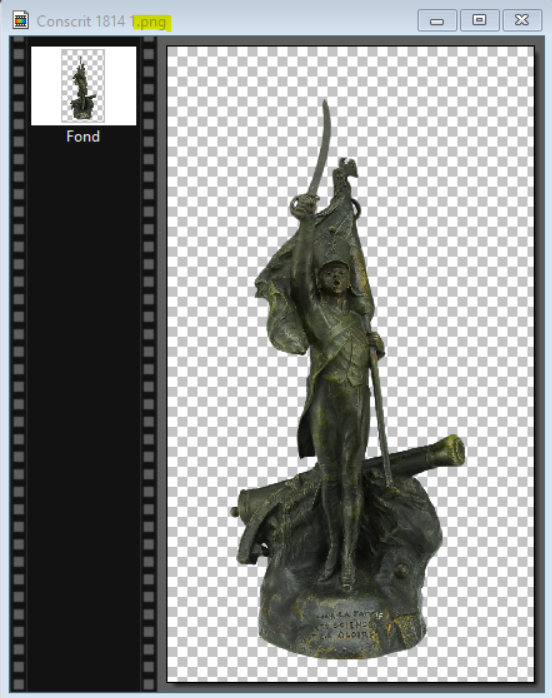
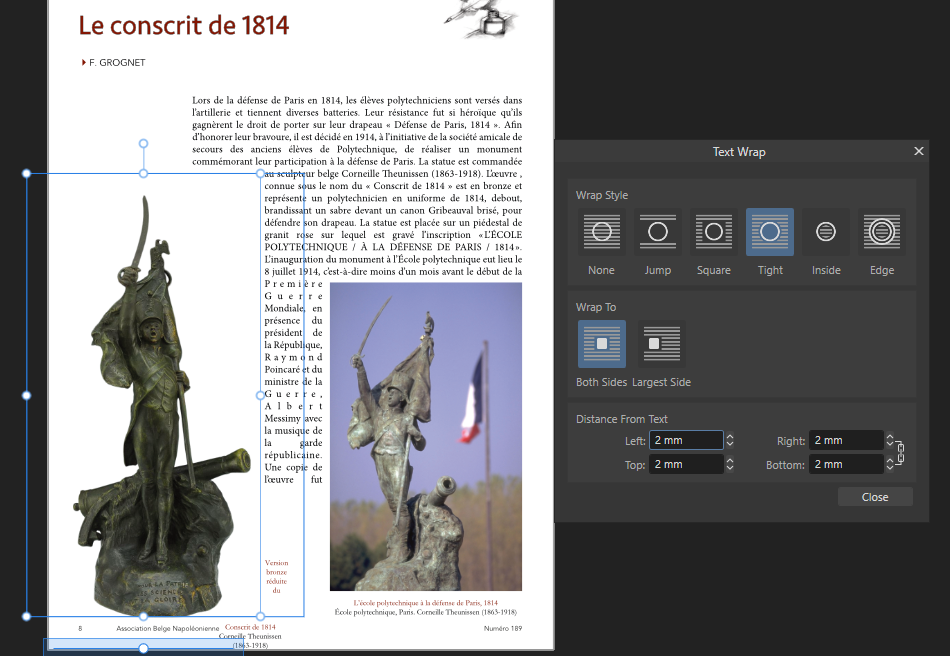
 Hi, As you can see on my the screenshot called Conscrit1814, I have a 2-column text and 2 images. The one on the right is a squared JPEG image and I apply a tight wrapping around it and it is ok. On the left image which is a transparent PNG (see second screenshot called PNG file) I also apply a tight wrapping and I was expecting that the text will flow following the curves of the bronze statue but it doesn't and I'm puzzled. It seems that the image is not considered as a transparent PNG but a plain JPEG and the text wraps around the image square... What is wrong ? Can you help me ? Thanks in advance. Frank
-
This sounds like you have applied a Text Wrap to the Picture Frame and or the image it contains. On the Toolbar
- 4 replies
-
- 1
-

-
- caption
- text frame
- (and 2 more)
-
Have you tried Pinning the tables, either "inline" or "floating" (+ text wrap)? This works to make the table flow with the text, though it may require manual adjustments in case of column / frame / page brakes. (Below a screenshot of V1) If the mentioned post feels relevant it appears useful to edit your post + add a link to this.
-
 Ach so, das wär die "Torte": https://affinity.help/designer2/de.lproj/pages/Tools/tools_pie.html Du kannst auch die roten Punkte bewegen, um den Ausschnitt zu rotieren. Brilliant! Daran hab ich nicht gedacht. Mit Publisher gäbe es dann weitere nicht-destruktive Möglichkeiten via Text Wrap ("Umbrechen/Umfließen von Text"). https://affinity.help/publisher2/de.lproj/pages/Text/wrapText.html
 -
 Hi, I have an interesting problem. I needed a shape in Publisher that wasn't available in the available shape collection available in Publisher, but does exist in OmniGraffle, so I created an OmniGraffle document, dragged in the shape from OmniGraffle's stencil collection, copied it, and then pasted it into my Publisher document. Surprisingly, it worked, but it was imported as a group of three objects ("Curves", "Curve", and "Object"). By experimentation, I found that only one of the objects allowed me to insert an image inside it in Publisher, so I deleted the other two unneeded objects. This is working fine, with the exception that when the shape is "right side up" in Publisher, its rotation property shows a 180 degree rotation. Visually, this doesn't pose a problem, but a side-effect of this is that when I set the shape's text wrap setting to "Jump", the effects of the "Distance from Text" values visually work the opposite from what one would expect (increasing "Top" would push text away from the visual "bottom" of the shape. As a workaround, I solved this problem by inverting the shape in OmniGraffle before pasting it into Publisher, but I'm curious as to whether there's a way to "reset" the rotation of a shape from within Publisher, so intuitive behavior of the "Distance from Text" would occur for a shape that's being used inverted from its typical orientation. Thanks, Ken RightSideUpShapeWith180DegreeRotation.afpub
 -
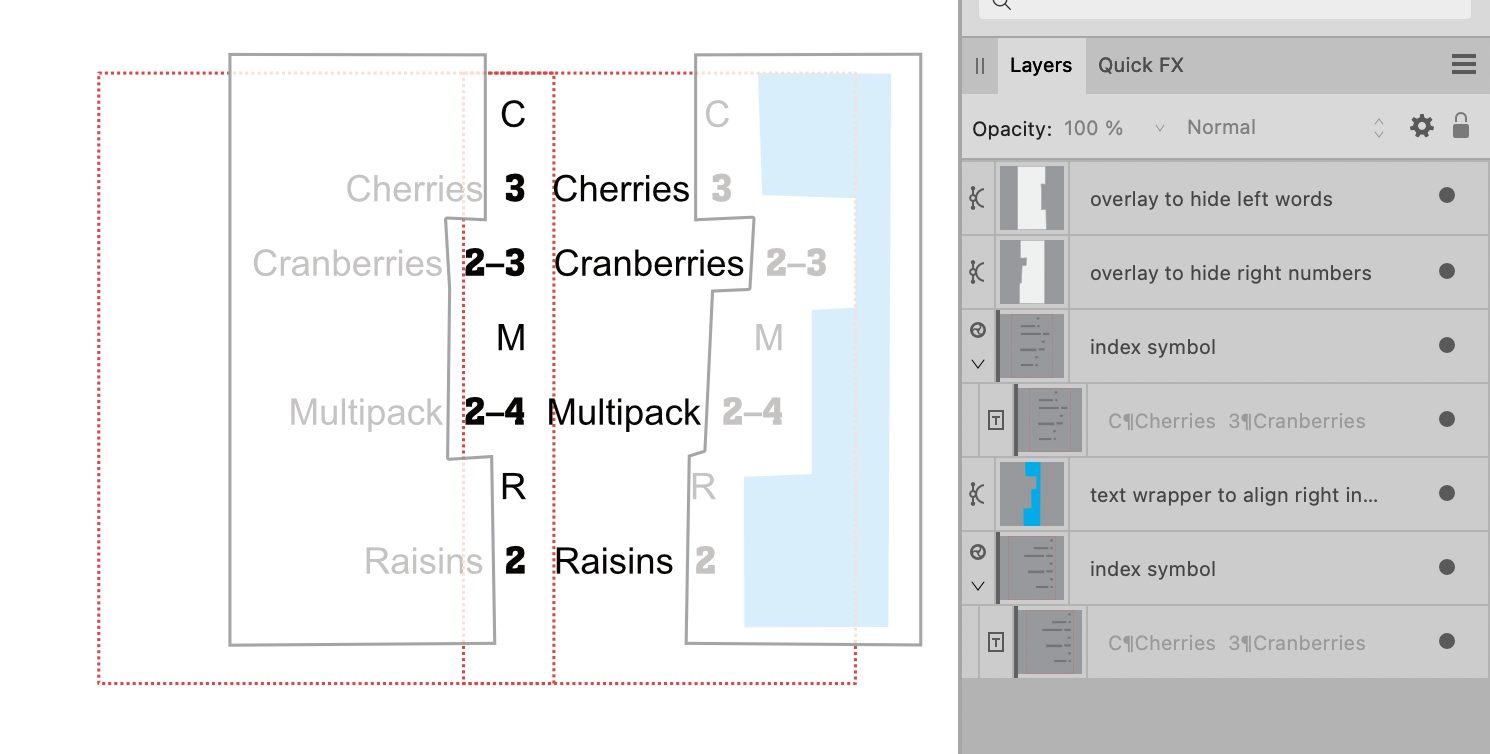
 Here's a rough and utterly ridiculous technique… Index as a symbol, placed twice (red dotted outline), blue shape has Text Wrap to force right side index to align left, white shapes (with transparency to show what's happening) cover up the respective words and numbers of the 2 symbols. Cons: insane to try and build and maintain Pros: um…technically does what the OP wants? maybe?
-
Images across multiple columns
Old Bruce replied to Tex4aviation's topic in Affinity on Desktop Questions (macOS and Windows)
With all due respect to @MikeTO I have to disagree with his suggestion of using "pin the image as floated". I would not Pin the image at all, just turn on the Text Wrap. With Pinning an image of this size you'll most likely run into problems later on as you edit the document. Pinning is great for small/tiny images, less useful for images which are the width of the page. A question I have is; Do you want the picture frame to be the width of the margins or just the width of the Picture? -
Images across multiple columns
MikeTO replied to Tex4aviation's topic in Affinity on Desktop Questions (macOS and Windows)
Hi, you've pinned the image inline and inline images are part of the text flow and thus are only in a single column. To wrap the text around the image in multiple columns you'd need to pin the image as floated and turn on text wrap. What you really want is the ability to span columns, a frequently-requested feature which Publisher doesn't have, but you can achieve what you want with floating and text wrap. For settings, I suggest Text Wrap = Tight and in Pinning, set Horizontal Align to Inside Centre, set Of to Frame. and select Keep Within Bounds. Select Keep Within Bounds for Vertical Align, too. Good luck