Alfred
-
Posts
25,470 -
Joined
Everything posted by Alfred
-
 Thanks for confirming that, Sean. I had hoped these issues might have come under "Fixed a variety of Light UI bugs" as mentioned in Mark's OP.
 -
That would be a reasonable expectation if the full version were just an unlocked copy of the trial version, but it isn't: it's a separate app.
-
Affinity buy (again)
Alfred replied to zitronixe's topic in Pre-V2 Archive of Desktop Questions (macOS and Windows)
Doesn't that restriction only apply to commercial use? :unsure: -
You can Cmd-click the path in the Layers panel, but I don't think that's any quicker than pressing the 'Selection' button on the Context toolbar.
-
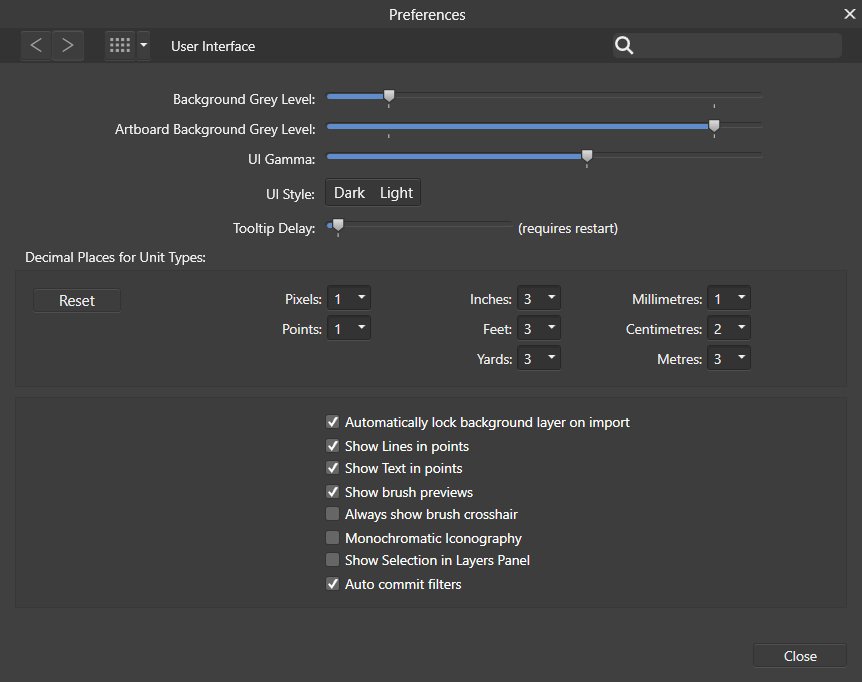
Using the dark UI, the glyphs in the Glyph Browser are nearly black (#0D0D0D) on a dark grey (#333333) background, so there is much too little contrast for comfortable viewing. The samples in the Typography panel are displayed on the same dark grey background, but using an off-white (at or near #E5E5E5) which is quite legible. Switching to the light UI, the background in the Glyph Browser and the Typography panel is light grey but the glyph colours are much the same as in the dark UI, so the problem is reversed: the Glyph Browser samples are quite legible but the Typography samples are not. Trivially, neither of the 'UI Style' buttons in Preferences was drawn in the active state when I first launched the previous version 1.6 beta build. I don't see that problem now, but I've no idea whether that's because this is an update rather than a completely new installation. As shown in the attached screenshot, I'm still seeing the same thing in Affinity Photo after updating from build 1.6.0.70.

-
According to Patrick Connor's post here, you can access one-to-one support by emailing affinitysupport@serif.com. Following the link from that post to the 'Contact Us' topic yields yet another email address: affinity@serif.com. Take your pick!
-
Affinity Publisher - Markdown Support
Alfred replied to Gebnar's topic in Older Feedback & Suggestion Posts
I don't use InDesign but I do use Markdown. Pandoc looks very useful, so thanks for that. :) -
The simplest and most reliable way to get that vertical blue line is to drag the shape over the thumbnail of the background layer.
-
Affinity Photo for iPad launched at Apple WWDC
Alfred replied to Patrick Connor's topic in News and Information
I've seen in a couple of places (sorry, I don't have a link for you) that the launch discount is set to end on June 19; i.e. two weeks from the launch date. -
Filler text
Alfred replied to avishag's topic in Pre-V2 Archive of Desktop Questions (macOS and Windows)
Other Lorem Ipsum generators are available. ^_^ -
Version 1.6.1 fixes the bug, and it has been confirmed that it works for Swedish. :)
-
Did somebody mention bananas? What he said!
-
Affinity for iPad discount for current paid users?
Alfred replied to John Galt's topic in Pre-V2 Archive of iPad Questions
Hmm ... I said that I'm considering buying the app for the same reason as you are, and now you've now replied that you're considering buying the app for the same reason as I am. This could become very, very circular! :P -
Very!!
-
Getting really hard, Stuart? Apart from the trivial case of the very first one you see, which has to be your favourite so far, it's always been hard! ;)
-
The answer is very simple: persuade your wife to buy you one! :lol:
-
Affinity for iPad discount for current paid users?
Alfred replied to John Galt's topic in Pre-V2 Archive of iPad Questions
I don't have a supported iPad (or even a wife who has an unsupported iPad) & I am still considering buying the app at the discount price, just in case I ever get a supported one. ^_^ -
I think the only conflict is between what Serif wanted to say and what Apple insisted on saying! When I go here I just see but clicking on '...More' reveals this:
-
Quick way to duplicate a layer
Alfred replied to alsarraf's topic in Older Feedback & Suggestion Posts
That's what I thought you meant, Alex! Since it's analogous to Alt/Option-dragging an object on the canvas, it would be a nice and intuitive way of duplicating a layer in the Layers panel. -
LOL. :D I dunno, Brian. What are you thinking?? :unsure:
-
Following on from that analogy, shouldn't the macOS versions be abbreviated 'macAD' and 'macAP' (or 'macAPh')? :unsure:
-
Phublisher, obviously! :D
-
You can send email to support@seriflabs.com, but the main advantages of posting to a public forum are that (a) you get answers from more than one source and (b) other users can benefit from the answers provided.
-
Affinity Designer Customer Beta (1.6 - Beta 1)
Alfred replied to MattP's topic in [ARCHIVE] Designer beta on macOS threads
Do you really expect us to believe that?? :o