firstdefence
-
Posts
11,711 -
Joined
-
Last visited
Everything posted by firstdefence
-
 @Granddaddy Double spacing can be disabled by pressing the shift key down as you return a line like this
 -
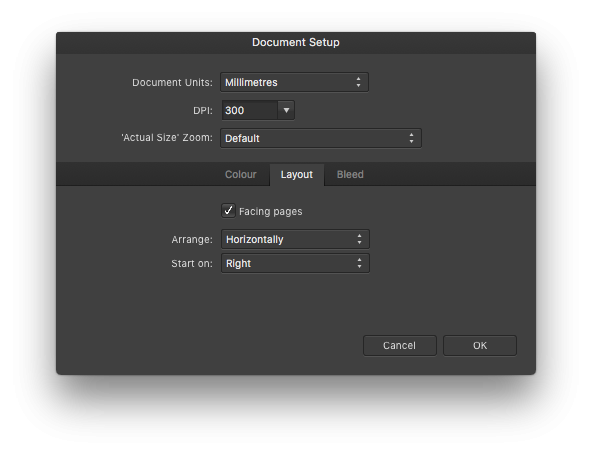
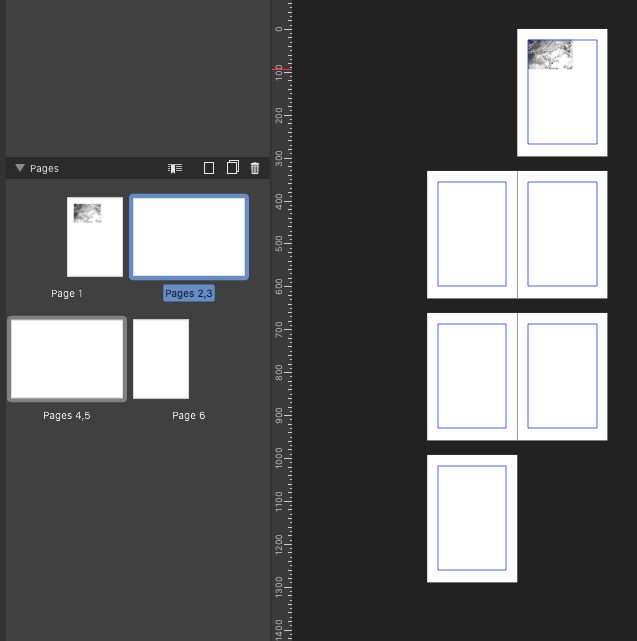
Spread is normally used for books/magazines and within File > Document Setup: Layout Tab you need to enable Facing Pages for spreads to show. If you think, when you open a book or magazine, you are "spreading" the pages open and effectively show two pages side by side.

-
File size change
firstdefence replied to Poohbear's topic in Pre-V2 Archive of Desktop Questions (macOS and Windows)
Take a screenshot of the XNviewMP Window with the file open -
That is one messy table lol! For a lot of this I think you are going to have to use the pen tool to make selections for the things you want to keep, and save as a channel so that you can load the selection back in, then make a shape matching the table and fill it with an elliptical gradient selecting the colours on the table, you can then load the selections and create a mask to knock out where the objects that you want to keep are. A quick tidy up, I'm sure you or others could make it better and spend more time on this but just as an example. Table Cleared.afphoto
-
text styles in Publisher
firstdefence replied to Fipo's topic in Pre-V2 Archive of Desktop Questions (macOS and Windows)
Again, from Affinity Publishers help files Creating and managing text styles Text styles can be created in the Text Styles panel, ready for applying to text. They can also be managed and modified to improve your design and workflow. There are several ways to create a new text style: build it from scratch—the new text style will have no initial connection to any other text style. duplicate it from another style—the new text style will initially be exactly the same as the selected text style but has no connection to that style. base it on an existing style—the new text style will use the selected text style as its base. A connection between the styles is retained and a hierarchy is established. A text style can be modified in two ways: Editing the text style directly. Updating the text style to match some selected, locally formatted text. You can also set up your own keyboard shortcuts to apply individual text styles to text. To create a text style from scratch: (Optional) Select a portion of text or click inside a paragraph. On the Text Styles panel, select: Create Paragraph Style—to create a new paragraph style. Create Character Style—to create a new character style. Create Group Style—to create a new group style. See Text style types for more information. Adjust the settings in the dialog. (Optional) In the Edit Text Style dialog, select the Apply style to selection option to apply the style to the text selected in step 1. Click OK. To create a text style from an existing style: On the Text Styles panel, click on a listed style's options menu and select: Duplicate—to start with settings exactly the same as the selected style. Create Style Based on—to automatically set the dialog's Based on option to the selected style. Adjust the settings in the dialog. Click OK. To edit an existing text style: On the Text Styles panel, click on a listed style's options menu and select Edit. Adjust the settings in the dialog. Click OK. To update a text style: Select a portion of text or click inside a paragraph and make any local changes via the context toolbar, Character panel or Paragraph panel. On the Text Styles panel: Select Update Paragraph Style to update the paragraph style applied to the current text to match the local formatting. Select Update Character Style to update the character style applied to the current text to match the local formatting. From any listed style's options menu, select Update ... From Paragraphs or Update ... From Characters. To assign a keyboard shortcut to a text style: Options The following options are available in the Style section of the Edit Text Style dialog: Based on—sets the default settings for this style. In a hierarchical sense, the Base on text style is the master style to this subordinate style. Next style—for paragraph styles, this determines the text style automatically applied to the following paragraph (see note). Keyboard shortcut—sets the keyboard shortcut which will apply this text style. Type—determines the predominant nature of the text style. Show in both panels—if this option is off (default), the text style can only be applied in its predominant way (determined by the Type set above). When selected, a paragraph style can be applied as a character style and vice versa. Reset Formatting—removes all the settings applied in the Character, Typography and Paragraph sections of this dialog. The settings in this Style section remain unchanged. The Next style feature is only activated when you press the when typing text or when using the Apply ... Then Next Styles option in the Text Styles panel. Additional Edit Text Style dialog options: Style name—defines the name the text style will use throughout the app. Character—assigns character-level attributes to the text style or overwrites those determined by the Based on style. See Character panel for details. Typography—activates OpenType features for the text style or overwrites those determined by the Based on style. See OpenType font features for details. Paragraph—assigns paragraph-level attributes to the text style or overwrites those determined by the Based on style. See Paragraph panel for details. Style settings—lists all the attributes applied to the current text style. Apply style to selection—applies the current text style to any selected text (if text was selected prior to entering the dialog). Where [no change] is shown, an attribute remains unchanged from the Based on style. -
text styles in Publisher
firstdefence replied to Fipo's topic in Pre-V2 Archive of Desktop Questions (macOS and Windows)
Use the Text Styles Panel This is from Affinity Publishers help files Text Styles panel The Text Styles panel gives you access to all the text styles in your document, allowing you to apply them, modify them, delete them or create new ones. About the Text Styles panel The Text Styles panel shows you which styles are applied to the current selection and gives you the option to apply paragraph and character styles at the caret position or to selected text. The panel also gives you options for creating new paragraph and character styles, redefining existing styles, or deleting them. Furthermore, there are options for setting specific text styles as defaults and for importing text styles from other projects. For more information on using text styles, see Using text styles. Display preferences There are several options, available from panel preferences, which allow you to change how styles are displayed in the panel: Show Hierarchical—styles appear nested below styles which they are Based on. Show Samples—when selected (default), a style's appearance mirrors what will be seen on the page. If this option is off, styles will all show as plain text. Sort By Type—when selected (default), paragraph styles are listed first, followed by character styles. If this option is off, styles are listed purely in alphabetical order. Options The following options are available in the panel: Current Formatting—displays the formatting applied to the selected text or at the current caret's position. Click the arrow to the left to display overflowing information, if necessary. Reset Formatting—removes overwrites and local formatting from the selected text, ensuring it honours the Current Formatting perfectly. Type—specifies whether the text style is a paragraph, character or group type. Text style—displays the name of text styles currently available in the document. Keyboard shortcut—displays the key combination necessary to apply the text style. A shortcut must first be applied to a text style. Options menu—provides access to a pop-up menu with creation and editing options. Create Paragraph Style—launches the Edit Text Style dialog ready for creating a new paragraph style. Create Character Style—launches the Edit Text Style dialog ready for creating a new character style. Create Group Style—launches the Edit Text Style dialog ready for creating a new group style. Update Paragraph Style—redefines the current paragraph style to conform with the local formatting of the selected text. Update Character Style—redefines the current character style to conform with the local formatting of the selected text. Delete Style—removes the selected paragraph or character style from the document and any instances of their application. -
Using HTML and CSS its easy to scale an image. You can make the image exactly the size you want or larger and scale it down or up. <div class="tiledBackground"> </div> .tiledBackground { background-image: url(https://whatever-image.png); /* Image location: Http or local */ background-size: 100px; /* adjusts the size of the image */ width: 1000px; /* Width of space to apply the background image */ height: 1000px; /* height of space to apply the background image */ }
-
printing / document size
firstdefence replied to hark's topic in Pre-V2 Archive of Desktop Questions (macOS and Windows)
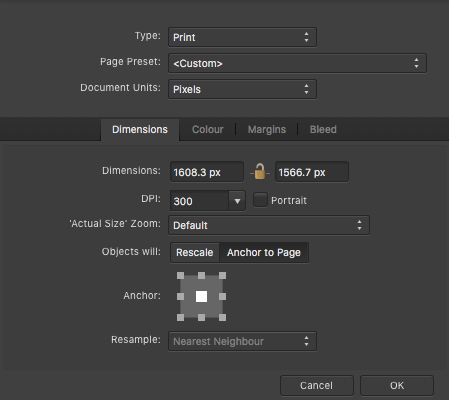
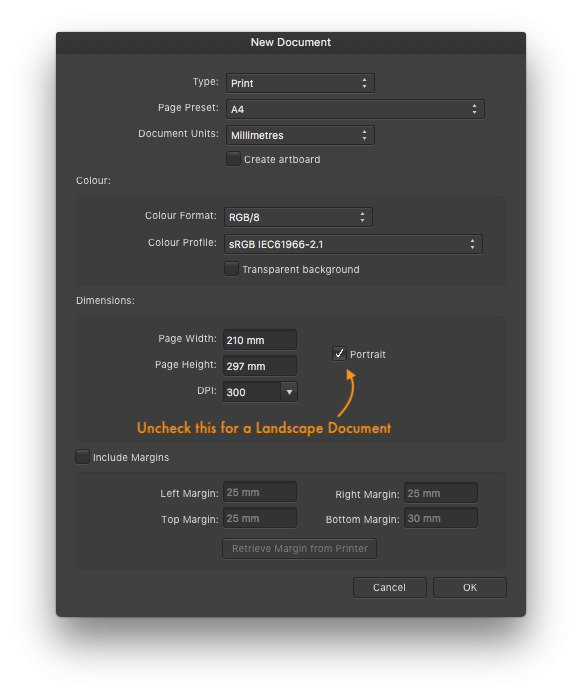
It's the printer software that would divide a larger image into sections to accommodate a smaller paper size, not Affinity. You can change the document size to whatever you want, by going to File > Document Setup: Dimensions tab and typing whatever new dimensions you want in the Dimensions: input boxes, or you can just select a Page Preset.
-
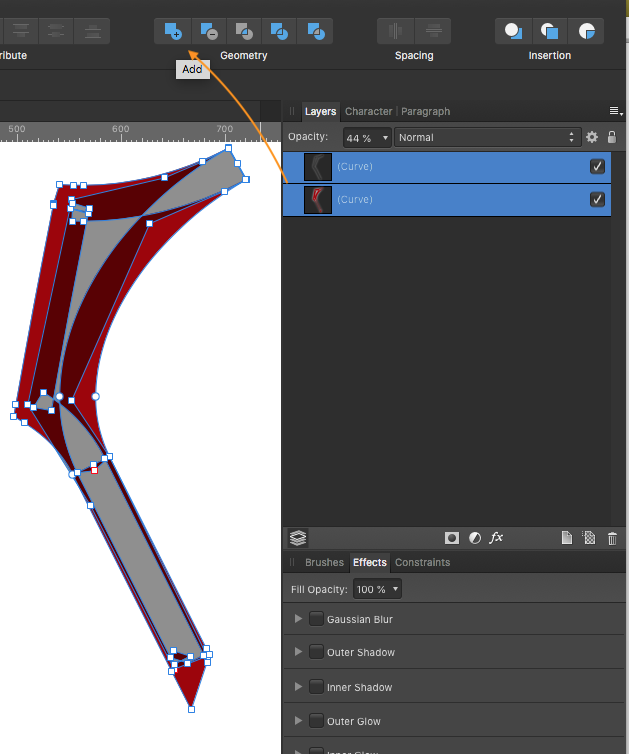
Corn-Stars-Logo-Emblem- Converted.pdf
-
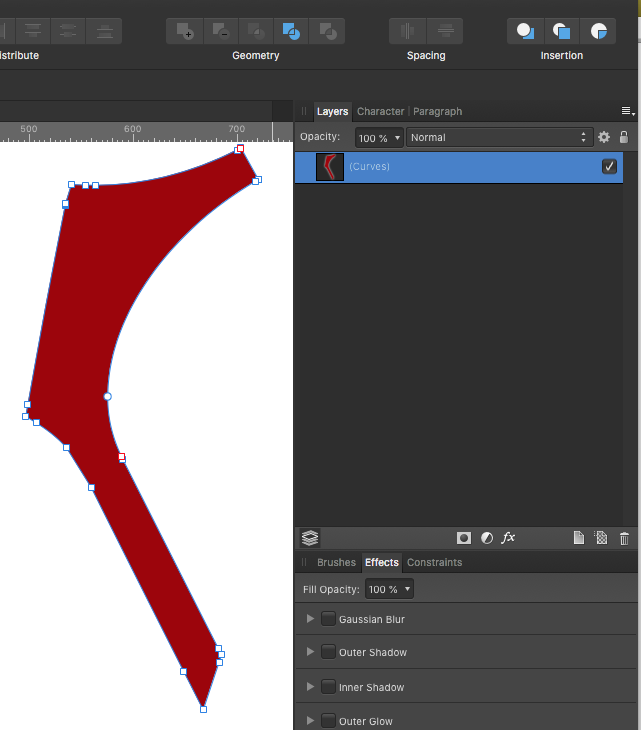
You can create a new curve that overlays the crazy crisscrossing paths and use add to remove them. but thats the only method I know of to get round this.
-
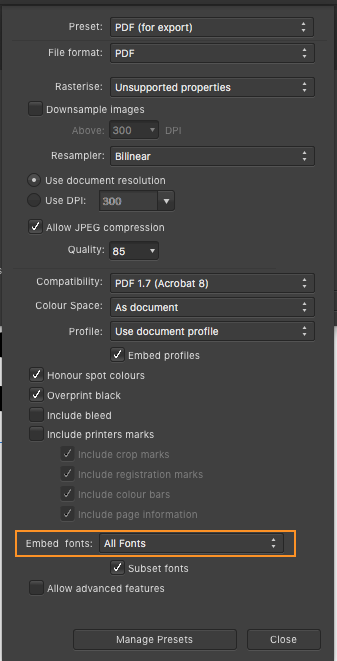
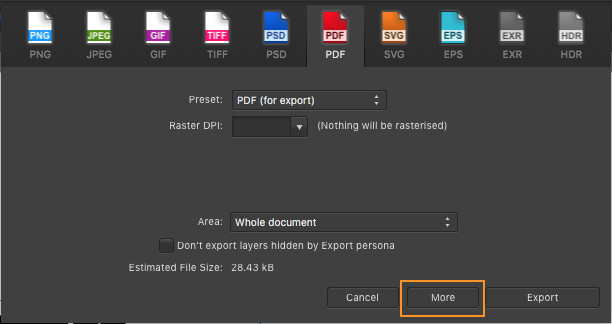
I would save as PDF unless you have specific reasons to save as EPS, you can see more settings under the "More" section of the Export Panel, I know it shows "PDF for Export" but its the same for "PDF to Print" it shows the option to embed Fonts. Explanation from the Help Files. For PDF file format: Compatibility—sets the version and type of PDF to be exported. Select from the pop-up menu. Colour Space—choose whether to use the document's current colour space or export using a selected colour space. Select from the pop-up menu. Profile—choose whether to use the document's current colour profile or export using a specific colour profile. Select from the pop-up menu. Embed profiles—when selected (default), the chosen (or document's) colour profile will be embedded in the exported file. If this option is off, the exported file will not have the colour profile embedded with it (the viewing device will need to have the appropriate colour profile installed to view the exported PDF accurately). Honour spot colours—when selected, spot colours within the design are exported as spot colours. If this option is off, spot colours are converted to an equivalent colour within the exported file's colour space (see above). Overprint black—when selected, design elements which use CMYK black are set to overprint. If this option is off, CMYK black elements are set to be indistinguishable to other colours during printing. Include bleed—when selected, any Bleed set in Document Setup will be included in the PDF output. Include printer marks—when selected, the PDF output will show printer marks around the page edge. All printer marks are added by default. However, particular types of printer marks can be switched off, depending on your preference. These include: Crop marks Registration marks Colour and greyscale bars Page information Embed fonts — select an option for handling fonts used in the document. Text as Curves — all text is converted to curves. This ensures the resulting exported file will display correctly regardless of the fonts installed on the viewing device. All Fonts — any fonts used in the document are embedded in the exported file. This ensures the resulting exported file will display correctly regardless of the fonts installed on the viewing device. Uncommon Fonts — fonts used are only embedded in the exported file if they are not part of the fonts traditionally installed on most devices. The viewing device must have the expected fonts installed to view any common fonts in the exported file. No Fonts — no fonts are embedded in the exported file. A viewing device must have all the used fonts installed to accurately view the exported file. Subset fonts — when selected, embedded fonts will only include the glyphs used in the document. If this option is off, all glyphs for the used fonts are embedded in the exported file, regardless of whether they appear in the document or not. Allow advanced features—when selected, all design features supported by the PDF file format are exported as vectors. If this option is off, depending on the nature of these features, they are rasterized or converted to curves on export. These features include: Artistic text which has been horizontally or vertically stretched. Text which has an applied stroke. Linear and radial gradients. Non-solid transparencies.
-
Affinity products for Linux
firstdefence replied to a topic in Feedback for the V1 Affinity Suite of Products
Would love to see the Math in relation to peoples assumption of "loss". When you talk about loss do you understand the development costs involved. -
Affinity products for Linux
firstdefence replied to a topic in Feedback for the V1 Affinity Suite of Products
I ran Hackintosh for 4 years on a Gigabyte EX58-UD4P motherboard it was solid, then the motherboard borked so I bought a real iMac. It was fun to do. -
there may be secondary processes that check for updates etc
-
You should also have the option to disable this checking for updates so as to suit how you work, I generally prefer to check for software updates myself.
-
Hi murattanhu, welcome to Affinity forums. In Affinity Designer when you create a New File there is an option to the side of the page dimensions, you can also create an Artboard immediately by clicking on the Create artboard option just below Document Units. Also look at the Layers Panel to make sure you only have one Artboard. Press the \ key to see if you have any objects outside the Artboard, pressing \ toggles document clipping.
-
Affinity products for Linux
firstdefence replied to a topic in Feedback for the V1 Affinity Suite of Products
That was brutal man -
Affinity products for Linux
firstdefence replied to a topic in Feedback for the V1 Affinity Suite of Products
I love Linux, especially Linux Mint, "it's green and minty" nuff said. You have to approach Linux in the right manner, "It's not like Windows" = Wrong Manner. People get locked in to a mindset and try to change similar things to fit that mindset, "bash that square peg into the round hole" If Affinity goes Linux hurrah! if they don't it's no bother, there are other comparable apps out there, I don't need to try emotional blackmail, or throw the rattle out of the cot because a software developer isn't going to do what I want. I'm sure some bright spark will figure a way to port it. "The universe is unfolding as it should, because if it could unfold any other way it would." You have been zen'd, Namaste. Chingbingaling. -
Block the app with your firewall to test
-
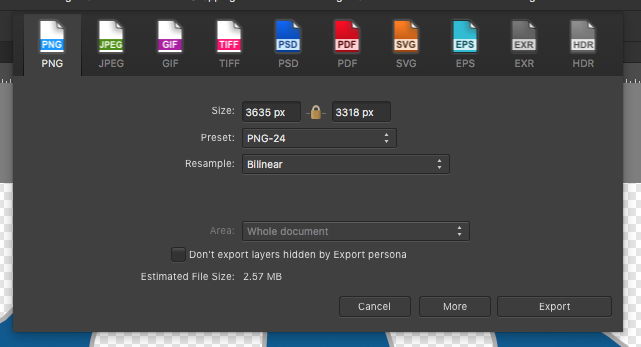
Just go to File > Export... and export it as a PNG-24 file. While in the export Panel you can resize the image to reduce the file size and fit within the iMovie dimensions better. You can also export as a PNG8 (Dithered) to reduce file size even more, probably about half the size of a PNG24 file of the same dimensions.
-
affinity designer Editable 3D text in Designer
firstdefence replied to designandprod's topic in Share your work
I can get close, and with a bit more time I could probably get it to look the same. File: 3D Text.afdesign
-
Nice colouring, I think the eye nearest needs adjusting it doesn't look quite right, seems too low or needs rotating a bit, possibly more curve to the eyelid on the right side. Could be because the eyes together don't quite fit but something isn't quite right.
- 3 replies
-
- 1
-

-
- audrey hepburn
- portrait
- (and 5 more)
-
affinity photo Third Week learning Photography & Affinity Photo
firstdefence replied to I'm Ant's topic in Share your work
The top image just needs a bit more cropping from the top and Ease back on the HDR the image looks too busy, better to make it more punchy with colour. -
Po'tat'toe
-
InDesign compatibility
firstdefence replied to Whitedog's topic in Feedback for Affinity Publisher V1 on Desktop
If not sub-forums, mandatory tagging i.e you cannot write a post until you have chosen which App you are referring too, although I still think sub-forums are a good idea because other forums with multiple apps manage this so why not Affinity. Look at car forums, each model of car under the car brand has it's own forum, all cars have wheels, engines, doors, lights etc but then the model makes it different, so it is with Affinity apps Referring to a feature that is in all Affinity Apps is all well and good but there are workflows that also require app specific features as well as the included ecosystem wide feature, so job lotting everything in one forum in the vain hope people are considerate enough to tell you what app they are referring too and what Operating System they are on is not really going to work, hence the myriad of "what app are you using" and "what Operating System are you on" questions that proliferate posts. In an organised forum these questions would not exist. I regularly look at persons profile to see what other posts they have made in order to glean app info and Operating System info so that I can refer to the question better, but I shouldn't have too. As the forum gets larger manageability becomes more of an issue and from an organisational point of view having sub-forums becomes clearer, it can also help with searches and browsing for info. Having sub-forums does not alienate Operating Systems it just makes it easier for people using those Operating Systems to relate to the posts they are looking at. Would you run an office like this forum? where you lump all files into one folder, I think not.