GDPR-365024
-
Posts
318 -
Joined
Recent Profile Visitors
3,389 profile views


-
 GDPR-365024 reacted to a post in a topic:
Vinyl Record Experiment
GDPR-365024 reacted to a post in a topic:
Vinyl Record Experiment
-
GDPR-365024 reacted to a post in a topic:
Vinyl Record Experiment
-
 GDPR-365024 reacted to a post in a topic:
PSD smart object support in Photo 1.8.0 (split)
GDPR-365024 reacted to a post in a topic:
PSD smart object support in Photo 1.8.0 (split)
-
GDPR-365024 reacted to a post in a topic:
PSD smart object support in Photo 1.8.0 (split)
-
GDPR-365024 reacted to a post in a topic:
PSD smart object support in Photo 1.8.0 (split)
-
GDPR-365024 reacted to a post in a topic:
PSD smart object support in Photo 1.8.0 (split)
-
GDPR-365024 reacted to a post in a topic:
PSD smart object support in Photo 1.8.0 (split)
-
John Rostron reacted to a post in a topic:
Slide scanner direct
-
Interesting images! Scannography is an established art form ... check it out
-
GDPR-365024 reacted to a post in a topic:
Slide scanner direct
-
GDPR-365024 reacted to a post in a topic:
Slide scanner direct
-
Suggestions for creating a website to show off portfolio?
GDPR-365024 replied to CT-Scott's topic in Share your work
My website host is SmugMug so of course I'm biased and recommend it! All drag and drop - both content and site design rearrangement (start with one of their templates then customise it). All very easy - no HTML / prior website building knowledge required. SmugMug is primarily for photographers so quite suitable for all visual art genres. The basic plan is US$48.00 p.a. As your daughter moves further into her career SmugMug has the marketing and other professional tools (in other plans) that could well be an asset to her ... -
GDPR-365024 reacted to a post in a topic:
Baby Yoda's Epiphany
-
In the Profiles / Output Profile panel in Develop Persona? The panel below the Shadows & Highlights panel in your screenshot. The screenshot looks like the Profiles Panel is unchecked!
-
I see in your screenshot the Profiles panel is unchecked. If that is checked and Adobe RGB (1998) is selected does your RAW result become similar to mine?
-
I used to calibrate with Spyder (Pro 4) however I was getting inconsistent recalibration results. @BmrBird Can you revert back to your previous Spyder calibration profile? Because of Spyder's inconsistent recalibrations I learnt (the hard way!) to save the new recalibration as another profile just in case I had to revert back.
-
Yes I agree. The reason I uploaded the above screenshot is so @BmrBird could apply the same (similar) settings as mine. If the image is far removed from my result then we need to look elsewhere for a cause/solution ...
-
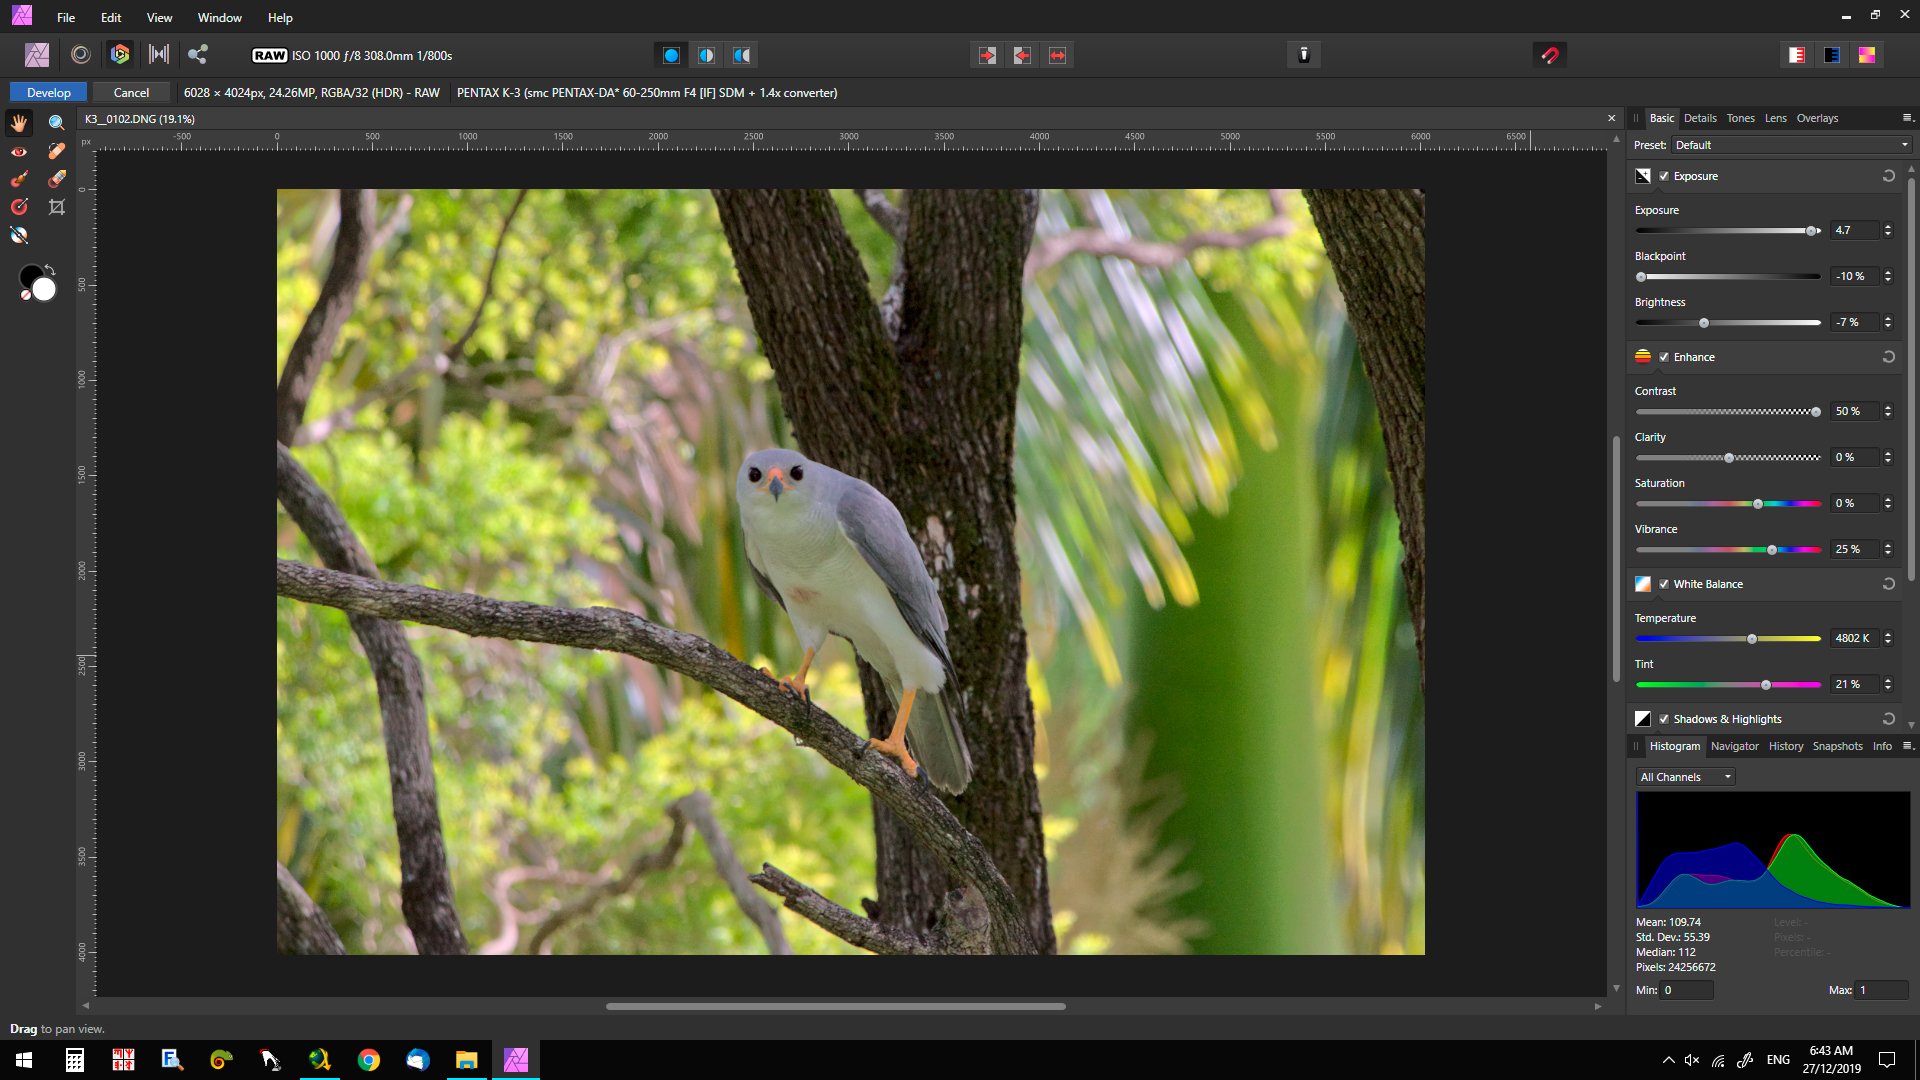
@BmrBird Here's the result of my play with the image. I wanted to spread the tones as much as possible without clipping - refer to the histogram (there's a small amount of tiny spot shadow clipping in the branch behind the bird and branch right side ... if I removed it the image would be too flat). Other than using 16 bit RAW Output Format the Develop Assistant settings are the same as yours (as per your screenshot above). The panels you can't see in the screenshot: Shadows & Highlights - both set to -100%. Output profile - Adobe RGB (1998). A small amount of colour noise reduction was applied. Note, your results may differ from mine (applying the same settings) due to monitor calibration etc. I saved the image as a .afphoto. I can upload it to my Google Drive account if you want it (172 MB).

-
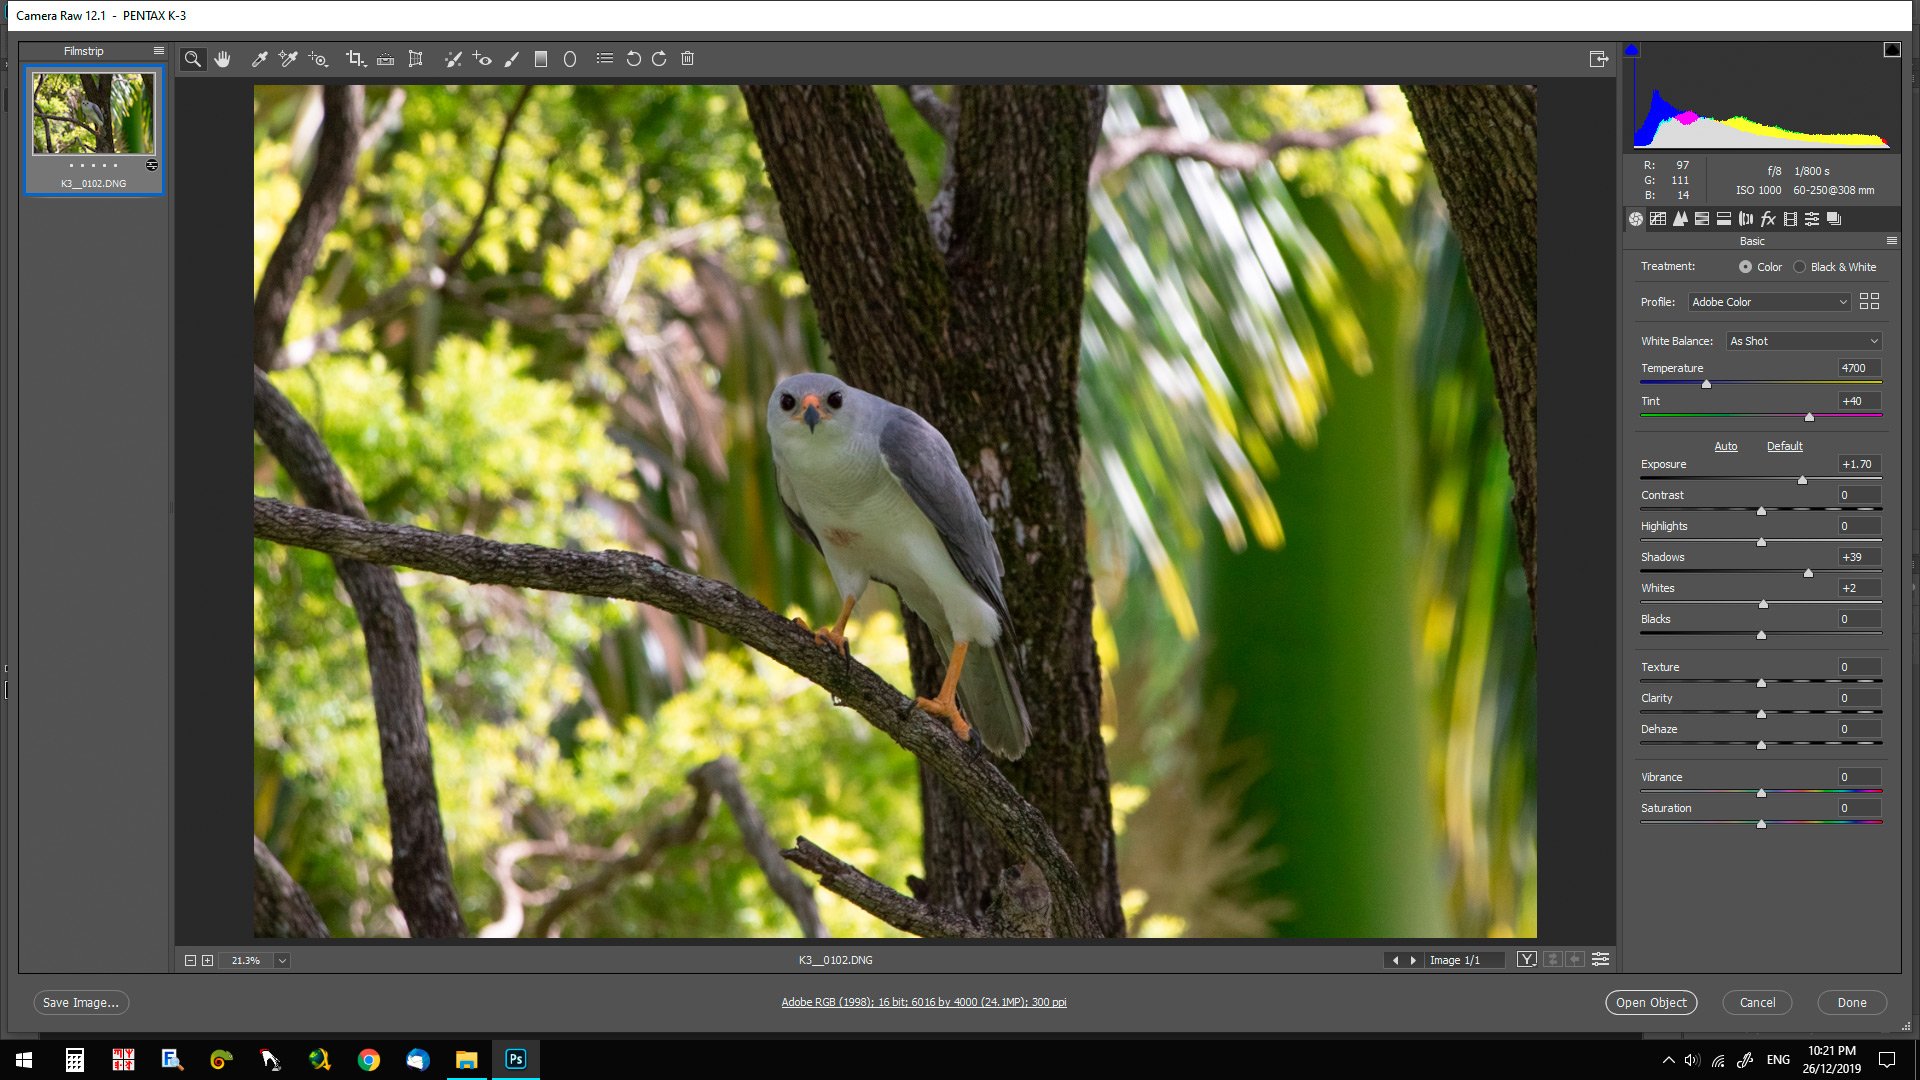
Opening the image in PS 2020 (Camera Raw) here's a screenshot. Note by default PS will do some correction - with this image the exposure has been lifted by 1.70 ev (almost 1.75 stops) plus has lifted the shadows +39 and whites +2. (no corrections by me have been done to this image). As per my post above the Picasa screenshots histograms indicated under exposure ... confirmed by this screenshot. I have opened the image in APh and the results are similar to PS (without PS default correction). Certainly I'm not getting the very dark image the OP has posted. It's late here in Oz so will upload the APh images tomorrow ... It's still quite puzzling though why the OP's RAW's are dark as uploaded! (the issue of this thread).
-
While the Picasa screenshots show what may seem to be an (almost) correctly exposed image, the histograms in the Picasa screenshots indicate otherwise. The shadows are almost clipped and the other tones crowded on the left side (minimal mid-tones through to high values). Any chance of uploading one of these RAW files? ... re process of elimination by examination.
-
Don Lee reacted to a post in a topic:
251 Series
-
Huawei 251 issue,
-
Thanks! I have no idea (obviously) how code writing does its business. So, is there any reason why the Affinity devs' code can't call .exe instead of .8bf? Surely (?) that would sort out these current issues with Viveza (considering there's no issues with Gimp).
-
... and I'm on Windows 10 and using the Google NIK plugins. I've found the following: In order to keep coherent as much as possible I've experimented with two different size images (.jpeg) I upload to my website - 2500px (long side) and 3000px (long size) - both 8 bit, sRGB, 96ppi*. #1 - 2500px images. No colour issues whatsoever with the default magnification in Viveza (APh 1.8 beta). #2 - 3000px images. These images have to be zoomed to 33% to obtain accurate colour. Now here's where the fun starts ... If I upsize the 2500px images to 3000px there's still no colour issues (default magnification in Viviza) nor are there any issues if I convert to .tiff .psd etc or convert to Adobe RGB. However if I convert the 2500px images to 16 bit then I have to zoom to 100% in Viveza. I no longer have installed any Adobe product so I've been using Viveza in Gimp. There's no colour issues whatsoever at the default magnification - 16 bit, pixel size, file format, ICC etc. Here's the NIK python files from Gimp. They're open source (as spelt out in the files). Perhaps they may be helpful to the Affinity dev's? [* dpi/ppi not important as it's purely for print and/or screen output - 2500 / 96dpi = 26.04 inches and 2500 / 300dpi = 8.33 inches] NIK Plug-Ins - python.zip
-
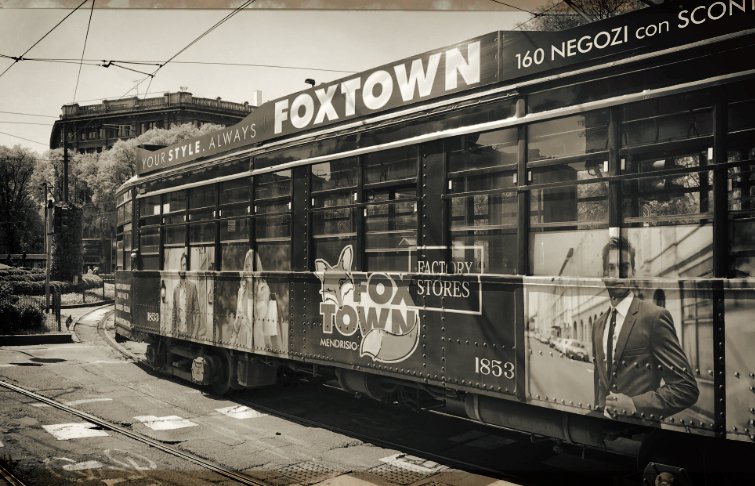
@curtj Have you thought about taking this image to monochrome? I had a 5 minute play in NIK Analog Efex via APh ... yeah a bit moody however it may give you ideas (?) Garry's uploaded .png is low rez so I couldn't do much with this
-
Just thinking Patrick ... Booktopia.com.au is a major online book seller in Australasia (Oz and NZ). Perhaps Serif could get in touch?
-
Enough said! Thanks Edit: A smart cookie (living in the UK, US, ?) could have a little enterprising business on selling to us down here in the colonies and conquered territories