justwilliam
-
Posts
189 -
Joined
-
Last visited
Recent Profile Visitors
1,333 profile views

-
 2:3 reacted to a post in a topic:
What is the difference between Lanczos seperable and non-seperable.
2:3 reacted to a post in a topic:
What is the difference between Lanczos seperable and non-seperable.
-
 Thanks for the link, rmar; I just watched this and the follow-up video. This is pretty much what I have been doing for my small(er) prints. I am really more in need of understanding what dpi/ppi would be appropriate for such large prints - they will be viewed both from afar (20-30 meters away) and from fairly close up (3-6 meters away) and on whether my global sharpening adjustments are better done in the Develop or the Photo Persona.
 -
I have been using Affinity Photo for editing my product shots (for the web) and some of my own Fine Art prints (nothing over 40cm X 60cm as of yet); but I just completed all of the shots for some work for a large local company (who had mentioned in the brief that they planned to make 'large prints' with a couple of the images) and they informed me today, whilst we were making selections, that they plan on three of these images being 1:1 format and 4 meters by 4 meters! I have never edited an image for a final print that size and am now concerned about what I need to be aware of in the editing process. Should I perform some type of preliminary noise reduction, sharpening, and chromatic aberration corrections on the RAW images in the Develop Persona before doing the 'creative' adjustments in the Photo Persona? Are there any things I need to focus on when Output Sharpening? I am not even sure what options to choose in the Export Persona for such enormous prints (should I have the client contact their printer/sign-maker regarding any special requirements/suggestions they may have?). Any help that those with experience with such large prints can offer will be greatly appreciated. Thanks
-
Affinity Photo for iPad launched at Apple WWDC
justwilliam replied to Patrick Connor's topic in News and Information
I was so excited this finally arrived :D - unfortunately, I am still using an iPad 4. :( I am still excited about this app, :wub: but will have to wait for funds to somehow miraculously appear so I can pick up an iPad Pro. :mellow: -
justwilliam reacted to a post in a topic:
How to sharpen without halos (super-simple method)
-
justwilliam reacted to a post in a topic:
Blend mode notes
-
Alfred reacted to a post in a topic:
Critique of wedding pictures
-
affinity photo Critique of wedding pictures
justwilliam replied to Chintan's topic in Share your work
I can not share the edits I made as I deleted them after seeing how much I could accomplish with the jpgs. I made the edits only so I could let you know what I had done and then that was answered by others. But I can share something better than the edits with you that will help you greatly from now on and will help you to see the value of 'playing' with each and every slider to see for yourself what they do. I hope I can write this clearly enough to be understandable. It will help with white balance only, but it will make clear the principle to use on other sliders. Open a a copy of the unedited image of the couple in AP. Go to Develop persona. Under the Enhance panel, slide the vibrancy slider all the way to the left and then all the way to the right and notice what it does to the colours. Do this a few times. Move the slider all the way to the right and leave it there. Put a check mark in the White Balance panel's box. The panel will open and show you two sliders. Move the top one all the way left and all the way right a few times and notice what it does to the colours. Move the bottom one all the way left and all the way right a few times and notice what it does to the colours. Put both sliders back to the middle position. Keeping an eye on what should be white in your image (and on the colours a bit as well), move the top slider until there is neither too much blue nor too much yellow in the whites. Keeping an eye on what should be white in your image (and on the colours a bit as well), move the bottom slider until there is neither too much green nor too much magenta in the whites. Continue moving these sliders until you are happy with the whites. You should now have a pretty good starting point on your White balance. When you have completed this adjustment, move the vibrancy slider back to the middle position. (Important step!) If you have lost too much saturation (or gained) you can fix that in the Photo persona later. That's it! Well, as far as White Balance. Use this same technique to make other adjustments. For example Clarity. Zoom in to the woman's eyelashes and adjust clarity until they look right to you (probably 1 - 2%). Same for exposure, black point, contrast, etc. Obviously the order in which you make these adjustment not only depends upon the image but it will also affect the outcome. But, once again, trial and error will teach you. Following someone else's advice on which order to use will not teach you. Knowing 'why' is better than knowing 'how'. Doing it yourself will teach you the 'why'. A good way to start might be to start at the top with the exposure slider and work your way down. But that is only one way to do it. When you teach yourself you will develop your own workflow. I hope this helps. :) -
affinity photo Critique of wedding pictures
justwilliam replied to Chintan's topic in Share your work
Chintan, The grey card could be somewhat helpful to you; but not so much in a shooting situation such as that. If you shoot.jpg, then setting a custom white balance using anything white would be better than the grey card for a wedding. Best option, depending on your camera, is to save as RAW and take care of white balance in post for each individual image - things happen fast at weddings and parties. rmar's mention of the NIK collection now being a free download is something you may want to act upon quickly; one never knows what Google may do next. As far as these particular images go, some simple adjustments in contrast, brightness, HSV, and a negative adjustment to vignetting made vast improvements. Regardless of what camera you have and even the skills you develop with editing in AP, the thing that will help to improve your images the most (of course, I am speaking about future images) is for you to shoot as much as possible and get to know each and every setting on your camera and what they do and then to be able to change them almost blindfolded. Secondly, look at images of the type you plan to shoot and see what you like and what you do not like while also learning as much as you can about composition - after which, you can forget everything you learned about composition and those images you do not like so that you can shoot images that you yourself do like. But your question was about what more you could do in AP to these images. I might suggest, and I am being completely sincere with the thought only to help you here, is that you open the original files in AP and then one by one see what each slider does in the develop persona. Then do the same in the Photo persona. Seriously, as you move each slider you will see, "Oh, I like that" or "Usch, I don't like that" and then be sure to make a note of what you did and what that did to the image. There is no formula or set of adjustments that make all photos better; in fact, so called 'presets' only work well on certain images. You will want to know how to adjust each image to your own liking. I would even be so bold as to say that presets can even prevent you from consistently creating good images. The NIK collection has some presets that can sometimes be good 'starting points' for an edit but if someone only uses these presets what will happen the day NIK no longer works? There are a lot of great tutorials made by Serif for AP and they have even stated that there will be a workbook, similar to that which they made for AD, coming out soon. Plus, the 'Help' files in AP are very complete and should be able to answer almost any question you may have. And then, as you have already done, there are the members on this forum which should be able to provide the answer to any specific questions that may come up. I edited the photo of the hands and of the couple, with slight adjustments to the compositions as well, and they turned out well. The close up on the eyes is hindered by the fact that she appears to be wearing coloured contacts. But I thought your compositions were OK and I hope to see you showing off your images here after you have gotten a handle on AP. :) -
justwilliam reacted to a post in a topic:
Critique of wedding pictures
-
Robchoc reacted to a post in a topic:
A bit of Fun and practice using Affinity to make an album cover. :)
-
Alfred reacted to a post in a topic:
A bit of Fun and practice using Affinity to make an album cover. :)
-
justwilliam reacted to a post in a topic:
A bit of Fun and practice using Affinity to make an album cover. :)
-
justwilliam reacted to a post in a topic:
A bit of Fun and practice using Affinity to make an album cover. :)
-
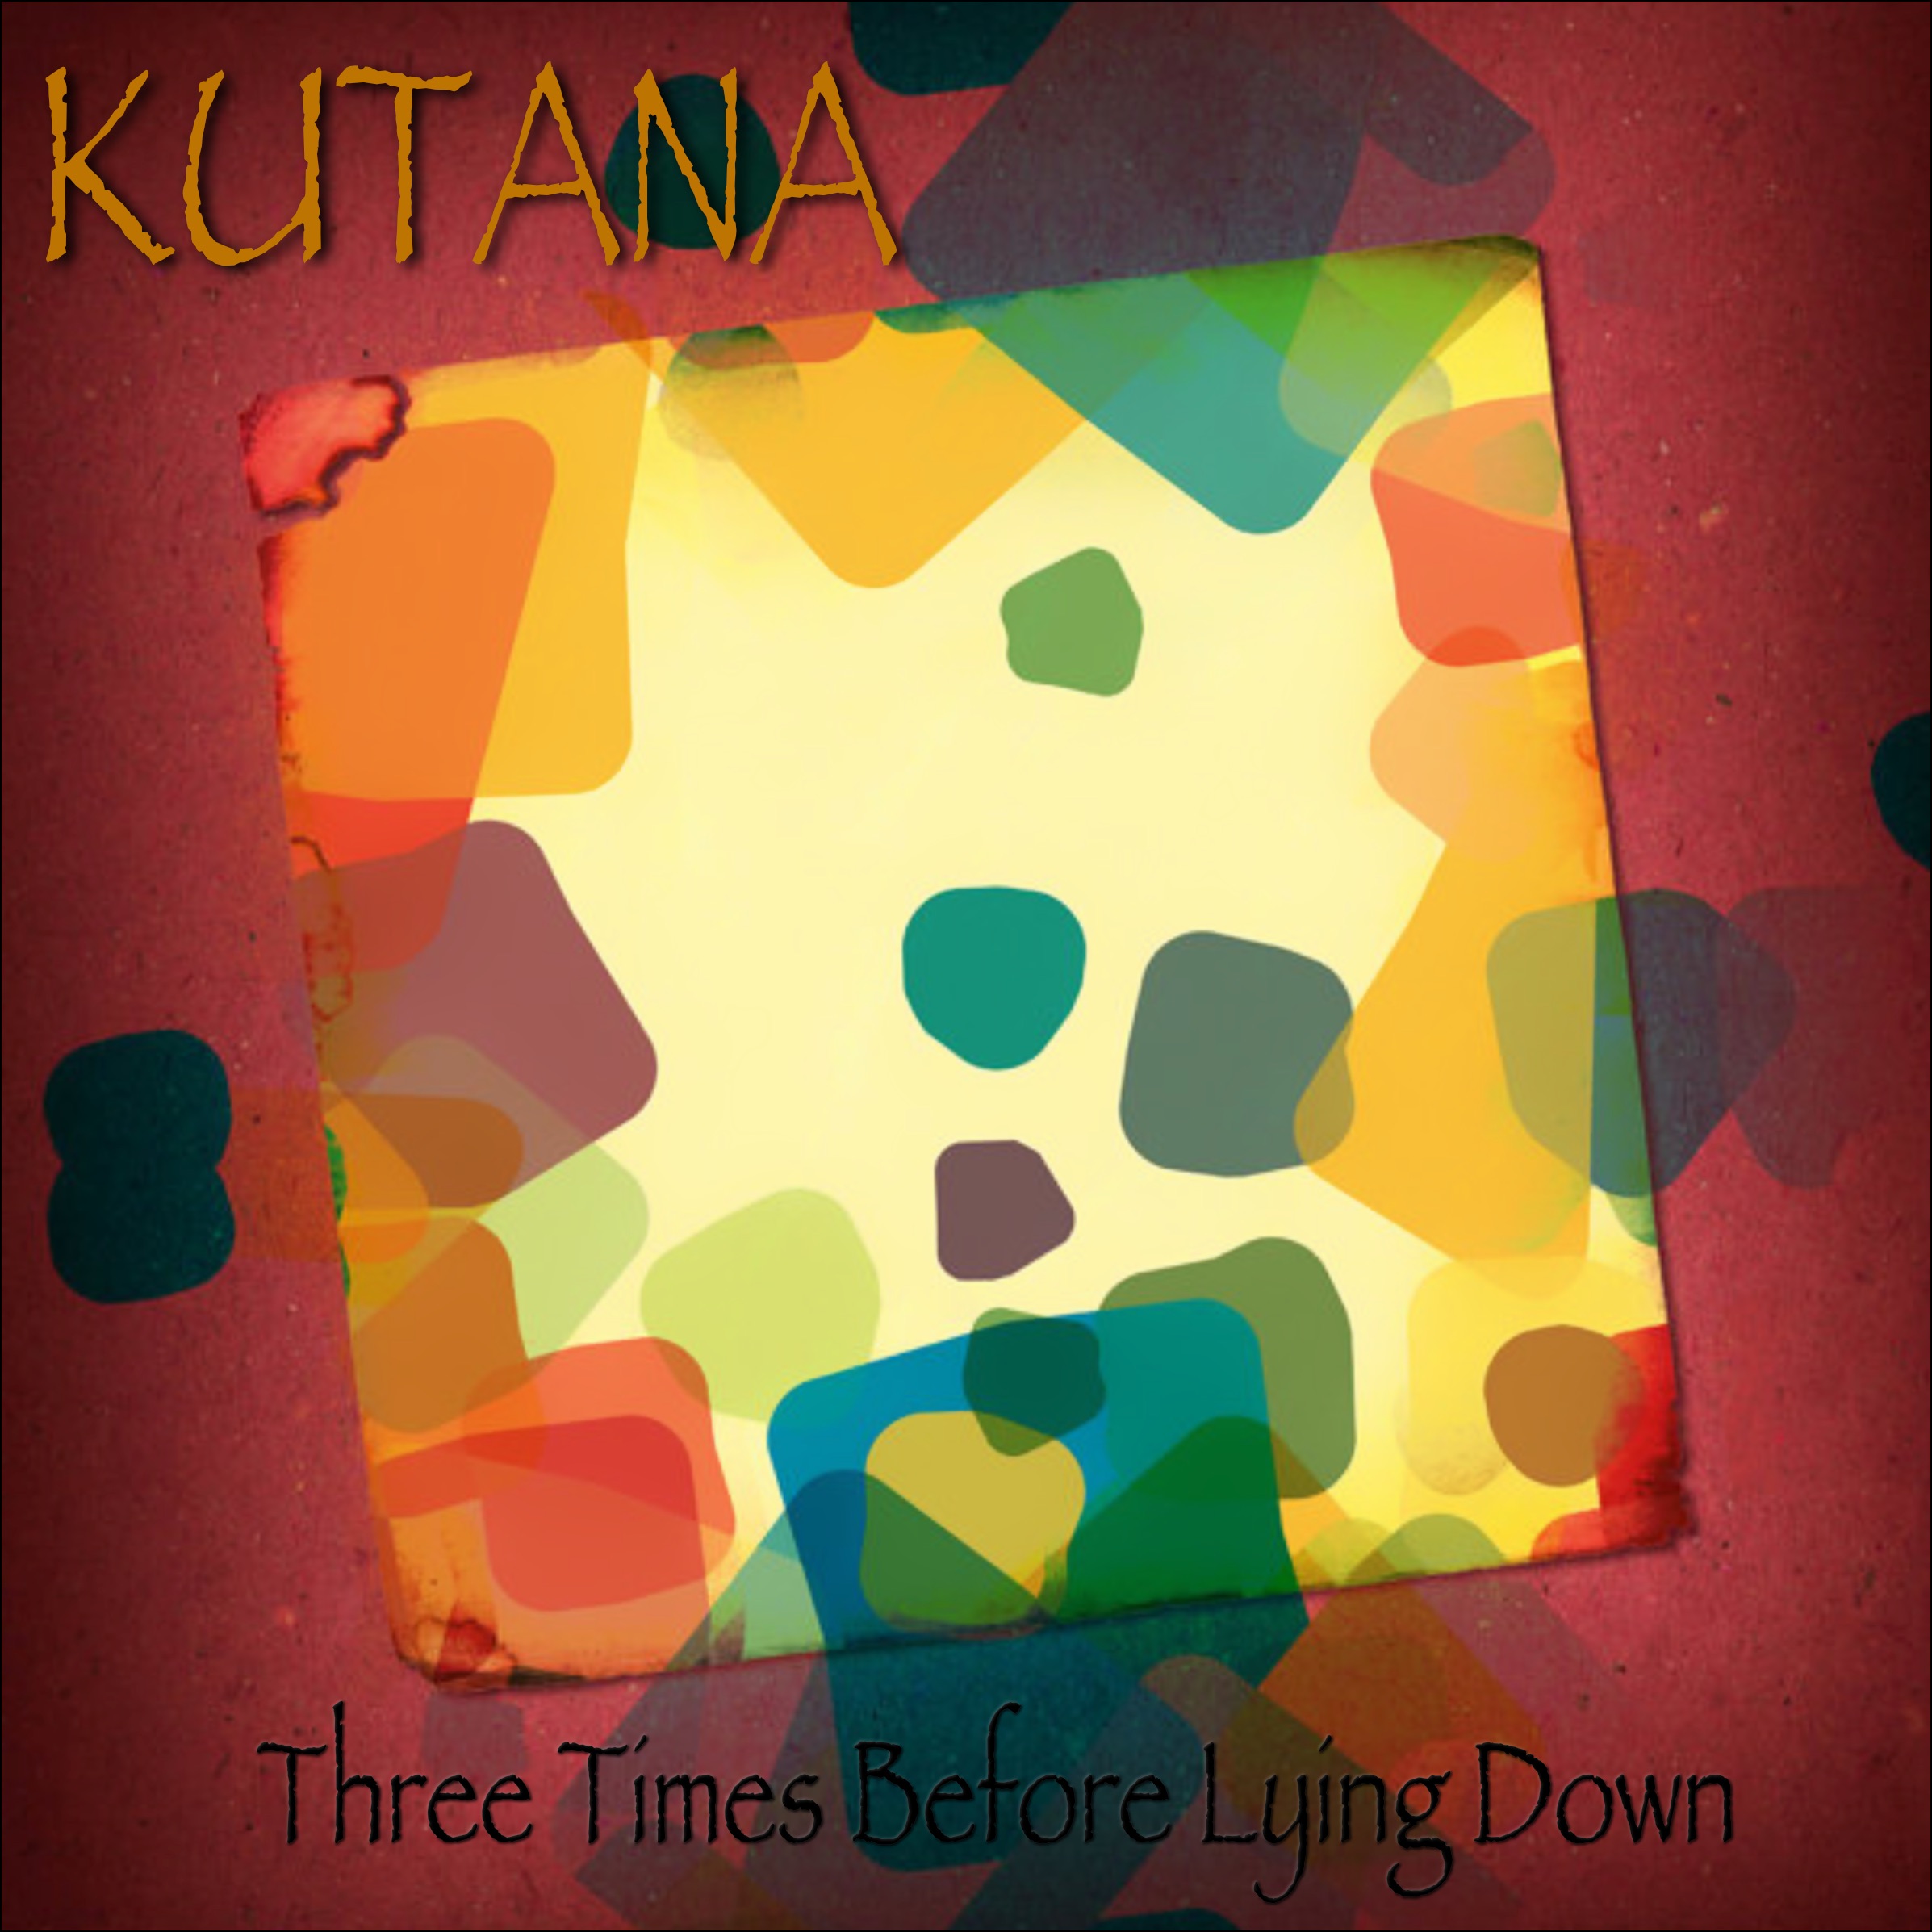
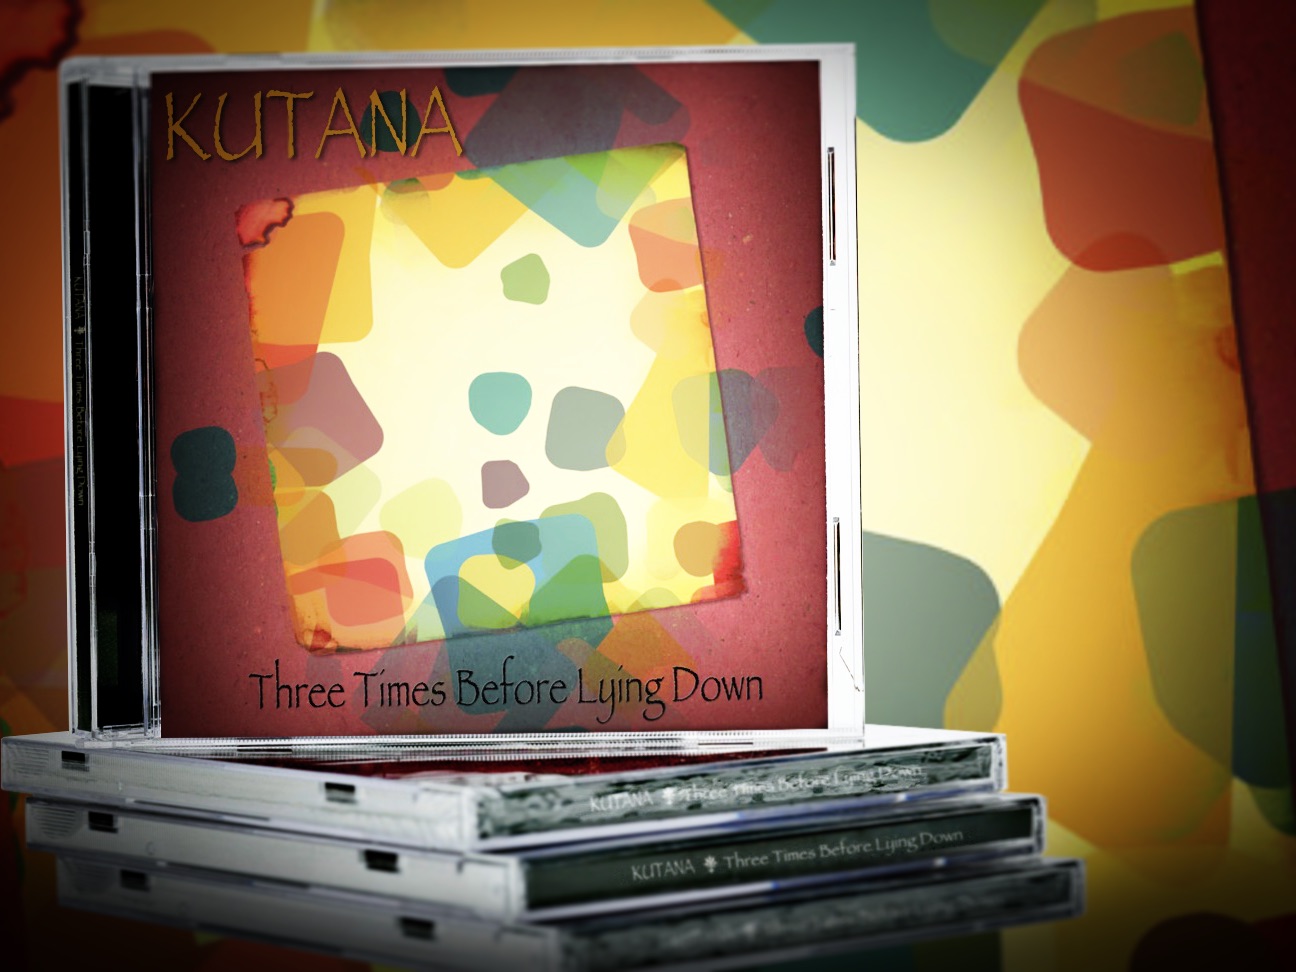
OK, I'll play, too. I wasn't that pleased with the three random selections I got but I suppose it doesn't matter. I thought I would include the CDs since not everyone can play vinyl these days. :rolleyes: Fun idea Robchoc!

-
Very good to hear!
-
:) :D :wub:
-
justwilliam reacted to a post in a topic:
Affinity Designer Workbook
-
justwilliam reacted to a post in a topic:
BlueSketch
-
justwilliam reacted to a post in a topic:
List of Resources.
-
Most of the bird/wildlife shooters I have met here are 'scoping' (using an iPhone mount on a scope) and claim it is mostly because of the difference in T-stops. A scope, they say, just lets in that much more light. Is that something you have tried; any opinion? ... Admittedly, I sometimes still compare the RAW conversion from Aperture with that of AP and often prefer that of Aperture; but this could be a user-related thing.
-
Some great shots here, Kodiak. It is quite amazing what we can do with today's camera, lens, and clothing technology; especially considering the camera shake induced by a long lens (and cold weather) and the high ISO you would have needed in in order to maintain a 'just fast enough' shutter speed in these lighting conditions even with a wide open aperture. Having a tool like AP to go from RAW image to that which we envisioned with ease is the icing on the cake.
-
Madame, Your info shows that you are in 'Scandinavia' but not where. I ordered the book last week and it was delivered early this week. So if they ship to Sweden I do not understand why it wouldn't ship to you.
-
I just this moment placed my order; I hope the delivery is quick as others have stated, but as I am in Sweden maybe it will take the full 5 - 7 business days. I was a bit confused about this when placing the order (hadn't read through this thread) and so gave a new password. I suppose now I have two affinity accounts? Regardless I hope I benefit as much from this workbook as I anticipate. :) BTW, any plans for a 'workbook' for Affinity Photo in the works? :rolleyes: I could definitely use that as well.
-
Is Sfx working as a stand-alone app for you?
-
BatteriesInc reacted to a post in a topic:
[DAM] Affinity Lightroom Killer Request
-
printing help
justwilliam replied to tomark789's topic in Pre-V2 Archive of Affinity on Desktop Questions (macOS and Windows)
Yes. Go to this thread: Downloadable Affinity Photo Help 1.4.2 Epub for IBooks (May 2016) https://forum.affinity.serif.com/index.php?/topic/13112-downloadable-affinity-photo-help-142-epub-for-ibooks-may-2016G -
davemac2015 reacted to a post in a topic:
All UI Elements are too small on a 5k iMac
-
peter reacted to a post in a topic:
Toothpaste
-
affinity designer Mandala Designs with Affinity Designer Beta
justwilliam replied to garetmckinley's topic in Share your work
Fantastic work; very creative and expertly accomplished.