

appearsharmless
-
Posts
68 -
Joined
-
Last visited
Posts posted by appearsharmless
-
-
Nice tip, @Lisa45.
If anyone's using Firefox, and @Lisa45's tip messes up your browser's formatting, you can tweak it pretty easily (from https://support.mozilla.org/en-US/questions/1258673)
"(1) In a new tab, type or paste about:config in the address bar and press Return. Click the button accepting the risk.
(2) In the filter box, type or paste devp and pause while the list is filtered -- there should only be one preference left
(3) The layout.css.devPixelsPerPx normally has -1.0 which follows the system Text Size.
Double-click to open a small dialog where you can type a new value.
If you have a Retina display (double-density): try 3
If you have a standard display: try 1.5
That should give an effective "150%" zoom compared with the base size.
If you would like larger, you could repeat the test with 4 and 2 respectively (200%).
If something goes wrong, you can right-click (Ctrl+click) the preference and choose Reset (or tap the R key) to get back to where you started."
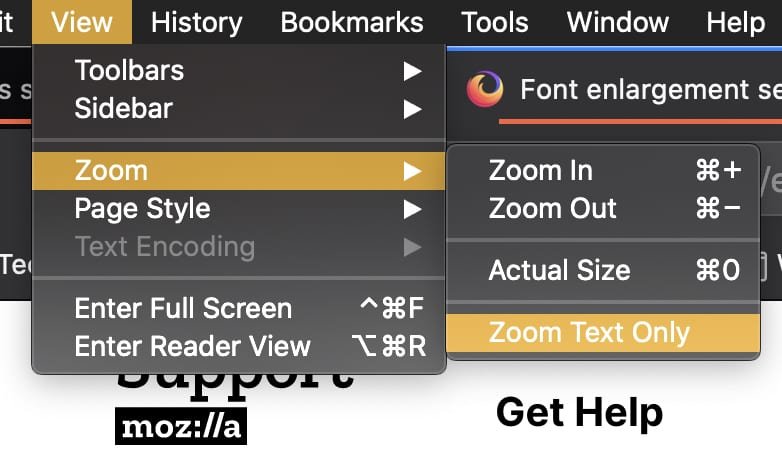
Note that you may want/need to select this option in FF menu to fine-tune the appearance:
-
To supplement @BofG's advice, if you use the Gradient Tool to drag a gradient onto your object instead of using a Gradient Overlay layer effect, the gradient will be exported to SVG without rasterization. Also, the only brushes that are pure vector are the first two brushes in the Pen category. All of the other brushes are composed of raster images stretched or repeated along a vector path.
-
The techniques @firstdefence and @GarryP came up with might work for you:
-
@StuartRc generously posted a set of Vector textures he created in the Resources forum. You might find some of the grunge patterns useful:
-
3 hours ago, R C-R said:
The least disruptive, simplest way I know to do this is to marquee select both colocated nodes & then Shift click to select just the bottom one.
YES! This works, regardless of direction the curve is drawn, whether the node is an end node, etc. Thanks @R C-R ! 👍
( @haakoo 's method is pretty slick, too.)
-
54 minutes ago, Gear maker said:
Now instead if you break the lower left node and do a click then a grab with shift ctrl down the node on the curved line will move. The bottom node belongs to the curved line and moves in this case.
Nope, not for me. That results in a smart node. And I'm aware of the directional difference working with end nodes (See "Addendum" from my previous post).
57 minutes ago, Gear maker said:One issue I have had that still surprises me is that when a curve is broken and one end node is moved out, if that node is then dropped back onto the other end the curve is healed, no longer broken. The history shows it was broken but it's no longer broken, history doe not show it's healed. This causes me problems because I'll break one node in a stack, then try to move it, and a different one than I planned moves, so I move it back. I then try to move a different one but my curve is no longer broken. Not only does history show it's no longer broken, also the break curve icon is still grayed out showing it thinks it's broken. I'm not sure if that's what you are showing in your video. or what.
Hopefully something from this answers you question.
I appreciate the info, it's helpful, but I didn't really have a question; just trying to help the OP.
I'm sticking with my original method: it's stupid and clumsy, but, to me, it beats trying to memorize a multiple-step checklist (end node?, direction?, shift or shift+control or lasso then shift+control? kiss mouse and genuflect once or twice?).
-
Here, allow me to make this even more confusing:
1) Left click on bottom left node
2) Break Curve
3) Left click on bottom left node to select it
4) Hold Shift + Control and drag over node
5) Left Click and drag node
Taaa-Daaa! Bottom node has moved!
Repeat with bottom right node = topmost node moves instead of bottom.
🤔??
(And, yeah, I checked to make sure the curve wasn't broken at both the left and right bottom nodes)
@Gear maker If I Shift+Control lasso the nodes, then hold Control and drag, the bottom node moves, but the top node is converted to a smart node. Again, 🤔(Addendum: On further experimentation, I'm pretty sure the wonkiness has to do whether you're selecting a start node, an end node, or a... "between"... node.)
-
10 hours ago, R C-R said:
Yes, but it is not obvious. By default, the top node is selected when you click, but if you marquee select both nodes & then shift-click on them, the lower node will be the only one selected.
Are you using the Beta of Designer? I can't get this to work in 1.8.3: Marqueeing then Shift-clicking just selects both stacked nodes and constrains their movement to 15 degree angles.
-
The only way I know of to do this is to break the curve at two nodes:
1) Break the curve at both nodes
2) Select the new layer that's been created under the original layer
3) Move that underlying node to wherever you want it
4) Select both layers and lasso the nodes you didn't want to break, and select "Join Curves"
It's not exactly elegant, so hopefully someone will come along with a better solution for you.
-
On 2/10/2019 at 6:04 PM, v_kyr said:
Ctrl-Clicking on the curve layer icon in the layers panel will give you a selection of the curve, without loosing the curve layer!
FWIW, this works in Affinity Designer, too, but you have to be in the Pixel Persona (If you switch back to work in the Draw Persona, the selection remains).
-
There a discussion on this thread that you might find helpful (including the link to a PS tutorial that can be replicated in AP):
-
14 minutes ago, firstdefence said:
I think @appearsharmless used the wayback machine website, a very useful tool in these situations and one I’d forgotten about:
https://web.archive.org/web/20141119055748/https://aircavs.wordpress.com/2010/06/18/photochrom-vintage-postcard/Yup. And Firefox to take a screenshot of the entire webpage. And Affinity Photo to make an .afphoto file because I couldn't figure out how to attach a jpeg without it losing quality after the upload. 🤔
-
Here's a screenshot of the entire webpage @firstdefence linked to, including images.
-
14 minutes ago, aethic said:
@appearsharmless It kind of looks like the left most node in the right ellipse is snapping to the right most node in the left ellipse, which I have been able to do (I think). It's just when getting an absolute precise snapping on the curves, from what I can tell it's non-existent.
It's a bit hard to tell in the videos, but there's no node-snapping occurring at all (but then, there's no segment snapping occurring, either 🤷♂️ )
-
How close do the curves have to be to each other?
A clunky, "well, they're close but not overlapping" workaround:
1) Enable "Snap to object bounding boxes" in Snapping manager
2) Draw a rectangle over the area on the curve you want to "join"
3) Select curve layer and rectangle layer
4) Menu>Layer>Alignment>Align Middle
5) Drag other curve over until it snaps in the center of the rectangle's bounding box
6) Delete rectangle
Depending on whether you're working in pixels, millimeters, etc., there might be a way to use the Transform panel to overlap the curves precisely, but I'll leave that one to those wiser heads I mentioned earlier.
-
If you're wanting to snap a segment between nodes to another segment between nodes, then I'm pretty sure Affinity Designer can't do this (wiser/more experienced heads may chime in to correct me). If you're on a Mac, you can download a free beta of VectorStyler ; it has "Collision Snapping" which sounds like what you're after.
(Just in case, you know about "Snap to geometry of selected curves" in the node context toolbar, right?):
-
-
I downloaded your non-beta file, R-C-R, and it worked flawlessly. I tried the technique two more times with my own file, and got the sharp nodes. I made a screen recording to show you... and it worked flawlessly; no sharp nodes. Did it three more times, worked flawlessly every time. 🤔 Either it's an intermittent bug, or I need stronger coffee (or both).
-
12 hours ago, R C-R said:
Weird that "Add" works but it does. In fact, it isn't even necessary to select the top two nodes -- just select both halves after they are snapped together, select both, switch to the Node Tool, & click "Join Curves." Then finish with "Add" & there are no 'stacked' nodes.
The attached beta shape join.afdesign includes the history so you can see how few steps are required. I tried this both with the Mac 1.8.3 & beta 1.8.4 builds & it works in both.
More weirdness, R-C-R: In Mac 1.8.3, it works exactly as you described as long as the nodes at the top and bottom are sharp. If the nodes are smooth, it will successfully merge the two top smooth nodes, but convert the bottom smooth nodes into sharp nodes with a segment between them 🤷♂️ .
Have you noticed any new glitches or downsides to the current beta? I think I'm ready to make the jump...
-
59 minutes ago, R C-R said:
I cannot not see what you did not post from another unsuccessful experiment, in the unlikely event that is somehow what your first sentence meant.
😁 Sorry about that; I certainly didn't intend to make this thread more confusing! Let me change this: "I didn't track along the curve in the video I posted; that was an (unsuccessful) experiment I did later."
To this: "I didn't track along the curve in the video I posted. However, after reading the suggestion in your post, I tried it again, this time tracking the curve along the yellow indicator line until the node snapped, but it still didn't work."
If you really want to, you could right-click on that video I posted, save it to your HD, and see if you can get a better view with Quicktime, VLC, etc. All I can tell you is that it is as I described, yellow indicator line and all.
And I do indeed appreciate your help (and suggestions. And analyses.)
-
I didn't track along the curve in the video I posted; that was an (unsuccessful) experiment I did later.
I understand the indicator line you're referring to; if you hold down the control key on your Mac keyboard and use your trackball to magnify your display while the video is playing, you can see the yellow indicator line appear right before the curve goes all wonky (you can see me getting, and losing, the yellow line several times before I can get both the yellow line and the snap).
-
1 hour ago, R C-R said:
In your video I do not see the yellow 'snap to curve' indictor ever appearing -- the curve near where you drag the node should light up with a thin yellow line along its curvature when you get the dragged node near it. With multiple snapping options enabled it can take a short amount of time for that to appear, I suppose because the app has to sort through all the snapping options to decide which one(s) to use.
So maybe experimentally either first try dragging the node onto the other curve a little away from its end node, waiting for that yellow indicator to appear, & then move it over the end node; or alternately disable several of the other snapping options that would 'compete' with the snap to geometry one.
As an experiment, I tried dragging the node to the curvature of the target node as you suggested, and carefully tracked along the curve, never losing the thin yellow indicator line, until the nodes snapped. Then I clicked on "Join Curves". Bupkis. The curves remain separate.
If I just drag the node directly onto the target node and wait for the yellow indicator line to appear, this happens:1 hour ago, JimmyJack said:@appearsharmless judging by your layers panel your procedure is joining the two objects at the bottom. Try separating the two bottom nodes and doing it. It'll work.
That....worked! The two nodes at the bottom of the curves were overlapped, but not joined, just like at the top (where I was trying to merge the two nodes), but I can merge them by selecting both layers and clicking "Join Curves", as you suggested. BTW, I'm using 1.8.3, not the latest beta.
Thinking it might have been because the two bottom nodes were blue start nodes, I reversed both curves and tried the top nodes again. Nope.
So, to paraphrase Inigo Montoya, "Join Curves. They keep using that term. I do not think it means what they think it means." -
27 minutes ago, R C-R said:
@appearsharmless, try this:
- Enable Snap to object geometry in the Snapping manager.
- With the Node Tool selected, enable its Snap: Align to nodes of selected curves option. (Note that this is independent of the global snapping options set in the Snapping Manager.)
- With the Node Tool, use Shift to select both curves.
- Drag one of the end nodes over the other curve. A yellow snapping indicator will appear, allowing you to snap the dragged node to any point on the second curve. Make sure you drop it on one of the end nodes of the second curve -- a small double rectangle 'badge' will appear below the pointer to indicate that it will be dropped exactly on a node instead of on a segment.
- Now click the "Join Curves" button.
You should end up with a single curve, with the two end nodes merged into a single one.
These snapping options have to be enabled for this to work reliably because otherwise it is extremely unlikely one node will actually be dropped exactly on top of the other one. As I understand it, this is a result of the extremely high internal precision of the Affinity apps needed to support its unusually large zoom range. Apparently, the internal precision is so high that unless you are zoomed in to near the maximum magnification you can't place one node exactly over another without help from the snapping options -- even a difference of a few thousandths of a millimeter will cause the two curves to be joined with a line segment of that length.
In practice, other snapping options are also likely to be enabled, which can make it difficult to know which one(s) are being used unless close attention is paid to the visual indicators.
Yeah, I've tried that one before; still doesn't work:
I should note that in the previous video I posted, the one that works, I had both Snap to object geometry checked on in the Snapping manager and Snap: Align to nodes of selected curves option on in the Node Tool context toolbar. The whole "Join Curves" thing is pretty goofball.
-
1 hour ago, PixelPest said:
Then this video is misleading or just a bad example. I know AD can´t simply add a segment to 2 selected nodes and/or make 1 node from 2 at the same spot like I do in Inkscape all the time.
The only way I can merge two nodes (i.e., make 1 node from 2 at the same spot) is to snap the 2 nodes on top of each other with the Node Tool, use Layer>Geometry>Merge Curves to get the curves on one layer, lasso the stacked nodes with the Node Tool, and click "Join Curves" on the context toolbar. Which is weird, because doing the same thing without using Layer>Geometry>Merge Curves appears to get the curves on one layer as well, but it doesn't work:
Works:
Doesn't Work:
If I want to add a segment to 2 selected nodes, I do this (which seems like a bug):


swapping colours between canvas
in Pre-V2 Archive of Affinity on Desktop Questions (macOS and Windows)
Posted
@Kim B, I may be misunderstanding what you're trying to do, but to swap a color between documents and add the color to a swatch palette, open the documents in tabs, create document palettes, then do this: