StudioJason
-
Posts
379 -
Joined
-
Last visited
Everything posted by StudioJason
-
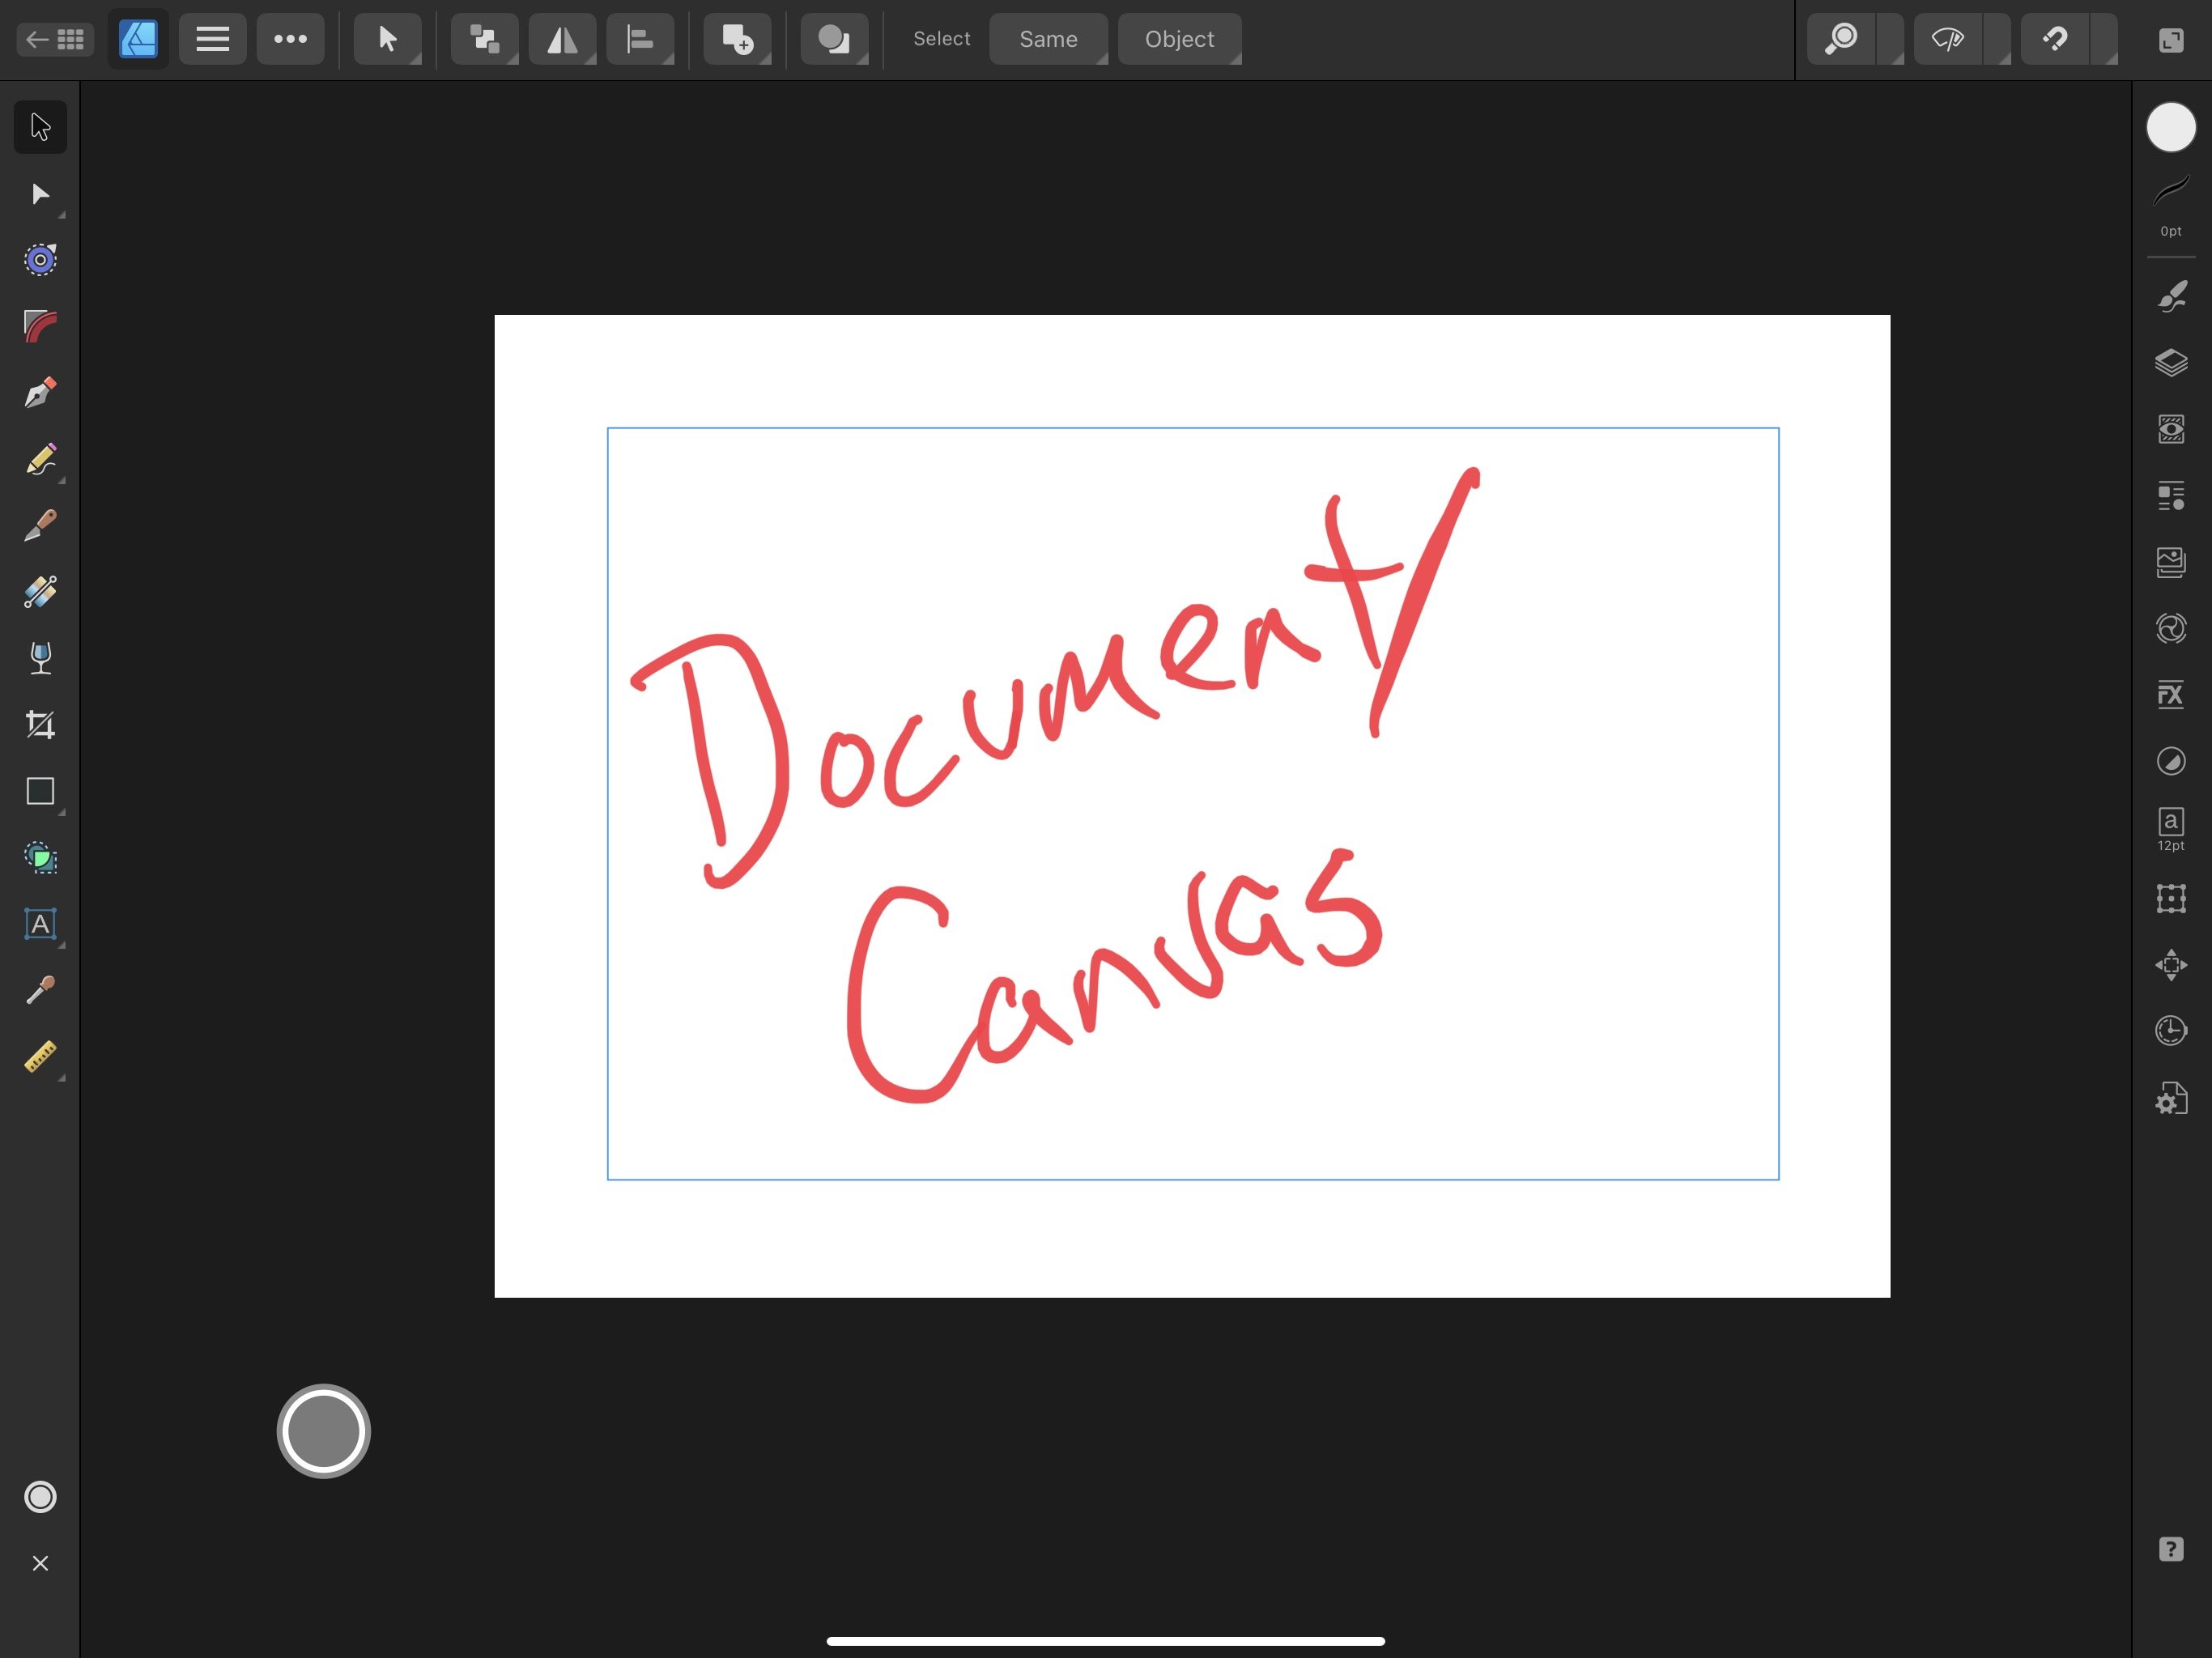
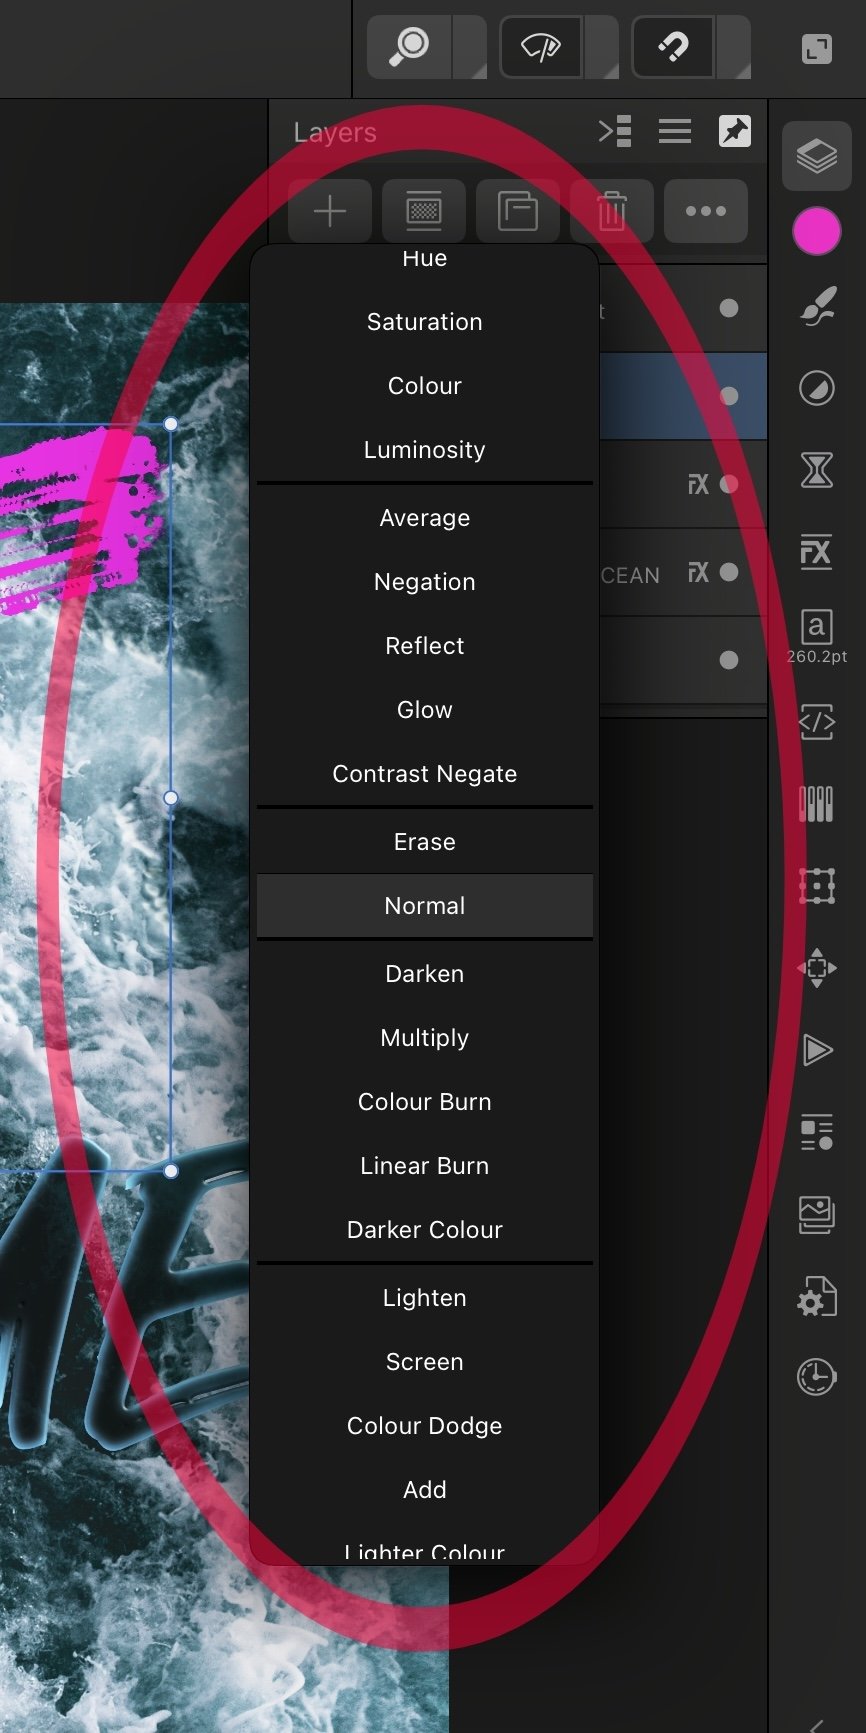
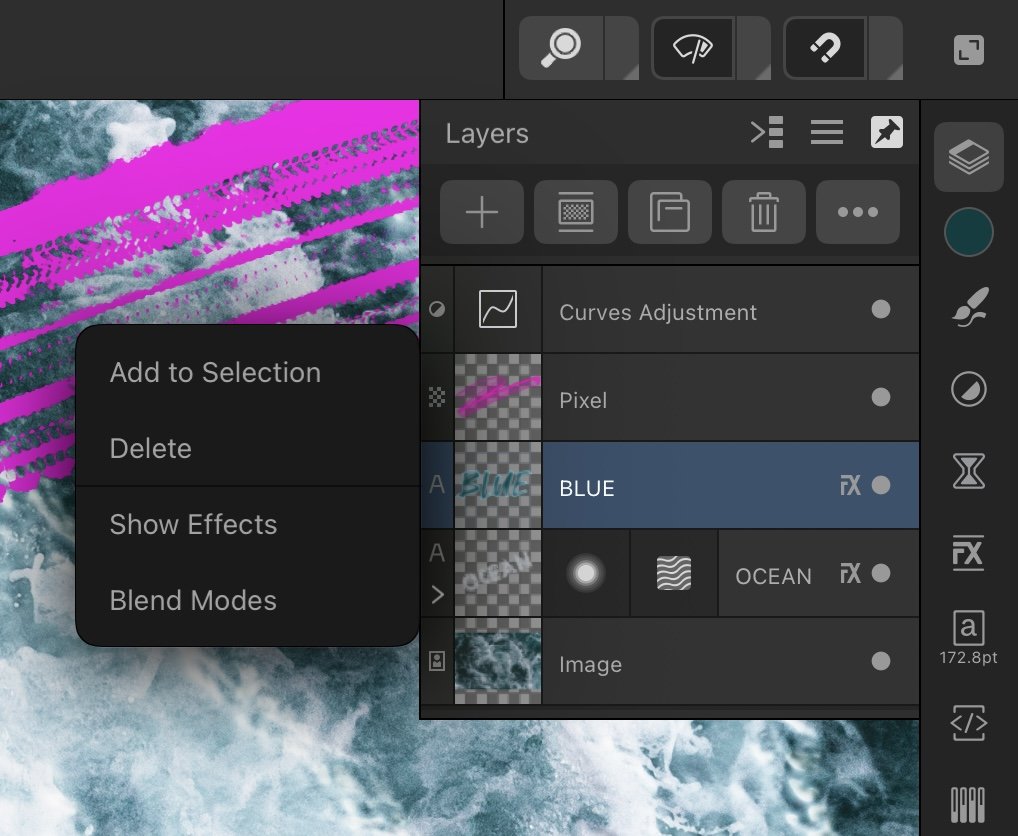
When you first open Designer, the Create/Open Document Box should be the first thing you see, and can open one….after choosing a Type of Document (size etc) it will open a Documant Canvas…..this is not an Artboard but a Canvas. Artboards are created once a regular Document has already been created/opened AND THEN you select the option to make an Artboard by choosing the option within the 3 Line ‘Hamburger’ icon. Canvases and Artboards are similar but different. Canvas is first image. Artboard is second image.

-

Select multiple images on Ipad pro
StudioJason replied to Fleetwood's topic in Affinity on iPad Questions
Should be able to Drag and Drop…which is the way you would choose multiple. There really is no way to Place Multiple Images. Is very convenient now with the new Autoflow feature…which allows you to Drag and Drop…then place images where you want individually once collected into Photo/Designer/Publisher. There should be at the Top Right of the Screen of Photos…’Select’ - to which you can select one or more images (shows a blue/white check mark bubble). With those images selected, if you Press/Hold your finger/stylus on one of the images and pull away, it should collect all selected images. Continue Press/Hold of images, and with your other finger Swipe upward from bottom of screen to reveal the Homescreen and all of your Apps…can open up Affinity Photo/Designer/Publisher (which should already have your Document open) and Drop them onto the Work Area. Can also do a simple Place (Command menu- (three dots)) - place image from Photos or Files, where an option to select will appear, but as aforementioned only works with 1 image not multiple. After selecting, use finger or stylus to ‘Drag/Size’ the image onto the canvas. -
Purchased Add-Ons V1 to V2 compatible?
StudioJason replied to dmtp14's topic in Affinity on iPad Questions
Can confirm, they work. -
Copy and Paste between iPad apps
StudioJason replied to Ikikuru's topic in Affinity on iPad Questions
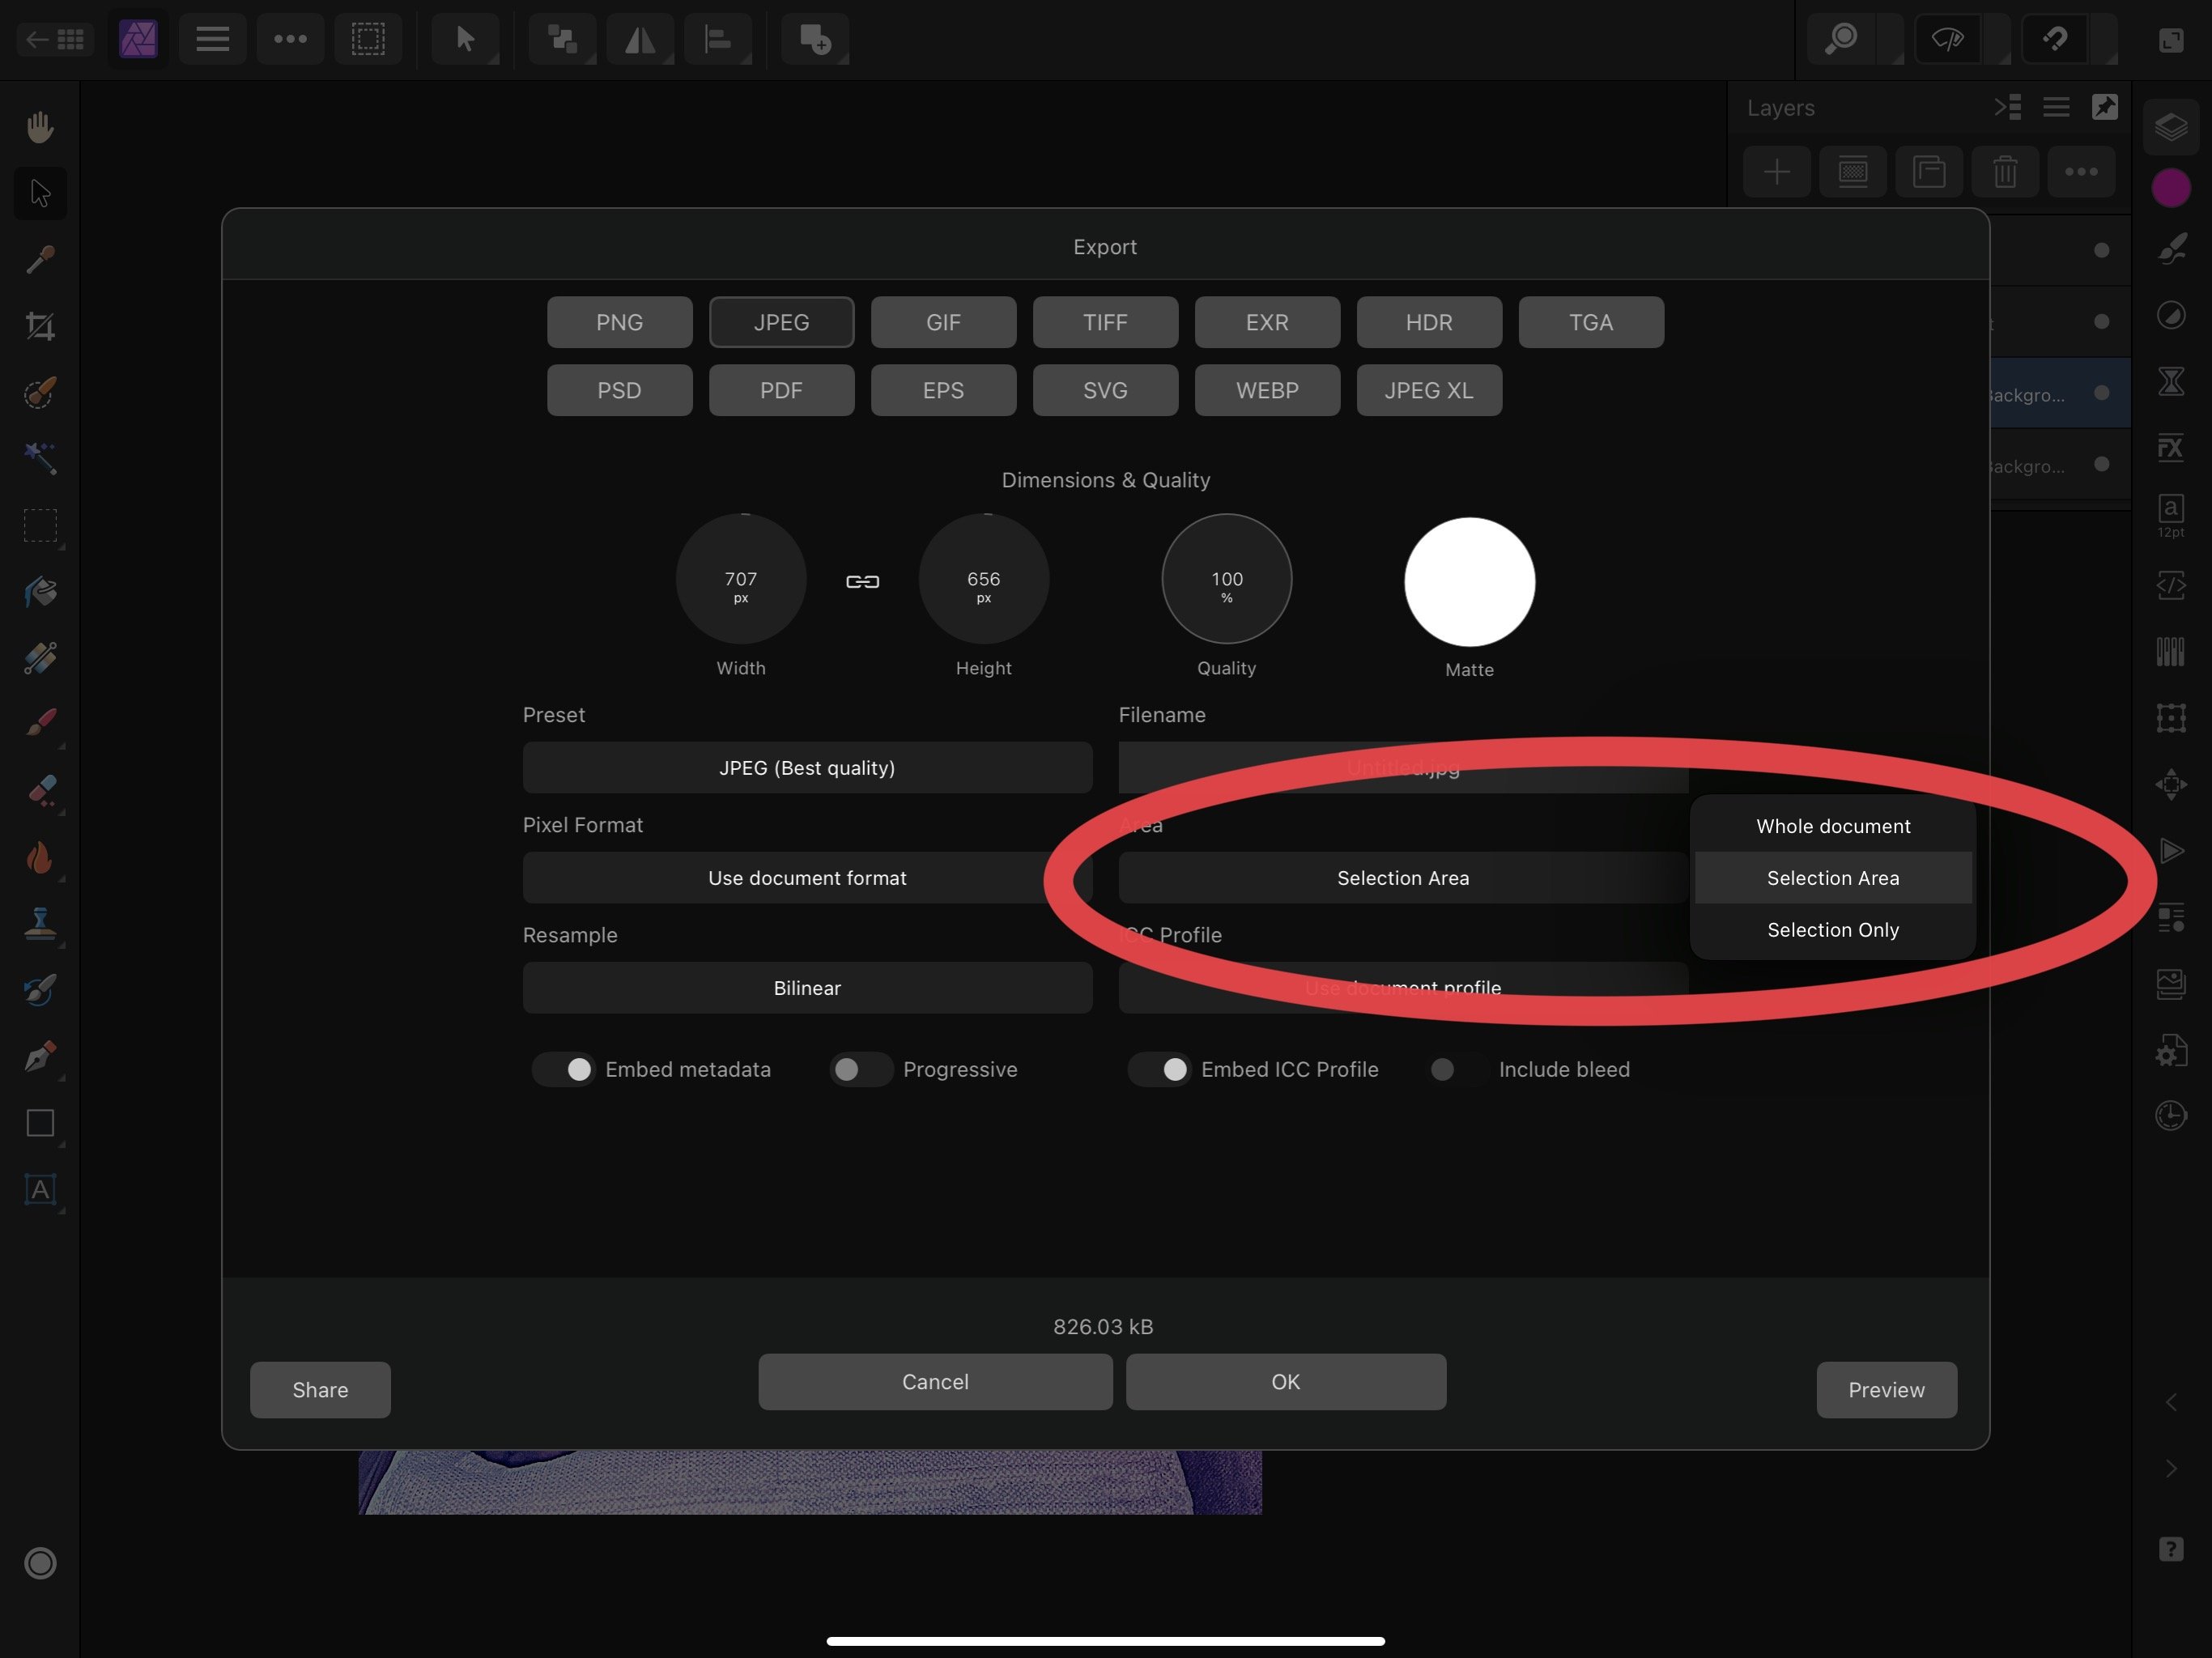
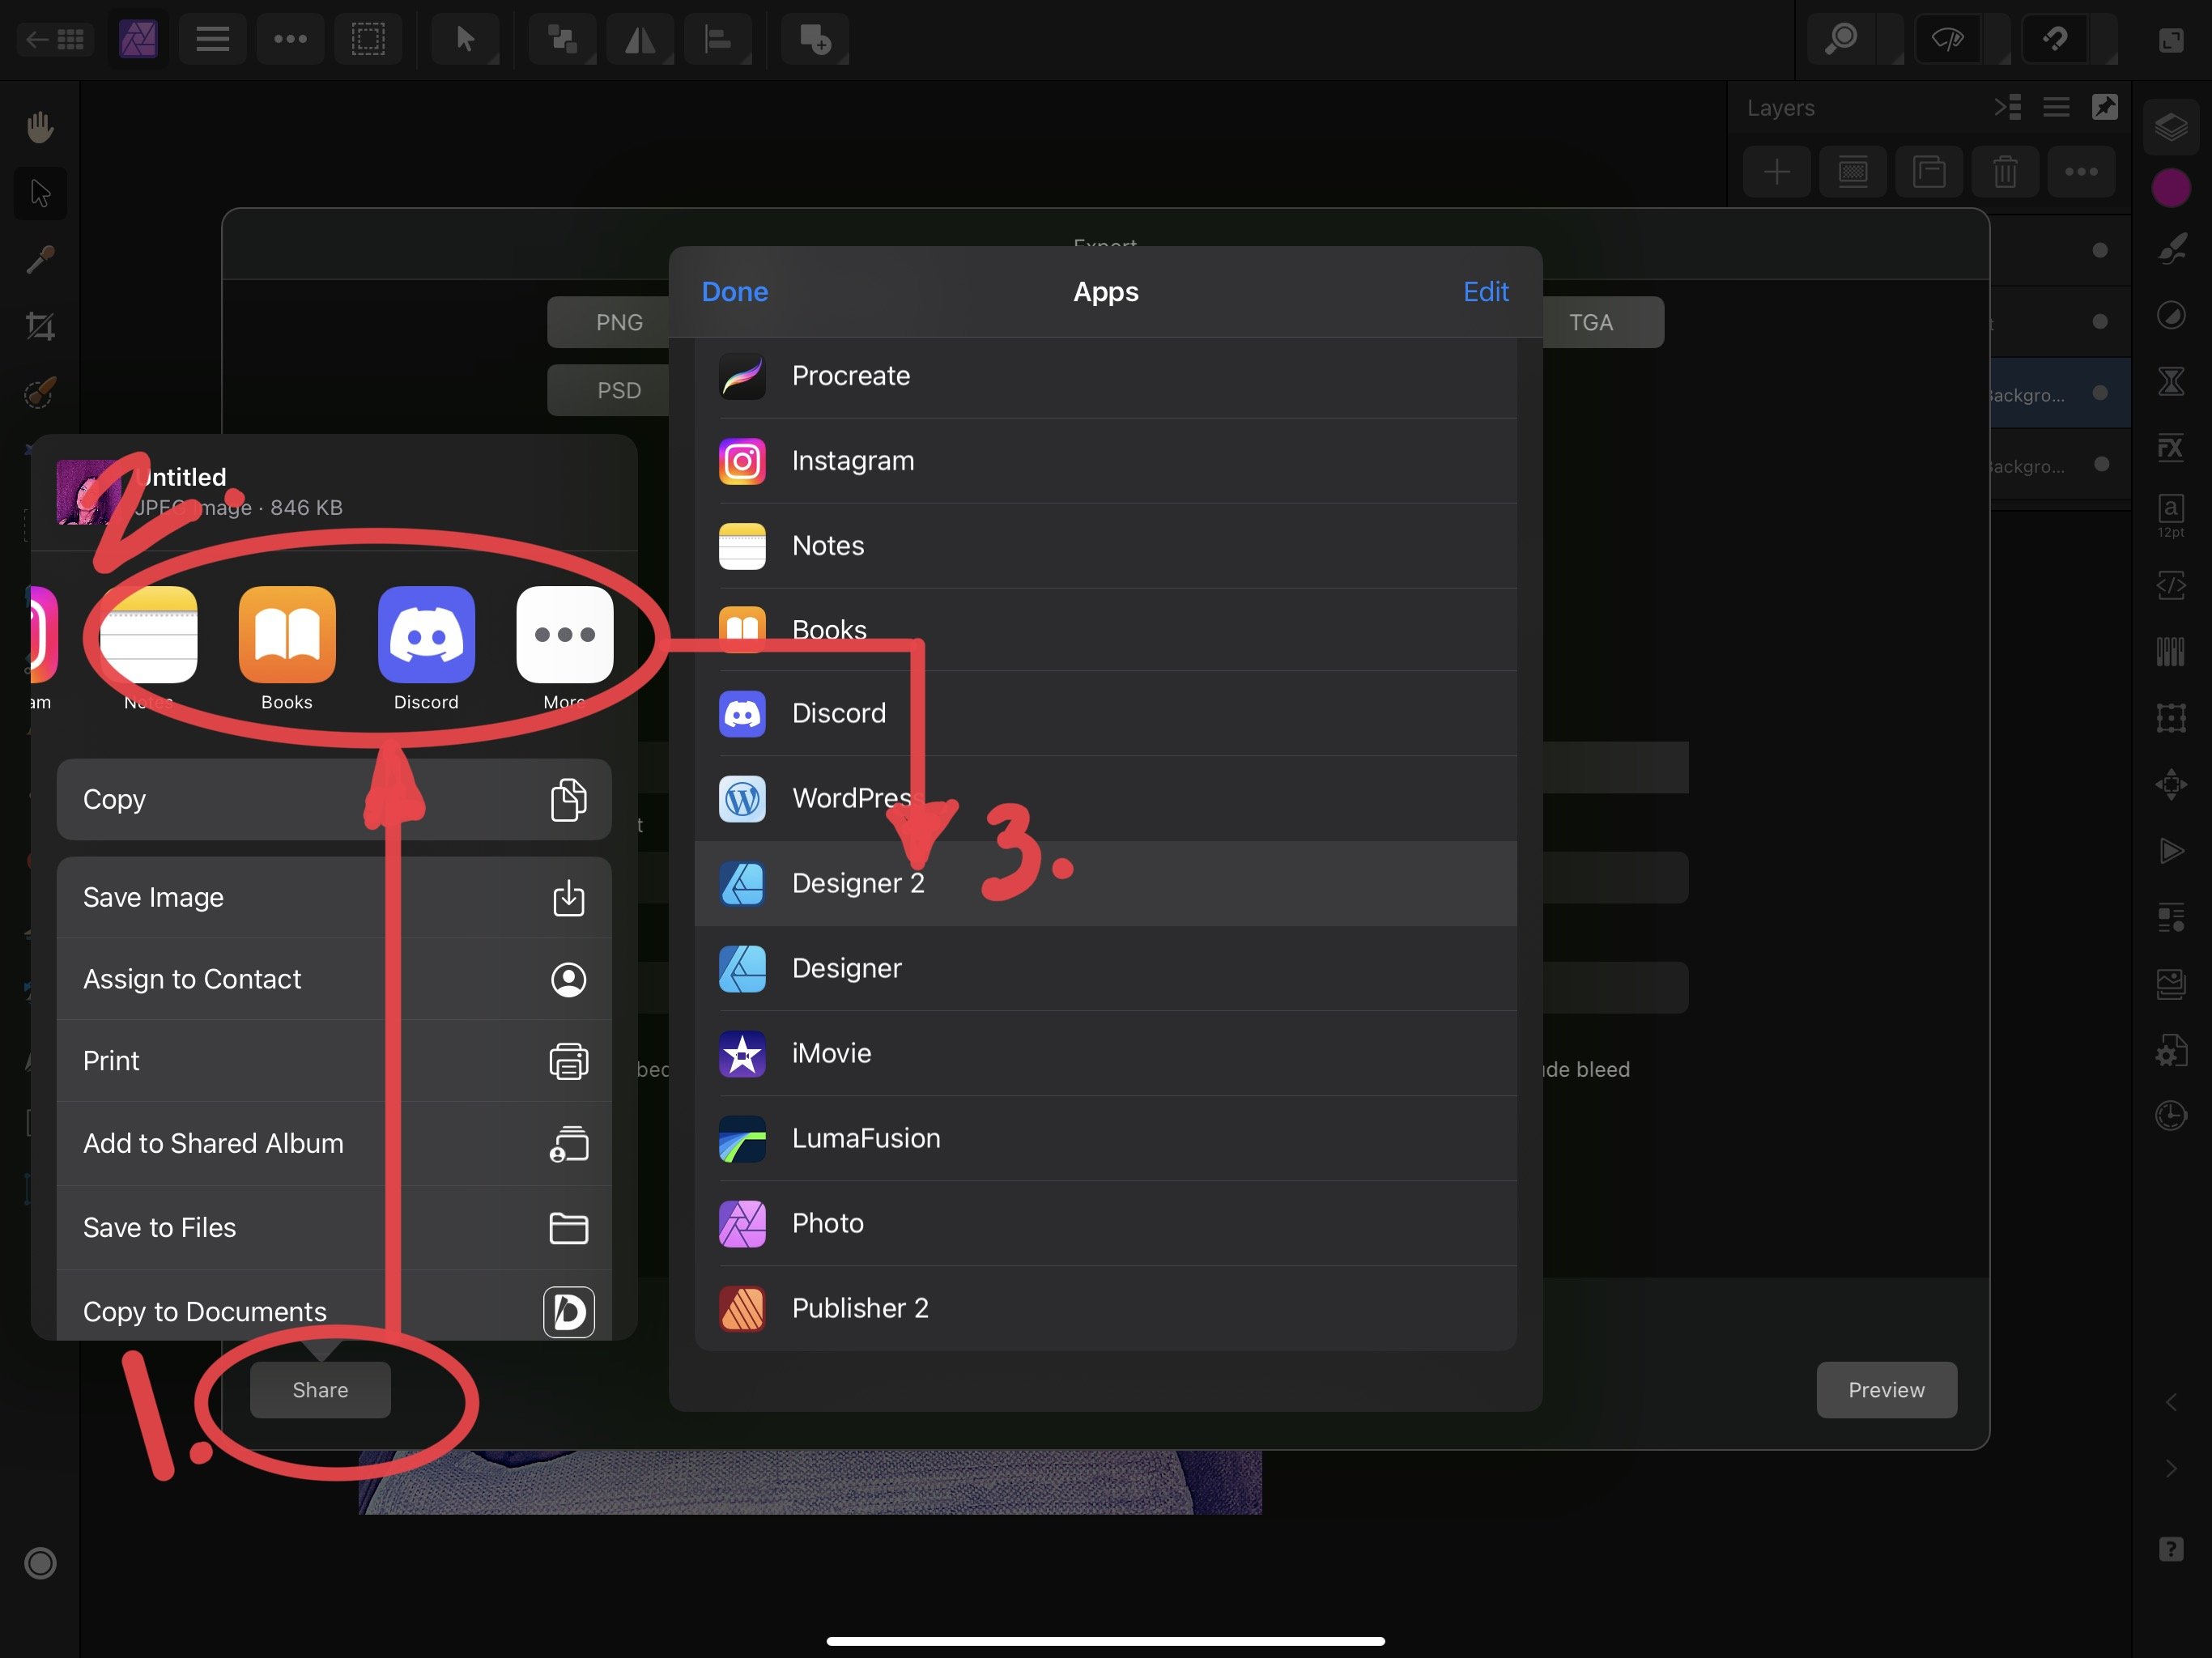
Ah..I get it. Export > Can even choose… Area-Whole document, Selection Area, Selection only. Share (Copy unnecessary) > Select App options at the top…for me, under the ‘More’ option > Select App. Opens up as a new Live Document…but, transferable all the same. Works as a workaround for sure. Not the greatest but works. Thanks.
-
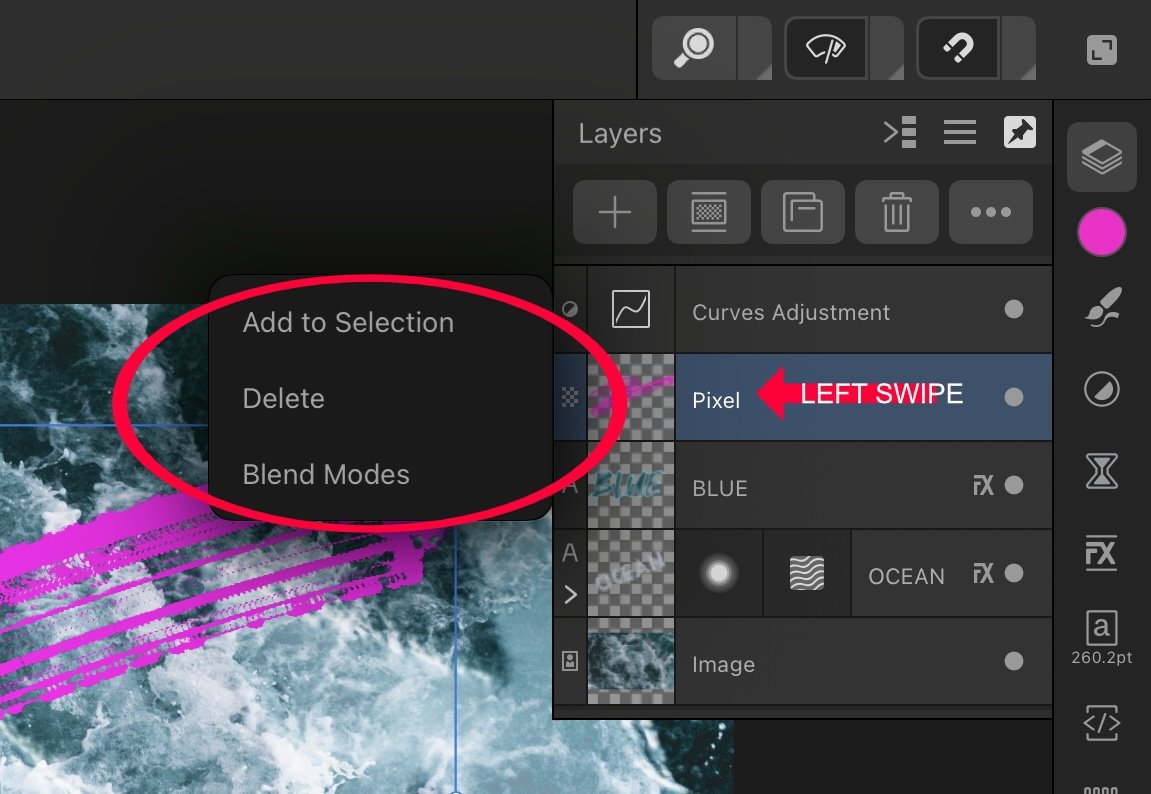
Left Swipe on Image in Live Docs/Gallery. Should be first icon option…small letter ‘a’ with Pencil. Second icon Duplicates. ‘Third is not a Share but a Save option (saves in Affinity Photo files)
-
Copy and Paste between iPad apps
StudioJason replied to Ikikuru's topic in Affinity on iPad Questions
Think I’m confused. How does Export > Share > Copy….transfer between Affinity apps…and what is a share/sheet intent? ‘Because Share > Copy and switching apps does nothing as well. -
Affinity Photo 2 (iPad) - inpainting clones (and erases)
StudioJason replied to keriAH's topic in Affinity on iPad Questions
One of the great things about the Inpainting Brush is that the default one used is sufficient. (Other than altering size and such) File type shouldn’t matter. ‘Large areas can depend on several things. Can use the selection Tools to Select an area, the simple use Flood Fill..a few times perhaps depending on what gets covered and detail.( If highly detailed it can be some work.) Or the Selection Tools alongside the Clone tool… or Smudge Tools within selected area, refinement after. But I typically (depending on Image/Size/Detail etc) use the Inpainting Brush quite successfully. Just go in measured applications of it. ‘There used to be a way to use the Selection Tool > Edit > Inpainting….and it would do large areas within selected area, but cannot find anymore in V2. -
Affinity Photo 2 (iPad) - Cloning Tool Questions
StudioJason replied to keriAH's topic in Affinity on iPad Questions
Clone Tool is another finicky one. 1- Source Area is designated by a Press/Hold of the finger first (wherever you choose), and should display the retina circle with central plus in middle. Apple Pencil does not designate the area, only using the Cloning aspect. 2- Aligned is more of remaining in place of original designation, allowing you to Clone from the same original spot. But it can remove from that static place if moved without lifting the Apple Pencil. Use more so as a Spot here, spot there type of use, not large cloning coverage. 3- Dark Grey should be the ‘Off’ 4- Yes and Not really. It gives you a ‘Ghost Image preview’ within the designated Size of the Brush used…but not really a full view type. Try designating the Source using th small + in the center of the reticle, then with Apple Pencil measure out a distance for how close or far away to begin cloning. -
Affinity Photo 2 (iPad) - inpainting clones (and erases)
StudioJason replied to keriAH's topic in Affinity on iPad Questions
Often times a “cloning” of something within the image is due to the overall area/size of the brush. It sometimes takes a bit of precision and more calculated applications of using the Inpainting Brush, rather than solely on larger swipes. ‘Sometimes can be finicky, taking finesse…other times easy and quick swipes. Current Layer is usually suitable for .jpeg images alone. (No need to Duplicate your image, unless as an original backup copy). ‘Current Layer and Below is typically for when you have added a Blank Pixel Layer above the image, and want to use Inpainting Non-Destructively. So for: Destructive InPainting (will permanently alter image)- use Current Layer Non Destructive InPainting- add a Pixel Layer, use Current Layer and Below on that Pixel Layer. (When you Hide the Pixel Layer, you will see nothing was removed from image). -
Macro Recording on iPad
StudioJason posted a topic in Feedback for the Affinity V2 Suite of Products
As the title suggests…the ability to Record Macros on iPad. There has been a long history of posts about it…even one reply by a Moderator back in 2020, about it still being in the works. With Affinity Photo V2 out…you’d think it would have been a definitive inclusion for the iPad version, but obviously was not. Having to rely on chance of finding…or paying… only to get close to what you want, and having to “fill the gaps” so to speak is really disheartening. Should have this as an option on the iPad, to Record your own Macros. -
Would be nice. ‘I do know that one of my new favorite things is a ‘hidden gem’ inclusion: Left Swipe on a Layer - to reveal the Layer info Can easily perform a quick see/select Layer Options/Layer Blends, Layer FX, etc., or whatever was incorporated and then proceed to whichever to select, not visit the Panel manually. Is on all V2 iPad apps.
-
Just did a slight revamp to the Calendar originally created…for including images. All you have to do is swap out the Master (Calendar) with Master B - Image. With the new Autoflow…should be able to easily place multiple images at once, on several Pages. Modifications: Document Setup - 2page - Facing 11 x 17 Added — Master B - Image Added — Bleeds (for images) 3mm (.118in) 2022-afpub-calendar-template.afpub
-
They are aware and has been logged.
-
As suggested, TIFF and PNG are what I use for my Artworks. PNG is optimal for most cases If truly wanting to make Prints or use a Printing Agency, TIFF is best. The new JPEG XL couldn’t tell you about, as it exports as a .jxl file and cannot even open on iPad in Files or Photos to see any visual quality change.
-
Yes, tried to do same. Nothing happens.
-
Haven’t even gotten into Designer yet, but was curious and checked this out…thinking perhaps some hidden Long Press or the option was within another Drop-down icon, or even if the new Modifiers would toggle something. But there is nothing. 😳 Other than forgetting to include, it looks like they may have used the same Help information for Desktop on the iPad version, which they did for V1 as well making it highly confusing for iPad users.
-
Publisher, insert hyperlink
StudioJason replied to Dampsquid's topic in Feedback for the Affinity V2 Suite of Products
On iPad version, tried to insert the name/hyperlink provided…and when I went to select and switch the hyperlink from default ‘Page’ to the website ‘URL address’, it crashed Publisher completely. Surely not the same issue, but pretty significant issue. -
barcode generator for publisher
StudioJason replied to Chills's topic in Feedback for the Affinity V2 Suite of Products
All in all….thanks for the resources guys! -
Been there done that, as well as others. Needs lots more.
-
Nice find!
-
Having just released Publisher on iPad…I would have thought there would already be an assortment of iPad specific Tutorials. But alas, there are only a few rudimentary ones (as usual from the other previous Version 1 apps). ‘Diving into any advanced things, shortcuts, or other unavailable on iPad items are always a frustrating task to figure out.
-
Support for Blender
StudioJason replied to Jack Underscore's topic in Feedback for the Affinity V2 Suite of Products
This would actually be the route that you need to take. Not a competition aspect at all, but simply support for file formats Blender enables. -
There is an option in Publisher Preferences > General…where you can opt for Connecting to External Displays. Not the same as actual Presentation Mode of Keynote, but can use the Navigator to resize output to External Screens and modify. Might at least be a workaround.
-
It would be nice if when you initially Created a new file it would Auto Save as a Live Doc. Why? What happened? Created a Doc in Publisher > Set up Picture Frames, Text Frames, Page #’s, Pages/Masters etc. Basically, a lot of initial setup but accidentally Closed the App while attempting a Drag and Drop. This of course erased/deleted the entirety of it all. I know that it is a simple ‘personal blunder’ type of instance or accident, but crashes could also occur and would lose all Prep or Setup. ‘Since it is a Live Doc in a sense after Creating, is it not possible to have a safeguard like this in place? Checked on V1 apps (of Photo/Des) and the V2, and none do an Auto Save for Live Docs. Even if in a Preferences Setting could be a nice add for this type of blunder.
-
Integration with Apple Photos on iPad?
StudioJason replied to WildroverAndy's topic in Affinity on iPad Questions
Have no idea of what you are referring to, unless it is something with your own personal settings. I’m on an iPad Pro and it seamlessly incorporates and transfers with Photos. Mine did so after an initial prompt asking to access Photos at the beginning. You can go into your iPad Settings > Affinity Photo (or Designer, Publisher) > Photos > Choose to Allow Photo either All access, Selected Photos, or None. Can then either use Place to select and add or Drag and Drop, whichever your preference. For simply Opening a Photo file image… Long Press the New icon…and a list will appear of several options (including From Photos).