Search the Community
Showing results for tags 'stroke'.
-
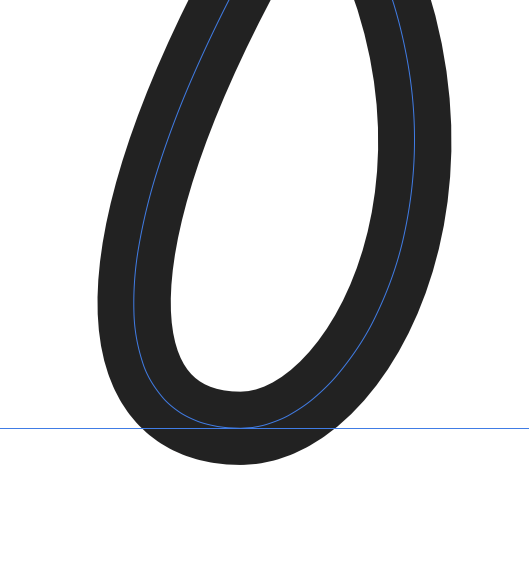
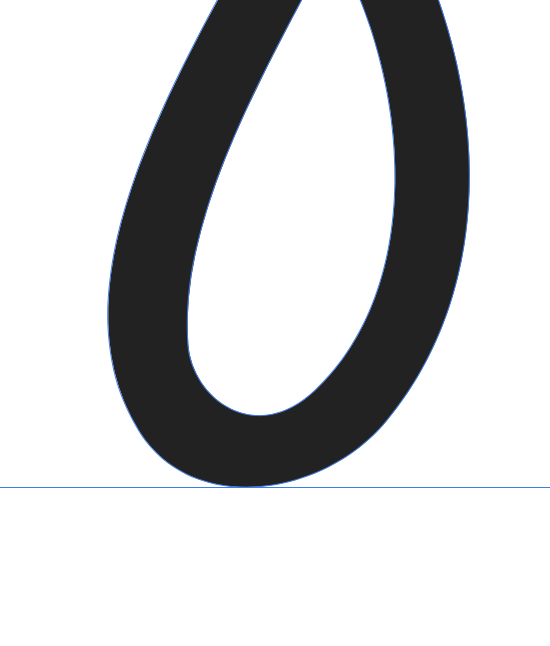
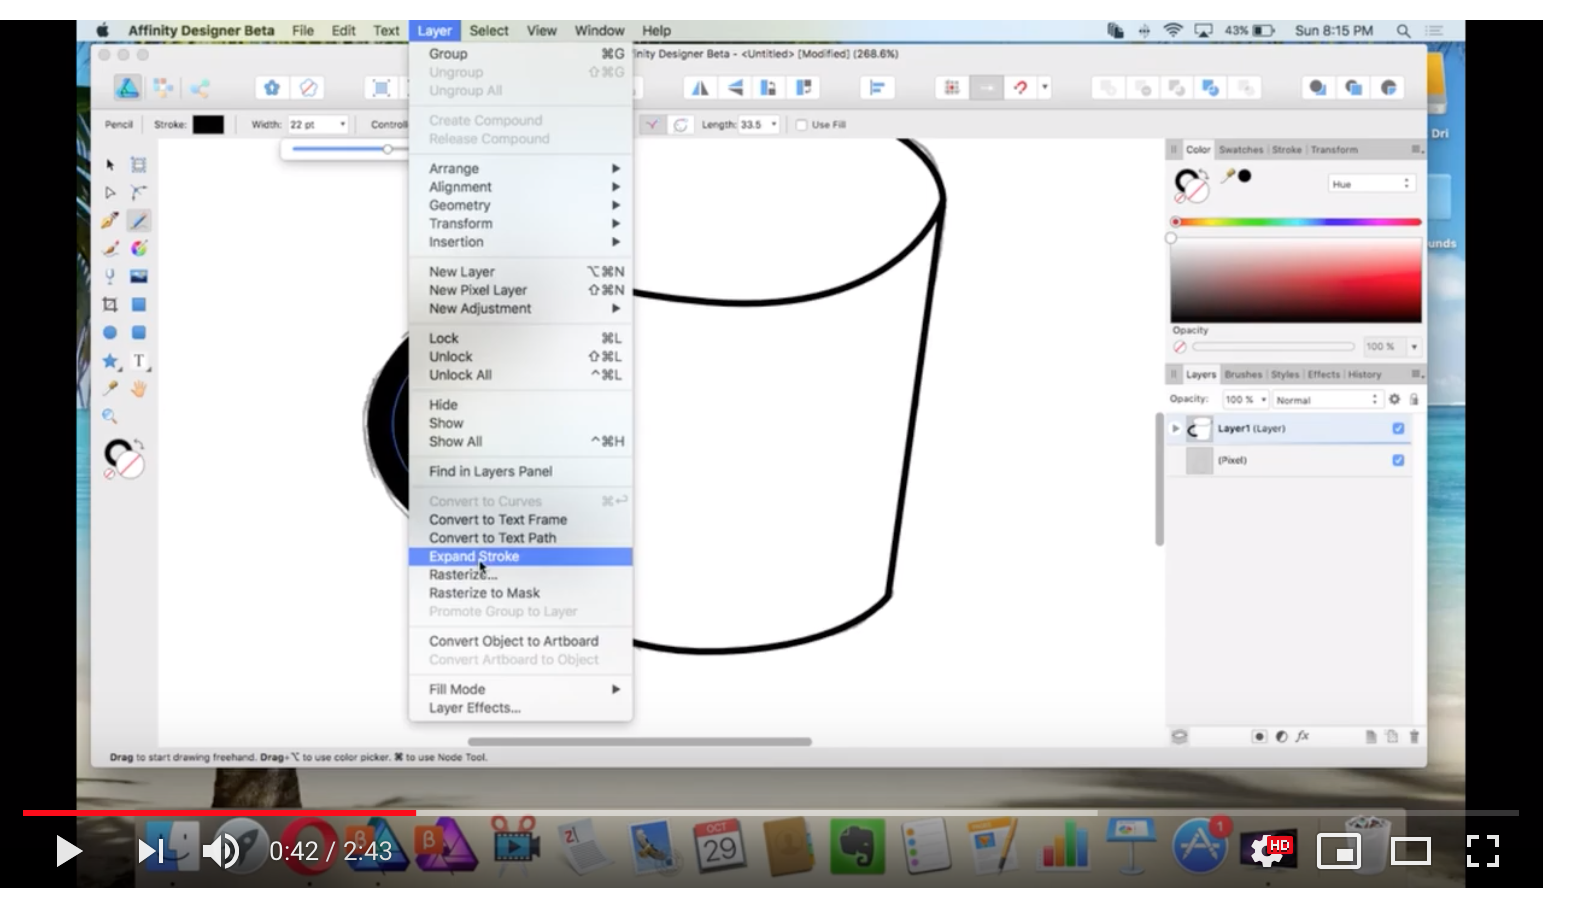
Hi there, I just wanted to let the team know that the Expand Stroke option needs some work—especially with curves. I've had multiple instances where A.D. gets this wrong and ends up giving me a shape that is not exact, and in some cases it looks really terrible. Below is one example—although not the most extreme case. This may look like nit-picking, but when Illustrator can get it spot on and when detail matters, this is an issue that will stop me from using the program. Thanks for your time, and have a nice day. P.S. Try Expanding the stroke of a circle. It's bad. I know there is a donut tool, but it's still an issue.

-
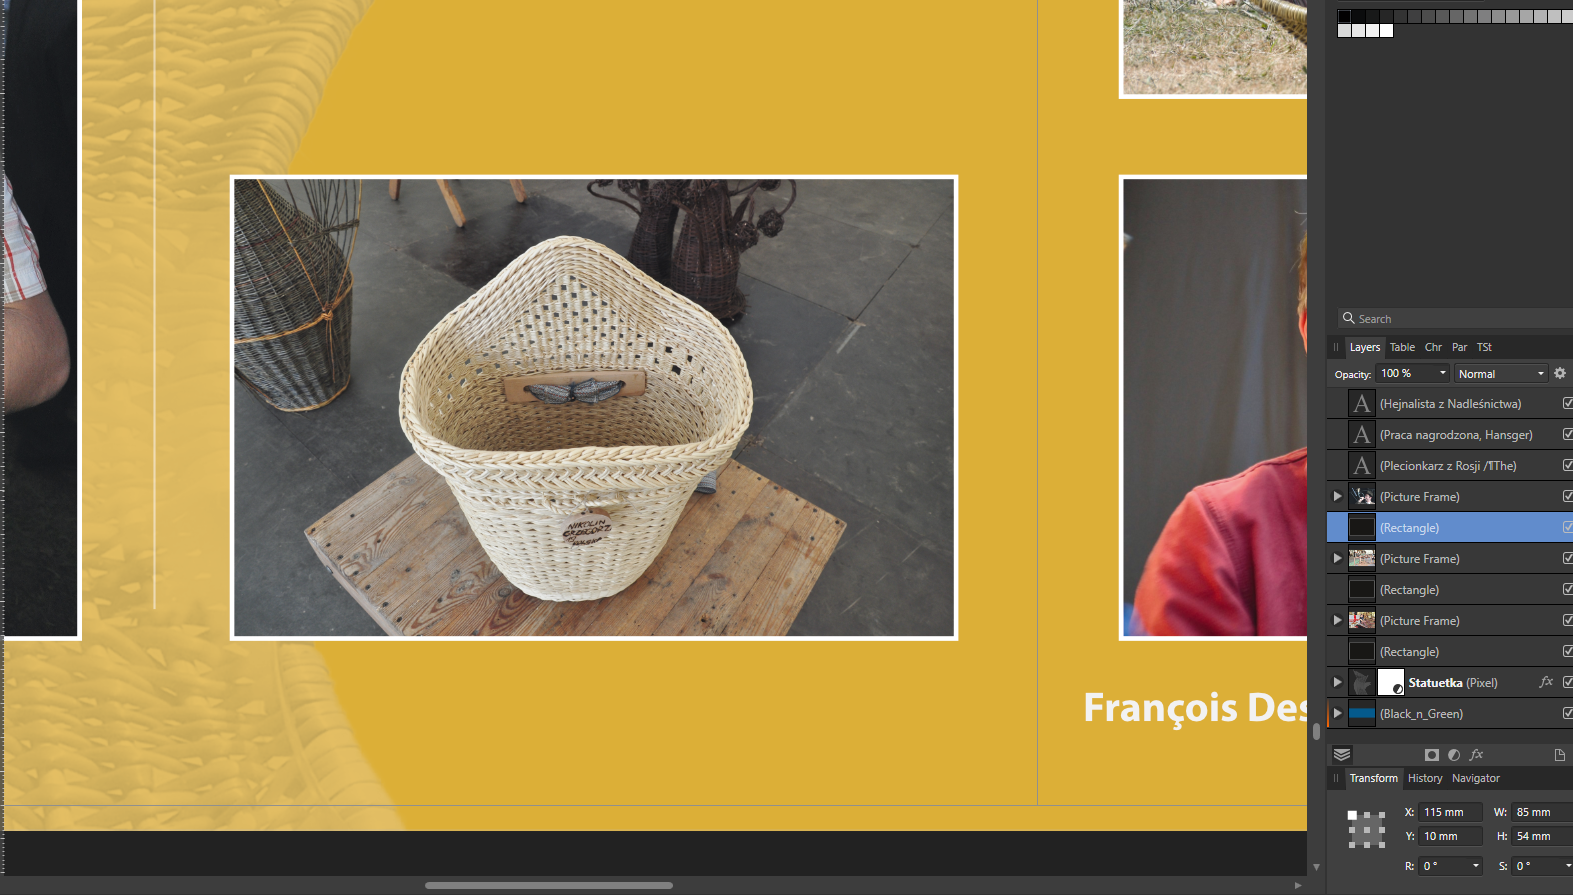
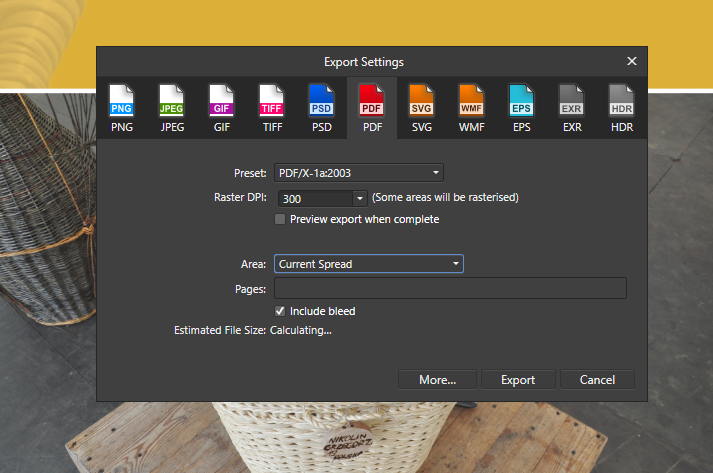
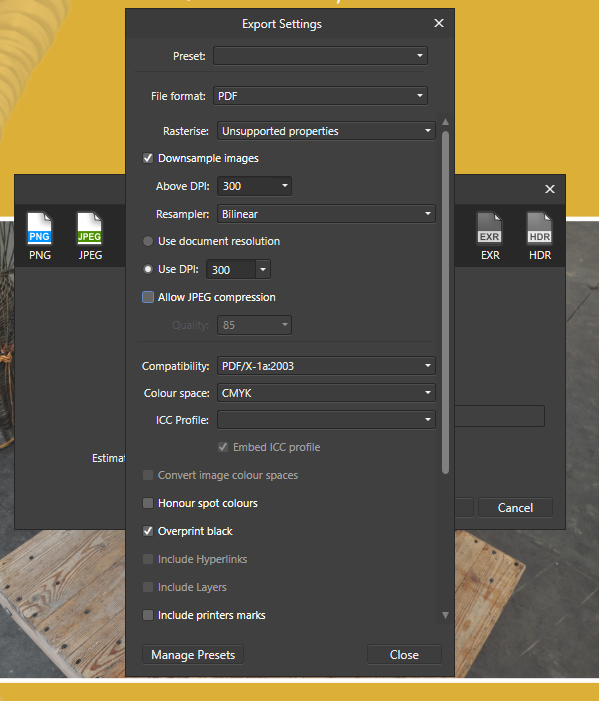
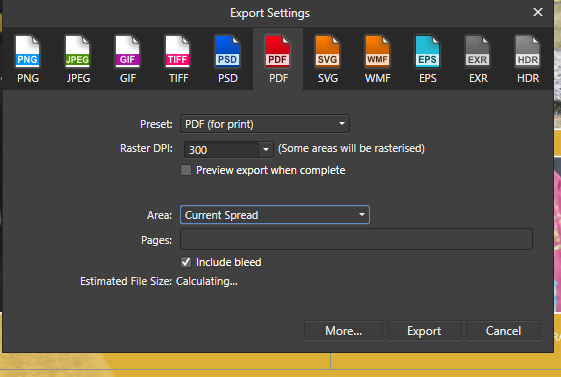
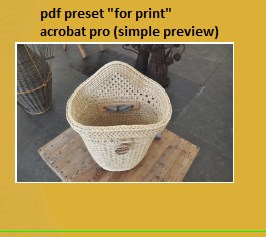
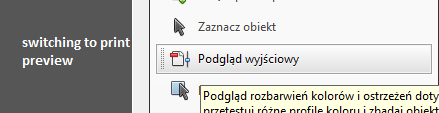
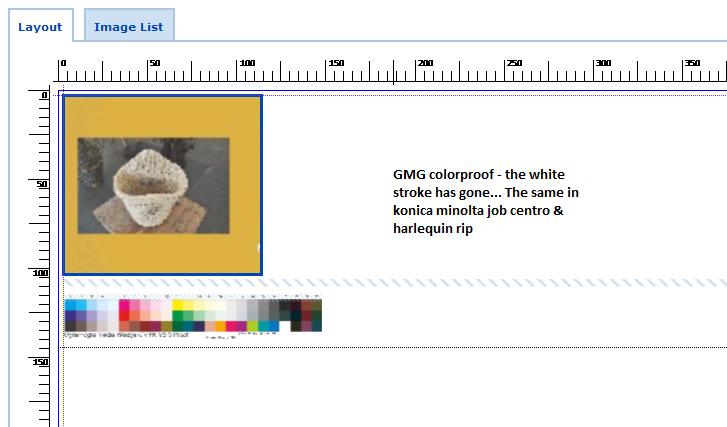
Hello, I found very frustrating problem in publisher ;/ What I did and what happend? I am creating a photo album with pictures. Each photo is placed in picture frame and under that, I placed a black rectangle with white stroke (to give a photo nice, white frame). When exporting to .tiff everythings fine. But I need to export it to pdf (I usually choose pdf x1). The white stroke disappears (even in basic preview in acrobat pro). When I choose pdf preset to "pdf for print", the white stroke appears, but when I open that file on proofing printer software/ print on digital printer/ offset printer (just prepress software or even desktop printer), the white dissapears. As I remember in beta I had a problem when I placed white text over photos in pdf (tiff was fine) (it disappeared in the same way). I'm attaching every steps described above + .afpub file. Are you working on that? white_problem.afpub
-
 Hi guys, Is there a possibility to change the angle of a gradient stroke? Can the gradient fill tool be also used for strokes somehow? Cheers, Chris
 -
 Is it a bug or intentional? Every time to select a different brush, your storke with gets reset, making it a pain to check the look of individual brushes, as they mess up the object you're trying to apply the brush to. This just in... Helmar
 -
If you drag an object underneath another one (subordinating it), it will be used as a fill layer to the the parent. My question is: why can't this also be applied to the stroke? Or am I missing something here? Helmar
-
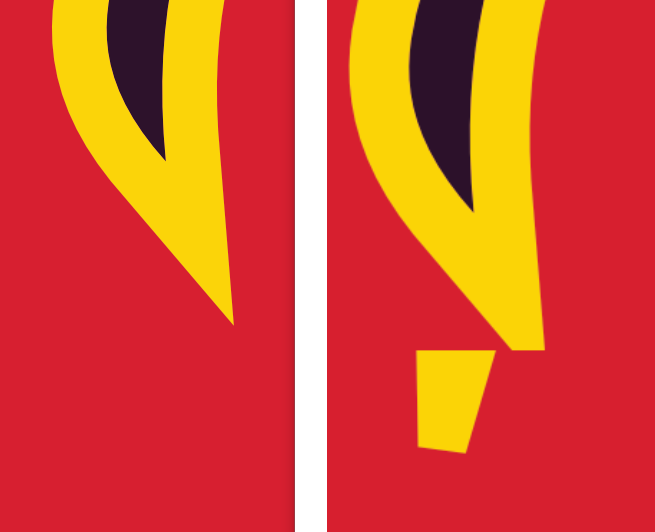
I'm having a strange export issue. The polygon and its border look perfect in Designer, but when I export to PNG, the corner gets messed up. I've tried changing the corner's angle, but since I can't duplicate the effect in Designer, I never know if I fixed it or not and need to re-export and look at the PNG to see if anything changed. Left: Designer, Right: Exported PNG
-
 Hi, i am just trying to use Affinity Designer from the 1st time. I have seen from different tutorials that there is the function EXPAND STROKE (in english version), but i can't find it in my italian version. Can you help me to find it? thanks, Regards Eleonora
-
 Create text, shapes, lines of varying thickness Group Grab a corner and drag to scale Everything scales nicely except for the lines and shape outlines (strokes), which stay the same thickness. Kind of defeats the object.
 -
 Hi, I want to use an artistic Brush to outline my text Text Strokes using brushes doesn't work Regards.
-
 Hello friends, Do you know how to apply the gradient tool to stroke? Thanks in advance. Regards, Nick
 -
Hello I’m having problems trying to change the stoke with on vector persona. It changes randomly and it wont allow to change it to a desired with. thanks 28EFD05C-D7F7-4C95-9126-1EC638E19571.MOV
-
 I am trying to find a way to outline or stroke a selection but not having much luck. What I want to do is to make a selection from a raster image, then outline that selection into a vector and discard the raster image. I only need the outline. Any ideas would be greatly appreciated. Bob
 -
 Hello, the vector "pattern brush" of AI is really useful for a lot of decorative work. Today, it seems to me that I can't do such vector designs in Affinity... And the Bitmap Brushes do not really answer to my need, especially regarding the handling of the corners. I've seen some questions on this subject on the forum but no actual answer from the team, can this feature be planned or considered? Thanks a lot!
-
 The problem is that the line has a rectangular (or square also, I suppose) "shape" assigned to it with handles. The line follows a vertical or horizontal side of this shape. Once the line is rotated the line no longer follows the vertical or horizontal side of the "shape", it now goes from corner-to-corner which changes it's length, and requires that one also has to rotate it to find the new angle to make it "90 degrees". This happens when you use the transform panel and the Top Menu > Layer > Transform > Rotate Right command.
-
I'd love to see a set of basic stroke pressure presets, with associated thumbnail icons. ie. Flat, 100% - 0, 0 - 100%, Centre-peak etc. I find myself so often wanting a simple stroke pressure style and having to recreate it every time. I guess I could make them myself and save them, but they wouldn't have easy-to-use icons I can just click.
-
Please look at the two screenshots. The left one is the design as laid out in AD, and the right one is the one after the PDF export. You'll notice that the dotted line is messed up. Please investigate and fix. Thanks so much, guys! Helmar
-
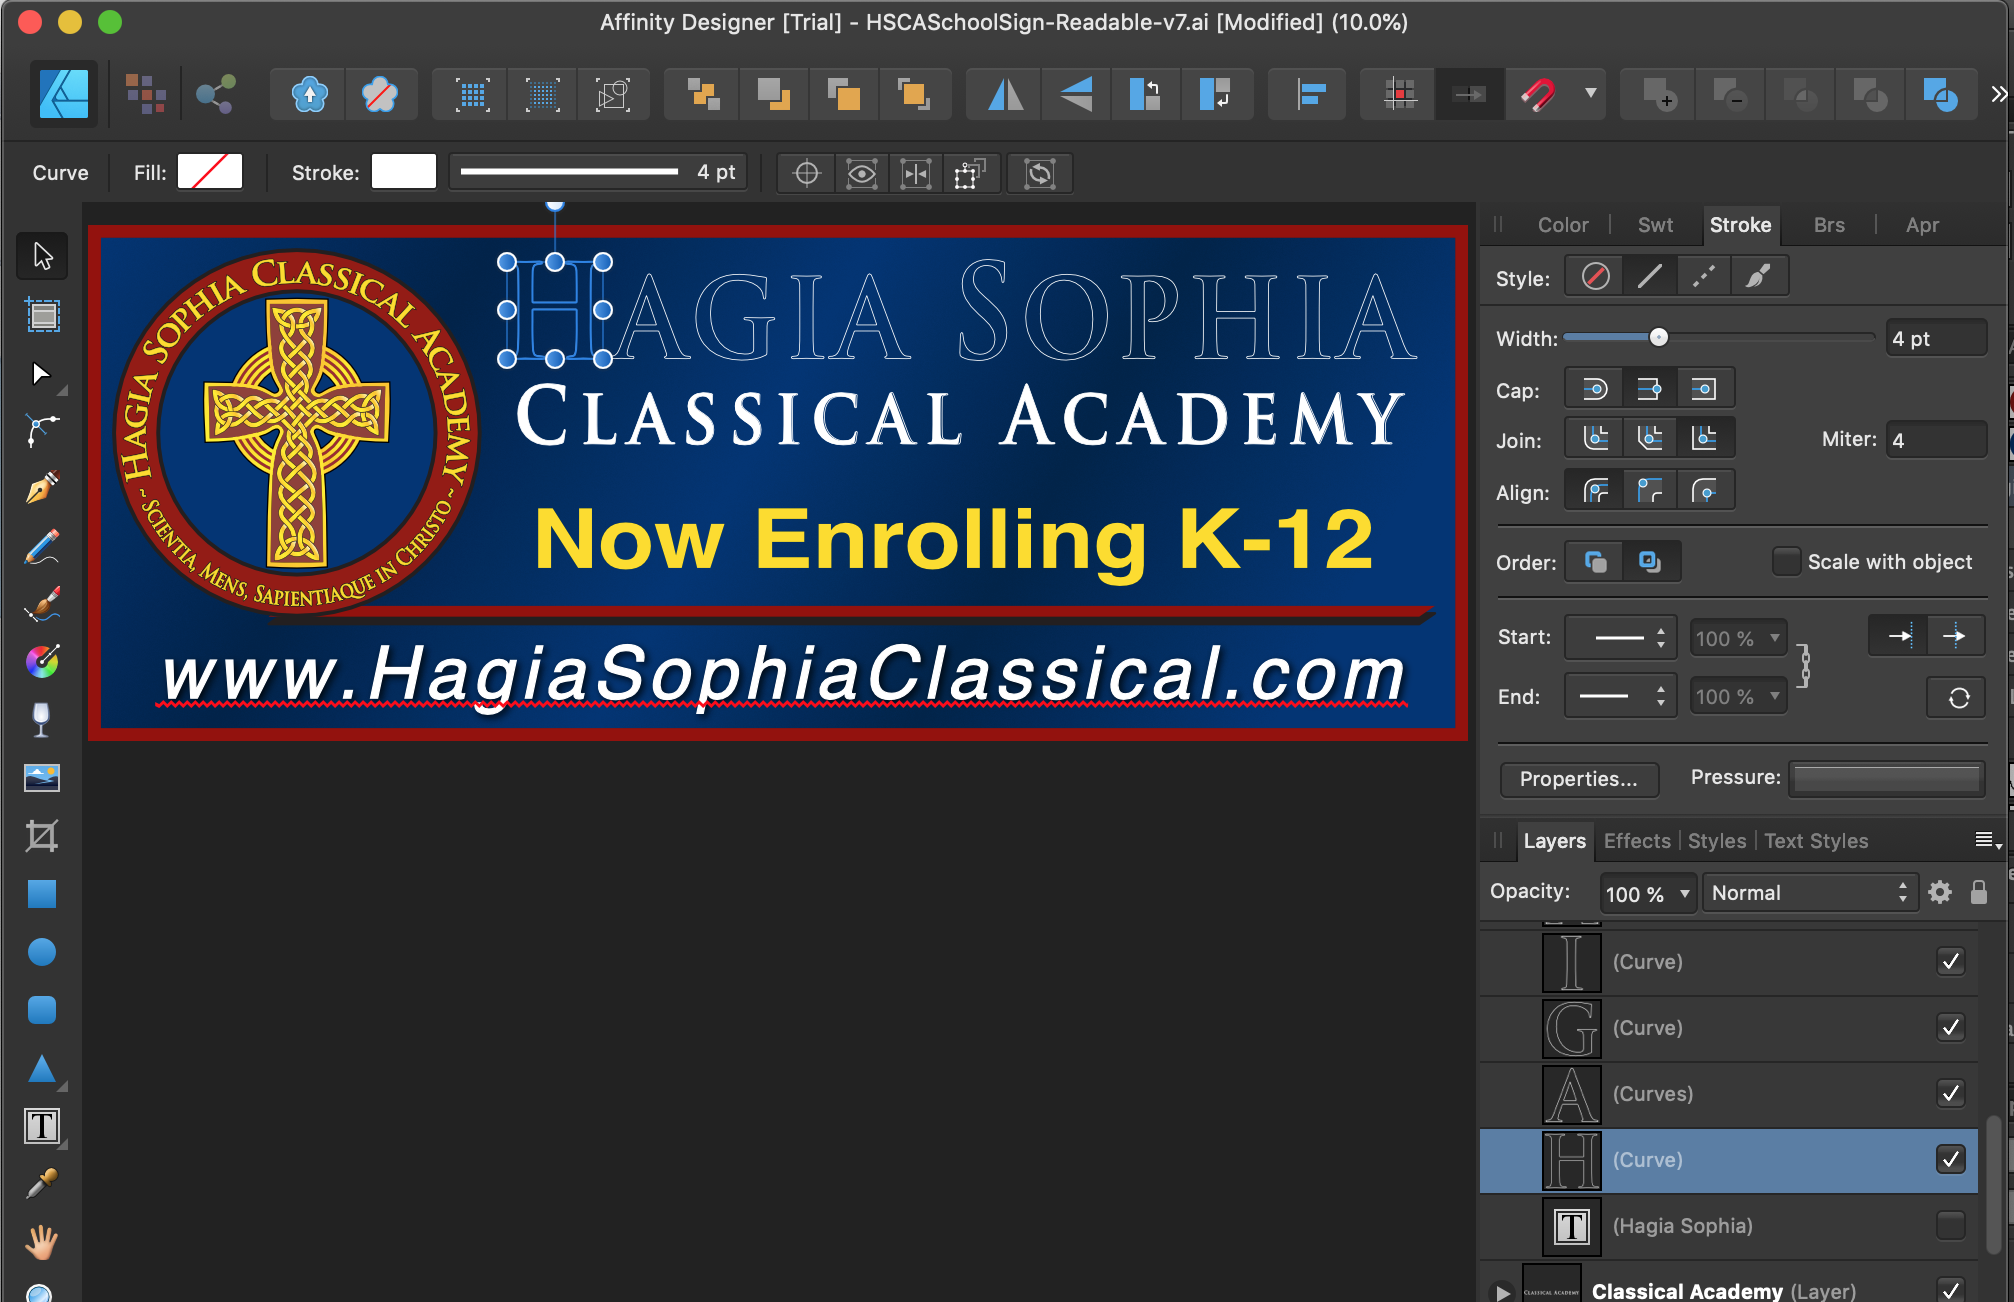
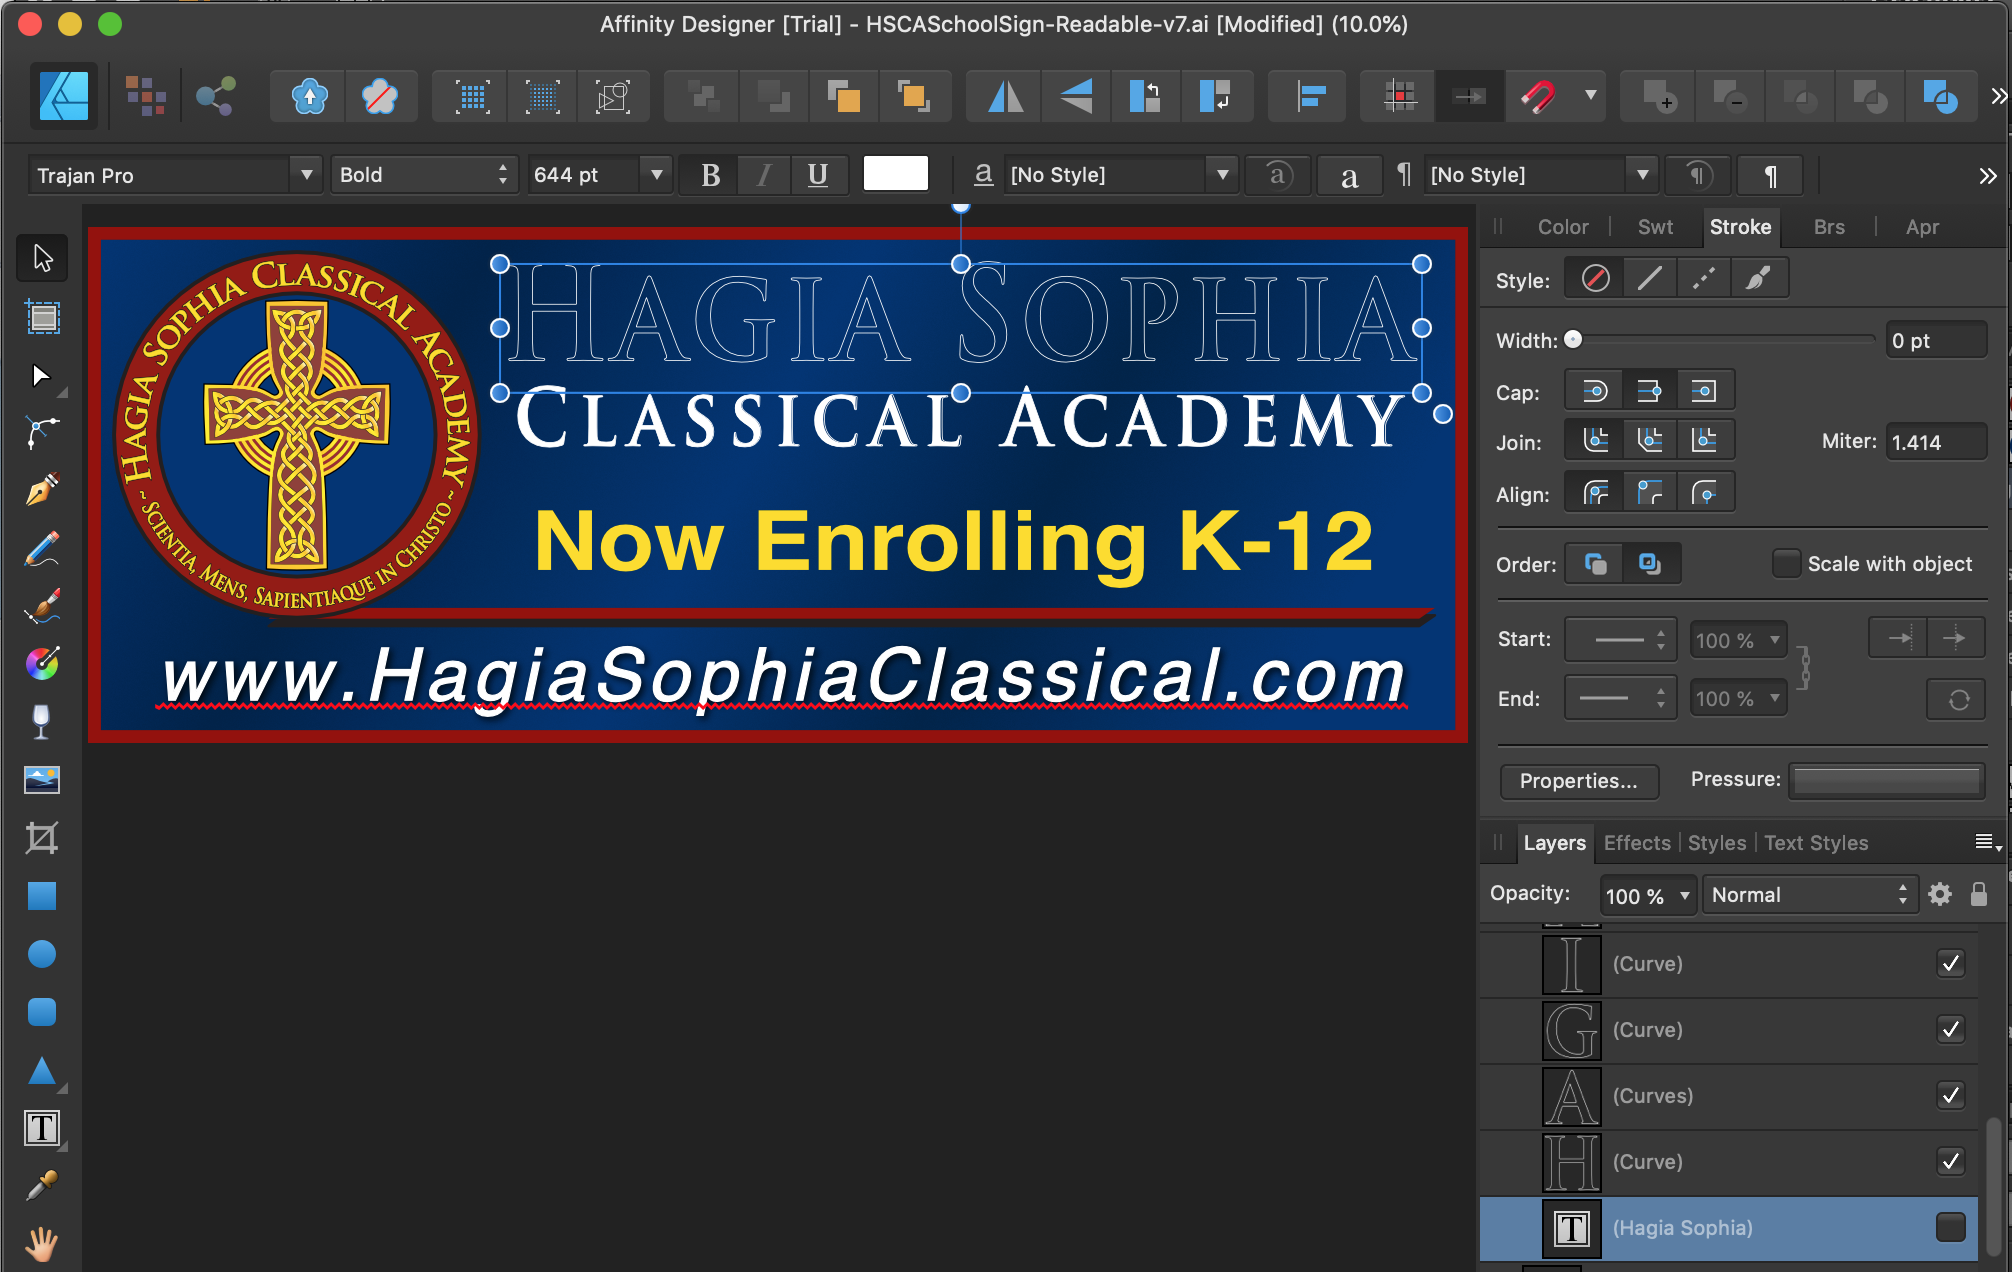
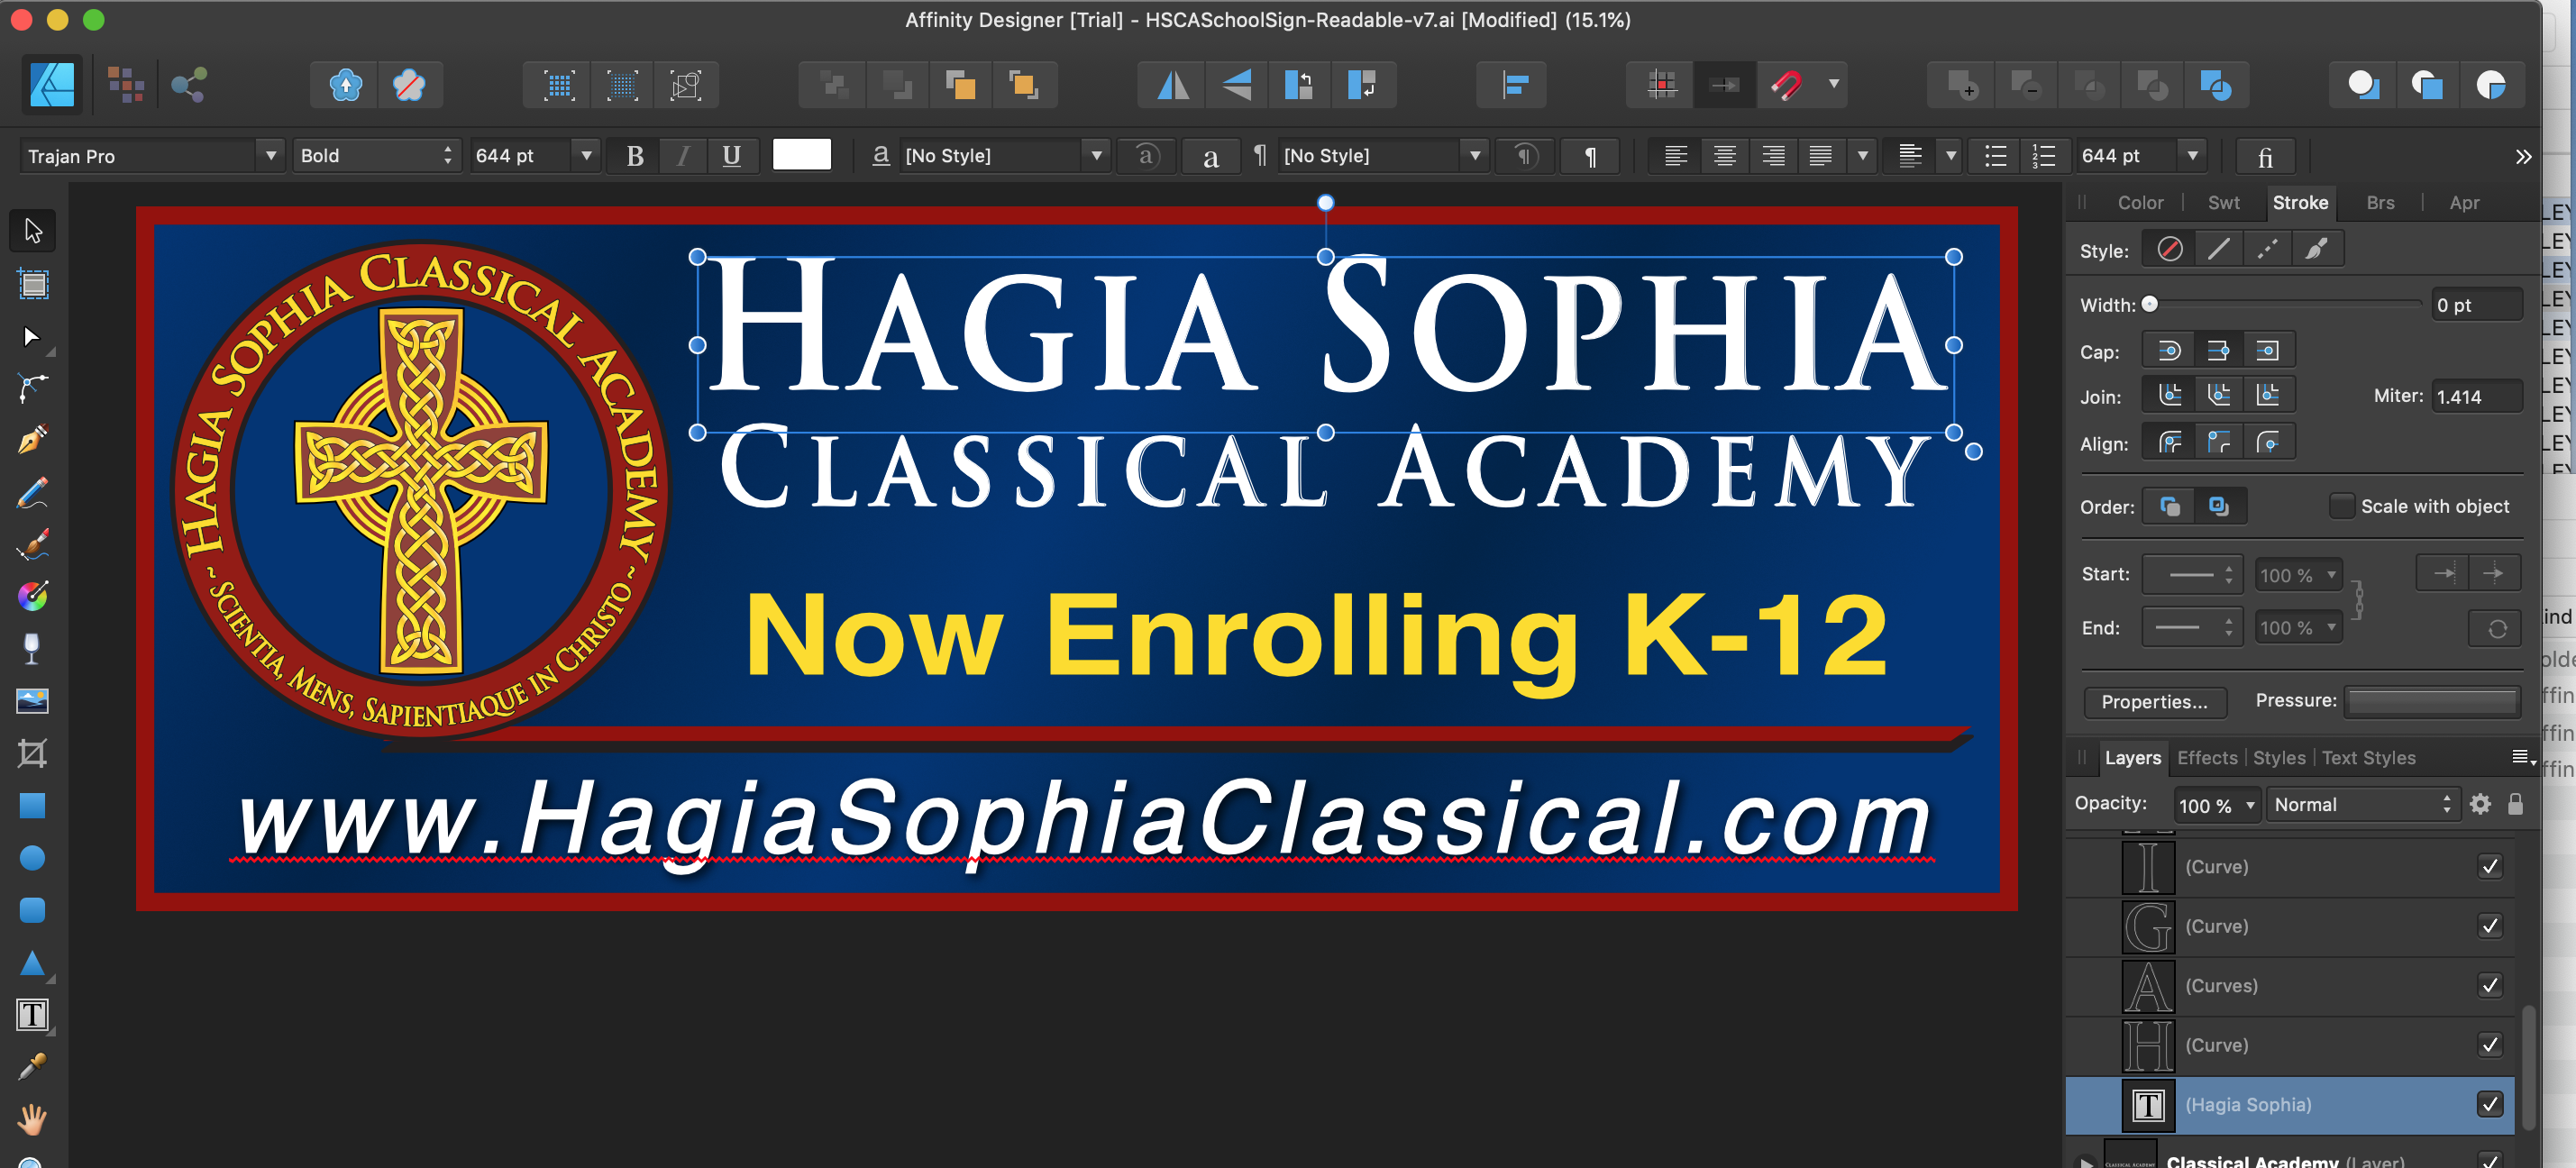
On the A.I. file, you can see in the above menu that the text stroke is 4 pt. Over to the right, in the Layers, column, you see only the selected text block. (There are NO outlines...) After importing the ai file into Affinity Designer, everything "looks" fine, however the STROKE border has been eliminated from the Text itself, and has been converted into separate outlines for each letter. Look at the Layers column and you will see that I have selected the text, "Hagia Sophia" (blue highlight). You will also see that stroke width is 0 pt (not 4 pt.) Above the text selection are separate outlines for each letter of that text. Those are the "strokes" that have been removed from the text and converted to outlines. (See more below...) To demonstrate what I mean, I toggled off the visibility of the Text, and you can see that what is left are the outlines that have been converted from the original text. When I click on the outlines, voila!, there we see the 4 pt stroke in the stroke column to the right. The current way you do it would be okay if all I never wanted to revise the image but that, of course, is why I would import my ai files into Designer . . . so that I can revise them. Even on this simple grahic image, it took quite awhile to revise the text. It seems that you already can translate the stroke values from the original ai file so, rather than creating a new outline for each letter, couldn't you add the stroke value to the text of the converted Designer file? Thank you for hearing me out.
-
 When two or more shapes are alligned (from anchor to anchor), and these shapes have no stroke, it results in a transparent edge instead of no edge. See Example. Each of the triangles here are perfectly alligned from point to point, which should leave no space between shapes. The stroke is set to no colour, and the weight set to none, so I would imagine that the 'fill' should take up 100% of each shape. However, it seems that the stroke (which shouldnt exist), stil takes up a fraction of the shape, and allows the background to show through ever so slightly. The obvious way to get around this is to slightly overlap each shape - as you can see, there are quite a lot in the above, so this would be impractical. Is there any obvious way to get around this? Apologies, this question has probably been asked before, but I was finding it dificult converting this question to a searchable term.
-
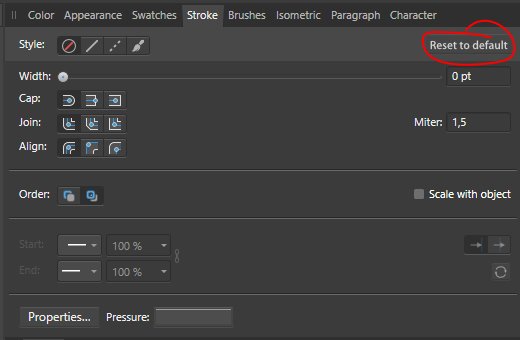
It's great we have arrows now and I use them a lot already. So thanks a lot for that!! This makes our lives so much more fun! When creating a new object, this new object gets the same styling as currently set. So all new objects get the arrows and stroke settings applied when created. While creating a new object, especially when just used a stroke with arrows, I am missing a single button to reset the stroke to a factory preset, like a line of 1 px, stroke disabled, but most importantly: no arrows selected (and set back to 100%). A reset stroke would be nice to use after using strokes with arrowheads to reset the stroke to the (in my opinion) most used strokes, which are just lines without arrows.
-
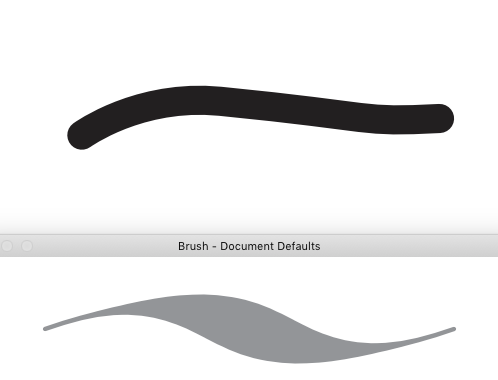
 Hi, In Stroke properties, both in Publisher and the Designer app, the settings for a stroke and be make think - thick - thin yet the results in a stroke do not show as such. As this photo below. Settings, bottom yet the top, which is the line I'm working on stays fat. Oddly enough this is also true in my iPad Designer app. What am I doing wrong or is this a quirk?
-
 I cant apply to a path any stroke width, nor change brush shape nor change stroke colour. I can only apply fill colour. Similar situation is when I try to change stoke width and colour to the artistic text or defined shapes like rectangles or ellipses. I found that this problem disappears when I apply no colour to a stroke, and then I can apply any stroke width, brush and colour.
 -
 I finally give up. How do you stroke something? I drew a rectangle with the marquee tool and want to stroke that line. I do it all the time in Photoshop, but I cannot find a way to do it in Affinity. I also can't find any instructions or tutorials online. There seems to be help for what to do with the stroke after you have it, but I need to create it in the first place. I have the same question for filling the selection. thank you
 -
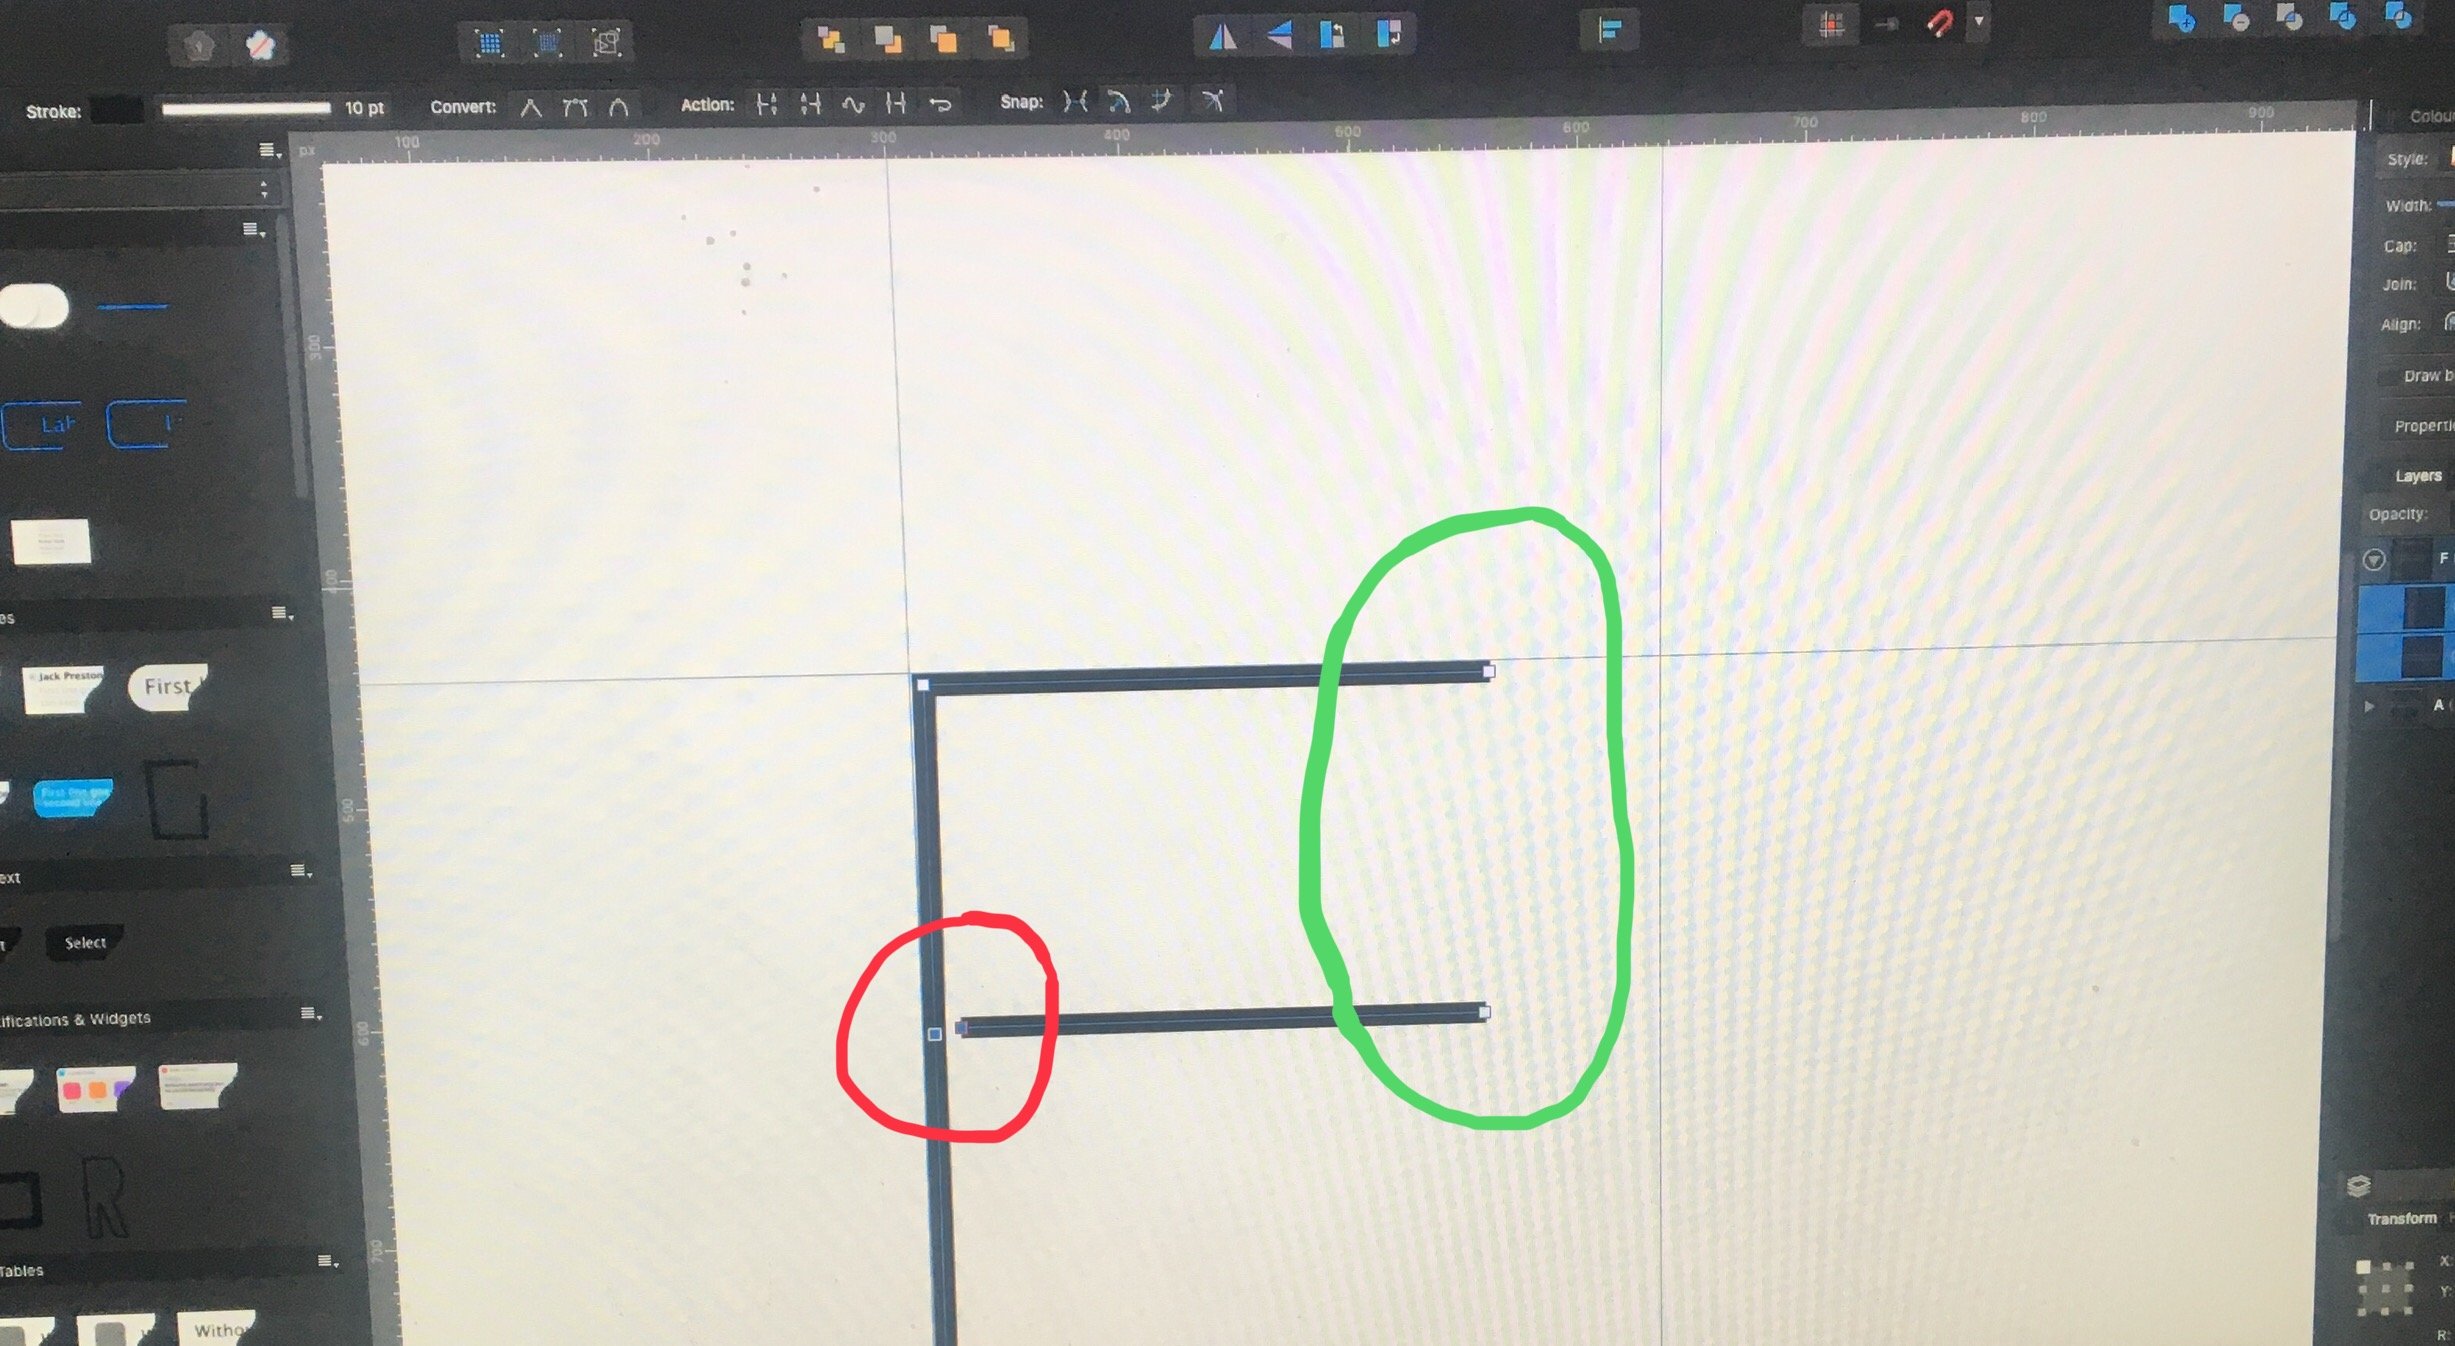
Hi, I am creating the letter F by connecting the two nodes in the red circle to create a single path that I want to expand from a stroke to a shape and export to FontForge. After trying everything on the list below, ‘join’ continues to connect the two other end nodes in the green circle that I don’t want to connect. Things I have tried: Select both nodes in the red circle and ‘join’ and 'close' Select both nodes in the red circle hold shift and drag until both nodes turn yellow Enable ‘snap to selected nodes’ then select both nodes in the red circle and ‘join’ ‘Join’ both nodes in the green circle, select again and ‘break’
-
 Hi, I am new to Affinity Photo but have used Photoshop for a few years. Is there some way of stroking or rendering a curve? regards Beckett
 -
 Hi, I already drew a picture and realize now that the width of the paint brush is too thin and I have been searching everywhere for how to change the width of the paint brush strokes but I haven't found any solutions and I experimented with things and nothing has changed. Is there a way to fix this? Thank you.