Search the Community
Showing results for tags 'brushes'.
-
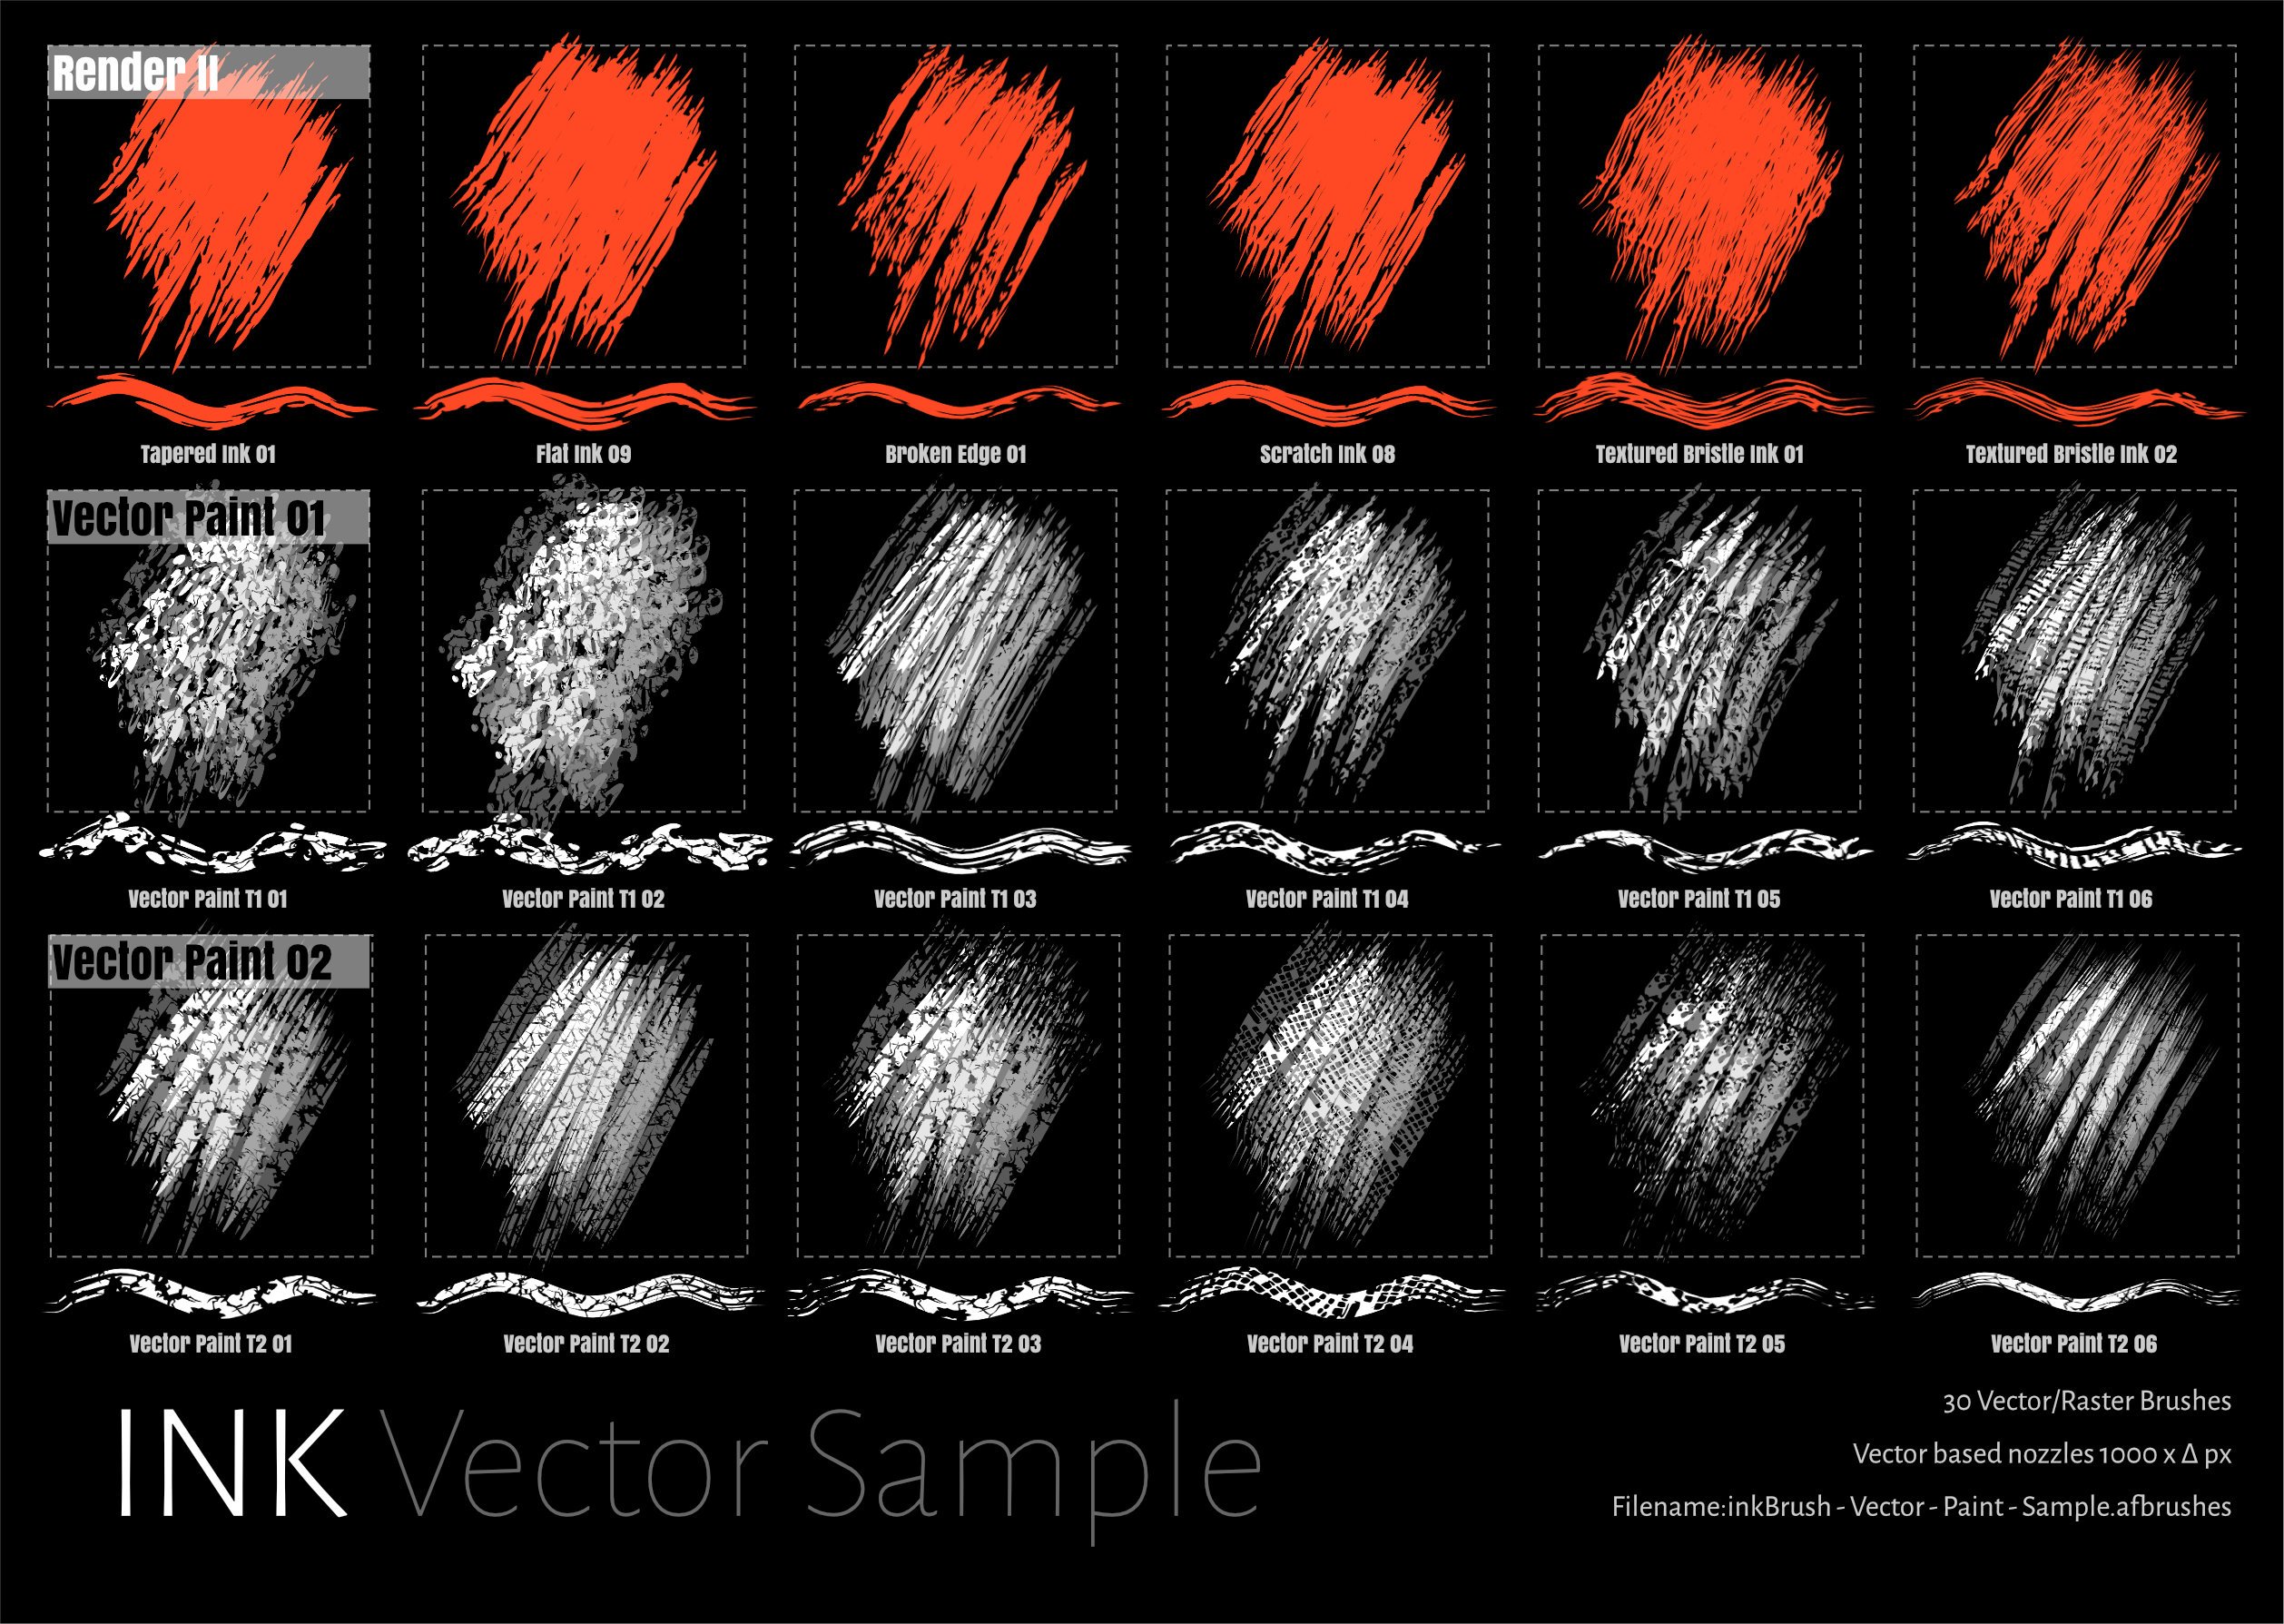
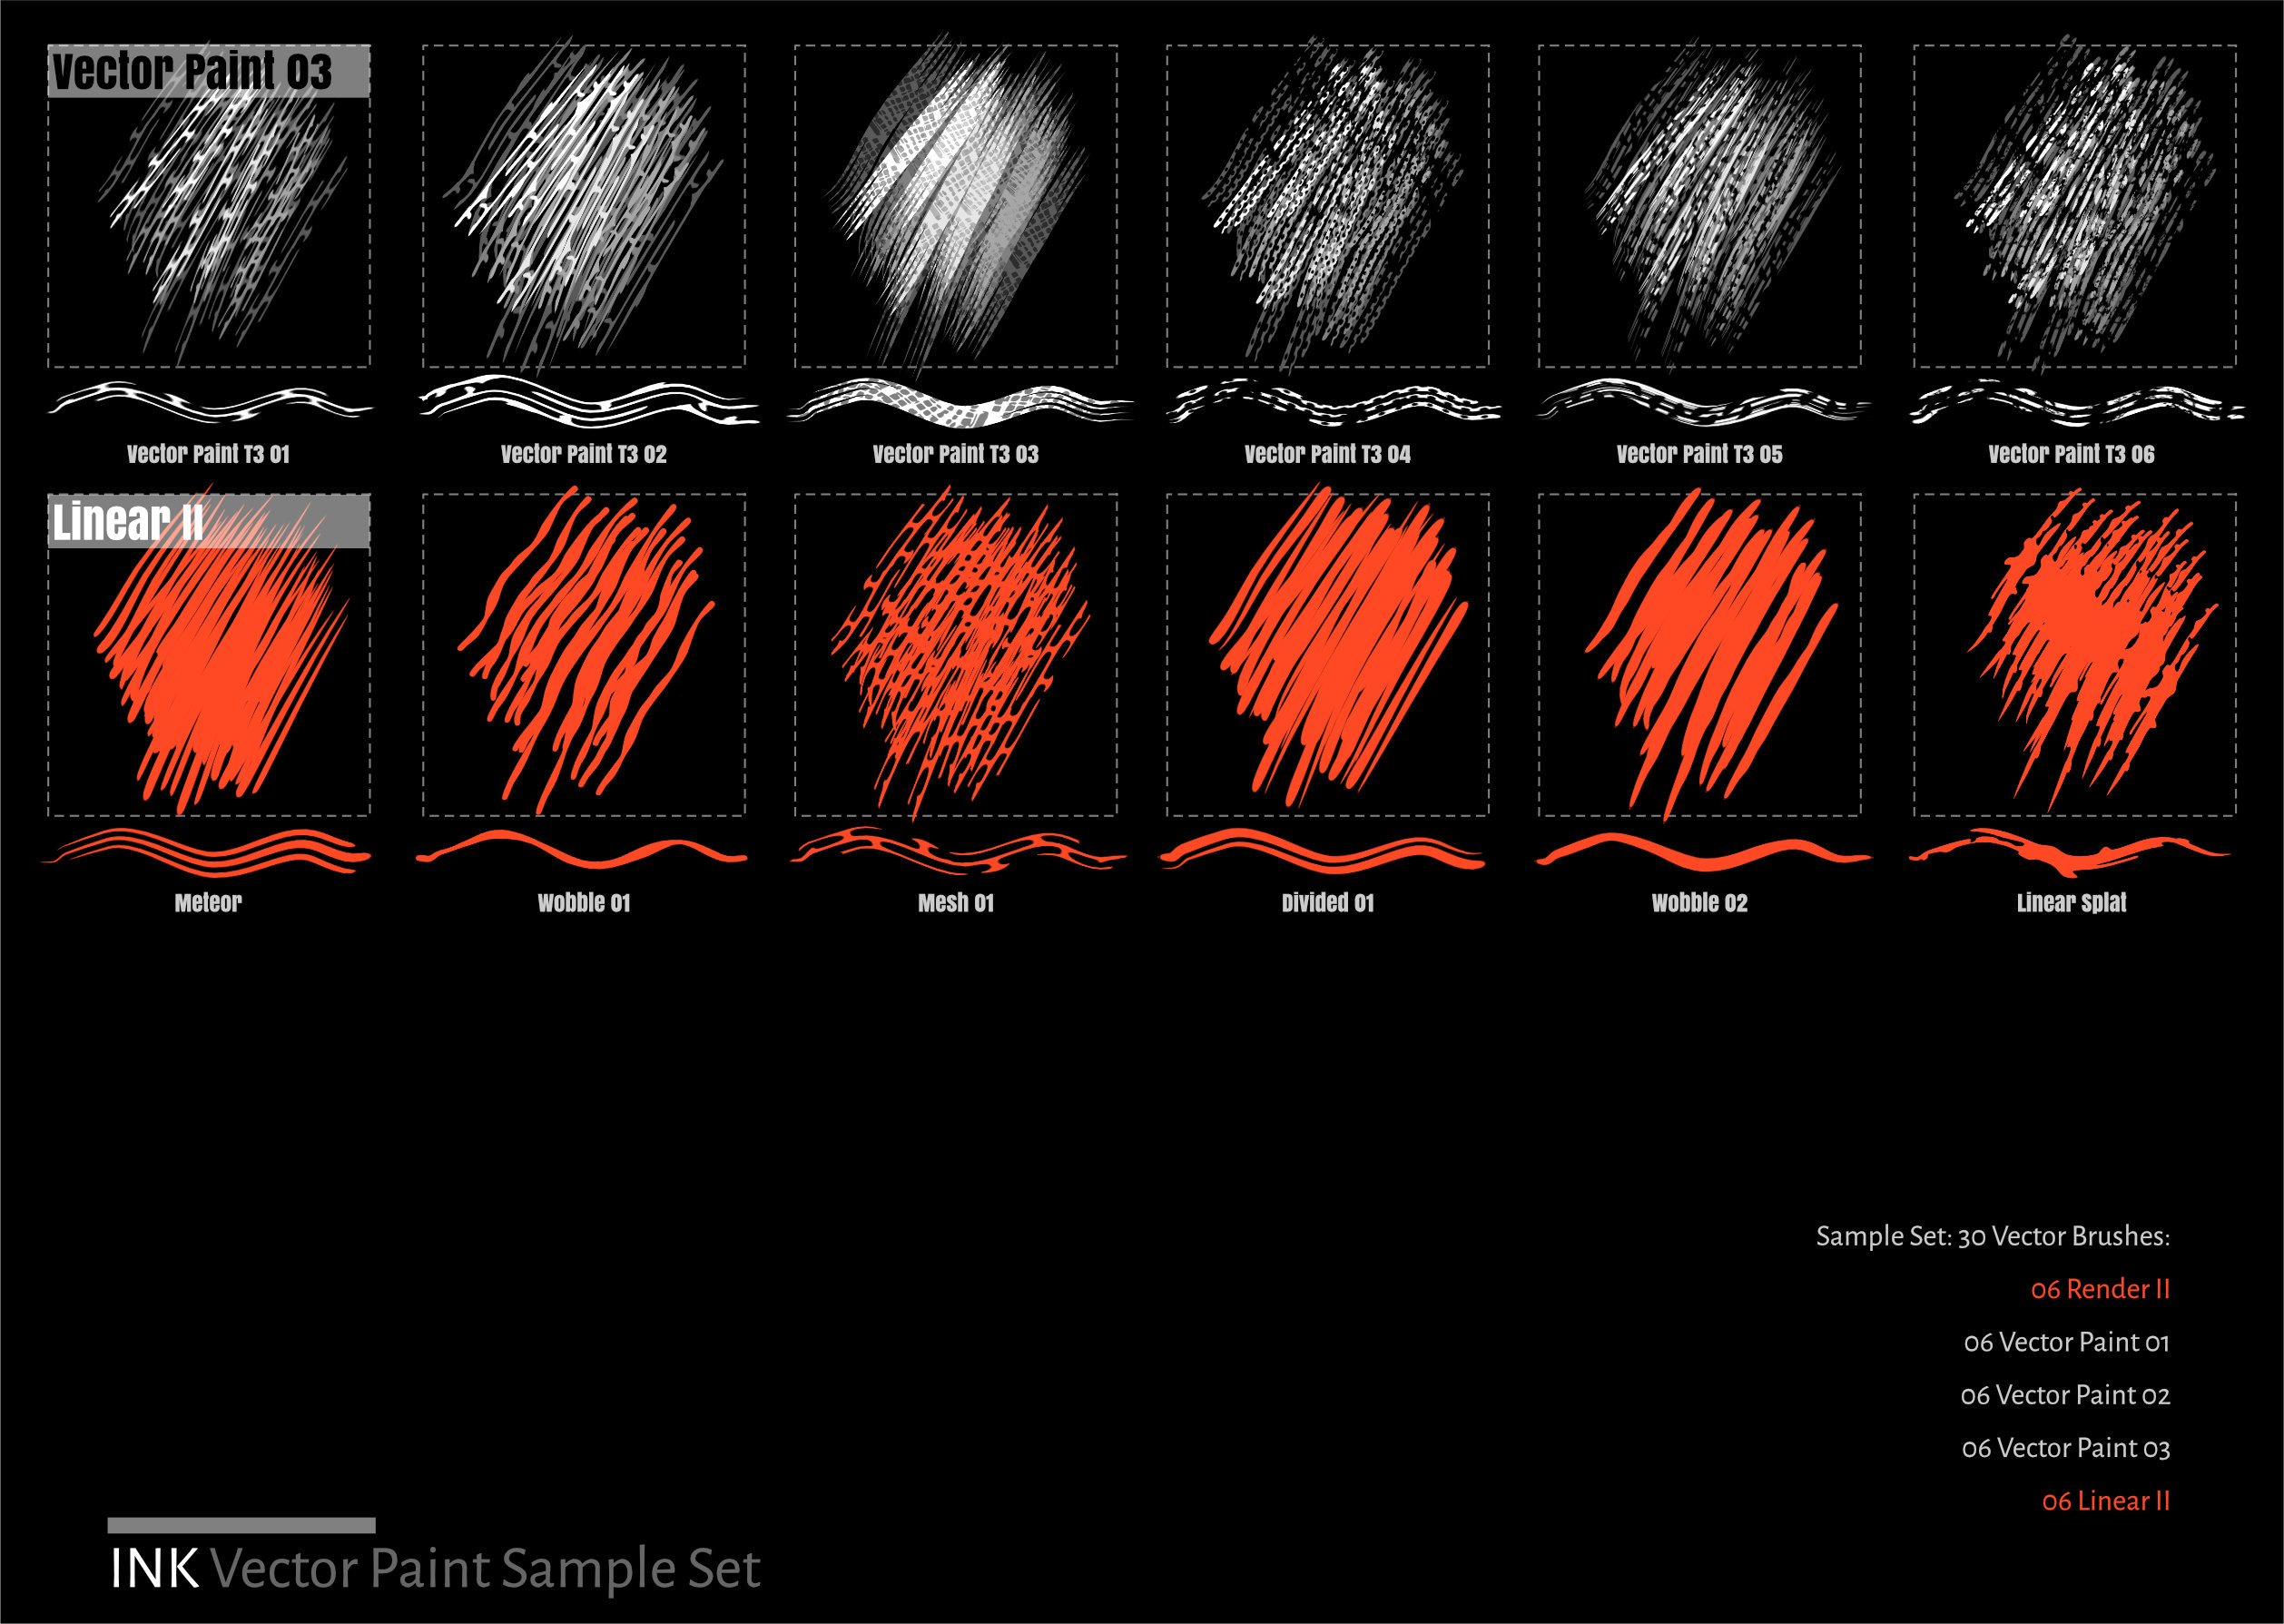
Inkbrush 07 and Project Set 12 Added new 5 new sets of Vector brushes to library based upon work for Inktober 2019 and Camouflage II with some help from the supplementary Vector Assets library Sample set inkBrush Vector Paint as below consisting of the first 6 brushes from each of the 5 set (30/150) Red:Render and Linear II extensions for inkbrush Project 07 White: Vector Texture Sets 01, 02 , 03 Project Brush Set 12 Vector Paint Sample Set 01.zip

-
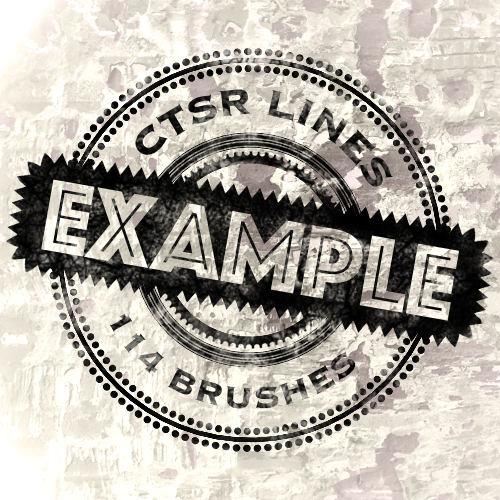
I was in need of lines with dots and triangles for a project. I started creating a few lines and then I encountered a whole bunch of problems with repeating patterns in the Texture Intensity Brushes in the Designer Persona. My triangles got squished, my squares became rectangles and I went into full pitbull mode and did not sleep until I understood what went wrong. These are my work arounds if you’re struggling with squished or otherwise deformed repeating patterns: https://forum.affinity.serif.com/index.php?/topic/101575-textured-intensity-brushes-and-body-repeat/&tab=comments#comment-545105. With the work arounds in mind I’ve created a set of brushes with repeating patterns that hardly show any deformation*. I was on a roll, so I created 114 in 9 families. I won’t use all, so feel free to use them. They're nice for stamps and borders and such. Enjoy! *) When using these brushes on a tightly curving curve or a sharp corner they of course do deform. Experiment with the brush setting for Corners to find the best solution for your project. The brushes all contain a centred line (in 3 widths, S, M and L) and repeating shapes and stripes above or above and below. The brushes with stuff above the line, but not under are therefore not vertically centred on the stroke. In the stripey families I added 3 lines with a different center point, those are marked with a suffix ‘mid’. They are symmetrical, the 'mid' version is vertically centred on the whole stroke. When you import the brush files you’ll see that a few of the brushes in the round families have different heights from the other brushes. The sources of these brushes have a different width height ratio (see the post linked above for the reason why). I added them to the brush files with a height that by default fits to the brushes with the standard height of 80px. Lines CTSR examples.pdf lines CTSR - pointy L.afbrushes lines CTSR - round L.afbrushes lines CTSR - stripey L.afbrushes lines CTSR - pointy M.afbrushes lines CTSR - round M.afbrushes lines CTSR - stripey M.afbrushes lines CTSR - pointy S.afbrushes lines CTSR - round S.afbrushes lines CTSR - stripey S.afbrushes
- 12 replies
-
- 14
-

-

-
- brushes
- affinity designer
- (and 1 more)
-
 I love everything about the vector persona and making a lot of vector illustrations as you can see them on my dribbble account. However, there is just one missing feature for which I'm switching to pixel persona; applying grains, spray textures. Since these pixel brushes are not scalable, I might have to reapply these brushes again on larger formats. I wonder if affinity guys can include a set of vector brushes to apply a nice, subtle textures which cab be scalable. This is one of the features that can set affinity ahead of procreate as well. What do you guys think?
 -
 Hello community, Not sure what happened, for months i have used many brushes in affinity photo and have added tons as well. Suddenly noticing, there are only default brushes left. All my brushes have disappeared. Help very much appreciated. Thanks Gyan
 -
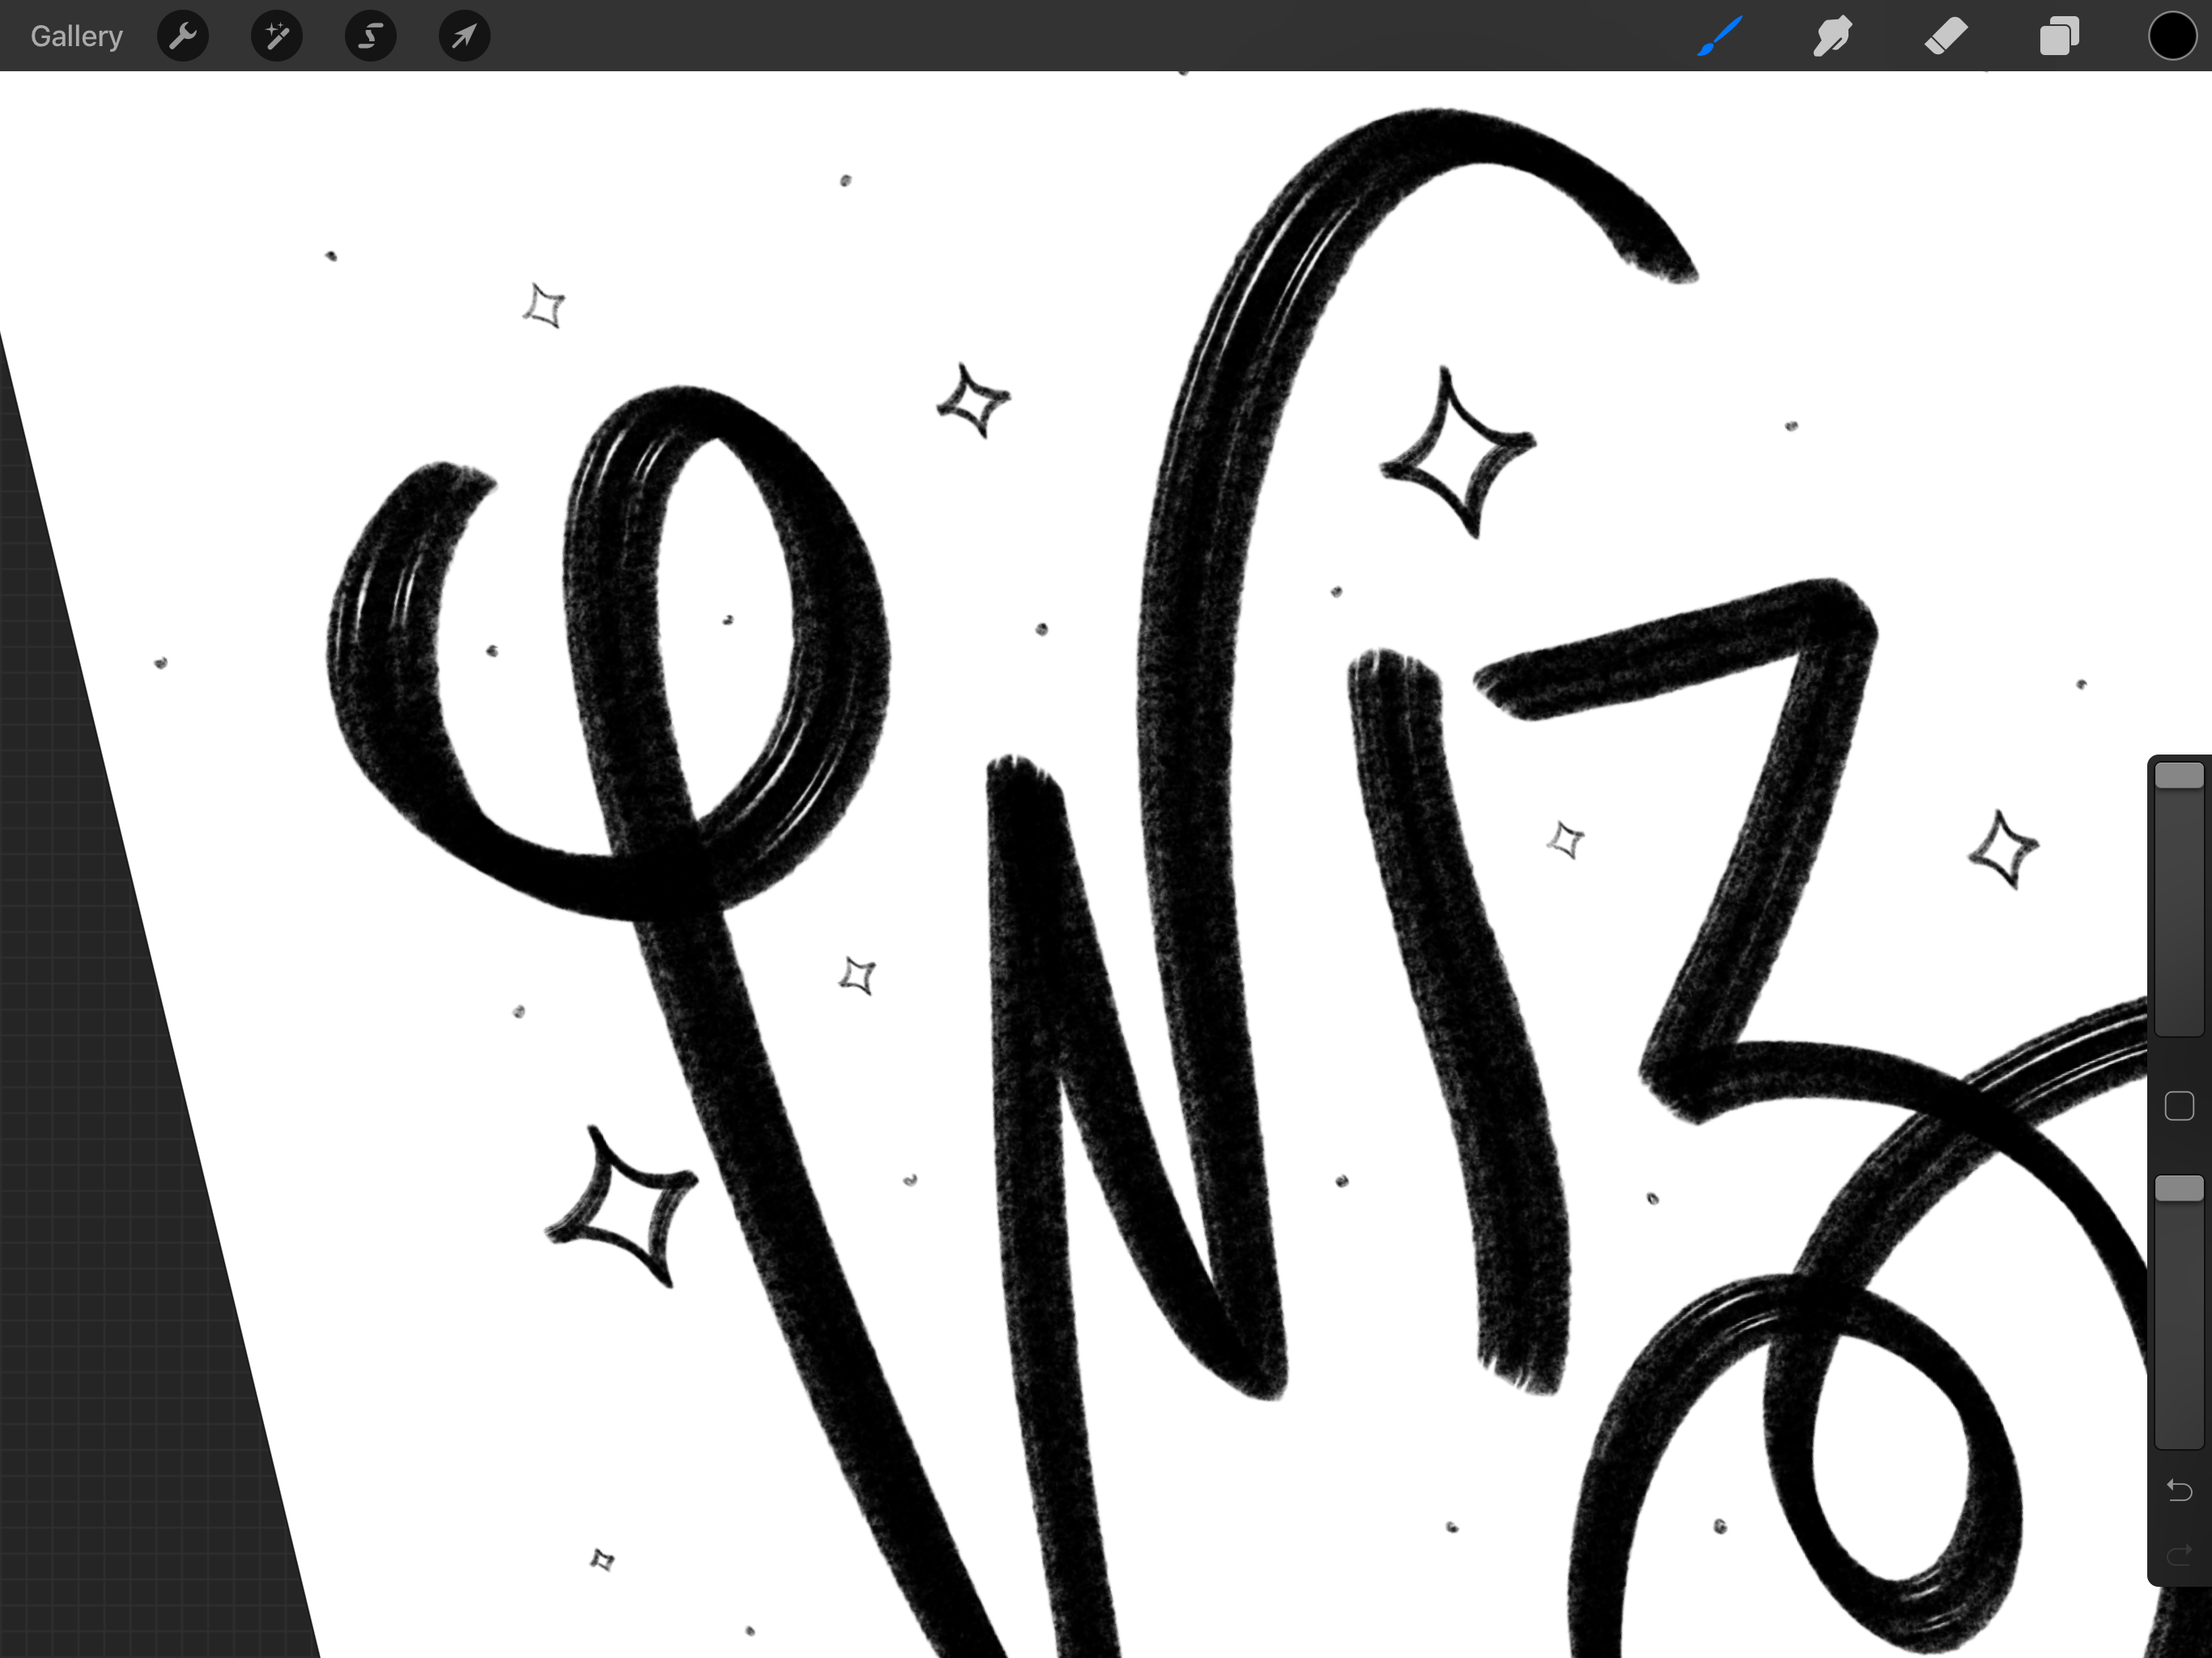
 I've just swapped over from Procreate to Affinity due to Procreate not being vector based. I initially started designing a logo in Procreate until realising I needed to swap, but I'm unable to bring my brush with me. I've searched for days for a similar brush and cannot find anything! Any help would be massively helpful otherwise I'll have to start the logo again and re-jig the style I've attached 2 screenshots to show the brush. Thanks!
-
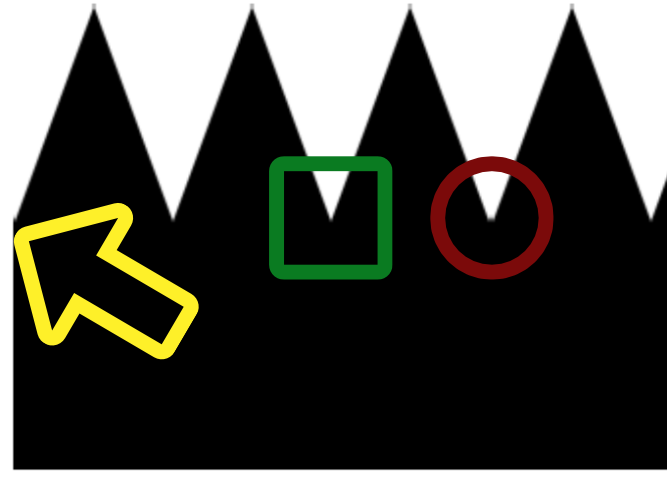
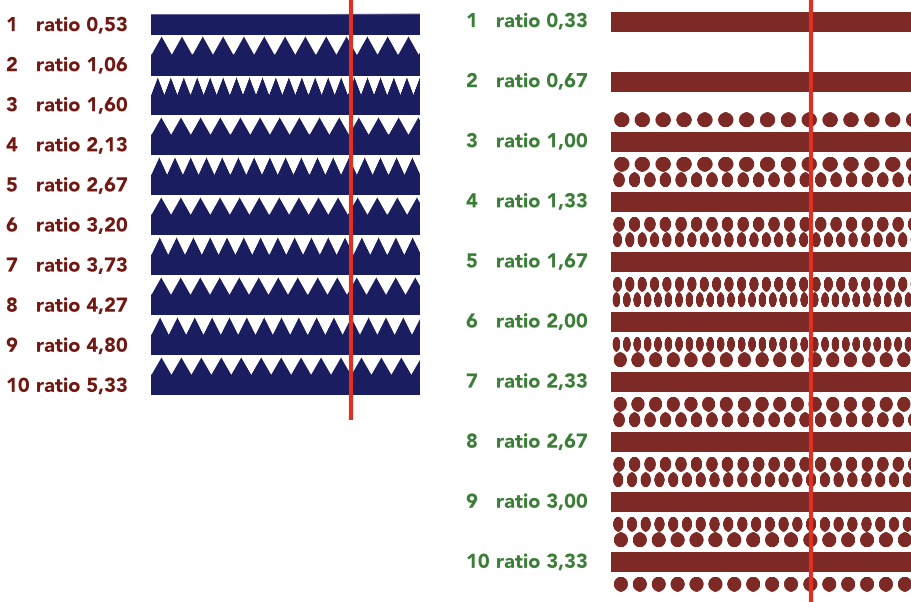
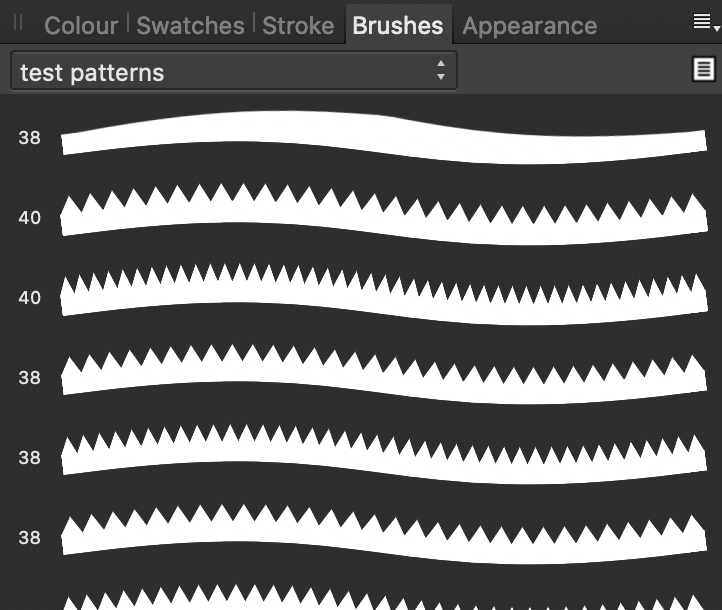
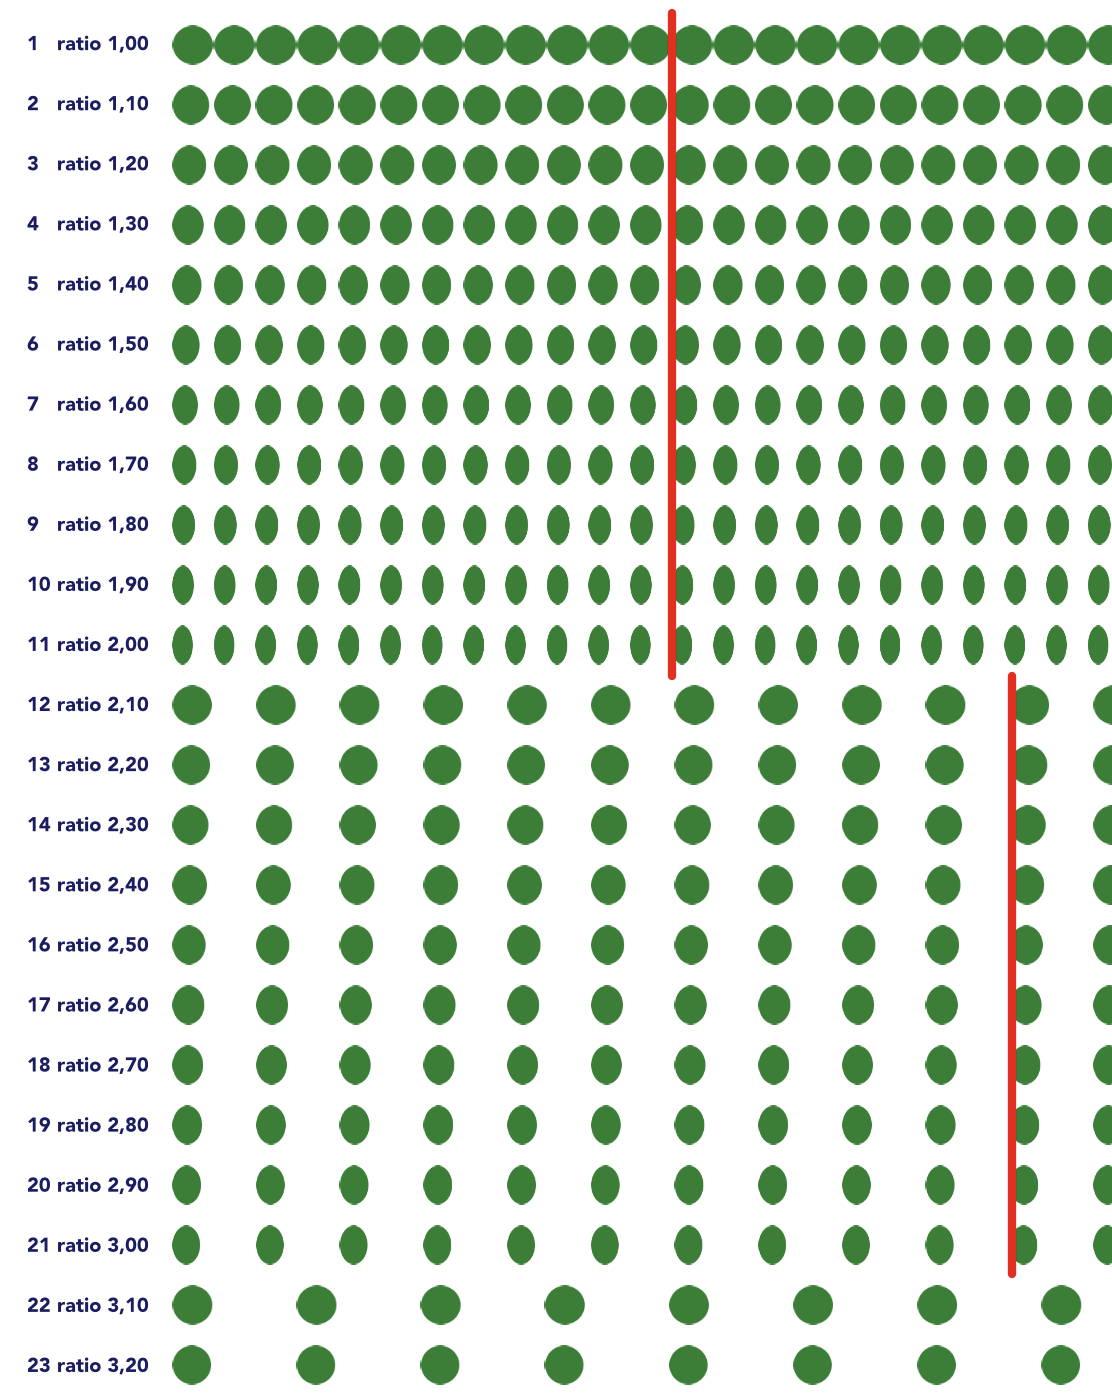
TL-DR: Textured Intensity Brushed act weird when using repeating patterns. There are work arounds. Do not create a source that is less wide than high, since it does not repeat. Mind the ratio beween width and height, because a lot of ratios cause deformation of the image used. Ratios that hardly show deformation are 1; 2,1; 3,1; 4,1; 5,1. Add black space above and under your pattern to get to a ‘safe’ ratio. I like working with custom made brushes. I love the Textured Intensity Brushes in Affinity Designer. Playing around with it I observed some unexpected behavior when using the Body: Repeat option. This setting is on the Brush panel that opens when you double click a Vector Brush in the Brushes Studio in the Vector Persona. I’ve seen a few other posts about problems with repeating patterns, mostly in the Questions section of the forum, so that’s why I put this here. But this is also a bug report. Now for the unexpected behavior. 1. Refusing to repeat If your source image's width is smaller than its height (e.g. W:120px; H:200px) the repeat fails, the pattern will be stretched, no matter what. From what I read in From what I read in https://forum.affinity.serif.com/index.php?/topic/62767-vector-brush-stretching-despite-choosing-repeat/ this problem has not yet been addressed. I tried working around it by repeating the pattern in the source image twice or more to make it wider that high. It works, but it brought to light other unexpected behavior (I’m fond of that term!). 2. Offset values don’t behave as expected Expected: when there’s no head or tail to the brush, offset values remain the default values as set by Affinity Designer on creation of the new brush. That is 0px for the Head Offset and the width of the source image for the Tail Offset. Observed: the repeated part has seams, like an extra column of pixels is added in between the occurrences of the pattern. I’ve marked the seam with a red circle. I’d expect it to look like what is shown in the green square. Work around: to have a pattern repeat pixel perfect, set the Head Offset to 1px and the Tail Offset to width-1pt (if the source image is 180px wide, set the Tail Offset to 179px). Trade off is that there is now an extra column of pixels at the start of the line, see where the yellow arrow points at. A better work around for sources with a relatively small width: have 3 repetitions in the source and define the first repetition as head and the last one as tail. So if the source image is 240px wide, set Head Offset to 80px and the Tail Offset to 160px. Now the numbers make sense. 3. Elements of the pattern get squished The first work around from problem 2 lead to experimenting with the ideal number of repetitions in the source image. I spend many lonely nights creating tests sets of patterns, counting repetitions on grids and creating spread sheets filled with the height width ratios of patterns. That sounds dramatic, but I was actually immensely enjoying myself. I like a good puzzle. I’m not the only one who noticed something was off. @LionelD started this thread: https://forum.affinity.serif.com/index.php?/topic/98456-textured-intensity-brushes-on-ad-ipad/. But it’s not about deformation to fit a curve. Of course you’d have deformation on a curve. But there’s also deformation of the pattern on a straight line. I observed that the amount of deformation varies with the ratio between width and height. Of course with a repeating body you’d always have to squish the repeating part a bit to fit it on a line that is not exactly a round number of times the length of the repeating part. But when a line is long enough, one might expect it to even out a bit. Well, it does not. I made test lines of 7200px and brush sources from 80px to 800px wide, incrementing in steps of 80px. The source format fits 90, 45, 30, 22,5, 18, 15, 12,86, 11,25, 10 and 9 times when applied to the line using the source file’s height as the Brush Width. Those are nice round numbers in 7 out of 10, but it does not help. It’s not the line length, it’s the width height ratio. By the way, the deformation and the refusal to repeat from problem 1 already reveals itself in the picture of the brush in the Brushes Studio. Now a ratio of 1 (same width and height) gives hardly any deformation: W:240px; H240px works and W: 427px; H:427px also works great. Another ratio that seems to work is W:800px; H:150px (ratio is 5,33). Other ratios I tried are off. They are off in varying degrees. Sometimes they are very off, 1,6 is a very bad one, as is 2,0. Next step was to observe what happens when the ratio is increased in small steps. I created a test source image of W:200px; H:200px and then 10 more, increasing the width in steps of 20px. So that is a series of ratios: 1,0; 1,1; 1,2 ... all the way to 2,0. I created 11 brushes. The 1,0 was looking very good. 1,1 a bit less and with each step the image got more squished. Actually, the sources all were squished into the same amount of space. Now there’s a pattern! The pattern of the W:400px; H:200px (ratio 2) brush got squished into a box of half its width! I had already tested ratios larger than 2, and at some point in the higher numbers found ratio’s that also looked pretty good, like 5,33. Another series 2,1; 2,2; 2,3 ... 3,0. Remember: 2,0 was squished to half its width. But 2,1 looks great! And from 2,2 it is getting worse and worse ... 3,0 looks the worst. Another series 3,1; 3,2; 3,3 ... 4,0. Now 3,1 looks great again! And 3,2 looks less great and ... well, it gets worse and worse going to 4,0. But 4,0 is less deformed than 3,0 and 3,0 has less deformation than 2,0. Conclusion: ratio 1 looks good, round numbers >1 go bad and a width just over the round number looks good. Next question: how much over the round number would work? Let’s see what happens if I create a pattern with a ratio 5,01, W: 1001px; H:200px. Hmmmm, interesting ... it’s a bit squished. Not very much, but notably. 5,1 is doing perfect, 5,0 is as much off as one would expect it to be off. So there seems to be a sweet spot near 0,1 past the whole number. By now I pretty sure what causes this problem. There’s a rounding error somewhere in the creation of the repetition. I’m not sure where exactly this happens, since I’m not familiar with the way this was programmed, but I know a rounding error when I see one (I’ve always wanted to say that!). Trust me, I’m a coder. I know how to err. For me I’m a near as I can get to creating patterns that look good in a Texture Intensity Brush. I’d advise the people at Serif to take a good hard look into the math used to create repetitions. I’ve added a brush file and a project file to this post. The work around This is how to create a repeating pattern with hardly any deformation: create something beautiful jot down width and height and calculate the ratio (width / height: e.g. 540/200=2,7) now find the previous value that fits to #,1 (so if your ratio is 2,7, go to 2,1) divide width by found value and you have a new, slightly higher height for the background (540/2,1=257) create a black rectangle (W:540; H:257) and put it behind the pattern, align the horizontal centers of the image and background select the background, export the selection with background to a png use the png to create the new brush set your offsets and such and set the Body value to Repeat When you look closely, you’ll quite often see that even the ‘good’ ratios (1; 2,1; 3,1; 4,1; 5,1 ...) deform a little bit. Just a few percent, but still ... But that’s normal. They have to fit a round number of times on the line. Now, there’s loose ends to this long story, for instance what happens in the ranges 2,0..2,1; 3,0..3,1 and so on? And why does sometimes the repetition on the screen shift on changing zoom levels? I spend some free time on this puzzle, over a period of weeks. Every week when I had diner with a friend of mine I updated her on my findings. She offered suggestions and we grumbled about the funny quirks of the applications we’re using. So now, if you ever see two middle aged, greying ladies talking over a meal: this is what we’re gossiping about. I use a MacBook Pro (13-inch, 2018, macOS) and Affinity Designer 1.7.3 test patterns repeating TIB.afbrushes test patterns repeating TIB.afdesign
-
Hi! I'm very new to Affinity, but so far enjoying it as an alternative to Procreate. I bought a set of brushes and I've had no problem installing one, but I can't seem to import the other 3? When I go to import and select my file (no problem doing this, it says its downloading) it doesnt import and goes back to the automatic pre-installed pen section. Can anyone help please?! Thanks :)
-
 I'd like a brush category "Recently used" on top of the list that automatically shows the ten (number could be configurable) most recently used brushes. Would make it much easier to switch between brushes of different categories. Alternatively (or additionally ) a category "Favourites" would be nice, to easily find frequently used brushes.
 -
 Hi everybody, I'm new in using Affinity Photo to draw... and I'm also not familiar with professional words in English so please excuse if I'm not good in explaining.I've started using Affinity Photo to draw and I think the set of brushes available do not exactly suit to my way of drawing. I often draw with a feather-like way, making my strokes be sometimes fine, sometimes broader. None of the brushes are close to that. I've seen there is a pack of "Neptune Illustration Kit" with etching style brushes and these may be closer to what I'm looking for. But I see these are for "iPad" only... (?) Isn't it possible to use them on a Wacom Cintiq pro "pad or tablet" (I'm not sure this is called a pad?) I use mu Cintiq linked to an Apple Mac. I there a way I could get this (Neptune) set of brushes or brushes of the kind (sort of feather drawing way)? I'd be so delighted to use these. But would not download if I'm not sure I can use with my Cintiq and it's "pen". Thank you very much! Zamfyr (French illustrator)
 -
Hello guys, I’m writing because even though I’ve uploaded the new version of Affinity Photo on my IPad (1.7.3), I’m still not able to upload brushes of any kind. What can I do to solve this problem?
-
 Hi, I'm not sure how this happened, whether it was a keyboard shortcut I inadvertently hit in Photo, or something else. The brushes I use the most no longer rotate as I draw along (for example) a silhouette; they just stay in one position. The brush tip has also become a ring instead of the shape of the brush, which I don't like at all. I have tried to figure it out on my own, but so far I haven't been successful in fixing either of these problems. I'm hoping someone knows how to fix this as I can no longer do my work. As a last resort, I'll be uninstalling and reinstalling, but I'm hoping to avoid that if I can. Thanks.
 -
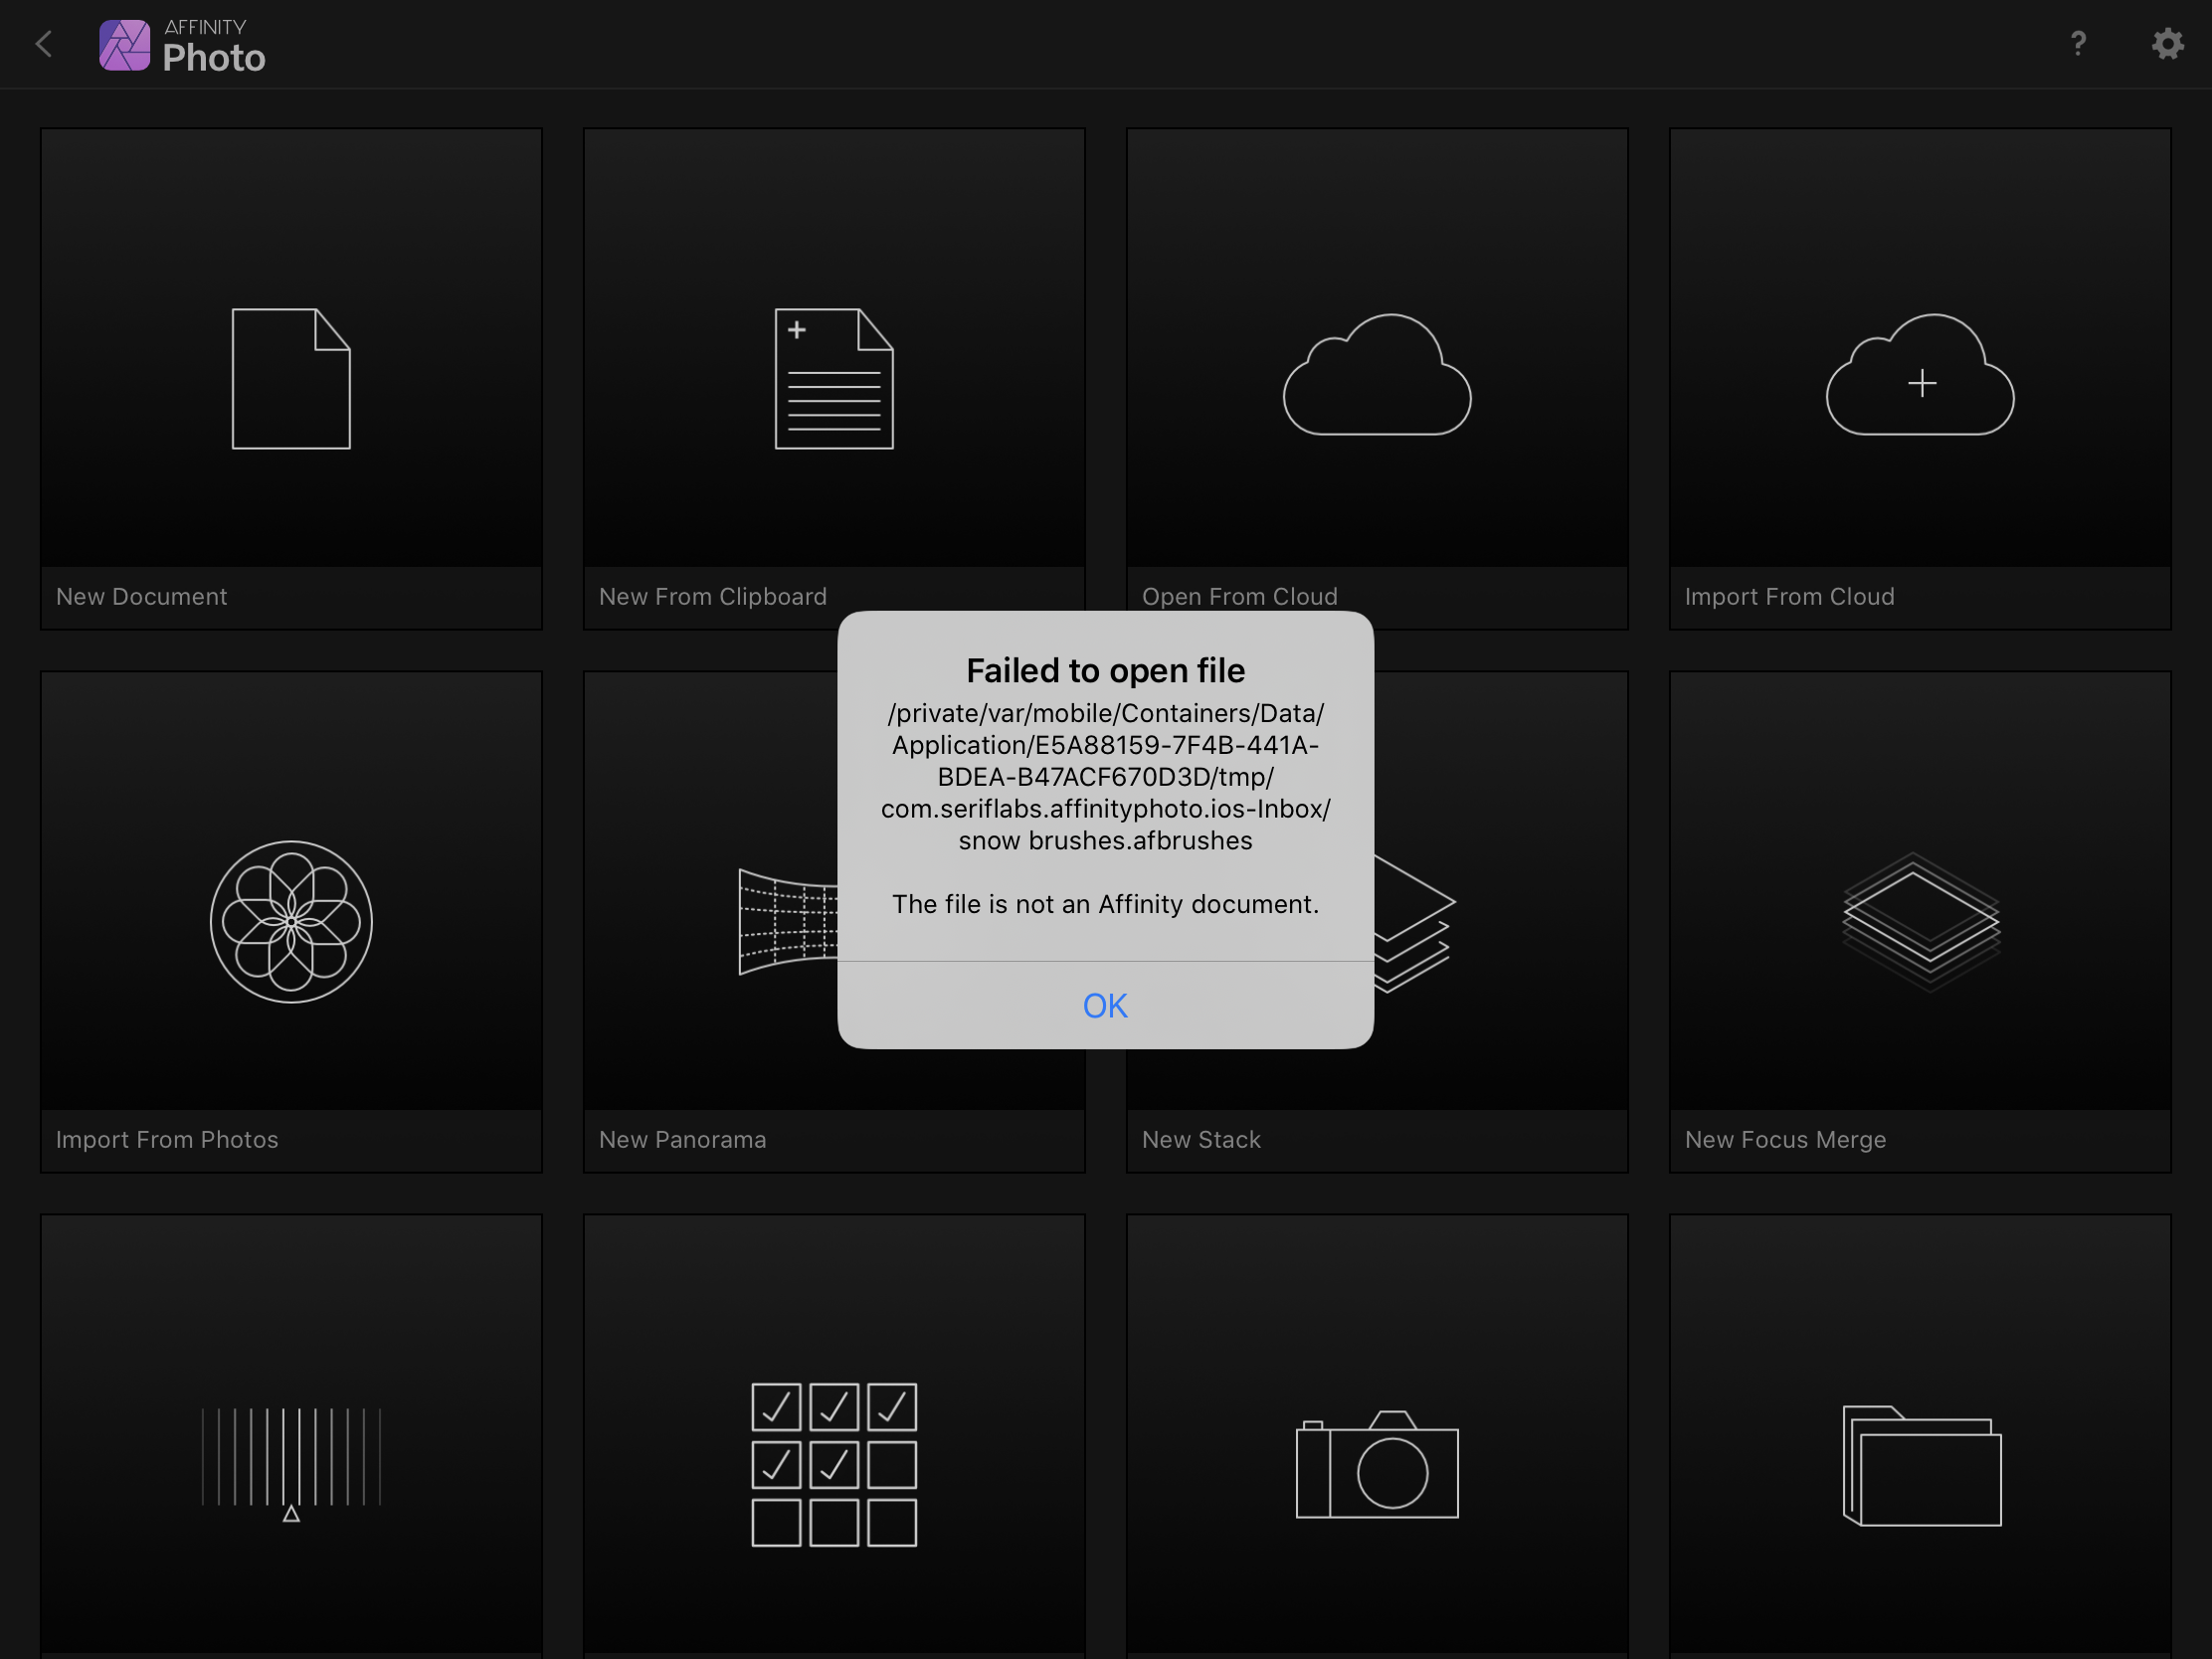
.thumb.jpg.476987bfdc608a922f362e0188703fe0.jpg) Hallo zusammen, in Affinity heißen alle Pinseldateien *.afbrushes, wie erkenne ich die Designer-Pinsel für Konturen, von den Pixelpinseln. Ich habe mehrere *.afbrushes Dateien in einem Ordner von denen einige für Affinity Photo sind und ein paar für Affinity Designer, wie kann man diese auseinander halten, oder hilft da nur ausprobieren? Bekommt man eine Fehlermeldung wenn man die falsche Pinseldatei versucht zu importieren? Gruß Dieter
Hallo zusammen, in Affinity heißen alle Pinseldateien *.afbrushes, wie erkenne ich die Designer-Pinsel für Konturen, von den Pixelpinseln. Ich habe mehrere *.afbrushes Dateien in einem Ordner von denen einige für Affinity Photo sind und ein paar für Affinity Designer, wie kann man diese auseinander halten, oder hilft da nur ausprobieren? Bekommt man eine Fehlermeldung wenn man die falsche Pinseldatei versucht zu importieren? Gruß Dieter -
Just a Heads Up for those not aware of this Website (NOT MINE) created for All Things Affinity .https://affinity.graphics/
- 2 replies
-
- 4
-
-
- free
- commercial
- (and 8 more)
-
 So how I got this idea was I was trying to import some photoshop brushes and I realized some of the brushes had jitter and directional for example and I always wished I could have that in Affinity and there are many other combinations of dynamics that would be great. So the Idea is to Create a Brush dynamics Hierarchy where you can have direction and etc... etc whatever you'd like And I cooked this image up in an hour The plus sign is when you add the dynamics to its hierarchy, and you can change the percentage from the hierarchy window or from the dropdown that is attached, you can add a lot of brush dynamics to one. the number indicates how many have been added to the hierarchy (excluding the dropdown dynamics that haven't been added) the dropdown one that hasn't been added still effects the brush. Mostly they work top-down like templates you can sort, for example, if Random was 10% and Direction at 100% the random would add/subtract to the direction with a bit of jitter. Importing Photoshop brushes would have Direction at top and priority of what it can get from the brushes. Anyways I hope you guys like the idea
-
 There have been similar posts earlier, but as it seems like nothing much has happened, perhaps the topic needs a push? Anyway, it seems to be two general kind of illustrators when regard to having strokes and lines scaling with objects; the first kind is the methodical one, who prefers to build up the drawing first and adding brushes afterwards, which I guess is a natural technique developed from the early days of vector based illustration. Then you have illustrators like me, who are newer to the game and who finally learn vector through programmes like Affinity Designer on an iPad, using Pencil. It’s fast and smooth and intuitive and you can easily swap between vector and raster. That makes it very easy to draw almost like you would draw on paper. You thrown down a quick sketch in raster and continue in vector, adding quick brush strokes, varying the brushes etc. Finally, you add colours and might do some shading in raster as well. But then we have the problem with scaling with objects. For the first kind of illustrator it’s preferable that this is not on by default. For the second kind, it would be great if one could have it on by default. I think that vector illustration has developed a lot since the beginning and is still developing, thanks to the development of software and hardware. Therefore I think lots of people would have welcomed such an option in the preferences. It would have been enormously time saving.
 -
 character design 100% Vector for those that want to give it a little try, there is a Free vector brush with texture that you can download, thanks for watching
 -
Hello, Affinity community! The past few weeks had troubles importing brushes into affinity photo or affinity designer. The new update has fixed the problem for the designer. For the affinity photo, the problem stays the same. The program gets hung up while importing any brush. Please help. Thanks Gyan
-
I'm a big fan of the liquify persona, one thing I would like is to have a rectangular or bar brush. When moving a far or body having a circular brush is not easy to operate on most things. It would work much better if a bar that can be rotated as needed was used to push the pixels rather than the round brush.
- 1 reply
-
- 4
-
-
- affinity photo
- liquify
- (and 1 more)
-
 [Designer/Desktop/Mac] Hi I've been working for some time on a large document containing many artboards (a picture book). Suddenly today all pixel brushes are invisible (history is clocking strokes). Using pixel layer, alpha unchecked, opacities fine etc... I followed tips from similar issues I found in the forum, and have done a full settings reset. No change. Can't use pixel brushes in this document. If I create a new document brushes seem to behave as normal. Any help would really be appreciated as I really can't see anything different to how I usually work. Thanks
 -
 Hello everyone! I've purchased and downloaded from the Affinity Store the following brushes: Blast Powder Brushes by Ian Barnard DAUB® Watercolours & Washes which are supposed to be compatible with both Affinity Photo and Designer. They appear in Affinity Photo but NOT in Designer. I go to Brushes > Import Brushes and choose the right files. A window then appears, saying the "Brushes imported successfully". I've done this more than once and every time a number is added at the end of the brush-set name like it already exists and is being added more that once. In the image I attach you can see the 6 in the end meaning I tried 6 times to add the specific brush set but it is still not showing up in my Brushes. Is anyone facing the same problem? Thanks in advance!
-
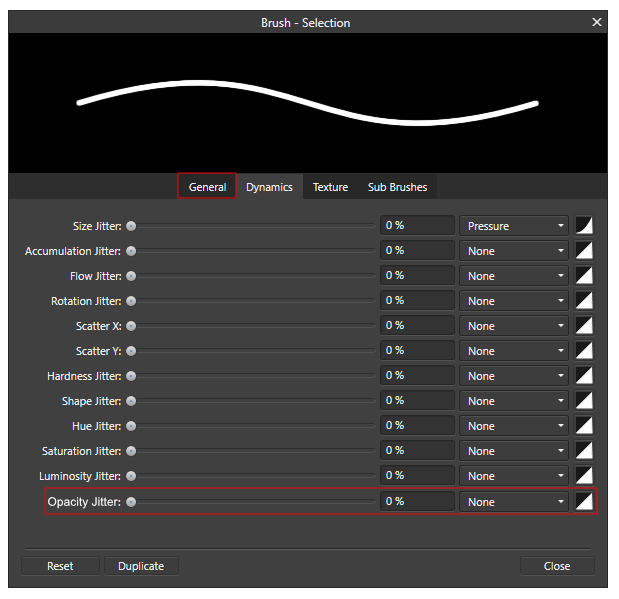
 I love Affinity Photo for editing photos, 3D renders and also be able to do some digital drawings. Recently, I have really noticed that I could really use an opacity slider in the Dynamics tab for brushes. It is now usually a standard for Image editing softwares and digital drawing software to have pressure sensitivity levels on opacity for brushes and I would think this one thing could make the software a lot better for photo editing and also make painting on Affinity photo very viable. It would also be nice if the normal Opacity slider was also in the general tab as well. These are just some quick screenshots that I took of the brush settings and just edited it to show what it could look like. I really hope "Accumulation" will be renamed to Opacity or the Opacity slider getting renamed to "Accumulation" . EDIT: I noticed Accumulation does do similar or the same thing to Opacity but whenever I would change the Accumulation in the brush editing, it would not effect the "Opacity slider" in the context tool bar making me very confused. I also think it would really really nice if there was "global pressure sensitivity settings" in maybe like the preferences and it would be just like a pressure sensitivity curve that can be set.
-
 HI, I have a mac mini and tried to import the TB DOT Set. I read the message that the pack is imported succesfully but I can't see them in my brushes. Thanks fro any help
 -
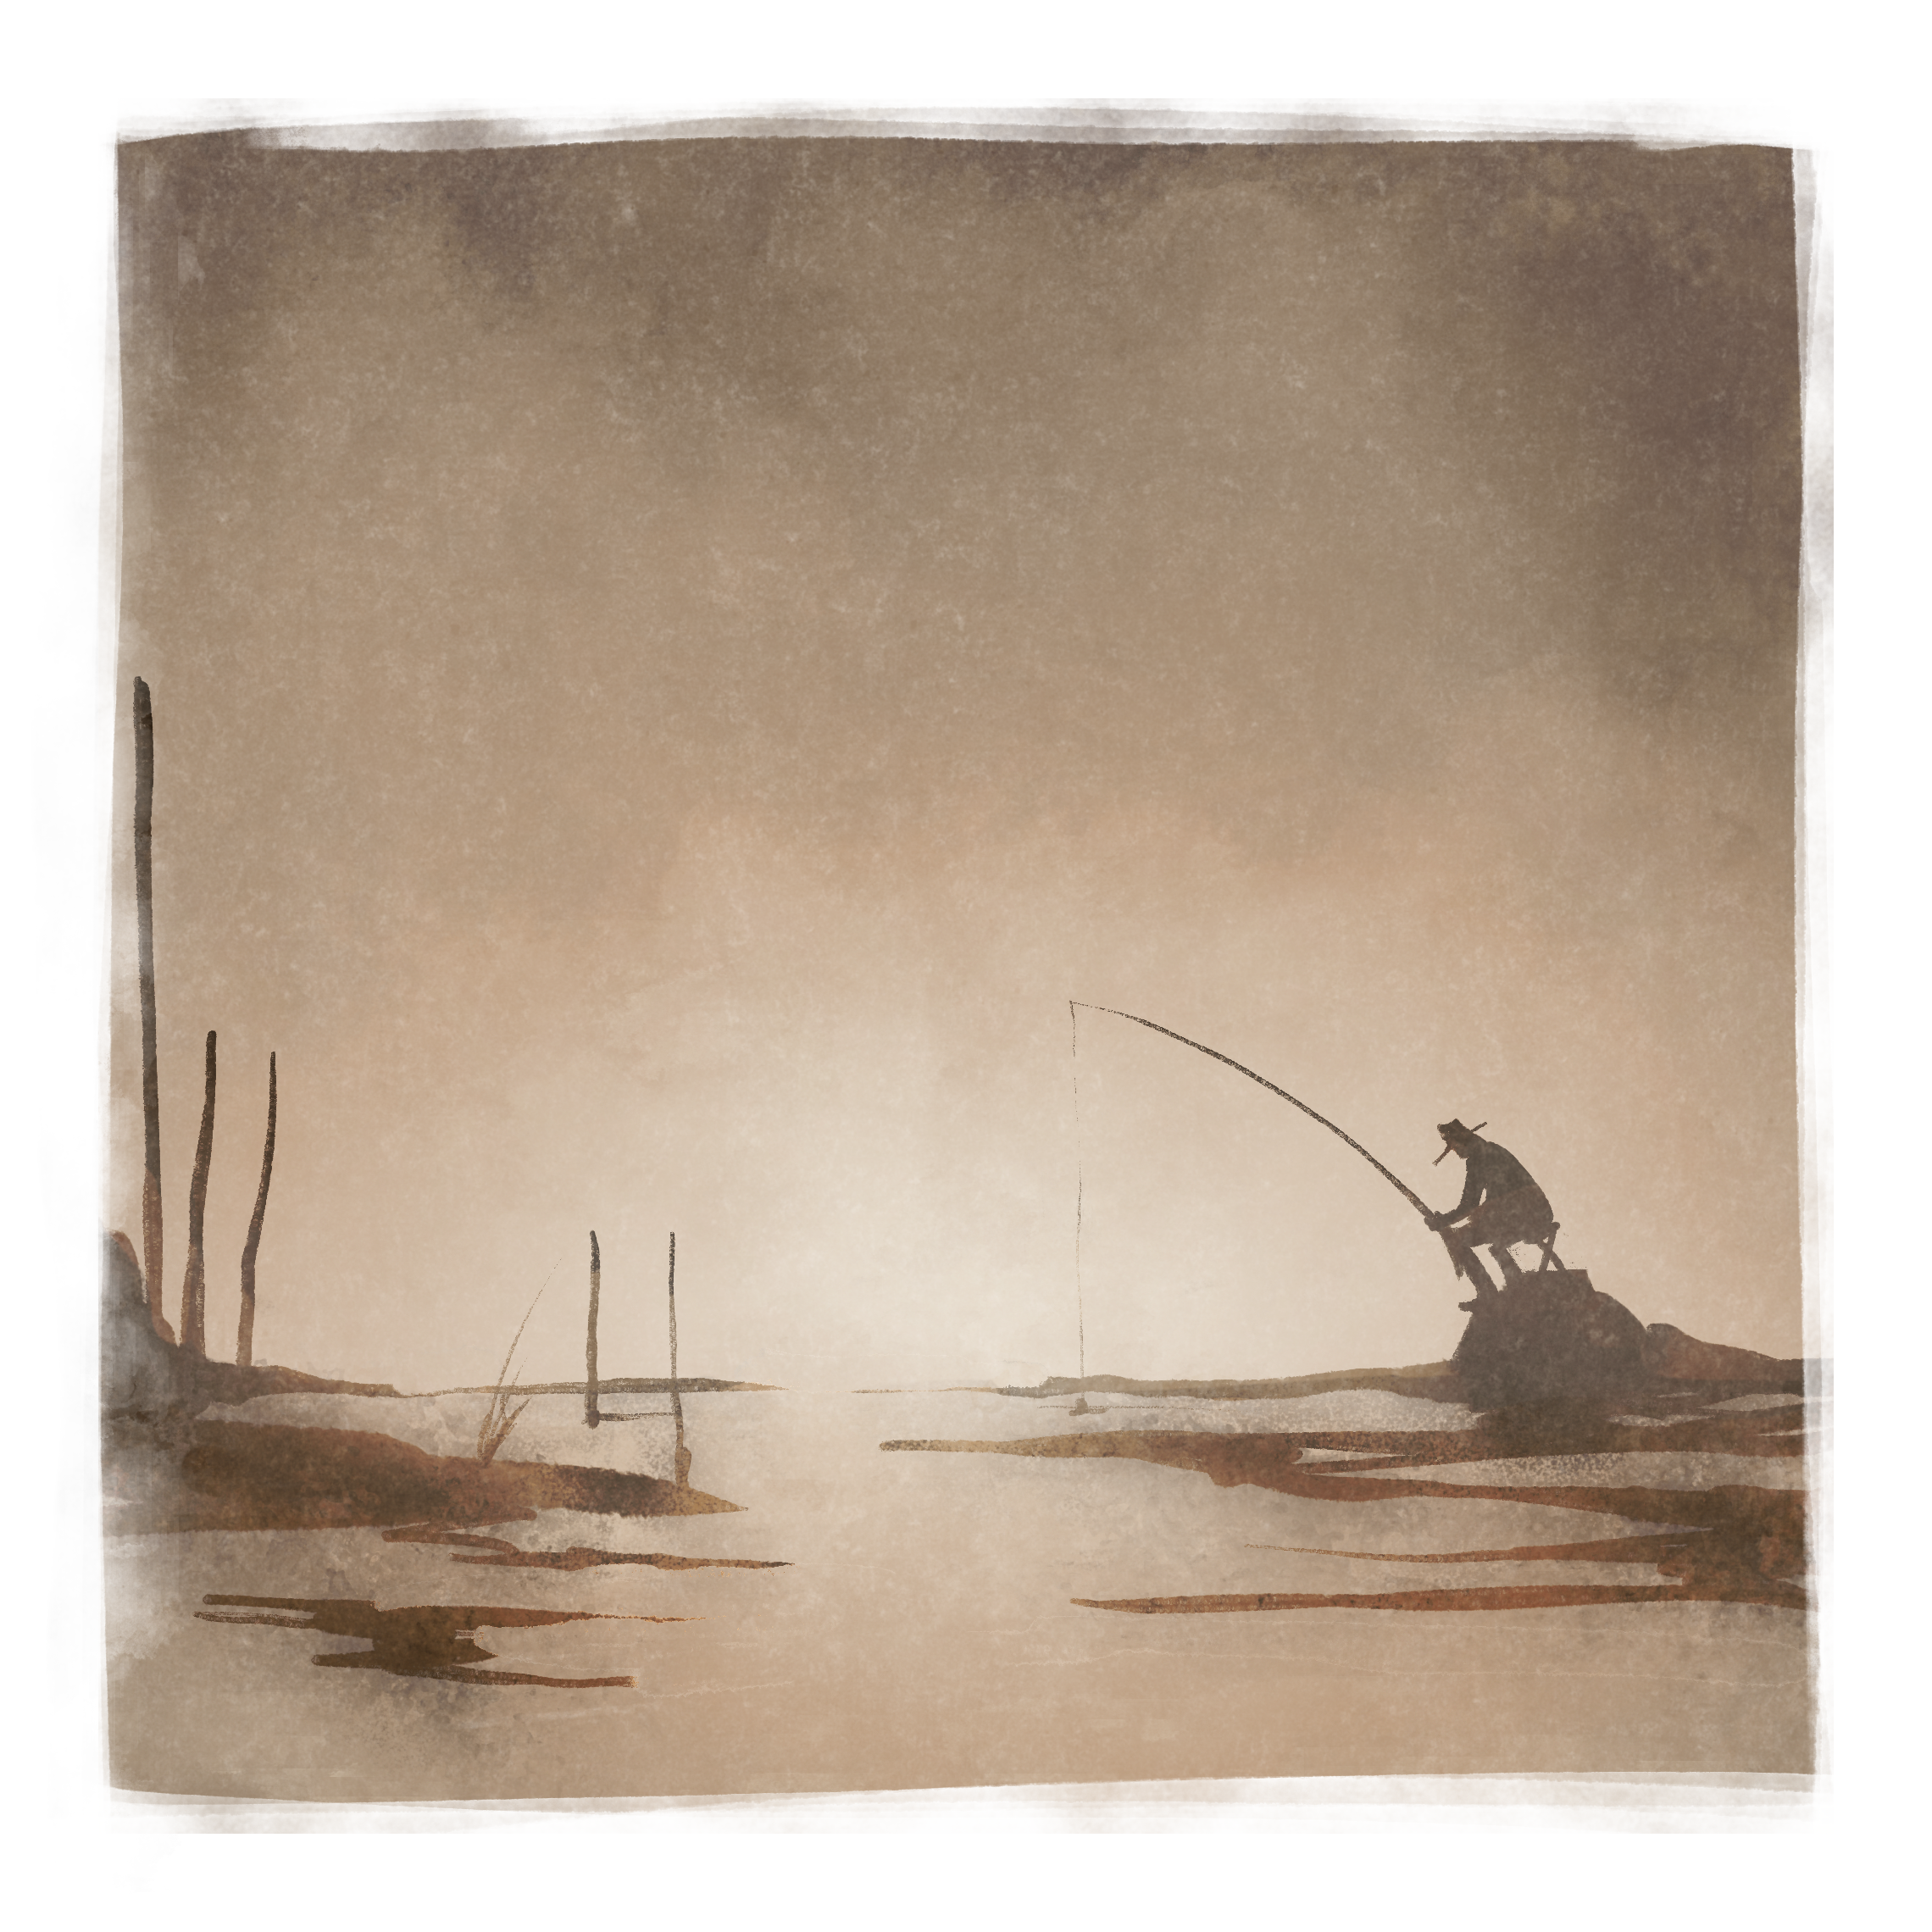
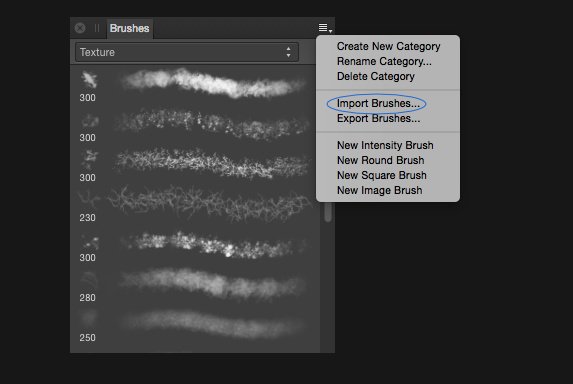
FREE DAUB Blender Brush Set December 21, 2015 12 awesome blender brushes from DAUB – completely free! This FREE blender set has been created especially for Affinity Photo – but you can use them in Affinity Designer too! This blender set allows you to mimic blending techniques and media in Affinity Designer and Affinity Photo with brushes such as watercolour, dry sponge, sponge on canvas, wet sponge, oil, plus much more! Paolo from DAUB, has created this sample illustration too to show you what you can do with them… How to install your free DAUB Blender set in Affinity Photo • Drag the DAUB Blenders.afbrushes to Affinity Photo OR • Use the Import Brushes… function found in the Brushes Panel You will see this dialog box when your brushes are successfully installed: We hope you enjoy them and would love to see what you create in the usual places! daub-blender-set.zip
-

styles brushes and more FREE STUFF~! Posted on Affinity Graphics
LyricsGirl posted a topic in Resources
A heap of my stuff- Styles Images and more Fantastic FREE stuff from the site Hosts and other members! https://affinity.graphics/
-
 Hello I'm using a drawing tablet (Huion 950p) and I want to increase my brush size without using [ or ] because there isn't a possiblity to change the brush size individually. Now there is another option, the alt + rmouse + left mouse, but as you can may guess, that's very complicated to do with a graphic tablet. Huion's driver doesn't give the possibility to use rmouse and lmouse on the same button. So is there a way to change the hotkey alt + rmouse + lmouse to only alt + rmouse? Kind regards Andy