Search the Community
Showing results for tags 'affinity Designer'.
-
 I have looked through the forums, the support pages, and watched a couple YouTube videos, but I haven't found the best method of accomplishing my task. In summary, I want to take a .jpeg image, and cut out the background of spaces outside the image, and inside the image. Then I want to export to SVG. I want the background of all the spots I've cutout to be transparent. With the methods listed below, my image cutouts are not transparent on the exported SVG. My image is a case. sample.afdesign is attached. I am using Affinity Designer V2 at the moment because I found the most documentation and methods around using this software. The methods I have found and tried are. using the pen tool to draw around the case, give the curve a fill, and then from the layer drop down I made it an erase layer. Visually it looks to do the job, but the exported SVG does not show that area cut out. I tried the Pixel Persona selection brush tool to select the portions of the background that differed from the black of the case. That seemed to work well until I got to the portions of the image where the background was very similar to the case. I had to touch up the edges / stroke with the eraser brush to remove the boarder. I found that I can use the pen tool to make a shape of a section that I want to cut out, choose invert selection to get the piece I want, but I am not sure what to do with it from there. From what I am reading, I feel like a need a method of making the shape of the area I want to cut out, make a mask, then delete the mask. Or flatten the mask and the image I am working with. I don't completely understand the usage of a mask, so I am trying to figure that out as well. If it helps, in the past I used fireworks to accomplish the task with the pen tool, converting that to a marquee, cutting out whatever was within the marquee, and making another shape. I refuse to go back to that. I bought the whole Affinity suite, so if another tools is more efficient I can go that route as well. Thanks in advance for any help. sample.afdesign
 -
Hi When I look for a typo sometimes affinity gets stuck on the color wheel, I need to force quit the application, then lost my work and my time. But the biggest issue is Affinity designer get totally lost after that looking for a License... I need to come here see if there is a solution, I think I try to disable all my fronts to relaunch but its really lot of time lost. Don't know what your software is checking but blocking the starting I not a good idea, I need to work. Please can you fix this issue Its not the first time happen. I am on M3Pro with the last infinity update I use standard Google Font activabled by Typeface, Thanks

-
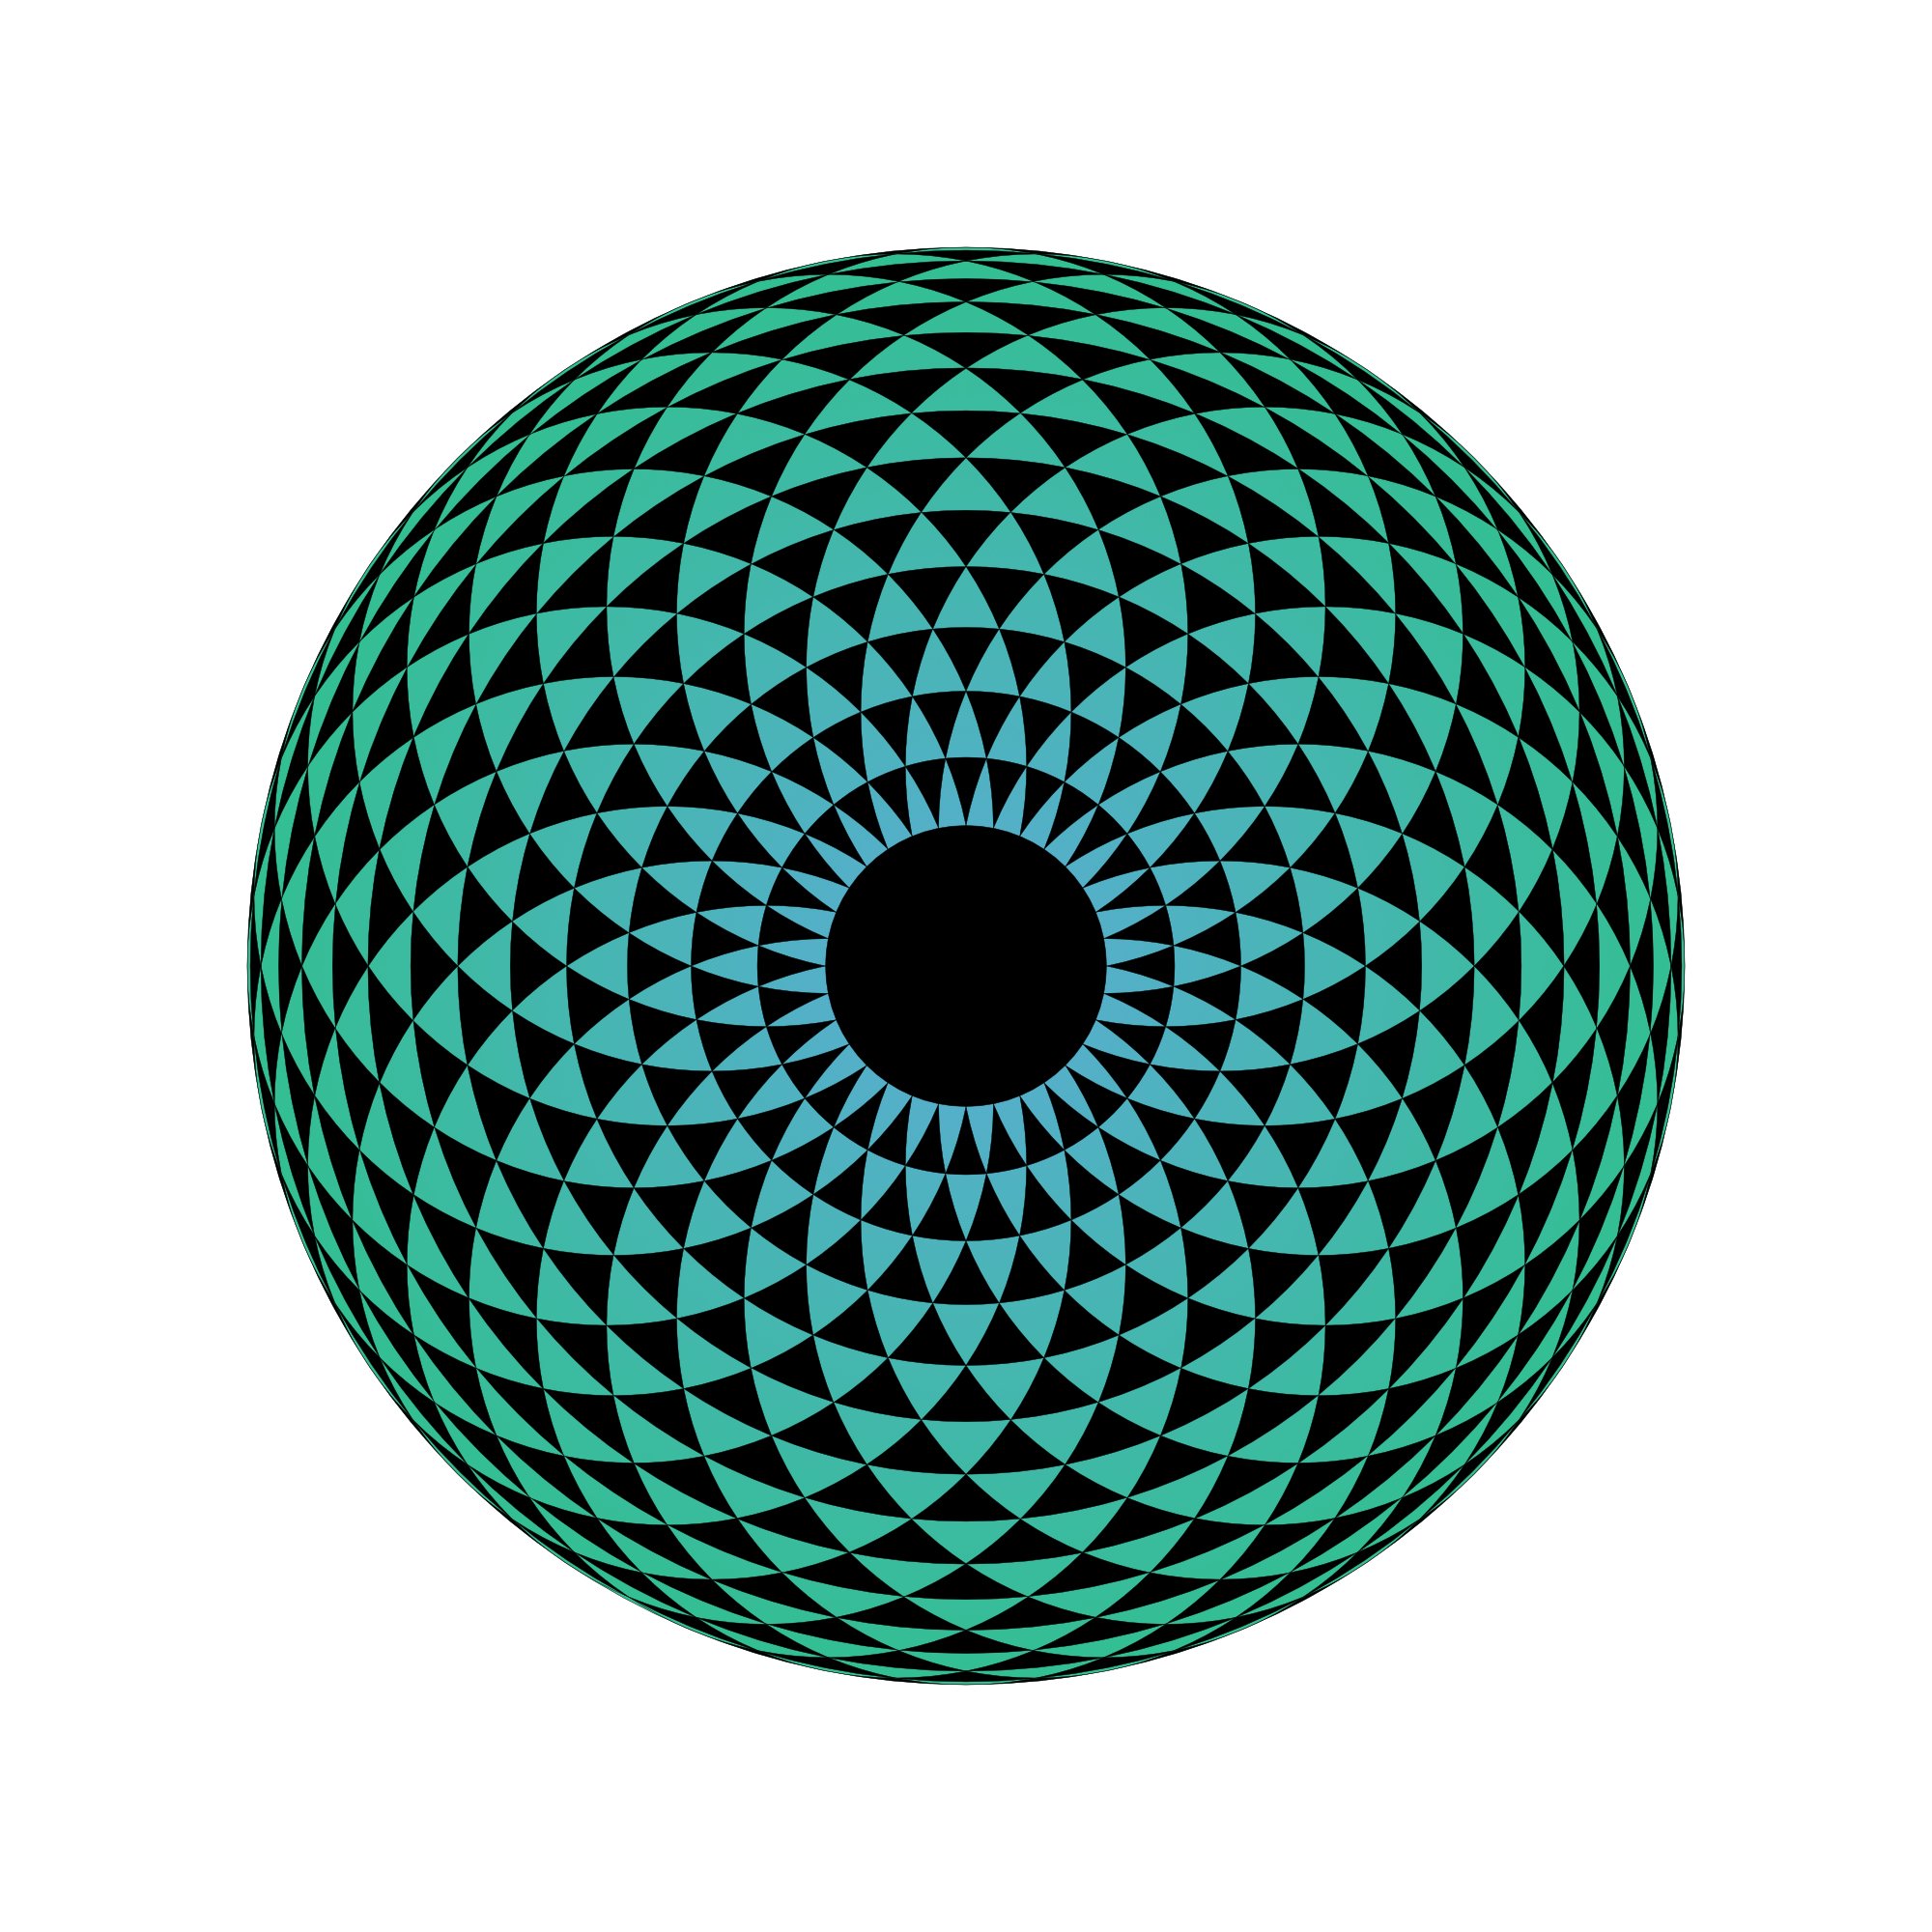
 Hi everyone, and happy Easter! I record this tutorial on how to draw a Torus Eye mandala in Affinity Designer. I hope you guys find it interesting.
-
- 3
-

-

-
- affinity designer
- torus
- (and 3 more)
-
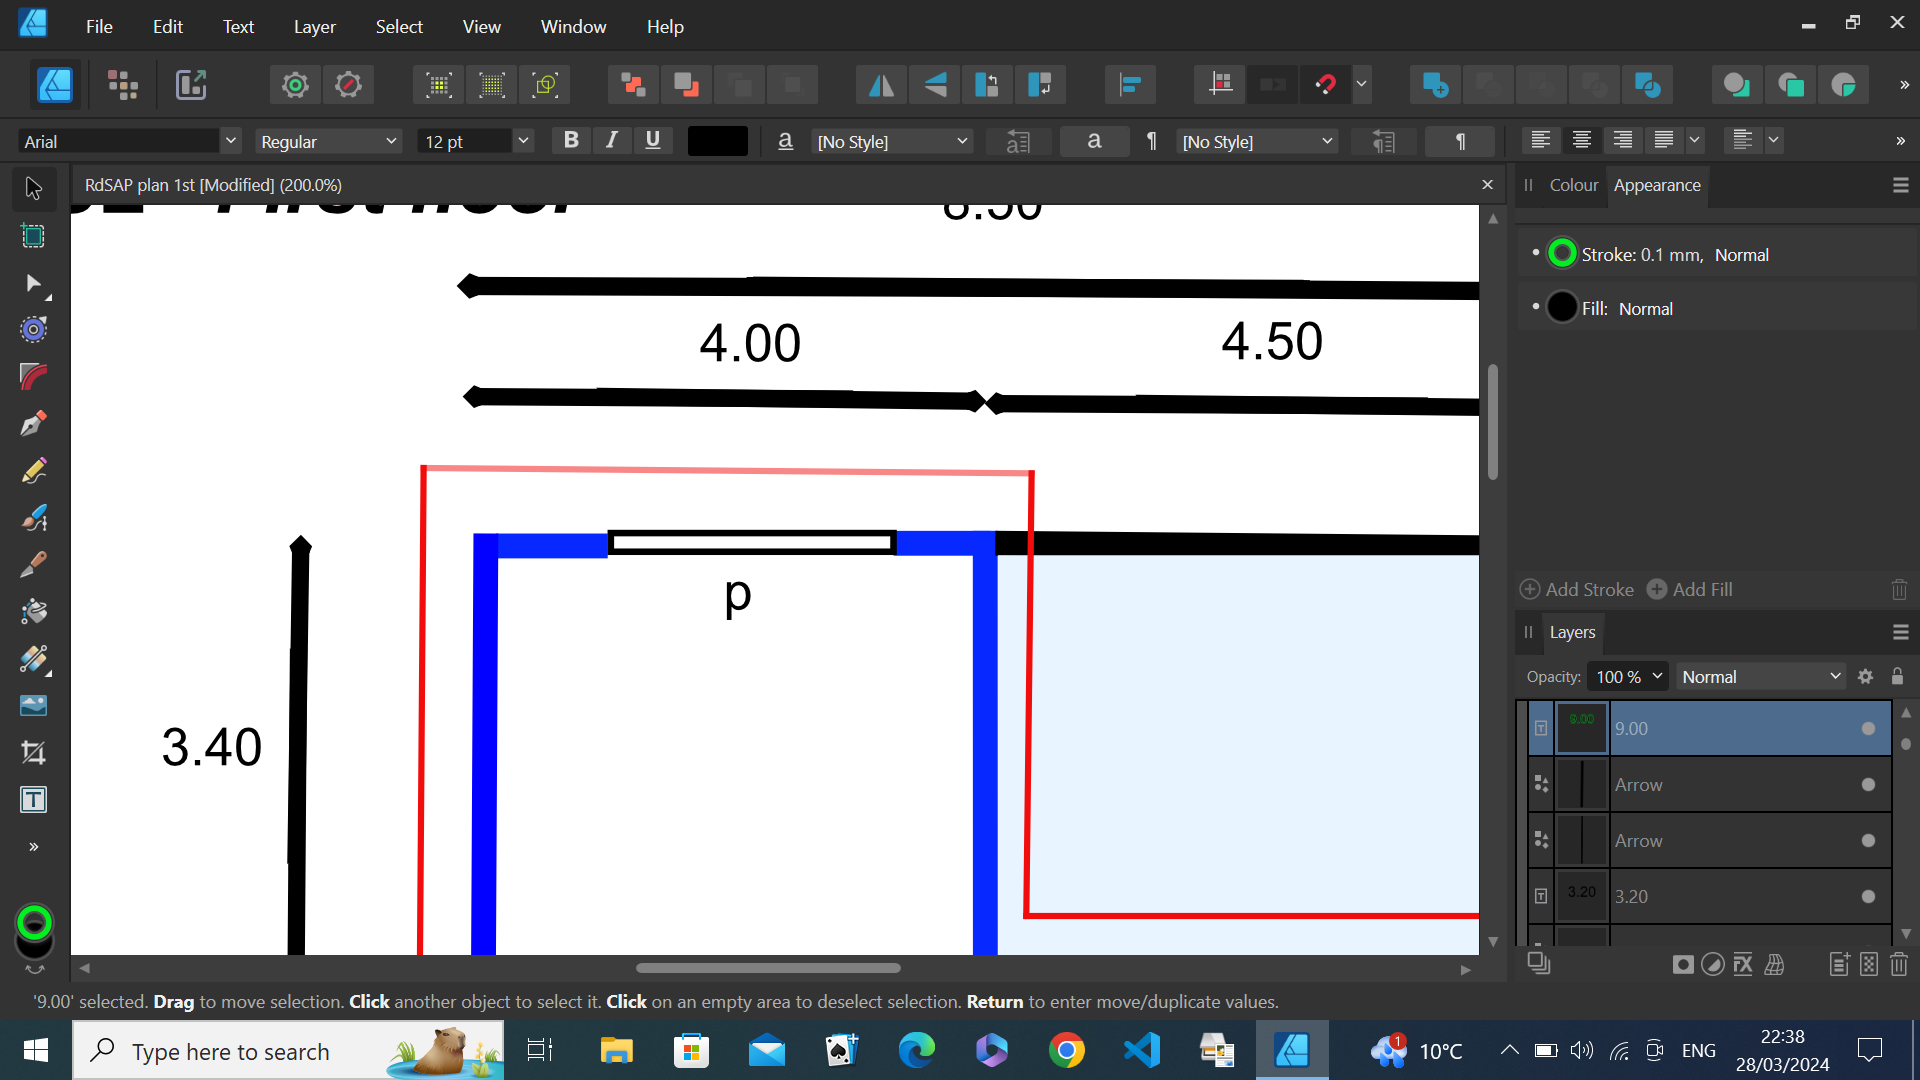
 I am new to Affinity designer and am strugling to get used to it. I am trying to export a floorplan to pdf but the corners on the straight lines are missing in the pdf file. (i've attached a copy of the pdf and screen print from affinity). The lines were originally individually drawn. I then tried ?snapping where I stopped changed direction and carried on. Neither resolved the problem. I've also watched an old Affinity video for drawing plans. I couldn't find a solution. There is a red line around the outside of the walls. I tried deleting them and re exporting but got the same result. Is there a way around this? RdSap plan 1st.pdf
-
 Hello! I am currently doing my trial on Affinity and it has a lot of things I love using. On designer 2 that is. I have used inkscape before and am considering the leap here but one thing inkscape had that I love was a create snapping function. It was so easy to get anything into place with it able to line of up things at angles. Like if I have a half circle and a line and I want them to connect, it was so easy to snap them into place as the nodes hooked onto each other with a snap! Now I am trying the snapping function on Designer 2 and it does not do that as I keep trying. Given this is professionally made with more money behind I have a hard time believing the issue is the program, but the issue has to be me. So my question is, how do I turn it so I can make different objects line up up and snap in place more? Like this example and even more ones where the edges of objects, even strokes, snap into place against each other and so on. Am I missing something as I played around with it and it just fails and I am certain I am the dummy here. Thank you for your time!
 -
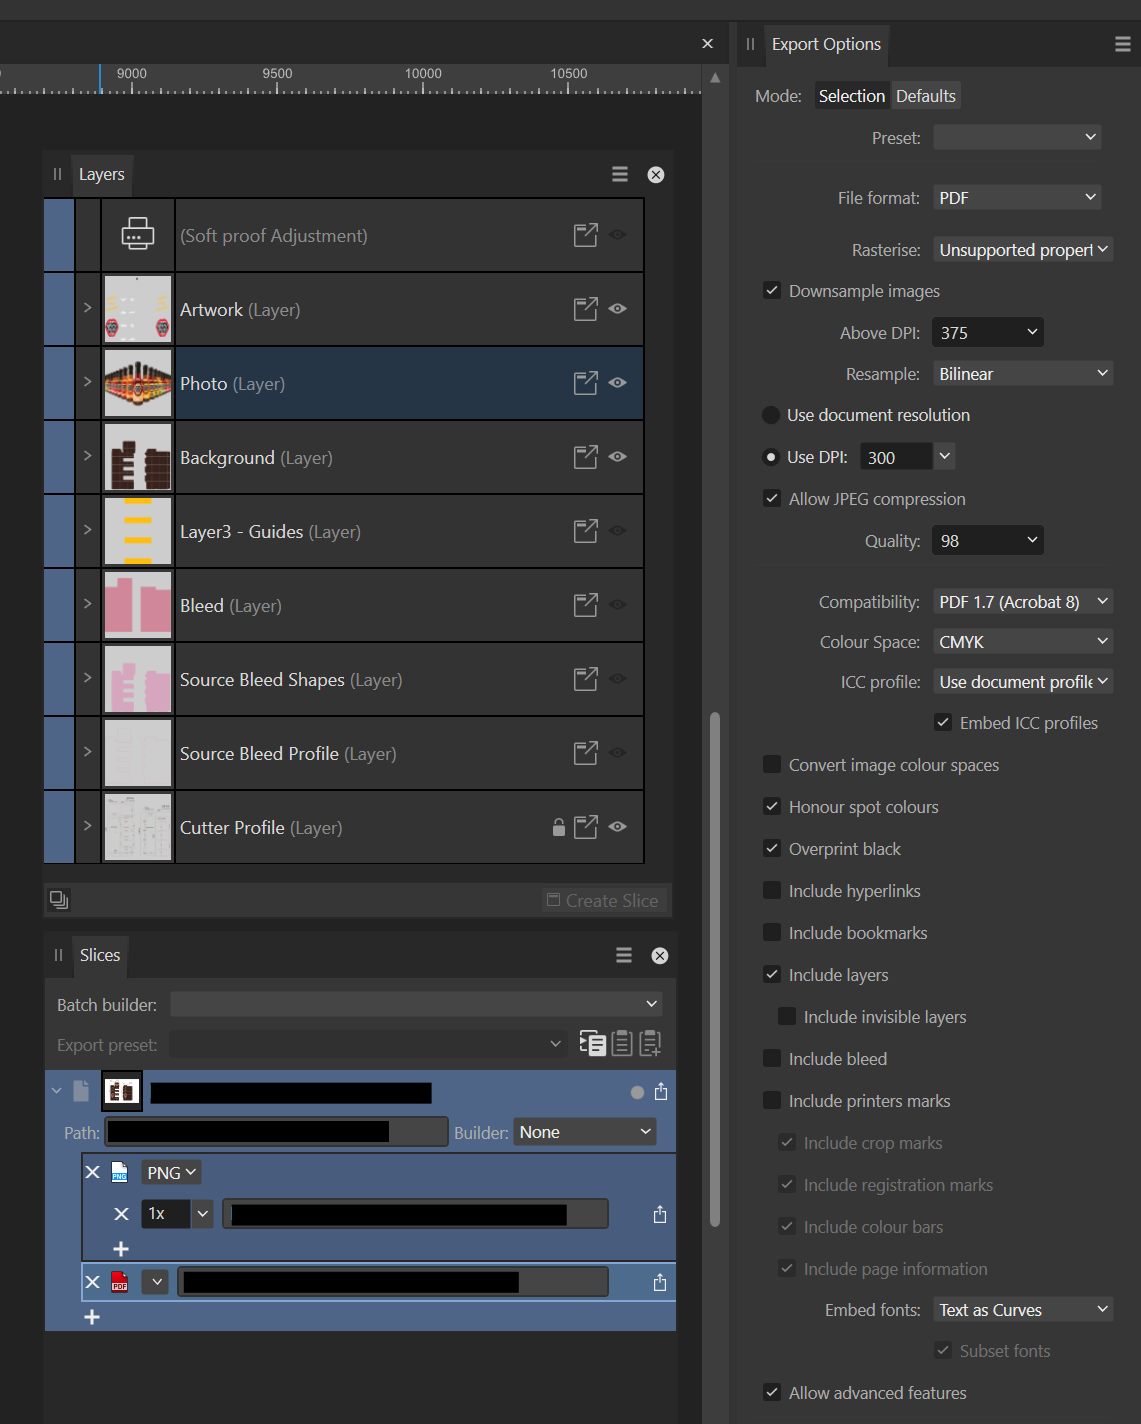
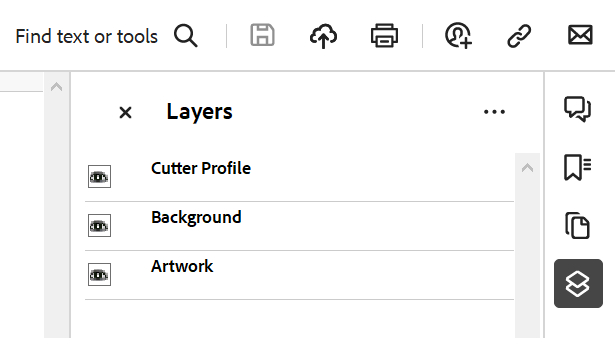
 Hi everyone, I'm exporting some artwork to PDF and I'm unable to export one layer as a layer. The results is that all but one layer export as expected and the contents of one layer appear at the top level and not as a layer. Here's the setup in Designer: And here is the result when opened in Acrobat Reader: The Photo layer is missing. The Photo Layer contents appear at the top level so this might not be a showstopper but I'm curious as to why it didn't export. Any thoughts?
-
With all the hype surrounding Canva's acquisition, let's not forget it's Easter. Have a great Easter. Made with Affinity Photo, assets from @v_kyr.
- 5 replies
-
- 8
-
-
-
- affinity photo
- affinity designer
- (and 1 more)
-
Hi everyone, I created this Torus-Eye mandala in Affinity Designer. It is really a labor of love, but I am satisfied with the result.
-
- 6
-
-
- torus
- torus yantra
- (and 2 more)
-
Authentically textured vector brushes for Affinity Designer, made from real crayon marks! Get our Wax Crayon Brushes FREE (plus other products) when you sign up for our newsletter. Find out more HERE! Your free download features: 40 high-quality realistic Wax Crayon Brushes Affinity Designer. A fully comprehensive instruction guide. Head to artifexforge.com and get them now! Head to artifexforge.com and get them now!
- 2 replies
-
- 2
-
-
- resources
- affinity designer
- (and 2 more)
-
 NEW TUTORIAL! - Learn How to Create a Neon Sausage Dog Design in Affinity Designer. Enjoy!
 -
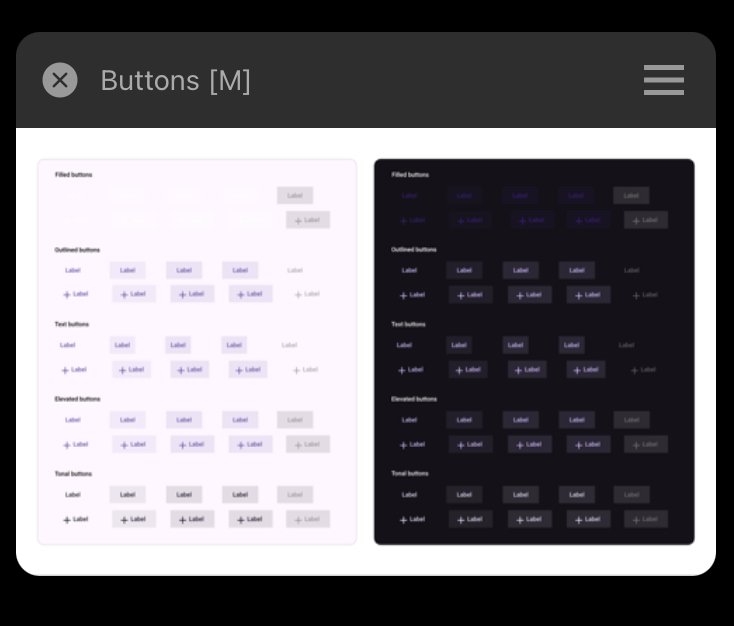
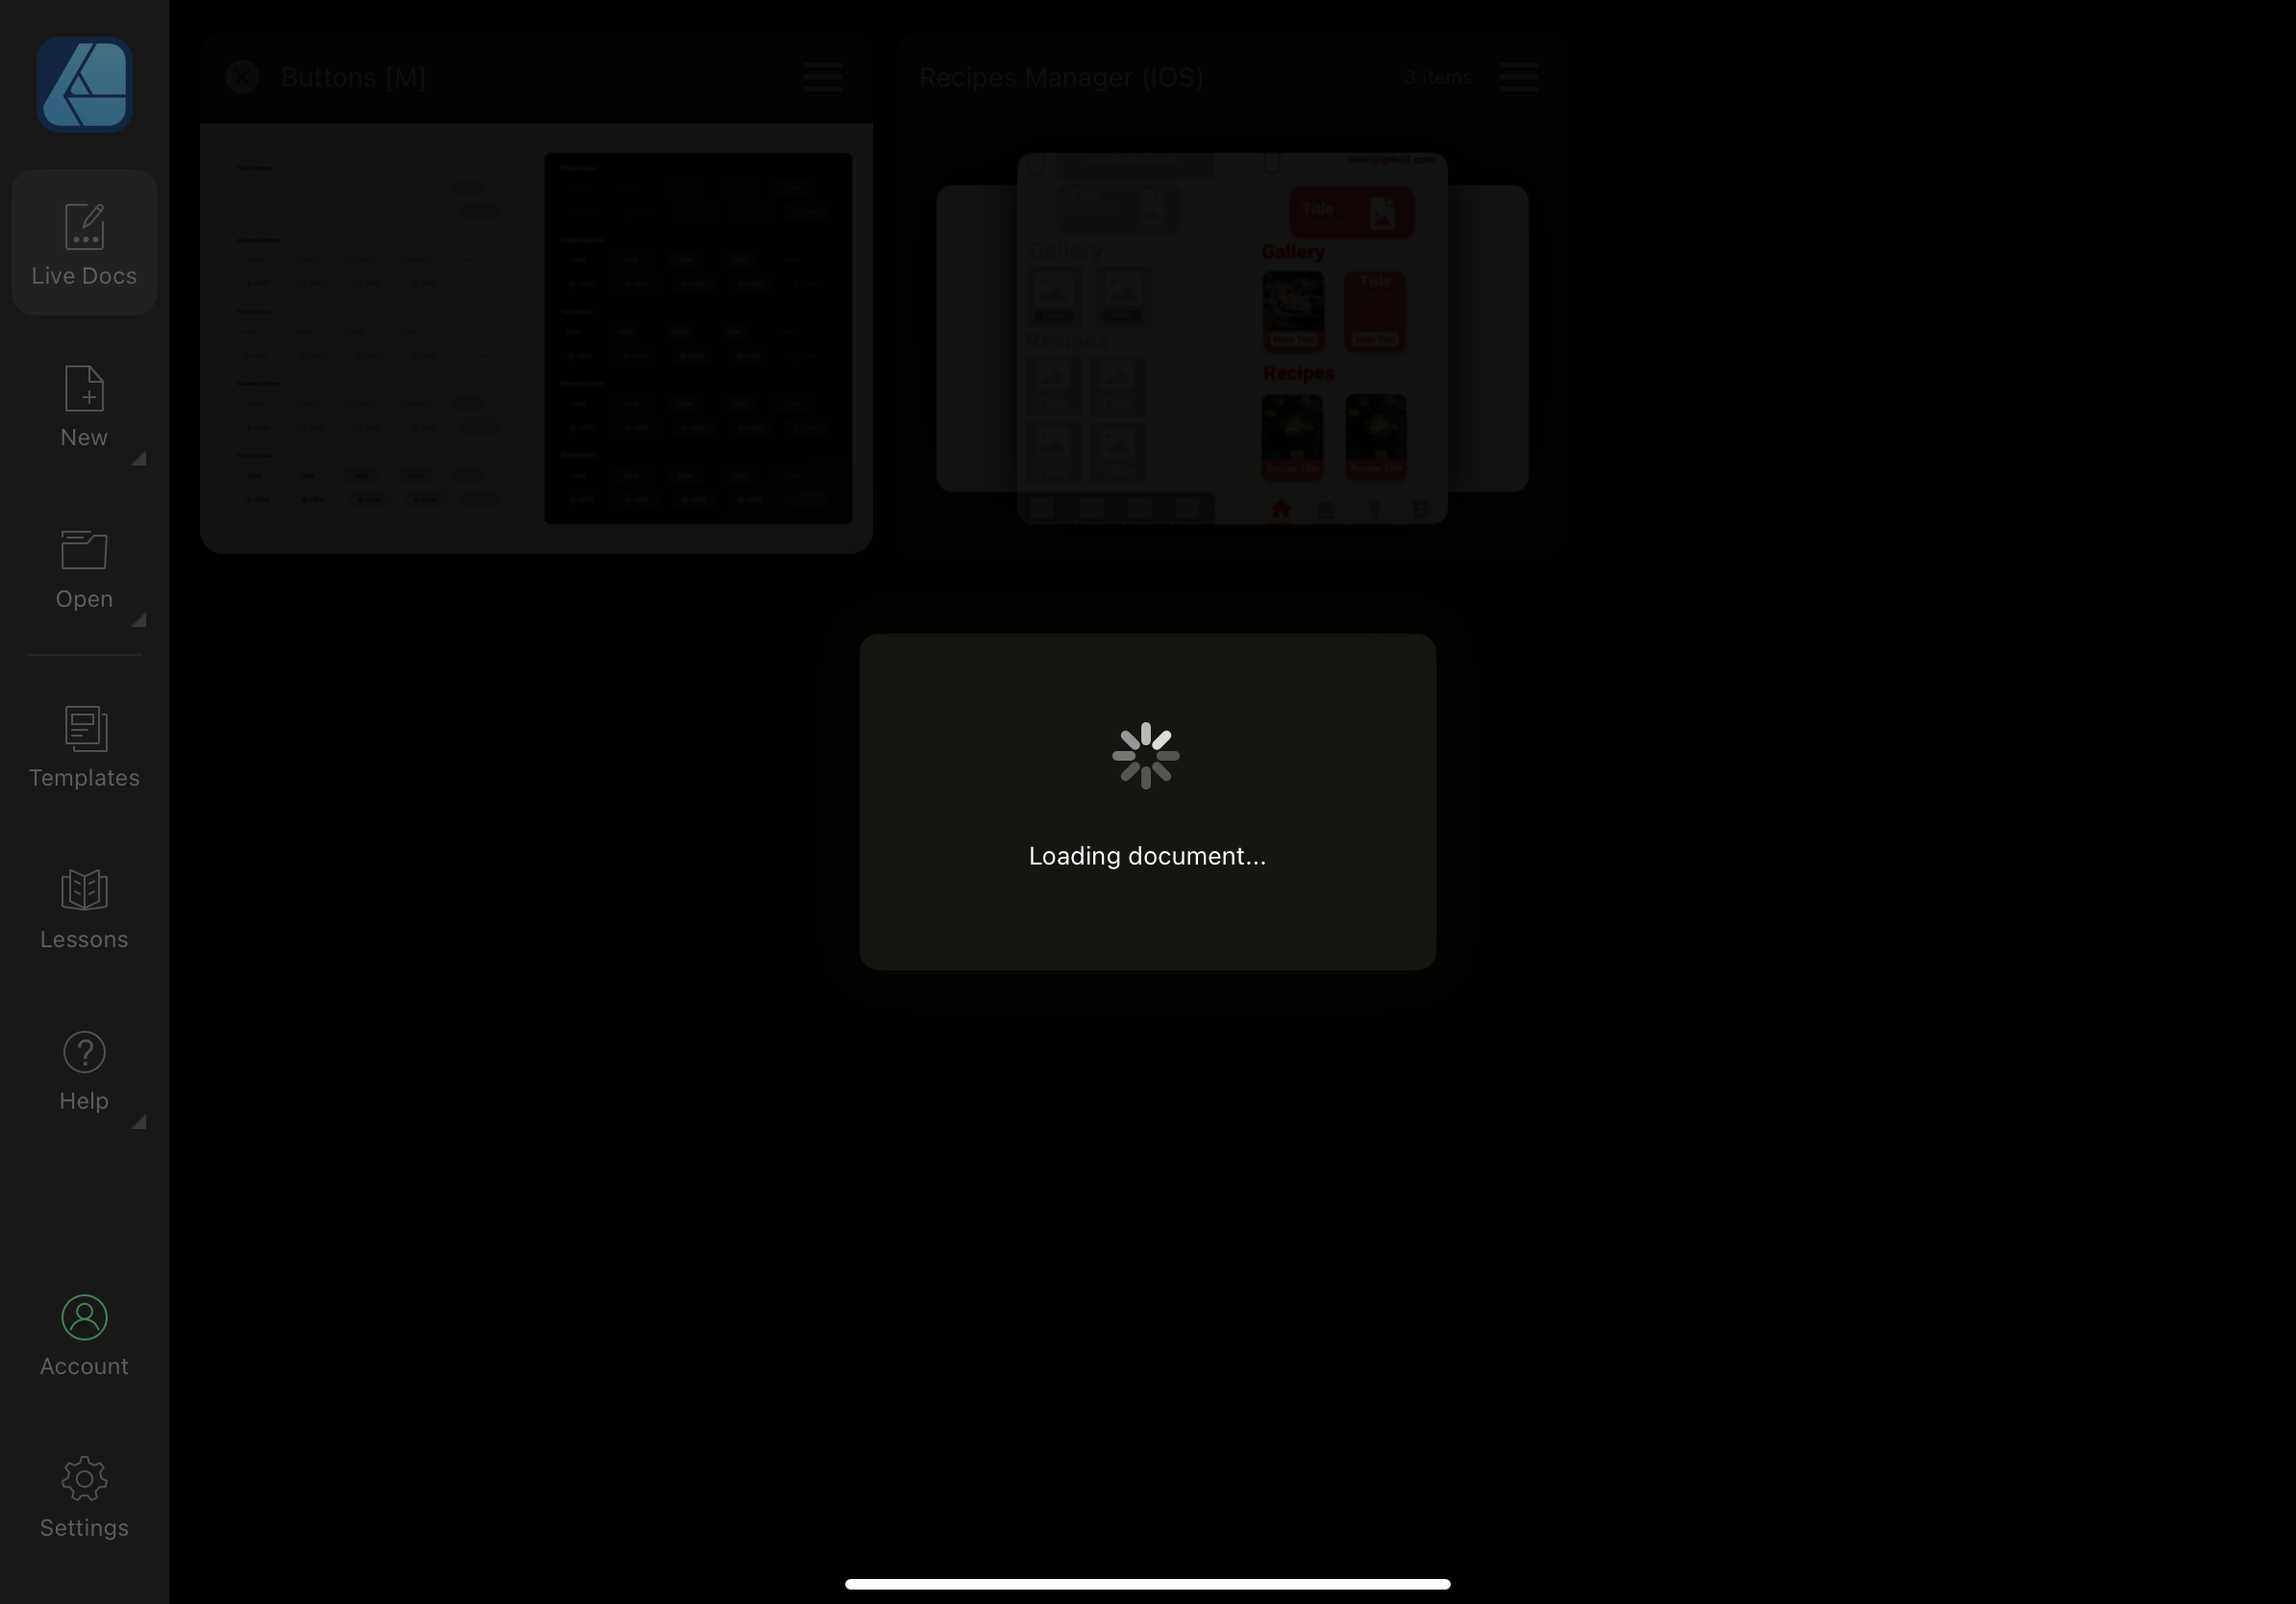
 I’ve recently tried to open a Photoshop(.psd) file in Affinity Designer. The file could successfully been opened in Photoshop, but not in Affinity Designer. Also the size of it hasn’t been big(2 MB). When I pressed open -> open document from the menu and selected a file, It has imported it successfully, but then it said loading file, and the app crashed. I tried both opening and importing document, but neither helped. I restarted the app, even the device, but still couldn’t open that file. Each time I press on it - the app crashes. I don’t know whether the issue occurs in other Affinity apps, but in Designer it exists for sure. I ask developers to fix importing/opening psd files in Affinity Designer on IPad. Thank you, in advance! Buttons.psd
-
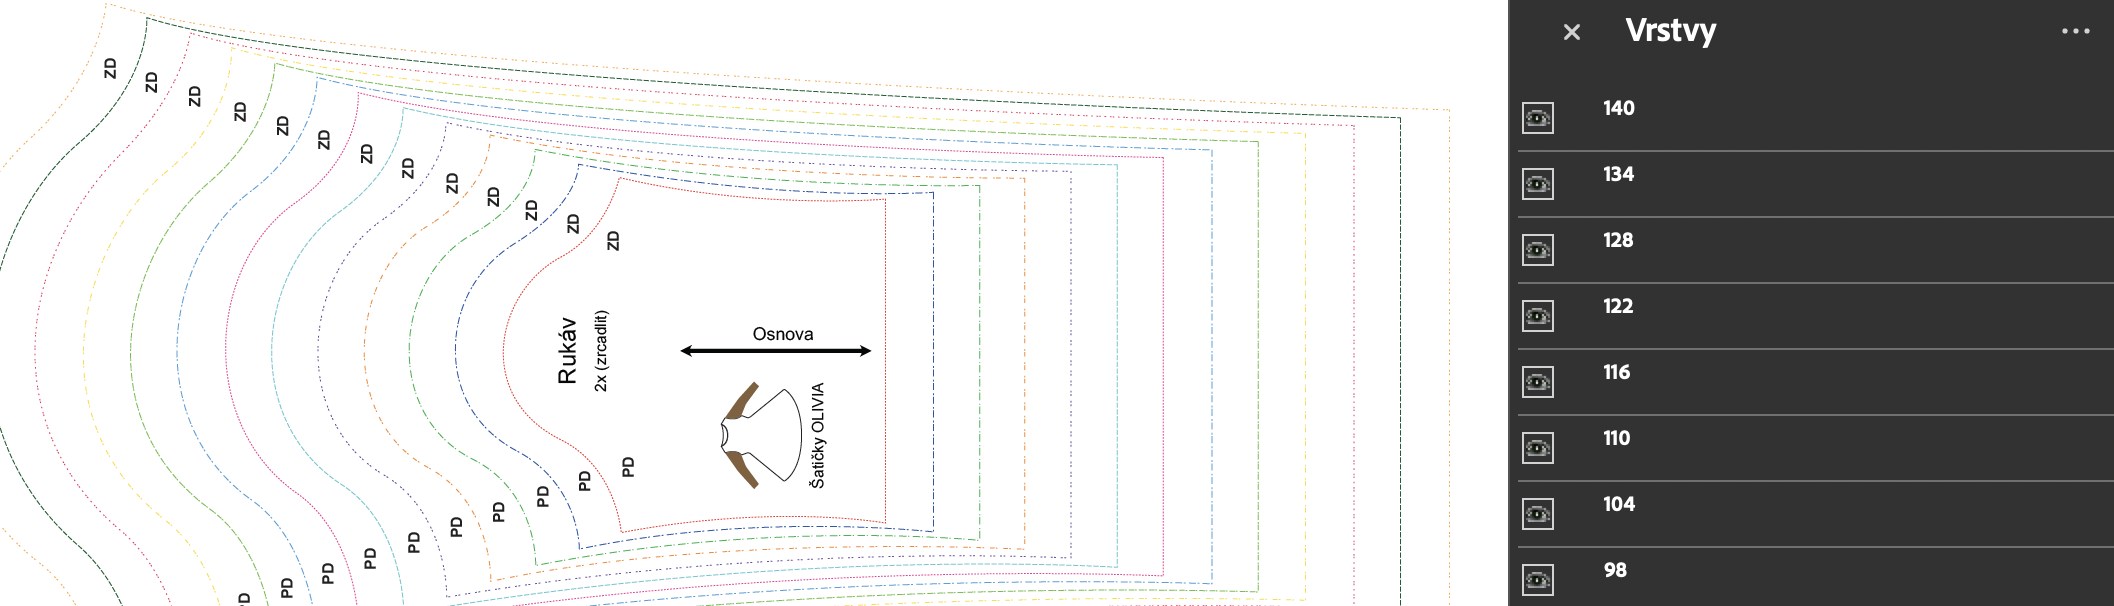
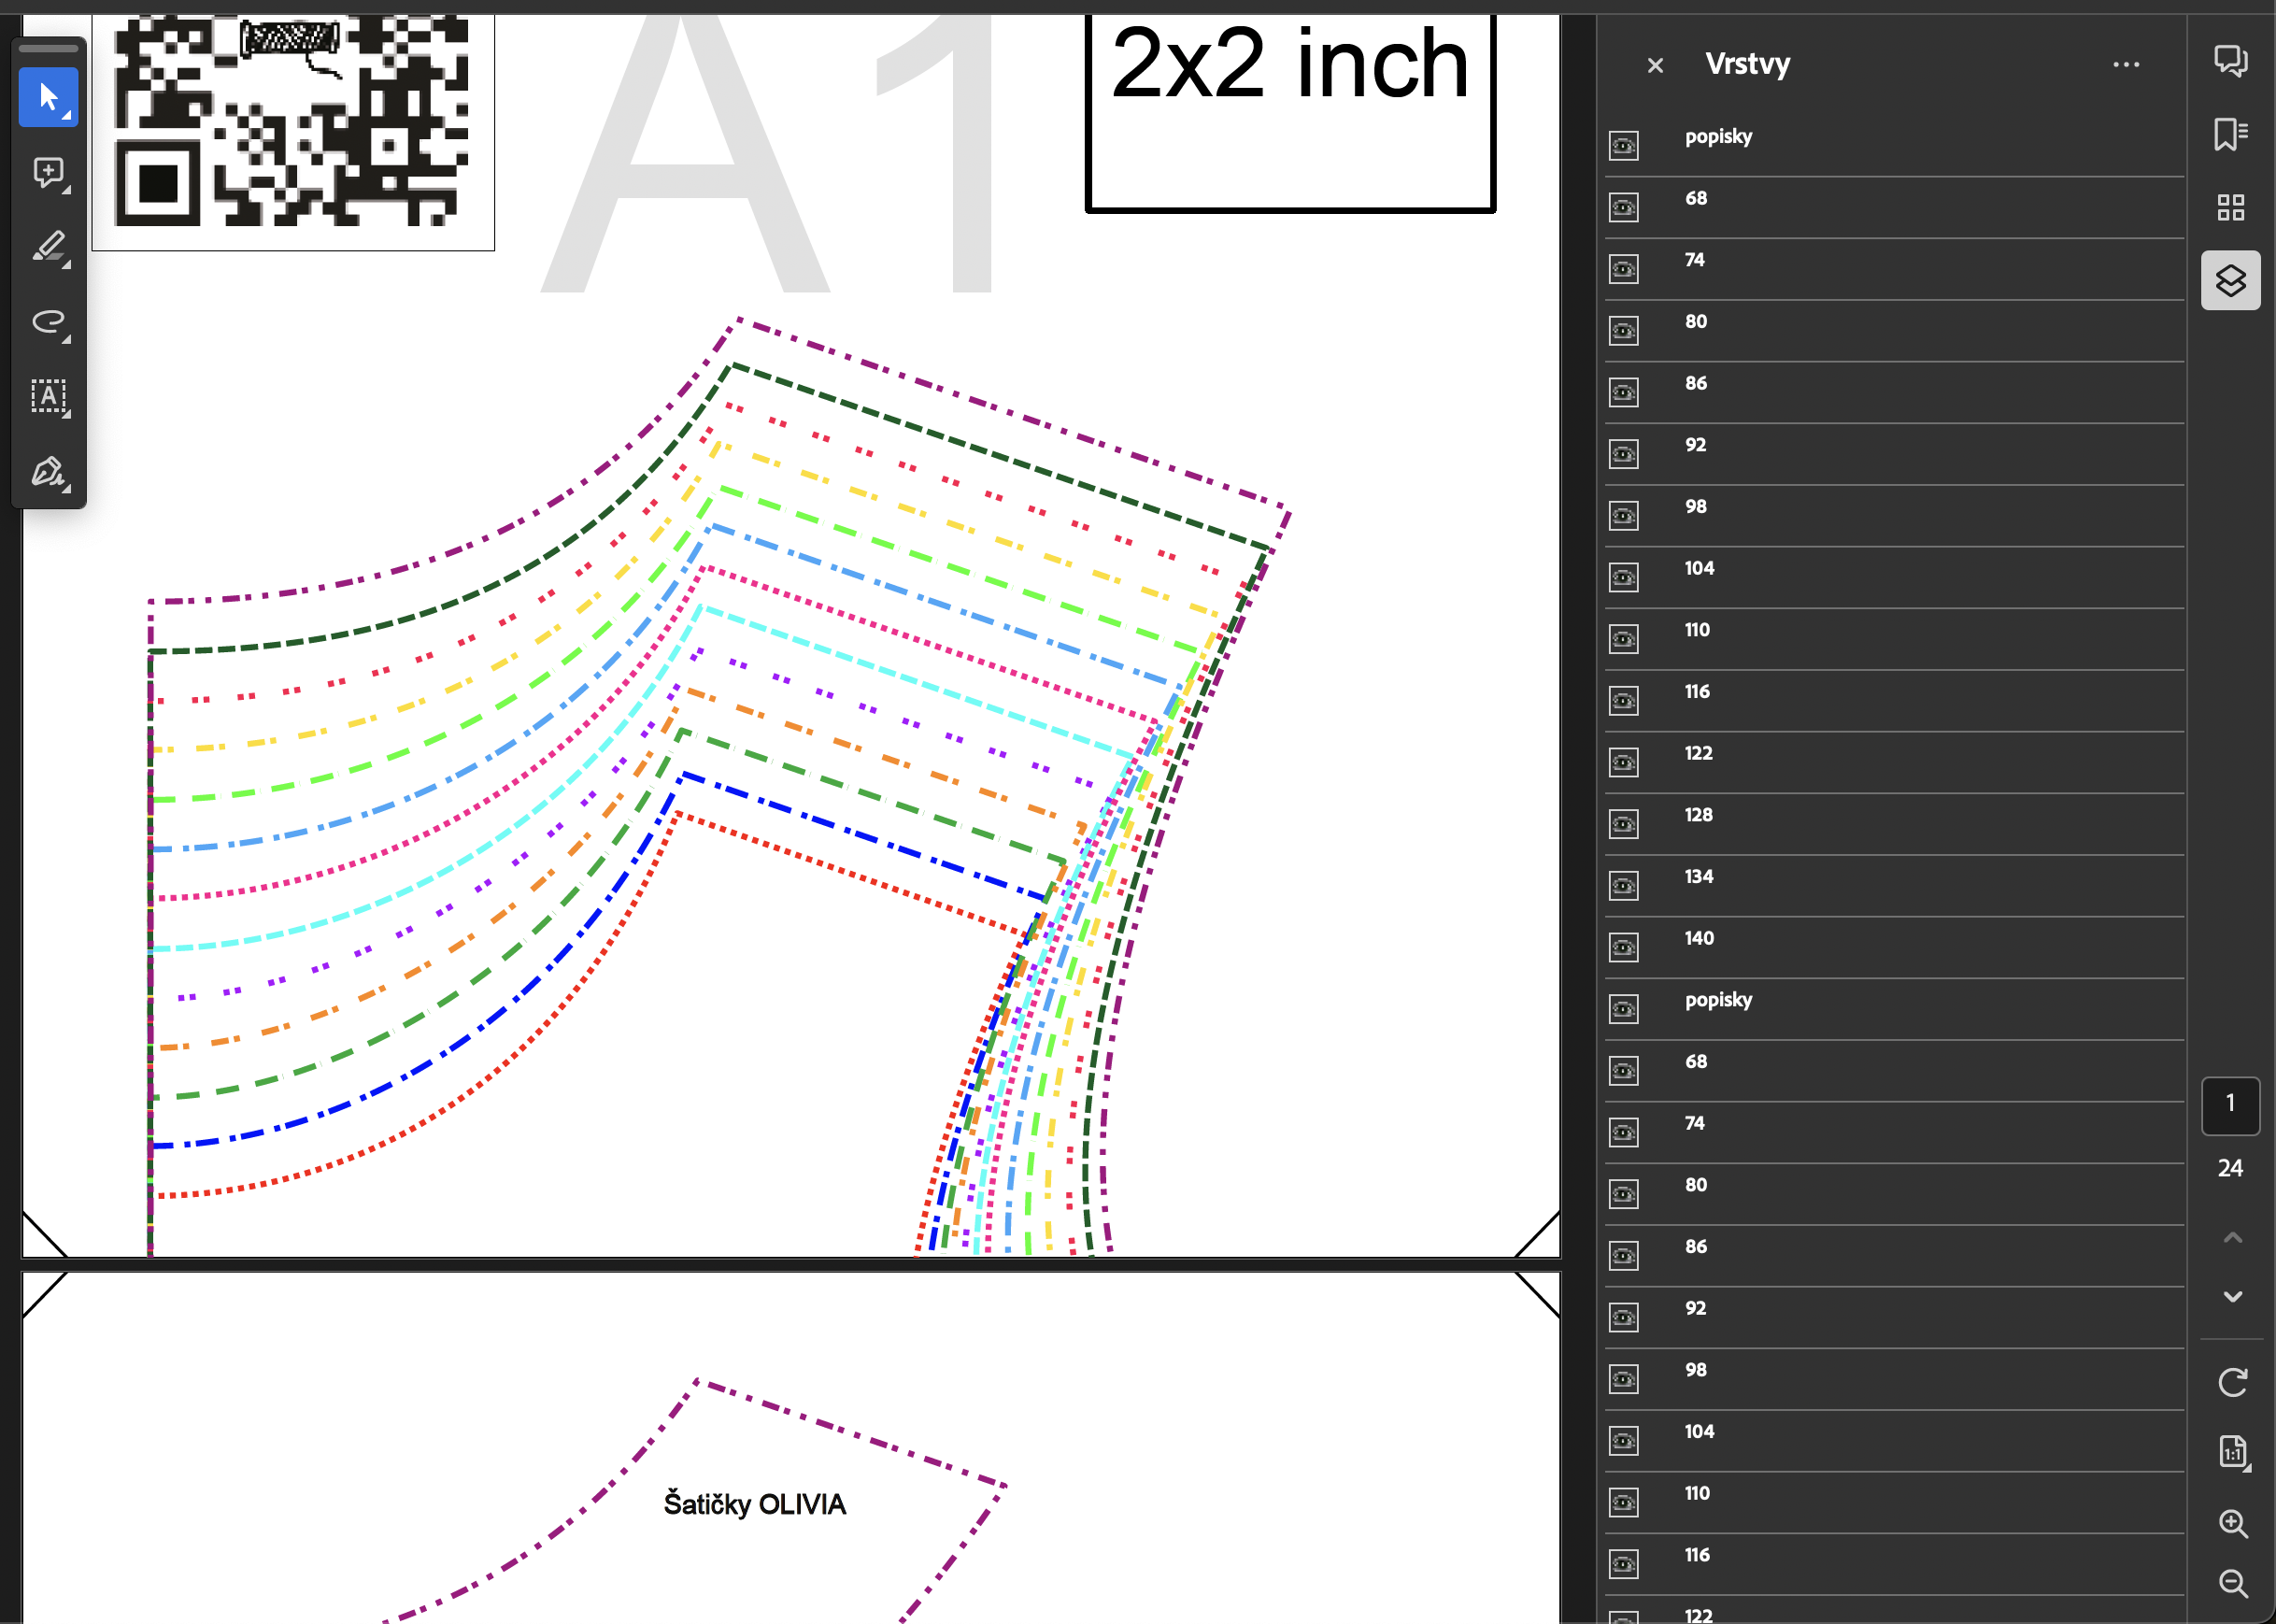
 Hello. I encountered very specific problem I can't find solution to. I am creating sewing cutting patterns. And I wanted to export the file with layers so people can print only the size they are interested in. It should work like this - you have pattern with multiple sizes and in layers you can choose which one you want to see/print. This was created and exported in Illustrator and works as expected. But when I try to export the same thing in AD, the layers on multiple pages are not linked - meaning you'd have to select the visible layer for every page of the document separately. You can see when I am in the middle of two pages I see all the layers of every page but it should be just one layers for all twenty something pages of the document. I also created super simple documents simulating my issue since I am not able to upload the screenshotted document itself. Is there any setting to make the "layers linked" across all the pages or is it something than can not be done in AD? Thank for any kind of help. A4 .pdf A4 Print Template.afdesign
-
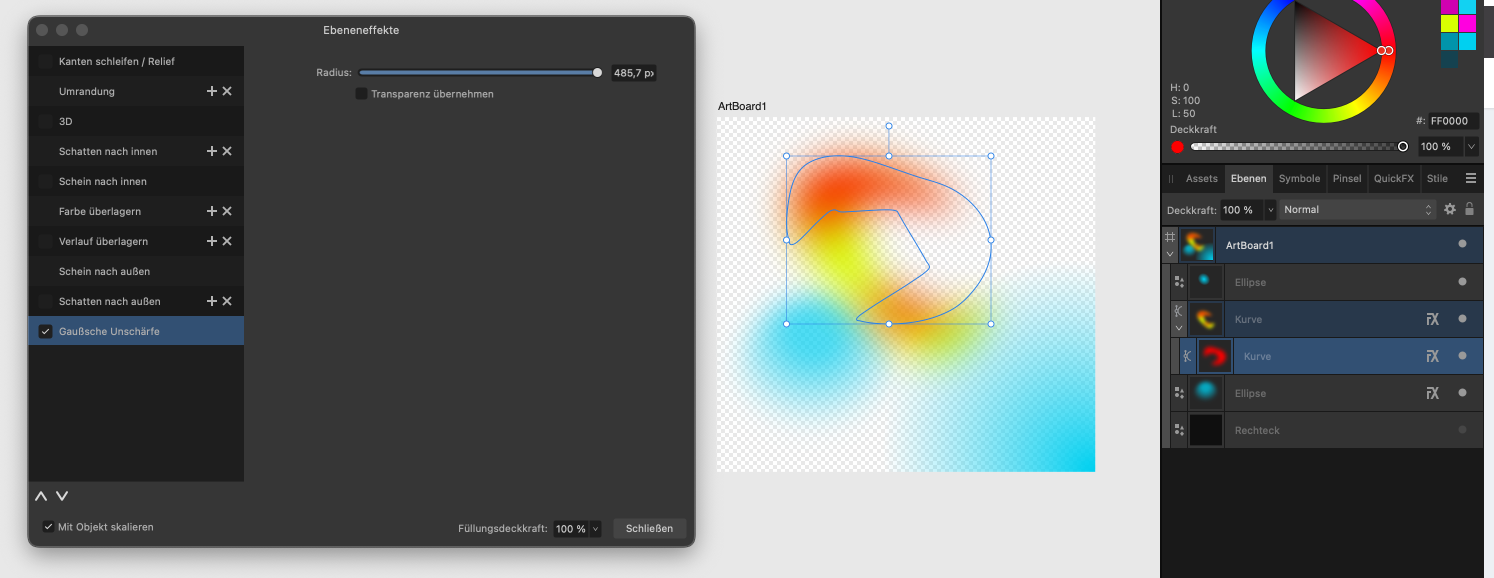
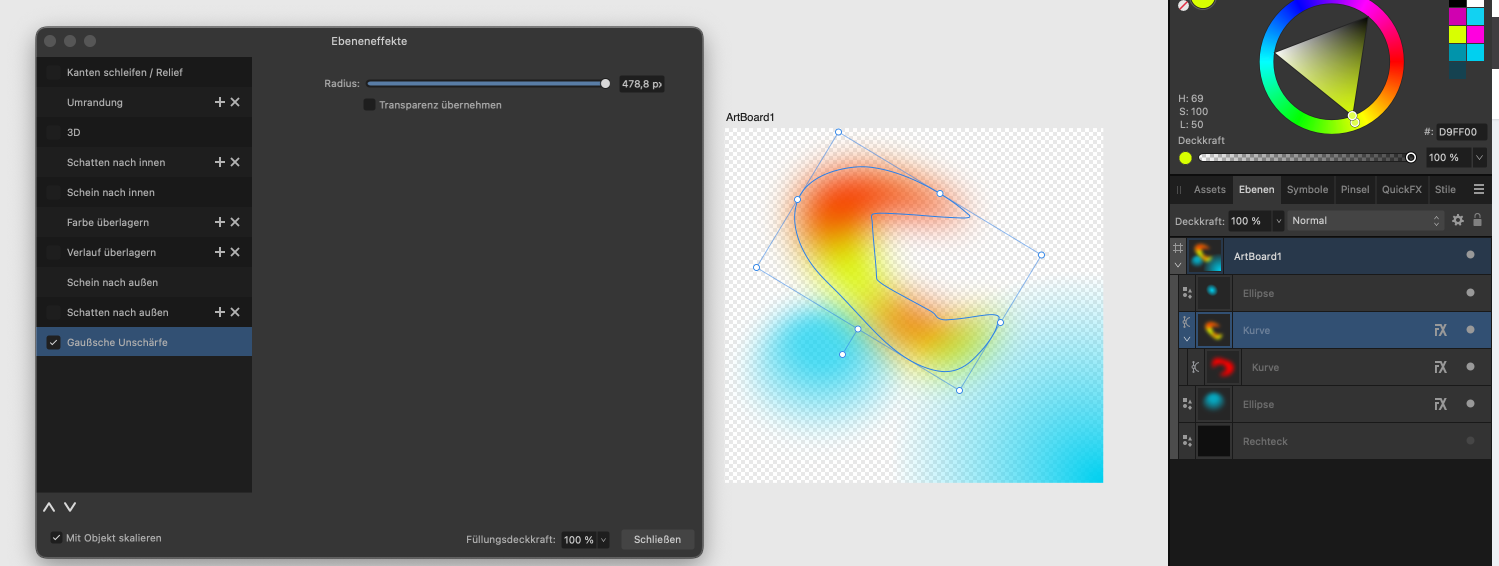
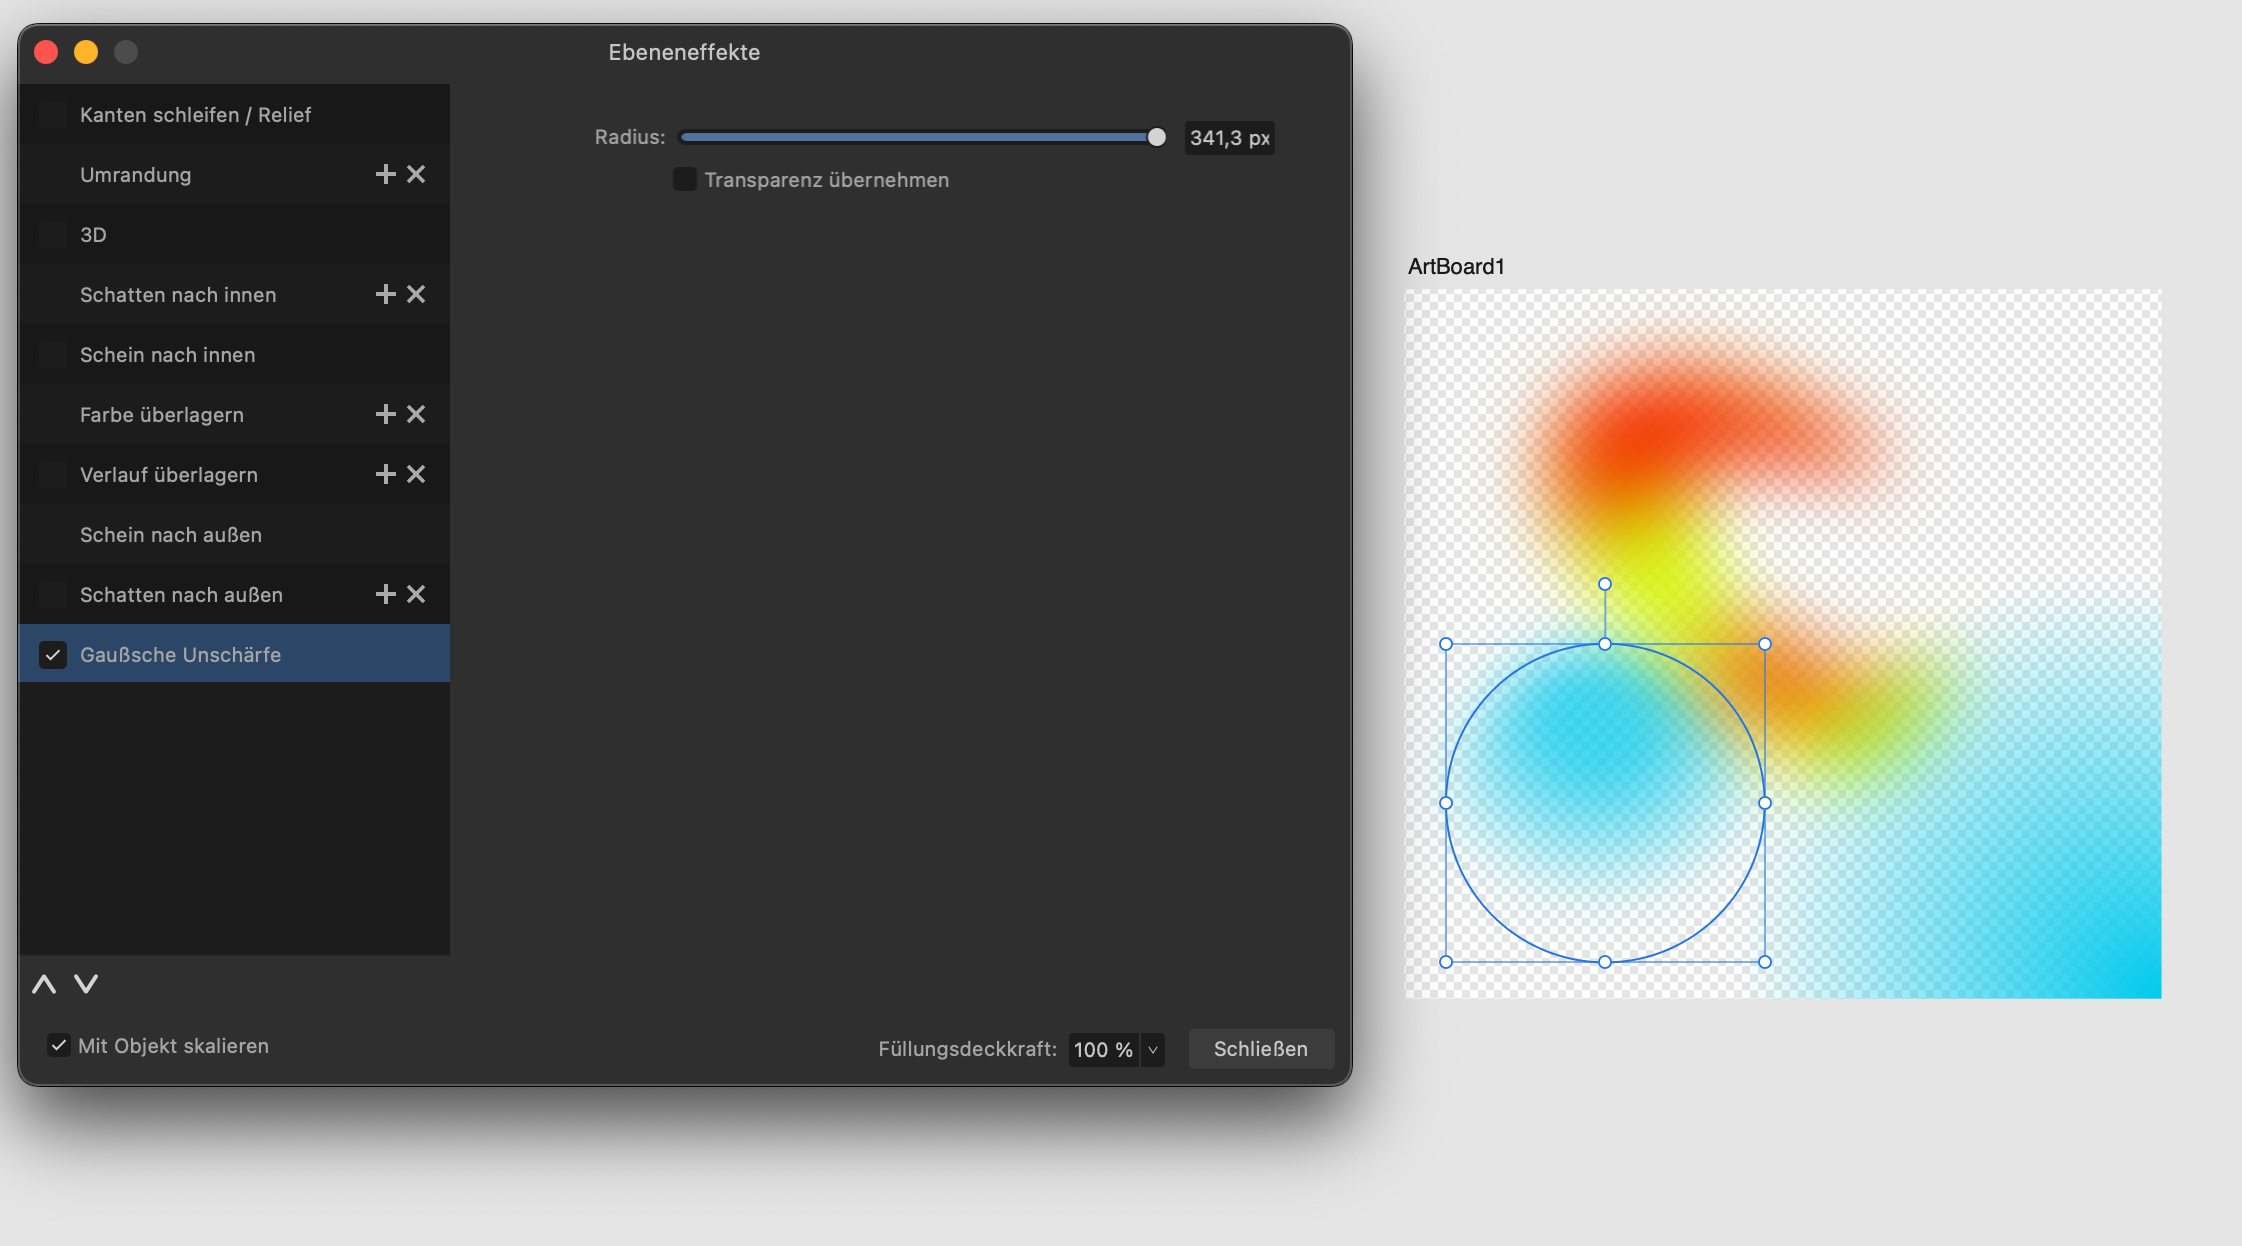
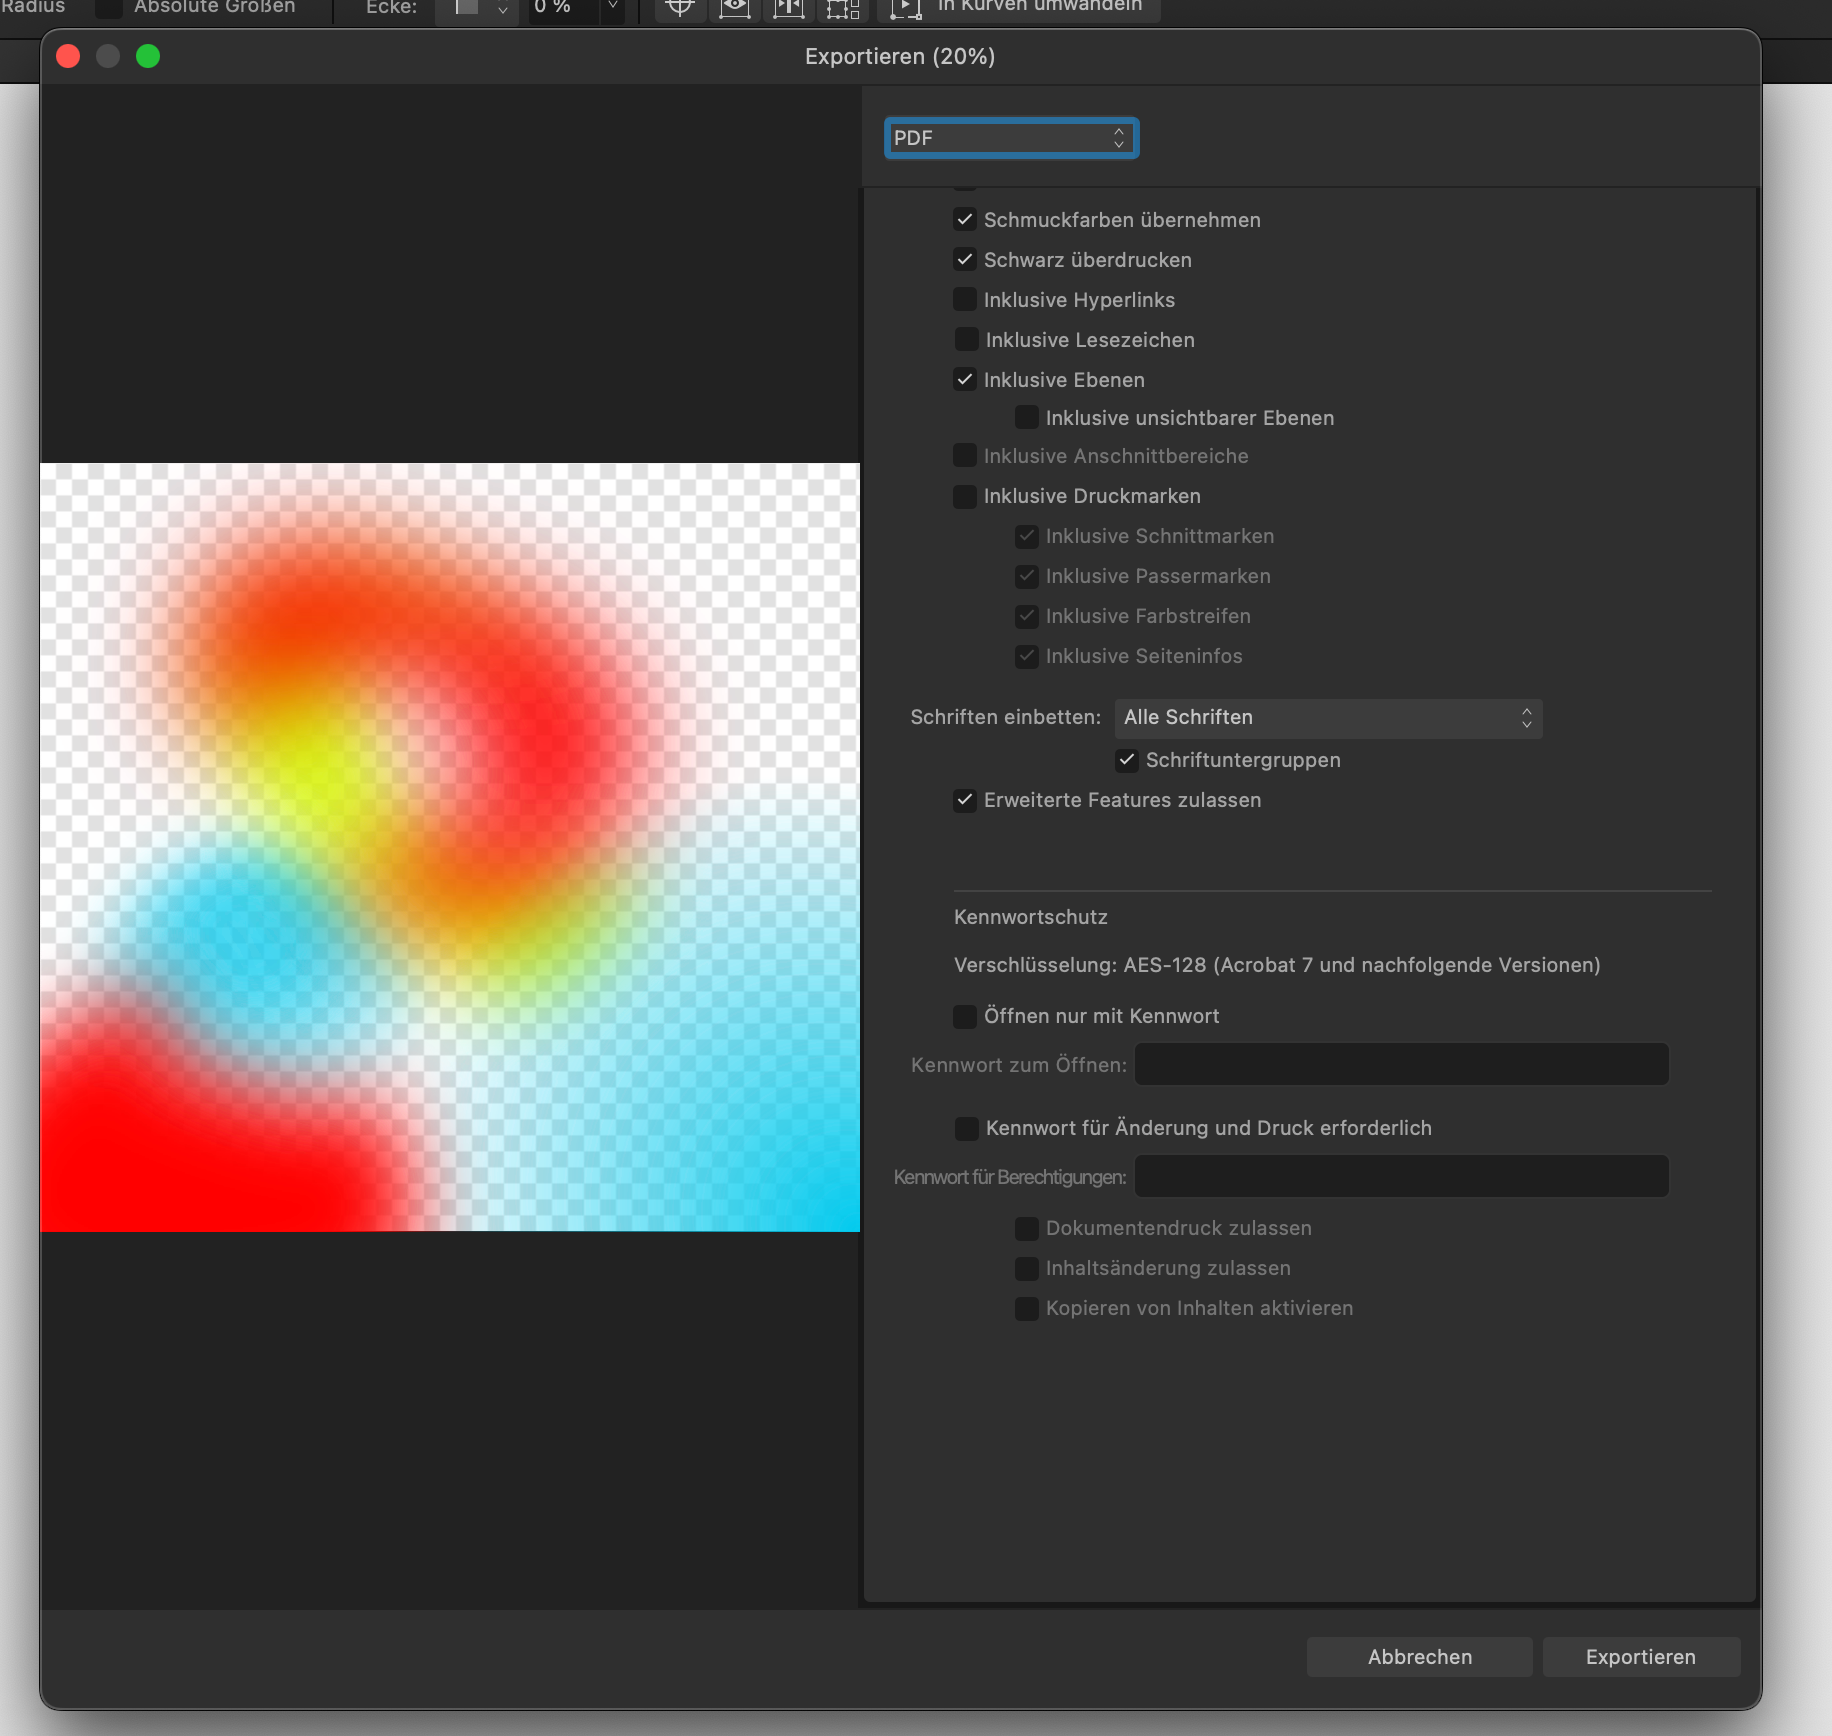
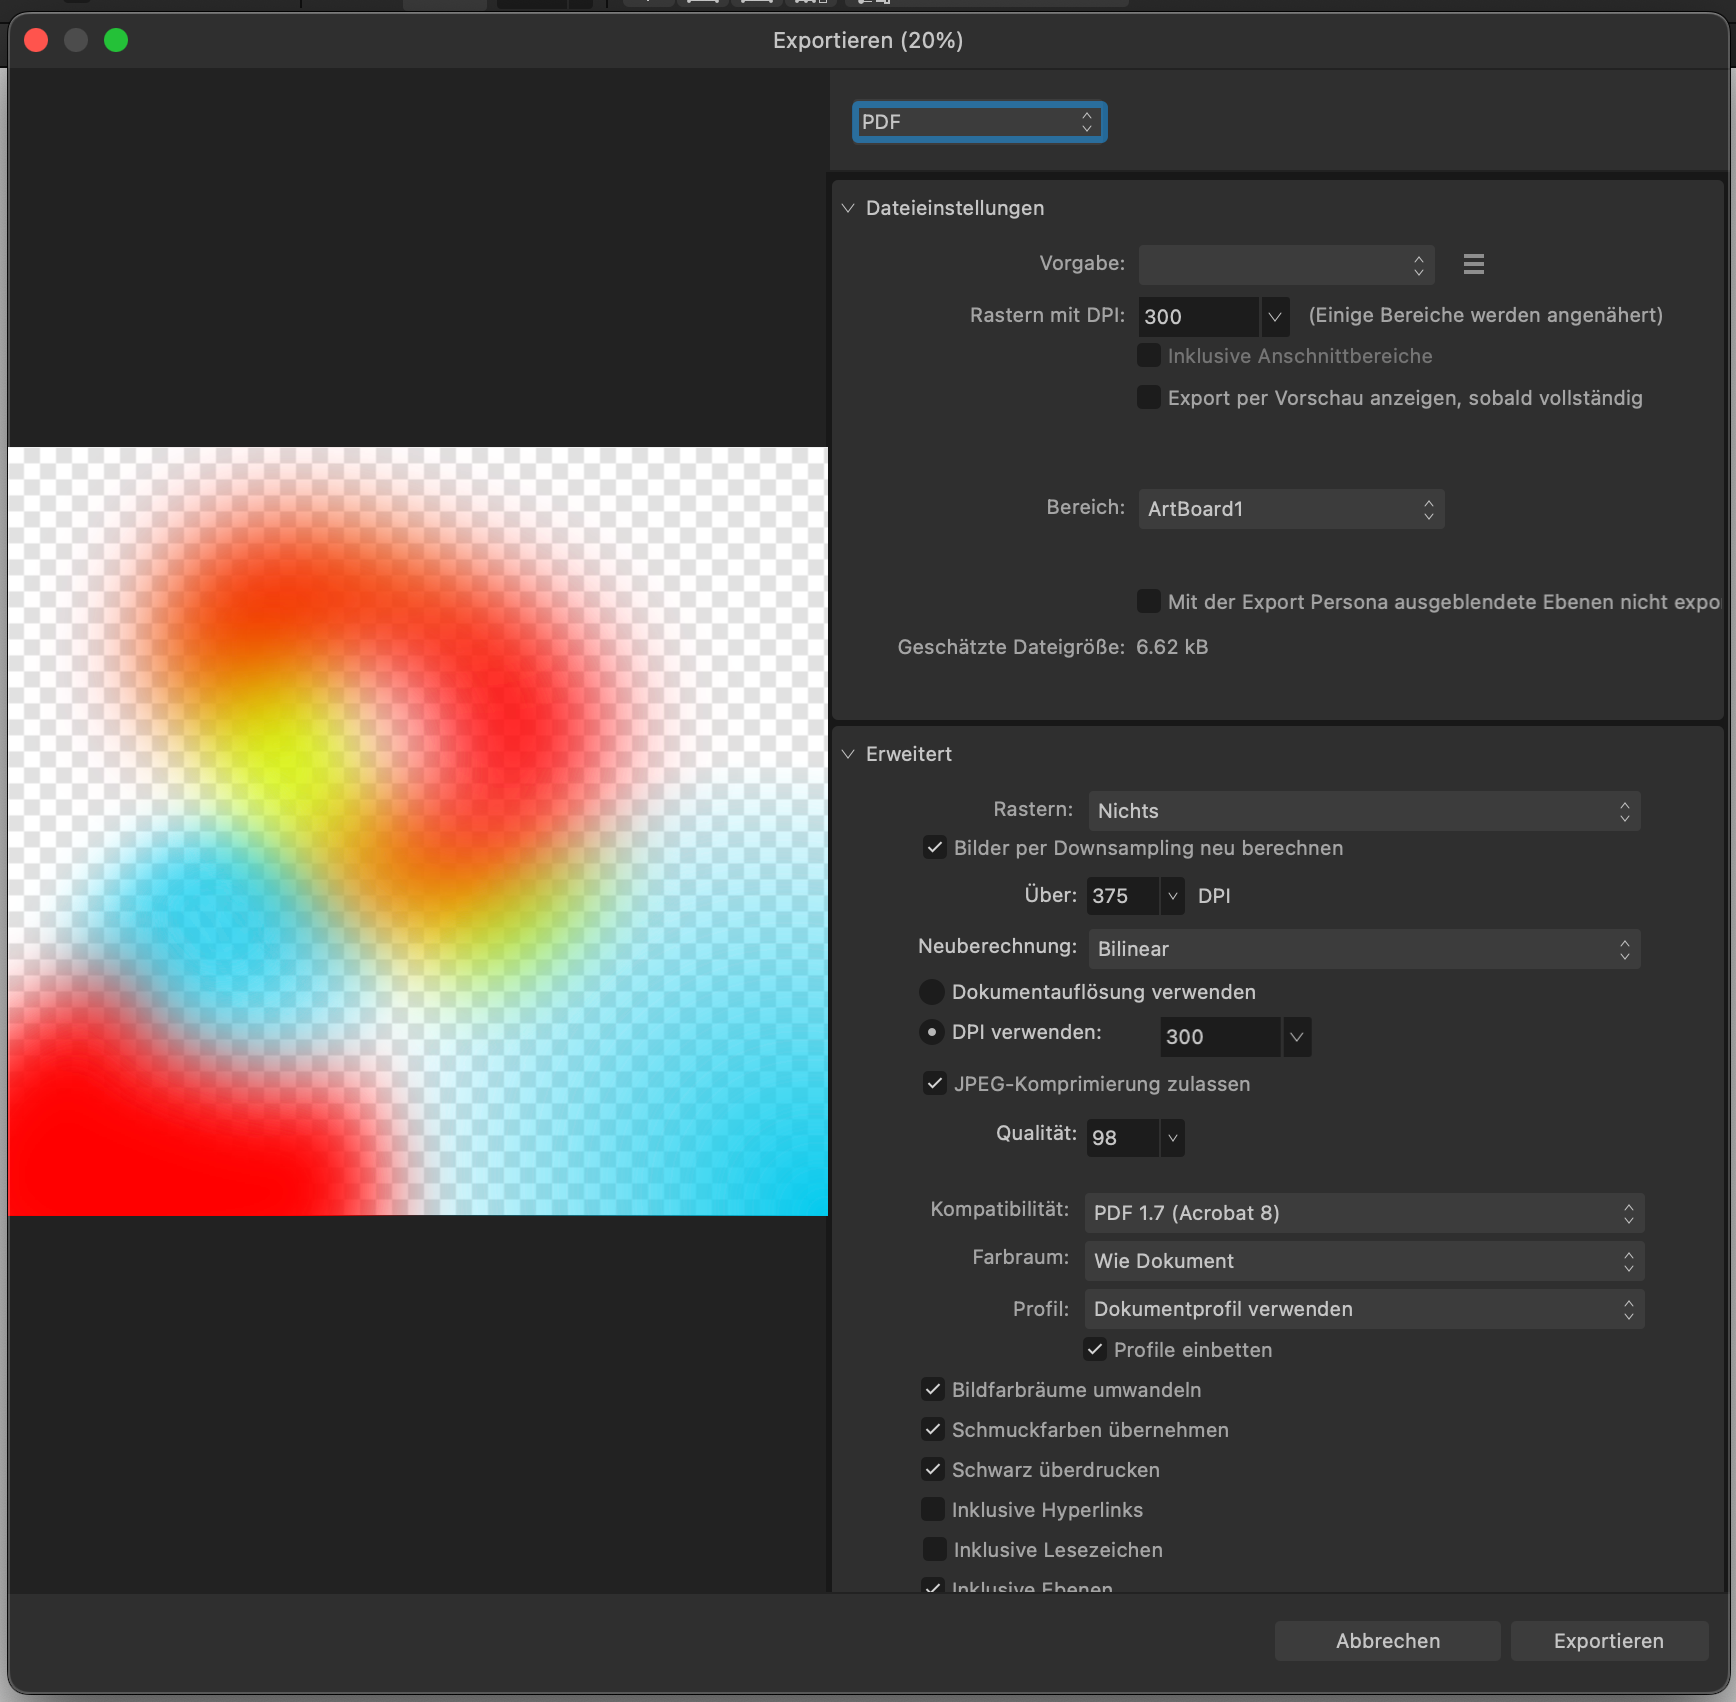
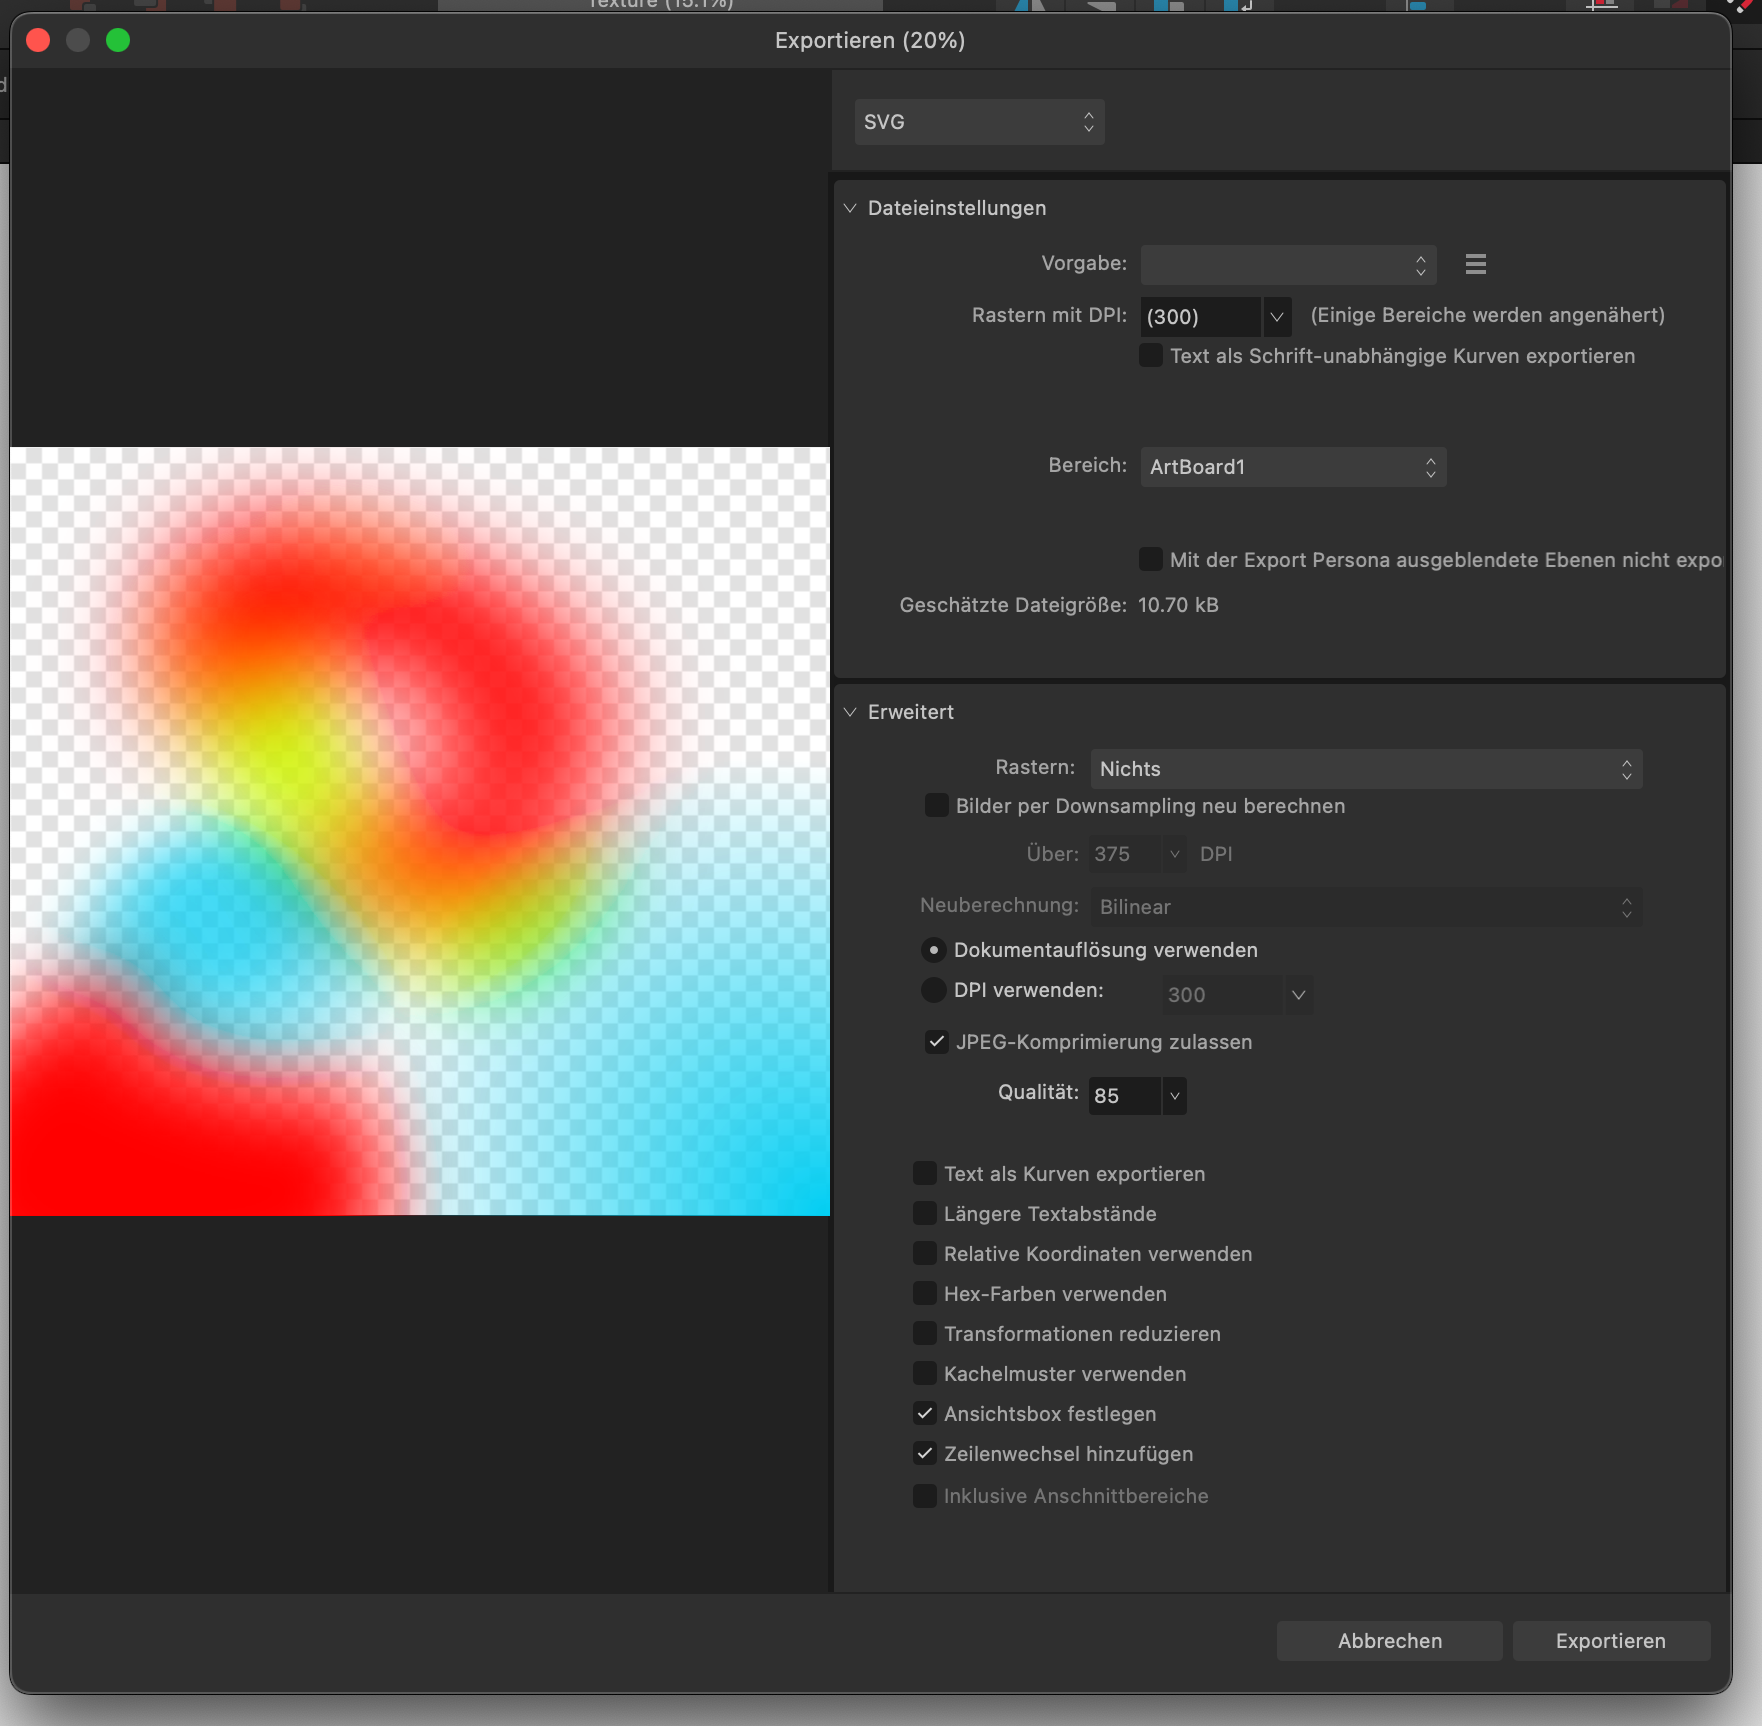
 I want to create with Affinity Designer a gradient mesh. In order to be able to define a brand specific texture, I am experimenting. The texture shall be used in Powerpoint slides but also on large prints like banners. So I must work in a way that it does not raster the image, because I want to scale it infinitly. Unfortunatelly you see in the Texture.pdf that the gaussian blur applied on the shape does not exist any more. Only the color gradients work in the PDF. If I export to SVG, then the gaussian blur exits. Also if I bring the SVG to Powerpoint and Export the Powerpoint as PDF, then the shape is blured correctly. So I assume this must be an export error in the Affinity Designer 2.4. Can you please help? I have posted the export menu screen shots so you may see whether any adjustment should be made, to get it to work. Thank you. Texture.pdf Texture.afdesign Texture.svg
-
 I’m trying to find an answer to this and can’t seem to, but I would hope there is one. I am using Designer 2.x on my iPad Pro and when I select a shape tool, such as the circle, and draw some circles, then click the selection arrow tool to move some things around. The shape tool automatically switches back to the square instead of staying on the circle (or whatever shape I had selected). How can I stop it from reverting like that? I want it to remain on the shape I was drawing with. In my Settings I already have “Synchonize Tools Between Documents” checked. Although, I wouldn’t think that has anything to do with this anyway. Additionally, how can I make the pen tool keep the settings I was using to draw with on the iPad? Thank you.
- 1 reply
-
- 1
-
-
- affinity designer
- shape tool
- (and 2 more)
-
Our popular Affinity Designer Neon Brushes just got a whole lot better! What's new about the pack? we've completely reworked the brushes - revisiting the real neon tube source material to create a vastly superior look. A set of time-saving Affinity Glow Styles has been added - use these to add glows to your design instantly! We've also added a set of handy background gradients. >>GET IT HERE<< Or keep scrolling to learn more. Once again, the Artifex Forge has been on an urban adventure - exploring the city's bright lights to bring you better design resources! This time I've been searching for the best neon tubes to bring this super-realistic set of neon brushes and neon glow effects to life. If you find existing neon effects limiting, lifeless and a little unrealistic, this is the perfect set for you. Most are entirely computer-generated and therefore lack the lifelike qualities and quirks of genuine neon tubing. With these brushes, you can really give your design the wow-factor. So, why are they so much better? True-to-life: they are sourced from real neon tubing, so no flat, lifeless vector neon effects. Multiple highlight options: this recognizes that when you have a group of neon tubes together, they illuminate each other, creating more highlights. Flexibility: being brushes, they're malleable giving you more scope to create the images you want. Fun: you're drawing with neon tubing... what more can I say? Get the pack HERE and start creating Affinity Neon signs today! ________________________________________________________________________________________________________________________________________________ Learn how to create the sausage dog illustration in our tutorial HERE! Get the pack and follow along! ________________________________________________________________________________________________________________________________________________ The pack contains all of these fantastic components: The Neon Brushes 19 flexible neon tube vector brushes. The Neon Glow Styles Instant effects - add glows to your neon designs. A Wire Brush Style Add wires to your design with this one-click style. Screw Fitting Graphics Add this all-important extra detail to your neon designs. Free Stone and Brick Texture links Download free brick textures and textures from our screenshots are free. A quick reference guide Navigate this extensive Affinity neon tool kit quickly. Example file Backwards engineer the file to see how we did it. Instructions A thorough guide explaining how to load, apply and then adjust the brushes, neon glow effects and gradients is included. >>GET IT HERE<<
-
- 1
-
-
- affinity designer
- affinity
- (and 4 more)
-
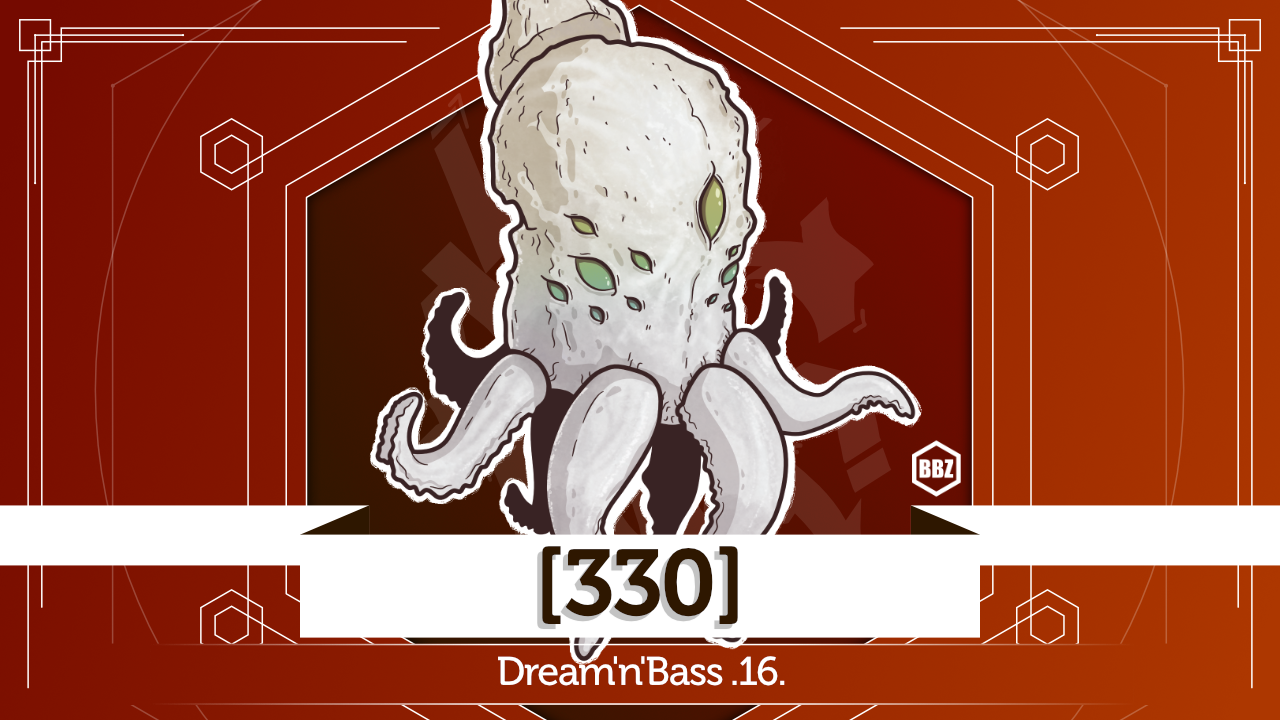
Here's my latest upload and work in Affinity Designer! Please click the picture below and enjoy 2hrs of finest drum'n'bass alongside some coloring! Thanks for your precious time!
-
 Hi... I Paid Subscription of Affinity Designer V1 only i would like to know when i pay for an Upgrade of 25% off the sale price of the V2 Universal Licence... AM I GOING TO GET ACCESS ALL V2 APPS ? or its Only V1 Paid Affinity Design will be Upgrades to V2?
 -
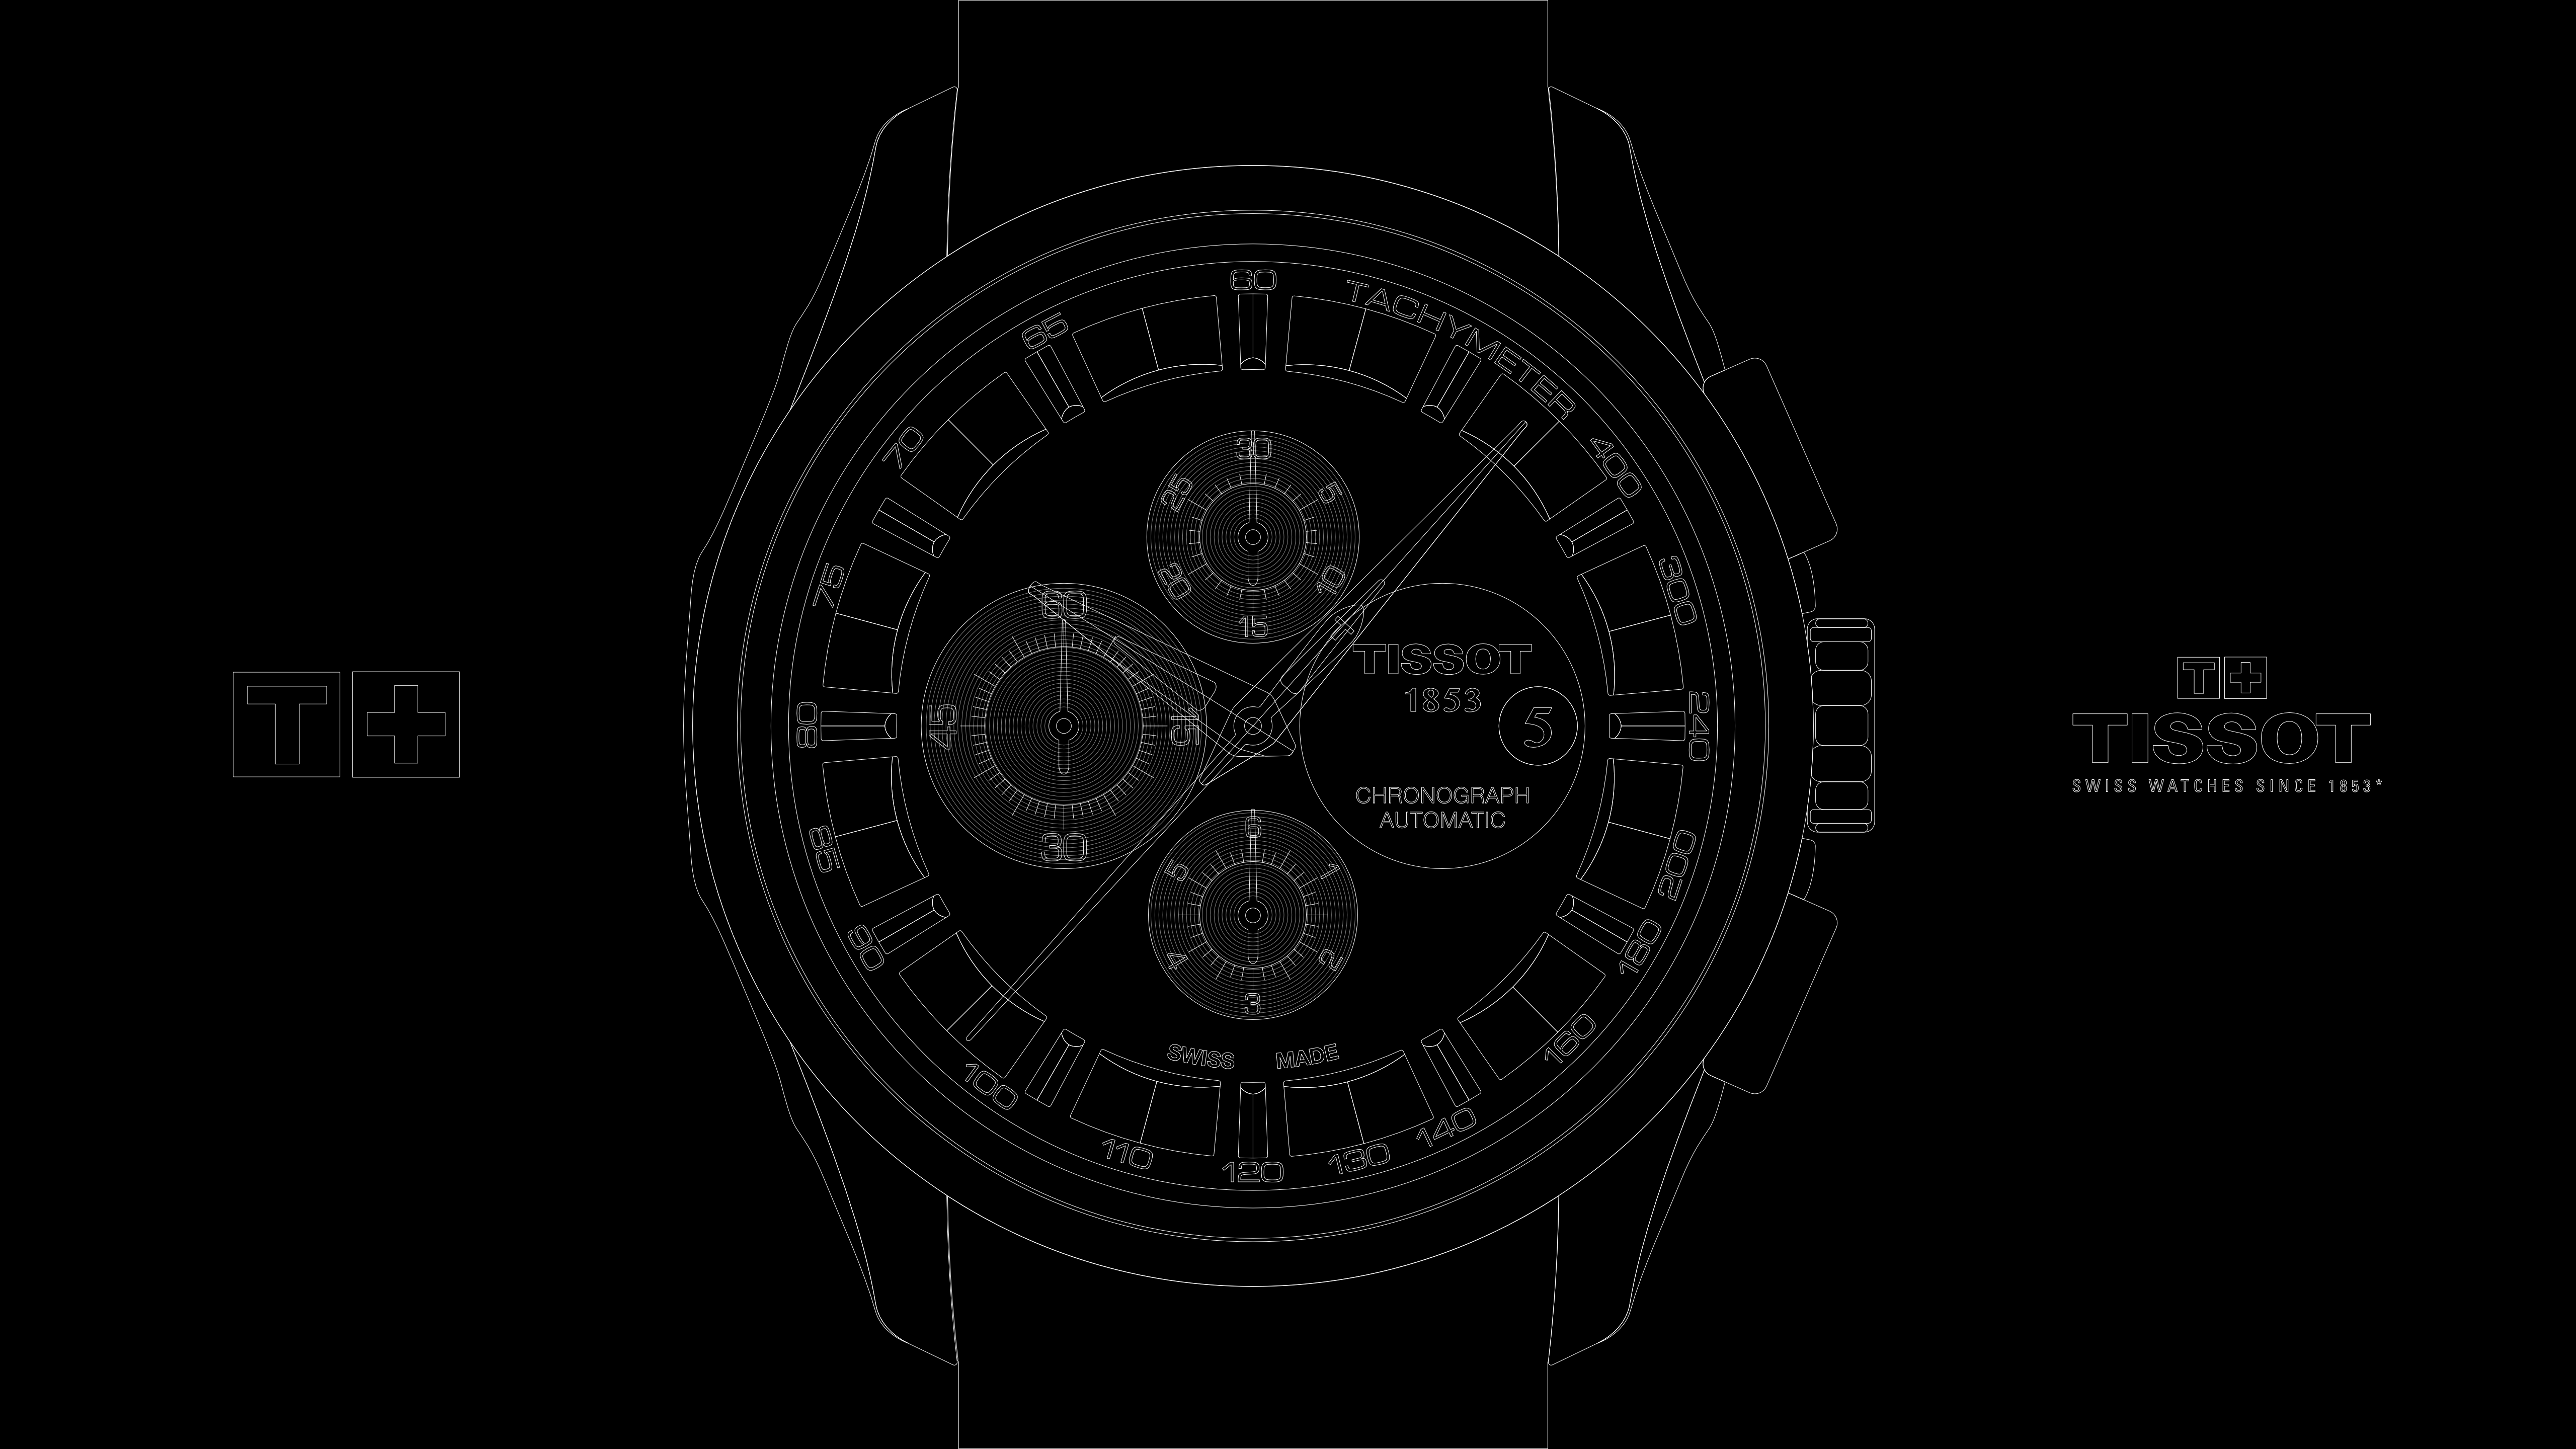
🇬🇧 Style exercise: I have had this watch for several years and I wanted to do an illustration of it. So, macro photographs, documentary research with the PDF file of the manufacturer's user manual, visuals gleaned from the web, dimensions taken directly from the watch (difficult and ineffective in the end), search for typographies (Eurostyle essentially)... I capitalized my time by focusing on the construction of the dial, hoping that the observer would not see the less “realistic” and refined parts: I did not want to spend too many hours on this project, so I adopted a production-optimization strategy (and also on the optical confusion caused by reflections on chrome surfaces…). So I took care of the construction, the symmetries, the few textures, the elimination of right angles (which do not exist in real reality) and the coherence of the lighting. I neglected the exterior of the dial. The leather is a hack based on several compiled and rasterized visuals. Note: I noticed slowdowns in the display of the illustration with the use of Live Filters Addition of grain and Blur (AD v2.4 - Mac Mini M1 16 GB - BenQ PD2700U 4K in HDMI). 🇫🇷 Exercice de style : je possède cette montre depuis quelques années et je voulais en faire une illustration. Donc, photographies en macro, recherche documentaire avec le fichier PDF de la notice d'utilisateur du constructeur, visuels glanés sur le web, prises de dimensions directement sur la montre (difficile et inefficace au final) recherche des typographies (Eurostyle essentiellement)… J'ai capitalisé mon temps en me focalisant sur la construction du cadran en espérant que l'observateur ne voit pas les parties moins “réalistes” et affinées : je ne voulais pas passer trop d'heures sur ce projet, donc j'ai adopté une stratégie de production-optimisation (et aussi sur la confusion optique que procure les reflets sur des surfaces chromées…). J'ai donc soigné la construction, les symétries, les quelques textures, la suppression des angles droits (qui n'existent pas dans la réalité vraie) et la cohérence de l'éclairage. J'ai négligé l'extérieur du cadran. Le cuir est une bidouille en partant de plusieurs visuels compilés et rastérisés. Nota : j'ai noté des ralentissements sur l'affichage de l'illustration avec l'utilisation des Live Filters Ajout de grain et Flou (AD v2.4 - Mac Mini M1 16 Go - BenQ PD2700U 4K en HDMI).
- 2 replies
-
- 8
-
-
- hyper-realism
- watches
- (and 1 more)
-
 Hi: Mac Retina 4K, 21.5-inch, 2017 (Intel) Processor: 3.6 GHz Quad-Core Intel Core i7 Graphics: Radeon Pro 560 4 GB macOS: Ventura 13.6.5 Hardware acceleration: On Metal US - English Publisher 2 2.4.0 Designer 2 2.4.0 Photo 2 2.4.0 Problem App launch causes bouncing icons in dock and slow opening (hanging). From the console log error 09:46:04.962502-0400 taskgated-helper com.seriflabs.affinitydesigner2: Unsatisfied entitlements: com.apple.security.application-groups error 09:46:04.962532-0400 taskgated-helper Disallowing: com.seriflabs.affinitydesigner2 What Application are you using? [Designer/Photo/Publisher] This problem affects all apps but I am reporting it when opening Designer 2 since the attached logs are from Designer 2. Are you using the latest release version? See above Can you reproduce it? Yes, but it is totally random and intermittent. Does it happen for a new document? Not related to documents or new documents. If you cannot provide a sample document then please give an accurate description of the problem for example it should include most of the following: So today after booting the computer I opened Publisher 2 which caused the icons to bounce and app to hang. I then opened the console and started streaming messages. With the console logging, I opened Designer 2 which also caused the icons to bounce and app to hang. The console log included error messages being caused by Designer 2 at the 09:46:04.962502-0400 and 09:46:04.962532-0400 timestamp as shown above. The console log also contains other messages related to Designer 2. It would appear that these errors are causing the bouncing icon and slow opening (hanging). For comparison, I again used the console to log Designer 2 being opened normally. The Console 2 All.txt file contains these messages. Hope these logs can assist in resolving this problem since it is a major nuisance on some days. The attached console zip file contains the console log output in text files. Console All.txt is the complete output from the console when Designer 2 had a problem. Console Error.txt is the error messages only from the console when Designer 2 had a problem. Console Activities.txt is activities from the console when Designer 2 had a problem. Console 2 All.txt is is the complete output from the console when Designer 2 opened normally. Regards, Maury Console.zip
 -
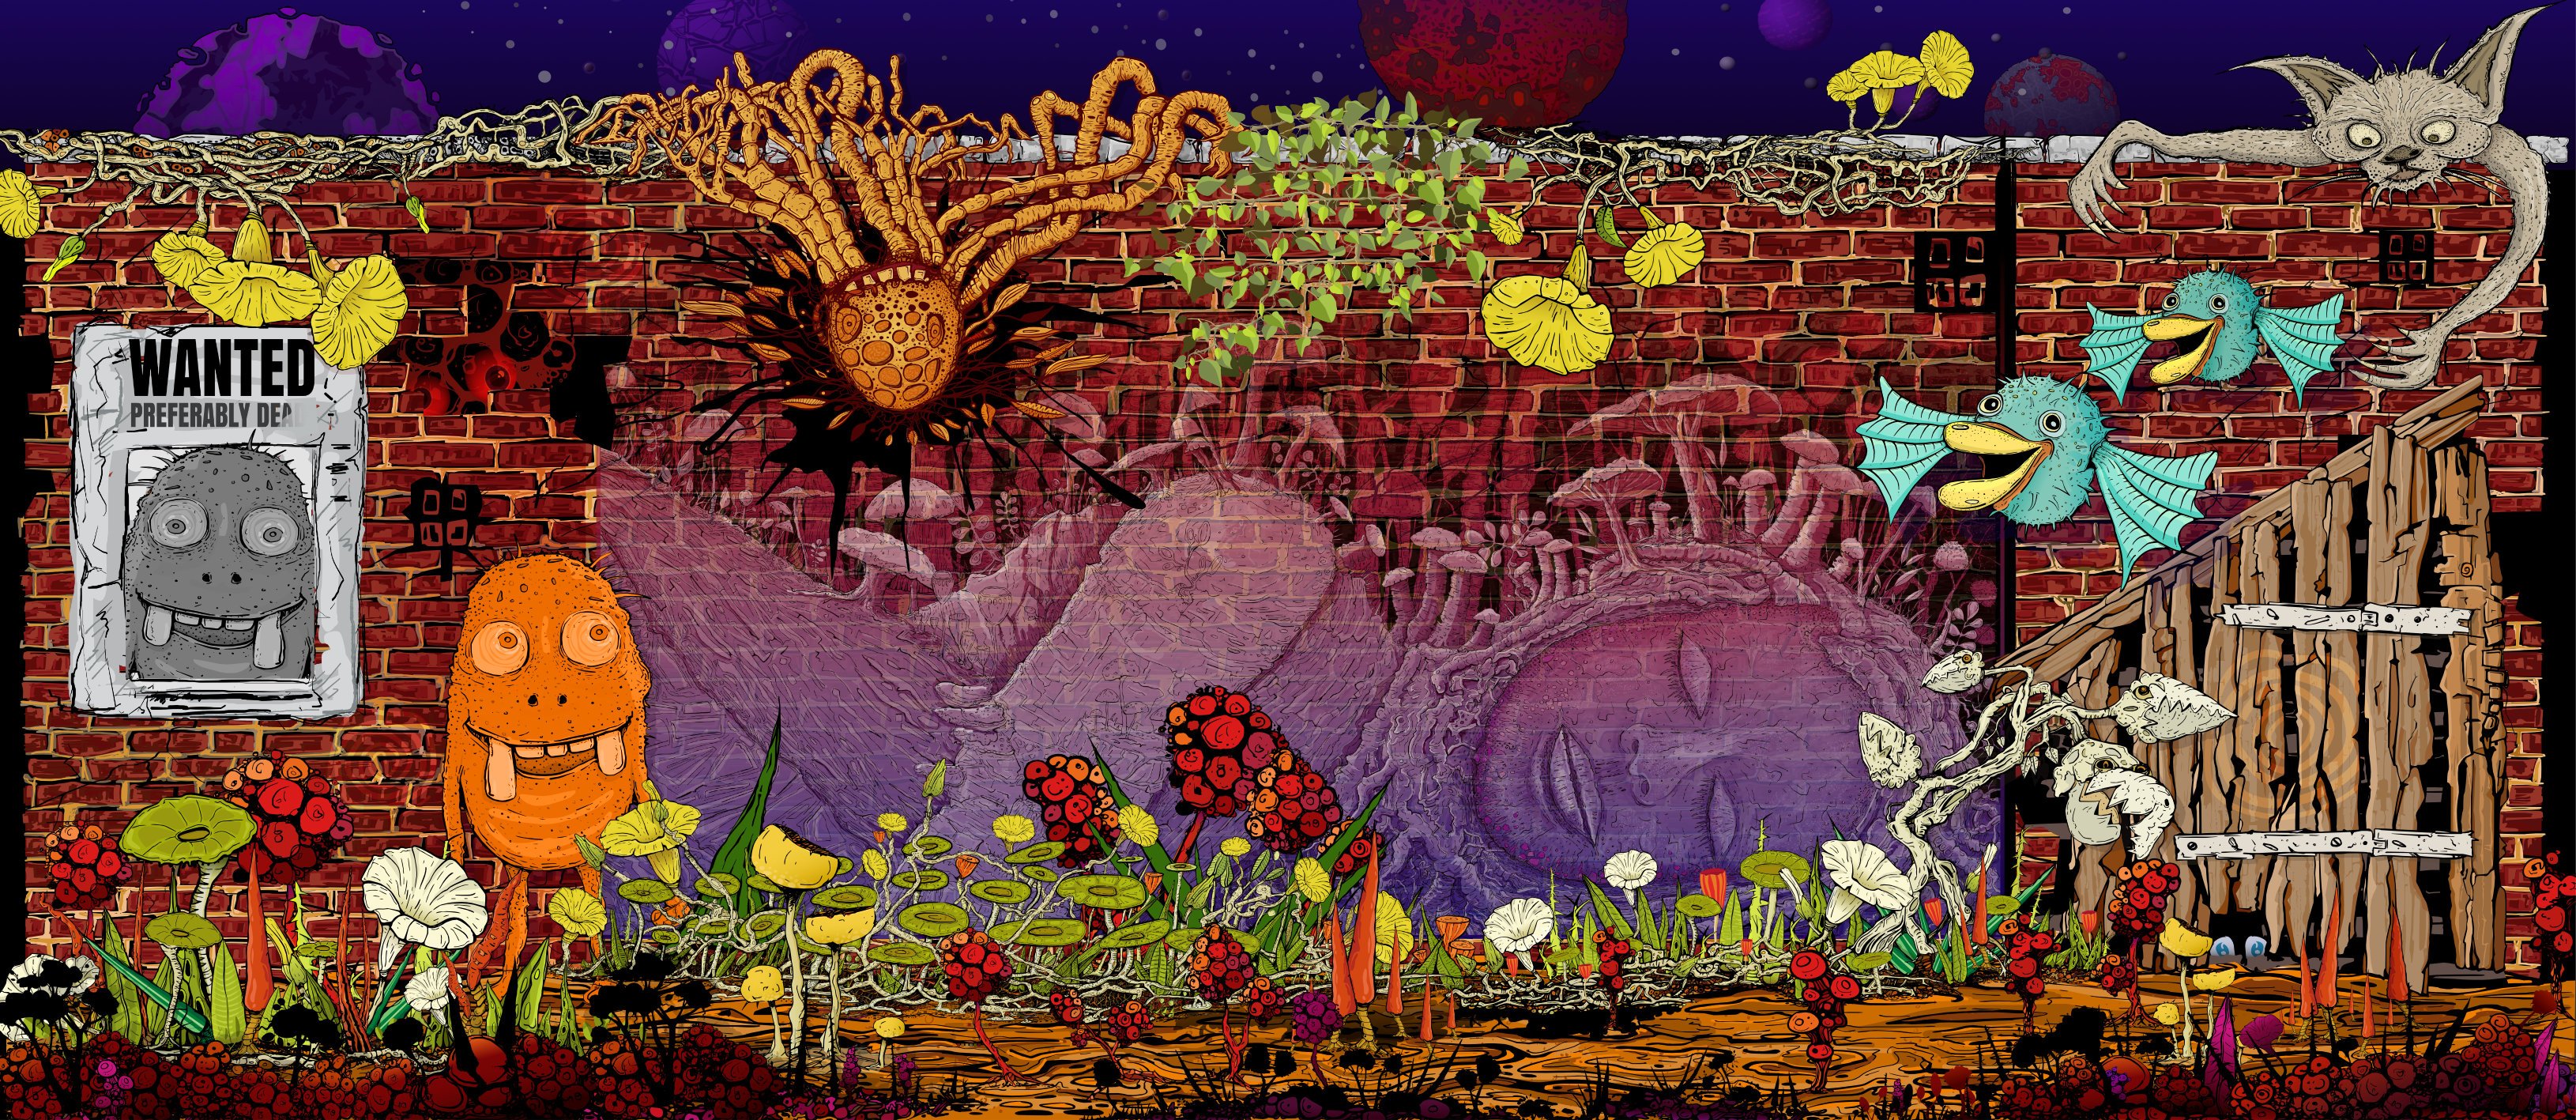
The Wall Affinity Designer | 1840 x 800mm 300dpi | Mixed raster and vector but mostly vector! Used Untamed: 'Planetary Toolkit' of for the Sky
-
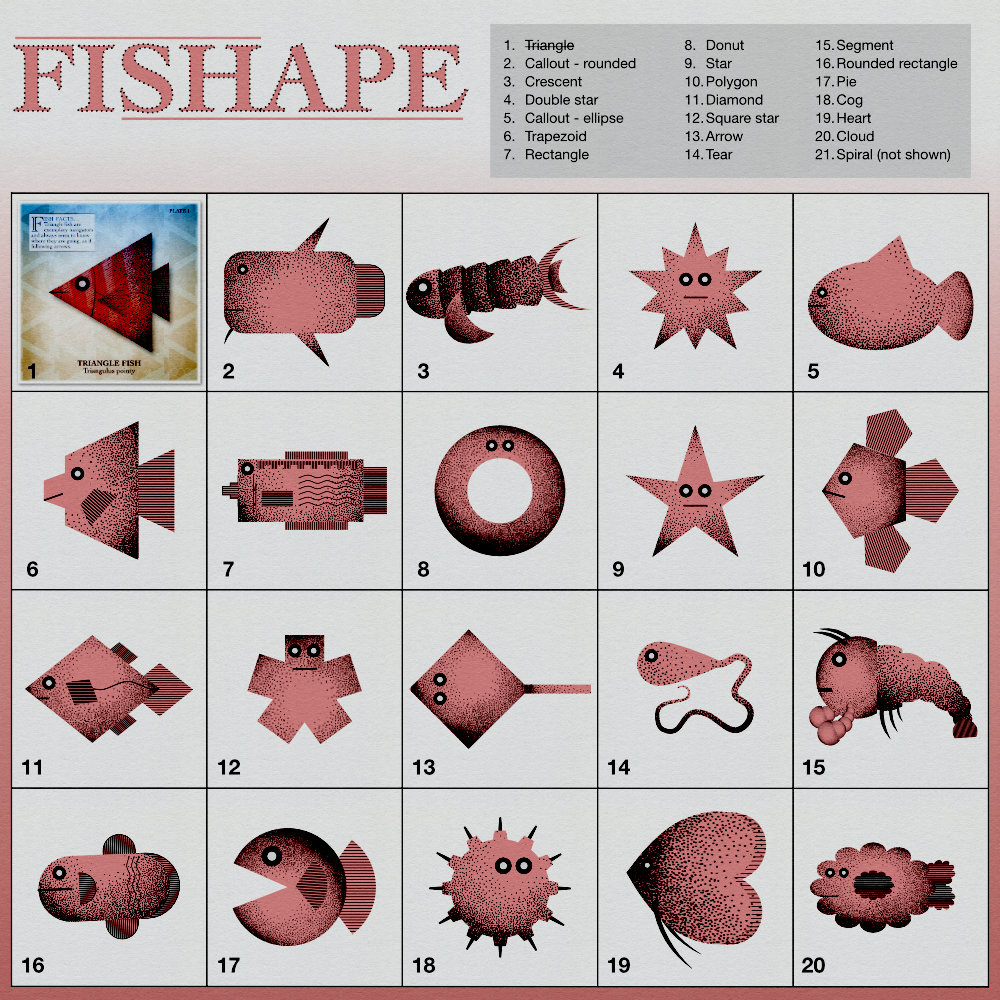
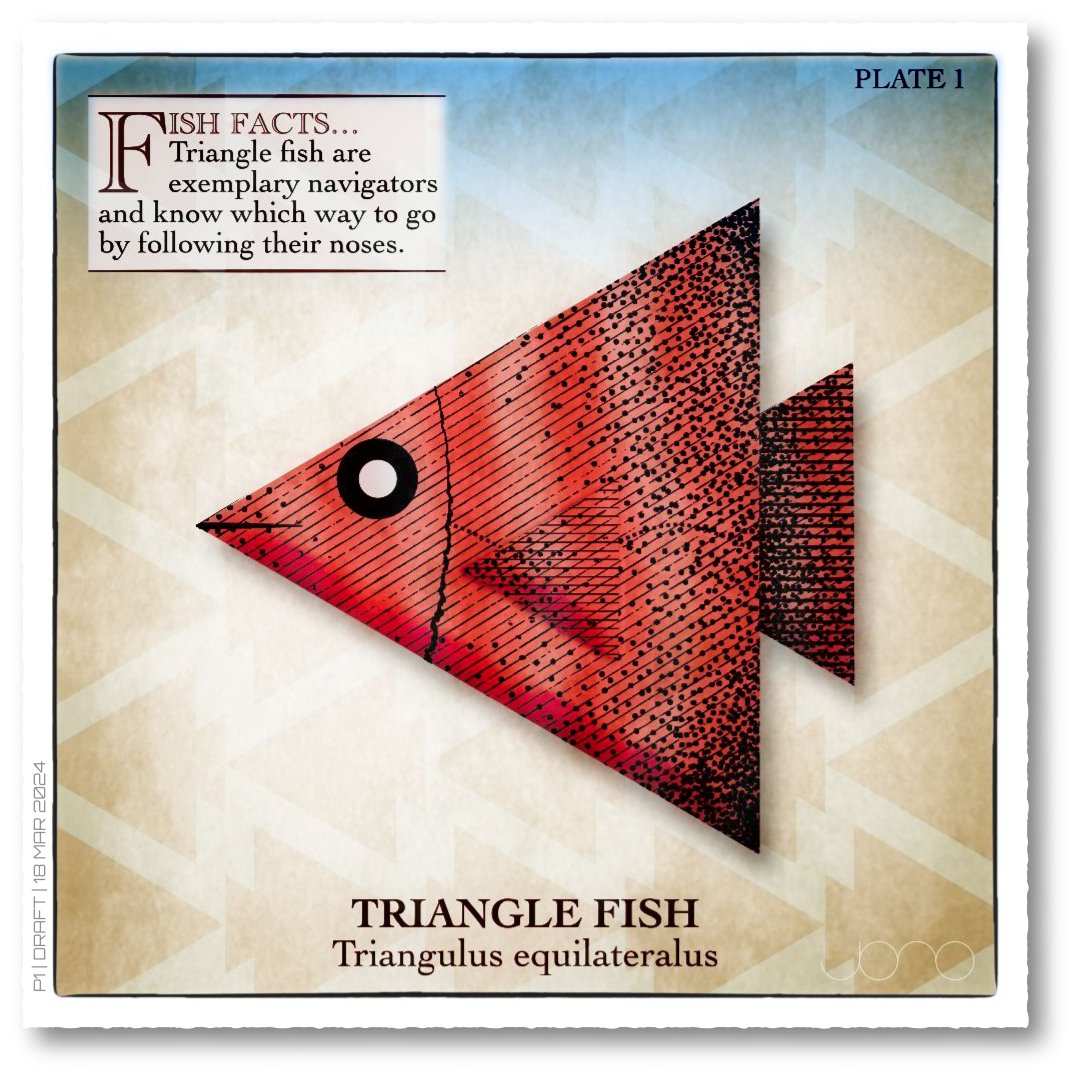
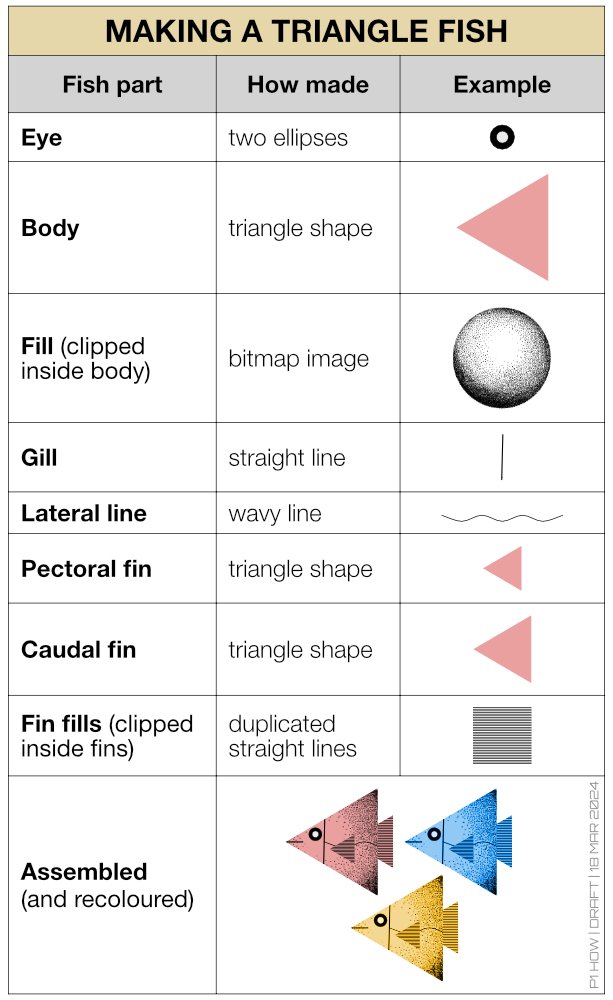
Hi all, I thought I'd give myself a quick project to explore Affinity's Shape tools and make a series of images. I've made some fish like creatures, but other themes could easily used, like monsters, faces etc. I was thinking this idea could help new users learn about the Shape tools and generally have some creative fun. When I get a few spare moments, my intention is to further embellish each shape with colours, different fills, backgrounds, text etc Note: the bitmap fill is from The Shizzle Style and Brush Pack (Grizzle 1), the paper texture is from True Grit Texture Supply (Folio-Vellum) and additional line shading is from Artifex Forge's Vintage Engraved Patterns (Pattern 6). Yes, I have splashed out on the Spring Sale offers!
- 8 replies
-
- 18
-
-
- affinity photo
- affinity designer
- (and 1 more)
-
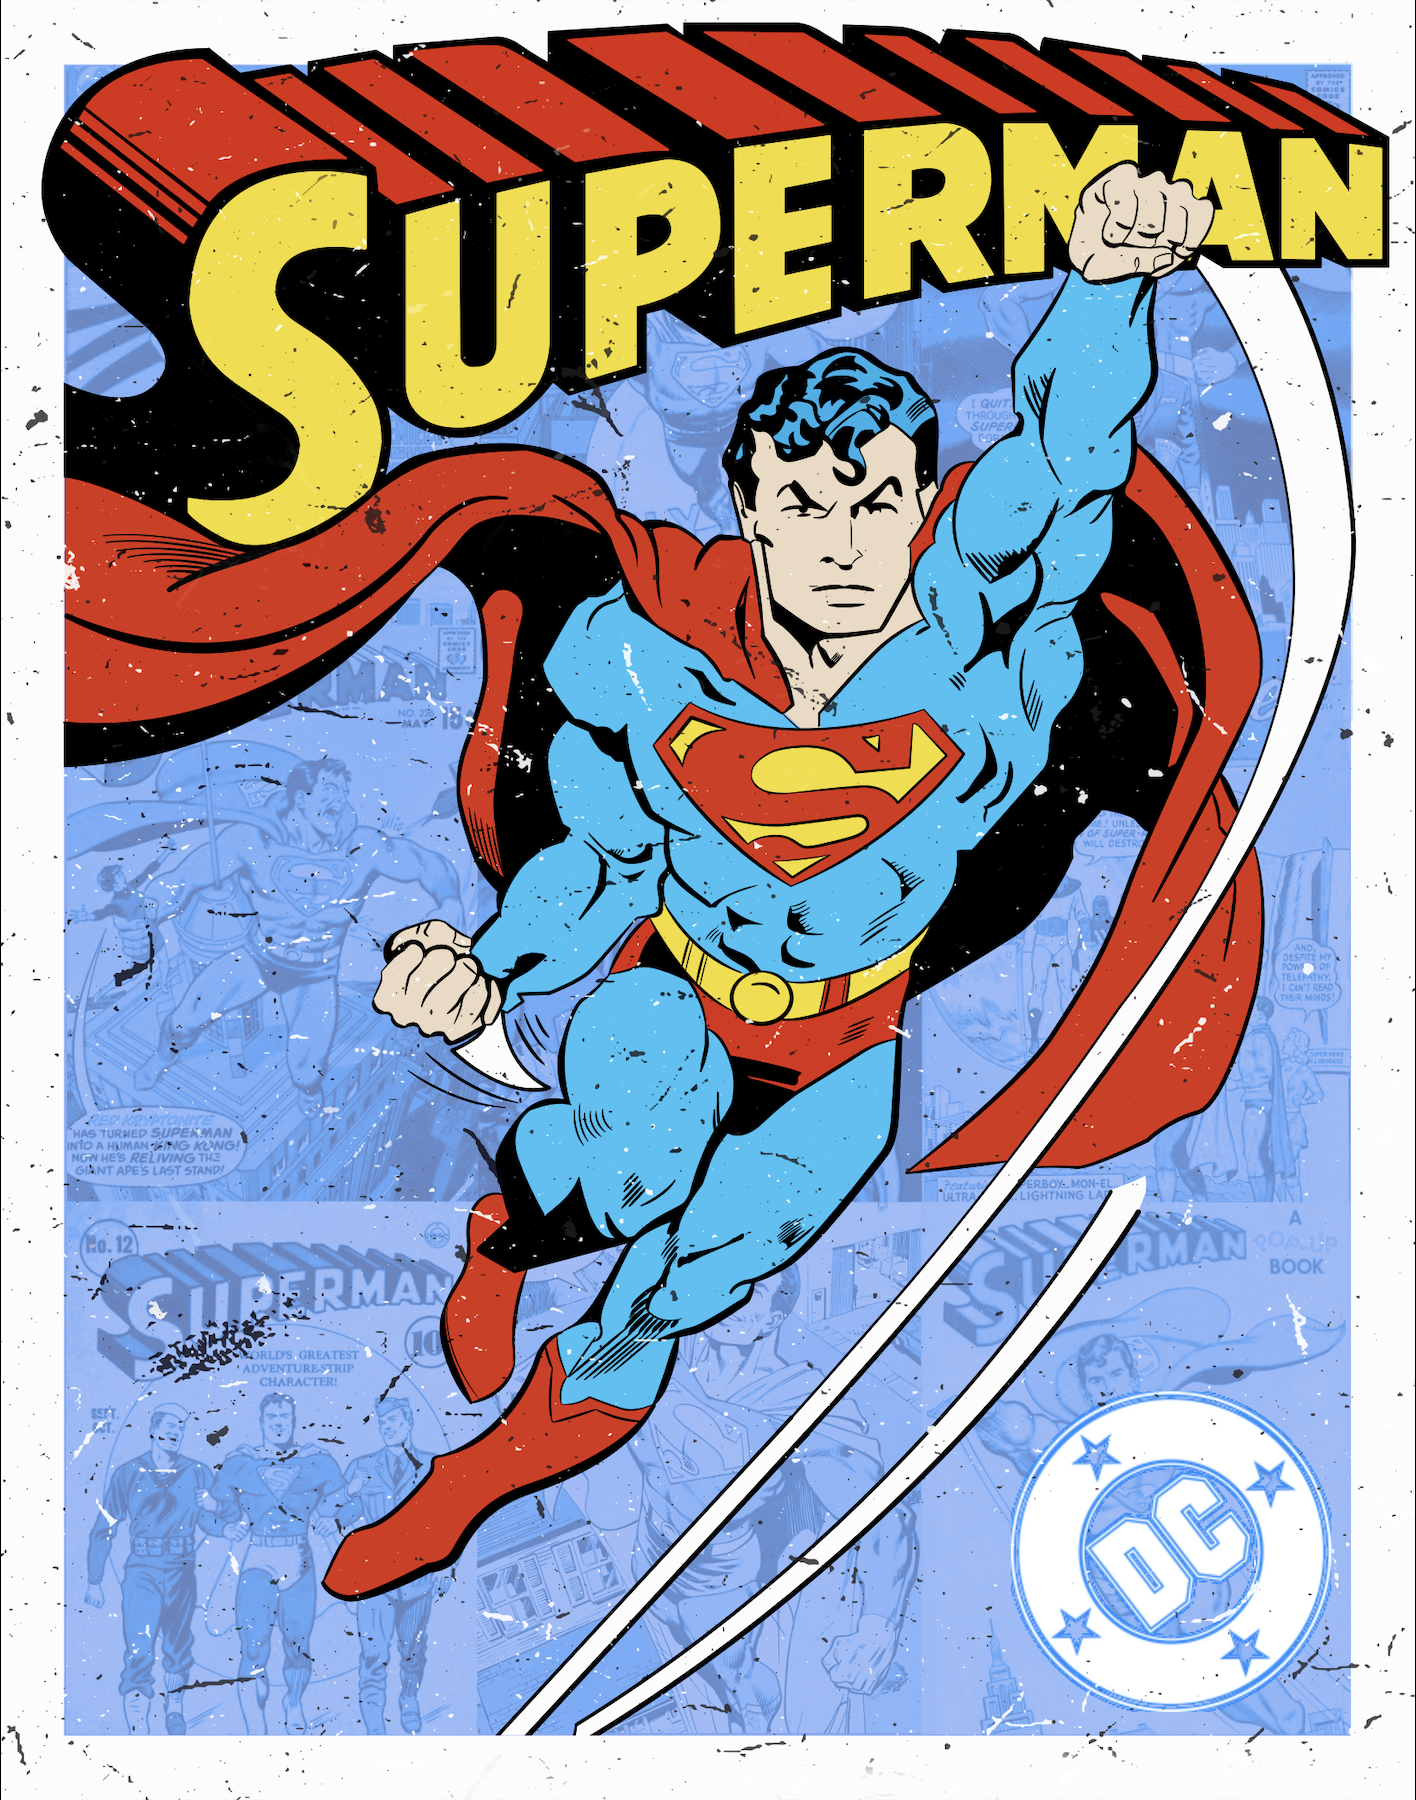
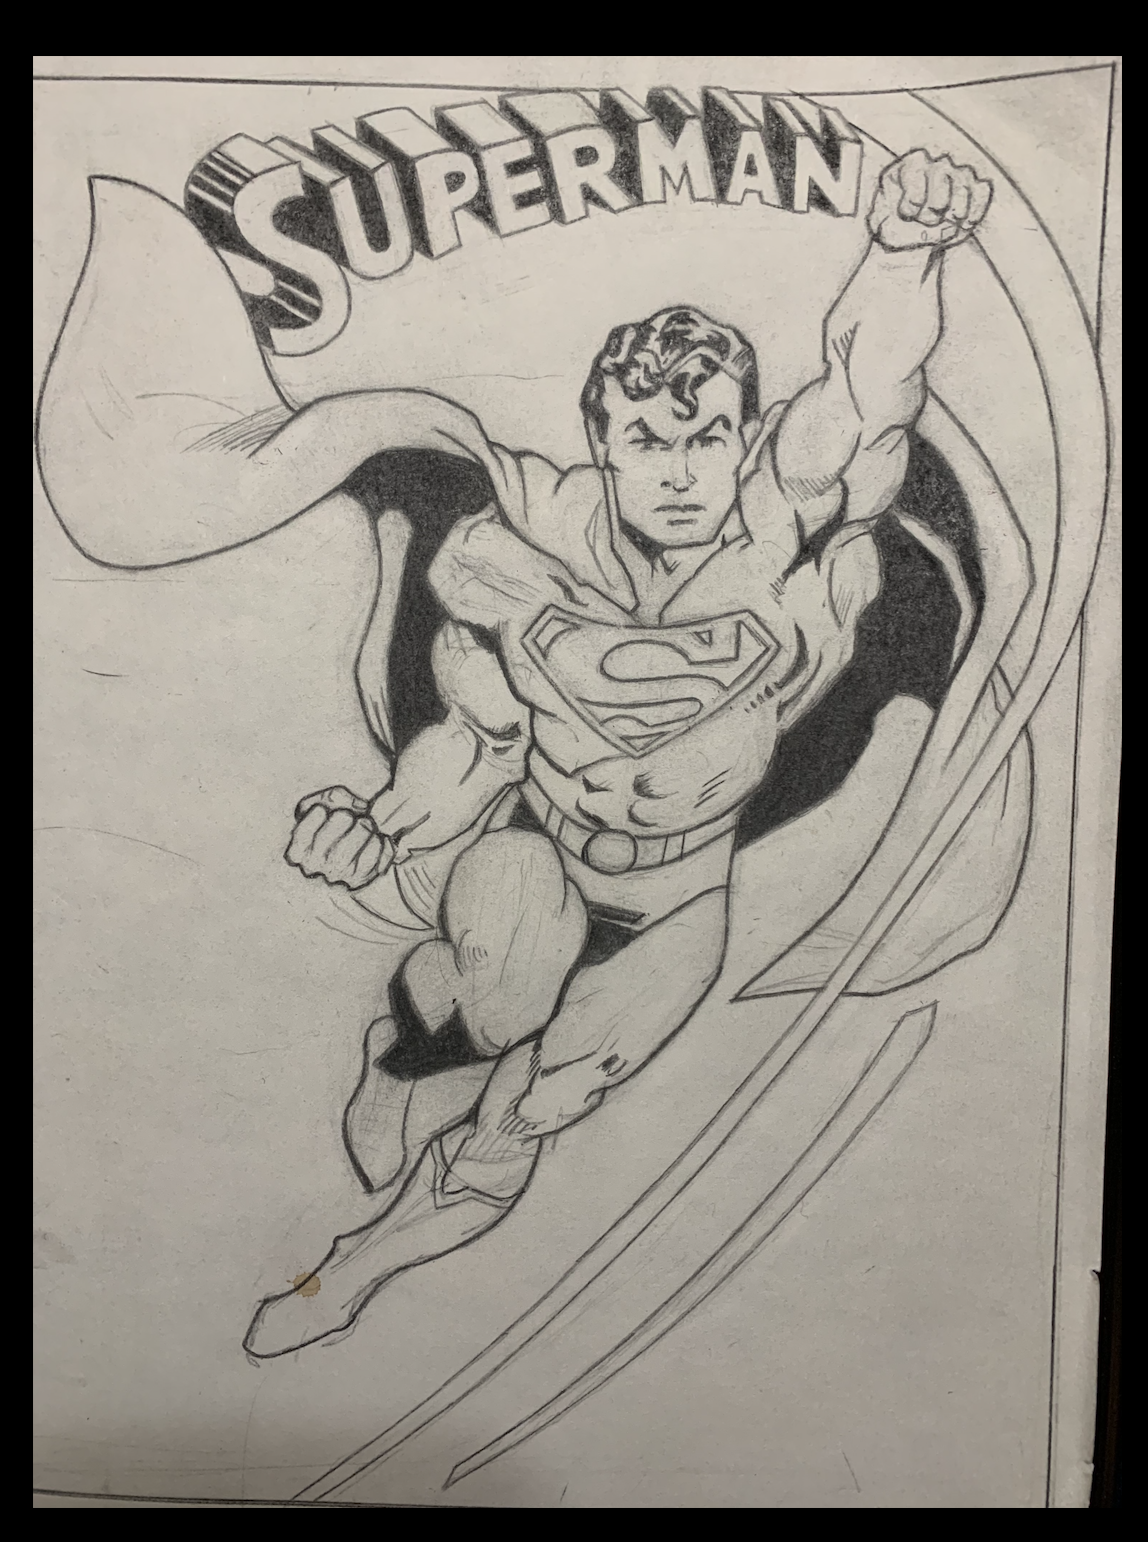
Learning the Affinity Designer Tools, I wanted to draw up a quick Superman sketch and ink/color in Affinity Designer. Pretty straightforward, draw, scan, pen tool, and color.
-
This design was created using Affinity Designer and Photo. Ehh the color and quality loss after uploading is painful and have had similar results on Pinterest. Anyway, Batman the Ride is one of the greatest coasters ever and had visited Six Flags over Texas and Great America last fall. There was no cool merch for the ride anywhere, so wanted to try and create something to do the ride justice. I created the outline using the pen tool in Designer with some vector fills to block in certain areas. I then imported the file into Affinity Photo and started coloring and adding detail with various brushes. I've had good results with the Nathan Brown brush packs. Thanks to Affinity for creating this great program, I will never go back to Adobe again. I WAS NOT commissioned by DC or Six flags to create this art.