Search the Community
Showing results for tags 'Printing'.
-
16-Bit would be so much better for printing. especially with gradients as a background. CMYK 16-Bit please. Thanks.
-
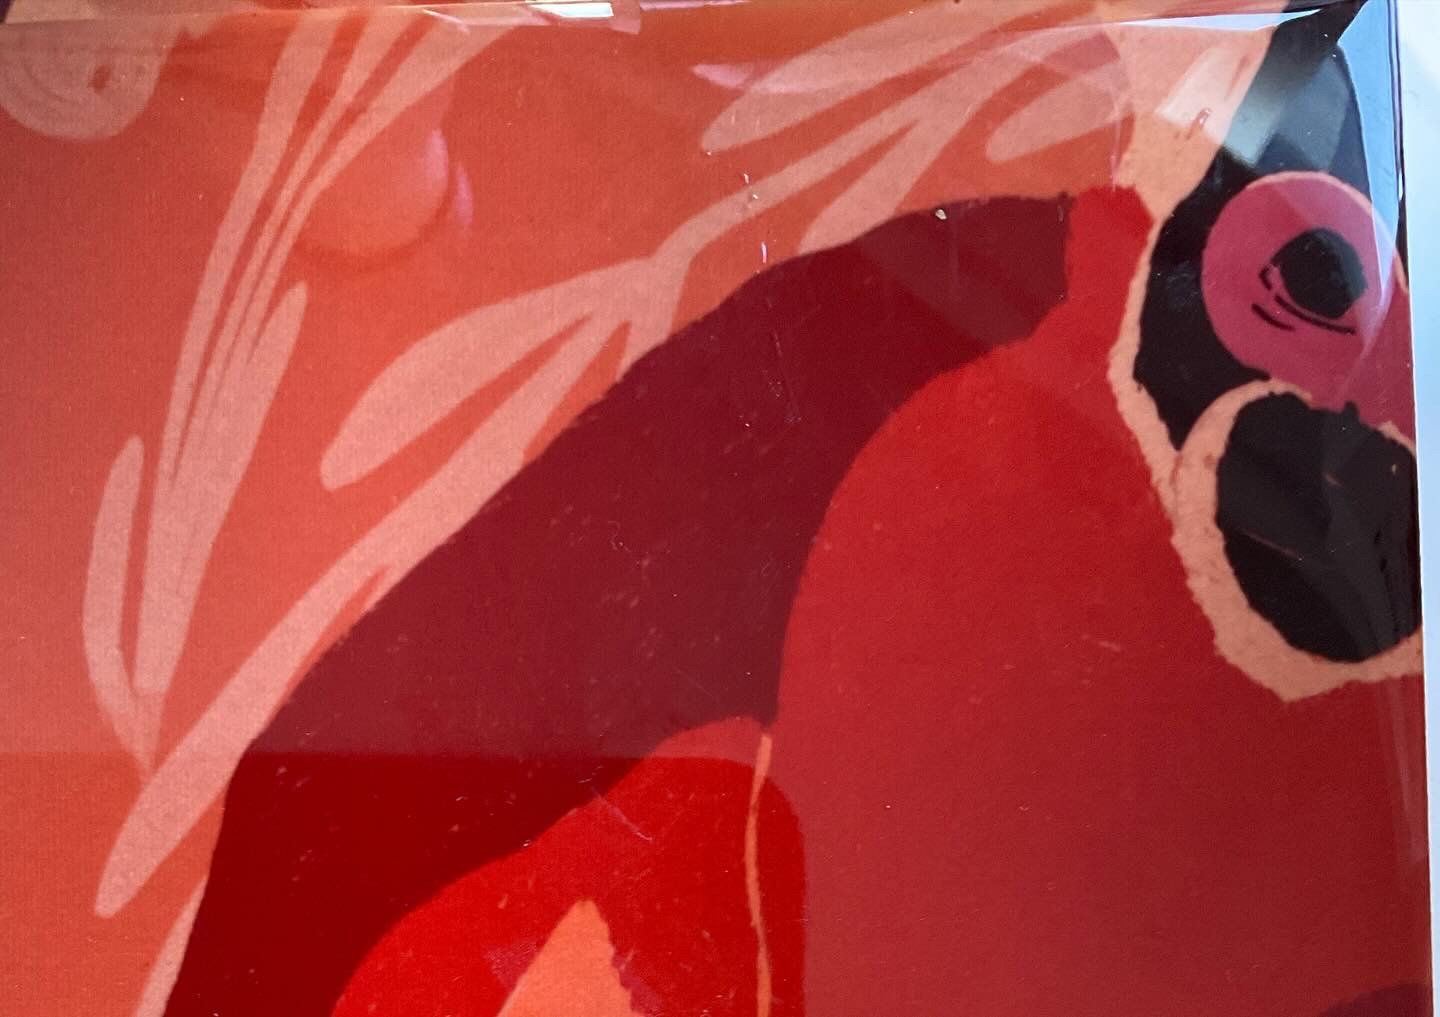
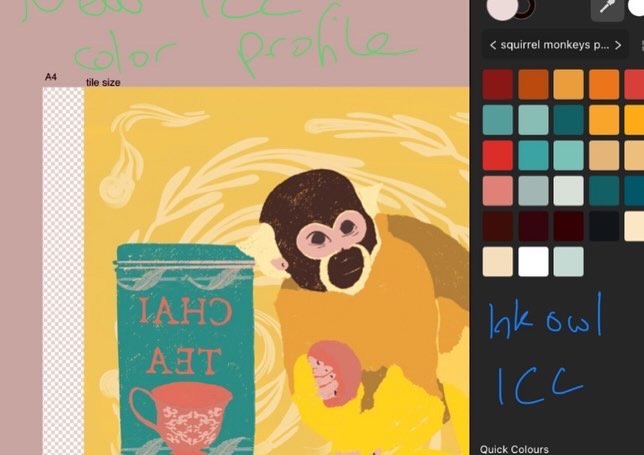
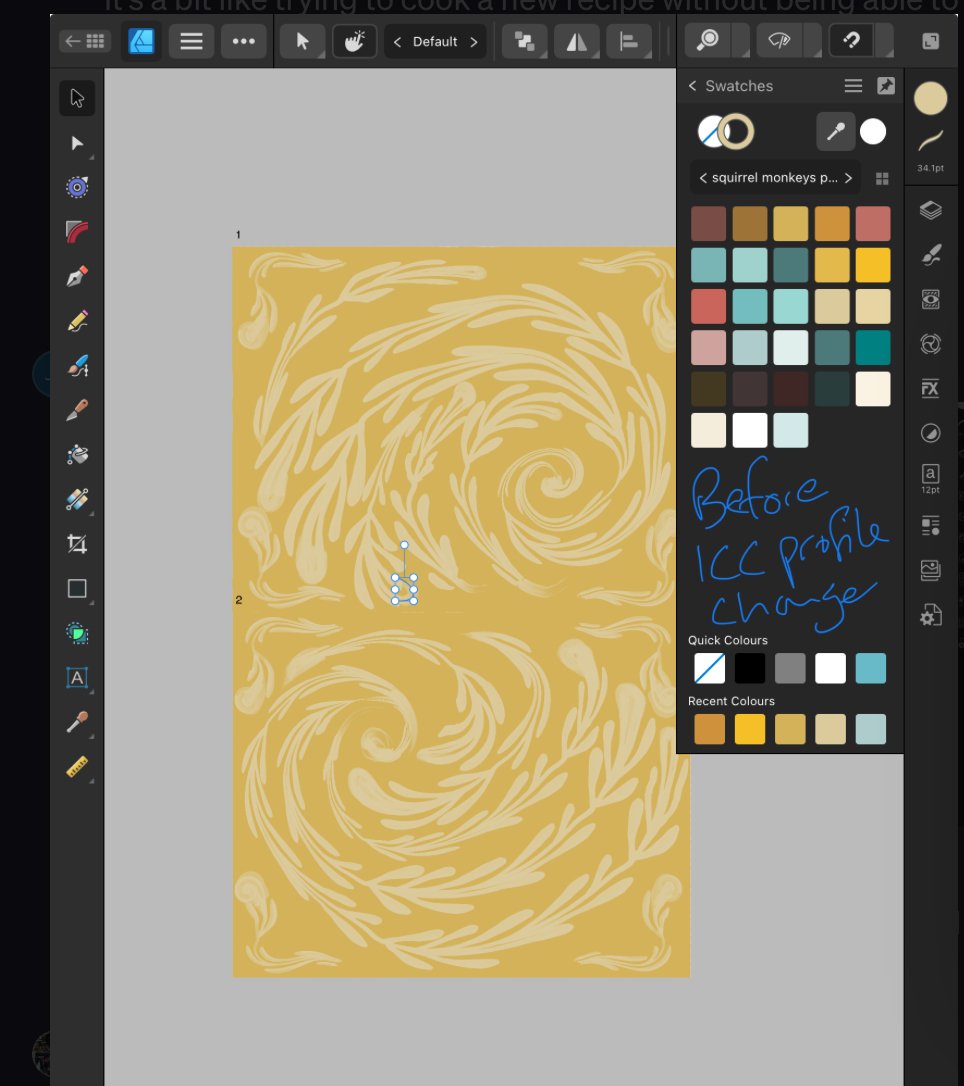
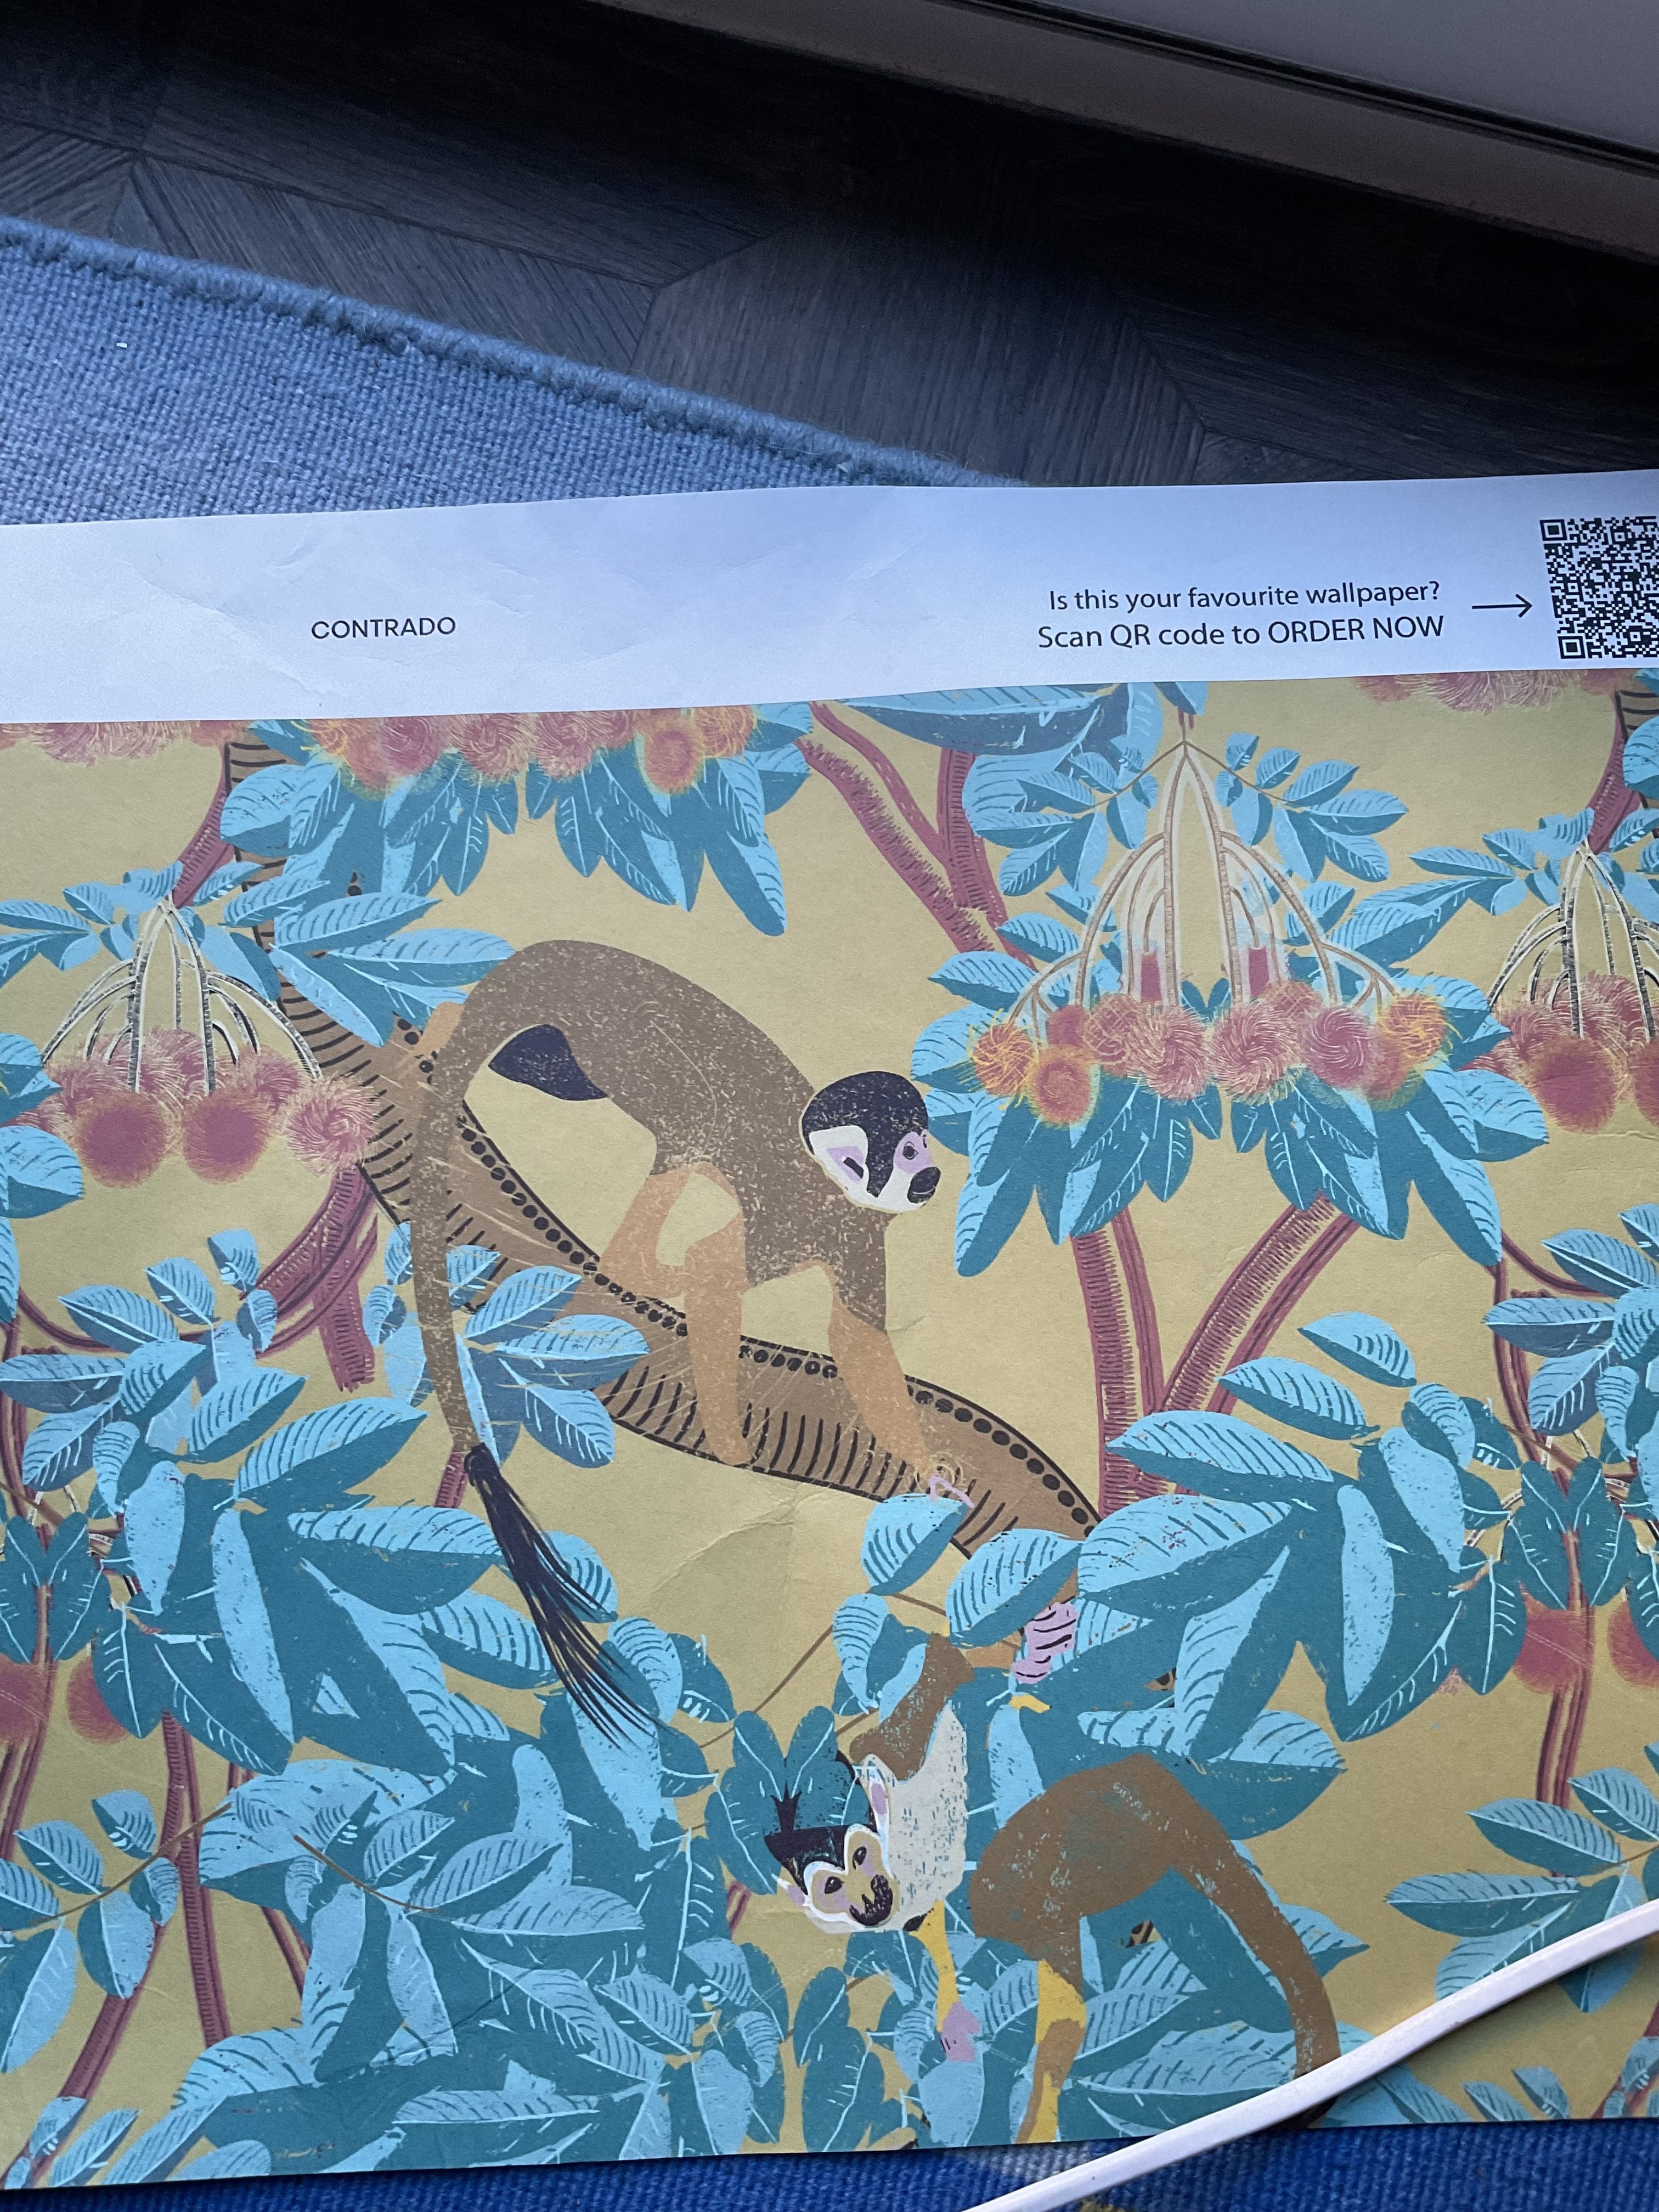
 Does anyone have experience of sublimating via Affinity Designer 2 on an iPad? I’m trying to print tiles to go with a wallpaper I designed. The wallpaper uses the same hex code colours, so they need to match. The wallpaper printed just as expected from the screen colours (but via Contrado, not printing at home). I have printed tiles before using this Epson ET-2720 printer, but using photoshop on a pc and I can’t remember what I did for colour settings. I downloaded a couple of ICC profiles which should be compatible with my printer but they turn the screen pink and the palette more red, and they also sublimate too red (so it’s not correcting a printer bias). The standard srgb profile was better but not right 🤷🏻♀️ Apple RGB is closest but again too different against the wallpaper I’ve tried to adjust the colours rather than the ICC eg CMYK/RGB, more blue, more cyan, less red, 95% opacity etc etc but haven’t found the solution this way. We’ve done various things on the printer eg power clean, nozzle check, changed ink. It can test print the colours ok.
-
Hello, I have a small book ready to print but have not yet managed to find a way to do so. I have many, many problems but the one of greatest significance is to find a way of actually printing the book in the signatures I need for binding. The following is what I have looked at. There must be a solution somewhere (It is called Publisher after all.) but I have not found it. Any help will be greatly appreciated. I require signatures from 1 (rare) to 4 sheets of paper (that is, 4 to 16 pages). However, this requirement is not fixed as, for different books, I will be using paper of differing thicknesses and hence will select different numbers of sheets for the signatures. I have coloured photos that go to the edge of the spread and cover the entire spread, NOT just an entire page. This means that I have to use Bleed and then trim the text block. If I use Booklet as the printing option, it prints the entire file as a single signature (a "booklet" is, essentially, a single signature.) This is no good whatsoever. An average book has between 6 and 10 sheets for each signature. I've never seen a 100 page book bound in a single signature. Since I am using thick paper, my signatures will have about three sheets (on average). If I use Book as the printing option, then it does the page imposition assuming that each signature has a single sheet. This option is equally useless as it would force me into hand sewing every single sheet. As above, I have never seen a book where all the signatures have only a single sheet. Since neither of these options make sense in my situation, I have tried workarounds via the use of pdf files. I purchased a PDF editor (at twice the price of Publisher) just to do the imposition - but that failed too! The reason is subtle ( and very frustrating). IF I export spreads then I can get the bleed done correctly AND get crop marks etc., things that I need for alignment and trimming at the binding stage. BUT, while the PDF software CAN do imposition, it is NOT imposition of spreads that I need. It is imposition of pages AND .... Phew! IF I export, from Publisher, as Pages, THEN it puts bleed round each page. That is, Bleed round FOUR sides of each page (not round each spread)!!! So then, when the imposition is done, there are two strips of bleed down the middle of each spread! Ouch!! This is NOT what is required. If I export as pages WITHOUT bleed, then the imposition in the PDF software does look fine. BUT there is no bleed, crop marks etc. So, although this looks nice on the monitor, it is NOT suitable for printing and binding when I need to trim the text block on the Crop Marks. There are additional, still serious, problems. I use Affinity Photo for photo-editing but, when I put a Photo image into Publisher, the colours change. I have checked and I have the same colour profile in each. I have also checked using Windows Explorer preview window. There is NO difference between the image in Photo and Windows Explorer (preview), but the same image in Publisher is significantly different. When I try my workaround by creating a PDF file, I have not yet found a way to get a PDF that does not change the colours. My monitor is a high-end NEC with its own 14-bit LUT and I re-calibrate it every two weeks. Surely all I need MUST be in Publisher but I have not found it yet. I have searched the tutorials but found no reference. I have been struggling with this for two years (from PagePlus9 days). The imposition algorithm is utterly trivial. I expected to find it under Print but can't see it. Where is it? I will be eternally grateful to anyone who can help me solve this problem. I have spent two years on this project, spent many thousands of dollars all the time assuming that printing a small book would be a feature in any publishing software. I have asked this question before and people have been sympathetic but could offer me no solution. I hope someone out there knows the answer. Splitting my file into several files is not practical as small changes are likely to be made from one printing to the next and these would cascade over all subsequent files. There is also the problem of all the photos covering entire spreads, not just pages. Sincerely, Robin
- 4 replies
-
- 1
-

-
- printing
- signatures
- (and 2 more)
-
Once I upgraded, I can't for the life of me to get my images to print a full image when printing. Sometimes it prints about 1/2"-1" worth of image and other times it prints closer to 1/2 of the image. I have zero issues is all other programs I have tried. Printer is HP OfficeJet Pro 6968
-
I don't see how to create a feature (object/layer) that is visible, but won't print.
-
 Hi all, I think I need some advice on the best way to create and print an A5 Booklet using my home printer (ideally from start to finish). I have searched the forums but have been unable to find any help on this topic. I have created a document (in A4 format, I believe? (.afpub file attached)), but when I come to print it, I am unable to get it to print in A5 Booklet format. I have tried all possible combinations in the print settings (my HP LaserJet4250dtn printer supports duplex printing) but no combination seems to produce the required result. I am not sure if I have created the document using the incorrect template, just missing something in the printer settings, or BOTH! Any advice or pointers/links would be greatly appreciated. Catalogue2.afpub
 -
 (Cross posting over here from the bugs forum hoping that maybe more eyes will help find a resolution.) As stated in the title, using any Affinity app if I open any document or create a new one and hit [Command P] to print and it will work the 1st time, but any attempt to print again will result in no print dialogue appearing on the screen. Choosing Print from drop-down menus has the same effect - no printer dialogue. I must quit the application and re-open the document to print again (and still just the once). This is affecting all Affinity apps (Designer, Photo & Publisher) and is also replicated in the earlier version 1 applications. Affinity apps have been fully updated to version 2.2.2.1 (which seems to have caused the problem) Running on Intel iMac running MacOS 14.1.1 (but issue began prior to updating from MacOS 13 and is actually the reason I updated in the 1st place). Issue only occurs in Affinity Apps all other apps are printing normally. Have deleted the preferences for Affinity apps - issue persists. Have deleted Affinity Apps and reinstalled - Issue persists Have reset by holding Ctrl at launch and cleared user data and Document & Window states, have also removed the preference and support files manually, none of which has resolved the issue. Have also confirmed that the Printing Dialogue is not hidden behind any open windows, is not lurking off the edges of the screen, or showing up on an external display (as I am only using the built in display / no externals). The apps do print normally when launched using a test user, but switching users every time I need to print something is not a viable resolution). Booting into SAFE mode and resetting NVRAM had no effect.
 -
 Using version 2.0 on MacOS Ventura (latest version). The issue is consistently reproducible. I occurs in new documents. A collection of sample documents are attached. Description of the issue: When creating objects that are black (K=100 or GREY=0 or RGB=0,0,0) in a Publisher document, then printing it, cause these object to output in various shades of grey. This cause the objects to be rasterised. Exporting a PDF X:1a and then printing that PDF from Preview correctly renders the objects with the colour K=100 as full black, and thus without raster. This is the expected output. I’m using an HP LaserJet P2015 set to highest quality and in-printer colour management. (This setting works in InDesign FYI). The HP printer is a mono laser. all_the_logos_4C_X1-a.pdf all_the_logos_4C.afpub logo_RGB=0,0,0.eps logo_RGB=0,0,0.pdf logo_RGB=0,0,0.afdesign logo_GREY=0.pdf logo_GREY=0.eps logo_GREY=0.afdesign logo_K=100.eps logo_K=100.pdf logo_K=100.afdesign
-
 Hello. I'm using windows and affinity publisher. Attempting to print some business card artwork and when I use file/print it results in a "fax" window popping up asking me for details of what I want to say in my fax. Am a bit baffled.
 -
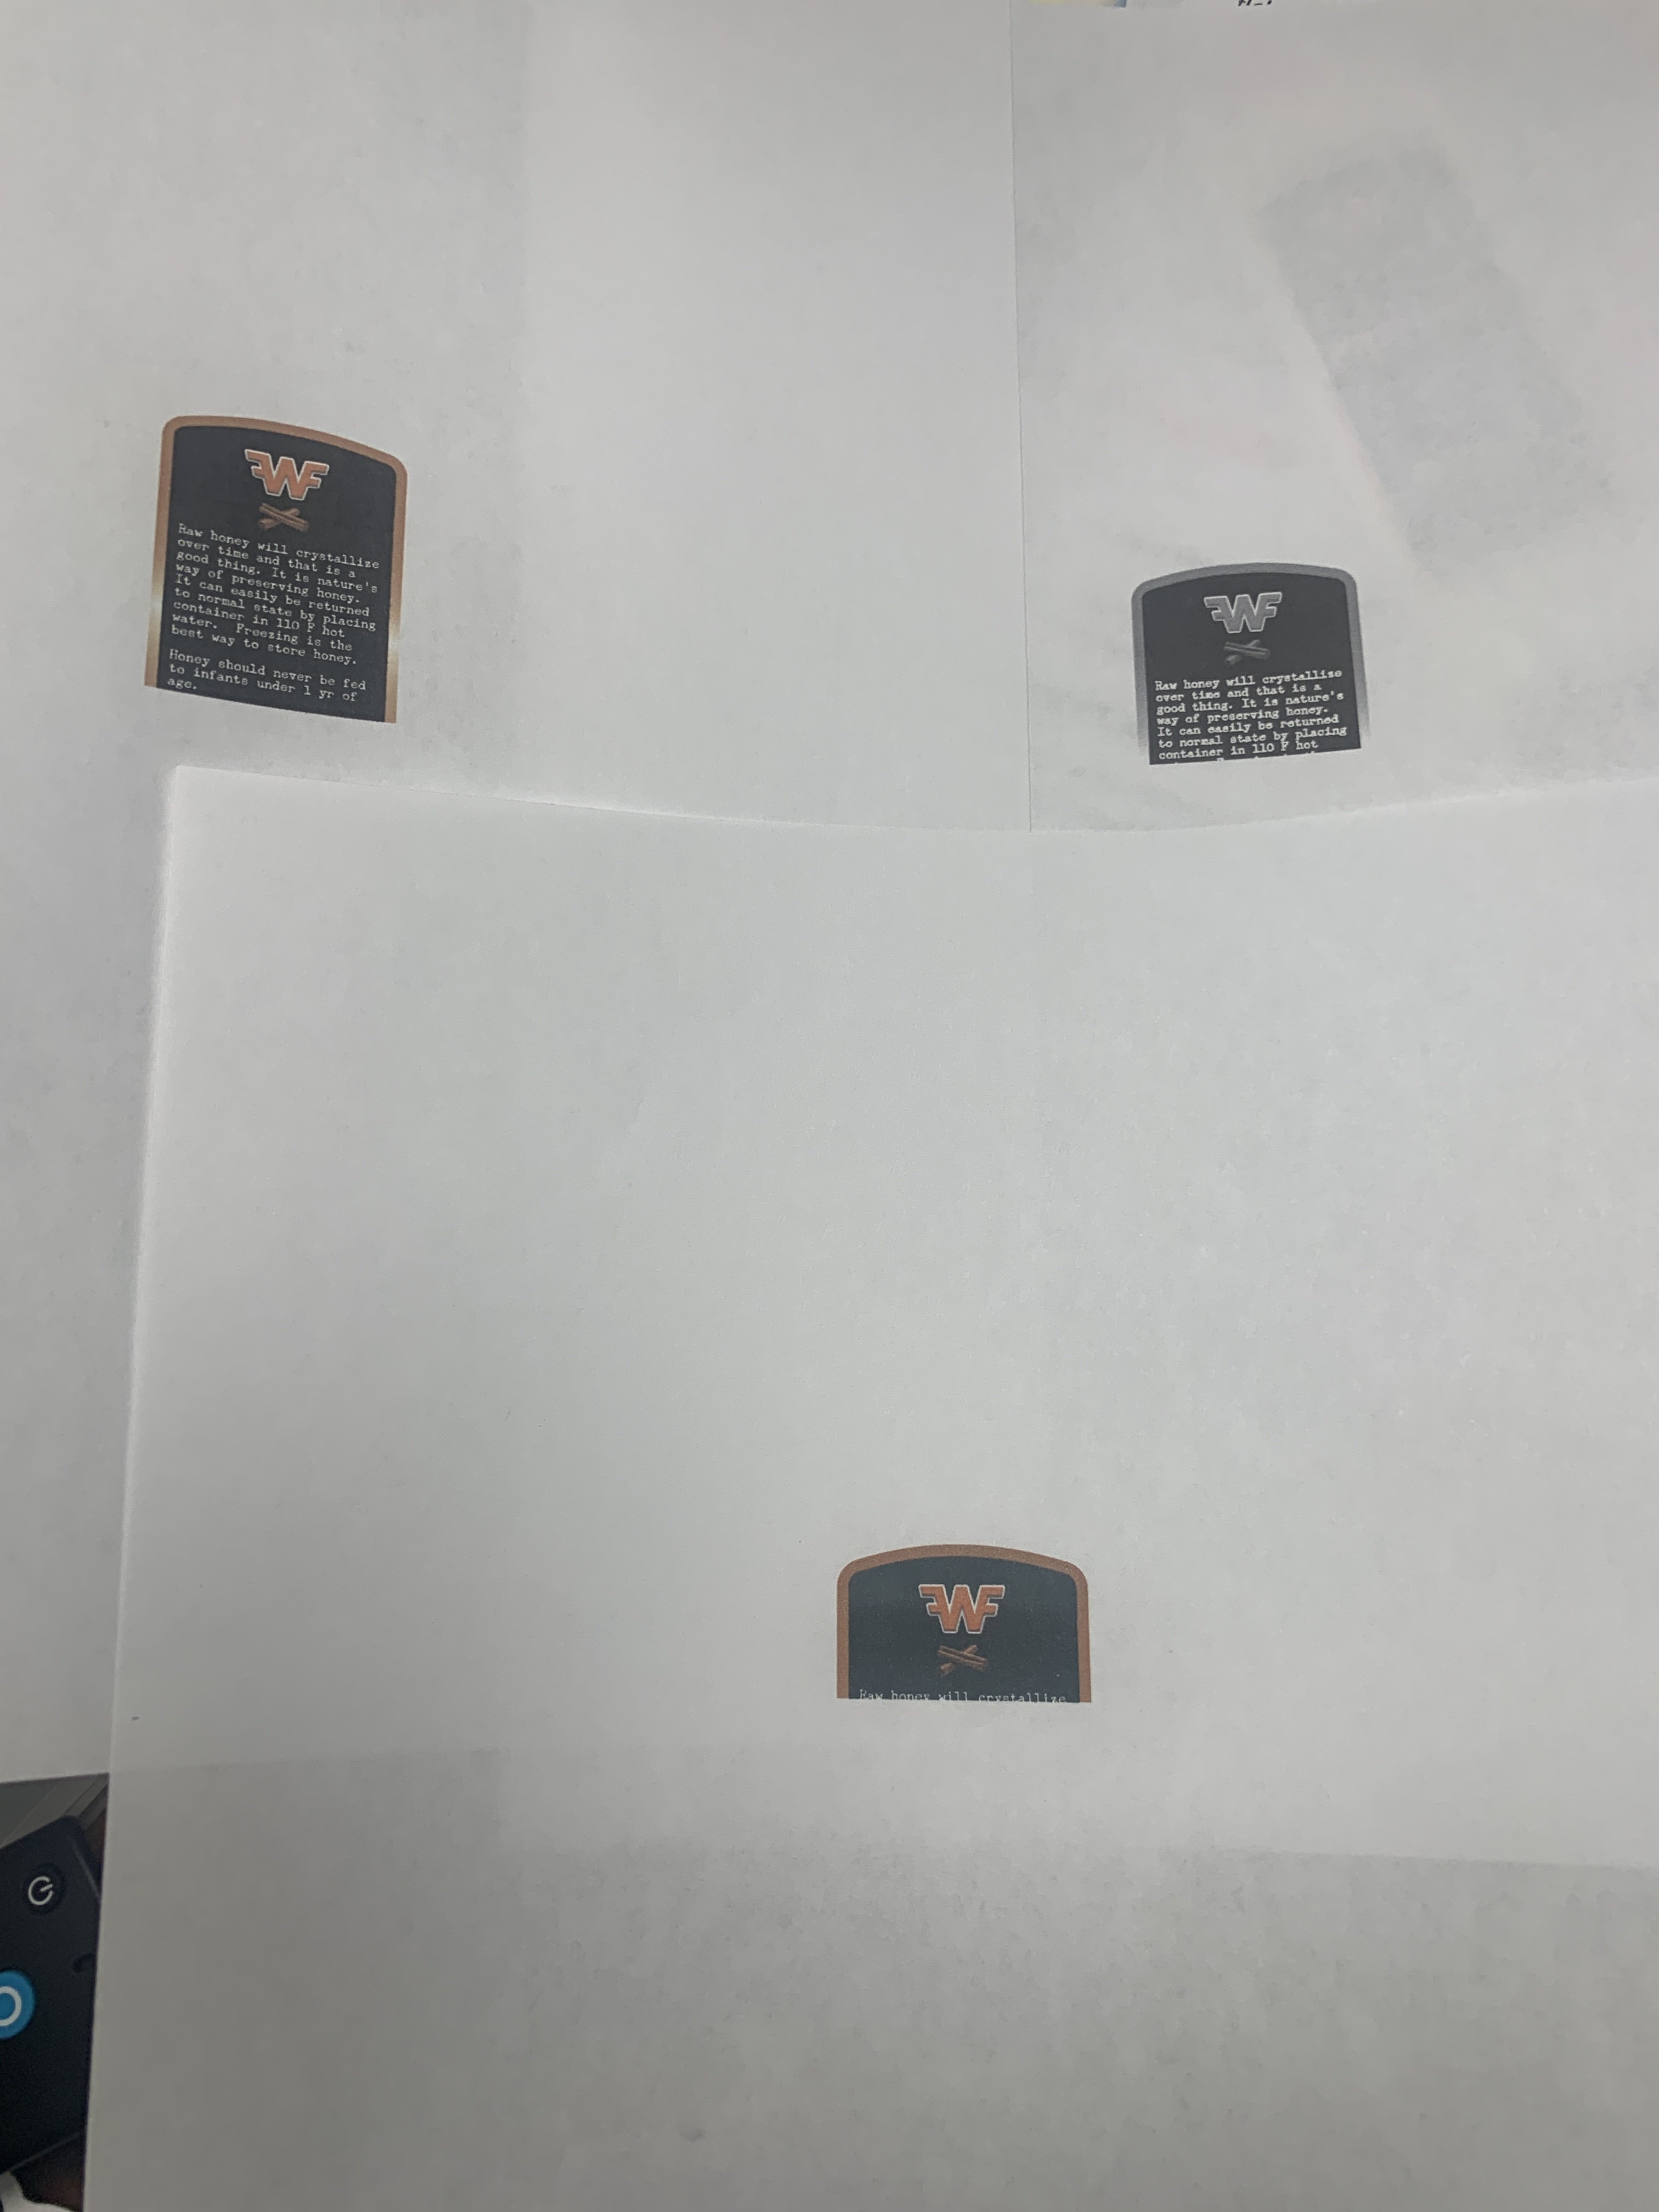
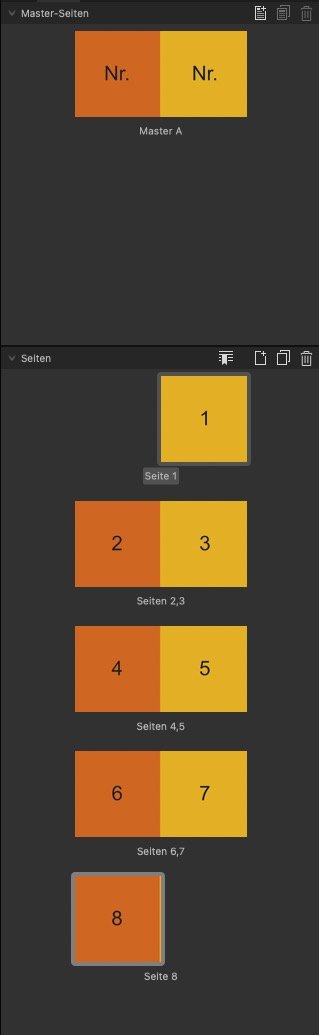
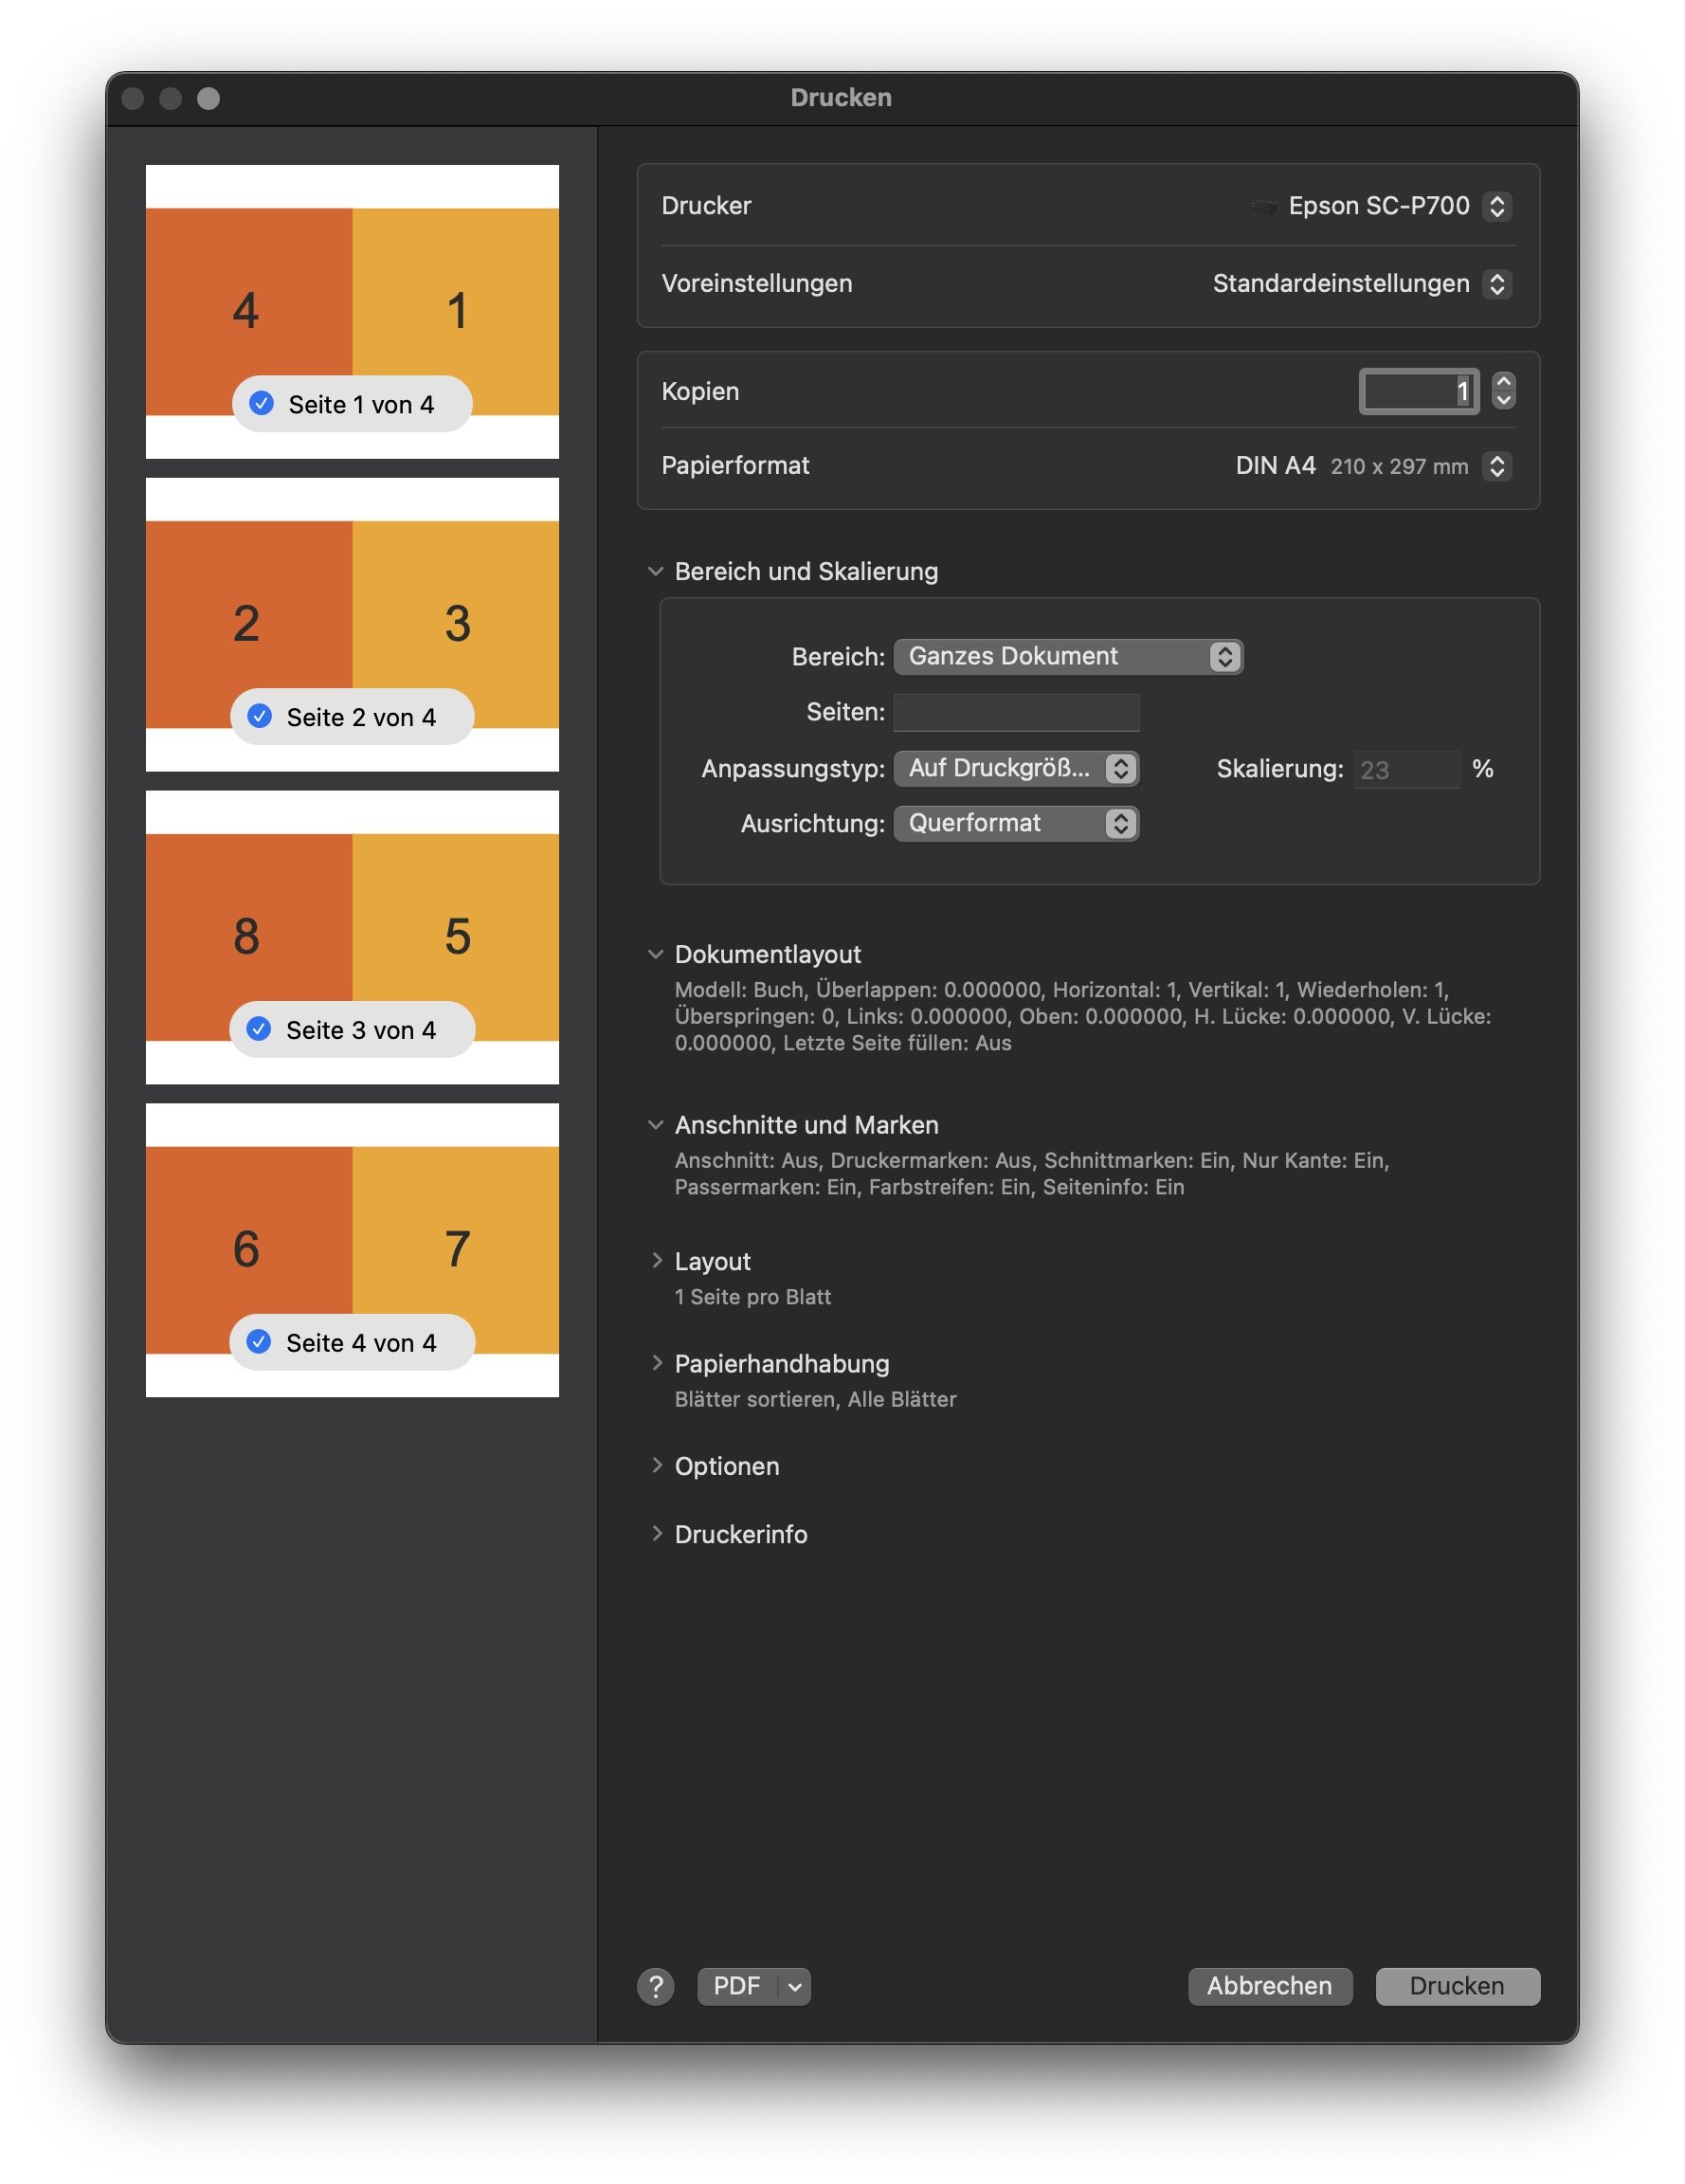
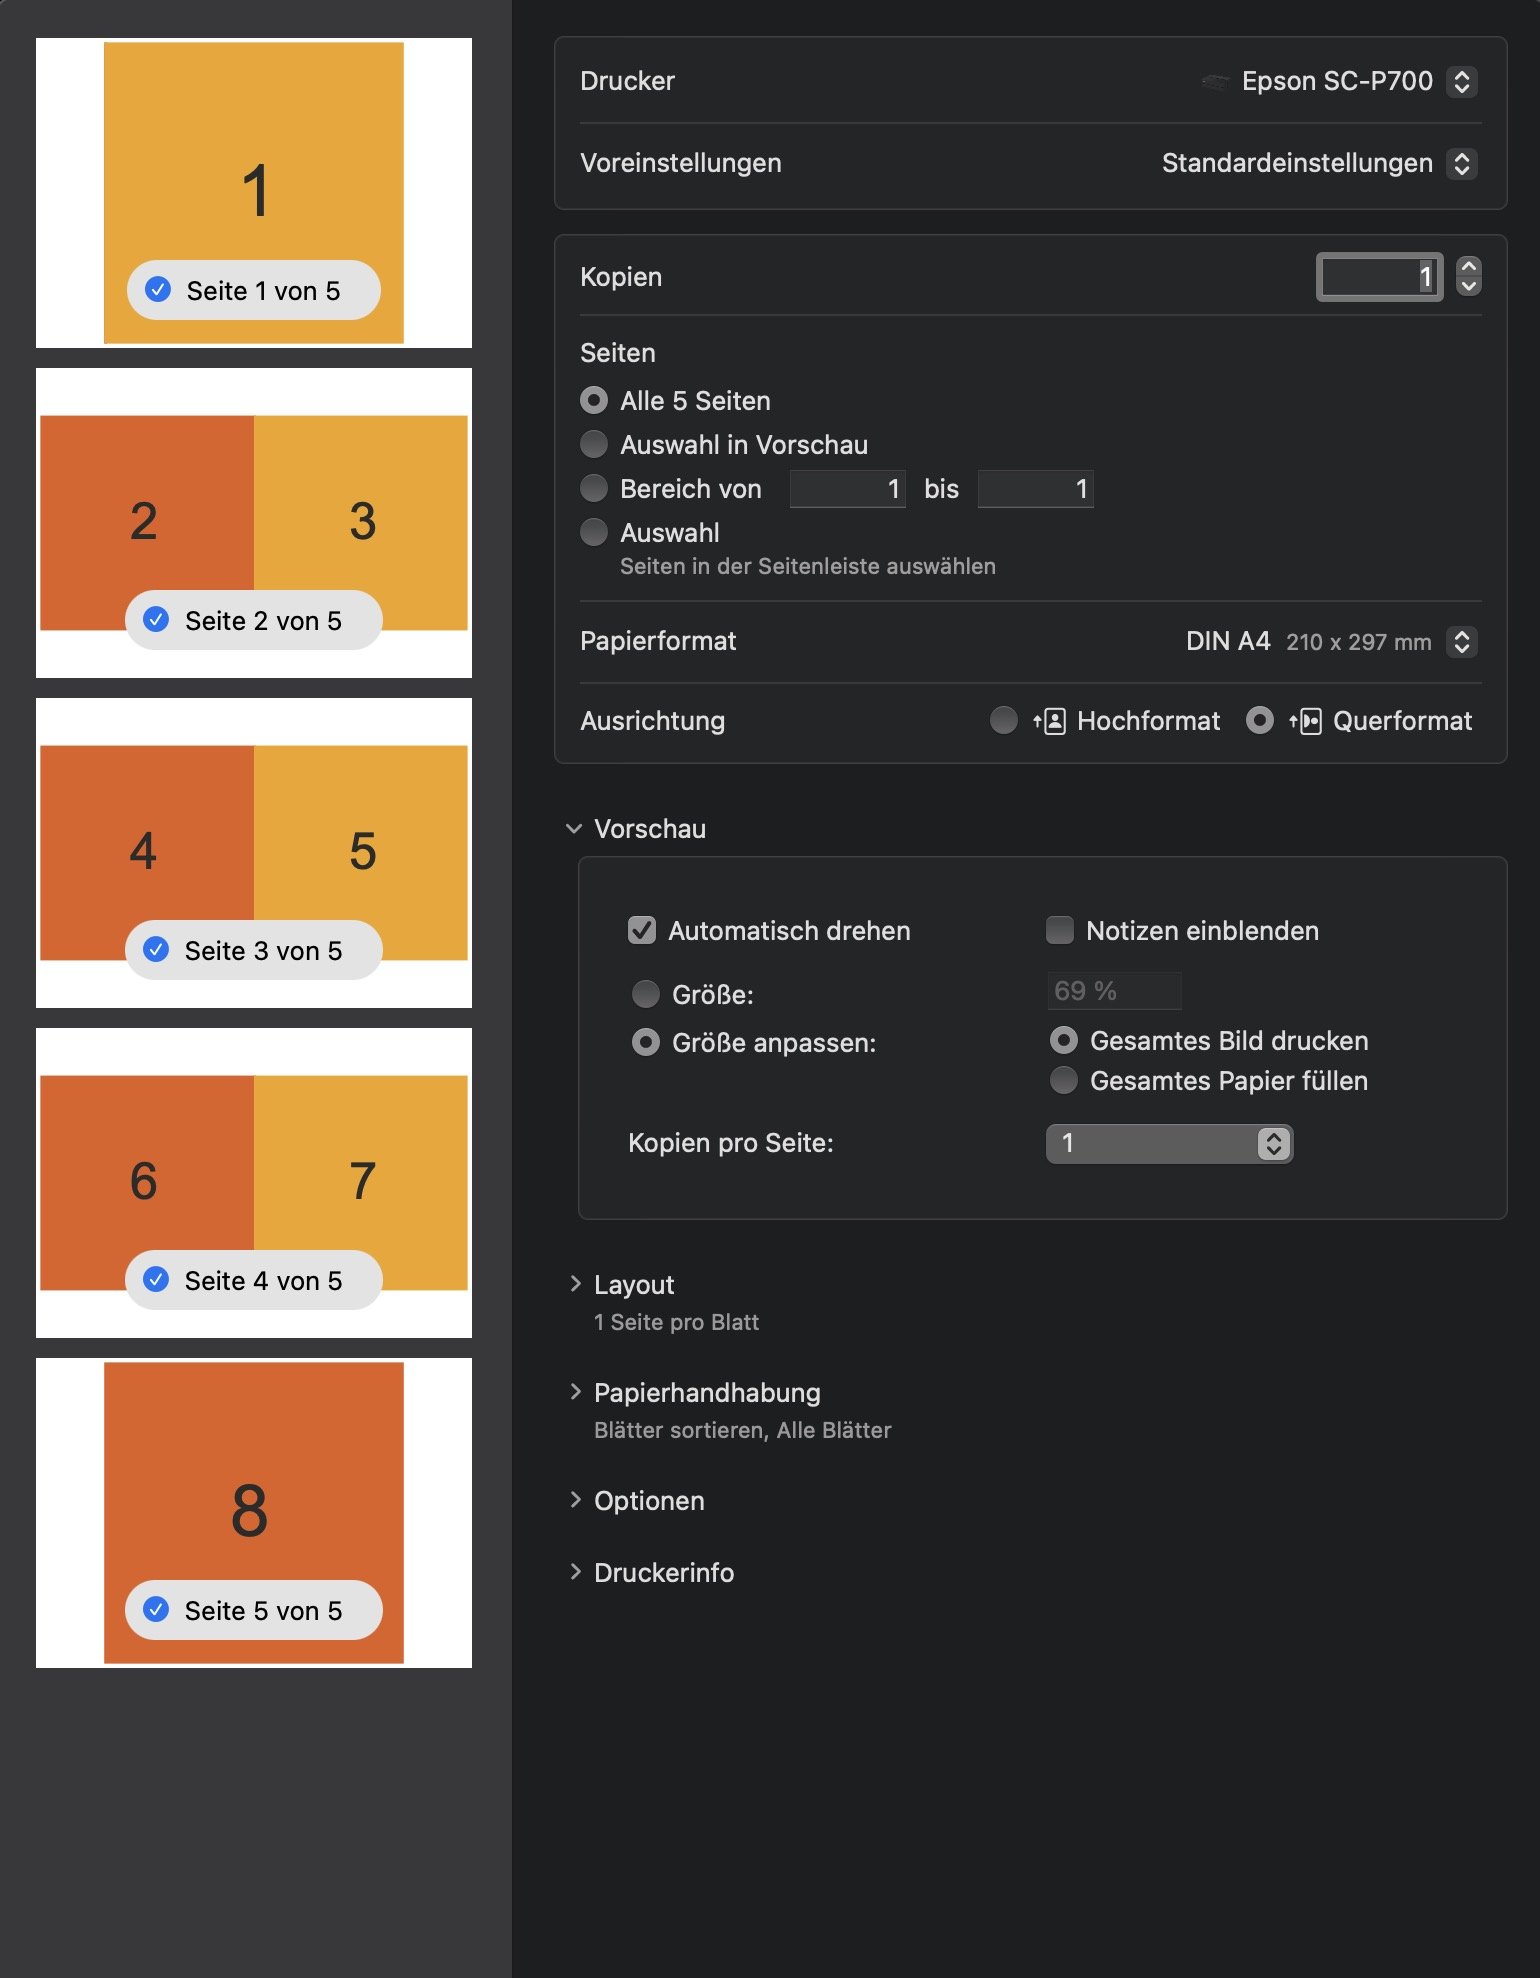
 MacOS Ventura 13.5 … Affinity Publisher 2.1.1. When I want to print a document as a book from Affinity 2, the pages are assembled incorrectly. The first page (right) should be on one sheet. Layout pages 2-7 each on one sheet and then the last (left) page should be printed as a single page again. Unfortunately, the software rearranges the order. This also happens if you choose the option "save as PDF" from the print menu. However, if you export the file using the "Export" function, everything is fine. Does anyone know a solution to print directly from Affinity correctly. For my large book project with many images, the way via the PDF export would be very inconvenient. PDF Export.pdf Print_Save as PDF.pdf
-
 So basically, I asked in the Adobe forums about a printer's requests for my transparent kiss-cut sticker sheets, as I thought I'd get more logo designers and such passing by. The printers designer asked for a vector image so that the printer can print white ink first and then the design on top of that. So the way I (think) I understand it, is that I have to create a new vector layer that paths perfectly around the shape/image, fill it 100% opaque white, and then sit it below the main layer and rename it "print first" or something along those lines? Then add the white colour to another document swatch? I am not sure what the guy in the screenshot means when he mentions "overprint in the attributes panel". Is that basically what I have already done in affinity by creating a "CutContour" swatch and adding the cut line colour (magenta)? Also regarding the text, I have used a glitter texture to fill the text, so I assume I need to do the same thing for that and would it be best to keep it on the same white layer as the image, or create a 2nd white layer just for the text? The printer is Chinese, so it is difficult to grasp exactly what she is saying. So if anyone has experience with this sort of thing, I'd really appreciate guidance! Thanks!
-
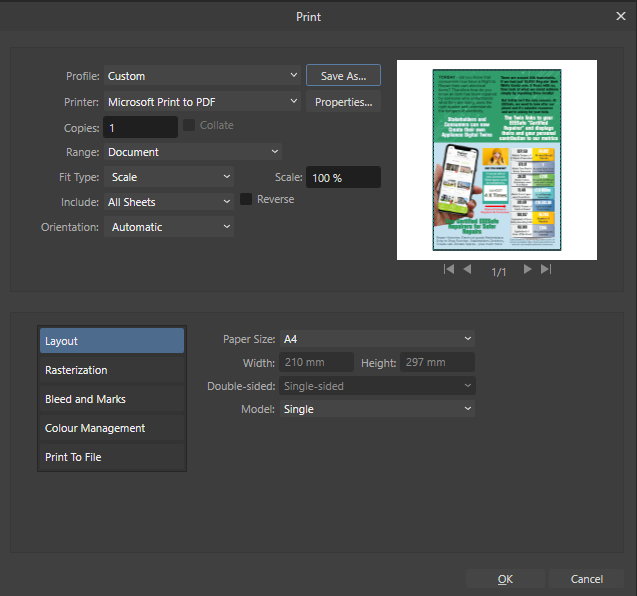
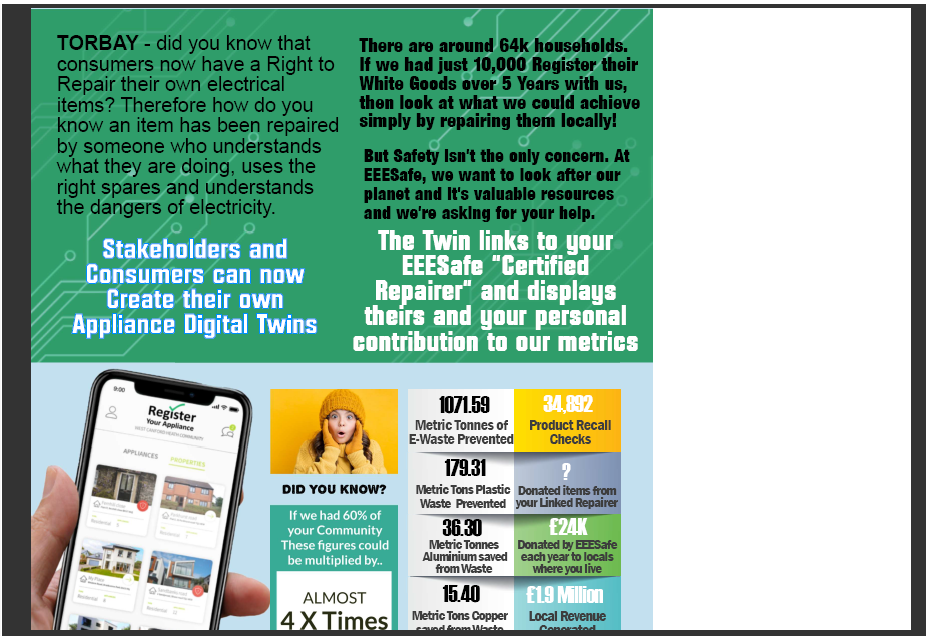
 So I have designed this document and have 2 problems. 1. If I choose print the PDF to my Brother Laser (which works fine with anything else) the document is not showing a fit to the A4 that is set too. Here's the output: So I just don't know if this is a bug or what? 2. On the image you see below, there are two large blocks of White Text. I've created a Style based on the one on the Right, and used it to create the same attributes for the one on the left. My image is now showing slight differences and I don't now why. I can get a correct A4 PDF from this, by using the Export Function. Issue one is related to Printing a PDF.
-
 v2.1 designer not saving printer and print info in file, resets every load Every time i reopen a file in 2.1, the printer information has been reset to a different printer. Gary
 -
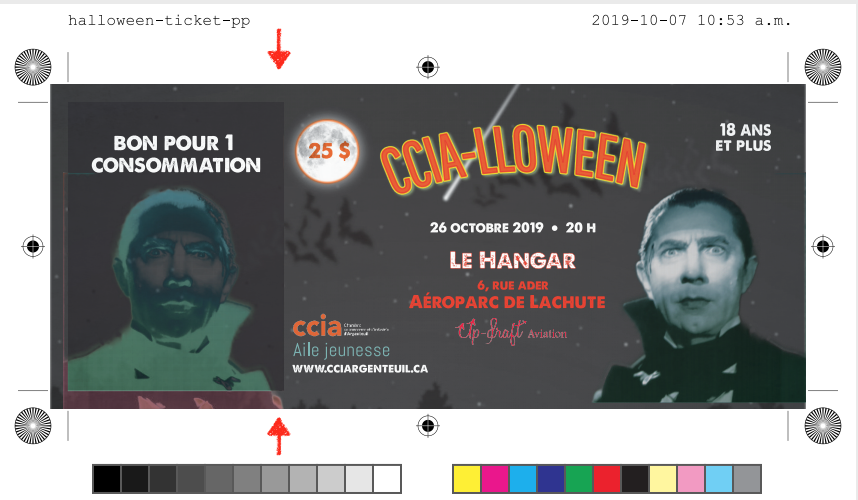
 Hi, I want to include score marks in a PDF, and the printer wants them to be like the crop (bleed) marks, i.e. outside the design. See attached in lieu of the red arrows. How can I make those?
-
 Background: I have Affinity Publisher V1 on my MacBook Pro. I have a Brother J4535DW inkjet printer. I created a document that is 5.5"x8.5" and I am printing it on letter size paper, landscape, 2 pages per sheet. [Actually, in more detail I am printing a flier with a front page and back page. So my document has 4 pages with Page 1, 2 being the front; Page 3 and 4 being the back. I print double-sided, short edge. And top-bottom-left-right.] Margins are set to 0.2 inches. I scaled the print 110%. I printed directly from Publisher. Result: In Publisher the top item on the page is 0.5 inches from the top of the page. The print output is 1.8" from the top of the page. The page # at the bottom of the page is about 0.2" from the bottom within Publisher but prints ~1.7" from the bottom. There are similar issues on the left and right side. Question: Why can't I get the print output to be the same as what Publisher shows? When I play around with the printer scaling increasing it until it alerts me that it is outside the margins it still doesn't print to adequate margins.
 -
 Hi! I'm a new designer and I'm attempting to print my own zine on a risograph I recently gained access to. I've been looking up tutorials on how to set up files with Affinity, and while I figured out how to set up pages in booklet printing for a regular printer, I have some particular specifications I need help with. The risograph only prints on 8.5x11 or 11x17 paper, but the zine I want to make is A6. So I want to scale the pages on the sheet and lay things out so pagination is correct, even with multiple pages being printed on the same sheet. I also plan on staple binding it, so the typical foldable zine structure won't work. Is there a way to set up pagination automatically using Affinity, or do I need to figure it out for this particular setup by myself?
 -
 I have a couple of images that are masked. In publisher the mask is invisible, except if you zoom in and out (see attachment). If I print the page on a professional fine art RGB printer (EPSON), then the mask is printed as well. Do you have any clue what the reason for this could be and how I can avoid this? Kapture 2022-09-28 at 22.12.01.mp4
 -
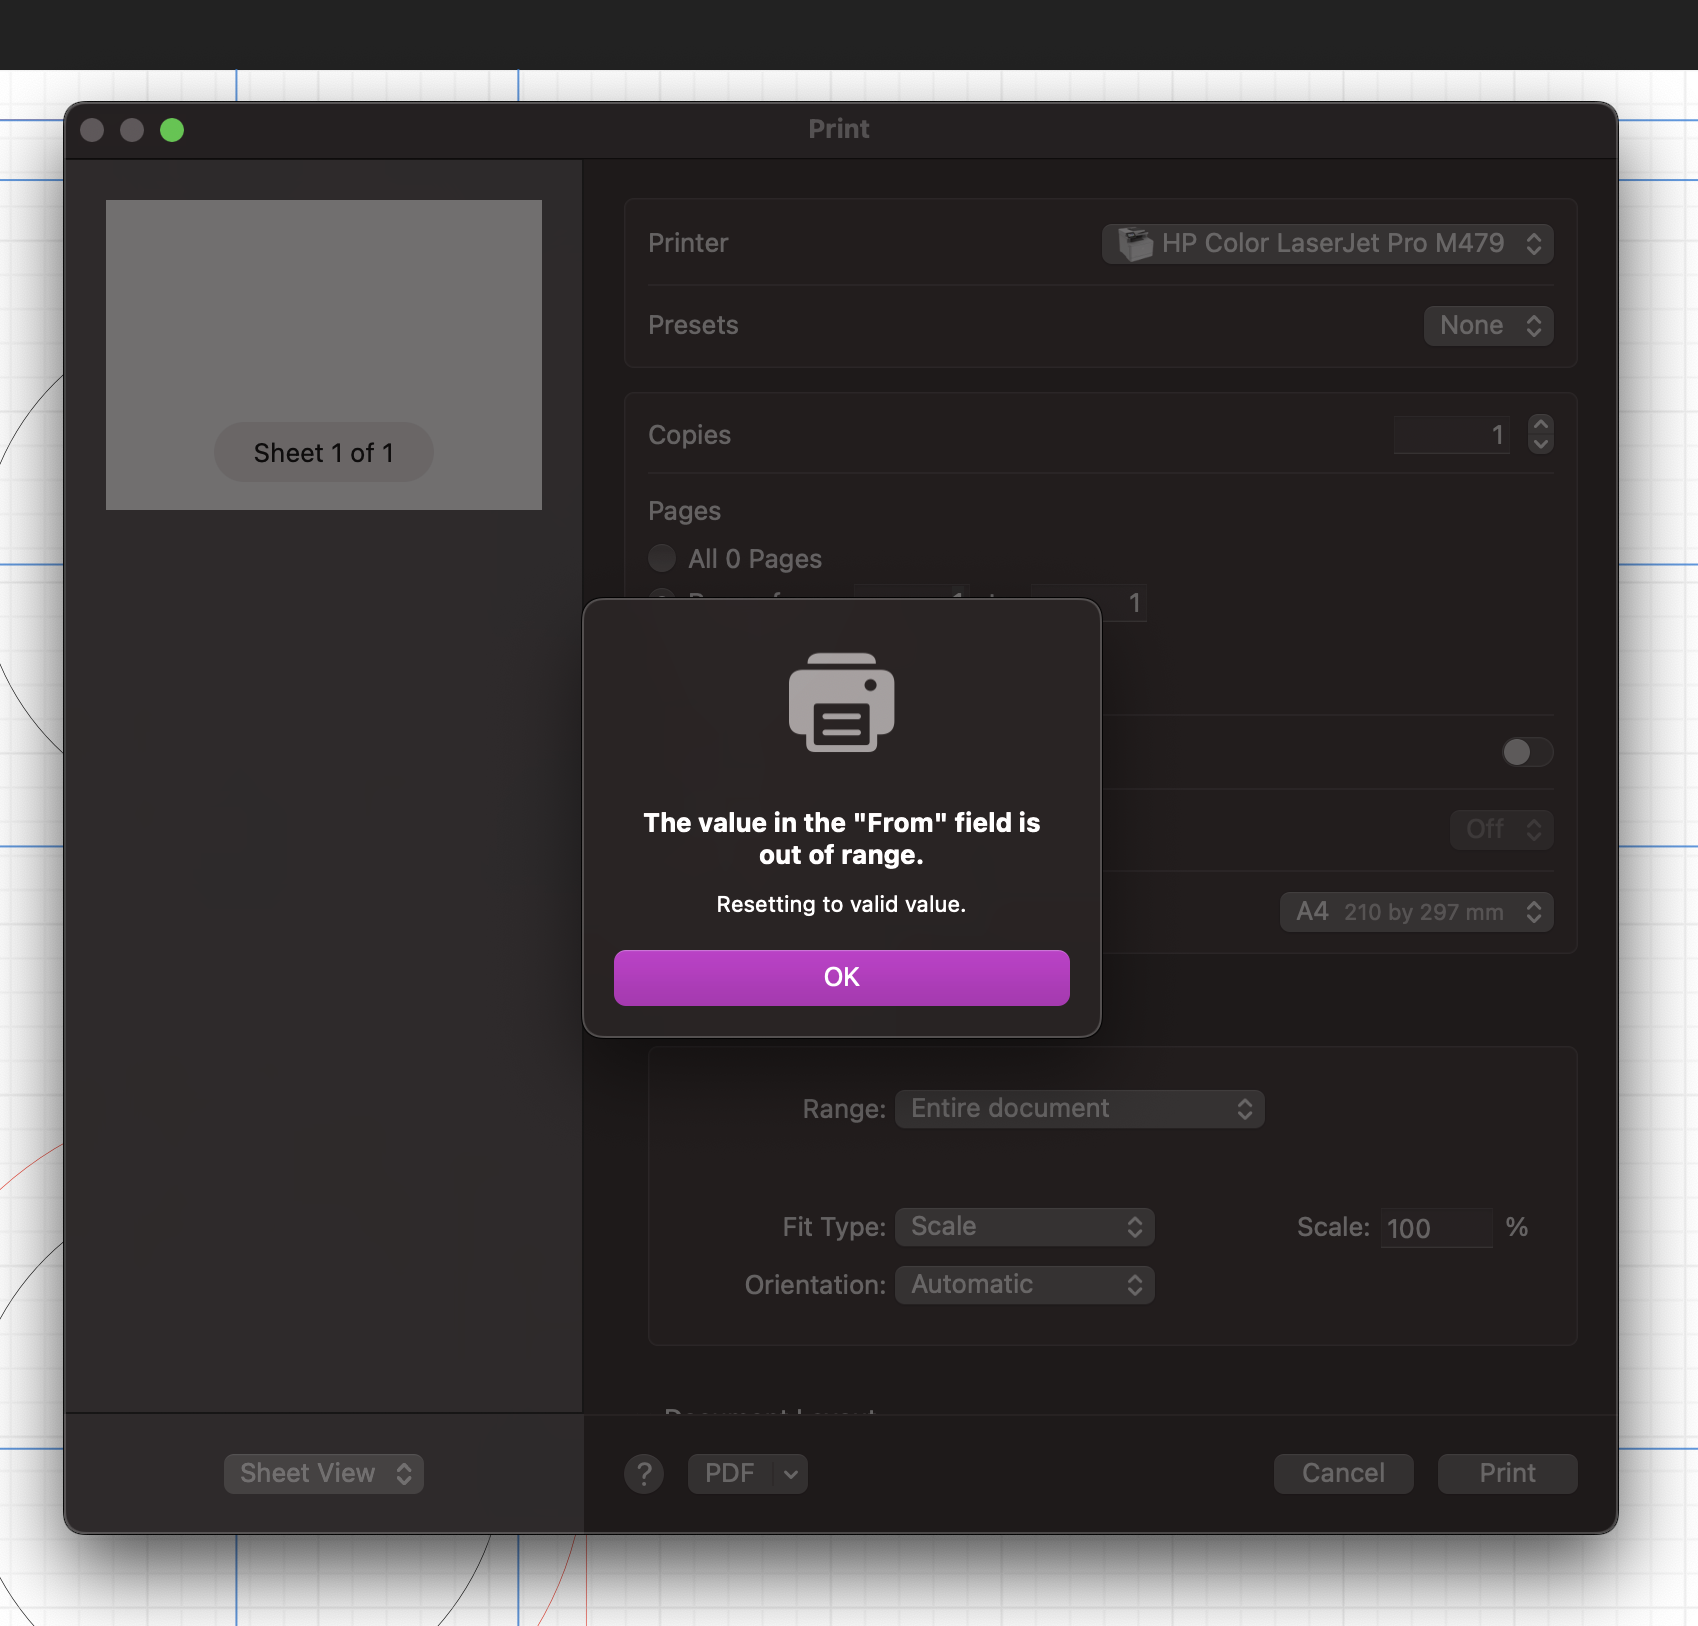
I'm using a registered version of Designer 2 and it's stuck in a loop. I have two documents open - both saved - and I want to print one of them. At first it reported I hadn't selected the document to be printed, and now I'm stuck in this loop (see screenshot) and it won't let me leave. The "From:" value is set to 1, as was the "To:" value. Help!
-
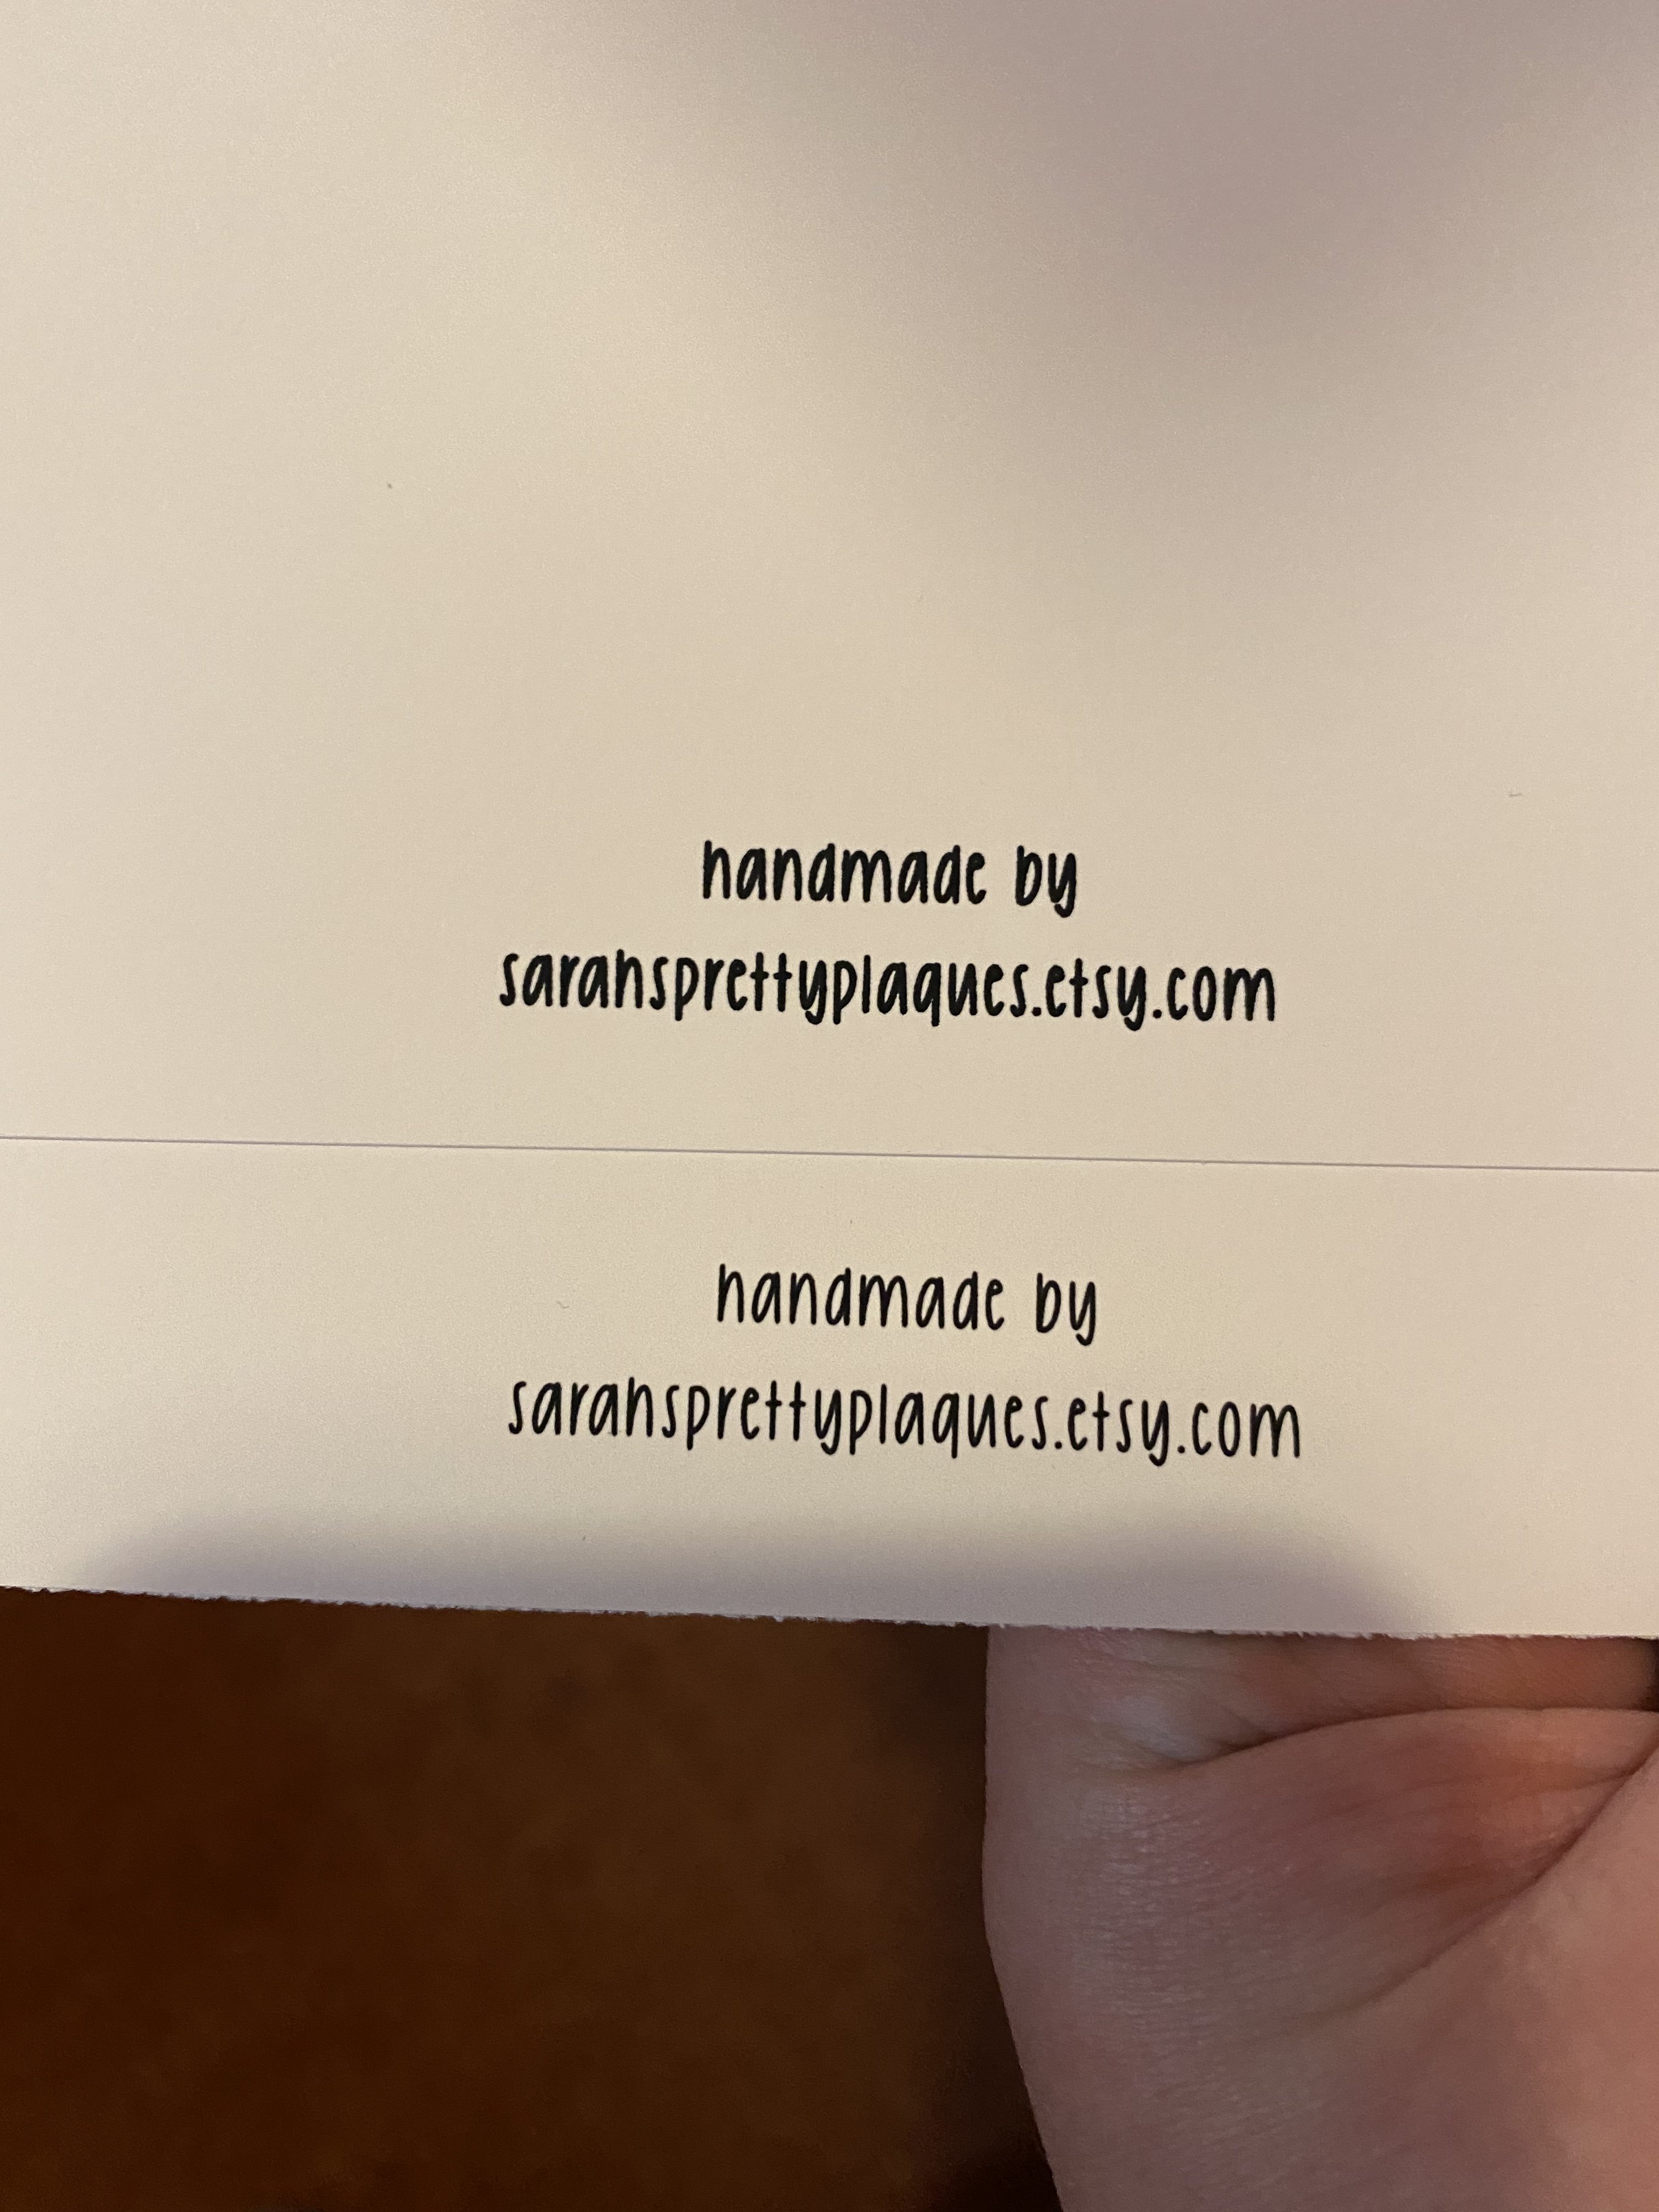
When I print from affinity Designer, the text is always bolder than what’s on screen. Tonight I exported the document as a PNG then printed it from the PNG, and the font thickness is as it should be on screen. Does anyone know how or why this is happening? Or how to fix it? im using a Mac and V1 AD. I’ve attached a photo so you can see the difference in the print direct from AD and one from the exported PNG.
-
 I have PDF'd my file with facing pages turned on because that is how I want the PDF to be presented. The issue is I want to have the ability to print the pages physically individually instead of a full spread on one sheet. I know I would need to export as "All Pages" instead of "All Spreads" but it would ruin the affect of the facing pages. Is there a way I can work around this? Hopefully I explained this well... Thanks!
 -
 I recently noticed that none of the "black" text in my document was actually printing on my laser printer as black. I created the attached simple Affinity Publisher document to demonstrate the problem. This document accepts all the default settings for a new "Press Ready" letter sized document, which includes the CMYK/8 color format and U.S. Web Coated (SWOP) v2 color profile. I changed nothing, added a single line of text, and printed the document. The text on the printed document is noticeably dithered. I tried exporting a PDF (also attached) and find that when I try to print it, the text is exactly the same, dithered a bit. I have confirmed that the document has (by default) chosen the proper C0 M0 Y0 K100 color of black for the body text. Note that I can use the same laser printer to print a similar simple test from Apple's Pages software and the text appears crisp and fully black. What am I doing wrong with Affinity Publisher? How can I be sure that when I export my PDF for the printer, it will export with proper black text when I cannot confirm this myself before sending it off? I'd like to be able to print decent proofs in my office, it is extremely frustrating that everything I print comes out looking pixellated (see the photograph, Affinity Publisher sample on top, Pages sample below). test-black.afpub test-black.pdf pages-black.pdf
-
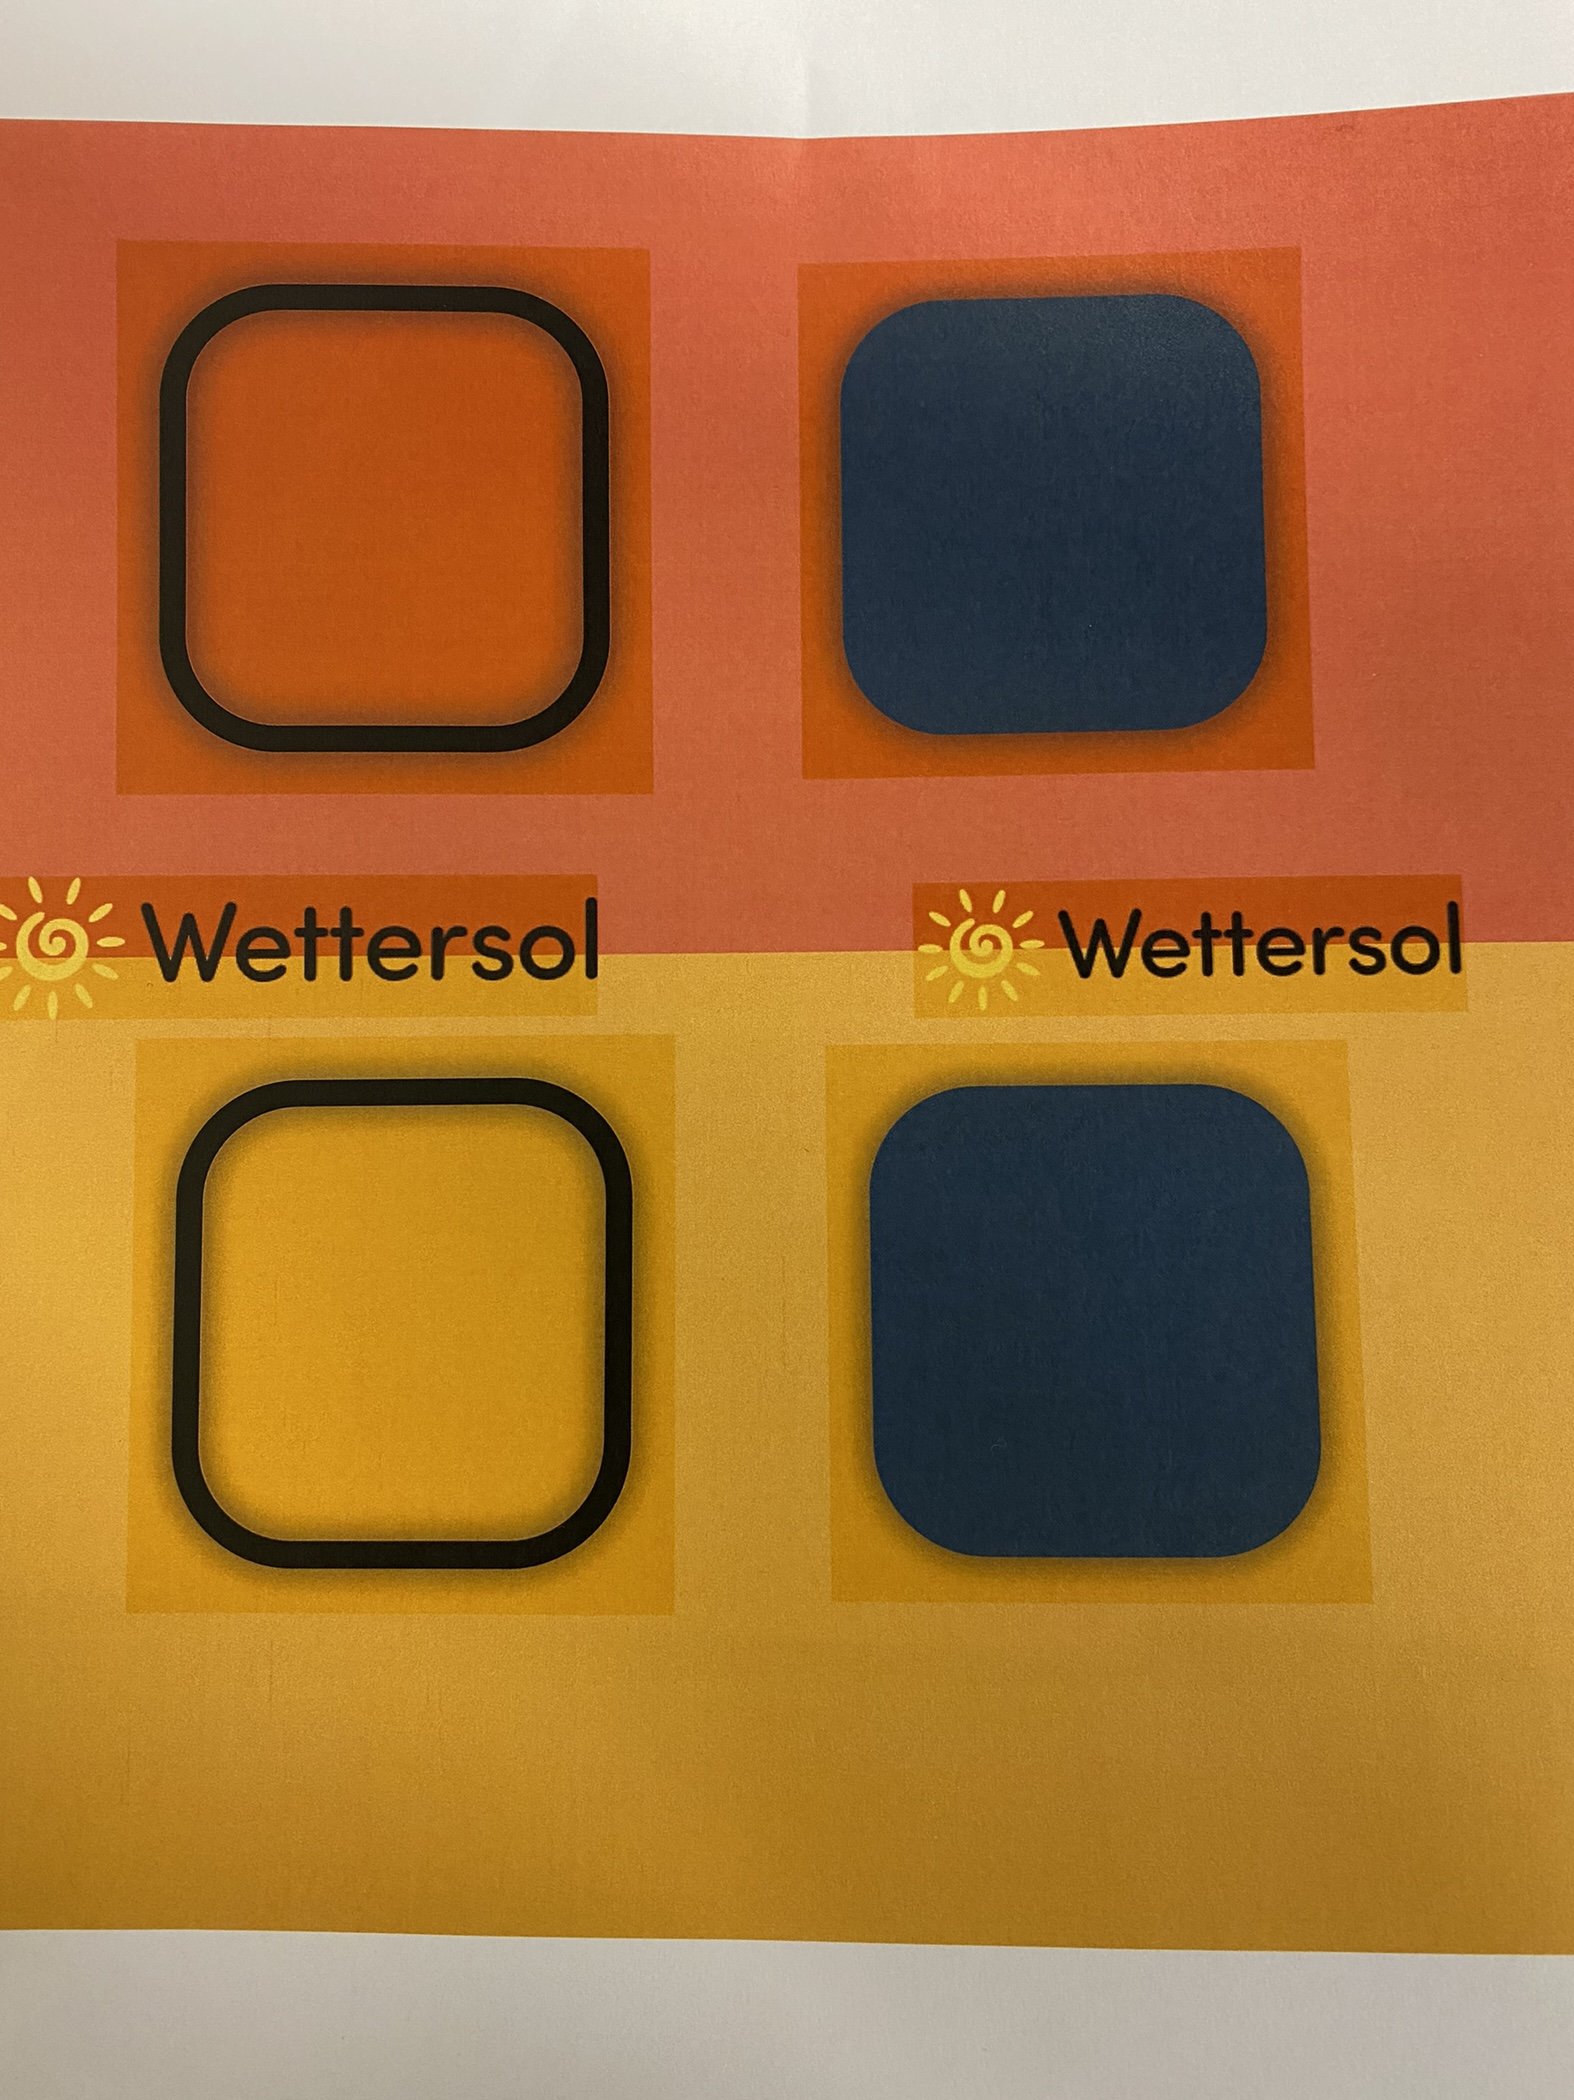
 Hi, When im printing a document I made, it prints these weird boxes around curves with dropshadows. This also happens to ordinary .EPS and .PNG logos. The box is not visible without a background color printed on ordinary white paper. I've attached a picture taken with my phone of a test document I printed. I use a mac, and the printer is a Xerox WorkCentre 7830 v1 Multifunction System PS. The problem don't appear when I export to PDF and print thru adobe acrobat. But when I do this, the colors are super ugly and pale. Cant understand why the built in printing option produces a different color profile...
-
 I'm trying to print a poster, tiled across multiple A4 or A3 sheets. PagePlus X7 ( where I'm migrating from ) had some useful templates which tiled the output automatically. Can anyone tell me how ( or indeed if ) I can do this in Affinity Publisher, please ? Thanks,
 -
 Windows 11, latest release versions of the Affinity products. Let me preface this by saying that although I've been using Affinity products for some time, I've never tried to print anything and am struggling to get what I see on my screen onto paper. Here's what I've done... In AD, I created a CMYK/8 document at 600 DPI (as that is my printer's native resolution). I'm printing to a Canon MF630 color laser printer, using the latest printer drivers w/correct profile selected. I printed to standard office paper and chose U. S. Sheetfed Uncoated V2 as the profile. The document is a proposed logo for our church, attached (I am in no way a designer and make no claim as to the quality of the design). I've tried printing using all four Rendering Intents, and I printed each using Color Handling by the printer as well as by Designer. I didn't see much (if any) difference amongst the results. The printed images are not only too dark, but I see too much red & even brown in the gradient. Have I configured something incorrectly in the document? Could I improve things if I used a better/different paper? I've spent many hours & wasted too much paper and ink trying to figure this out on my own, so I turn to the experts for assistance. Scaled Logo.afdesign
 -
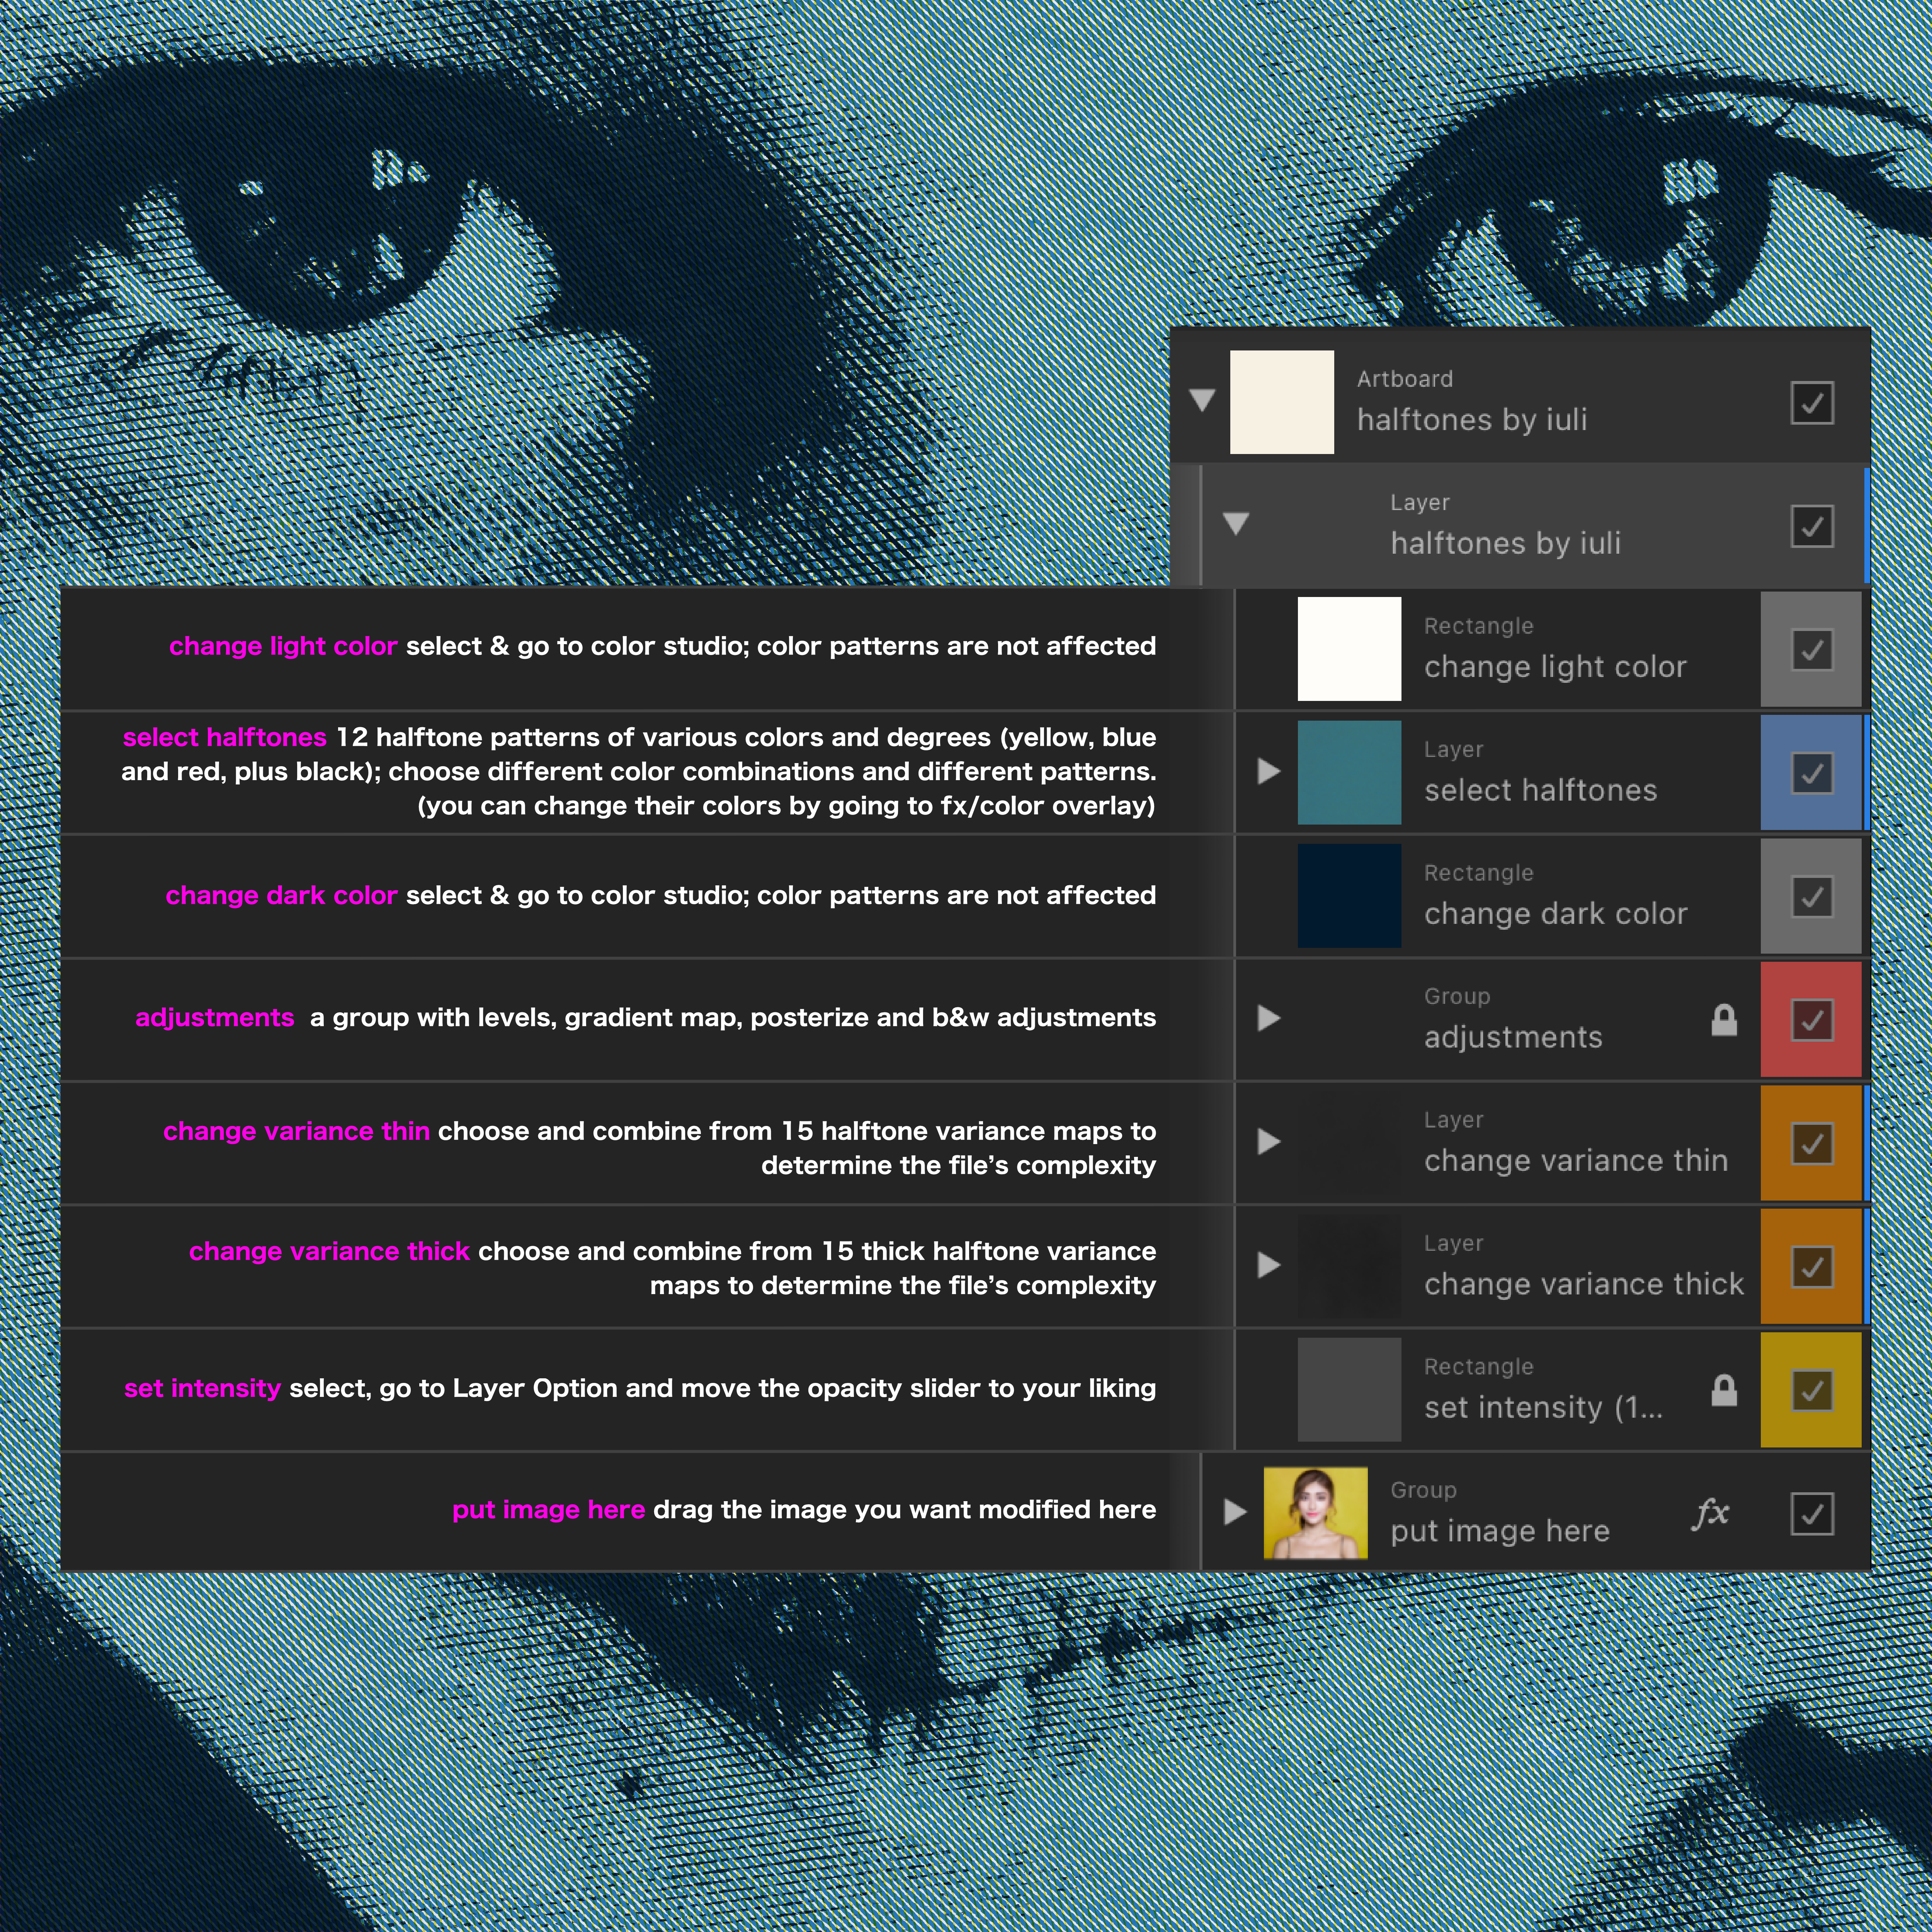
This is not much, it’s a simple .afdesign file that turns photos into pre-digital vintage-like printing halftones (the industry standard here is affinity, not the lame PSD). It is of course compatible with both Affinity Photo and Affinity Designer. Sorry for the big size (over 400mb), it’s because all halftones and maps are ‘heavy’ (I didn’t want to ‘reduce’ them). I made all the files included here over the years, for halftone brushes and styles. The process is simple, and the user has complete control over the final result. I think the file is self-explanatory even for newer users. Instructions inside (and below). Edit, for new users: to have greater control over dark go to “adjustments” / gradient map. It’s one of the most important adjustment, and I should have let it outside. (If they’re too big please let me know and I will upload the files to mediafire) Template is 5000px X 5000px. A quick, soundless and boring video overview: https://www.youtube.com/watch?v=f5A8C5vk3Fs The resulting halftone file is pixel-perfect. There are two files available for download below, one with dot halftones and one with line halftones. They’re obviously intended for Affinity users only. Resulted images can be used for any purpose without any worries. Maybe someone will find these useful. All the best! line_halftones.afdesign dot_halftones.afdesign
- 12 replies
-
- 14
-
-