Search the Community
Showing results for tags 'Affinity photo'.
-
 I've been encountering a recurring issue with RAW development, but the issue happens inconsistently and seemingly at random. After loading a RAW file, I make some of the color and lighting adjustments I want to make to the file. But then I click "develop" and the edits are not preserved, leaving me with a developed image without any of the RAW edits I made. I use the same process for developing images every time, but the results have been inconsistent. Perhaps I'm experiencing a PEBCAK problem, but I'm not sure what exactly I would be doing wrong that causes inconsistent development results.
 -
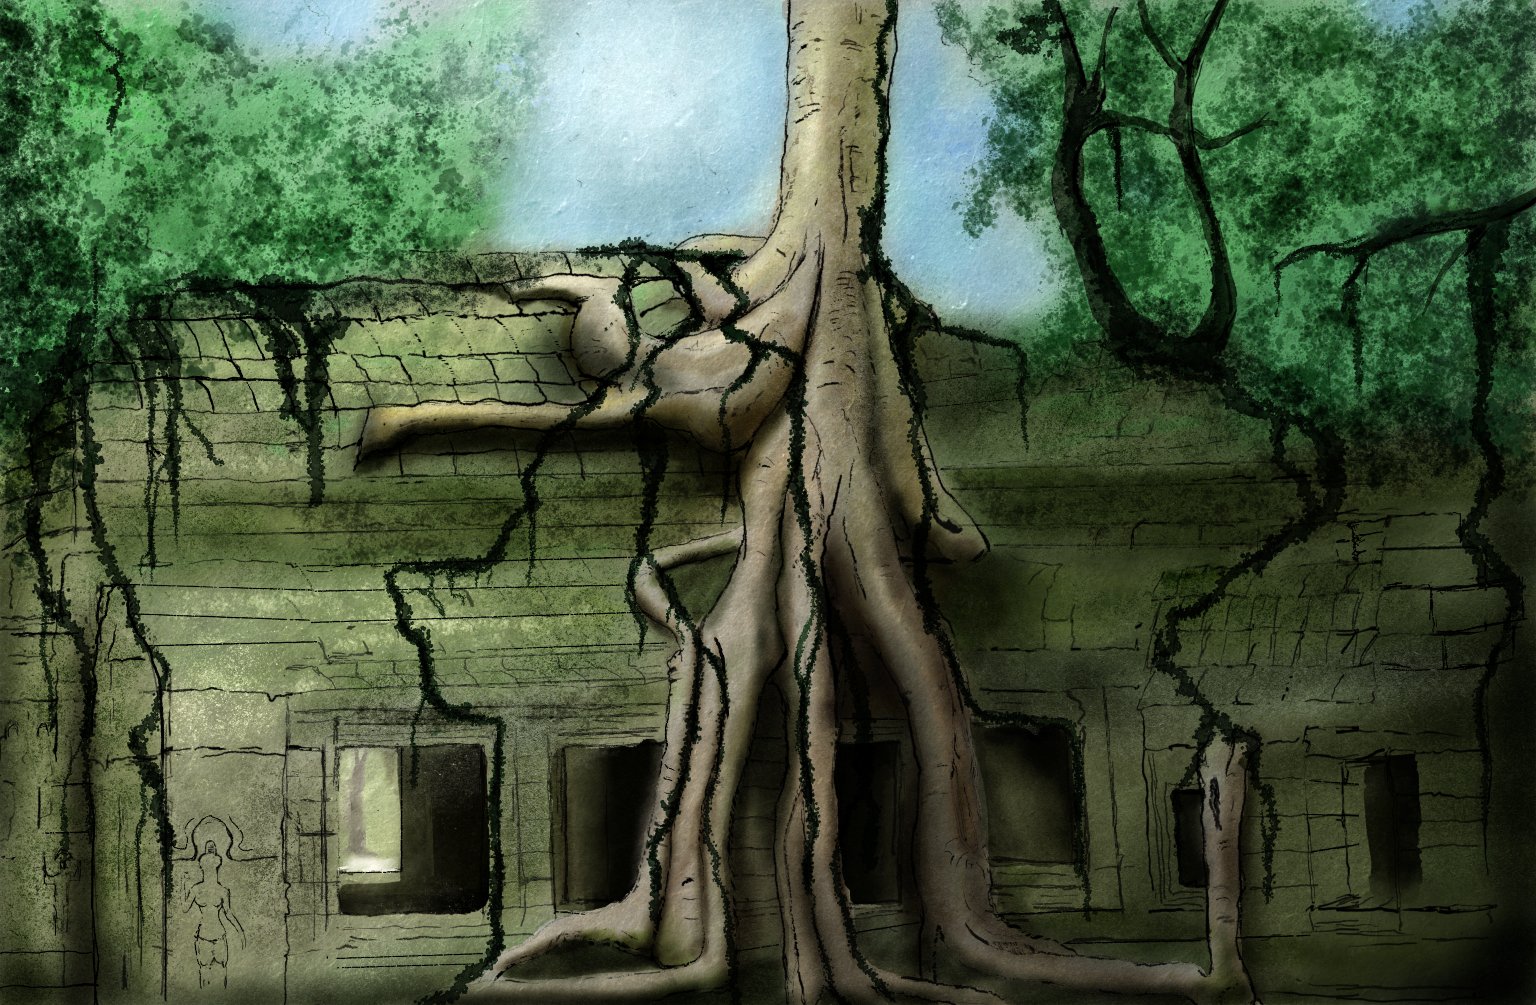
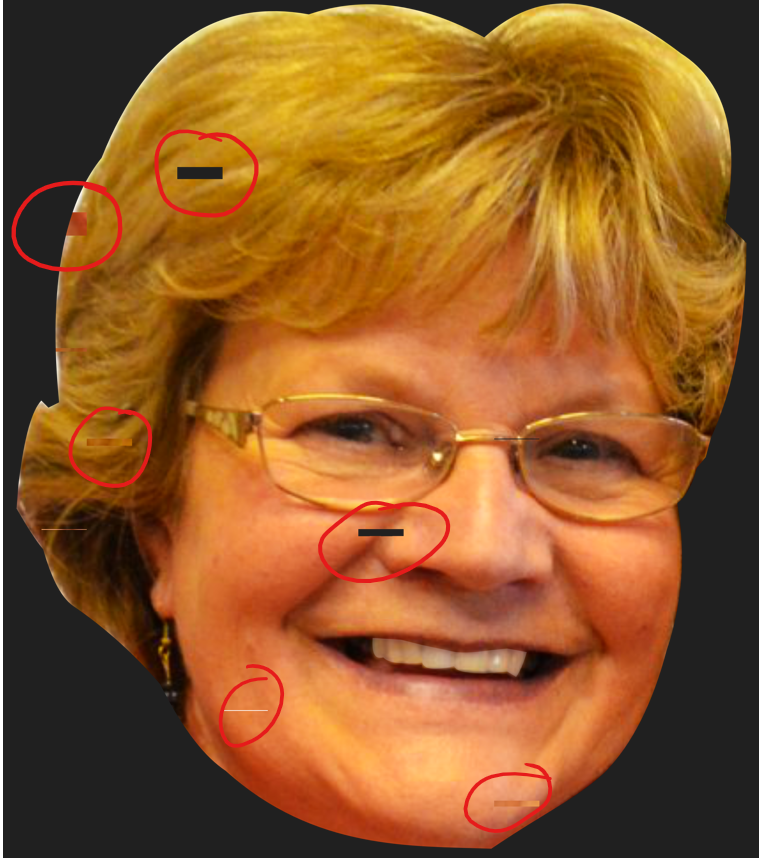
 This pic is just an example photo.. But I am trying to cut a woman out of a green forest background. How do you cut out the hair without taking some of the green glow with you? And is it possible to recolour the green parts back to the hairs natural colour with adjustments or too difficult to get it right? I've tried selecting the green bits and playing with sliders but just can't seem to get it right. I have also tried using the background remove brush over the hair but it either doesn't delete enough or it deletes some of the hair too. Any tips? Cheers!
 -
 Greetings, in Aphoto V1 can you turn a selection into a shape? Thanks to everyone who will read me...
 -
 I'm using Affinity Photo and I'd like to stroke a rectangular or circular (or any other selection) shape. I haven't figured out how to do it… I've made the selection with the rectangular marquee tool. In Photoshop, this operation is really easy but I'm stuck in AP. Thanks for your help.
 -
 Just now updated from 2.0 to 2.0.4 this evening. Was really hoping they'd fixed that brush menu double-click lock-up bug. It's really quite nasty, and makes the software basically unusable. It's like walking into a booby trap. I'm able to deal with basically being forced to work in tabs, but this brush menu bug is a show-stopper. When double-clicking a brush in the scrolling menu to bring up the width/etc adjustment panel, Photo throws up the spinning rainbow beach ball and goes for a lie-down, requiring me to force-quit. The clumsy UI design decision re: the Big Frame That Won't Go Away And The Non-Detachable Toolbar is something I can work with, but this bug makes V2 pretty much unusable. Will this ever be fixed? Here's part of the bug report transmitted to Apple, if it means anything: Date/Time: 2023-05-04 21:39:57.623 -0400 End time: 2023-05-04 21:41:48.369 -0400 OS Version: macOS 12.6.2 (Build 21G320) Architecture: arm64e Report Version: 35.1 Incident Identifier: 025B1725-F537-4813-AA9B-58C905D248BD Data Source: Stackshots Shared Cache: BE7FE6AD-4560-3AE2-883E-432F78B45062 slid base address 0x1b07cc000, slide 0x307cc000 Shared Cache: 075C518A-CD16-346D-A539-3A4D45B847A6 slid base address 0x19932c000, slide 0x1932c000 Shared Cache: DF545CF0-AB3D-34B5-900B-63364D9C86AB slid base address 0x7ff80fce8000, slide 0xfce8000 Command: Affinity Photo 2 Path: /Applications/Affinity Photo 2.app/Contents/MacOS/Affinity Photo 2 Identifier: com.seriflabs.affinityphoto2 Version: 2.0.4 (2.0.4.326) Team ID: 6LVTQB9699 Architecture: arm64 Parent: launchd [1] PID: 2744 Time Since Fork: 224s Event: hang Duration: 110.75s Duration Sampled: 1.90s (process was unresponsive for 109 seconds before sampling) Steps: 19 (100ms sampling interval) Hardware model: Macmini9,1 Active cpus: 8 HW page size: 16384 VM page size: 16384 Time Awake Since Boot: 45707s Time Since Wake: n/a (machine hasn't slept)
 -
 Hey community! The title actually says it all. I've been using this incredibly useful little feature ever since I learned it decades ago (when I was working with Adobe applications), and was very happy to find it right from Affinity’s first ever release (?) in the shortcuts menu: »Set Fill to Black and White«. It's particularly useful in Designer when you need to quickly reset the base colours of your shapes, but also in Photo, especially as all the apps in the suite work so seamlessly together. However, using this shortcut in Photo with an active Fill Layer in the layers panel completely breaks it, like … irreversibly. Not even the »Revert defaults« button (if added in the toolbar) can revive its initial state! ☹️ Steps to Reproduce: Set up a shortcut under Shortcuts → Miscellaneous → Set Fill to Black and White. Note: There's no menu item for this option at all, it's only accessible via a keyboard shortcut, factory default is D. Create a Fill Layer. Select Fill Layer (if not already active) in the layers panel. Use the designated shortcut previously assigned to Set Fill to Black and White. Expected Behavior: I’m actually not sure what I expected. 😅 Probably a reset to white? But I'm not sure about the stroke, since a fill layer is practically borderless. And I suppose that might be the reason why it breaks. Current Behavior: The Fill layer turns transparent and stops responding to any changes of color or other fill. As mentioned, Set Fill to Black and White completely breaks the layer irreversible. You have to delete the layer and create a new one. I'm having the same problem on MacOS and Windows, but as I'm sitting in front of a Mac at the moment (and since the forum is lacking a thread for bugs that affect the application regardless of OS), I'm going to post it here. Can someone verify this? Cheers Dennis aka The Guy With All the Fill Layer Issues 🥲
- 12 replies
-
- 1
-

-
- affinity photo
- macos
- (and 7 more)
-
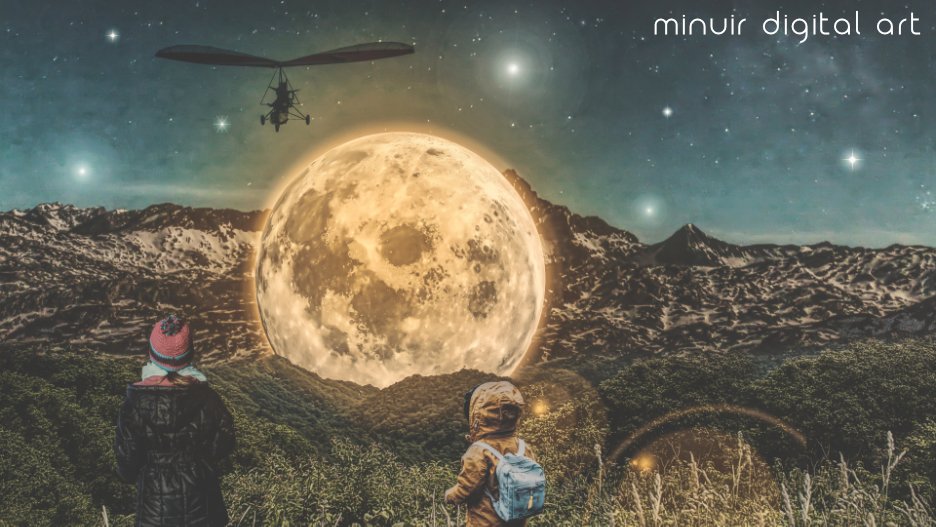
 This photo manipulation artwork is "The Rest Of The Moon". I want to give a break to the moon that works the same routine always~ "The Rest Of The Moon" speed art : https://youtu.be/AcqqmanKBRM?list=PLaYwL68IKsHT621IiqxrLp3tVp2xYHc7W
-
 It would be great with a more powerful grid- and perspective tool in Affinity Photo, similar to the Perspective Warp tool in Photoshop. Thanks for a great suite of products!!!
 -
 Hey there people! Hope ya'll are safe and sound.. I moved onto Affinity a couple of months back and I've gotta say, it's worth every penny! My problem is that the tolerance of the fill tool in AP automatically goes to 1% when I click to fill USING HUION 640P.. and increases as I slide my pen upwards... However if I fill with the trackpad, it remains the same.. This is really getting on my nerves.. 2nd issue is that right click with the pen doesn't work at all HELP!
 -
 Hi Affnity, Hi Forumers! I (ab)use Affinity Photo to edit my astrophoto, I find Affinity Photo a great piece of software! However I'm facing a problem that I can't solve: the tiff files out of AP don't work in any star stacking software. I tested Sequator, Starry landscaper, Deep sky star stacker, Iris and Siril. All report the message "unable to read files". Strange, because with jpgs everything flows. I wrote some line to the developers and that is the answer I had: "TIFF is not fully standardized. Although they are called TIFF, some formats or fields may be incompatible. Sequator uses the most popular TIFF library, but there may be still some proprietary fields the library can not recognize." Any hint, idea, suggestion you could provide? Thanks a lot for your help! G:
 -
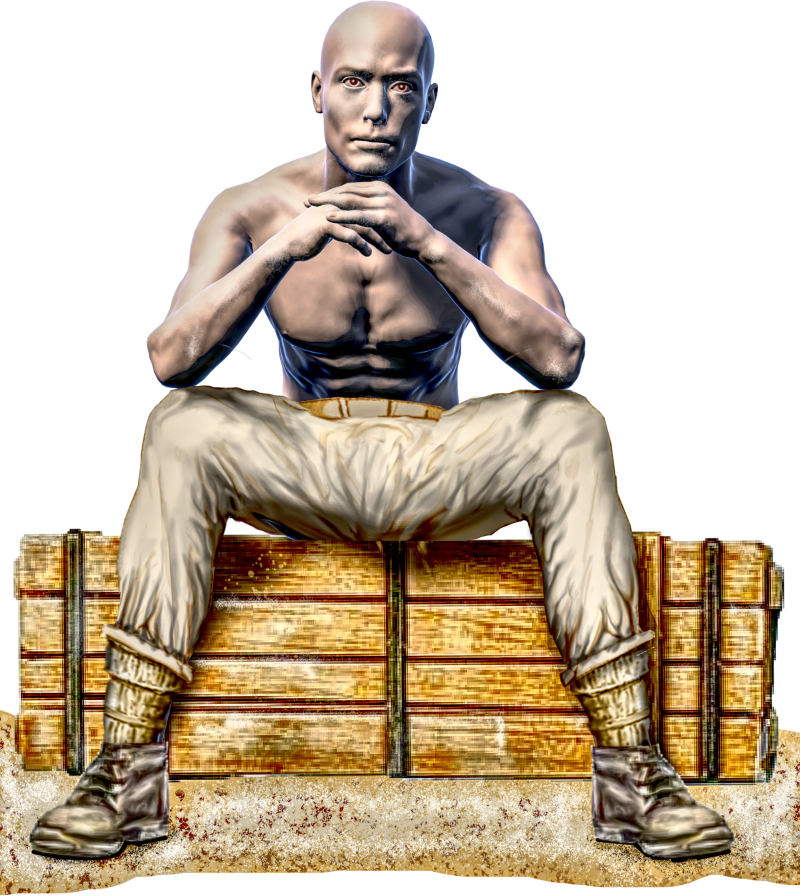
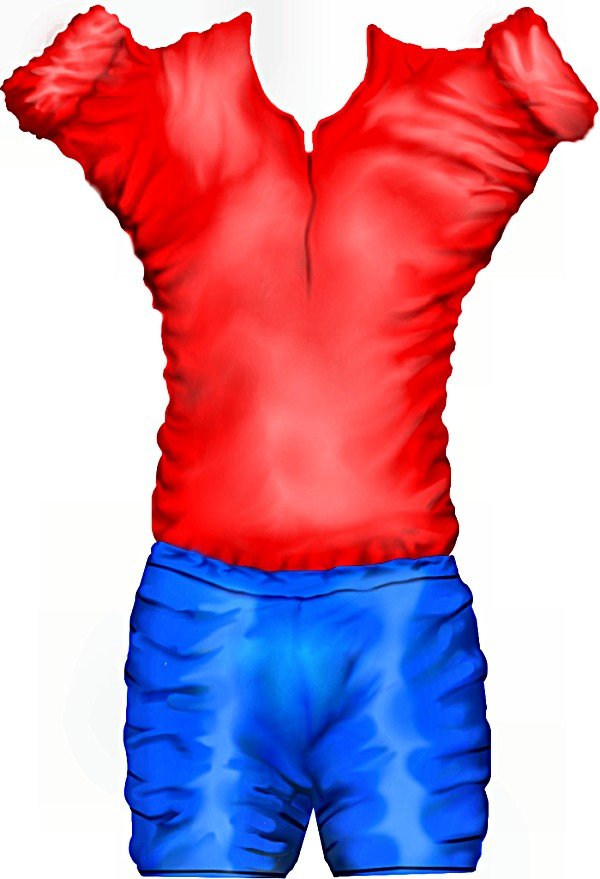
Male worker at rest. The body itself coming from "Magic Poser", IMHO an ideal complement to AP.
-
 Hi there! Stumble upon an video that demonstated how to colorize black and white pictures… He used an site called palette.fm, this use AI to colorize, take this new colorized pictures into Affinity Photo and use this in blend mode ’Color’ to get the color information to the hiresolution black and white pictures…
-
For a few days now I've been playing around with layer effects and some procedural filters – it's super fun and I love the results it can generate! This is the result this morning, based on my own logo and 100% pure Affinity Photo magic, and (except for the very last couple of steps) nondestructive. Maybe I'll release a macro for this sometime, if I can manage to squeeze it into a clean sequence. It'll work with almost any kind of base – images, texts, vector layers. This is what the base result will look like after the macro is applied, everything else is layer effects (and a background texture):
- 4 replies
-
- 7
-
-
- affinity photo
- layer effects
- (and 5 more)
-
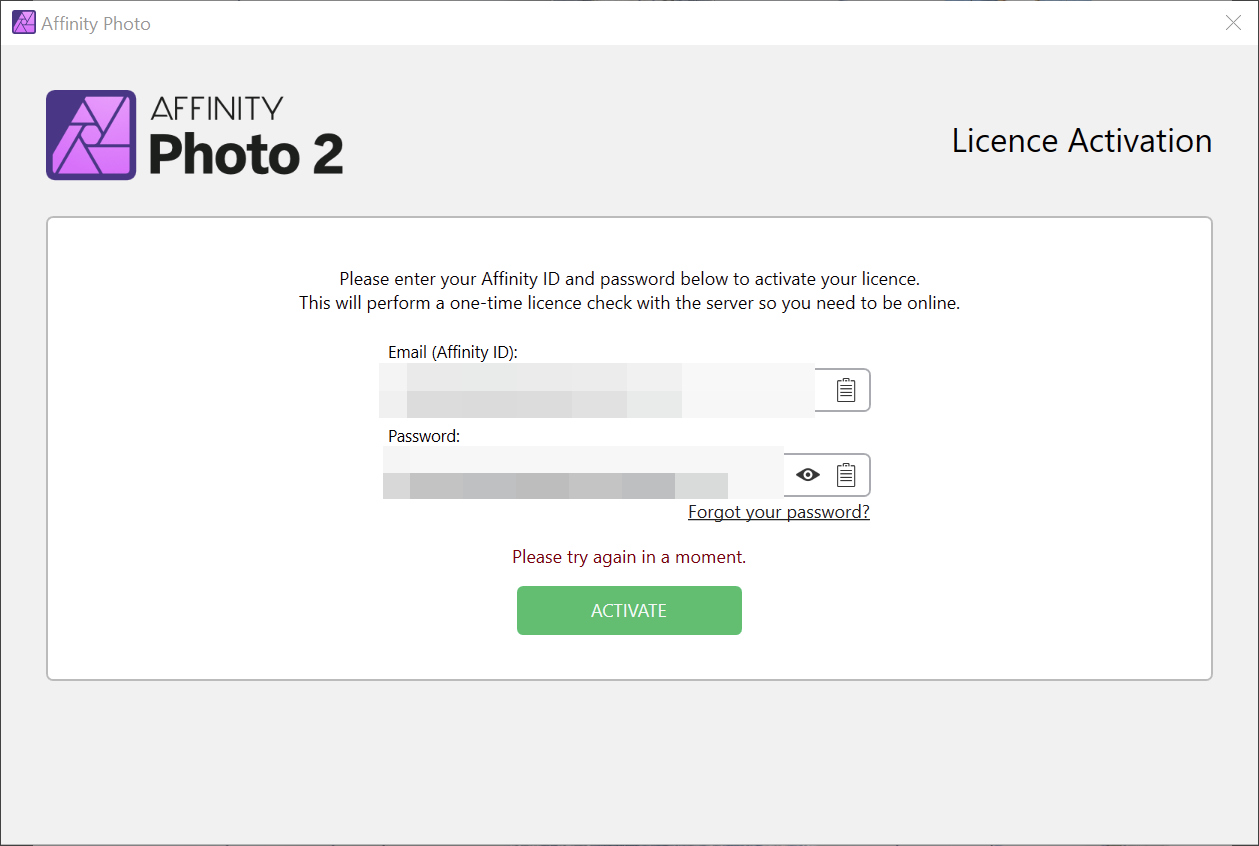
Same computer, single-machine. Photo installed as MSI, Publisher and Illustrator as MSIX. Latter two work as usual, former refuses to launch with this: The application is not restricted by Firewall or DNS filtering at the time of activation. Pressing the green button just makes the "Please try again in a moment" blink once.
-
Hello Community! Question regarding fill layers, selection marquee and masks (in all applications of the suite, but especially in Photo due to my workflow in that app): I often find myself in a situation where I already have an active selection marquee and need to create a fill layer to which I want to apply this selection as a mask. Way to replicate this: With an active selection marquee, navigate to Layer → New Fill Layer. Click on New Fill Layer – the active selection marquee is now gone and an invisible, inaccessible, non-editable mask (?) is created/applied to the fill layer. (Unless I'm missing something). Question: How can I access this mask/delete the automatically generated invisible »mask«? Is there any way to change this behaviour? The Affinity Help mentions nothing about it. And yes, I know there are a few workarounds for this. 😉 For example, plan ahead and create the fill layer first, or select the newly generated fill layer with the invisible mask and convert it into a regular mask, and so on. But this is not always so easy and costs at least a few extra steps that I would like to save myself. Expected behaviour: I would rather have the selection converted and applied as a normal mask to the fill layer or remain an active selection. Cheers and happy weekend Dennis
-
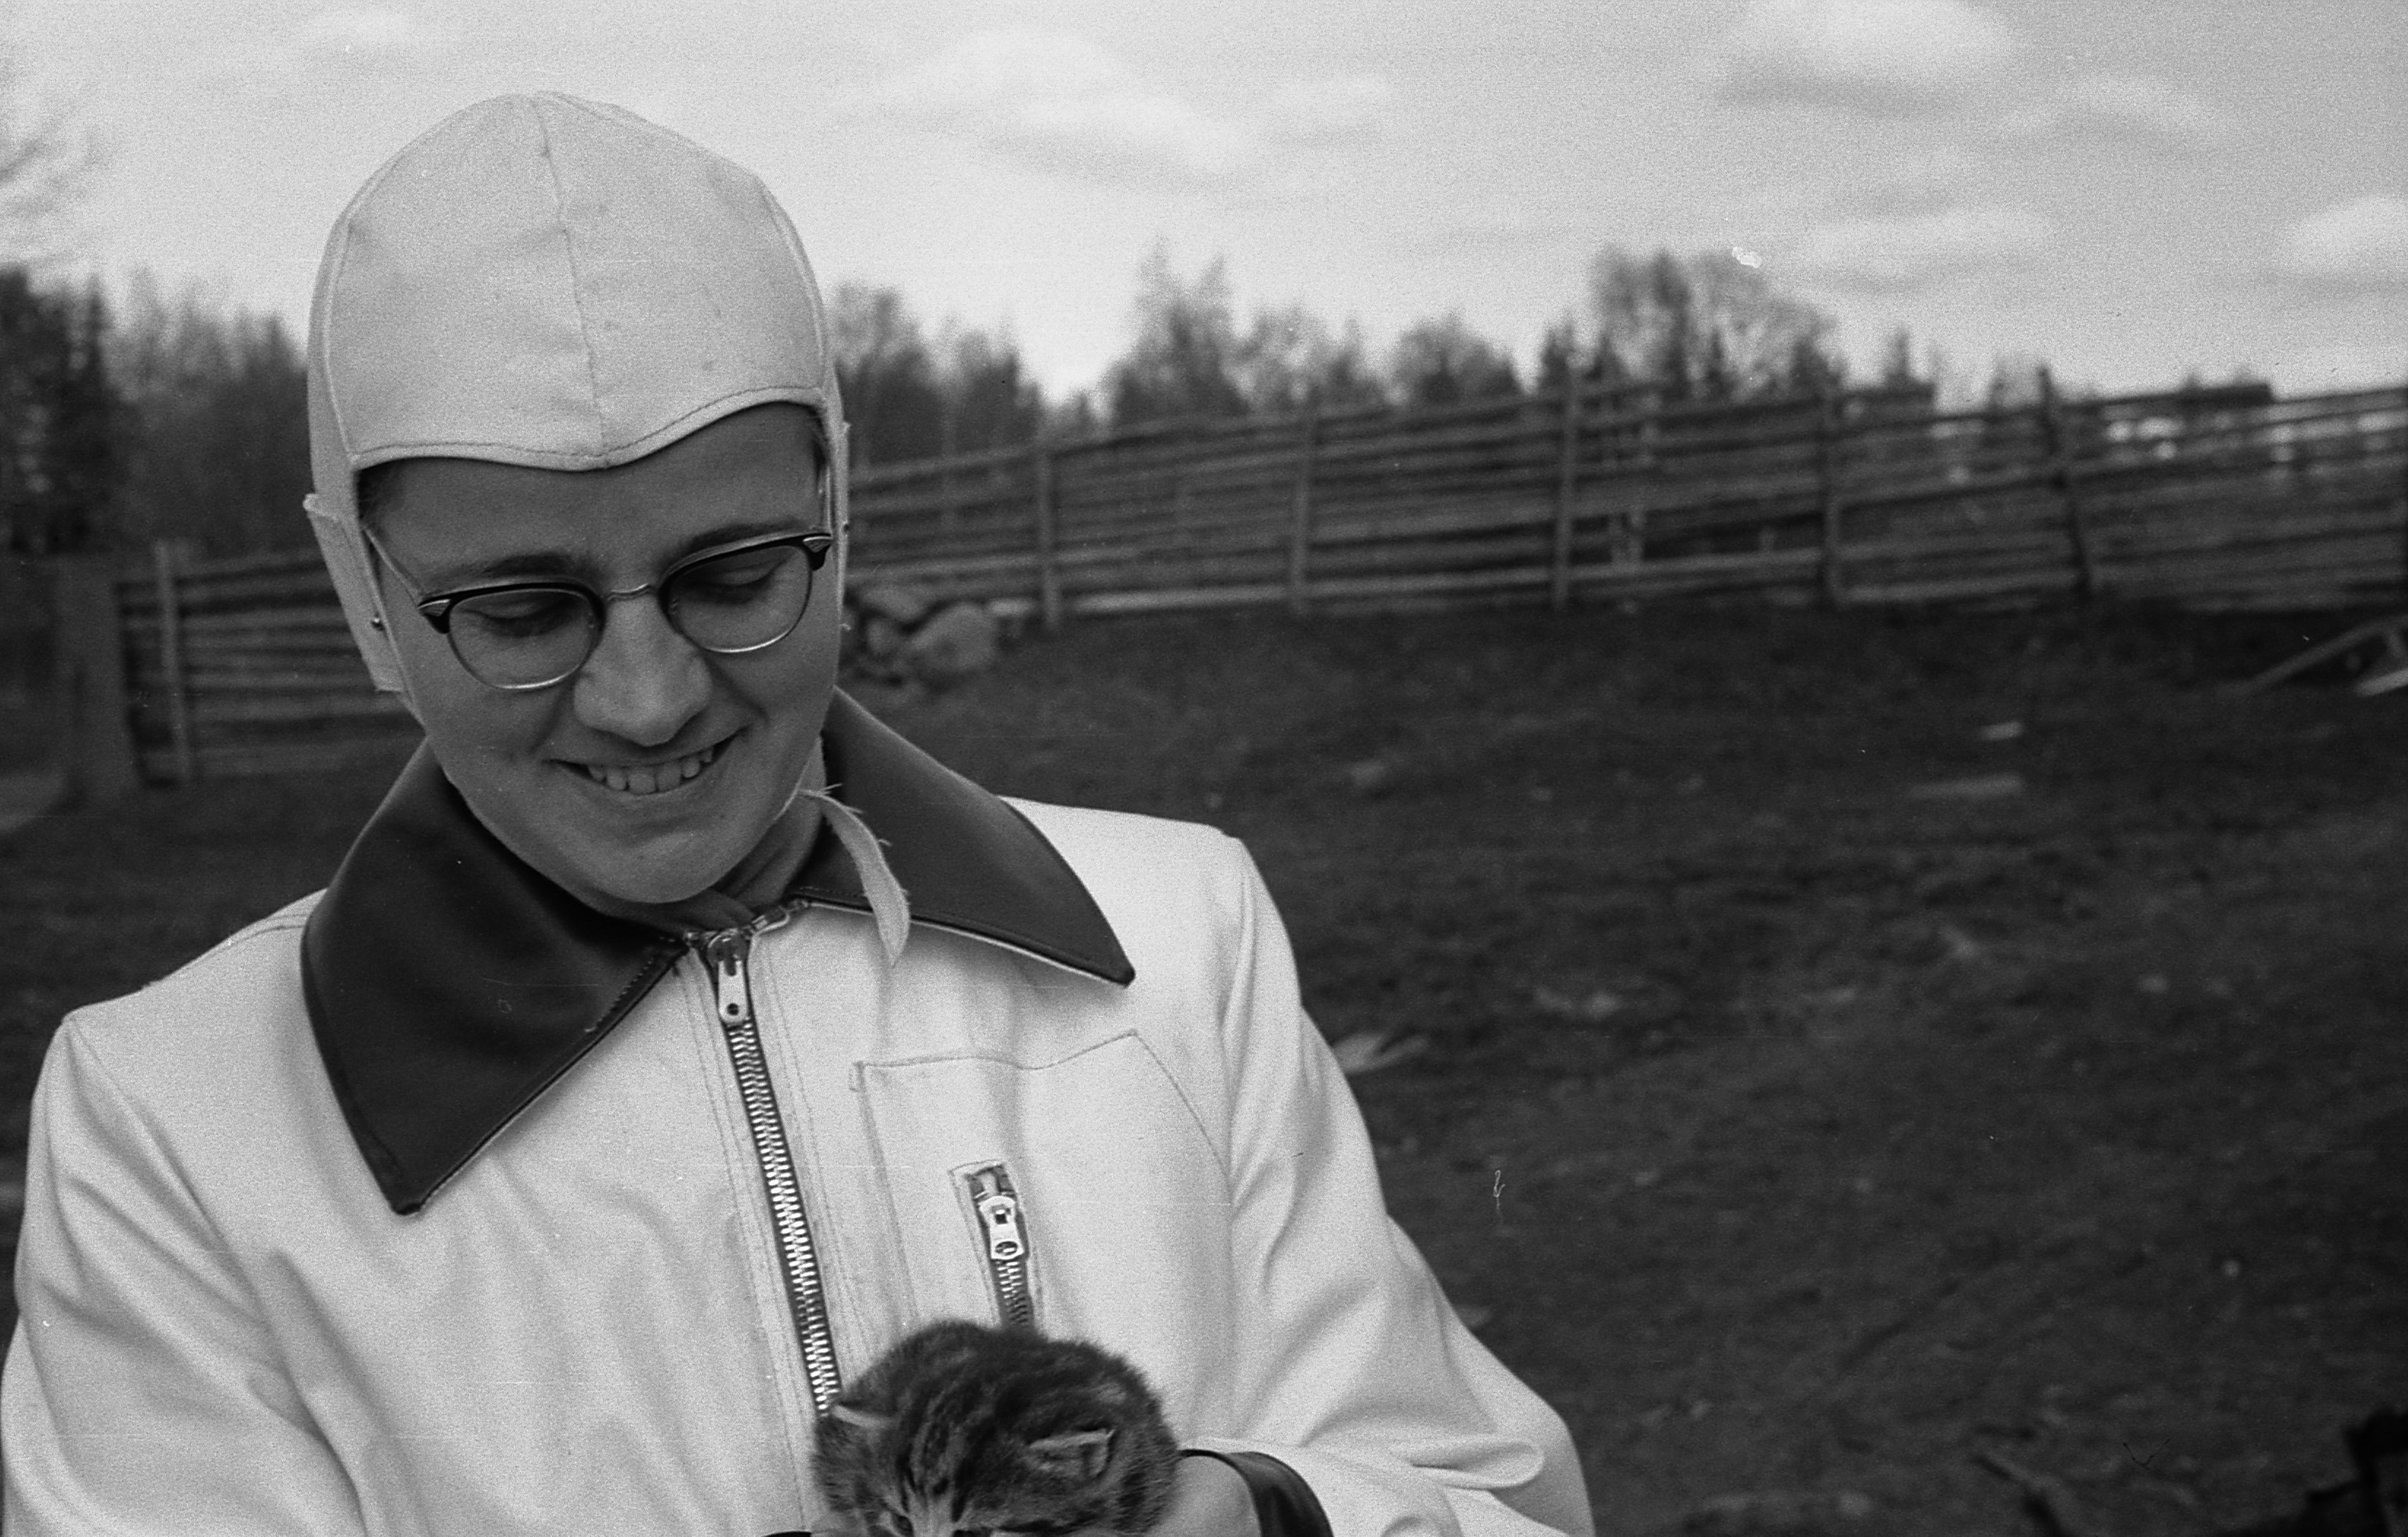
Ref: Pexels or Pixabay. Started using dip pen - scanned, re-inked and colored.
-

Save as dialog permanently cause total crash :(
Roland Rick posted a topic in V2 Bugs found on macOS
This is a super annoying issue I already reported several times since AP V 1.x and it is still not solved in 2.0.4. Watch the video. -

multi Oh crap...I need an 'album' cover stat, you got 3 days.
Junkbox posted a topic in Share your work
So my good buddy calls me says I need a CD/album cover in like a few days. Apparently, as we artists are the last to learn there's been all sorts of contemplations that the designer is only privy to after significant procrastination. Then come to find out that a late night decision the release is to be under their newly independent label. This has no effect on my process. I've done many graphics for the band, and even played in a side band or two with em. So yes, of course I'm in. The title track is a Burt Bacharach cover, so the idea was to make the 'album' cover appear as a dusted out 70's LP, replete with the 'I've been sitting in Mom's basement' look. Here's the final. This is the first time I've used Affinity Suite exclusively for a project like this. Just wanted to share. The suite works well, glad to do a full project with it. Thanks.
- 5 replies
-
- 12
-
-
- affinity designer
- affinity photo
- (and 2 more)
-
 Bug in every app: Scrolling with mousewheel inside navigator does not respect position of the mouse inside navigator panel view, but it is using position of the mouse of the whole affinity publisher application. It should work either like manual zoom input > zooming in/out centered on actual view or zooming based on mouse location inside navigator panel.
 -
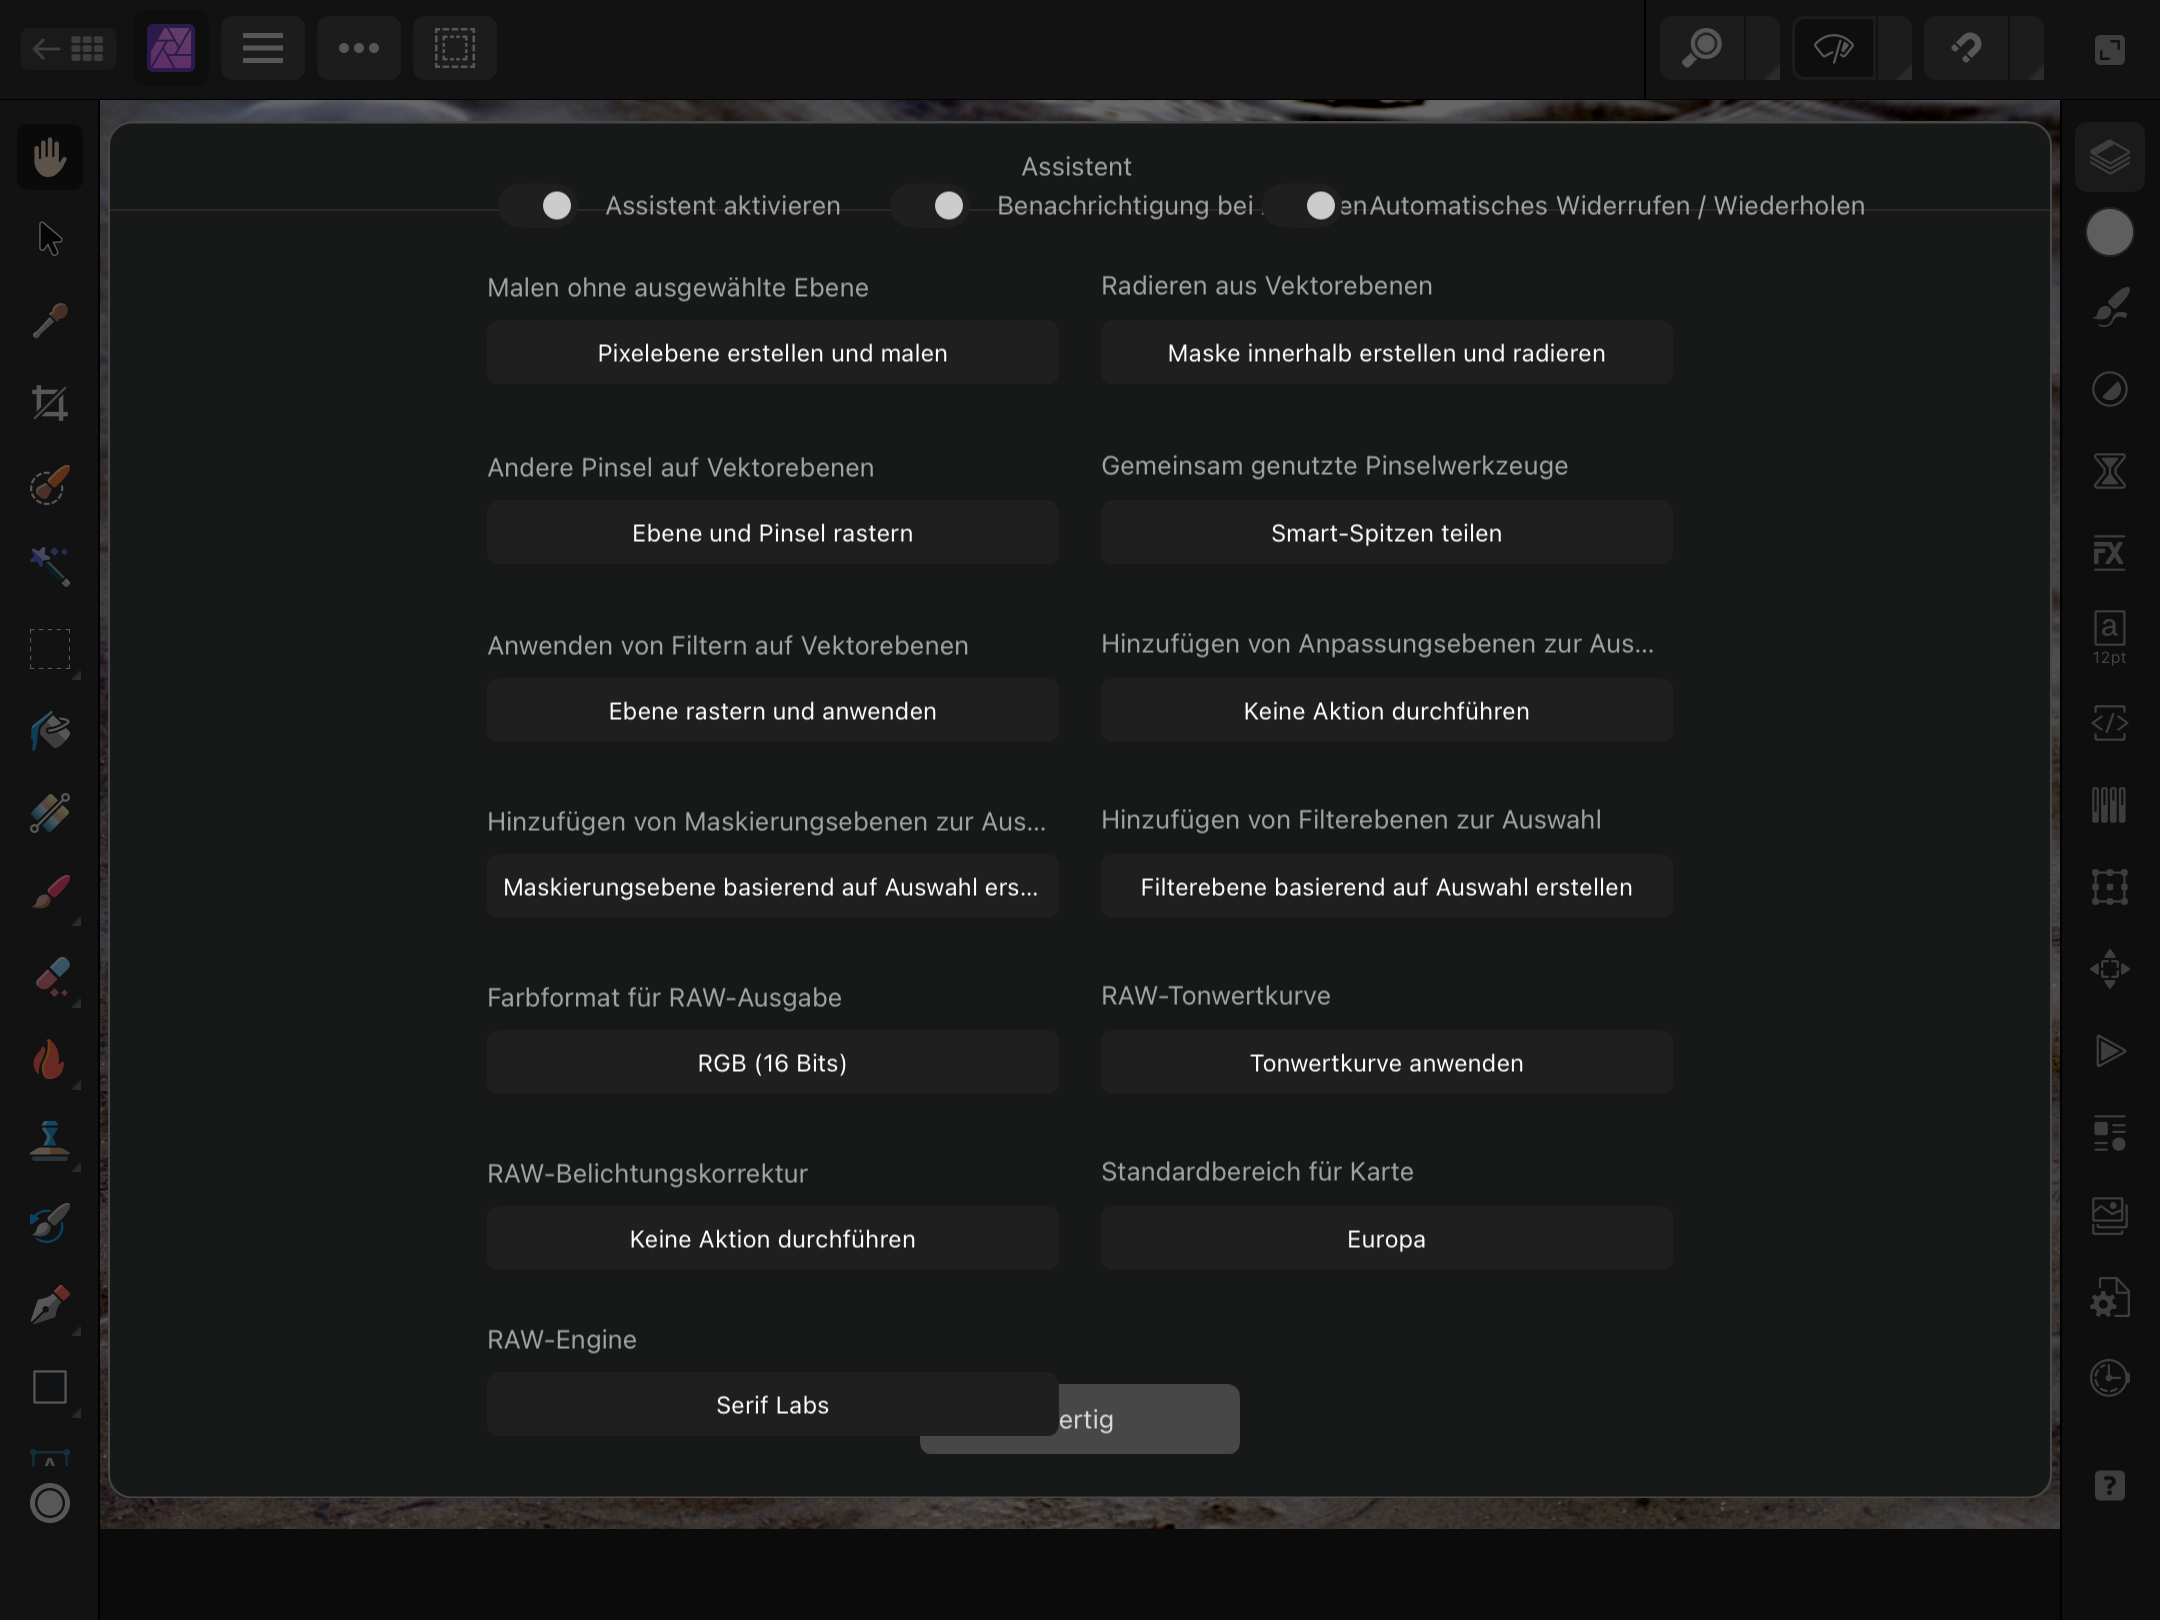
In the Assistant window is a overlap of the UI elements which disturbs the functionality, see attached screenshot from my iPad 8.
- 2 replies
-
- 1
-
-
- ipad
- affinity photo
- (and 1 more)
-
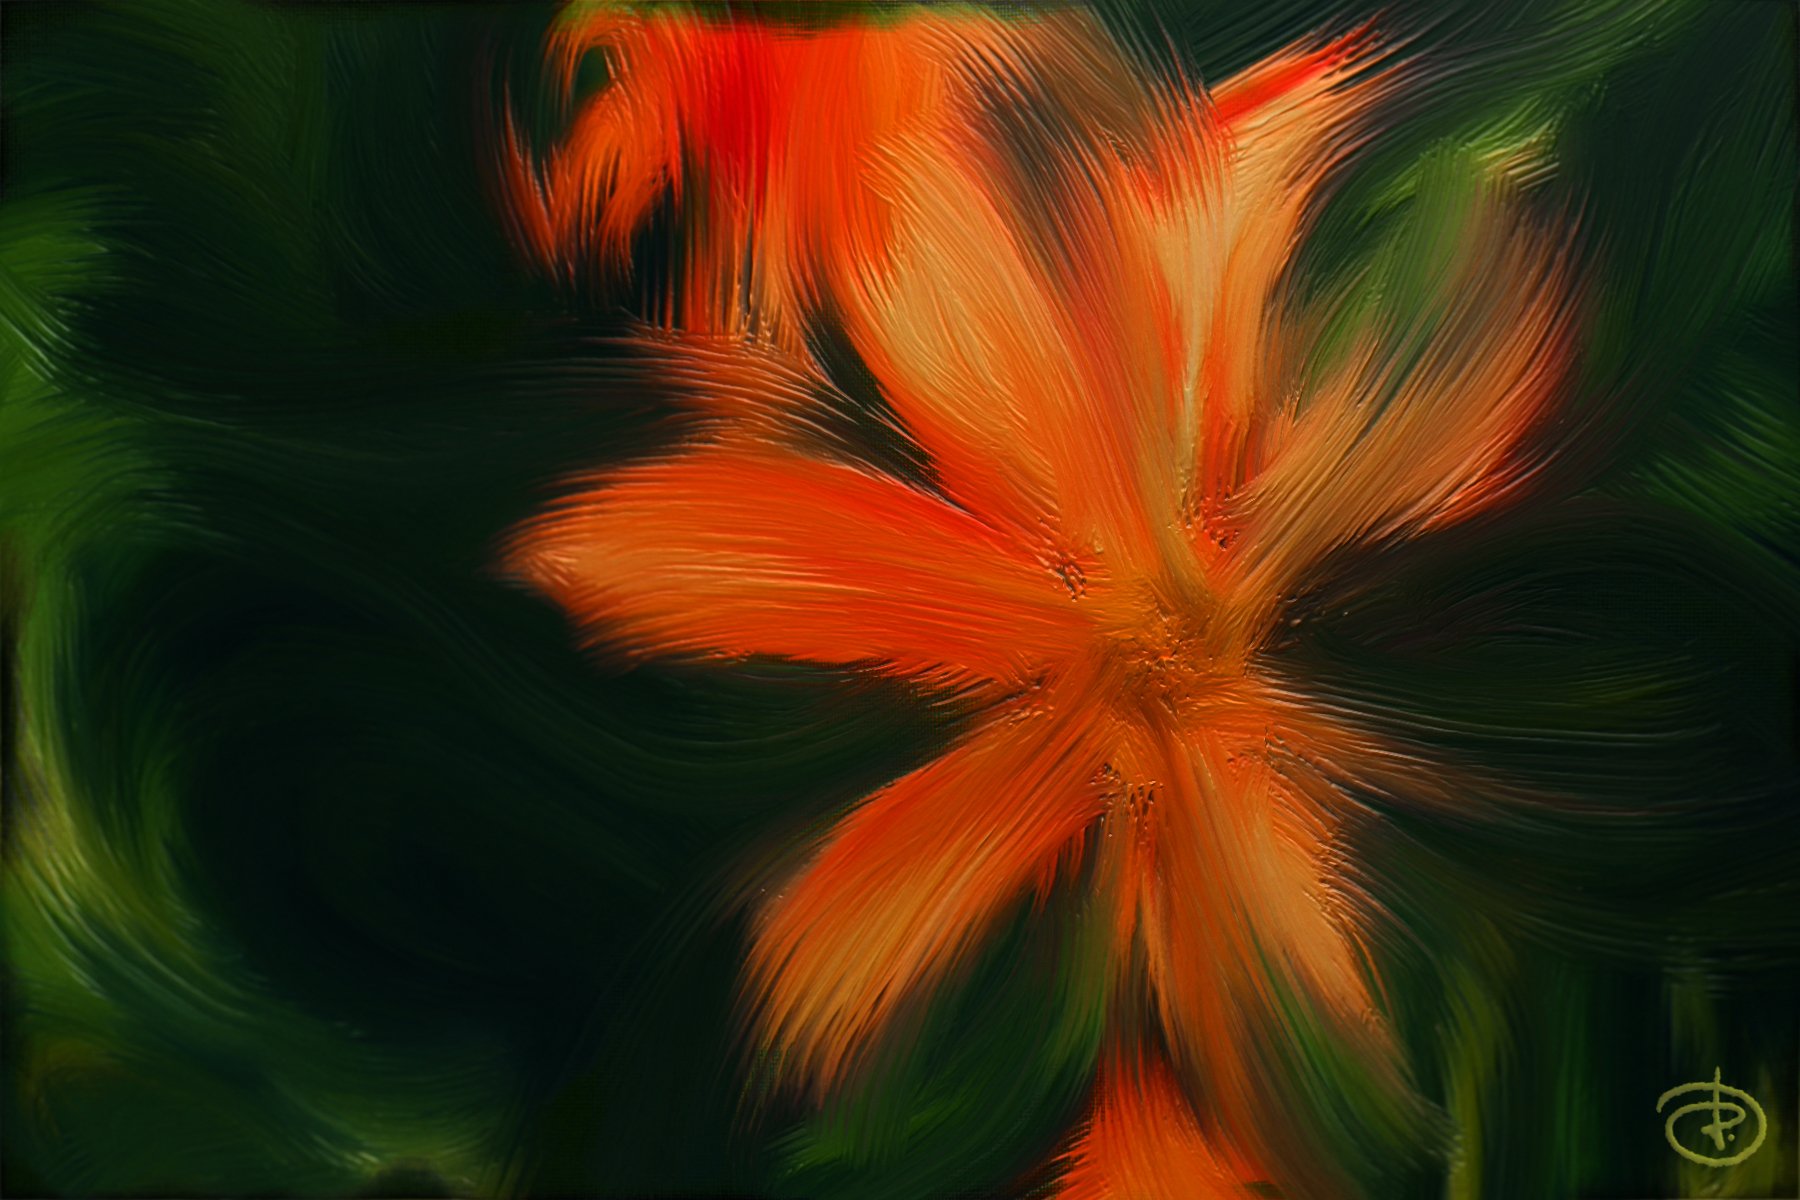
I'm always amazed how much plasticity a simple Lighting filter can add to an otherwise rather flat image. I used the Paint Mixer Brush quite extensively, painting over a stock photo of a lily with a coarse bristle brush and adding some layer effects. This was just for fun and to unwind, nothing serious. 😌 I thought I'd share it anyway, maybe it inspires someone to try something similar. 😊 Cheers!
-
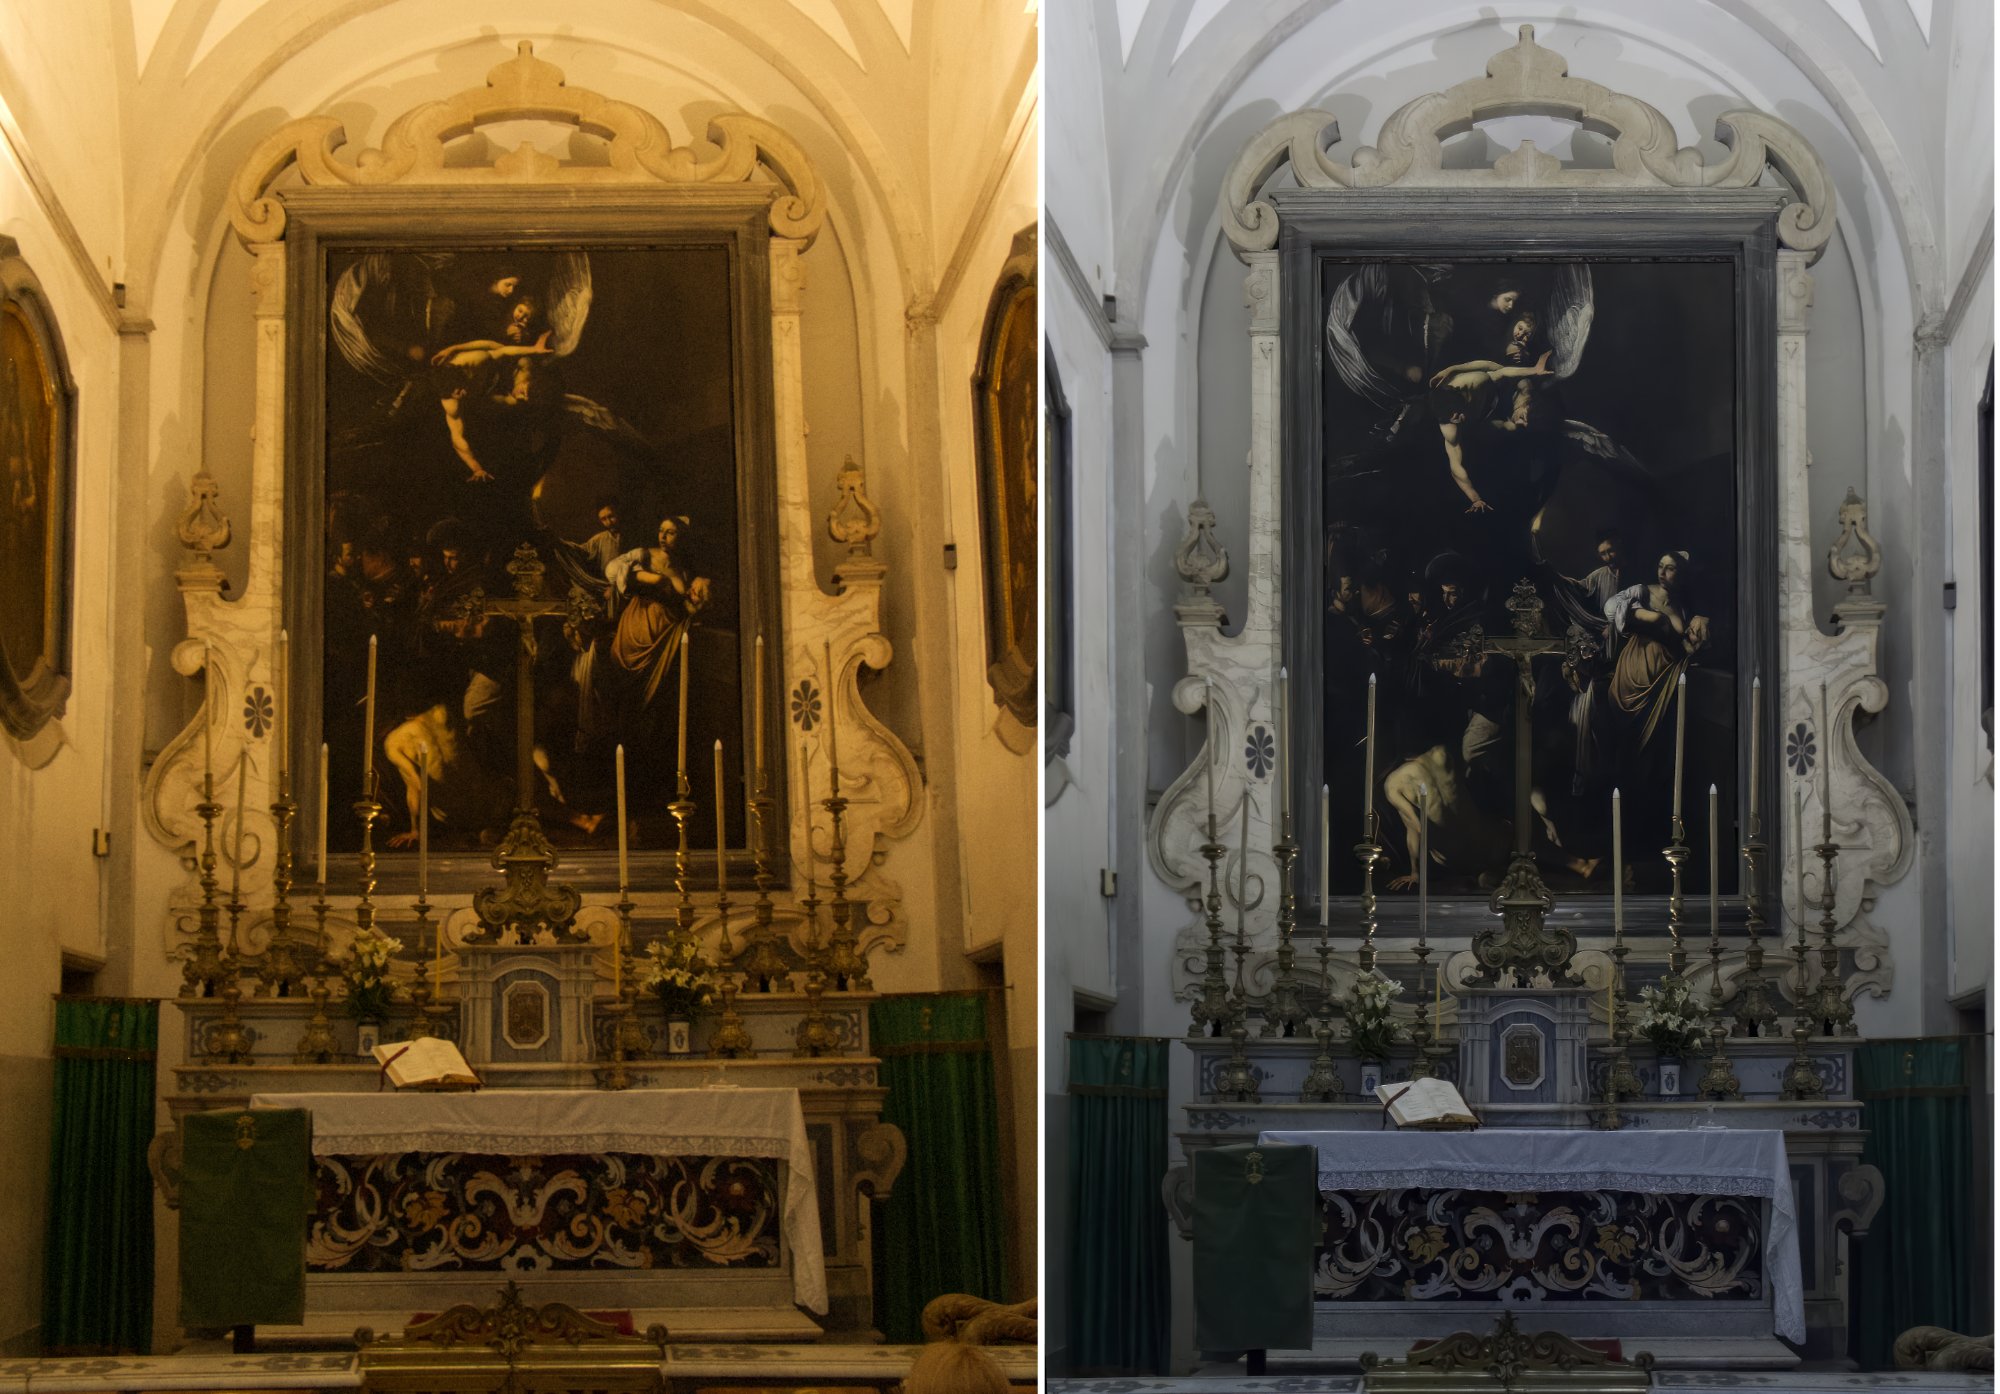
I was delighted with how well AP v2 dealt with this image of Caravaggio's 'The Seven Works of Mercy' shot in the church of Pio Monte della Misericordia, Naples in 2005. The camera was a Canon PowerShot G3 that produced a CRW Raw file of just 3.9MB. I though that some members of the forum would be interested to see. The comparison image is a jpeg and I have included a tiff version of the edited file. Most of the editing was done directly in AP, with noise reduction courtesy of the Topaz photo AI plug in and some geometry correction on DxO PL6.5 (the Raw conversion was not possible in PL6 because the PowerShot G3 is not supported by the software. CRW_2052_DxO.tiff
-
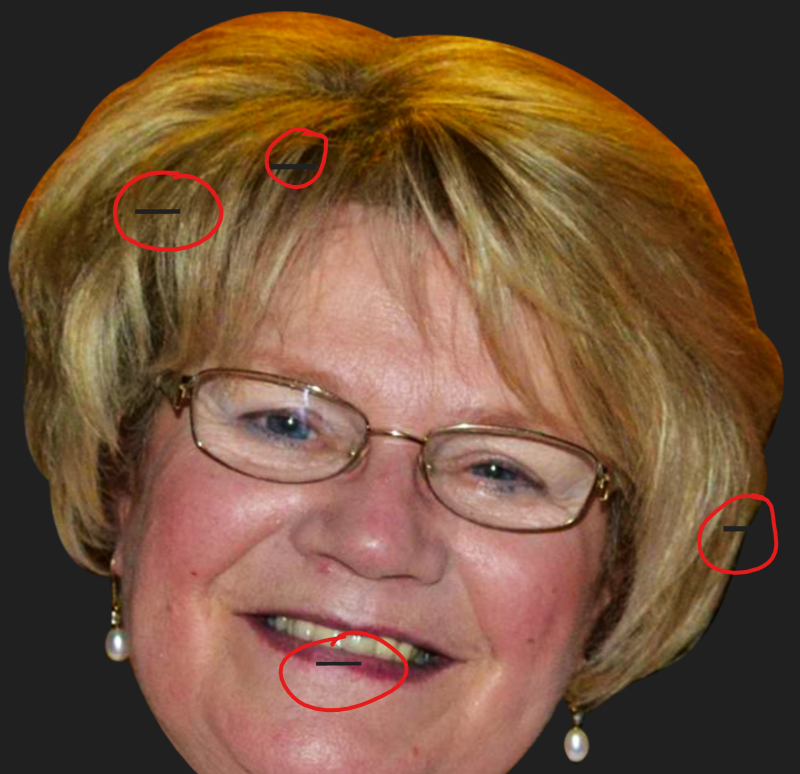
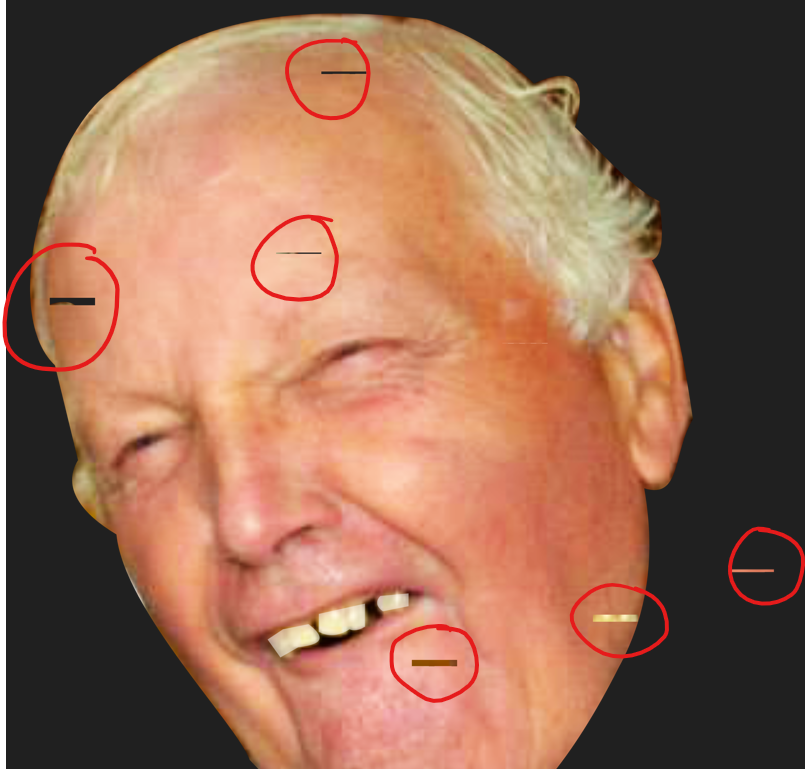
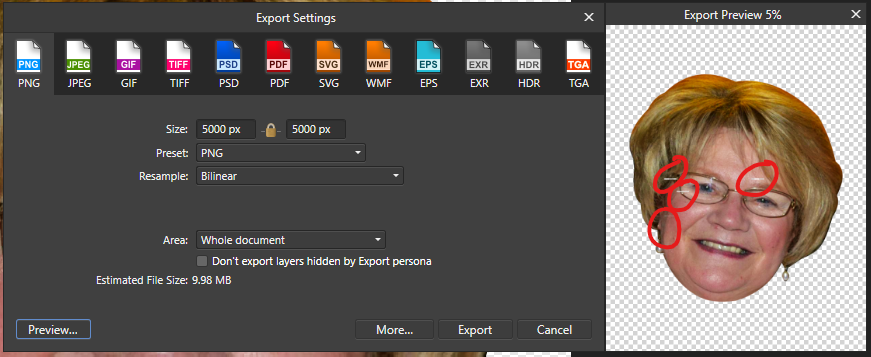
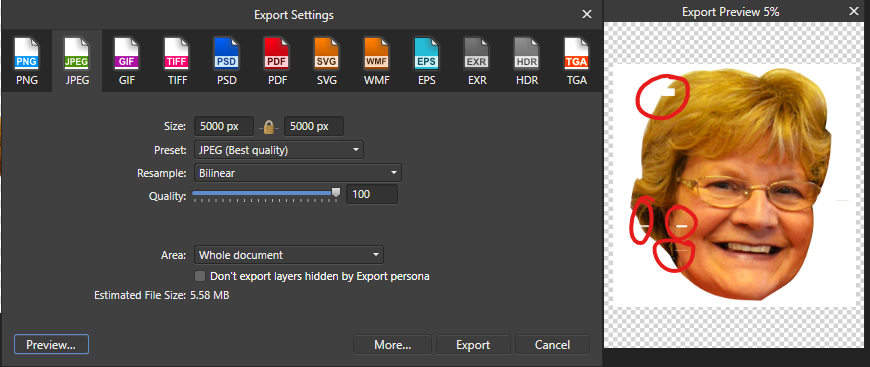
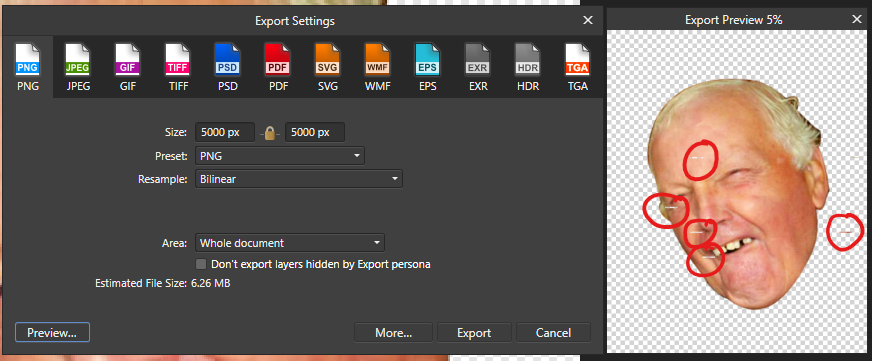
 The final pictures have brick-like flaky holes within holes it after exporting. The export preview has the same. How can I fix this?
-
 Can anyone help here? I opened a file from psd with a mockup inside, but when opened the view of the mockup is messy. Any suggestions on what should I do?