Search the Community
Showing results for tags 'Affinity Photo'.
-
 When I attempt to cut out or make a copy of a selection from a pixel layer, the selection is ignored and the entire layer gets copied/cut. The problem persists with all selection tools and with both keyboard shortcuts (ctrl+x, ctrl+c, ctrl+v) and clicking on the "Cut"/"Copy" and "Paste" options from the File menu. The problem is present in Photo as well as in Designer's pixel persona. The only workaround is to copy the layer, make the selection, invert the selection and erase the parts that are not needed. Very frustrating. Is there any way to fix this?
 -
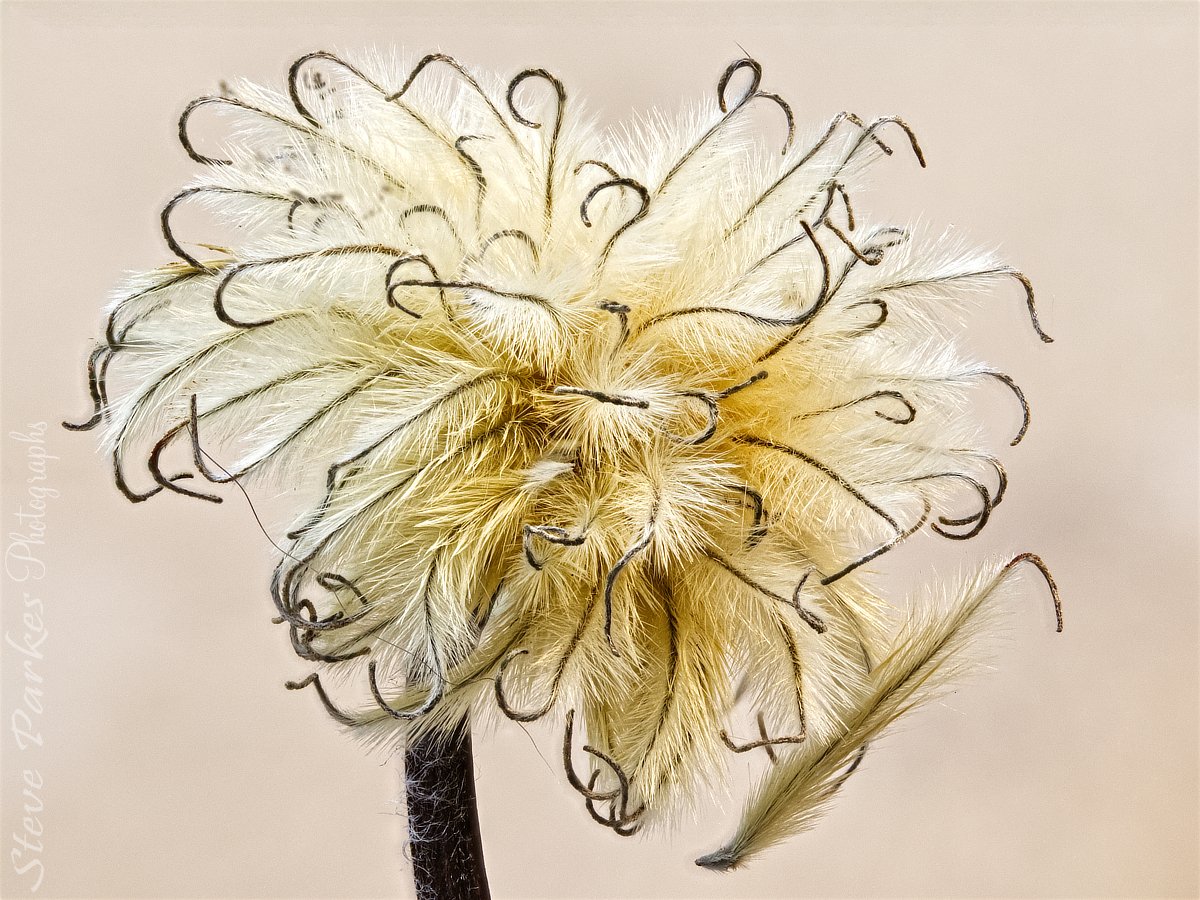
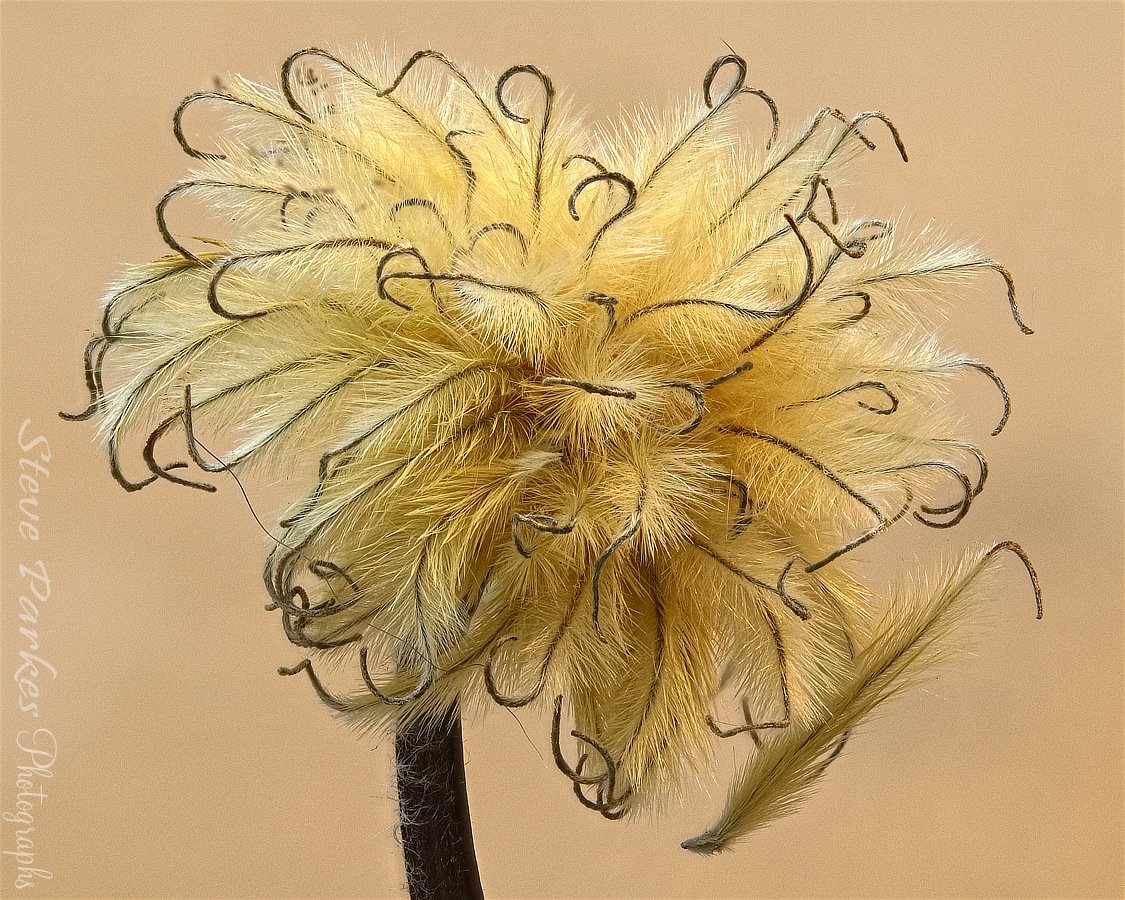
Another one. The clematis flowers have all started going to seed, and some of the heads are getting quite fluffy. I'd intended to make another merge or two, but the camera battery ran out! Technical stuff: Canon EOS750D camera, Canon EFS 60mm (96mm equivalent) macro lens, f/2.8, ISO 1600 (because I forgot to set it to 100 before i started!); thirty photos. I have the camera set to save CR2 (Canon Raw) and jpeg; for quickness, I made the first merge from the jpegs straight out of camera then adjusted white balance and vibrance, saved the afphoto file, then reduced the size and ever so slightly sharpened the image. (For some reason I get an error trying to upload the first file, but this slightly compressed version works.) Although I set the white balance and vibrance to give what i thought was the same result, as you see the two pics are quite different. I think I prefer the first one, but that's just me. And maybe a more contrasting background next time?

- 4 replies
-
- 7
-

-
- focus merge
- focus stack
- (and 2 more)
-
 Hi guys, here's a new video about how to change black and white color into any color that you want in Affinity Photo. I hope you enjoy and learn something new from this video, thank you!
-
- 2
-
-

-
- affinity photo
- tutorials
- (and 5 more)
-
 Hey Guys, This is a Template a background template which I wanna use as a background image when I want to isolate the subject from the background. But this in its current forum is a little too dark for my taste. what would be the best way to slightly, just slightly lighten this without taking away the colours from this template which then can be used with other subjects ?
-
Hi guys, here's a new video about how to create a realistic reflection for any of your products in Affinity Photo. I hope you enjoy and learn something new from this video, thank you!
- 1 reply
-
- 1
-
-
- affinity photo
- tips & tricks
- (and 5 more)
-
 I'm doing some architectural graphics and need just some basic fill patterns. I've watched the tutorials on how to use them but unless I'm missing something, I'm not finding any that come in Affinity Photo. I've searched but not turned up any. Not sure if I am looking for vector or bitmap. Maybe I'm searching for the wrong thing. Can anyone recommend a fill pattern package? Are PS ones compatible? TIA
 -
I have just checked my Affinity account and my purchase of Affinity photo and Designer do not appear in that account. I am in the process of carrying out a clean install onto a new MacBook but can only find Affinity publisher within the account. How can I access these files for reinstallation. Is this the quickest method of contacting support.
-
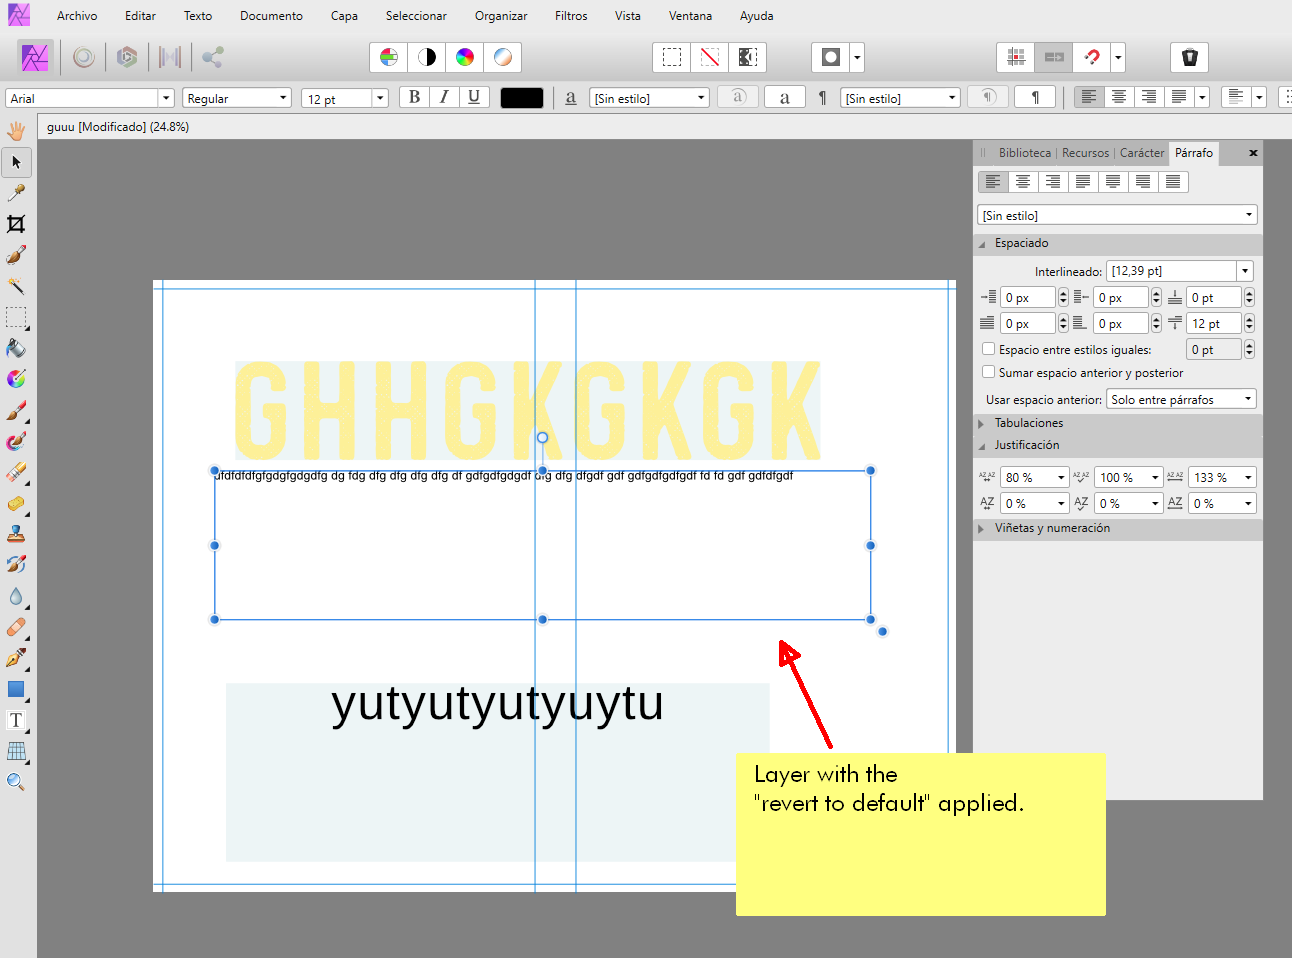
 TLDR; Edit : After all the entire thread writing. I suspect that it indeed is an issue that happens in A. Designer, in a Designer file where the issue appears as an unwanted gradient fill in the text boxes (mysteriously inherited from a vector rectangle shape with that exact gradient fill), but that might have turned to solid somehow, to replicate after several iterations as solid fill in Photo's text boxes. I tested now that it brings such gradient fill (or whatever the problematic background fill) issue when sending to Photo. So, "maybe" Photo has nothing to do with it (and surely neither linked or embedded files feature, so I modified the title). It started on my Designer, and keeps being a problem in Photo, that's it. I detailed two fixes (one works the same in both apps), but the safest and fastest has the inconvenience that I don't know which other things are reset with menu option : Edit/Default settings/revert. ------------------------------ Not sure if it's a bug or sth that could get a bit better UX, and I notify it just in case it helps the dev team, as I found a workaround. To replicate it (not sure if it will happen with every file, but I cannot provide the files, sadly) : - Create a file, with a text layer, layer effects (I believe it was color and gradient overlay, external shadow, etc) applied to it. Also with some other pixel layers with live adjustments (hue, levels, etc) - Create another file with only pixel layers with live filters and live adjustments. (although this one might not be the culprit). - In a main design (yet another file), place these two files (using the place (linked) feature). Initially it seems it worked very well (it's amazingly functional), but after some operations, the text field shows a background color, solid (a "cyan-ish" white), instead of being transparent. It is not the actual "text background" (triple checked), and setting the background (or even the font color) to "none" does nothing. Actually, it is not the whole text box background, but the background actually used by the text characters (as can be seen in the screenshot). Once this has happened, you can even delete all layers and leave only the text layers, and yet the glitch will still remain. I had a lot of work done as to trash the main file, so, I dug all I could for a solution : No setting in Character or Paragraph panels (studios) can fix it. It is not any of the live adjustments, as I fully removed all of them. (But perhaps they caused it somehow, internally? Or maybe the layer FX) The one and only solution for me has been to go to (I don't have the UI in English, I guess these are the terms) : - Menu Edit -> Default Settings -> Revert (great feature addition, btw). It fixes the text box layer I had selected in that moment. So, it might be that something went the way of the Dodo (probably it shouldn't) with text settings due to the layer effects over the text element, or due to the document linked placed, or who knows if maybe even the live filters/adjustment on pixel layers. If someone has the issue, this is a way to keep at least working with the file and not having to start from scratch. It might be just that I am using something wrongly... But then slight suggestion to improve a bit there the UX (for a portion of users that won't guess what's going on ), as I am not a complete newbie and yet got a bit lost . Other than that, the whole suite is working amazingly for me (indeed, the above is no show stopper due to the trick), thanks again for such great software. Linked files (together with "duplicated linked" and the Assets panel) are excellent for productivity. Thanks a lot. Also, huge apologies if it is something obvious that I am not seeing, somehow. Attaching below a screenshot of the issue.
-
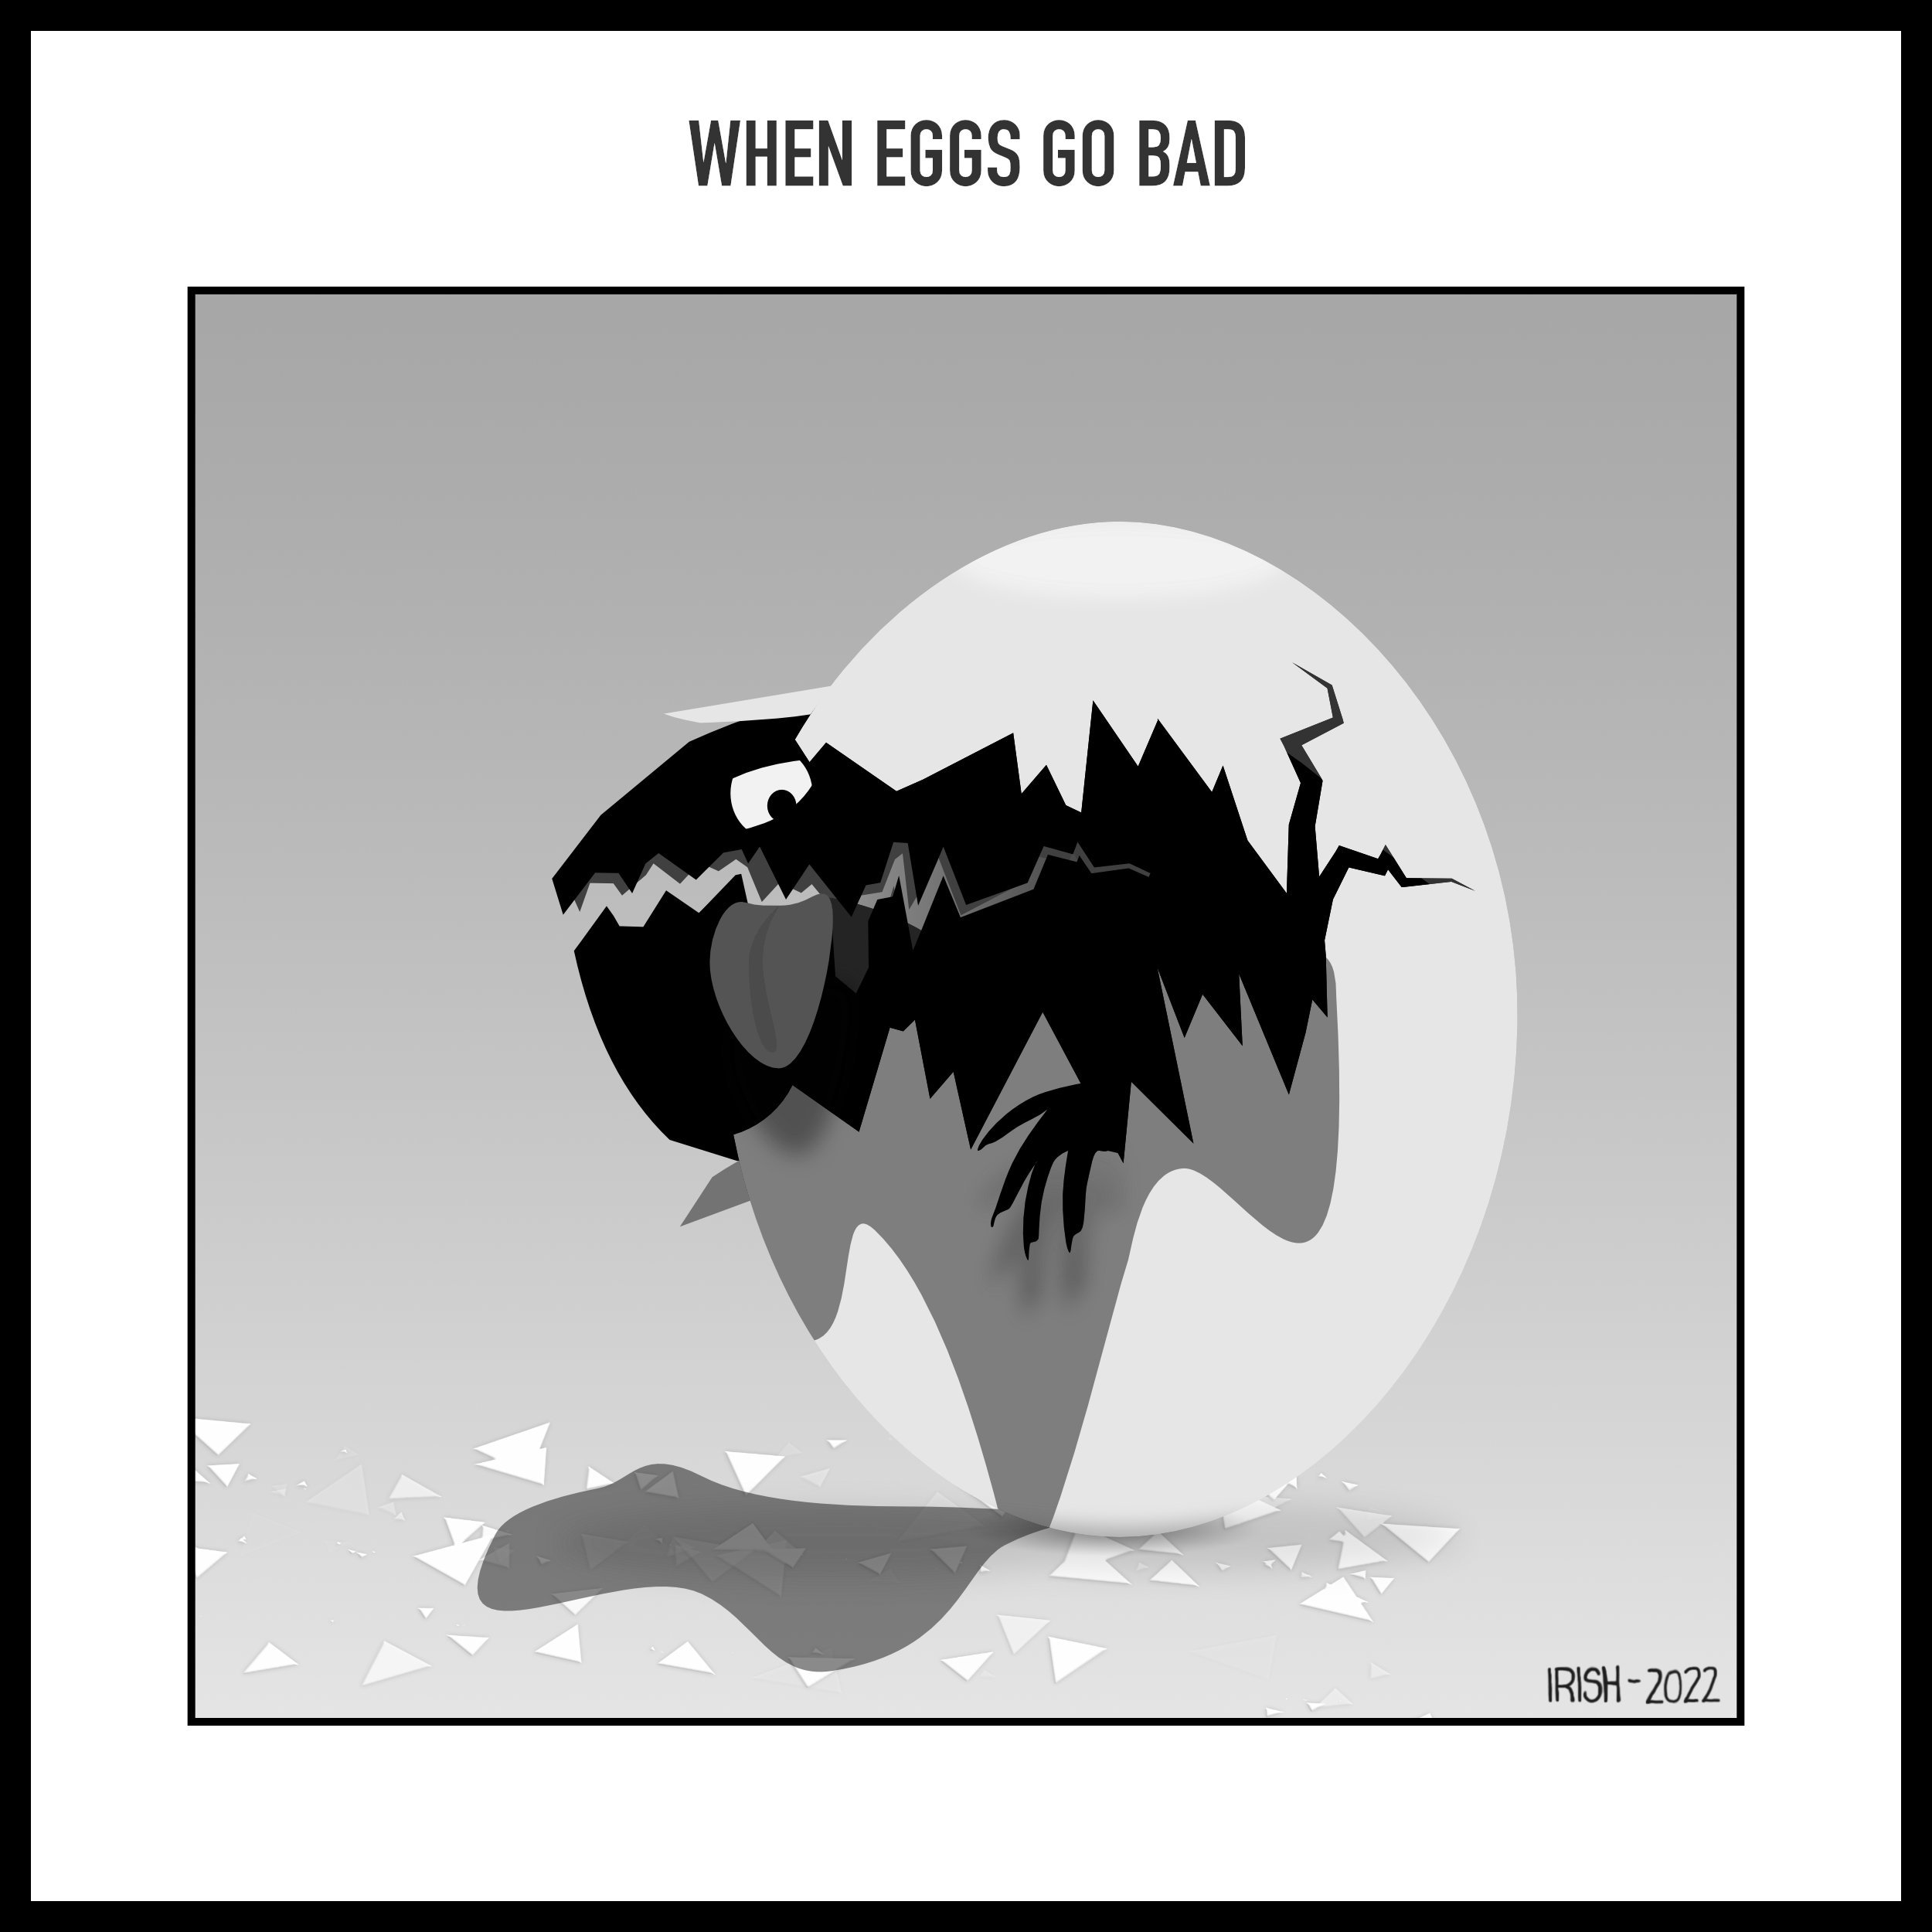
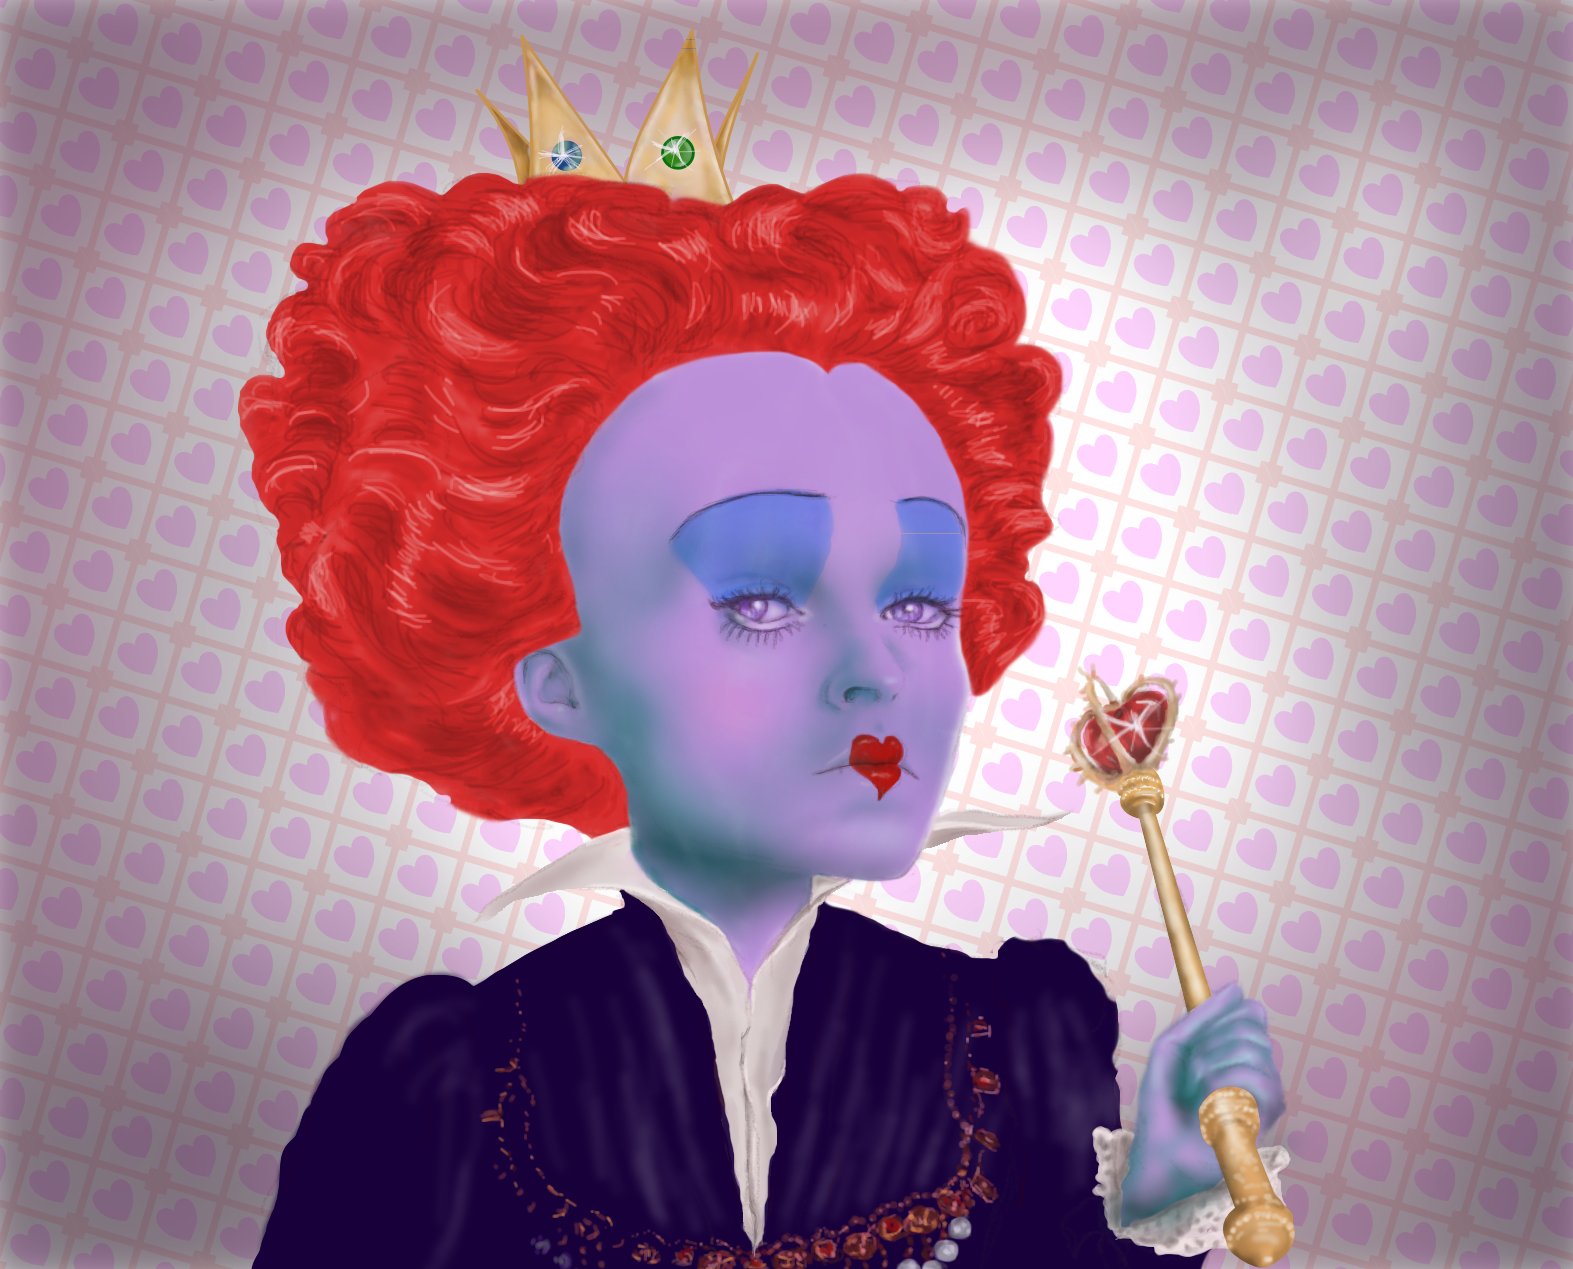
Hello : ) I draw cartoons as a hobby. A long time ago I worked as a 3D Motion Graphics Animator in the television commercial industry. I was firmly entrenched in Adobe products along with Maya. After I retired I started drawing using Autodesk Sketchbook Pro as I couldn't afford to buy the Adobe suite. A few years ago... 5 maybe?? I discovered Affinity and immediately bought everything I could get my hands on. I love how well Designer, Photo, and Publisher all work together seamlessly. If I could have bounced back and forth between apps as I can now while I was working, my life would have been SO much easier. I'm in the process now of shifting from creating my illustrations in Photo to Designer... with help from Photo when I need it. The goofy image below is mostly Designer with help from a Photo custom brush for the broken shell pieces.
- 4 replies
-
- 10
-
-

-
- affinity designer
- affinity photo
- (and 1 more)
-
I have never done this, I have never removed a Subject from the Background, I have always removed the background from a Photo not a subject. So there is this Photo I want to remove the Glasses from this Photo and want to use the background in other images. How can I do that ? I tried the selection and then inverted it but could not remove the glass it just masks the Glass but that does not help me get a background without the glass image of this Picture. How do I do it ? Image attached.
-
-
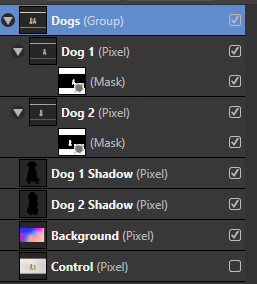
 I know this is actually a really silly question, and I know how to do it on photoshop, but for some odd reason I'm having a VERY difficult time with my mask layers and adding shadows.... Currently my Layers look like this: I'd like to bring my Shadow layers above the background, but outside of the masked Dog 1 and 2 layers group.... Having a hard time wrapping my head around this without making additions to the mask to show the shadow layers?
-
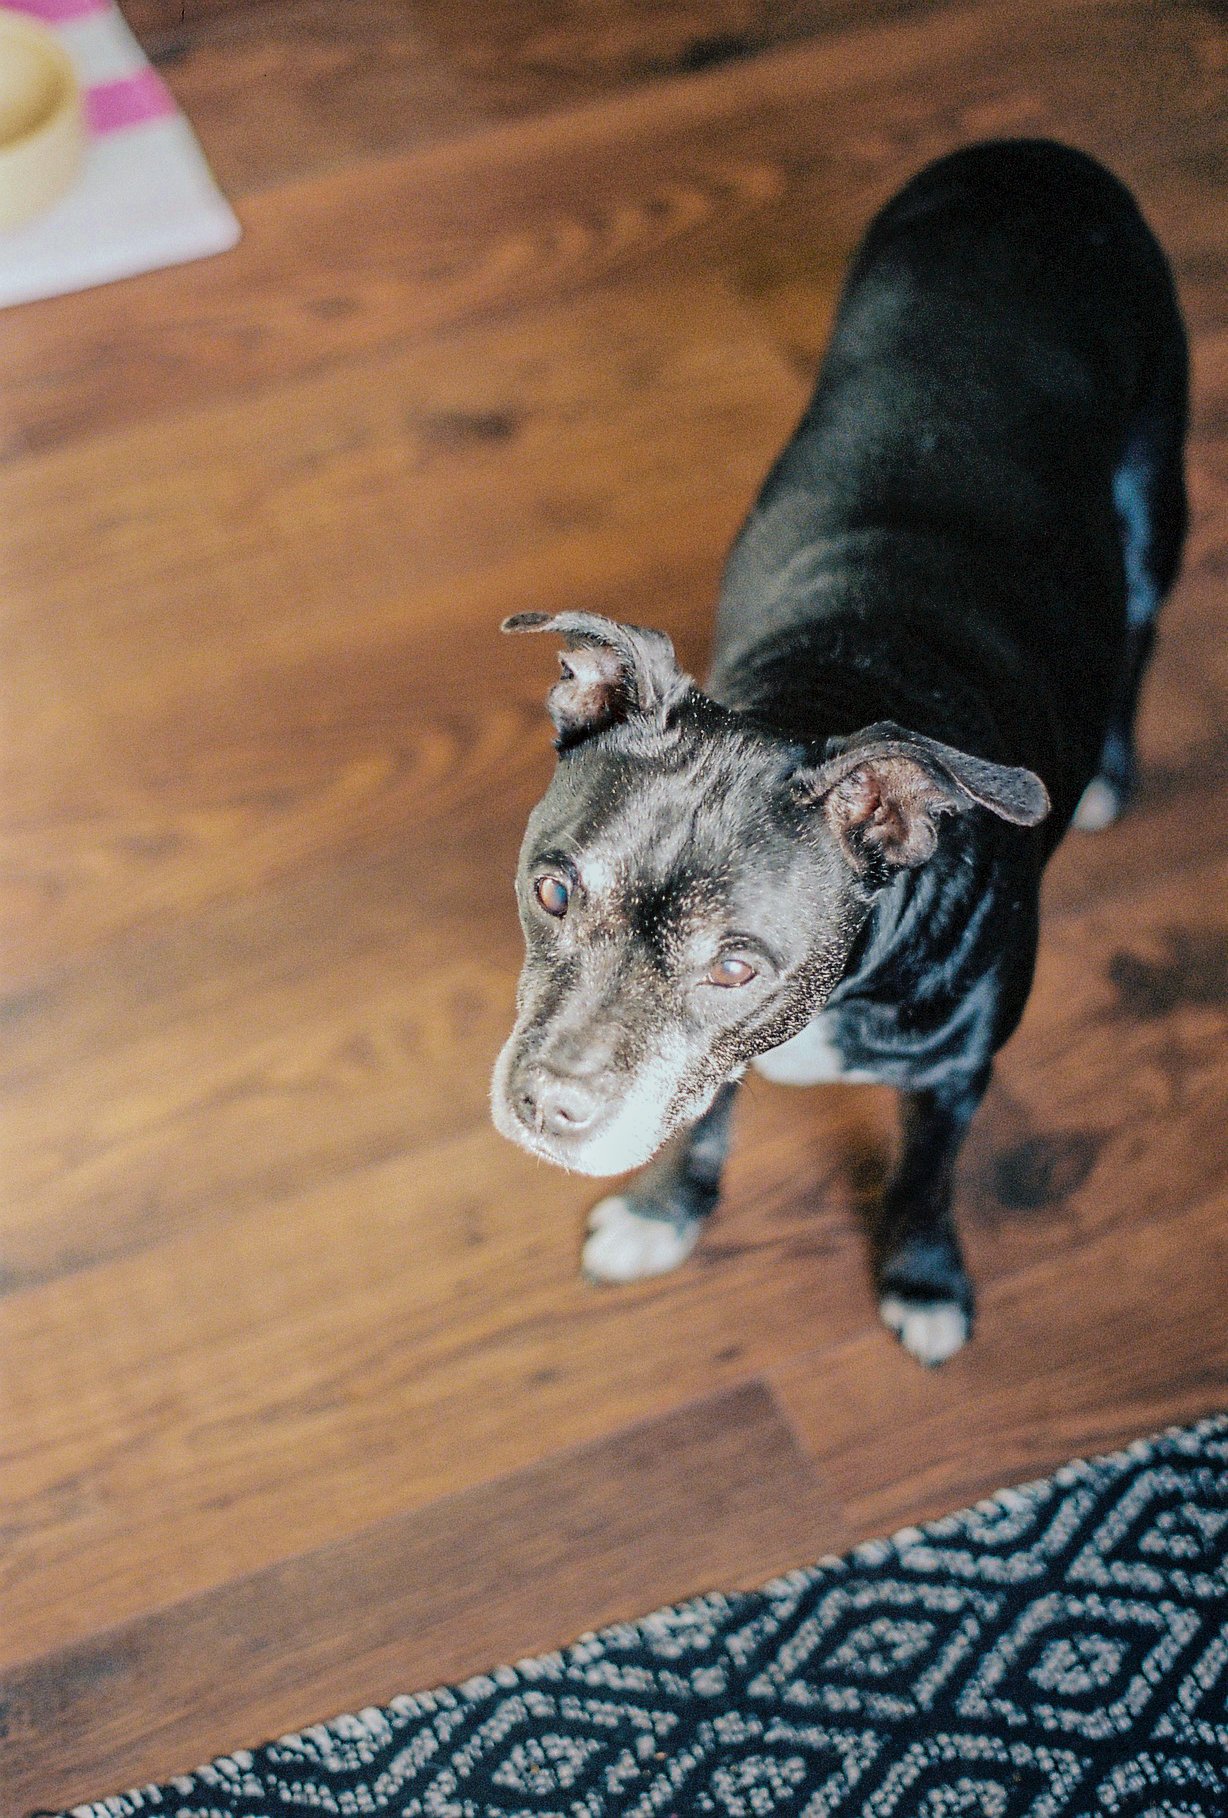
Hi Everyone, Long story short, i'm a big fan of film photography. Mentioned this to my dad and he gave me his Pentax Spotmactic he brought new over 50 years ago. All i've done with the images is load them into Affinity and use the Auto colours, tones, contrast and white balance. The photo of the dog (Naboo) i did load into the Develop persona and lower the highlights, whites and blacks. Have to say, for a 50+ year old camera i'm really happy with the results. I used Kodak Portra 400 35mm film and the scans provided to me by Asda were in JPG format, so don't leave much room for improvement. The 2nd n 3rd image are from Nottingham, the rest are from Bristol.
- 4 replies
-
- 11
-
-
I seriously need help! I’ve done my editing on the iPad version for years, and I’ve never experienced this before. While editing, it has started destroying whole blocks of pixels down to the last layer, sometimes, even deleting the last layer too. When I try to go back in the history, IT DESTROYS MORE. It gets worse the more I go back, but I can’t stop it in the current point in its history. I sat for 4 hours and had been thrown back at least two-hours in progress. Does this happen to anyone else? I need help to fix this ASAP. Do I have to switch some setting?
-
 As an excercise today I Animated my own Paper Drawing of 40 Years (!!) ago when I was five years old 🙂 Wanted to practise animating, but also using Photo again after a long time only working with vectors. To refresh the workflow and knowledge of Photo a little bit and doing some raster work again. Long live the Affinity Photo Clone Stamp, non-destructive vector masking and the great exporter which directly exports to Spine, which is just wonderful! 😀 The video is also a seemless loop btw! 🚶♂️👍 drawing-83-def.mp4
- 4 replies
-
- 13
-
-
-
Cropped a little bit the layer, duplicated it, then Levels, Curves, Exposure, Brightness adjustment and Gold Punch, Subtle Yellow/Blue and Enhaced Yellow macros by James Ritson (different levels of opacity).
-
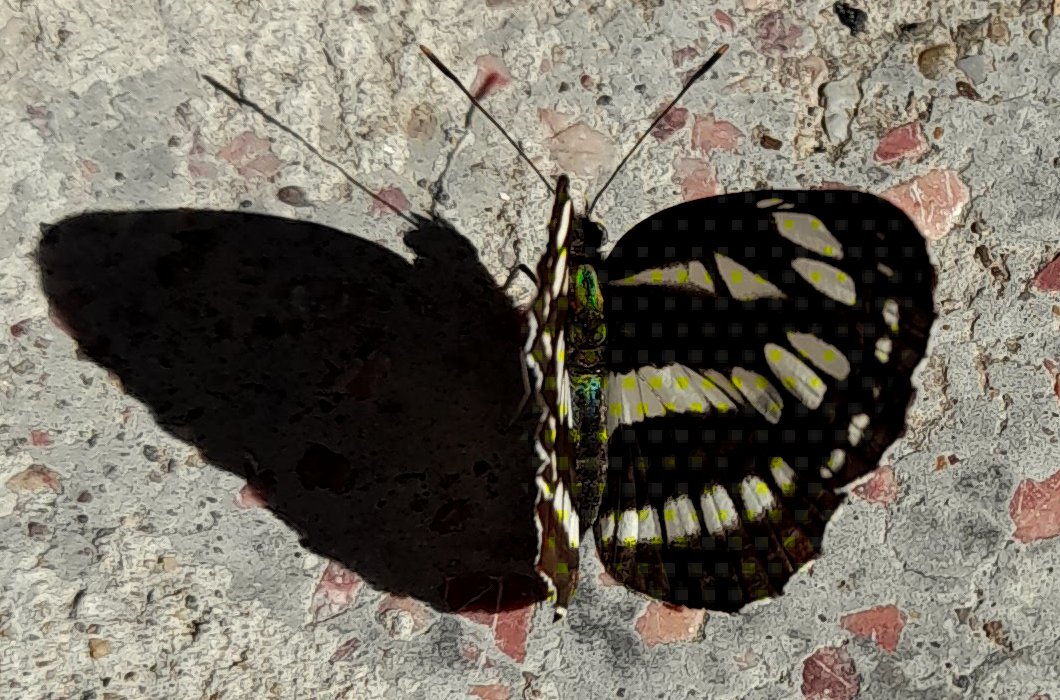
A small butter-fly having a moment of rest. I clipped the image, I added Levels, Vibrance, Curve and Selective Colors adjustment only for the right wing and for the body.
-
I'm a big fan of the liquify persona, one thing I would like is to have a rectangular or bar brush. When moving a far or body having a circular brush is not easy to operate on most things. It would work much better if a bar that can be rotated as needed was used to push the pixels rather than the round brush.
- 1 reply
-
- 4
-
-
- affinity photo
- liquify
- (and 1 more)
-
 Hi, I'm used to the Photopea program that when I turn on a shadow on an object (via Layer effects) with parameters so that this shadow looks like the outline of an object of a certain thickness, in the mentioned Photopea the shadow had beautiful smooth edges. If I do this in AP, the edges are jagged, see screenshots. Yes, I can use the outline of an object whose edges are smooth, but I would like to move this outline, just like when I set the offset and angle in the shadow. Is there an easy way around this or should I ask the Affinity team to fix the jagged shadows?
-
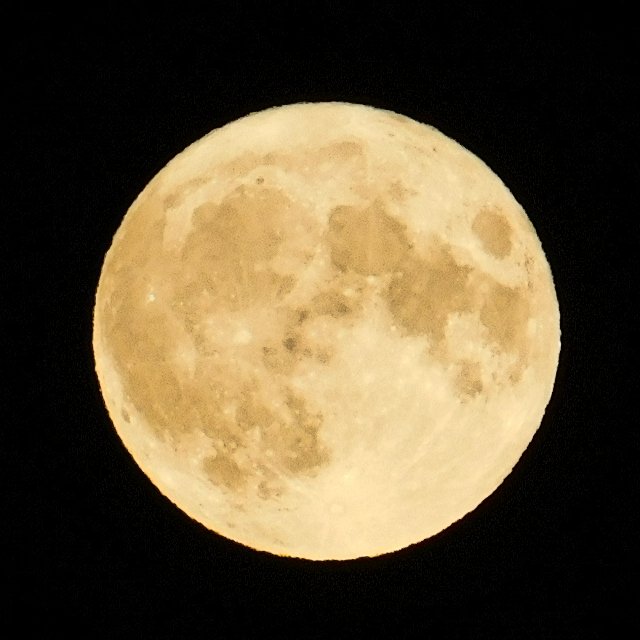
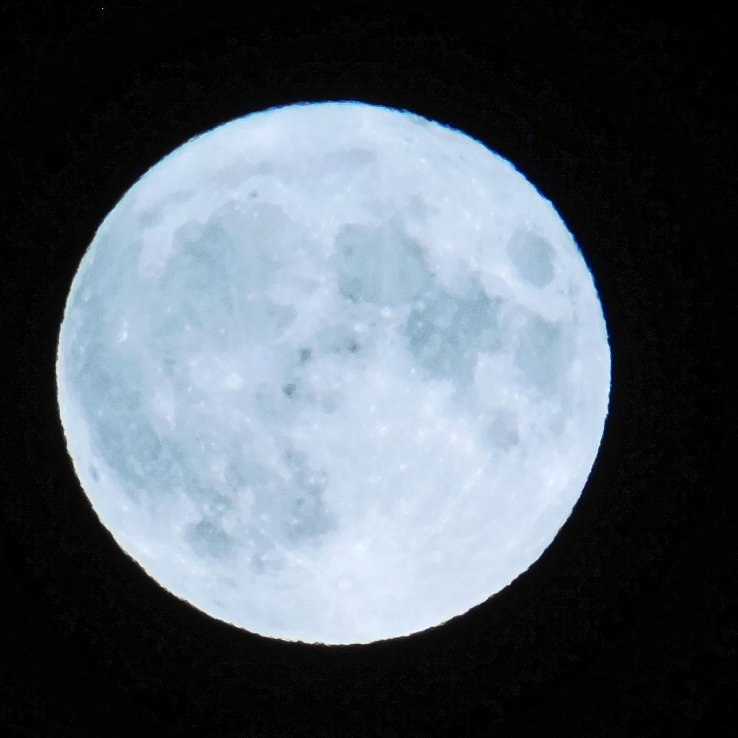
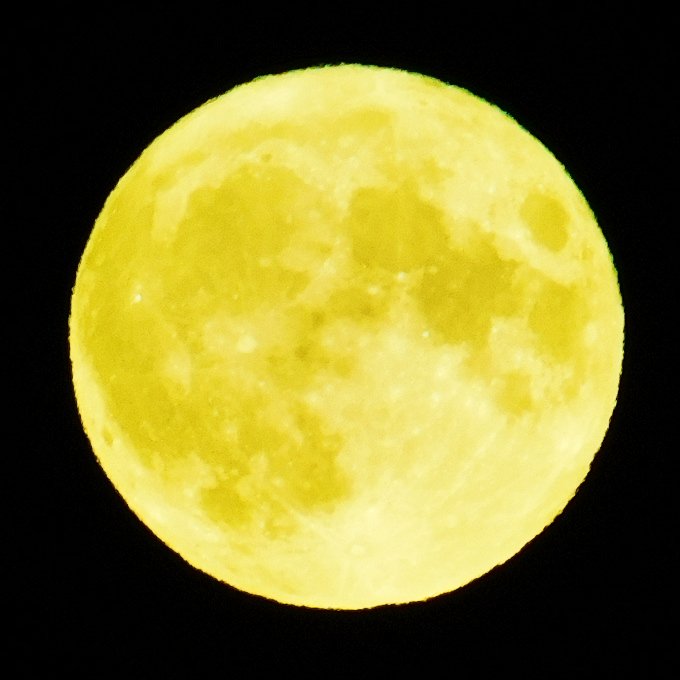
Moon in the night of 13th July 2022
-
I made the sky a little more dramatic with a Curves adjustment. Before I duplicated the layer and I put it in Soft Light blend mode. I played with the opacity.
-
Just lips recoloring and some small skin retouching (with frequency separation filter). I added a Curve adjustment, and a little dodge & burn.
-
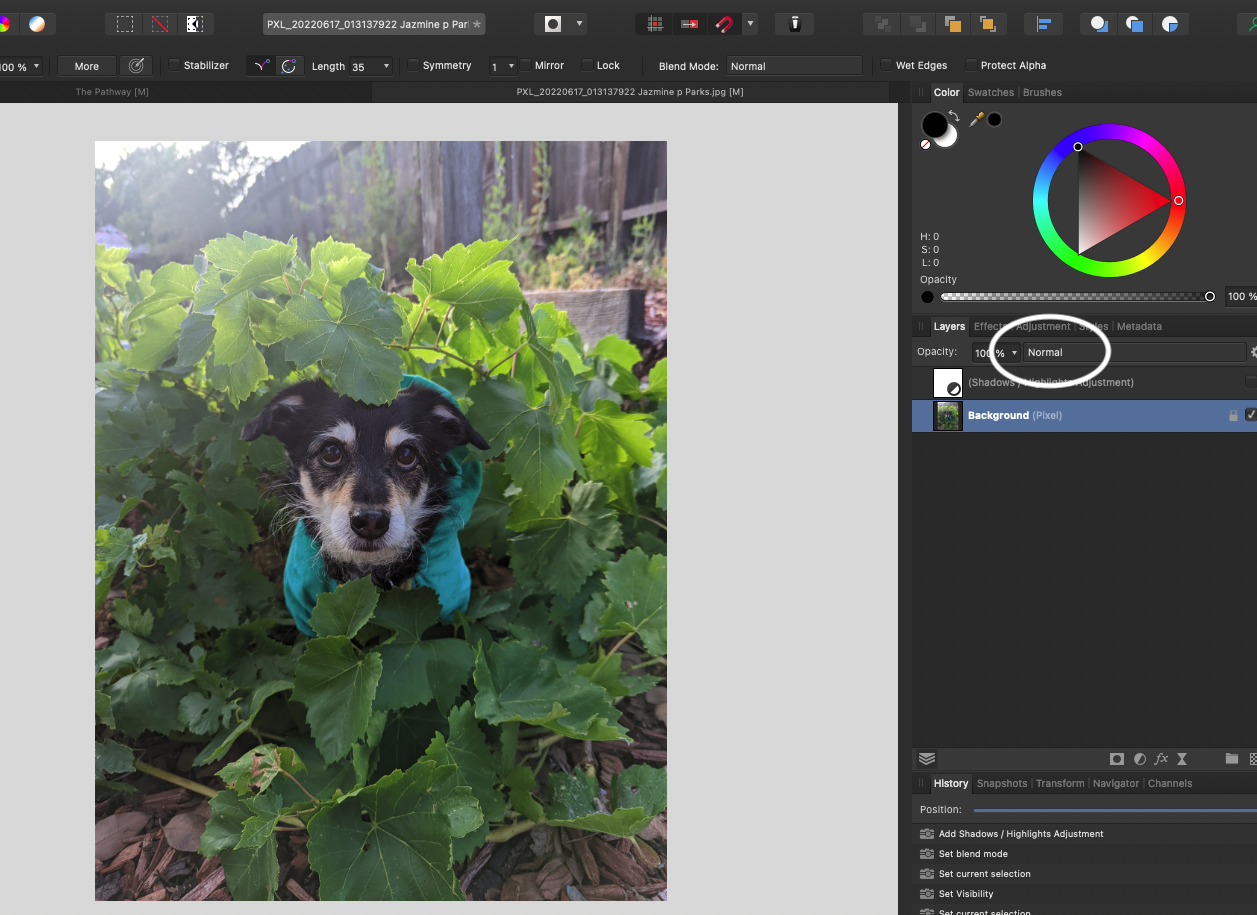
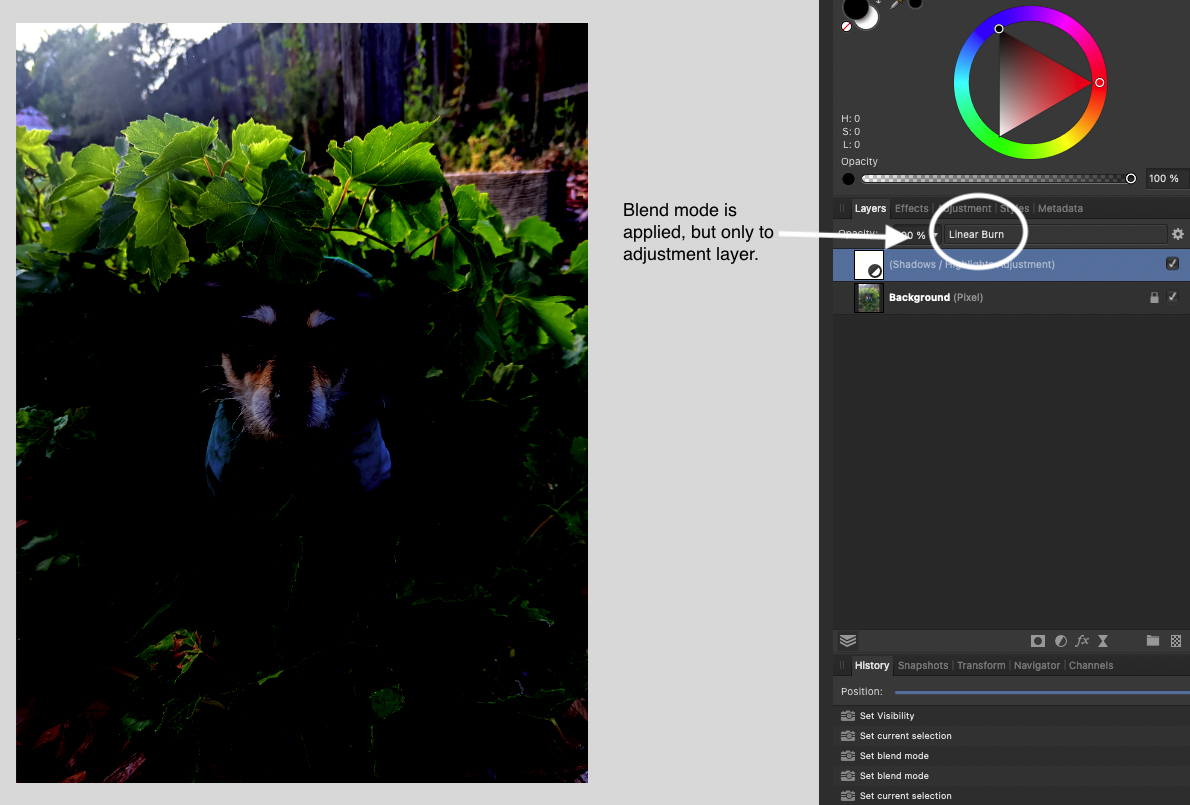
 I know I used to be able to change the blend mode of single image before, but for some reason I can't get it to work anymore. I can change the blend mode of an adjustment layer, but not the image itself. Is there a setting I need to change I'm not aware of or is this a new feature in AP? I've attached some screenshots to better explain. Can someone please help me with this?!
-
Hi Guys, I am facing a problem, So I have one image where one side of the subject is slightly dark then the other side (Photo not taken in ideal light condition) So I want to brighten the dark side and I want to isolate the subject from the background. So what I did isolated the background from the subject and then I applied a Gradient Mask on the subject and then applied curves adjustment layer to brighten only one side of the image. But what this has created is, a problem when I apply a fill layer with a plain colour background (any color) the backgroud shows one side slightly dark and one side slightly bright this is because of the Gradient Mask that I applied. How do I handle this problem ? after applying the fill layer I want both the sides to look even. Also just like applied Gradient Mask on the Curves adjustment layer I have also used Exposure and highlights shadows adjustment layer to the project and I want to apply a gradient mask even to this layers. How do I do that ? Thanks in Advance !