
unni
-
Posts
155 -
Joined
-
Last visited
Reputation Activity
-

 unni reacted to NotMyFault in Problem with Applying Image in a macro.
You can have the same function in a non-destructive workflow.
(updated version with drastically simplified workflow, ready for copy & paste of one group with 3 adjustment layers):
A group of 3 layers from bottom: levels to reduce lightness range from 0-100 to 25-75 bilateral blur layer with blend mode "subtract" levels adjustment to increase range back to 0-100 group layer set to blend mode "linear light" you can store this as asset, and put it atop the layer where you need it adjust blur settings and levels settings (upper layer) to fine-tune File contains example image to see impact. Zoom in to 100%.
sharpen by bilateral blur 2.afphoto
-
 unni got a reaction from walt.farrell in Problem with Applying Image in a macro.
@walt.farrell Thanks for the feedback. I have posted in the Feature requests&suggestions part.
-
unni reacted to walt.farrell in Problem with Applying Image in a macro.
This topic is in the Questions part of the forum. If you're hoping for an application change you should be posting in the Feature Requests & Suggestions part of the forum.
-
unni reacted to Archangel in Turn a sunset image into an HDR using Affinity Photo and G'MIC
Here I have taken an original image of a beautiful sunset and using the G'Mic plugin with Affinity Photo created some artistic HDR versions of the Image. Using a variation on the HDR merge technique.
-
unni reacted to zaflemos in Improving clarity on background view
Thanks for that advice. I never tried the refine mask option. Gotta practice using that one. Finally learned to put layers in group something that make things easier.
-
unni reacted to zaflemos in Improving clarity on background view
Trying to improve the image I took on a very sunny day. I made separate selection for the sky background and the grounds on the foreground. It does show I need to practice more on many things.
-
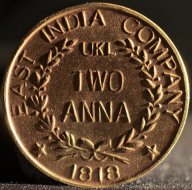
 unni got a reaction from John Rostron in Advanced sharpening with high pass using Apply Image
I was going through various videos and articles on sharpening to understand it better.
One unwanted by-product is halos and there are various ways to remove it. Also, some
methods produce harsher areas in the brighter part. Found this video
interesting but it is for photoshop. I was wondering how to use it for AP. Only two points are to be mapped for affinity photo.
One is Surface blur and another is the Offset and Scale inside the PS Apply-Image dialog box.
For the surface blur, AP equivalent is Bilateral blur. For the other two, I did some trials and found as below.
In the video, there are two layers - High and Low. High layer is the target and Low layer is the source
as far as Apply image command is concerned. Then offset is 128 and scale is 2.
To get the same result in AP Apply Image command under Filters, we have to first select the High layer.
Then from filters, click Apply image. Then click+drag the Low layer and bring it into the apply image
dialog box. Now the equations box will get enabled. click it. Now enter to make like this .
DR=((DR-SR)/2)+0.5
DG=((DG-SG)/2)+0.5
DB=((DB-SB)/2)+0.5
Blend mode is NORMAL and not SUBTRACT.
Click Apply.
Now the result is same as that of PS, in the video.
The bracketed step shown in the next line which de-saturates is not a must I think but some videos recommend it.
(To the High layer, clip a HSL adjustment layer . In the HSL, move the saturation slider to extreme left (-100%). This is to remove color info
from the High layer. Merge the HSL layer with the High layer.)
From here, the video can be followed as it is same for AP or PS.
Incidentally, the above method is also used for frequency separation in many PS videos with the difference
of using gaussian blur instead of surface blur. Here also, the same equations can be applied. (De-saturation step is never done in frequency separation). Since there is a frequency separation filter available in AP , manual method is not required unless one is
experimenting or learning.
I tried various advanced sharpening methods and found this PS video to produce very good results.
With the above workaround, the video can be applied to AP also.
If any expert or others on AP equations note any mistakes in the above formula or method, please step in and
correct because I do not want anyone to follow wrong methods as I am not an expert in advanced
methods of AP.
-
unni reacted to RisingArmechadon in First B/W image, 2 cats
Thanks for the info, it's my first attempt at black and white. I'll do some experimenting
-
 unni got a reaction from RisingArmechadon in First B/W image, 2 cats
B&W conversion has many possibilities. various proportions of grey shades can be obtained by converting to bw using hsl/channel mixer/apply image/vibrance . it will be interesting to experiment. your image is relatively flat. i would have further adjusted for more local contrast and tonal separation. ofcourse,its a personal choice .
-
unni reacted to zaflemos in LAB processed image
Nice and cool. Will be looking into the link. Thanks. That airplane looks real passing by.
-
 unni got a reaction from zaflemos in LAB processed image
I have just tried with your uploaded image. The method may appear a bit complex. There are other ways also, of doing this. The basic steps are explained below.
Duplicated tree image. Selected first layer, filters>apply image>use current layer>click equations> DR=SB, DG=SB. This will replace the red and green channel with blue channel. I selected blue channel because it gives max contrast for this image. Now there is a B&W image of the tree. This is the last layer renamed as mask before blur. This is blurred at 0.3 pixels and a layer is made with name mask blur. CNTR+ALT+Left click on the layer mask blur will load a selection and marching ants can be seen. Move cursor to the tree layer and select it. Then click on the mask icon. A mask will be created with the selection. This mask has to be inverted using the channels tab at the bottom. A curves adjustment layer is put above the mask and alpha channel is selected in the curves adjustment. Now the curves adjustment will affect the mask and not the tree layer. See the image preview to observe the effect.
My above description is not perfect and could be confusing but it conveys a way to do it. You can follow some of the youtube videos which explains things better. I have used a slightly complex way to achieve the same result.
Hops this helps !
-
unni reacted to zaflemos in LAB processed image
Started with this of image. I did place some import of clouds and rainbow and add effects and curves.
-
unni reacted to zaflemos in LAB processed image
I just want to create a different image basing on the original image above, practicing on use of layers and curve. This is my almost 2 weeks of affinity photo and sometimes I got lost on what to do next.
-
 unni got a reaction from markw in LAB processed image
Here is another image processed similarly. The basic workflow is as below.
Simple mask is used for the flower. So from the A&B colour adjusted layer, only the flower was passed through.
In the Lightness channel, sharpening was done and a mask was used to pass through the flower alone.
In another layer, L channel was adjusted to make the full image bright and the same mask was used to pass through the flower only.
Again in another layer, full image was made darker and inverted mask was used to pass the background except flower.
No blurring of A&B channel was done because there was no colour noise.
The colour separation and vibrance seems to be better when done in LAB. It may be possible to get same result in RGB mode
but could be more difficult.
First image is LAB processed, 2nd image is original. Camera Nikon D3100, Lens was a Sigma 70-300 DG macro. A humble camera system.
-
unni got a reaction from markw in LAB processed image
Original and LAB colour space processed image.
Converted image to LAB space, added Curves adjustment layer, improved contrast using the L curve,
applied slight unsharp mask to L channel, moved A and B curves by equal amounts of 0.25 at both ends
(left point to 0.25 and right point to 0.75) Applied Filters>noise>dust and scratches at 1.7 radius
only to A and B channels.
The above made image sharper, less prominent colours deeper and removed little bit of colour noise that was present.
Based on details from one of the best authors on LAB colour space : Dan Margulis
First image is LAB processed image and second is original
-
 unni got a reaction from j3rry in LAB processed image
Original and LAB colour space processed image.
Converted image to LAB space, added Curves adjustment layer, improved contrast using the L curve,
applied slight unsharp mask to L channel, moved A and B curves by equal amounts of 0.25 at both ends
(left point to 0.25 and right point to 0.75) Applied Filters>noise>dust and scratches at 1.7 radius
only to A and B channels.
The above made image sharper, less prominent colours deeper and removed little bit of colour noise that was present.
Based on details from one of the best authors on LAB colour space : Dan Margulis
First image is LAB processed image and second is original
-
unni got a reaction from j3rry in LAB processed image
Here is another image processed similarly. The basic workflow is as below.
Simple mask is used for the flower. So from the A&B colour adjusted layer, only the flower was passed through.
In the Lightness channel, sharpening was done and a mask was used to pass through the flower alone.
In another layer, L channel was adjusted to make the full image bright and the same mask was used to pass through the flower only.
Again in another layer, full image was made darker and inverted mask was used to pass the background except flower.
No blurring of A&B channel was done because there was no colour noise.
The colour separation and vibrance seems to be better when done in LAB. It may be possible to get same result in RGB mode
but could be more difficult.
First image is LAB processed, 2nd image is original. Camera Nikon D3100, Lens was a Sigma 70-300 DG macro. A humble camera system.
-
-
 unni got a reaction from Kosta MK in LAB processed image
Here is another image processed similarly. The basic workflow is as below.
Simple mask is used for the flower. So from the A&B colour adjusted layer, only the flower was passed through.
In the Lightness channel, sharpening was done and a mask was used to pass through the flower alone.
In another layer, L channel was adjusted to make the full image bright and the same mask was used to pass through the flower only.
Again in another layer, full image was made darker and inverted mask was used to pass the background except flower.
No blurring of A&B channel was done because there was no colour noise.
The colour separation and vibrance seems to be better when done in LAB. It may be possible to get same result in RGB mode
but could be more difficult.
First image is LAB processed, 2nd image is original. Camera Nikon D3100, Lens was a Sigma 70-300 DG macro. A humble camera system.
-
unni reacted to Smee Again in Clover Flower
Got our for a few minutes today to do some macro shots in our garden. Didn't see what was going on in this one until I pulled it into Affinity.
I mean, I could see the fly and was trying to focus on it but didnt notice the spider.
-
-
 unni got a reaction from lepr in LAB processed image
Here is another image processed similarly. The basic workflow is as below.
Simple mask is used for the flower. So from the A&B colour adjusted layer, only the flower was passed through.
In the Lightness channel, sharpening was done and a mask was used to pass through the flower alone.
In another layer, L channel was adjusted to make the full image bright and the same mask was used to pass through the flower only.
Again in another layer, full image was made darker and inverted mask was used to pass the background except flower.
No blurring of A&B channel was done because there was no colour noise.
The colour separation and vibrance seems to be better when done in LAB. It may be possible to get same result in RGB mode
but could be more difficult.
First image is LAB processed, 2nd image is original. Camera Nikon D3100, Lens was a Sigma 70-300 DG macro. A humble camera system.
-
 unni got a reaction from Smee Again in LAB processed image
Here is another image processed similarly. The basic workflow is as below.
Simple mask is used for the flower. So from the A&B colour adjusted layer, only the flower was passed through.
In the Lightness channel, sharpening was done and a mask was used to pass through the flower alone.
In another layer, L channel was adjusted to make the full image bright and the same mask was used to pass through the flower only.
Again in another layer, full image was made darker and inverted mask was used to pass the background except flower.
No blurring of A&B channel was done because there was no colour noise.
The colour separation and vibrance seems to be better when done in LAB. It may be possible to get same result in RGB mode
but could be more difficult.
First image is LAB processed, 2nd image is original. Camera Nikon D3100, Lens was a Sigma 70-300 DG macro. A humble camera system.
-
unni got a reaction from RisingArmechadon in LAB processed image
Original and LAB colour space processed image.
Converted image to LAB space, added Curves adjustment layer, improved contrast using the L curve,
applied slight unsharp mask to L channel, moved A and B curves by equal amounts of 0.25 at both ends
(left point to 0.25 and right point to 0.75) Applied Filters>noise>dust and scratches at 1.7 radius
only to A and B channels.
The above made image sharper, less prominent colours deeper and removed little bit of colour noise that was present.
Based on details from one of the best authors on LAB colour space : Dan Margulis
First image is LAB processed image and second is original
-
unni got a reaction from lepr in LAB processed image
Original and LAB colour space processed image.
Converted image to LAB space, added Curves adjustment layer, improved contrast using the L curve,
applied slight unsharp mask to L channel, moved A and B curves by equal amounts of 0.25 at both ends
(left point to 0.25 and right point to 0.75) Applied Filters>noise>dust and scratches at 1.7 radius
only to A and B channels.
The above made image sharper, less prominent colours deeper and removed little bit of colour noise that was present.
Based on details from one of the best authors on LAB colour space : Dan Margulis
First image is LAB processed image and second is original