.jpeg.1b727463d44a0d52bc3499597e28d11c.jpeg)
James Ritson
-
Posts
855 -
Joined
-
Last visited
Everything posted by James Ritson
-
.thumb.jpeg.6f143e8223547aba974205ef53397036.jpeg) Just a quick post to say I've updated Soft Proofing - it's now more comprehensive and looks at how to use gamut check (as well as exploring the rendering intent options). Have a good weekend!
Just a quick post to say I've updated Soft Proofing - it's now more comprehensive and looks at how to use gamut check (as well as exploring the rendering intent options). Have a good weekend! -
Been a busy week so far, but here are two more videos: Abstract Ideas ProPhoto vs sRGB Abstract Ideas involves taking a photograph and applying filters and adjustments to create an abstract image. ProPhoto vs sRGB focuses on editing in a wider colour gamut, and how to convert that back to sRGB before exporting to ensure your images display accurately across all devices/displays. Hope you find them useful!
-
Hi Chris, just check the document colour format on the context toolbar after you click Develop, it's likely still 16-bit. This is a known bug on the Windows version where the 16/32-bit option doesn't apply properly upon clicking Develop until you next load an image. If you develop or close the current raw image after setting the option then reload it, you should find it converts to the desired format correctly. Apologies, the bug is with the developers but they have to prioritise what to fix, so it is lower down the list. Regarding the black level being more sensitive, this is expected, as in 32-bit it has an exponentially larger tonal range to cover. Its scaling makes more sense when using it with high dynamic range content (3D renders, specialist image/video equipment, etc). Hope that helps!
-
Here we go, another 8 videos for you! Apologies, I'll try and get round to replying to some of the queries in this thread as well. There's a bit of a mix this time - a plugin installation video for Windows, channels work, brush importing and laying images out on a new document: Installing Nik Plugins (Windows) Importing .abr Brushes Creating Photo Collages Product Shot Retouching #01 Undo Brush with Snapshots Editing Single Channels Channels: Greyscale Blending Channel Packing Hope you find them useful!
-
Hey Mithel, thanks for the feedback. That video was part of the first set that launched with Photo; at that point, the videos were intended more to familiarise people with where the relevant X, Y and Z features would be that they're used to in other software. So, rather than each adjustment or feature in the Develop persona getting exposition (which would probably make for a much longer video), it's more of a "Here's where you will find this feature" approach. There's a separate video dedicated to fringing and chromatic aberration (https://www.youtube.com/watch?v=IrGNjvAfD_0) which also explains what they are visually. As time has gone on I've endeavoured to widen the scope of the videos and cover as many features, workflows and more esoteric requirements as possible. Like with most projects, I've occasionally looked back at the older videos and thought it would be nice to revise them (and indeed, several have already been rerecorded), but there's only so much time in the day :) - having said that, its time may come in the future.. Thanks again for the comments, I'm glad that you're getting good use of the tutorials! I'm forever planning new videos and content so if you feel there are areas that haven't been covered (or not covered in enough detail) then I'm eager for any feedback. Cheers, James
-
Hey TimoK, just watched the video, that's really odd. Have you changed any of the advanced brush settings (under More on the context toolbar)? Does it fail to work with any image that you open? It's worth suggesting that you try and clear your user settings - before you do, though, you could try downloading the customer beta from this thread: https://forum.affinity.serif.com/index.php?/topic/35421-affinity-photo-customer-beta-152-beta-4/ The beta settings are completely separate and won't interfere with your main version of Photo. Could you perhaps give the beta a try and see if the issue happens with that too?
-
Hey mayukh, as F_Kal mentioned above, could we just clarify what you mean by using a pre-calibrated "sRGB" profile? On MacBooks, the default colour profile is usually "Color LCD". Are you assigning this as the colour profile when developing your images? If that is the case, you should really avoid using "display" profiles with your images - use standardised editing profiles like sRGB IEC61966-2.1, Adobe RGB, ProPhoto etc. The loss of "punchiness" or saturation when viewing on the iPhone sounds like the exported image isn't converted to a standard sRGB profile before or during export. To my knowledge, iPhones only work in sRGB, and they won't convert images that are in other colour spaces, so you must make sure you convert to sRGB beforehand. If you're working in some other profile like a display profile, that profile will be embedded with the JPEG on export, and you can guarantee that image will then look wrong on other devices like the iPhone, because they will assume an sRGB colour space. It might be helpful if you were able to provide a screen capture of your main Photo interface. If you could, would you be able to select the View tool (the hand icon near top left) then screenshot your interface using Shift+CMD+3 and attach the image here? As an aside, how "wrong" does the image look on your iPhone? Is it just the colour saturation, or does the image look warmer/cooler etc? Do you have a spectrometer or profiling device to profile the Macbook's display with, to ensure it's displaying colour accurately?
-
Here are another 5 videos! Editing 32-bit Renders OpenEXR: Using Alpha Channels & Association Adding Extended Borders Installing Nik Plugins (macOS) Installing & Using Nik Dfine So, I'm dipping my toe in the water somewhat regarding plugin videos. I chose the Nik plugins as they're popular (and more importantly, free ;)) but I'm planning to investigate plugins that might require some more manual effort to get working in the future. The borders video I believe is long overdue for some; it focuses on extending the canvas rather than cropping into the image with a clipping mask. The two OpenEXR videos are for you 3D render guys out there! Hope you find them useful, James
-
Hey pipkato, my knowledge of printing and layout is somewhat limited in this sense. Are you referring to borderless printing or bleed? Photo has margins which you can turn on either from a new document or by going to Document > Margins. There's an option to retrieve margin values from the currently selected printer. Are you able to explain in more detail what you're hoping to do? Thanks, James
-
Hello again, I've added two new videos to the first post - Canary Wharf and Banded Demoiselle. Hope you find them useful!
-
Hot on the heels of the previous update... I've done two videos that focus on printing your own images with more accurate results - one for Mac, one for Windows (since the print dialog and configuration is quite different between the two). They cover profiling your monitor, soft proofing the document, two ways of preparing for printing, and how to configure the print dialog to use software colour management. Hopefully they'll prove helpful to people who are doing home printing! Printing on Mac Printing on Windows In addition to those, I've recorded two new Photo Windows videos that focus on "projects", and so are more of a walkthrough focusing on several techniques: Canary Wharf Banded Demoiselle Hope they're helpful!
-
Hey Montychristo, could we ask what camera you're using and whether you're shooting at a high ISO or doing long exposure shots? We currently don't remove/remap hot pixels so that's why you are seeing them - I do believe it's something that will be introduced in a future update though. With regular exposures and typical ISO speeds hot pixels aren't usually an issue (hence my asking the above questions), but if you're getting those with typical exposure settings then it would certainly be worth investigating (as Leigh mentioned above regarding sending the images across). Cheers!
-
AP RAW
James Ritson replied to larsh's topic in Pre-V2 Archive of Affinity on Desktop Questions (macOS and Windows)
Hi Lars, this is expected behaviour. In-camera JPEG processing typically crops off edge pixels rather than processing them because they're complicated to interpolate. For consistency, RAW files also contain edge cropping information which most RAW software obeys, so the final resolution is the same. Photo ignores this cropping information and processes the edge pixels, however, resulting in a slightly larger resolution. Most of the time, this simply gives you a few extra pixels to work with. On some cameras, however, the cropping is actually necessary - Canon Powershot models have some strong vignetting in the corners, which you typically never see because that information is usually thrown away. In most cases it's nothing to worry about (unless you're a Powershot user ;) ) Hope that helps. -
Hey Eugenio, Photo has comprehensive 32-bit support and also has OpenColorIO integration. If you want to see some videos about OpenEXR and OCIO check out these playlists: OpenEXR - https://www.youtube.com/playlist?list=PLjZ7Y0kROWit_Nwo_XNn_Ii9j4_hKnDQp Colour Management - https://www.youtube.com/playlist?list=PLjZ7Y0kROWiuoA4y-63r-v3x9gHoPIq4e Also, check out this video on using the 32-bit Preview panel to preview unbounded tonal ranges - https://www.youtube.com/watch?v=wvJBR7dXT4I To answer your questions: Yes, pretty much anything you can do in 8-bit or 16-bit, you can do in 32-bit. Some blend modes behave slightly differently but they all work. With the exception of Median, Bilateral and Dust & Scratches, all other filters work in 32-bit and can be used as live filter layers. All adjustments work. Yes, there's a Tone Mapping persona. To work non-destructively you would have to duplicate the image layer (or Merge Visible on your work done so far) then move into the Tone Mapping persona. Unfortunately not quite yet. There was a Z-Blur filter in an early beta of Photo but it wasn't working correctly and didn't make the cut for release. You can use a Z depth layer as a mask (Layer > Rasterise to Mask) but it won't get you quite the same result. Watch this space.. Hope that's helped, please let us know if you have more questions!
-
Hey Roel, there are a couple of things to point out that may be causing a lack of sharpness. The first is that no sharpening is applied by default when developing RAW files (most RAW development software adds a small amount of sharpening, as RAW images tend to be slightly unsharp by nature). Therefore you might want to add some sharpening using Detail Refinement under the Details panel. The second is that you might be looking at a "mipmapped" preview - what is your zoom level at? Unless you're at 100% zoom or larger, you're not looking at the full resolution version of your image. Photo displays smaller resolution copies at various zoom levels to improve performance, especially during heavy editing (this is known as mipmapping). The downside of this approach is that some filters - sharpening, blurring, noise reduction etc - may not appear accurate unless viewed at full resolution. Generally speaking, filters should be previewed at 100% for accurate results. The mipmapping may explain why your exported result appears sharp but your previews inside Photo don't. Could you also check Preferences > Performance and see what View Quality is set to? Additionally, if you're on Mac, check the Retina Rendering setting. Could you let me know what these options are set to for you? If you try previewing some of your images at 100%, you should generally find things look more accurate. A good test is if you open a RAW photo in Develop, zoom to 100% and click the Develop button. You should see little to no difference (unless the noise reduction rendering hasn't updated). Hope that helps.
-
Hey all, Quite a chunky update this time, an old video has been re-recorded and renamed slightly: Circular Bokeh And a few new videos for you: Salvaging Underexposed Images Revealing Sky Detail Macros: Layer Behaviour Compositing Landscapes Batch Processing with Macros Bringing Out Water Detail Thanks, James
-
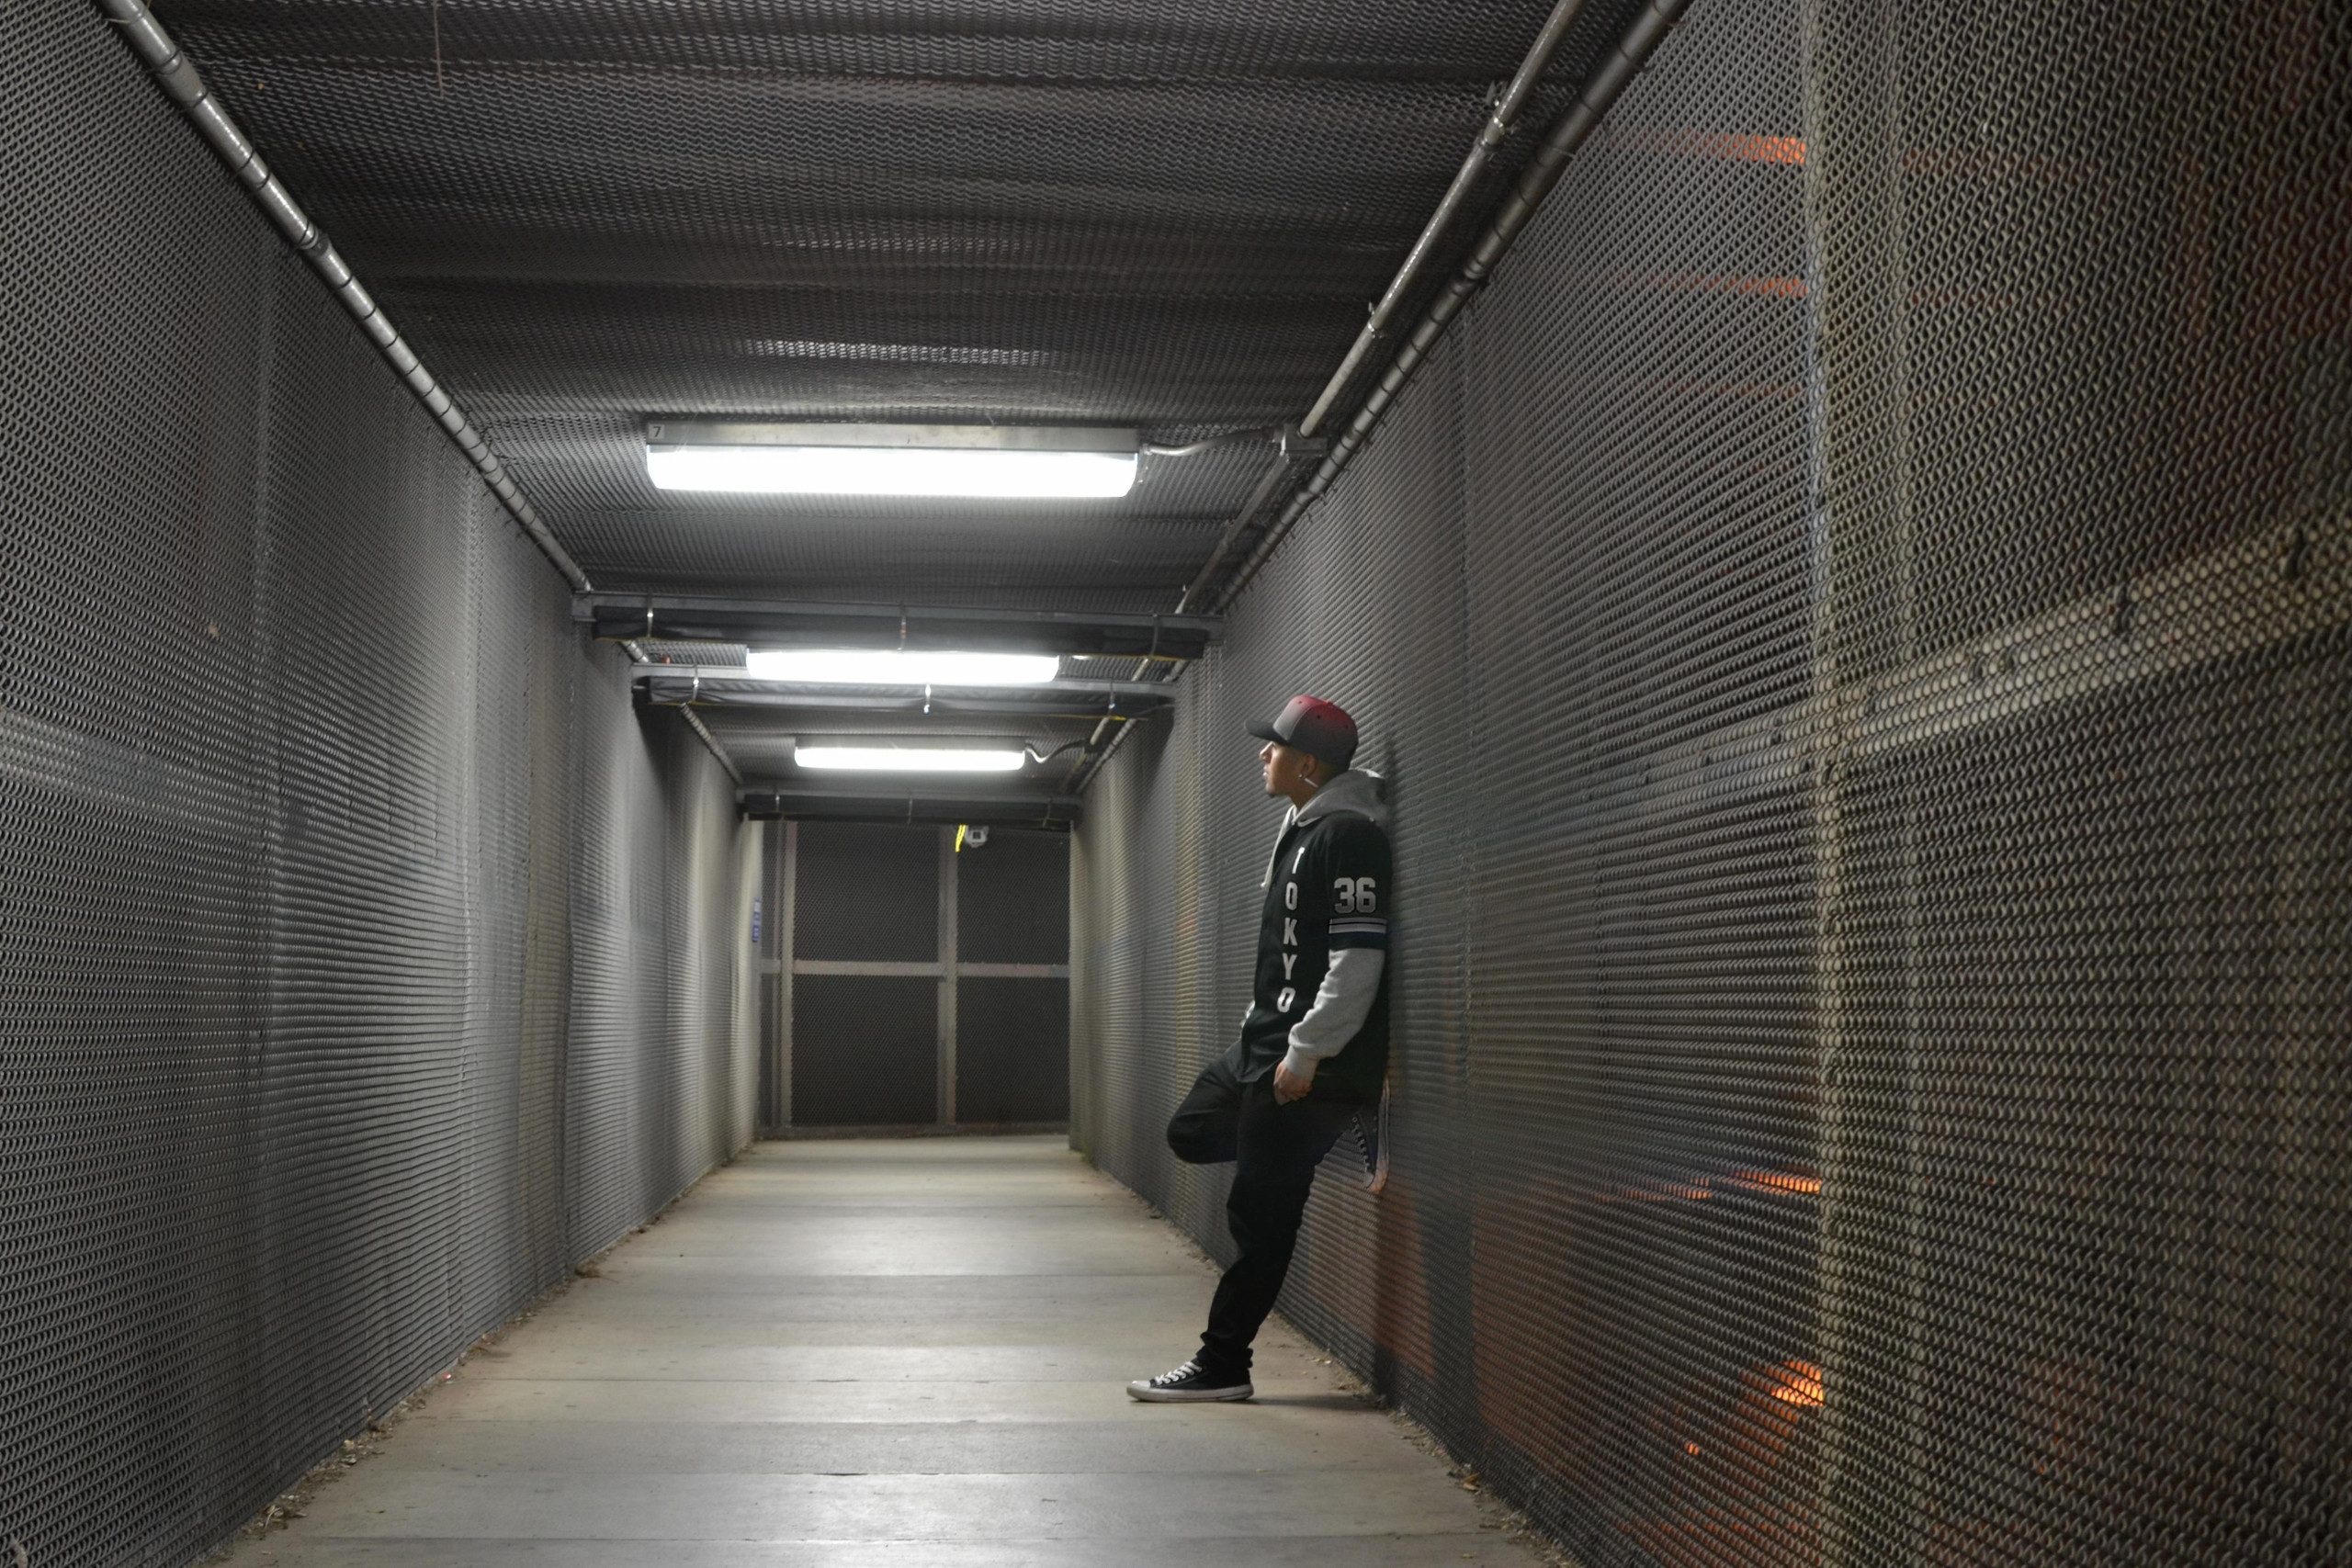
Hey Daniel, the lens flare issue in your image is a bit more complicated as it spans lots of high frequency detail like the mesh and the person. I've had a quick crack at removing it and have attached the result below. If you'd like I can upload the .afphoto document with saved history so you can take a look and scrub back through the history - if that's OK just let me know and I'll post a link here (or I can message you with the link privately). Because the lens flare runs across multiple subjects, I used the following techniques: Frequency Separation with its default values Inpainting the Low Frequency layer on some of the mesh Sponge Brush tool set to Desaturate to remove lens flare colour from most of the mesh Burn brush to try and make the mesh tones match Dodge brush to fine-tune the mesh toning in areas More Inpainting brush on some areas of the person Paint Brush tool with low opacity and using Alt-click to sample colour areas, then painting over areas where the lens flares used to be The result I've posted is a rough job and is just a few minutes' work, but it should give you a rough template to work from. Hope that helps! (And again, let me know if you'd like the .afphoto file posting)

-
Hey TommyD, there's no right or wrong way particularly. You can feed HDR Merge/Focus Merge/Stacking your RAW files and it will decode them before proceeding with alignment/merging. In that sense, the process will take longer than if you provide rasterised images (TIFF/JPEG etc). The difference will become especially apparent if you start focus merging large numbers of images. Bear in mind that you have no tonal control over RAW files when you use them like this; important to note if you have, say, some overexposed or underexposed RAWs that you'd want to correct beforehand for stacking or focus merging (HDR merge is less important since that's kind of the point!). If you have a separate DAM app or workflow that you use to develop your RAW images, you could use that to output TIFFs or JPEGs and then use those with HDR/Focus merge or Stacking. If you don't mind the larger file sizes, using 16-bit TIFF for more precision will give you the best results. We are working on a DAM app to complement Photo, and it would hopefully introduce a much slicker workflow for pre-processing multiple RAWs and then feeding them into Photo for stacking and merging. This would be the ideal workflow for these features; at the moment, I pre-process my RAW files into TIFFs to use these features as I get more tonal control (plus noise reduction/sharpening etc). Hope that helps!
-
Raw support
James Ritson replied to psaudio's topic in Pre-V2 Archive of Affinity on Desktop Questions (macOS and Windows)
Hmm, bizarre. Your provided (full res) RAW file opens fine here in both SerifLabs and Apple Core Image. The mRAW and sRAW formats clearly aren't supported properly with the SerifLabs engine, but the crashing you're experiencing is a separate issue considering it occurs with regular RAW files from the mk2 (which is most definitely supported in Photo). Reading back through the posts, another factor might be your OS; the apps are developed to be as backwards-compatible as possible, but Lion is on the cusp of compatibility and there may still be some issues. Raw development had a major overhaul in 1.5 (32-bit unbounded editing in a wider colour space) so there might be something happening there. Just a couple of suggestions; have you tried opening any other RAW formats to see if the issue is more widespread? I've uploaded a couple of images from my very recent camera, one of which was taken with the high res (80MP) mode. If anything is going to crash Photo, it'd be these files. You can get them here (click on one then find the download button at the top right): https://drive.google.com/open?id=0B7g7ERAseTZmNjNEelN2SjViX2s Also, could you try disabling automatic lens corrections just to rule that out? You can do this without having to open a RAW file. If you launch Photo then click on the Tuxedo icon at the top, it will take you to the Assistant dialog. From there, click the button saying Develop Assistant to move to it (usually you have to be in Develop to access this). Then change Apply Lens Corrections to Take No Action and try opening your RAW file. [Edit] Additionally, are you still on the App Store version of Photo or running the customer beta? I'd advise trying the customer beta as it contains some bug fixes that may help, you can download it from here: https://forum.affinity.serif.com/index.php?/topic/33624-affinity-photo-customer-beta-152-beta-3/- it just runs alongside the official release and doesn't interfere with it. Thanks for your patience, I'm hoping we can figure out what's going wrong here. The next step would be to upload a crash report if possible. -
Raw support
James Ritson replied to psaudio's topic in Pre-V2 Archive of Affinity on Desktop Questions (macOS and Windows)
Hey psaudio, if you try various 5D Mark 2 sample files (e.g. from PhotographyBLOG) you should find they decode fine in Photo using the SerifLabs engine. I noticed that your .cr2 file resolves to around 9MP - are you shooting sRAW or mRAW rather than full resolution? That may be the source of the issue, as the structure of mRAW and sRAW data is different and may not be supported with our raw engine. Have you tried shooting in normal RAW and opening those files? -
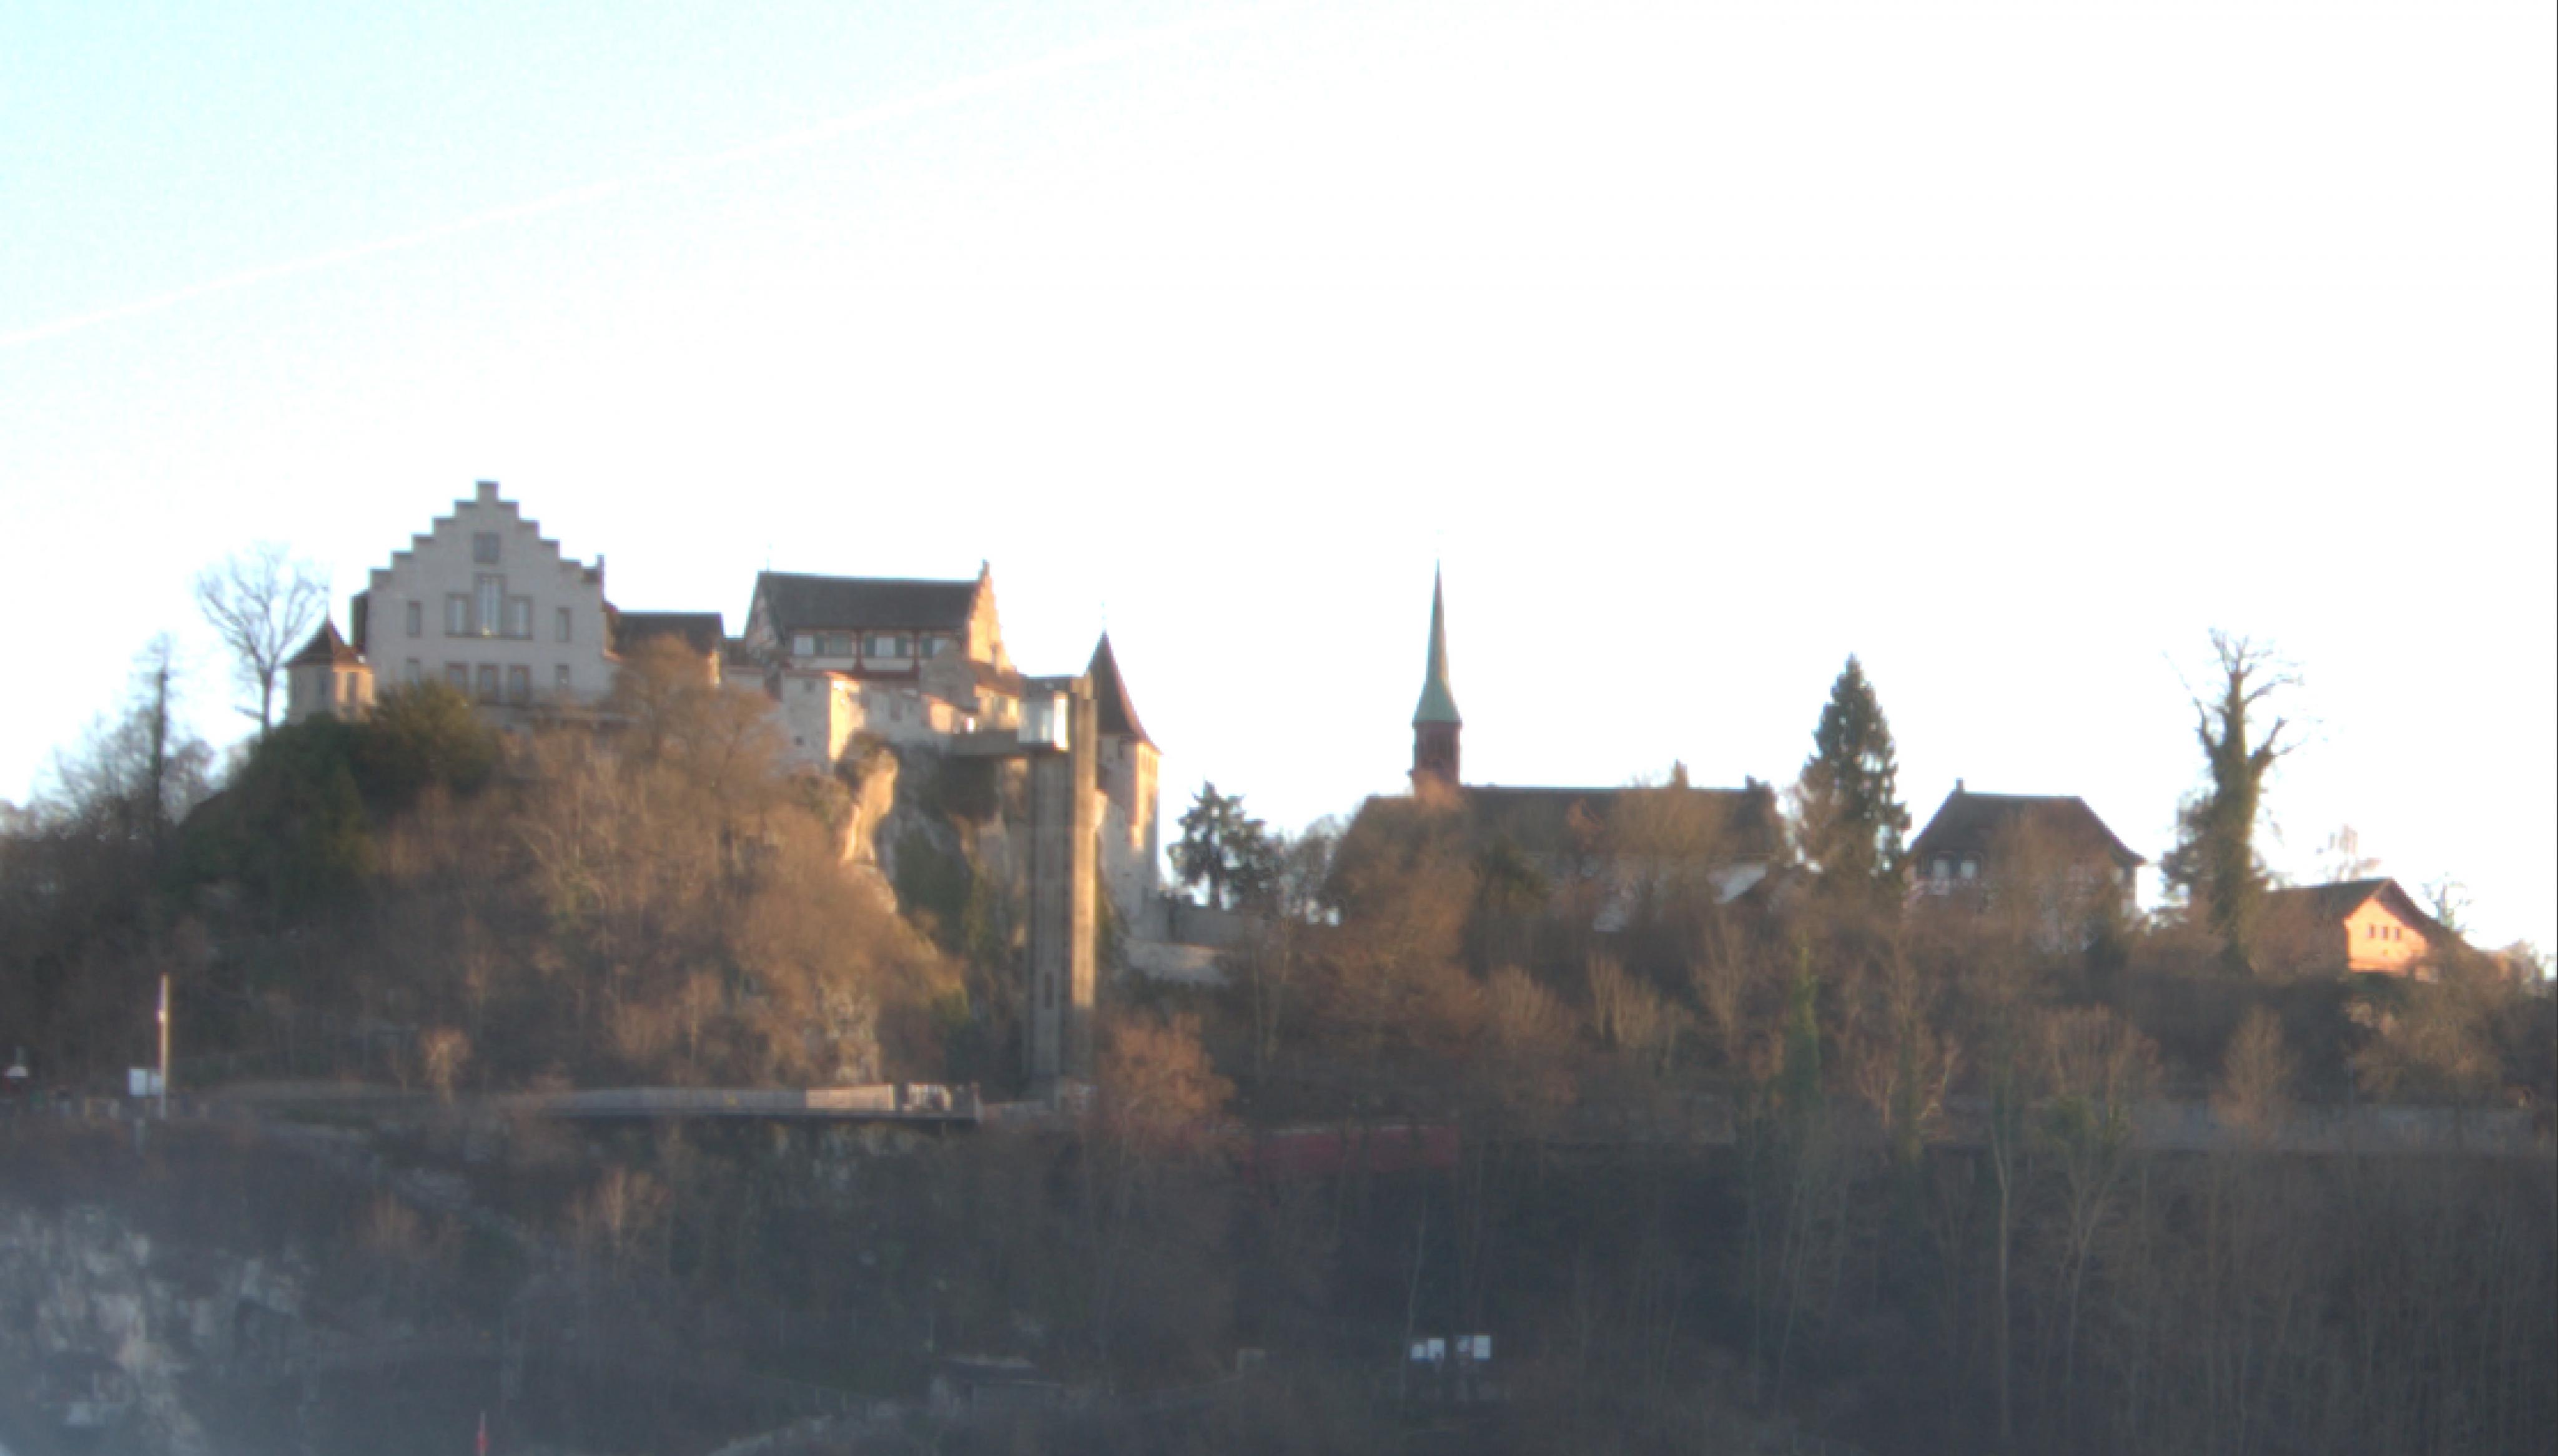
Hey Swissomat, I've tried the files out with an HDR merge. The issue is an interesting one - note how in the overexposed image there are no hard edges around the tops of the buildings, which is where the alignment seems to be failing. However, if you check Automatically remove ghosts when doing the initial merge, Photo will correct this. I've attached a screen grab of the area to show the result with deghosting enabled. I'd recommend trying to shoot more exposures using exposure bracketing for a wider merge precision and better alignment accuracy. More images, especially underexposed ones that reveal the hard edges, will be helpful for this type of composition. Does your camera have a bracketing mode? You could shoot 5 frames at +3/-3EV or 7 frames at +2/-2EV for example. Hope that helps!
-
Thank you! Just a small update today, the Focus Merging Bracketed Exposures video has been revised, and there's a new video that covers highlight recovery with RAW imagery called Raw: Recovering Overexposed Images - if you know about the tone curve option and using the highlights/exposure sliders, you'll be familiar with everything covered in the video. It's intended more for newcomers to Photo. Thanks!
-
Hey Shad, thanks for your feedback. 10-bit monitor support is something that the developers are aware of, and it will hopefully find its way into the apps eventually. Out of interest, did you find the test imagery from somewhere or create it yourself? Thanks, James
-
Well, being on YouTube as well as Vimeo should help expose the tutorials to a greater audience; many customers are unaware that the Affinity apps even have official tutorials! Vimeo is also blocked in certain countries as it tends to allow and promote risqué content from filmmakers. Whichever platform you prefer, though, the videos will be available on both - so you'll still be able to download the videos and watch them offline.
-
Hey again, apologies for the lengthy reply but I wanted to go into a bit of depth (especially as you said you're studying): DNG is an open file format developed by Adobe. It conforms to the TIFF/EP standard and supports both lossless and lossy compression. Since the specification is open, any developer can take image data and assemble it into the TIFF specification required by the DNG container. It also supports a wide range of embedded data including XMP and Exif, negating the need for a separate sidecar file. Because your first post mentioned exporting to a .NEF raw format as well, this is why I tried to explain why you wouldn't (or couldn't) re-export raw image data. Each proprietary RAW format (NEF, CR2, ORF to name a few) differs in how the sensor data is encoded. These formats are all closed rather than open, meaning reverse-engineering is required to develop a suitable decoder (this is what dcraw and, by extension, LibRaw achieves). Once sensor data has been demosaiced and processed, you can't convert it back to proprietary raw sensor data. What you can do, however, is produce what's called a Linear DNG. This is effectively uncompressed image data - it's been demosaiced but is still scene-referred, meaning it hasn't yet been mapped to a colour space. Various software can extract this linear DNG and treat it as if it were a RAW image - so it then goes through a tone mapping process and is mapped to a colour space. This is possibly what DxO Optics may do when you export to DNG - embedding XMP data into the file too. Alternatively, it may pass either the original sensor data (basically, numbers) or its interpolated version of that data along with instructions of how to process it. So, then, why is there no DNG export option in Affinity Photo? Simply put, Photo isn't a DAM like Lightroom or DxO. In these apps, what you see on-screen when you're tweaking a RAW file is temporary until you export or pass the file on. They allow for potential interworking; so if you tweak a few sliders in Lightroom then export to DNG, it will pass these tweaked values on. It's then up to the receiving software to interpret these values. RAW development in Photo is destructive. I don't mean the original RAW file is modified in any way; rather, when you load it into the Develop persona, the raw sensor data is demosaiced and the image is tone mapped and converted to a colour space. You then move from Develop to the Photo persona, where you're now working with raster image data. There would be no point in exporting to DNG - you'd simply be putting fully processed image data into the container (which I'm not sure is even supported as per the DNG spec). Photo's remit is to be an image editor, rather than as an initial image organiser and editor. It typically sits in the middle of a workflow, where you might pass either a RAW file or initially processed image to it. We are planning a DAM app, for which having a DNG export option would make some sense. As you've some concerns regarding quality, let's just clarify that you wouldn't take your processed image (that you've edited at home) and export it to DNG. As mentioned above, you're working with tone mapped raster image data in a colour space, not linear (or "non-raw" as it's termed) data. With that in mind, you could just export straight to a JPEG from Photo when delivering your project. "Level 12" refers to the maximum value on Photoshop's JPEG export dialog. The equivalent in Photo would be to keep the JPEG quality slider at 100. Additionally, if you want to export out of Photo for further editing or exporting in other software (or perhaps just for archival), I'd recommend using TIFF 16-bit. It's uncompressed, and the 16-bit precision (as opposed to 8-bit) will ensure you can work with fine colour gradations (like gradient fills, skies etc) without causing banding. Most raw sensor data is recorded at 14 or 12-bit precision, so you wouldn't be discarding data. Sorry for the ramble - here's the tl;dr version! Once you've edited an image's pixels it makes no sense to export it to DNG - use 100% quality JPEG for your project delivery, and if you want to retain maximum quality, export to 16-bit TIFF. Hope that helps!