toltec
-
Posts
3,560 -
Joined
-
Last visited
Everything posted by toltec
-

No styles panel
toltec replied to KellyD's topic in Pre-V2 Archive of Affinity on Desktop Questions (macOS and Windows)
Go View > Studio and click on Styles or View > Studio > Reset Studio -
Curves feature missing?
toltec replied to jw85's topic in Pre-V2 Archive of Affinity on iPad Questions
It's in the Filters Studio. Looks like a funnel between Adjustments and fx. If you press the question mark (bottom right hand corner) it will tell you. Alphabetically listed. Mesh Warp or Perspective are perhaps what you want. If All Filters is set, it's quite a long list or you can tap the top menu (where it says All Filters) and set 'Distortions' for a shortened list of Distortion filters. Many things to affect the image come under those two studios, Adjustments or Filters, which are next to each other on the right. It would be worth scrolling through both to familiarise yourself. -
How to...
toltec replied to Axander's topic in Pre-V2 Archive of Affinity on Desktop Questions (macOS and Windows)
-
Text on a path is not a shape. Use the Move Tool and drag on any edge or corner tool to resize the path only. The text will re-flow to fit. Press Shift to constrain the proportions. If you want to resize the path and the text at the same time, drag on the resize handle Again, press shift to constrain the proportions.

-
You would be much better off using the Displace filter, which is designed to allow the background texture to show through. It would look far more realistic.
-
Speaking of bloat, Photoshop elements is a download size of over 2gb with a required disc space of 6gb and it's hardly a high end product. I think it is also limited to 2 computers. Don't know about the full fat PS ?
-
Not everybody will have used Adobe products, so they won't know, will they? Not will they care about the under the hood stuff. They will just want a really good photo editor, and Photo is perfect for that. Photoshop is too expensive for most keen photographers or hobby photographers. Maybe Photoshop Elements but Photo is half the price and twice as good. The only people who might be that bothered are current or former Photoshop users who just want Photoshop 'on the cheap'. But as Photoshop is more geared towards professional (or trade) use, I think the tendency would be for most serious professionals to just pay the money. Photoshop is not that expensive for professionals.
-
Curves feature missing?
toltec replied to jw85's topic in Pre-V2 Archive of Affinity on iPad Questions
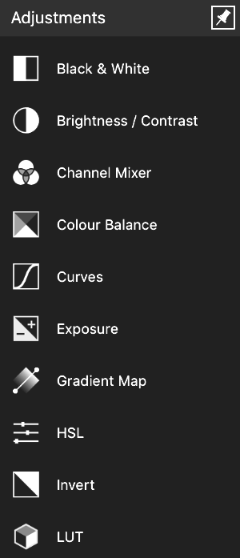
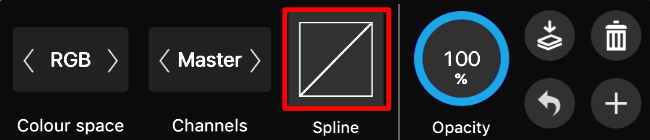
All adjustments are stored in the Adjustments Studio Adjustments Studio icon Adjustments are stored in alphabetical order, Curves coming under 'C' for Curves Tap on Curves and you get a Context Menu, tap on the representation of a graph for a Curve panel. You can decide on if the curve adjusts all channels or just R, G, B or Alpha. Pretty standard stuff. then just tap and drag. All adjustments are found in the same Adjustment Studio. I don't know about "Intuitive" but that all seems entirely logical to me. If you are talking about the Develop Persona ? Again, follow exactly the same logic, tap on the Adjustments icon and tap/drag on the curve I honestly don't see how it could be any simpler?
-
Affinity iPad "curves" adjustment is blank.
toltec replied to sanoy's topic in Pre-V2 Archive of Affinity on iPad Questions
All adjustments are stored inside the adjustments studio (right hand side) Adjustments Studio icon Adjustments are stored in alphabetical order, Curves coming under 'C' for Curves Tap on Curves and you get a Context Menu, tap on the representation of a graph for a Curve panel. You can decide on if the curve adjusts all channels or just R, G, B or Alpha. Pretty standard stuff. then just tap and drag. All adjustments are found in the same Adjustment Studio. I don't know about "Intuitive" but that all seems entirely logical to me. If you are talking about the Develop Persona ? Again, follow exactly the same logic, tap on the Adjustments icon and tap/drag on the curve I honestly don't see how it could be any simpler?
-
hi @inspiredmac Yes. Hold down the shift key. p.s if you look at the Status bar on the very bottom of the window, it lists all the modifiers.
-
30 years actually and bear in mind that Photoshop was/is a more expensive product and not only have Adobe had the benefit of thirty years development, they charged for each new update. That's an awful lot more development and revenue. What Serif have done is quite amazing in comparison. Like everything in life, you get what you pay for, although IMHO, with Photo you get much more than what you pay for.
-
What about the other 1% ?
-
Hi @bwackv The problem is, you appear to be comparing Designer to Photoshop? whereas Photo is comparable to Photoshop. In Designer, you start off by creating a page, so like any page based program (Quark, Word etc) you set the page size first and then place objects on the page. So what you are actually trying to do is resize the page to cut off parts of the page and the objects on it. A bit back to front. Photo, like Photoshop, is based on a canvas which is intended to be cropped. The cropped image would then be placed on a page in a page based program, like Designer.. There are a couple of ways round it. If you have Photo, you can load the Designer file into that and then use Photo's Crop Tool. If not, convert the Designer page into an artboard. To do that, select the Artboard Tool and with Size set to Document, click on Insert Artboard. You can "crop" artboards just like you would a canvas in Photoshop (or Photo). Just drag on the corner handles. After 'cropping', it is possible to convert the artboard back into a 'normal' document. Select it with the Move Tool and in the Layer menu, click on Convert Artboard to Object. As Designer does not discard the outer parts of original objects, they are still there in their entirety, but the new page boundaries 'crop' the objects. There is probably no reason why you can't just use the artboard as it is though as mostly, it works like a normal page. An artboard is more like a layer, so all your objects are clipped inside that, but they can be dragged out of the artboard if you really need a normal document. For what you are doing, it might be better to consider using Photo, which is more like Photoshop and does not use pages but a canvas which can more easily be cropped, or use Designer artboards instead of pages.
-
It's a bit easier if you select all the objects inside the artboard, (Ctrl + A) drag them outside the artboard then Insert Artboard with the Size set to Selection That will create an artboard exactly fitting the objects. You will still have to delete the old, empty artboard.
-
Not for 150 years or so it wasn’t. But that is history for you When is the last time you created a ‘photograph’ with brushes in any app. You might have created a piece af artwork, like David Hockney or many other digital artists, but a photograph it ain’t. As for image creation for bitmap images I would not consider Photo as my first choice. I am certainly not an artist so I don’t really know but from what I’ve heard, Corel Painter or Krita or are among the best, maybe Photoshop but what a price you have to pay! For vector graphics there are different requirements, maybe Designer but I know there are quite a few thing missing for many, like vector warp, offset paths and setting ruler origins. As far as I’m concerned (and millions of people worldwide for nearly 200 years) a photograph is something you get when you point a camera at something and press a shutter or button. It is reality, not digital art. That’s not to say it can’t be edited and turned into something more artistic. When it comes to editing a ‘real’ photograph, Photo is a superb program. It even has some bonus features thrown it, brushes, Guides, text tools etc but that’s the trouble these days, most people want an app to be bloated with every feature known to man. Here is a bitmap image, it is not a photograph. p.s. I’m pretty sure it is not art either
-
View > Studio > Reset Studio will sort it out.
-
I also use Designer on a 8gb Windows 7 machine and even (very occasionally) on a 2gb netbook thingy. More is always better but for stuff like this it will cope OK. Both Affinity apps do occasionally get confused and the Clear User Data usually works. Even when uninstalling and reinstalling don't.
-
I am a Windows user but I have no trouble either. I can adjust anything in the file. I am using Windows 10 with Designer 1.6.5.123 I can also open and edit the file in Photo with no problems. Try resetting Designer by holding down the Ctrl key when you launch the program. When the Clear User Data panel appears, press Clear and then try.
-
The problem is, it only appears under 'Reset Fills'. Nothing appears if you search for 'Reset Colours' or 'Reset Swatches', both of which would seem more logical for resetting the Swatches than Fills.
-
Why not use the Colour panel? You can at least have it on view most of the time. An alternative is to set the Tools panel to have 2 columns (View > Customise Tools) you will then get the colour wells permanently on display at the bottom.
-
How to edit the curve handles on a node?
toltec replied to kjs's topic in Pre-V2 Archive of Affinity on iPad Questions
Convert the node to Sharp using the sharp button on the Context Menu. P.S. You might need to drag on the line slightly to get the handle on the curved side to appear. -
Personally, I don't think it is a program designed to create bitmap graphics. To me it is an image editing program, not a painting program. In fact it is advertised as "Professional image editing software" not "Professional painting software". A lot of Photoshop stuff has been added year by year so they could charge you for an annual upgrade fee, which Serif don't do.
-
That's the point. The guides do stay exactly where you place them, relative to and fixed to the top left of the page. Which is exactly how I want them. You are obviously younger and don't recognise the history of this sort of program? Starting off with Quark and Pagemaker for pages and Photoshop for images. Guides that move around the page if you trim the page are a very odd concept and would be useless to me. But then, I mostly layout pages for printing. I have been doing that for decades and never actually used guides in Photo or Photoshop. If you are using Photo for it's intended purpose, editing photos, why do you actually need guides ? I lay out pages in software like Quark, InDesign or even Designer where I place guides relative to the page. I then edit photos in Photoshop or Photo to drop into frames (no guides needed). This is how it has worked for over thirty years. Still, if you have different (and more modern?) needs and want them to be fixed to and move around according to the page edges, that's fine. Choice is always good. You can put in a feature request for them
-
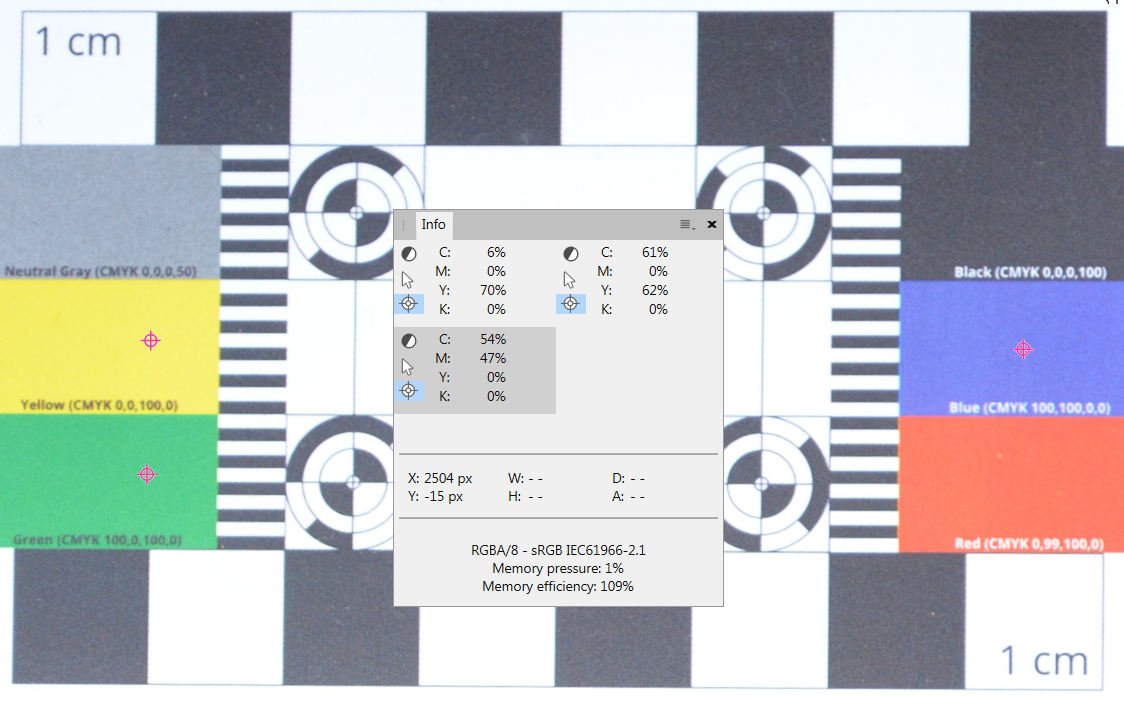
Although not a perfect solution you could use the Info panel as a guide. Drag a sampler target from the Info panel over each colour and set the sampler to CMYK (by clicking on the black/white icon) You will then get a readout of each colour where the targets are and can use an HSL layer to adjust. You can add more samplers by using the burger menu. There are three shown below.
-
I still find any settings that will move relative to the page origin very strange. Perhaps I spent too long working with paper, laying out pages etc. To me, if I set a guide to be 200mm from the left hand page edge, I want it to stay 200mm from the page edge. If I make the page 5 mm smaller, I don't want my guide to move 5mm to the left, because then it would be 195 mm from the left, not 200mm. To me, they are not guides, but margins. If the guides move around, what would the design be used for? As I said before, if you have guides set at 50mm intervals, what happens if the last setting suddenly moves 5mm to the left? One 50 mm gap suddenly becomes 45 mm. Odd I have nothing against choice, but any software that designs pages (like A4) should default to fixed page guides, as does Designer. Perhaps less important for Photo which is not page based.