
-Klein.png.434640cee1cdce404cab7e441b133223.png)
Michail
-
Posts
1,016 -
Joined
Posts posted by Michail
-
-
On 7/7/2023 at 11:51 AM, Ash said:
Additional keyboard shortcuts have been added to all pixel based brush tools (e.g. paint brush, smudge, sponge, dodge, burn, etc.):
- Fill with Primary colour has now been set with a default shortcut of Alt + Backspace
- Fill with Secondary colour has now been set with a default shortcut of cmd / Ctrl + Backspace
German, Windows:

-
23 minutes ago, Petar Petrenko said:
With these new features I think you are very close to Blend tool.
For this, it would have to be possible to cross-fade into other shapes. In addition, the number of duplicates should not be limited to 100.
- Frozen Death Knight and Ash
-
 2
2
-
-
9 hours ago, Tim Parsons said:
... at some point as well as some of the other AI features that PS has received over the last few months.
I would also like to see some AI functions. But in my opinion, that would be the beginning of the subscription model.
-
31 minutes ago, Dan C said:
In V2, if the Adjustment/Filter is added without changing the in-built mask, no line appears - however if you add the adjustment/filter with an integrated mask, the UI correctly reflects the state of the layer:
Thank you, Dan! The explanation sounds logical: if there is no integrated mask (in contrast to V1), consequently none can be hidden.
So one would have to extend the shortcut functionality to the maskless adjustments and live filters. I am curious to see how you will solve it
-
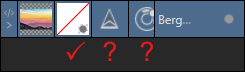
Layer masks can be shown and hidden with the shortcut Shift+LMK. When they are hidden, a diagonal red line is displayed. Very good.
Adjustments and live filters can also be shown and hidden with this shortcut. But there is no visual feedback when these layer types are hidden.
-
On 4/4/2023 at 12:16 PM, Pablo13 said:
I Hi, I wonder if anyone is able to convert an InDesign file to idml format?
-
2 hours ago, Chris B said:
2. Alt+Left-Click adds Default Mask
The problem with the strange highlight when holding down Ctrl and swiping over the mask options is a WPF problem that we cannot fix, so this is a possible solution.
The framework issue therefore only exists with the Ctrl key, not with the Alt key. Correct?
-
1 hour ago, Chris B said:
I'm not seeing this. Can you record a video? I can hold Ctrl and click to make as many masks as I want
Yes, the creation of masks works well. But the feedback for the user, by highlighting, only works sporadically (Windows). Only when the Ctrl key is released are all mask entries highlighted when the mouse is over them.
-
11 hours ago, Frozen Death Knight said:
R click works too I noticed.
The right-click is also the better solution at the moment: If you use the Ctrl-click, you have to release the Ctrl-key again after the click, because otherwise the selection does not work properly.
-
-
31 minutes ago, Ash said:
In the latest update (1736) we have now made it so single click adds a mask and alt-click gives the expanded drop down...
At the moment it is a Ctrl-click in Windows. Alt-click is like without an additional key.
- debraspicher, Ash and Frozen Death Knight
-
2
-
 1
1
-
36 minutes ago, Peter1959 said:
What I want to “achieve” is for serif to put a dual line option in the stroke panel like pageplus had 20 years ago
I don't know "Pageplus", but I'm curious. What could you do with the "dual line option"?
-
7 hours ago, Peter1959 said:
and the consequences are?
The consequence is that you see the background at this point. So this method is not universally applicable.
7 hours ago, Peter1959 said:Do you know of a different way of achieving this effect with the appearance panel?
I don't know exactly what you want to achieve. With the Appeareance panel you can create as many parallel contours as you like.
-
2 hours ago, Peter1959 said:
You're quite right Old Bruce but it's not an exact science for the type of dual lines I mean and takes some trial and error, the option I was referring to would be able to select dual lines inner line = x pt, offset = x pt, outer line = x Untitled.afpub
Due to the blending mode "Erase", the middle contour is not coloured, but transparent - which has consequences.
-
2 hours ago, rdelrossi said:
Can anyone give me some pointers on that?
Use the Symbols panel to do this ("Windows" menu) Create an object and click the Create button in the Symbols panel. Now you can drag this new symbol onto your page as often as you like. All symbol objects are now linked to each other and changes affect all of them at the same time.
-
On 3/16/2023 at 12:57 PM, Ash said:
With that in mind, we have removed the drop down from the mask icon in the Layers panel now and reverted the mask button to be:
- Click: add Mask
- Alt+Click: Add empty mask
It is a good decision because creating standard masks is more efficient that way. I also think that many users were rather confused by the drop-down list.
As a compromise, could one perhaps additionally integrate the special masks into the context menu of the layers?
- Chris B and debraspicher
-
2
-
Long awaited: Balanced corners - Thank you!
-
1 hour ago, Mick63 said:
I have probably a rather unusual question. I have some rather big Tiff files (around 1.2GB) I have previously worked on in Photoshop and which have been reworked in Affinity Photo 2. I haven't deleted any layer or changed any size but the file size seems to be almost half now, around 560MB. Does this have to do with Affinity algorithms or is something else going on?
That is unusual from my point of view. Most of the time, afphoto file is larger. This is because afphoto files is not a normal image format, but a project format.
Can you still say what you did to the file in Affinity Photo? Did you change the size of the image. Did you crop or trim? -
12 minutes ago, Lillino said:
Do you think that reinstalling the program altogether could be useful?
I have my doubts about that, but you can try.
Have you tried opening the file again in V1 and saving it (under a different name)?
If there are not too many pages, you could also delete individual pages one after the other (copy!!) and save again. This way you will find out if objects on a certain page are the cause of the problem. -
44 minutes ago, Lillino said:
I'm using Publisher V2 updated to today March 13, 2022. I can't open a file (portfolio including images and texts) produced in January 2022 with the previous version of the software. By clicking on the file, Publisher V2 opens the normal box representing the upload of the file. But stay still! And then you can't close the program, because it says there is a file open and you have to wait for it to load. But that doesn't happen.
At the moment, therefore, I unfortunately have to work on the file using the old version of Publisher, which fortunately I had not uninstalled.Welcome to the forums here
- What do you mean by "upload"?
- Is it possible for you to provide us with the file? -
32 minutes ago, toth said:
I see - so what's the difference/relaitonship between the stroke pressure and brush pressure?
In the properties you define the value ranges. In the pressure curve you determine the effect locations.
32 minutes ago, toth said:When you mess with it the preview changes as expected, but not the actual result.
When the relevant curve is selected, you see the effect.
-
Also note the following points:
- You can also make the selection in the layers panel.
- Notice "Preferences" > "Tools" > "select object when intersects with selection marquuee"
- Group objects that you need to select often.
- Lock layers whose objects you do not want to move. -


Additional keyboard shortcuts for pixel brush tools
in [ARCHIVE] 2.4, 2.3, 2.2 & 2.1 Features and Improvements
Posted
After resetting the shortcuts, the new default shortcuts are available. Thank you