Greyfox
-
Posts
312 -
Joined
-
Last visited
Everything posted by Greyfox
-

Straightening tool producing jagged lines
Greyfox replied to PetervL's topic in V1 Bugs found on Windows
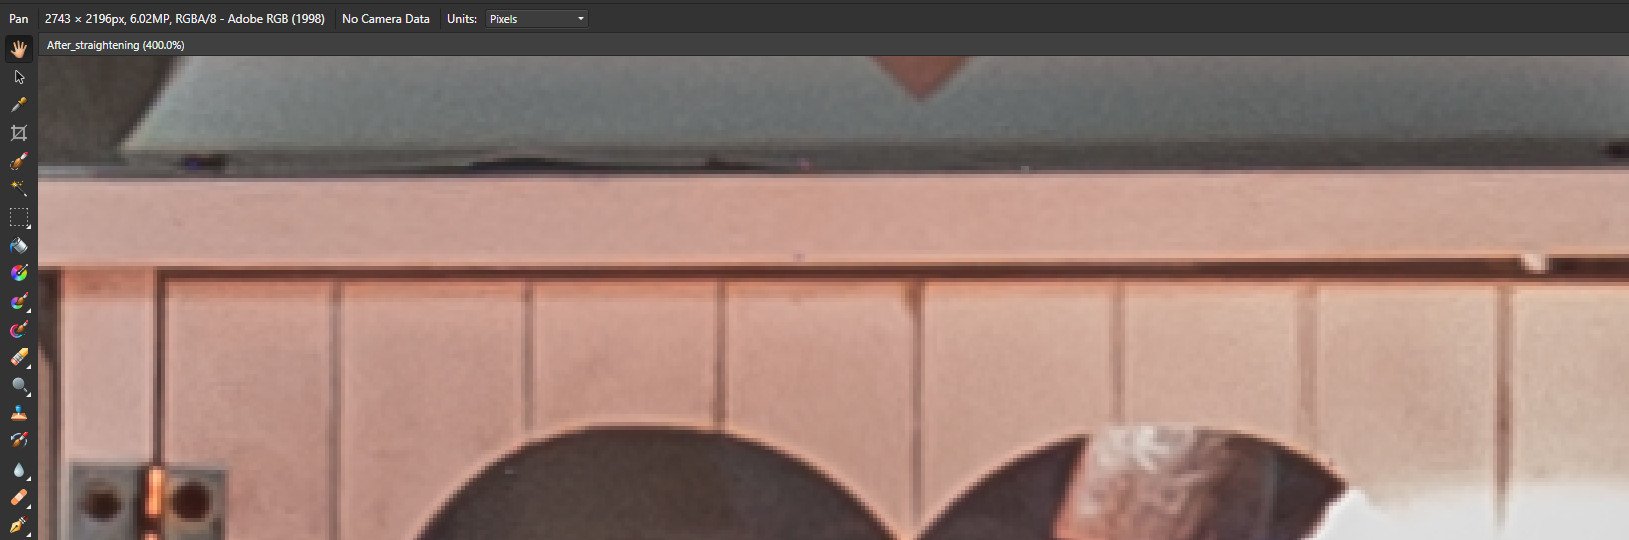
Peter, I've downloaded both your .afphoto files. I've zoomed the "After _straightening" one 400% and I can't see what I would call jagged lines. Using the "Before_straightening" one, I've also done a straighten here using the straighten tool from the crop menu, and again at 400% zoom I'm not seeing the problem. My monitors are 1920 x 1080, and my graphics card is a nVidia GTX 1050ti 4GB. Windows 10 Pro (1903) Maybe I'm missing something, sorry.
-
It looks like you are painting with the Color Replacement Brush Tool in the left side screen shot, and the Paint Brush tool in the right side screen shot. I'm not sure whether that was intentional. If it was, then because you have the Color Replacement Brush hardness set to 0%, the initial stroke has soft edges. When you try to cross over that stroke, with the Color Replacement Brush tolerance set to 10%, it will not paint over the soft edge. If you set the tolerance to 100% it will.
- 2 replies
-
- 3
-

-

-
- white borders
- brush
- (and 1 more)
-
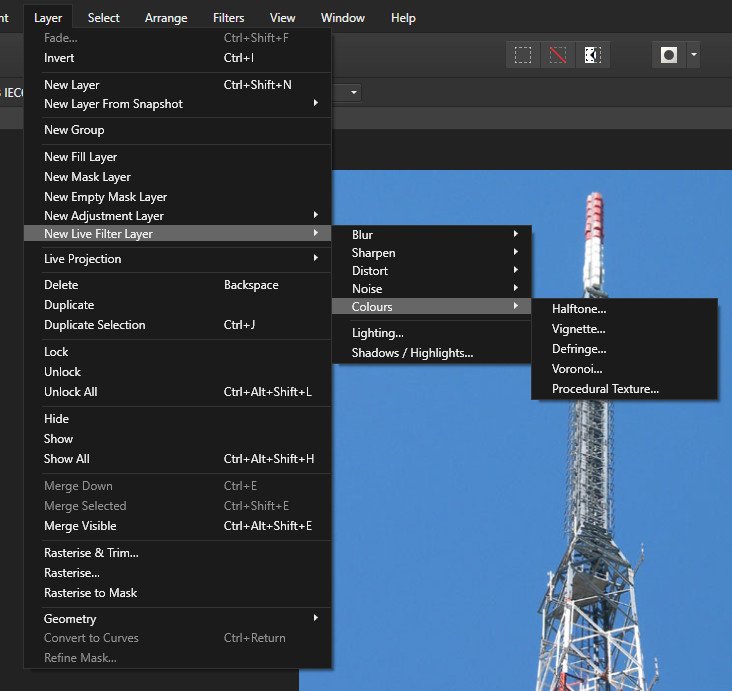
Your screen shot is correct for the current version 1.7.2.471 Vignette is now found under New Live Filter Layer->Colours->Vignette
-
You could try a reset Hold down the Control key while starting Affinity photo. When the Clear User Data dialogue appears, the top three items should be ticked. Click on the Clear button at the bottom of the dialogue.
-
4EverMaAT, I don't know what operating system you are using, however if it is Windows, Arial Black has been a system font with all versions of Windows, so as DWright has said, it should be there, however all Windows versions since 3.1 have included "Courier New" (from The Monotype Corporation), not "Courier". If I remember correctly, "Courier" was a Postscript font used by Adobe and IBM, which Microsoft chose not to licence for Windows. Again, if your operating system is Windows, there were reports of some of the fonts, and in particular Arial variants, including Arial Black, not being present after upgrading Windows 10 from Windows 7. If your system is Windows 10, then check C:\Windows\Fonts, and see whether Arial Black is in the Arial folder. Are you by any chance using a font manager?
-
Photo 1.7.2/ Win10/ Layers lose Info/blocky
Greyfox replied to chad sanborn's topic in V1 Bugs found on Windows
Chad, Does the problem occur if you work in RGB 8 bit instead of RGB 16 bit ? What are your renderer settings (Edit->Preferences->Performance->Renderer) ? -
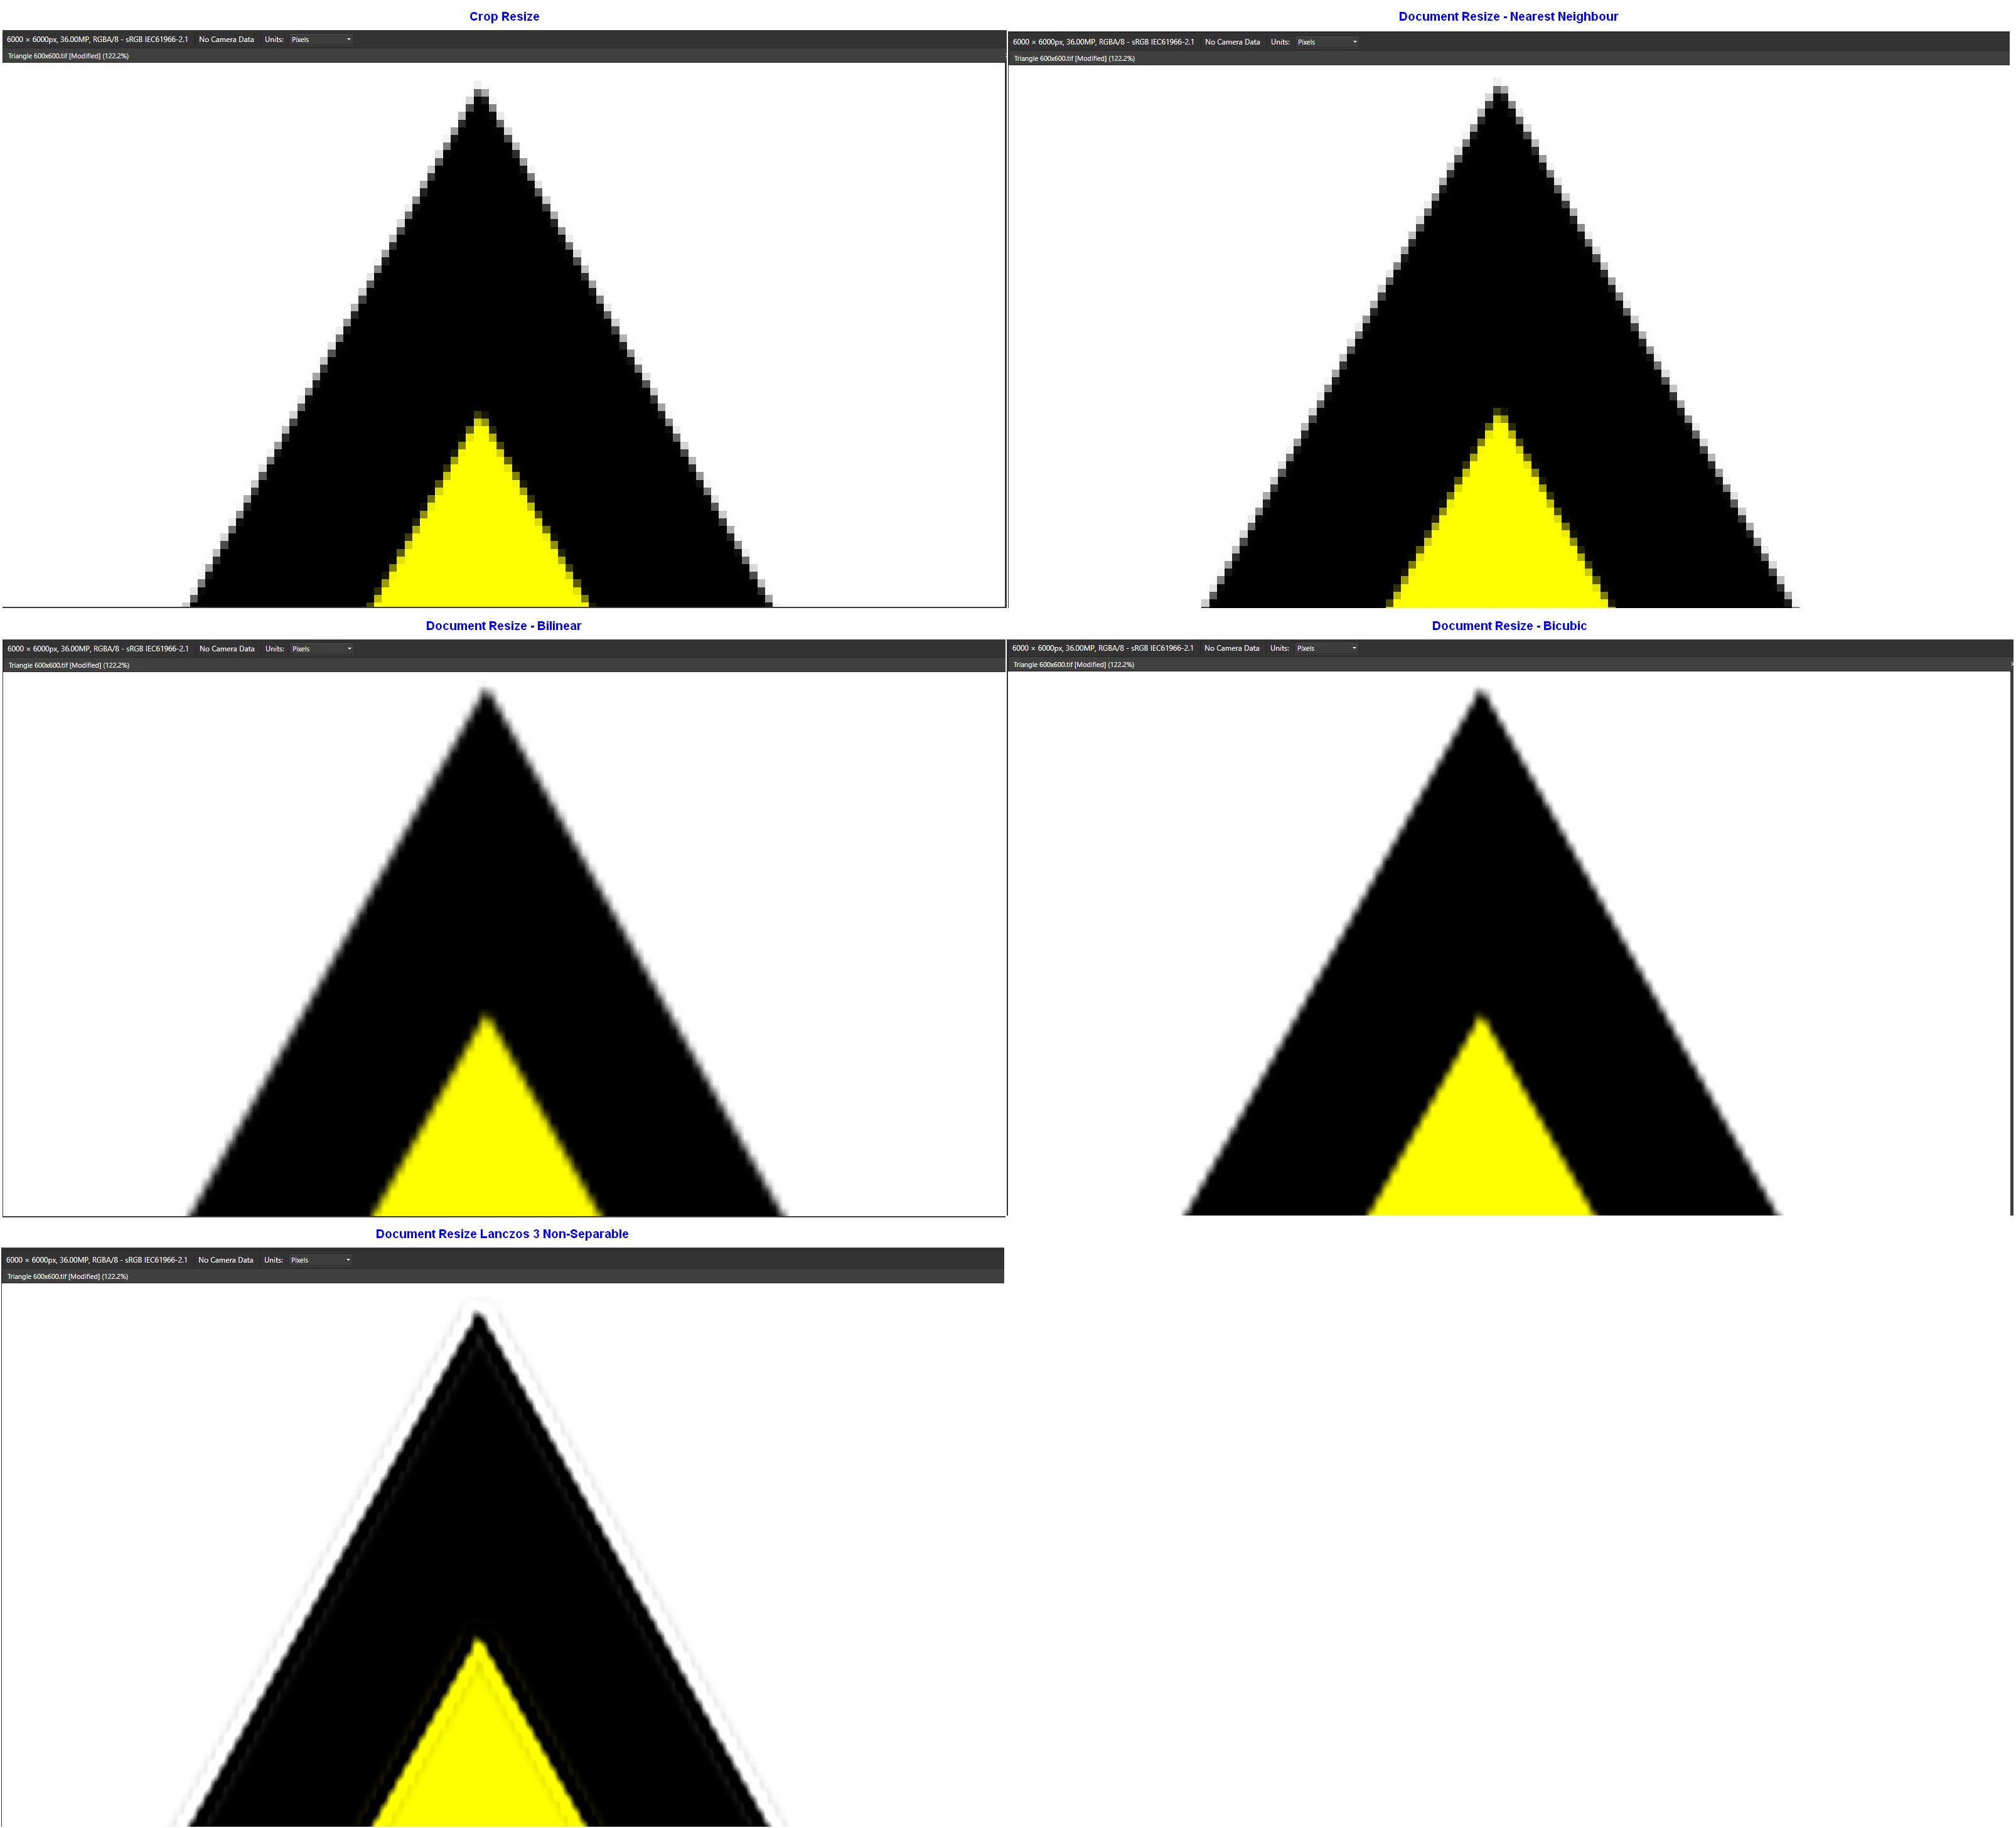
So having modified my test to exclude the export process, I've been able to get a reasonably clear comparison between a crop resample and a set of document resizes using the various resample methods, and that leads me to believe that the crop resample method might actually be Nearest Neighbour. !!! My test: My source image was a yellow filled triangle with a black outline on a 600px x 600px white background, produced in a vector drawing package, and exported as a 600px x 600px 300DPI uncompressed 24 bit TIF image. I've attached that image for reference In Affinity Photo I up sized the image by 10 to 6000px x 6000px leaving the DPI as 300 using each of the resample methods. I zoomed each resized image immediately after resizing to 122.2%, positioned the view so it showed the peak of the triangle and took a screen shot, then put the screen shots together for comparison. The simple triangle image makes it easy to see the difference in resampling methods on this type of image. The crop resize most closely matches the Nearest Neighbour resample. Triangle 600x600.tif
-
Yes, that would be helpful. Having done some tests, my thoughts are that it wouldn't seem to be Lanczos 3 Non-Separable, simply because using the same source image, a resize in Document Resize using Lanczos 3 Non-Separablen is taking far, far longer than the same resize using crop resize. I had thought a comparison would be relatively simple, just do the same resize to the same tiff source image using the different resampling methods in Document, Resize, and also a Crop resize, export each result as a non compressed tiff and compare the exported images at 100%. Unfortunately, it seems to me that the resample type used in the Export process is having an effect, even though I'm not making any changes to the pixel size in the export process. Not sure why that should be.
-
DWright, carl123, Thanks for the response. As a result I have now been able have my custom categories show at the top of the list when I open it. Thanks also for the information about the upsizing/downsizing method. Will be interesting to compare a resize using crop with a resize using one of the Lanczos options in Resize Document.
-
Possibly there has been an answer to these two questions. I've looked but so far haven't found. 1. When I use a Resample crop, what resample method is being used eg. Bicubic, Lanczos 3 Non-Separable, Lanczos 3 Separable or something else.. 2. Having created a couple of custom Crop preset cateagories, they appear at the bottom of the preset categories list, and I have to scroll down each time to get to them. Is there a way I can get my custom crop categories to appear at the top of the preset list. (I realize that if I just select None for each preset then theyt will appear at the top of the list)
-
The image in the .zip file appears to be a Motion Panorama image from a (Samsung Galaxy S7 ?) smart phone, rather than a standard static .jpg. It does indeed cause Affinity Photo to crash back to desktop when opening it, and it also has that effect on Topaz Studio 1 and Studio 2, so obviously they all have issues with that format. It can be opened by ACDSee Photo Studio and by FastStone Editor, but they display it as a static image, not a Motion Panorama.
- 10 replies
-
- 1
-
-
- crash
- affinity photo 1.7.2.471
- (and 3 more)
-
As can be seen from the screen shots comparison below, it is removing a significant amount of the color noise here in Affinity Photo 1.7.2.471 on Windows 10 Pro. This particular comparison was made using Layer->New Live Filter layer->Noise->Denoise.
-
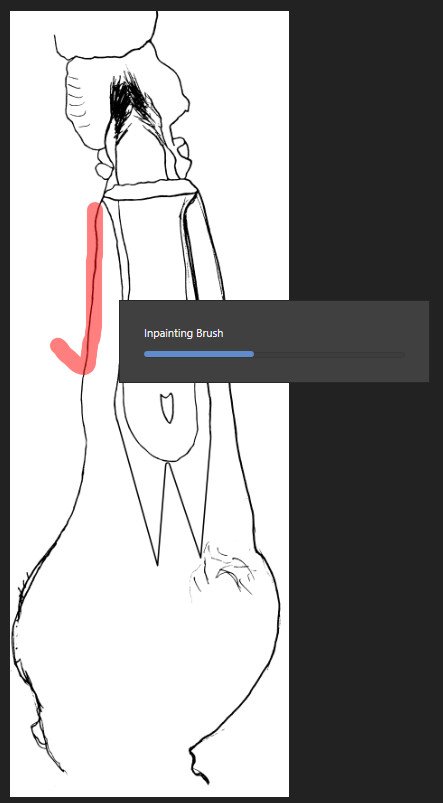
Chris, What I've found is that if I freehand down the line a short way, and then move left off the line and slightly back up (so the pink section looks something like a tick, (as shown in the screen shot attached), I can get the "hang" to occur nearly every time. The other thing I've found is that the "hang" is not actually terminal - if left long enough it does actually complete, but long enough has sometimes been in the order of 184 seconds.
-
Can't export to JPEG, anymore!!!! CPU 100%, !!!
Greyfox replied to Oscar Funes's topic in V1 Bugs found on Windows
Oscar, Can you provide details of your source file, width & Height in pixels, Color format & bits, Color profile, also the details from the Export Settings Dialogue Is the location you are trying to export to on a local drive in the laptop, or an external drive? As a test, have you tried exporting a jpg to the desktop?. -
Chris, In case it is of some use, the attached short video shows the hang occurring here with JohnEpler's .afphoto file, also the details from Task Manager during the hang.. Affinity Photo Inpainting tool hang.wmv
-
Chris, Were you using JohnEpler's uploaded .afphoto file? I've not experienced any lag or hang problems with the Inpainting tool on any other file, but with his project file the problem is fairly repeatable. Document size 2475 x 6968px, 17.25MP, RGBA/8 Inpainting brush: Width 179.3, Opacity 100%, Flow 100%, Hardness 80% Desktop PC, Windows 10, 64 bit (1903), Intel i7 CPU, 16GB RAM, Nvidia GeForce GTX 1050ti 4GB graphics
-
John, Using your file, I didn't experience any issues during the actually painting over sections of the lines with the Inpainting Brush Tool, but I did experience some random delays and a couple of nasty hangs after I stopped inpainting and when the inpainting progress indicator had reached about 50%. I opened a new copy of your project file and simply exported it as an RGB 8 bit TIFF file with no compression, then closed your file and opened the TIFF version. I have since not had any issues using the inpainting tool on the TIFF file. Would be interesting to see whether you get the same result.
-
When the lock is applied to a layer, all of the options in the Transform pane are greyed out and no longer available, so that is position (X & Y), Size (W & H), Rotation and Shear. That appears to be all that is locked.
-
Crop tool absolute size resampling
Greyfox replied to CedarHouse's topic in V1 Bugs found on Windows
You shouldn't be able to have presets with Unconstrained Crop. A preset be it a ratio, or a specified size is in itself a constraint (a limitation or restriction) . What is unfortunately missing in 1.7.2.471 is the ability to create Absolute presets. -
User Created Crop Tool Presets have no effect - 1.7.2.471
Greyfox replied to drphoto's topic in V1 Bugs found on Windows
Thanks for the response Walt That does appear to be the case with the two examples I quoted previously. However, another common crop for me is to crop to either 210:297 portrait or 297:210 landscape for full A4 page images, and I have saved a 297:210 custom preset for this. If the workspace units are set to millimeters prior to using the crop tool, then when I set the mode to Custom Ratio, and select my 297:210 preset, the values show as 21.6mm x 15.2mm. Those values don't resolve as the selected ratio, but the crop itself does give the correct result. Hopefully Serif can make this a bit clearer at some stage -
User Created Crop Tool Presets have no effect - 1.7.2.471
Greyfox replied to drphoto's topic in V1 Bugs found on Windows
I'm finding the Custom crop presets in the latest release a little confusing. For example, I open a 6" x 4.5" photo and I want to crop it to 6" x 4" If the units in the workspace happened to be set to Inches before I select the crop tool, then when I select it, change the mode from Unconstrained to Custom Ratio and select the 3::2 (6:4) preset, the values just to the right of Custom Ratio in the context tool bar show as 0.042 in x 0.028 in. Why these particular values? If the units in the workspace instead happened to be set to pixels, then when I select the crop tool, change the mode from Unconstrained to Custom Ratio and select the 3::2 (6:4) preset, the values just to the right of the Custom Ratio in the contexct tool bar show as 3 px x 2 px. Again what is the purpose of these particular values? Am I missing something simple? -
You need to click on Apply in the context toolbar when you are happy with the straighten or rotate. Exiting the crop/straighten tool by selecting another tool without first clicking on Apply has the same effect as Cancel
-
Color Selector Issues
Greyfox replied to squirrelfire's topic in [ARCHIVE] Designer beta on Windows threads
Nate, when you select the tool to draw the next new shape, is the previously selected colour for stroke being shown in the context bar? -
I can reproduce this here. 1. New document 2. Use ellipse tool to add ellipse and fill with solid green colour 3. Rasterise This will now show in layer tab as pixel 4 lock pixel layer Note you can still select the green ellipse with the move tool even though you can't actually move it. For comparison 5. Add another ellipse and fill with solid red colour This will show in layer tab as Ellipse (above the pixel layer) 6 Lock the Ellipse layer Note: You can't select the red ellipse but you can select the green one
-
Does Affinity Designer have a "radial copy" function, or equivalent. For example. Drawplus X8 had a Tools->Transform function which allowed a specified number of copies of an object to be made, with each copy rotated a specified amount from the previous one. I'm aware of the Power duplicate function, but that only allows a single rotated copy for each application