- S -
-
Posts
832 -
Joined
Everything posted by - S -
-

Hexagon as mask - How to?
- S - replied to cwmbrancon's topic in Pre-V2 Archive of Desktop Questions (macOS and Windows)
Another one. Timeline 01.mov (file no longer available) Edit to add: 'Snap to shape key points' need to be on in Snapping Manager for the second row to snap. -
Most of the work I do is photo work and I use a normal mouse most of the time for that because old habits die hard, however I also use a conventional graphics tablet made by Huion. I don't think drawing on screen would be a problem with screens specifically designed for pressure sensitive pen use as I guess they would have things like palm rejection built-in. However, I can't really comment on them as I haven't used them myself. I use CTRL + Z a lot with the graphics tablet though...
-
And even then data is subject to Schrödinger's backup theory - "The condition of any backup is unknown until a restore is attempted. Until that time the data can be thought of as simultaneously both alive and dead".
-
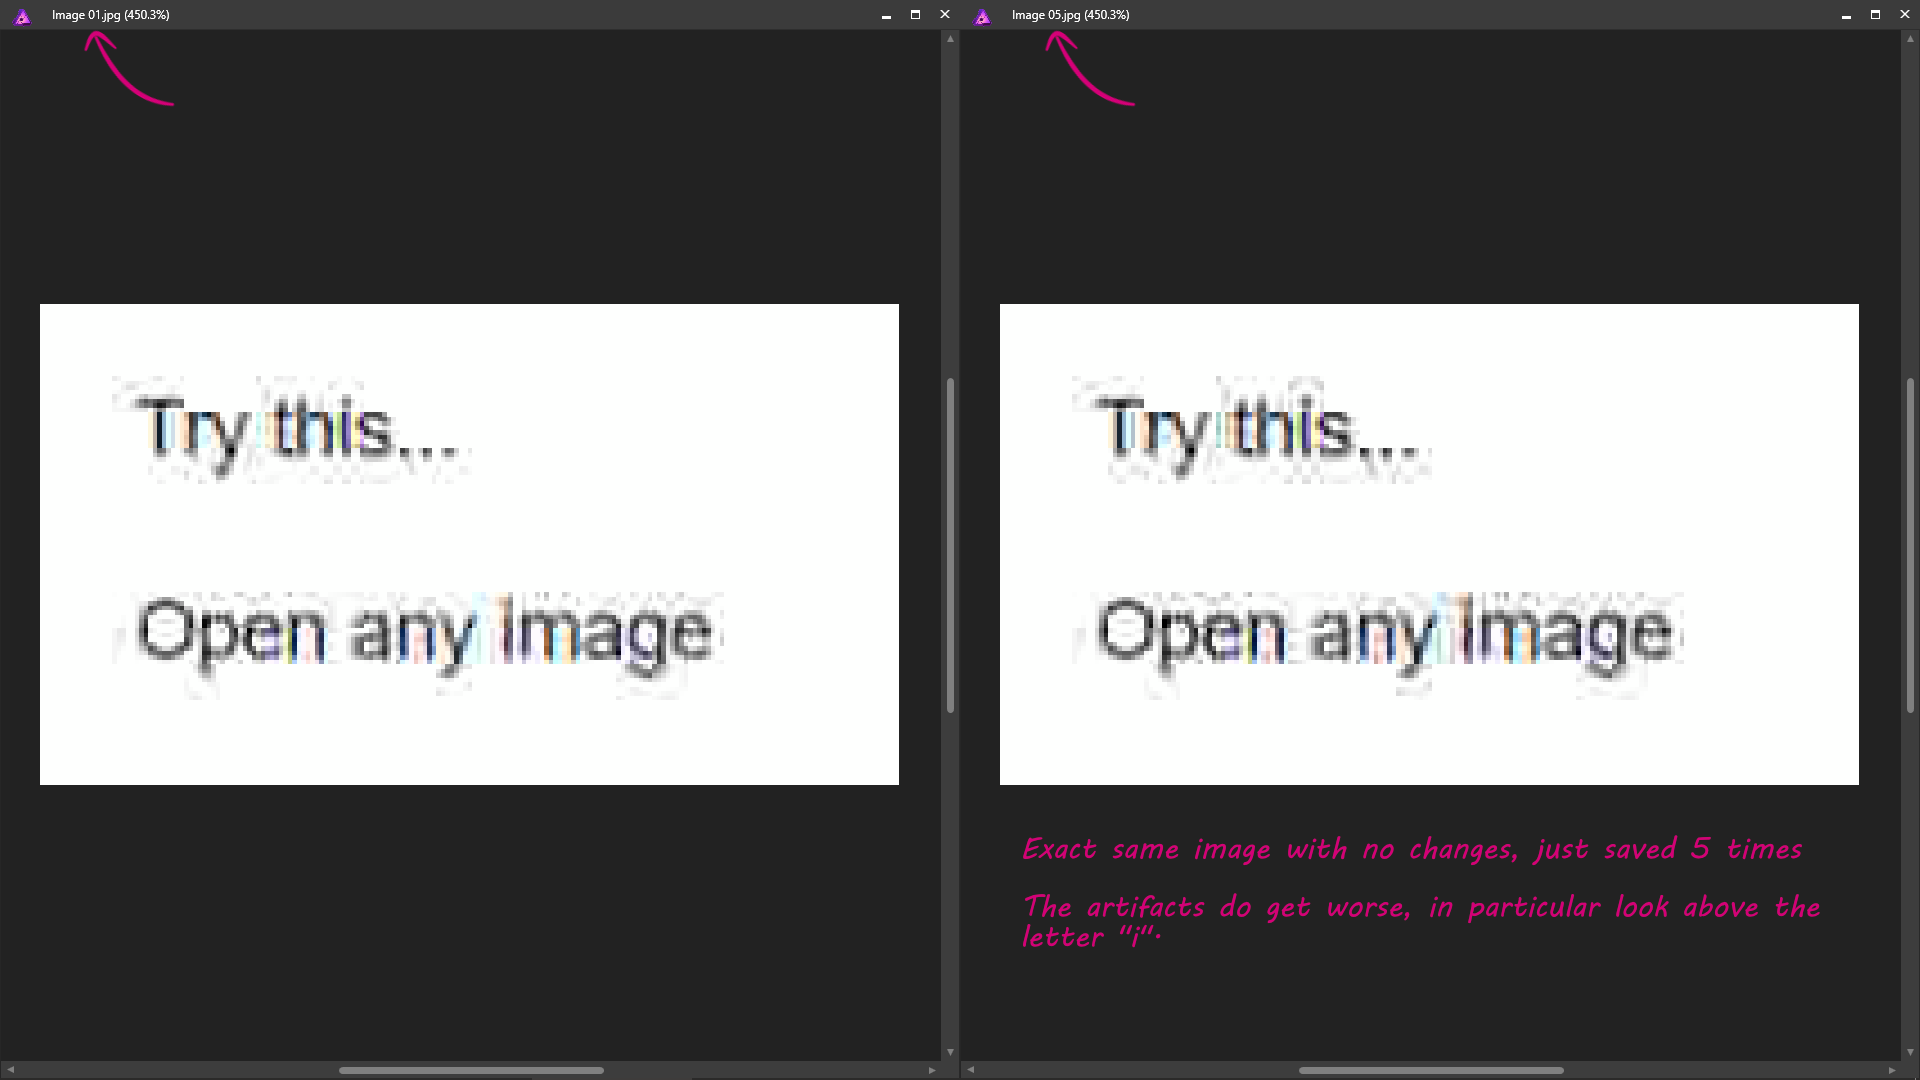
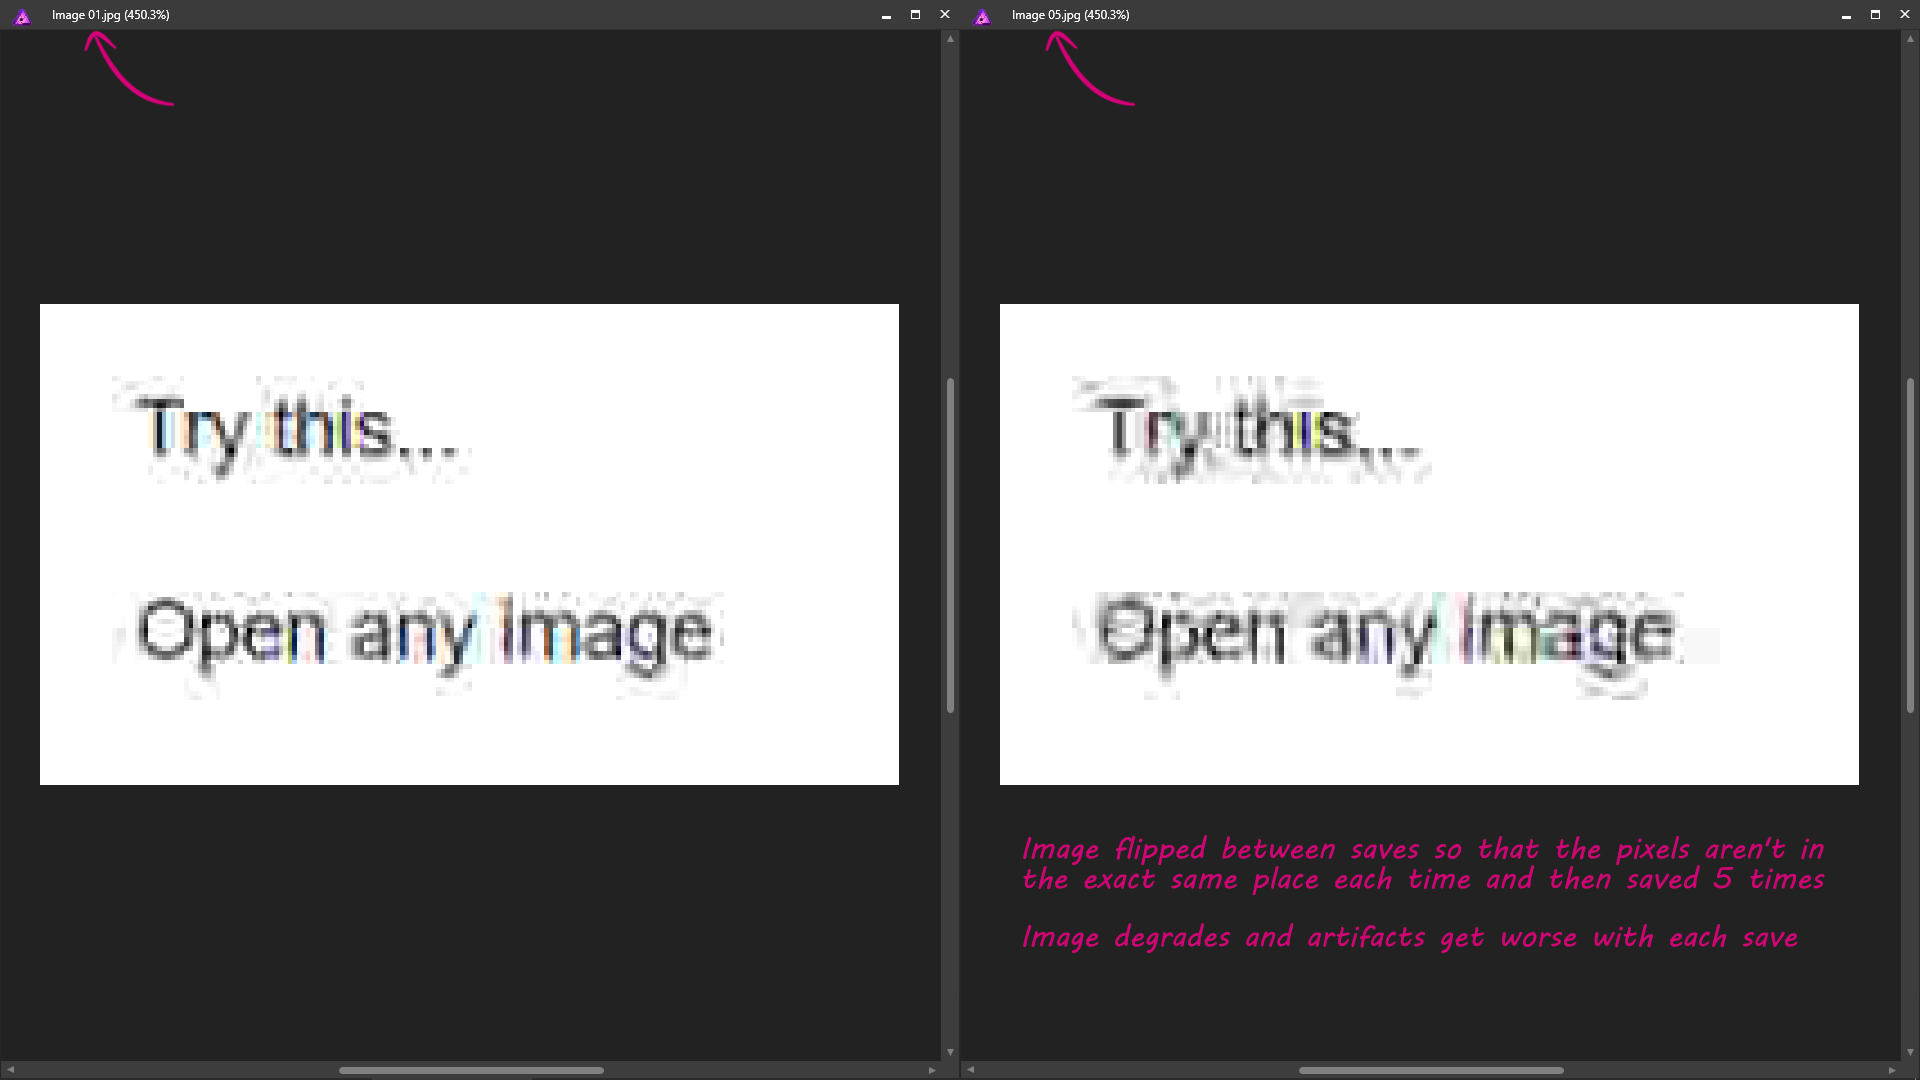
I have just tried this experiment and the image quality does degrade and the artifacts get worse with each save. Here is the first save compared to the fifth save. However it's not a particularly good experiment as it's resaving/compressing the exact same pixels each time. In a real life scenario the image is likely being edited/modified before saving each time, therefore the pixels are changing rather than remaining static. Therefore I carried out the same test but this time with the image being flipped horizontal each time so that the pixels aren't exactly the same each time the image is saved. Here is the first save compared to the fifth save, where you can see the image degrades and the artifacts get worse with each save. I can however see both sides. A user may want to open a JPEG, make a quick change, then resave it. So to them the file size increasing is an inconvenience. However, I agree with Affinity's logic to save it at 100% in order to preserve image quality, because JPEG should never be a working file format. There should really be two versions of the file, the working file format (AFPHOTO, PSD, TIFF) and the export format, because you never know when you will need to go back and edit it again (and again, and again, as you view it later with new eyes or realise you missed something).

-
I was thinking it could be the scanner software rotating the scanned image too. The last I read from Serif on this issue was "...this is a known issue so hopefully the team can look into sorting this sometime in the future soon ", so it sounds like it will be fixed, but I don't have any inside info when this will be.
-
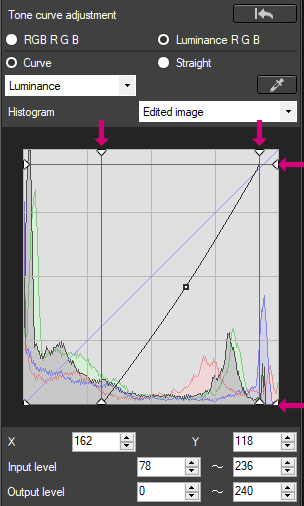
+1. And also have numerical fields in Curves too.
-
It may be worth uploading one of the scanned images you are having problems with.
-
Finding posts
- S - replied to Max N's topic in Pre-V2 Archive of Desktop Questions (macOS and Windows)
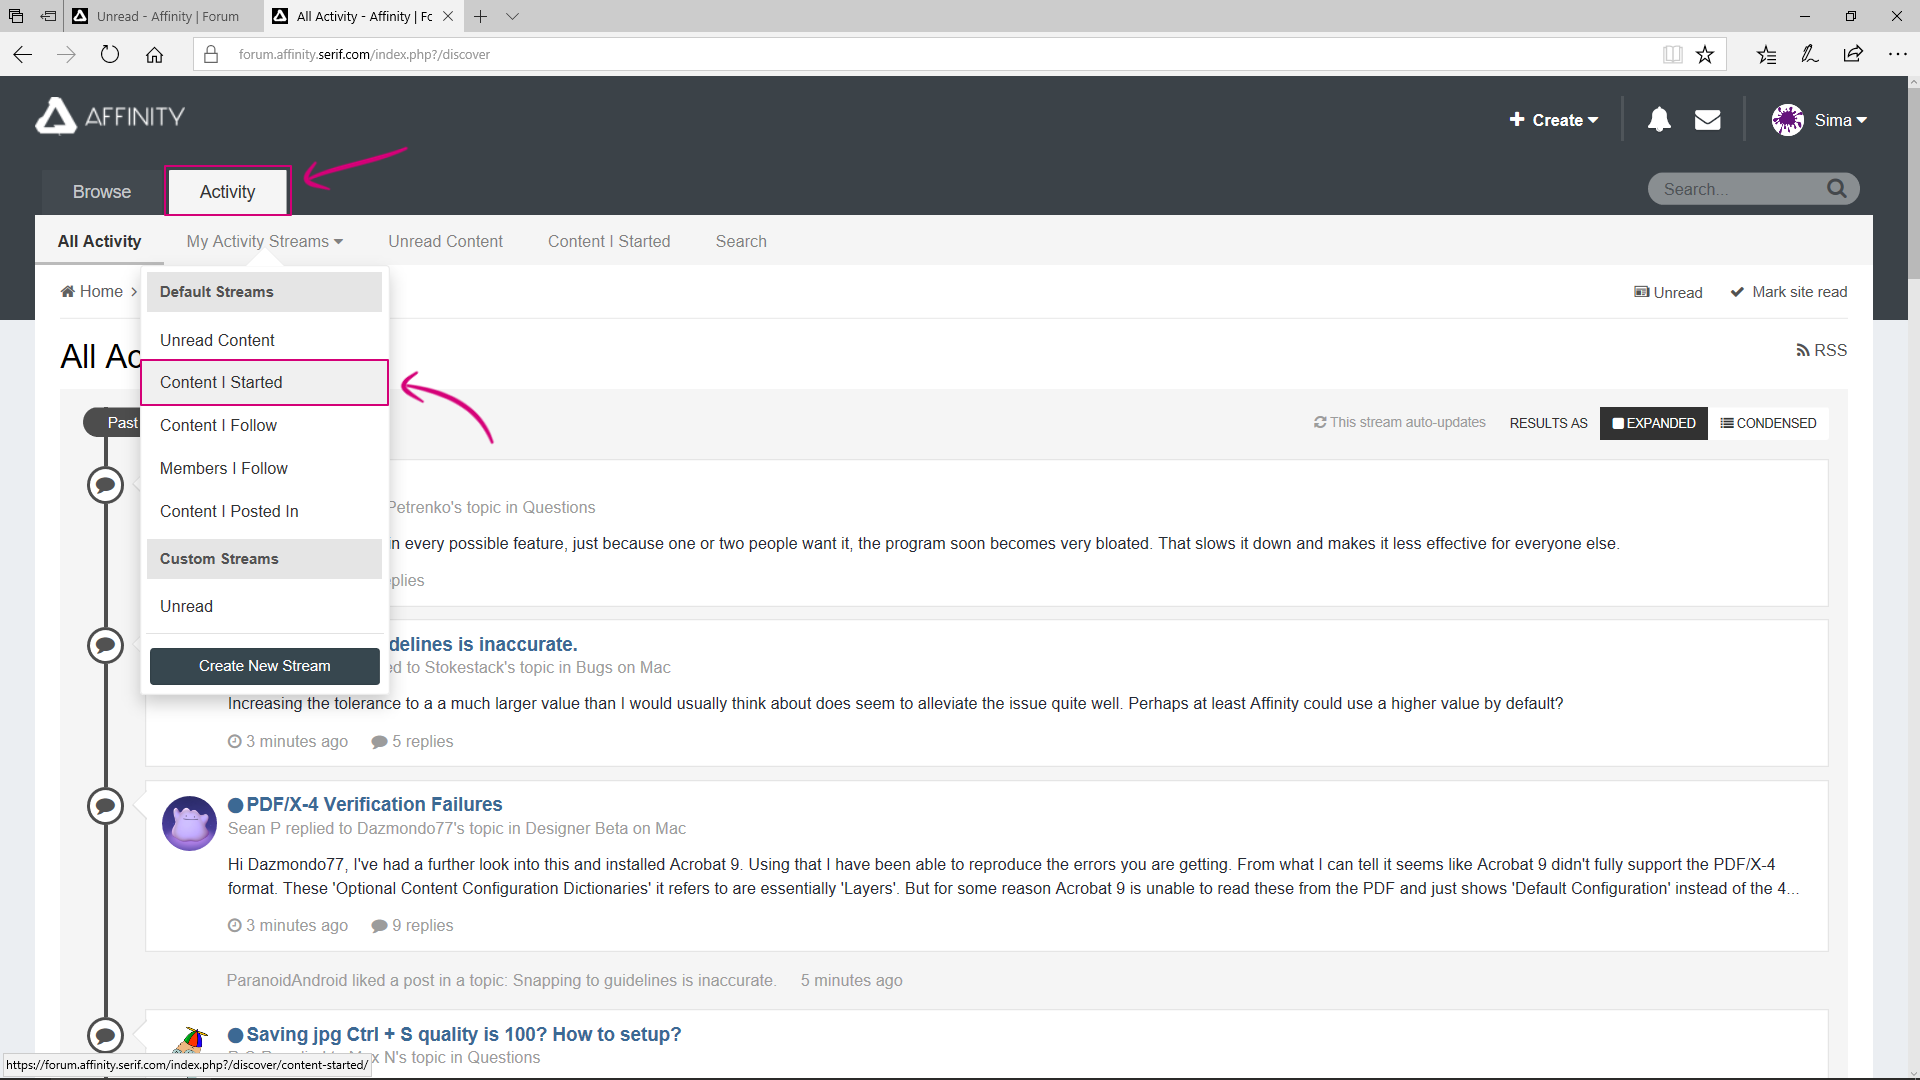
If you want to see just the posts that you have created, you can also go to Activity > My Activity Streams > Content I Started.
-
File extension consistency please...
- S - replied to rafikiphoto's topic in Older Feedback & Suggestion Posts
+1. Here's another feature request regarding the same problem too: Add .tif file mask to export dalog -
TIFF - why not TIF?
- S - replied to rafikiphoto's topic in Pre-V2 Archive of Desktop Questions (macOS and Windows)
I agree, Affinity's default use of *.tiff is a complete PITA. I have no idea why Serif don't standardise on *.tif. There's no advantage by defaulting to *.tiff when everyone else uses *.tif and have done for a long time. It just adds unnecessary complications with no benefit. -
Looking at the Wacom support page, the Bamboo Ink pen supports the following HP machines: HP EliteBook x360 1030 G2 HP Elite x2 1012 G1 HP Elite x2 1012 G2 HP ENVY 8 Note Tablet HP Pavilion x360 14-ba000 HP Pro x2 612 G2 HP Spectre x2 12t HP Spectre x360 13-ac000 HP Spectre x360 15-bl000 So I assume your machine is one of those? If it is, then presumably the pen works correctly elsewhere in Windows, but isn't registering pen pressure in Affinity Photo? If that's the case, it may be worth checking that the brush you are using in Affinity Photo is one that's set to use pen pressure to control the brush size. Different brushes have different default settings depending on what they were created to draw like or mimic. Some are a constant size, some change size or opacity/flow depending on pen pressure, etc. The default basic round brush in Affinity Photo however is a constant size brush (I.E. It isn't set to use pen pressure for brush size control by default), which may be why you don't think the pen is working correctly. Therefore try this first. With the Brush tool selected, click the 'Force Pressure to Control Size' button next to the 'More' button in the brush context bar at the top. This will override the brushes size jitter setting in brush dynamics and use pen pressure for brush size control. If the pen then works with 'Force Pressure to Control Size' on, I'd turn it back off and go through all the different default Affinity Photo brushes in the brushes panel and see if you can find a brush that draws like you want it to. In addition, if there's a particular brush where you want to permanently override the default brush settings, then you can do so by doing the following. 1) Select the brush you want to modify in the Brushes panel 2) Click on the brush settings icon in the top right corner 3) Click on the 'Dynamics' tab 4) Change the desired setting to 'Pressure' and adjust the slider
-
Are you using the exact same photo on both your Macbook and iMac? If not, the liquify tool can work in reverse depending on which way up the device was held when taking the photo. See my reply at the bottom of the following link: Opposite effects in Persona Liquify?! If it's the same photo, have you flipped the image at all, because that can also cause it to work in reverse.
-
It does, although re-reading it I think maybe I misread the original post. I don't think the Austin A30 is referring to this pic, but is referring to another pic that the poster is working on too.
-
Are you sure that isn't a Morris Minor?
-
Qs from former Photoshop user
- S - replied to Gary_F's topic in Pre-V2 Archive of Desktop Questions (macOS and Windows)
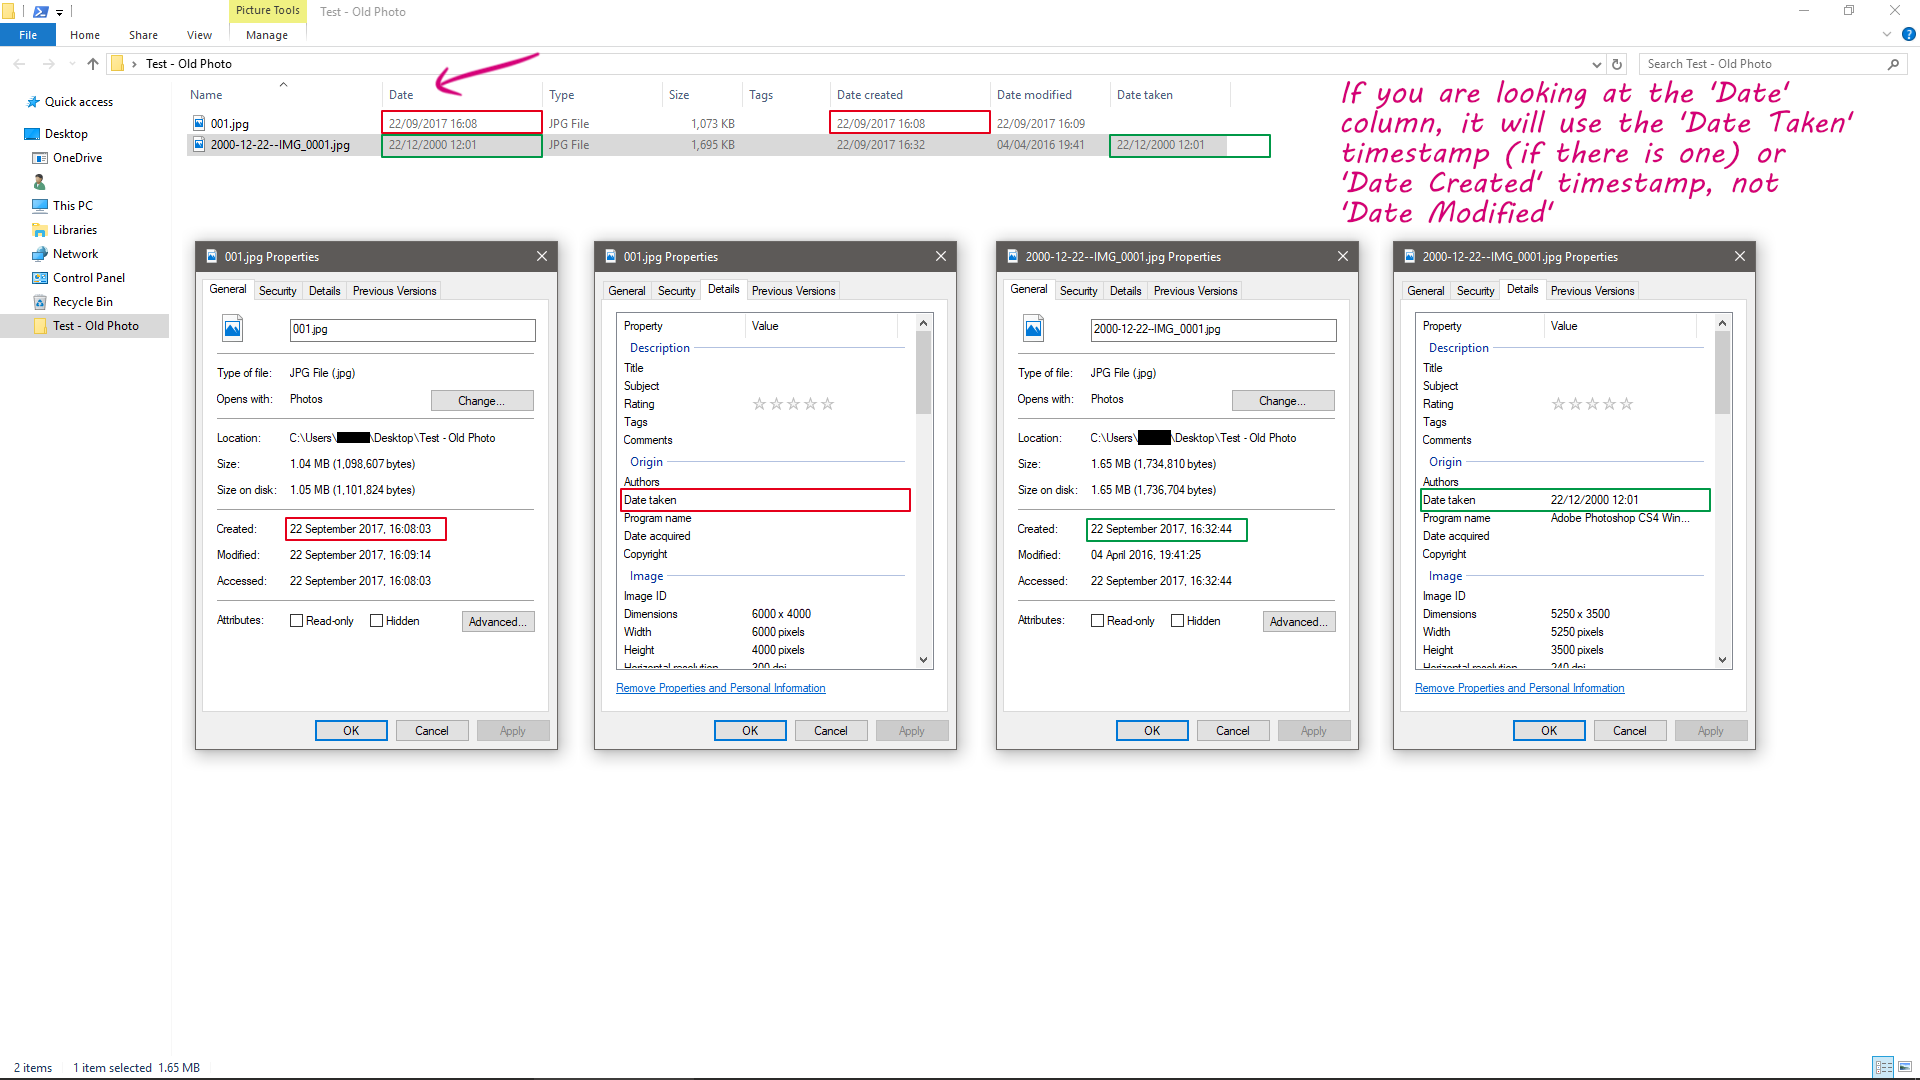
No the 'Date Taken' field in the EXIF metadata needs to be added when the file is first created and then remain unchanged, as it's the only constant date we have. To overcome your issue you'll need to sort by the 'Date Modified' column as the 'Date' column won't do what you want it to do. -
Qs from former Photoshop user
- S - replied to Gary_F's topic in Pre-V2 Archive of Desktop Questions (macOS and Windows)
I am unable to reproduce this on Windows 10 either. Exporting the file as a JPEG results in the 'Date Modified' timestamp being updated each time I export it. There are multiple dates in Windows File Explorer (Date, Date Created, Date Modified, Date Accessed, Date Taken), which can be added by right-clicking on the column title bar. The 'Date' field doesn't use 'Date Modified', but will instead use 'Date Taken' from the EXIF metadata if it's present (If it was created by the camera, image editing software, etc.). If there is no 'Date Taken' info, then it will use 'Date Created'. Is it possible that the column you're looking at in Windows File Explorer is just labelled 'Date' and hence why it doesn't appear to be updating? I've previously made a feature request here for files created in Affinity software to include 'Date Taken' timestamps though, because Date File Created, Date File Modified and Date File Accessed fields, have always been a PITA when data is shifted around.
-
Brush size shortcut with drag?
- S - replied to TheSchlonz's topic in Pre-V2 Archive of Desktop Questions (macOS and Windows)
Yeah, I can't get used to using the right mouse button that way either. -
Masking Adjustment Layer
- S - replied to Jim N's topic in Pre-V2 Archive of Desktop Questions (macOS and Windows)
How you explained it is how it should be working. Is the opacity for the white brush set to 100% in the colour panel?
-
It may be worth running the Microsoft tool as per Post No.2 in the following link. Can't Install/Uninstall
-
Brush size shortcut with drag?
- S - replied to TheSchlonz's topic in Pre-V2 Archive of Desktop Questions (macOS and Windows)
On Windows with a mouse you need to do the following (with the brush tool selected): 1) Press and hold ALT 2) Click and hold RIGHT MOUSE BUTTON 3) Click and hold LEFT MOUSE BUTTON 4) Drag the mouse left/right for size, up/down for hardness -
affinity designer Taking the way-back machine to the 80's
- S - replied to GarryP's topic in Share your work
The year is 2060, Serena gets into the driverless car which arrives at the same time every day to take her to the Elon Musk building where she works as an engineer on the Lisbon to Rio vacuum train project. In a brief intermission between the mandatory Google ads, she turns to a fellow passenger and says "Hey remember the good old days when we used to buy and drive our own cars"... -
Brush Preview Question
- S - replied to artemesia66's topic in Pre-V2 Archive of Desktop Questions (macOS and Windows)
I think the OP is referring to this, which is present when using both a graphics tablet or mouse. Video: Affinity Brush Preview.mp4 (file no longer available) Unfortunately you can't disable the static outline. You can go to Edit > Preferences > User Interface > and untick 'Show Brush Previews', however it disables the wrong preview IMO. It disables the real-time brush view (which is the useful one) and keeps the static outline (which is the annoying one that most people want to disable). -
In the Ethiopian calendar maybe...
-
Save location
- S - replied to Dracken's topic in Pre-V2 Archive of Desktop Questions (macOS and Windows)
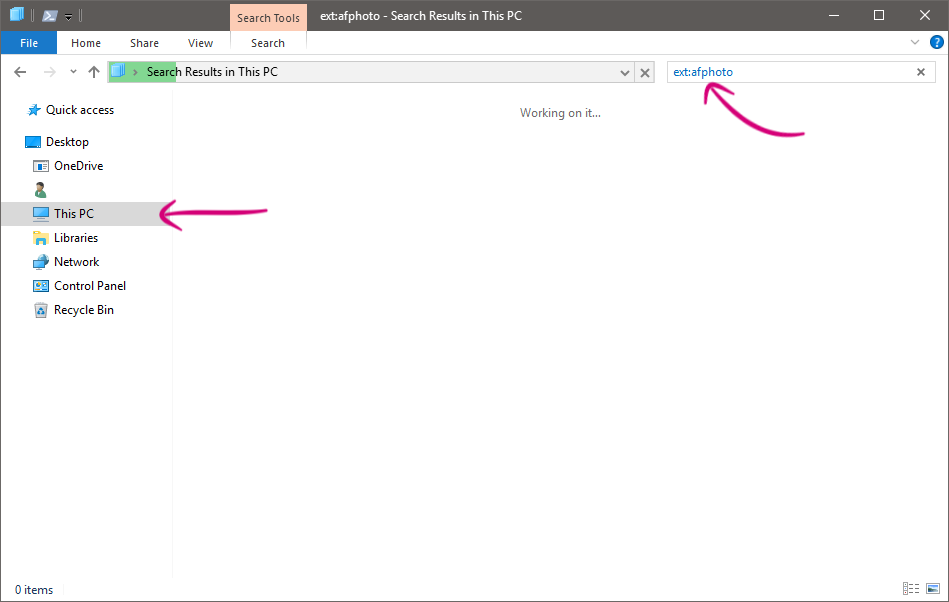
I'm not sure what this bit refers to? Do you mean the 'Save as' dialogue box? When you go to File > Save, it will save it to the last location that you saved a file. If that location is not there any more (I.E. You have since deleted the folder), it will default to User Folder > Documents. (Although I've also seen it default to C:\Windows\System32 before. No idea why). If it isn't a new document that you created from scratch (I.E. You open a JPEG/PNG/TIFF, edit it, then go to File > Save), it will write back over that same file unless you choose 'File > Save as' instead. Try creating a new document in Affinity Photo and go to save it. The 'Save as' dialogue should show you the location where it saved the last one. Alternatively, open Windows File Explorer, go to 'This PC' and paste ext:afphoto in the search box in the top right. This will search for and list all files with the .afphoto file extension on your computer.
-
Activations
- S - replied to bulajap's topic in Pre-V2 Archive of Desktop Questions (macOS and Windows)
Now confirmed for 17 October. https://arstechnica.com/gadgets/2017/09/windows-10-fall-creators-update-and-cheap-vr-headsets-launch-october-17/