

Gear maker
-
Posts
1,604 -
Joined
-
Last visited
Posts posted by Gear maker
-
-
19 minutes ago, thomaso said:
@Gear maker, on mac maybe resetting the font cache in Affinity Prefs > Misc > Reset Fonts can fix it?
thomaso, that did it. Thank you for your help. Now it'll stop bugging me. Thanks Dan for your help also.
-
1 hour ago, Dan C said:
Can you please open Font Book, then select all of the fonts listed and then File > Validate Fonts. This will check that your font files are not corrupted, or duplicated.
Hi Dan, everything looks good from this. Any other ideas? I appreciate your help.

-
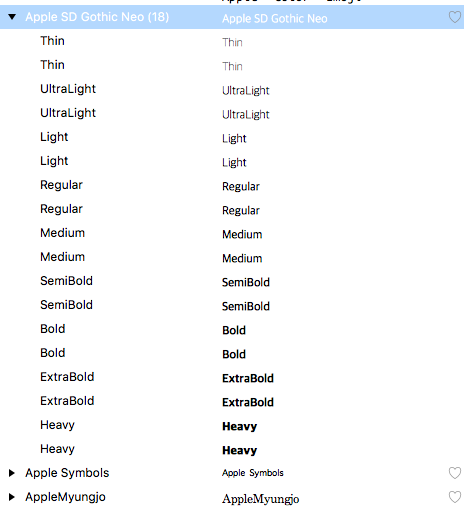
I'm using AD 1.8.6 for this project, but I think I've seen this in many versions. Two of many examples, in Font Book it shows:
In AD I see duplicates and triplicates for the font style of many fonts in both font selection area the context toolbar and the Character panel. Any idea how I can stop this?
-
8 minutes ago, Chris26 said:
Just when you thought it was safe to do your own stuff....it fails miserably. I am trying to get the top half of the blue stroke to go behind everything in this image. I have tried making a complete circle, then cutting a segment out to get that mathematical precision, I have had to eyeball it by making a similar shorter stroke by hand, when I experiment off to the side with simple operations on the canvas, things go according to plan. But as you can see from the video, I can not figure this out I am going bananas, I would like to be shown what I am dong wrong please. The Green stroke was supposed to take away the blue stroke underneath. So simple and a few seconds no doubt but I am lost now.
From your video I would guess that the blue circle was not closed before the boolean function.
-
3 hours ago, Yokoso said:
Dear friends, happy new year from The Netherlands. Last night I was working on some icons for my website and noticed this strange behaviour in Affinity Photo. Opening icons side by side to compare the collor in 'Seperated mode' opened the png files upside down! Opening the same files in 'Non Seperate mode' opened the files just fine.This morning I tried again and , yes, this looks like a bug. Anyone else seeing this behaviour? Please look at the screenshot. To the left, Affinity in 'Seperated mode', to the right Preview.
Happy New Year to you also. I only use Separated Mode in both APh and AD and have never run into this. Can you attach the png file? Did you create this png in APh? If so can you share the .afphoto file? What version of Affinity Photo are you using? How did you open the file in APh?
-
I don't know why they aren't displaying but you can get them online from: https://affinity.help/designer/English.lproj/index.html
-
On 12/21/2020 at 6:17 AM, Dan C said:
As Psenda has mentioned above, if you deselect the already drawn object first, then you should find you're able to draw another object snapped to any outside edge correctly.
The problem with pressing esc is that all laters are deselected so the new layer will then be on the top of the layer panel's list. If you are woking with a huge list of layers and the new layer belongs many pages down, then it's a pain having to go to the top and drag it back to where it's wanted.
I find that rather than esc, click on another layer that is very close in the layer panel, but not adjacent to the new shape.
Or, draw the new shape slightly to the side of the adjacent shape, then drag the shape or the adjacent nodes back into the proper position.
It would be nice to have a modifier that would stop this issue, but I don't have an idea of how it would function.
-
47 minutes ago, SS Gilbert said:
Thank you, Gear maker. Sometimes it auto closes, but most of the time it does not.
Yup, I always have to check. Have fun.
-
1 hour ago, v_kyr said:
Well other software can, so it's more a matter of the used library and it's capabilities to parse/read-in those Adobe file formats.
It could be. I can't read that link. But the format is a proprietary file format. I haven't heard that Adobe has been licensing any other companies to use it.
-
-
Oops, what I meant to say was to change the numbers of the width and height along with the % sign, if the file shows viewBox="0 0 246 123" then change the 100 in width to 246mm and the 100 in height to 123mm.
So <svg width="100%" height="100%" viewBox="0 0 246 123" changes to <svg width="246mm" height="123mm" viewBox="0 0 246 123"
-
5 hours ago, vikingtone said:
SVGs from Designer are massively expanded on export.
vikingtone, I have had some problems with svg exports and maybe can shed some light on them. First of all the svg spec allows the width and height to be specified as a percentage (or a mm, in, px, pt, etc.) Using a percentage has some advantages in that it allows svg images to be nested. But it also seems to cause some problems in that different applications implement the percentages different causing what you see.
I have found 2 ways that seem to work for many applications that you can try. If in AD you specify the Document units to be either pixels (px) or points (pt), I use pixels. Then as you are drawing ignore that the units shown are px (or pt) just assume they are mm or whatever you want them to be. So 100px you would just assume to be 100mm. Do a simple test drawing and see if that works.
The other way is to edit the svg file in a text editor (not word processor like Word or Pages as they add addition data to the file). The first few lines will look like:
<?xml version="1.0" encoding="UTF-8" standalone="no"?>
<!DOCTYPE svg PUBLIC "-//W3C//DTD SVG 1.1//EN" "http://www.w3.org/Graphics/SVG/1.1/DTD/svg11.dtd">
<svg width="100%" height="100%" viewBox="0 0 100 100" version="1.1" xmlns="http://www.w3.org/2000/svg"Change the two % symbols to mm so that portion reads like this.
<svg width="100mm" height="100mm"
Then save the file and again do a test. One of those might help you. Good luck.
-
22 hours ago, Matthew Schultz said:
The problem is that the Affinity Designer SVG export contains scientific e notation values like:
Matthew, fyi you had commented about the scientific notation. I believe that is necessary because almost all numbers stored in the Affinity suite contain 15 places after the decimal point to maintain the accuracy needed to be able to zoom in over 2 million % and still be accurate. Many programs might have been written so that they can zoom in maybe to 1000% or so. Which means they may not have written to be able to handle such numbers. They probably couldn't handle -0.000000000000000122465 any better than they could handle -1.22465e-16. So the only way Affinity could dumb the SVG down would be to round off that number which would destroy the accuracy of the SVG file if it were input back into a program needing the accuracy.
And each of the 6 numbers in the matrix statement can be used for multiple things that interact. That's why I gave up trying to write code to interpret it in my project as soon as I found I could get AD to do the work for me during the export.
-
You are welcome. That's the great thing about this forum there's almost always somebody else that has had the same task and will share how they got around it. The standard SVG (flatten) preset rasterizes everything and doesn't look like it flattens anything. Unless their Flatten means to rasterize? Good luck. Happy New Year.
-
I do something like you do. Except I wrote some C++ code to read the SVG file. Any transform causes my code problems. I'm too lazy to figure out how transforms work and add the code to handle the transforms. Instead I have created a preset that just flattens all transforms. Give this a try.
- Old Bruce, Matthew Schultz and Sean P
-
 2
2
-
 1
1
-
3DJ sorry for the problem. I couldn't get the file to be accepted either. I haven't seen this problem on any of my drawings. Unfortunately with the holidays upon us you might not be able to get an answer from Affinity people for a few days. I don't know if there is anything they can do, but maybe...
-
Just now, weheri said:
Thank you so much!
Any time.
-
1 hour ago, jmwellborn said:
If you purchased your copy of Publisher from the MAC App Store, I am not quite sure how to help
Logging into the mac app store, using the same login as when using the old computer, will let you re-download any purchased software.
-
30 minutes ago, weheri said:
Is this a bug or is there any setting I need to change, so the outer shadow is always shown, no matter which background color I use?
This is because the default blend mode for the outer shadow is a Multiply (black times any color gives you black). Open the Layer Effects panel by clicking on the fx at the bottom of the layers panel and change the Blend mode to normal or play with others to see the effect.
-
7 minutes ago, dancebles said:
that was it. thanks
Any time.
-
20 minutes ago, dancebles said:
how can that be corrected?
Do you have Snap to grid selected? Can you show us a screen shot of your snapping options?
-
1 hour ago, ZufDraw said:
it only happens when the layers panel is floating!
My layers panel is docked.
I've seen it since version 1.7.
-
On 12/3/2020 at 7:03 AM, MEB said:
Hi ZufDraw,
I remember someone reporting this before once, but i was never able to replicate it (and still don't). Any chance you can detail the steps you take from the point you create a new document (or record a clip of the whole app windows if you prefer)? What OS are you running and where did you bought the application - from us (Affinity Store), or from the Mac or Windows App Stores? Thank you.I was the one to report it before. The only cure was to turn off Use shift modifier to cycle tools, but I was one of the big requestors of having the biggest pushers for having Use shift modifier to cycle tools added. So I try to watch my names assigned to layers to not use the most common starting letters A, I, V, & G. I'd rather have Use shift modifier to cycle tools than to watch layer names. I believe another cure is to shut off Separate mode. But I don't feel that is an option.
Unfortunately there are relatively few people using Separate mode, and Light UI, so issues that only concern those modes don't get a high priority. Which I can understand because the staff at Serif have limited resources.
-
I just started a new drawing in 1.9.0.11 and it is also ignoring keystrokes when any layers in the layer panel has focus.
Too many problems with 1.9.0.11, I'm going back to 1.8.6 before I get too far into this project.


Keystokes ignored when layer panel has focus
in [ARCHIVE] Designer beta on macOS threads
Posted
Sean, sorry for the slow response. I just installed 1.9.0.14, and I am getting the same response. I click on any layer in the test 2 and AD ignores the keystroke and I get a sound from the mac saying it didn't like the keystroke. Okay I guess I'll have to make a new bug report for 1.9.0.14, when I switched to non-Separated mode I loose all panels. The view > studio has no checked entries. I'll get back to trying the non-Separated mode after documenting this.