h_d
-
Posts
1,629 -
Joined
-
Last visited
Everything posted by h_d
-
 No worries, hope my first suggestion makes your workflow easier.
 -
Where is my user interface?
h_d replied to locomoco's topic in Desktop Questions (macOS and Windows)
Or what's not on the screen... -
Where is my user interface?
h_d replied to locomoco's topic in Desktop Questions (macOS and Windows)
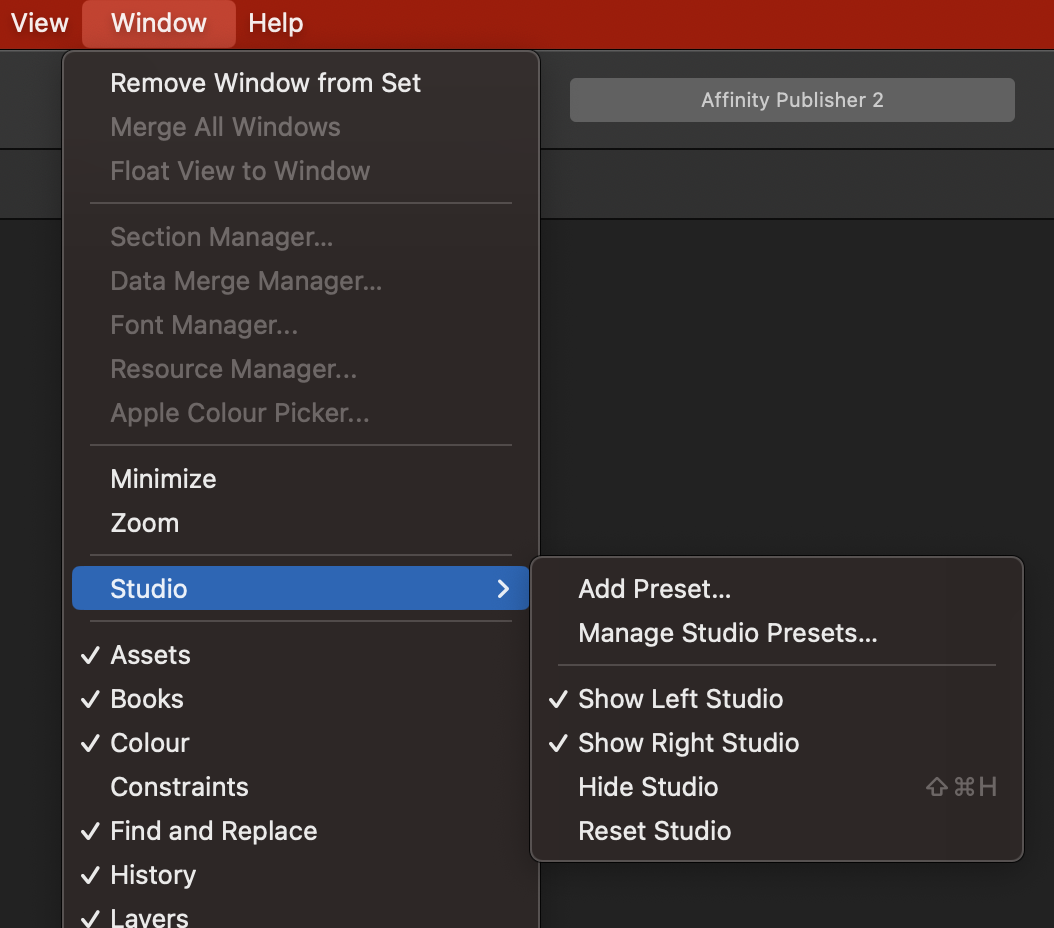
Press the Tab key. Alternatively, go to Window - Studio - and choose Show Left Studio:
-
Good evening, Personally I wouldn't rely on accurate conversion of pre-formatted text from Word. I would paste the text into a plain-text editor, remove any and all formatting, copy and paste into Affinity and apply all the character and paragraph styles there. That way you know you're getting what you want. (I'd also use Publisher rather than Designer for a newsletter, but that's up to you...)
-
Deselect to remove the pixel selection, then click on the HSL Shift Adjustment layer and paint on it in black or white. (It's a mask.)
-
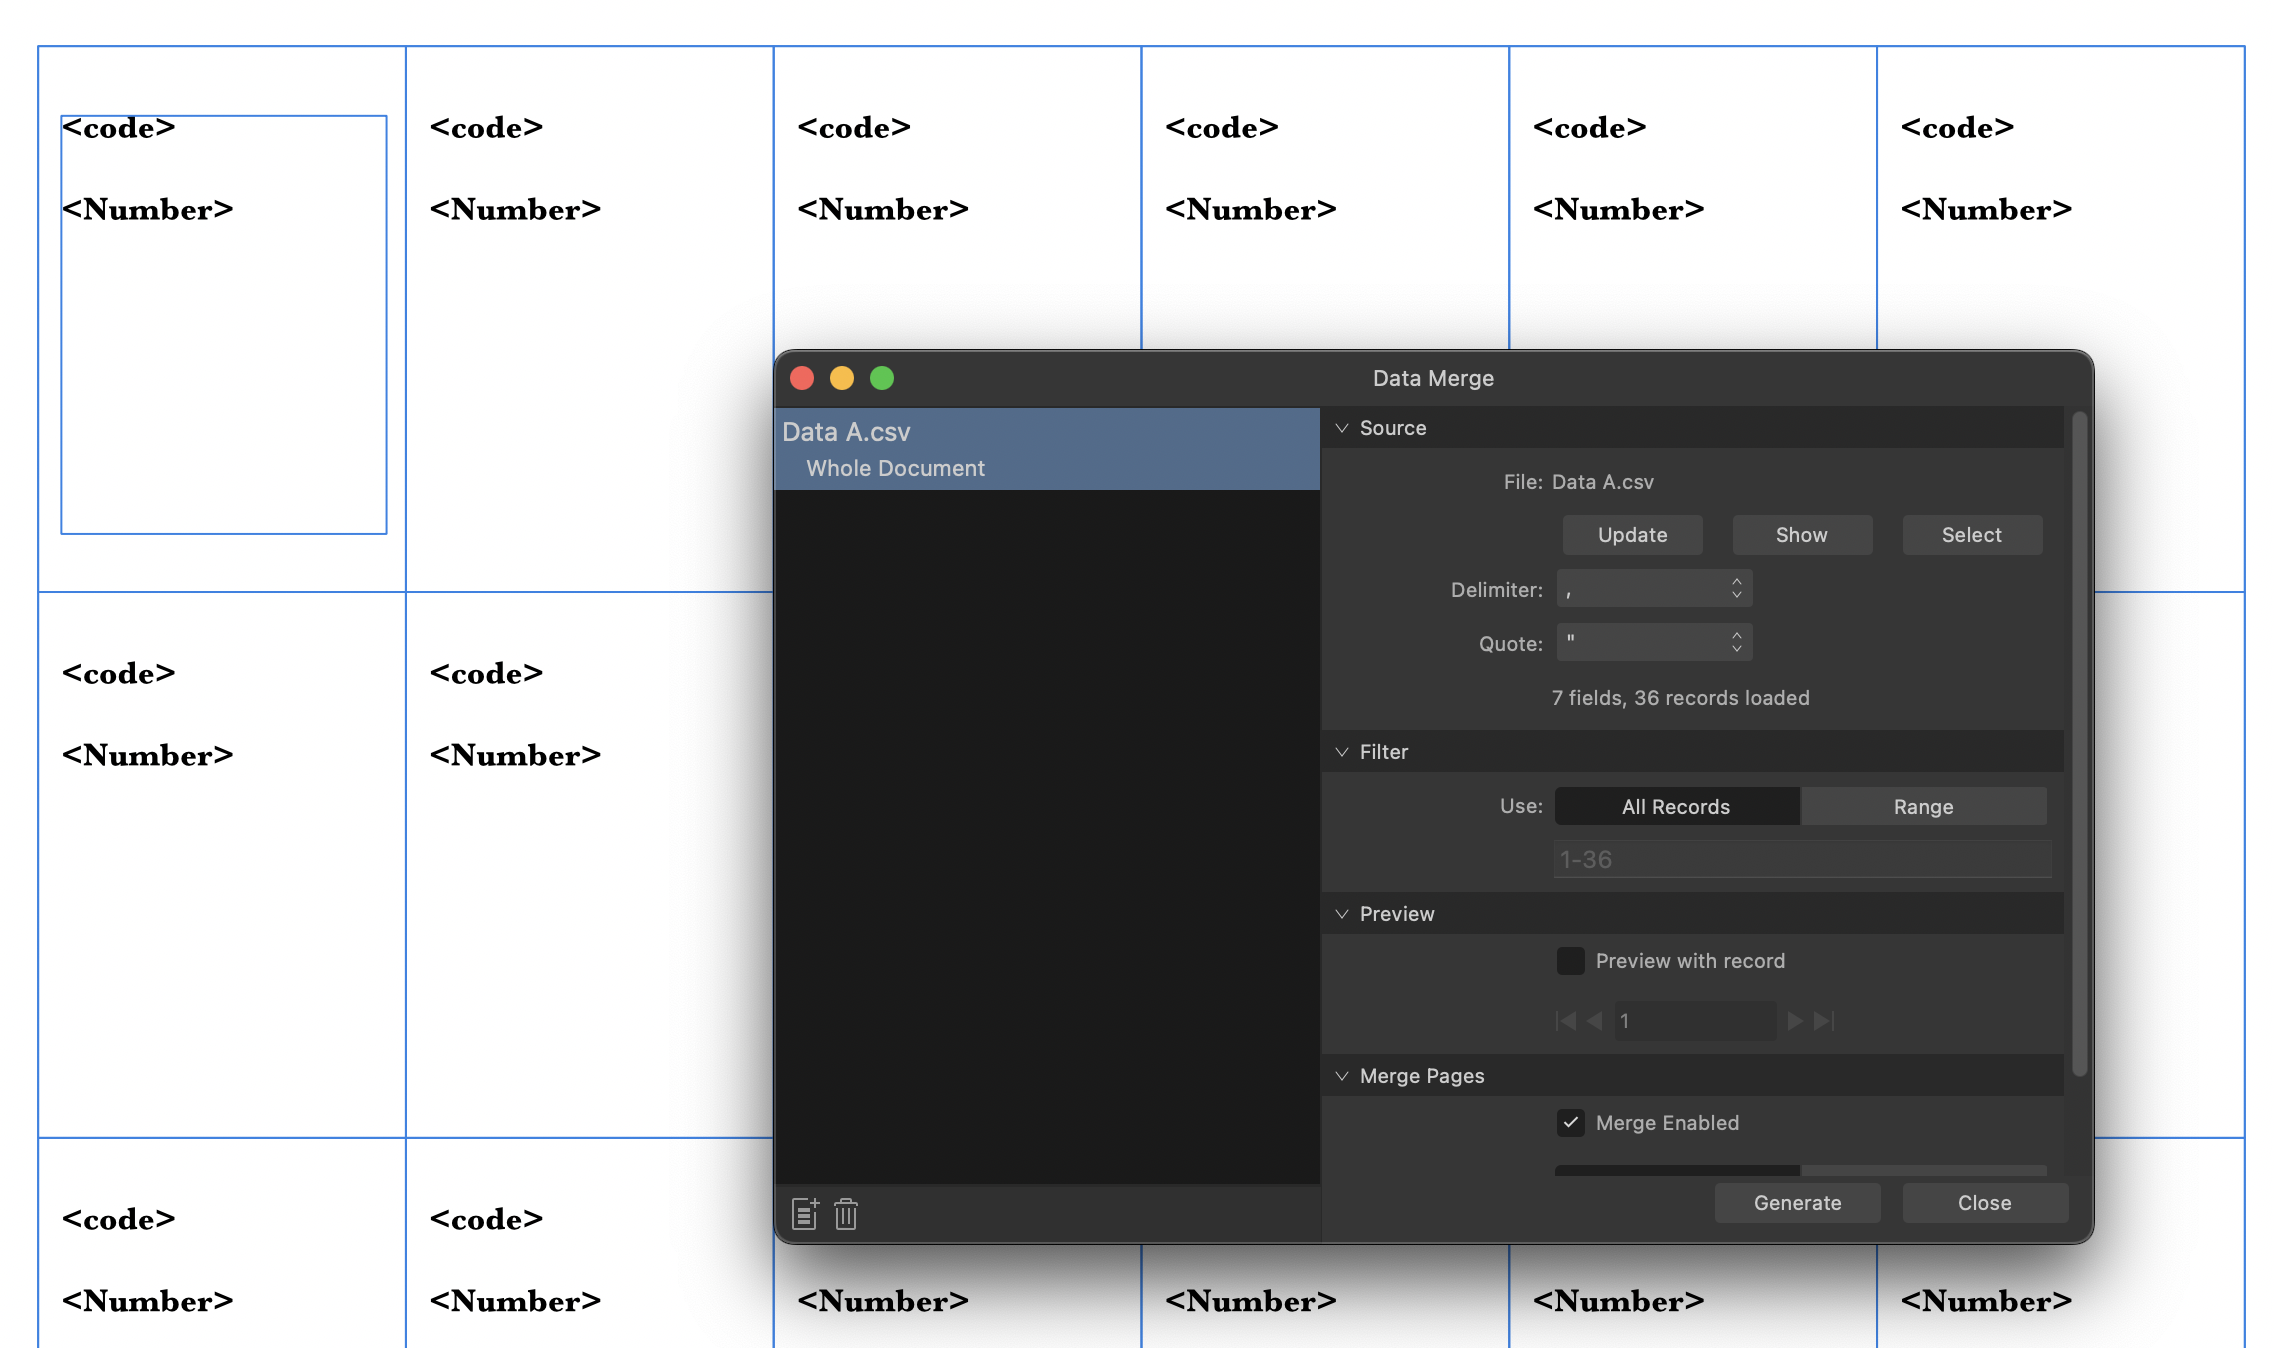
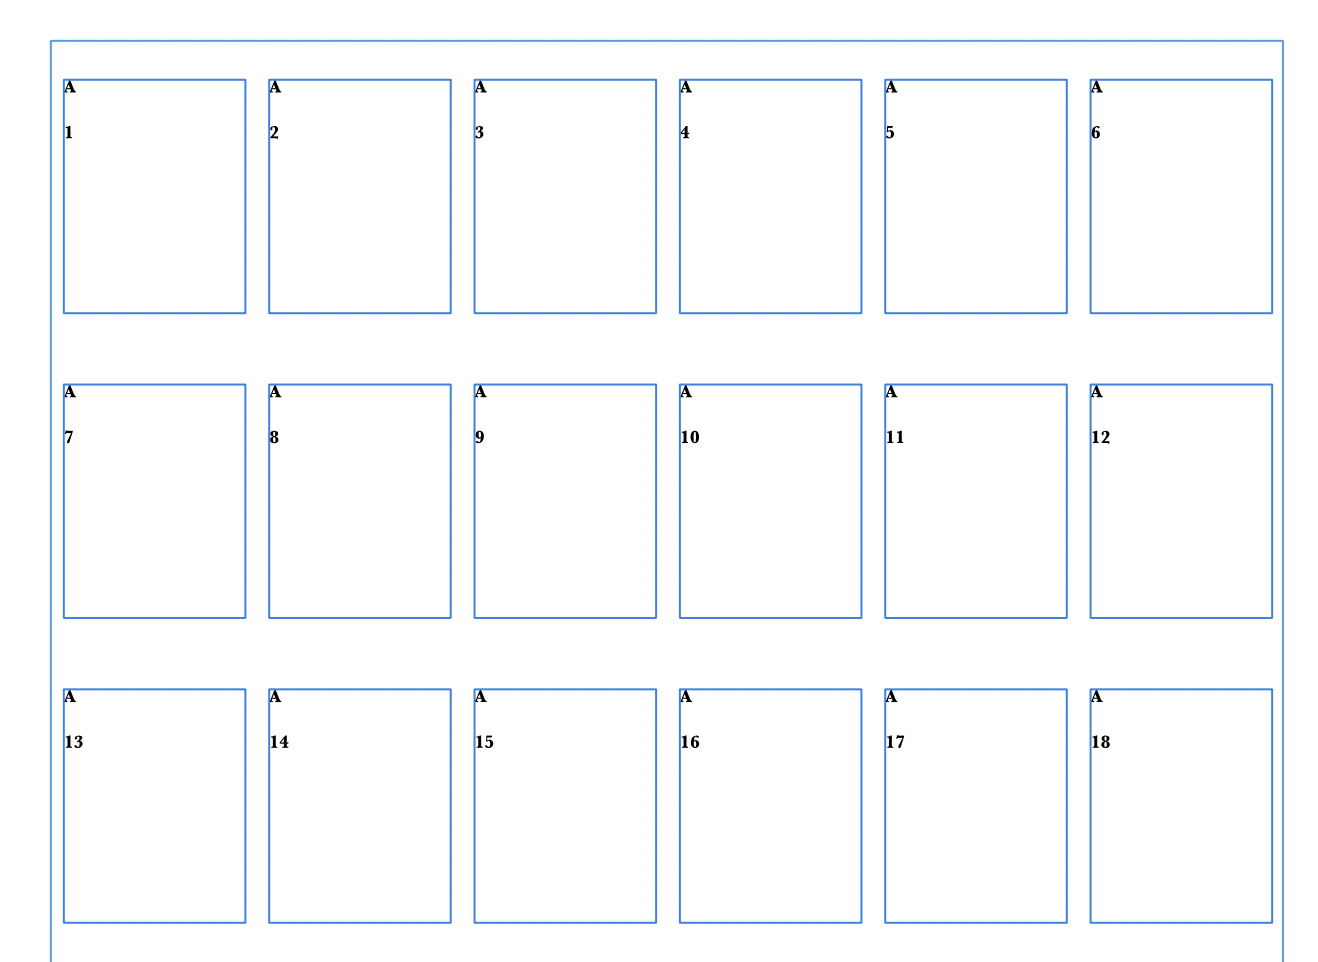
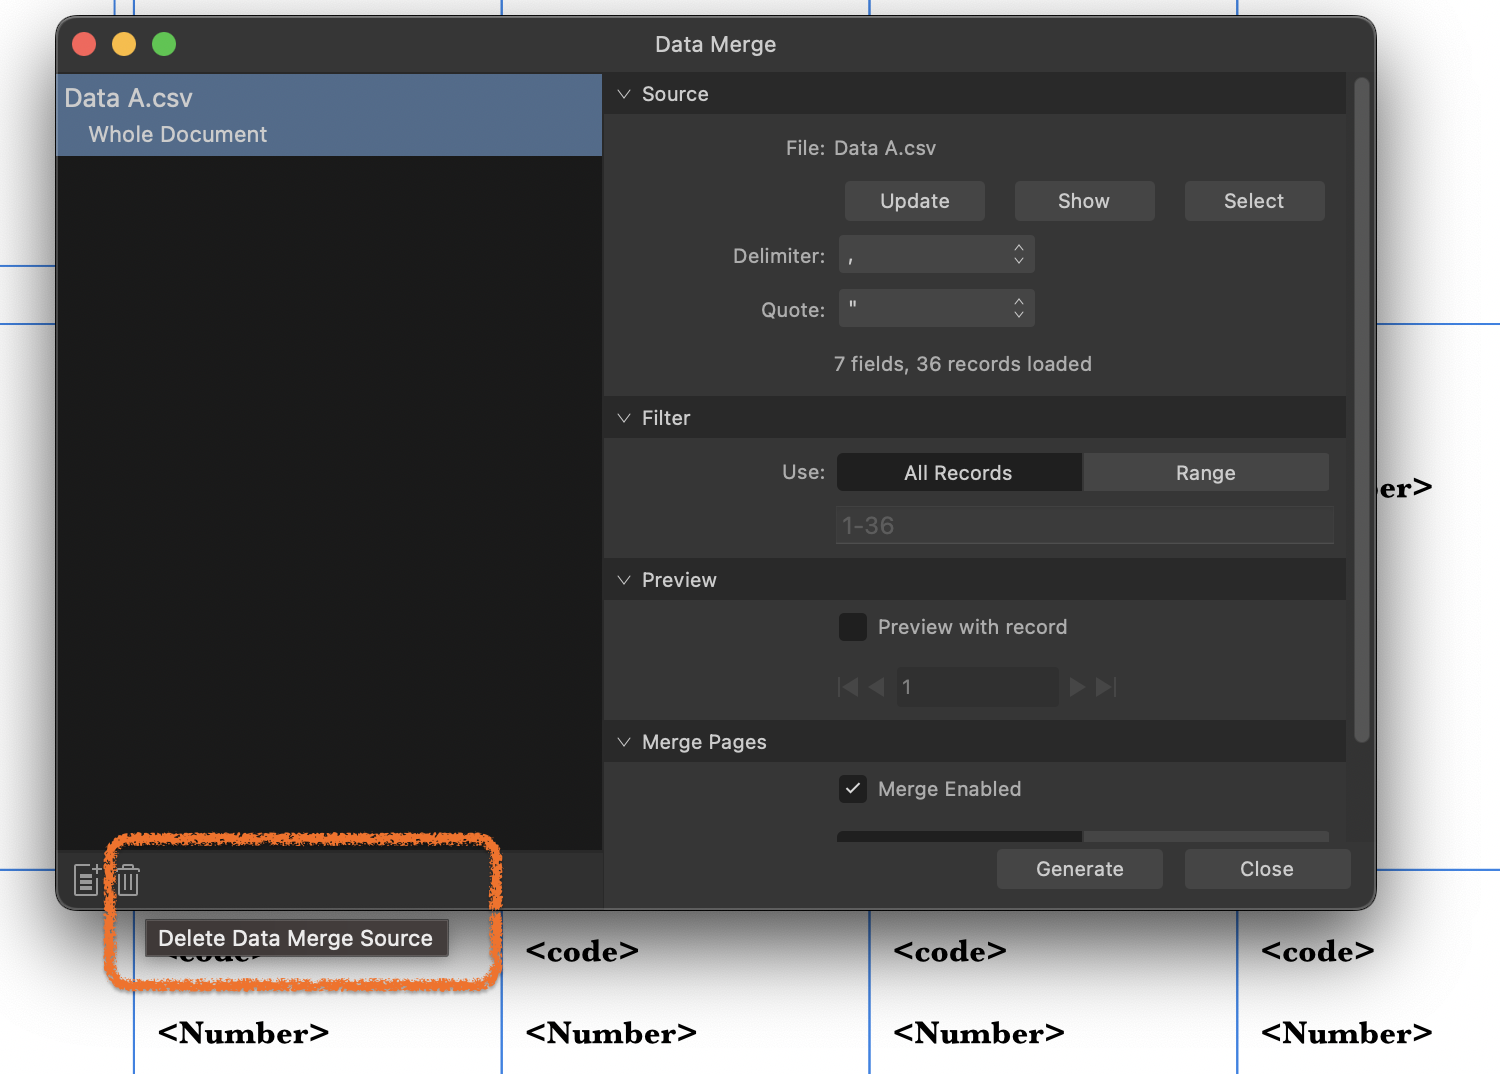
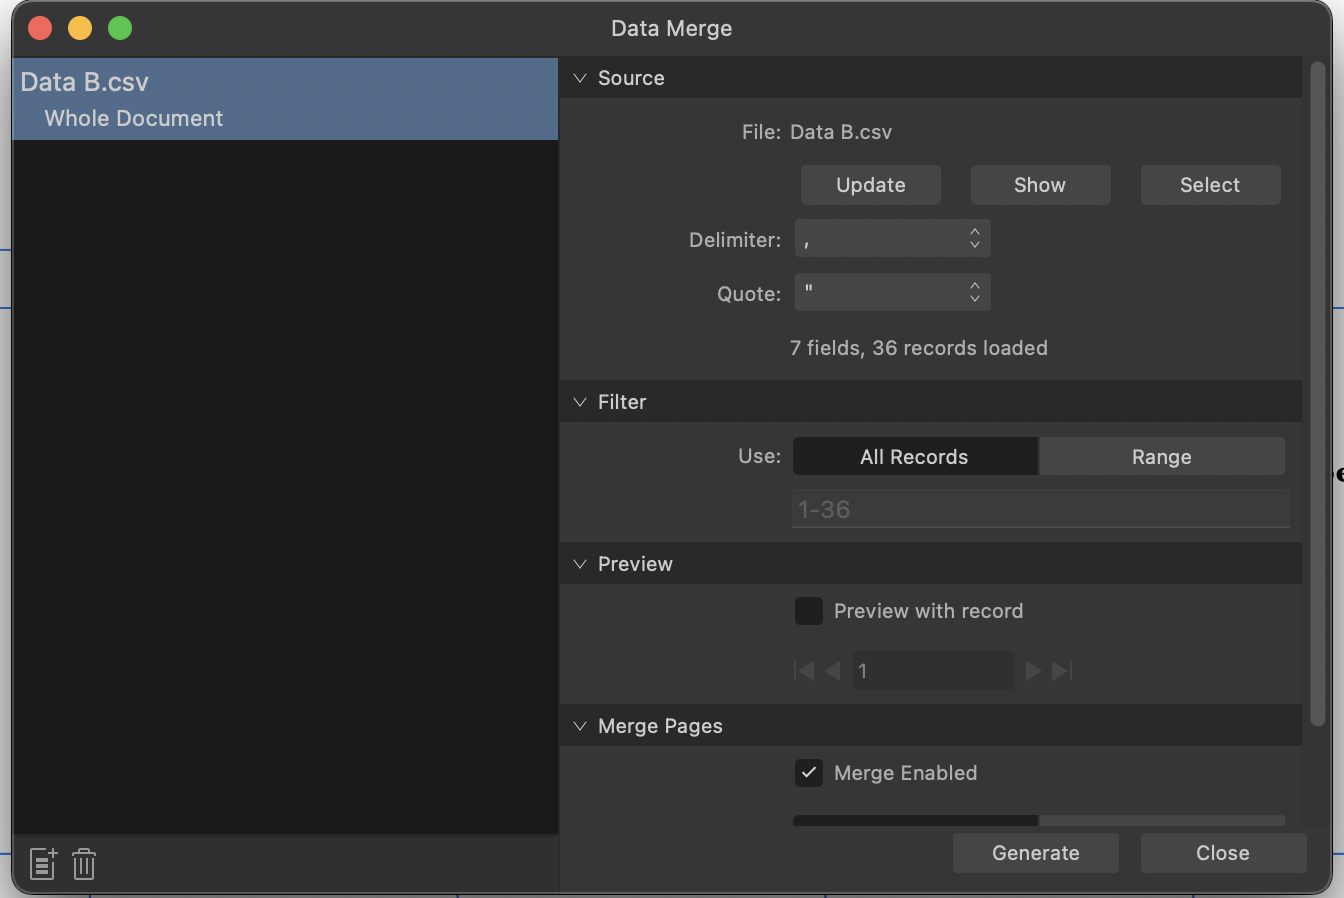
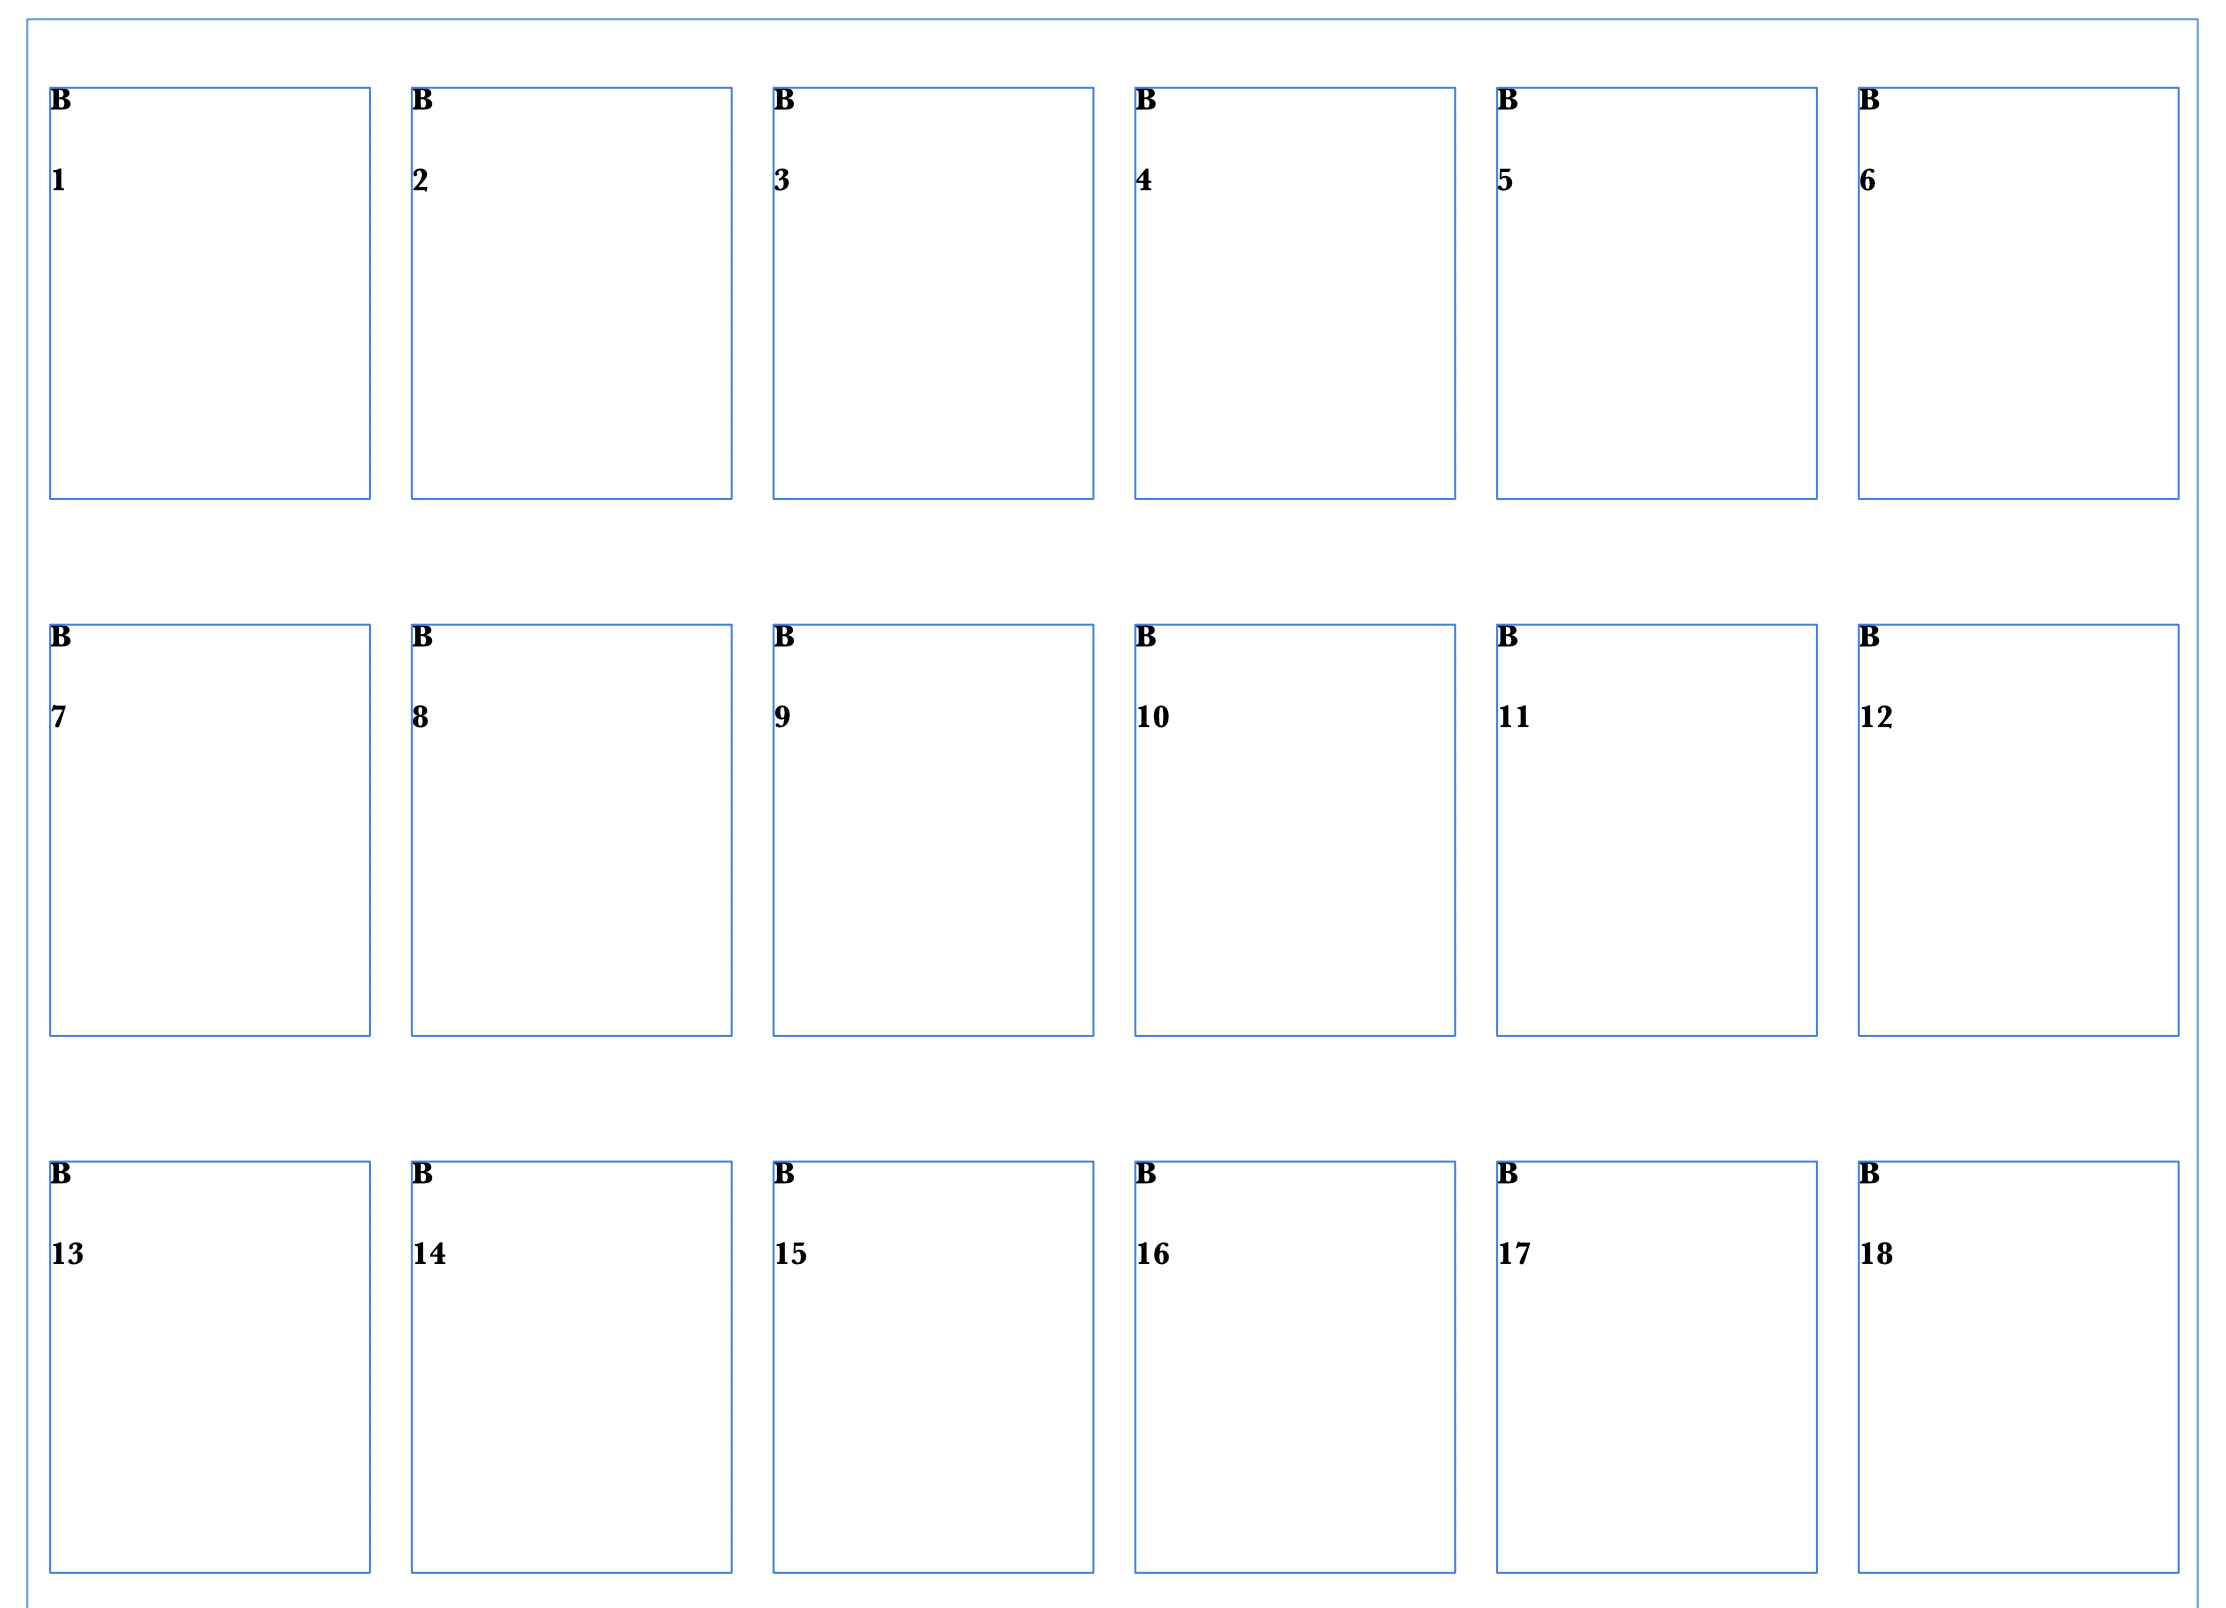
You will definitely need a data source to start with, in order to generate the fields for the merge. You can't just type them into the Merge Layout document: they have to be inserted from the Fields panel. However, if your different sources have the same data structure and field names, you can delete the original source in the Data Merge manager and add the second source to your existing Merge Layout document. Brief illustration. Here I've got a 6x6 Merge Layout document with two fields ('code' and 'Number') generated from Data Source A: When I click Generate it creates a new merged document. The 'code' in each case is just the letter A, the 'Numbers' are sequential from 1-36: I save and close my A merged document. The data merge layout document is still open. In the Data Merge Manager I delete Source A: And replace it with Source B by clicking the insignificant little icon at the bottom left: Source B is identical in structure to Source A, and has identical field names, but the 'code' fields have been changed to the letter 'B'. I click Generate again and a new merged document is created, this time with the data from source B: So basically you can re-use your Data Merge layout with different sets of data, as long as the data structure and field names are the same. Hope this helps.
-
There's a free 30-day no-obligation unrestricted trial. Give it a try.
-
I did manage to get this screen grab from the Nik Analog Efex Pro 2 plugin: LUT's will also work but they're less open to experimentation... (Original image from Pixabay in the Stock Panel.)
-
Wouldn't we all? 😋
-
I can't take screen grabs of the plugin interface for some reason, but here's a before and after of the default Wet Plate setting:
-
If you can snag yourself a copy of the original free Google Nik Collection (download instructions here among other places) Analog Efex Pro 2 should do all you desire. It has almost infinite combinations of retro settings. Works for me in Photo v2 running on macOS Ventura.
-
Startup configuration
h_d replied to Kenneth Weidlich's topic in Desktop Questions (macOS and Windows)
Bitte sehr! -
Startup configuration
h_d replied to Kenneth Weidlich's topic in Desktop Questions (macOS and Windows)
Yes: create a text frame with the default 'No Style'. Change to the font, size, weight, leading etc that you need. Then go to Edit - Defaults - Save: The next time you create a new document, the default 'No Style' will have the settings you made previously.
-
Hi @Mr Merlynn and welcome! None of the Affinity programs support audio or video, or export in any e-book format, so I think you'd need to look for a different product.
-
Can't help much more with your problem but I, Robot (note the comma) is by Isaac Asimov not Arthur C Clarke.
-
Shift + Return (as opposed to Enter) applies a soft return for me in both Frame Text and Artistic Text in Affinity Designer 1.10.6 on macOS Ventura. So I don't believe it's a bug. My laptop keyboard doesn't have an Enter key: if you have a full-size keyboard with an Enter key to the right of the number pad, then the shortcut may not work. Have you tried holding down Shift and pressing the main Return key while Shift is still held down?
-
Fonts and transferring text from Apple Pages
h_d replied to acajohn29's topic in Desktop Questions (macOS and Windows)
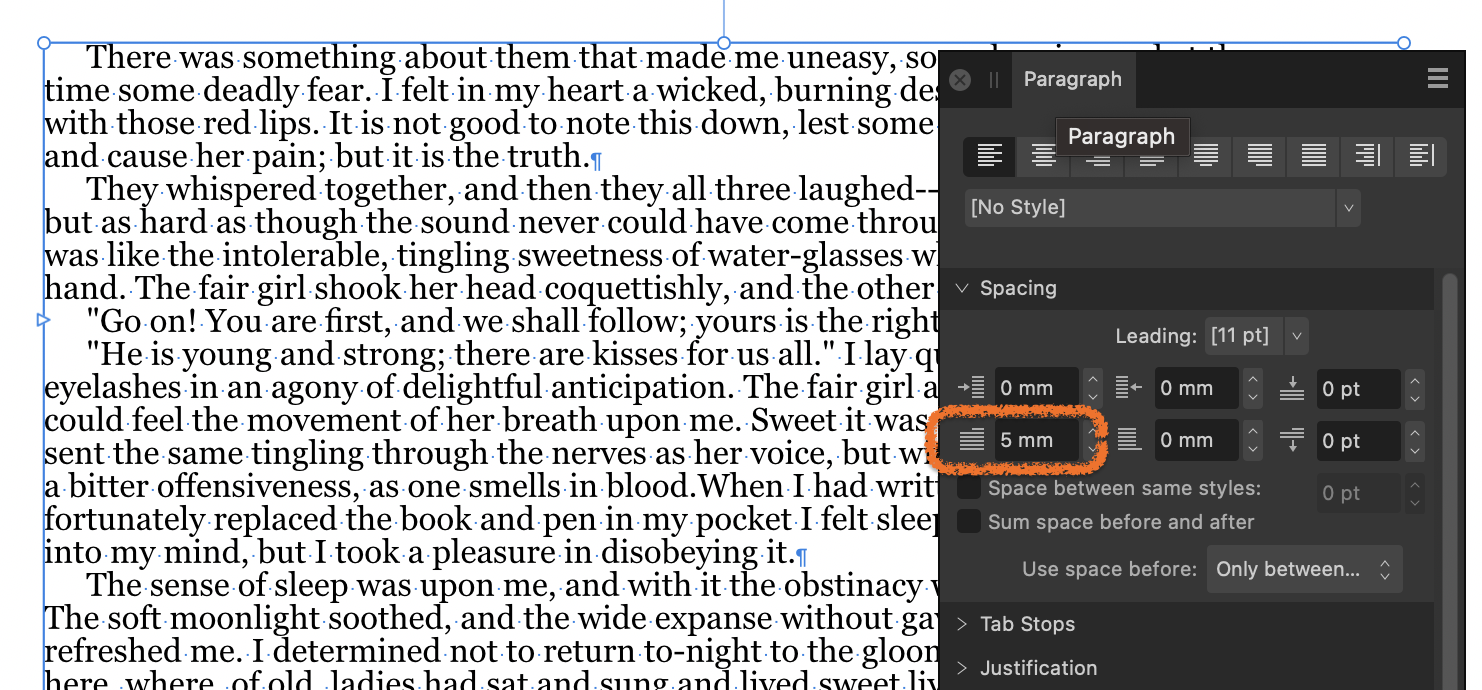
If I set up a style - here 'Transfer' - with a 5mm first line indent in Pages, apply it to a run of text... and then copy and paste the text into APub2, the resulting text in APub2 also has a 5mm first line indent: If you really do want to use tabs to indent text, then you could always Find and Replace in AFP. Search on the double tabs and replace with single tabs, rather than replacing each one manually.
-
Find and replace a specific colour in a picture
h_d replied to Maximilian's topic in Desktop Questions (macOS and Windows)
Hi @Maximilian and welcome to the forum. It's not a 'specific colour", though. It's a range of colours (mostly light-grey-purples). Even in your screenshot I can see the stripes. And the shadow has been cropped off. If it were me, I would delete the entire background to white and then paint in a light shadow using a soft brush. Your average punter isn't going to be too concerned about its precise placing as they focus on the bottle. -
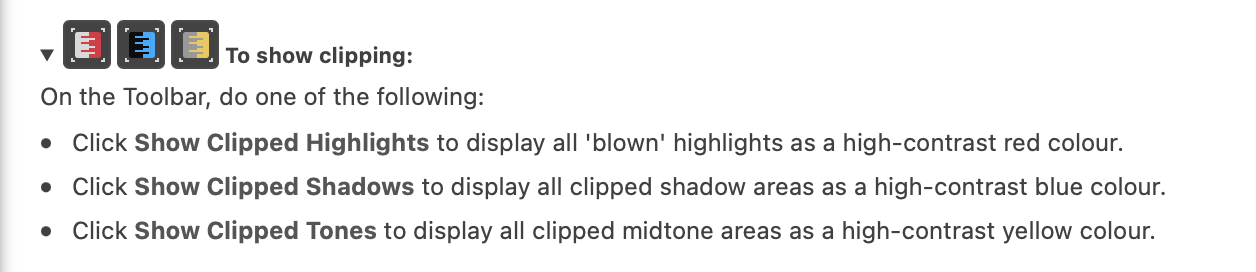
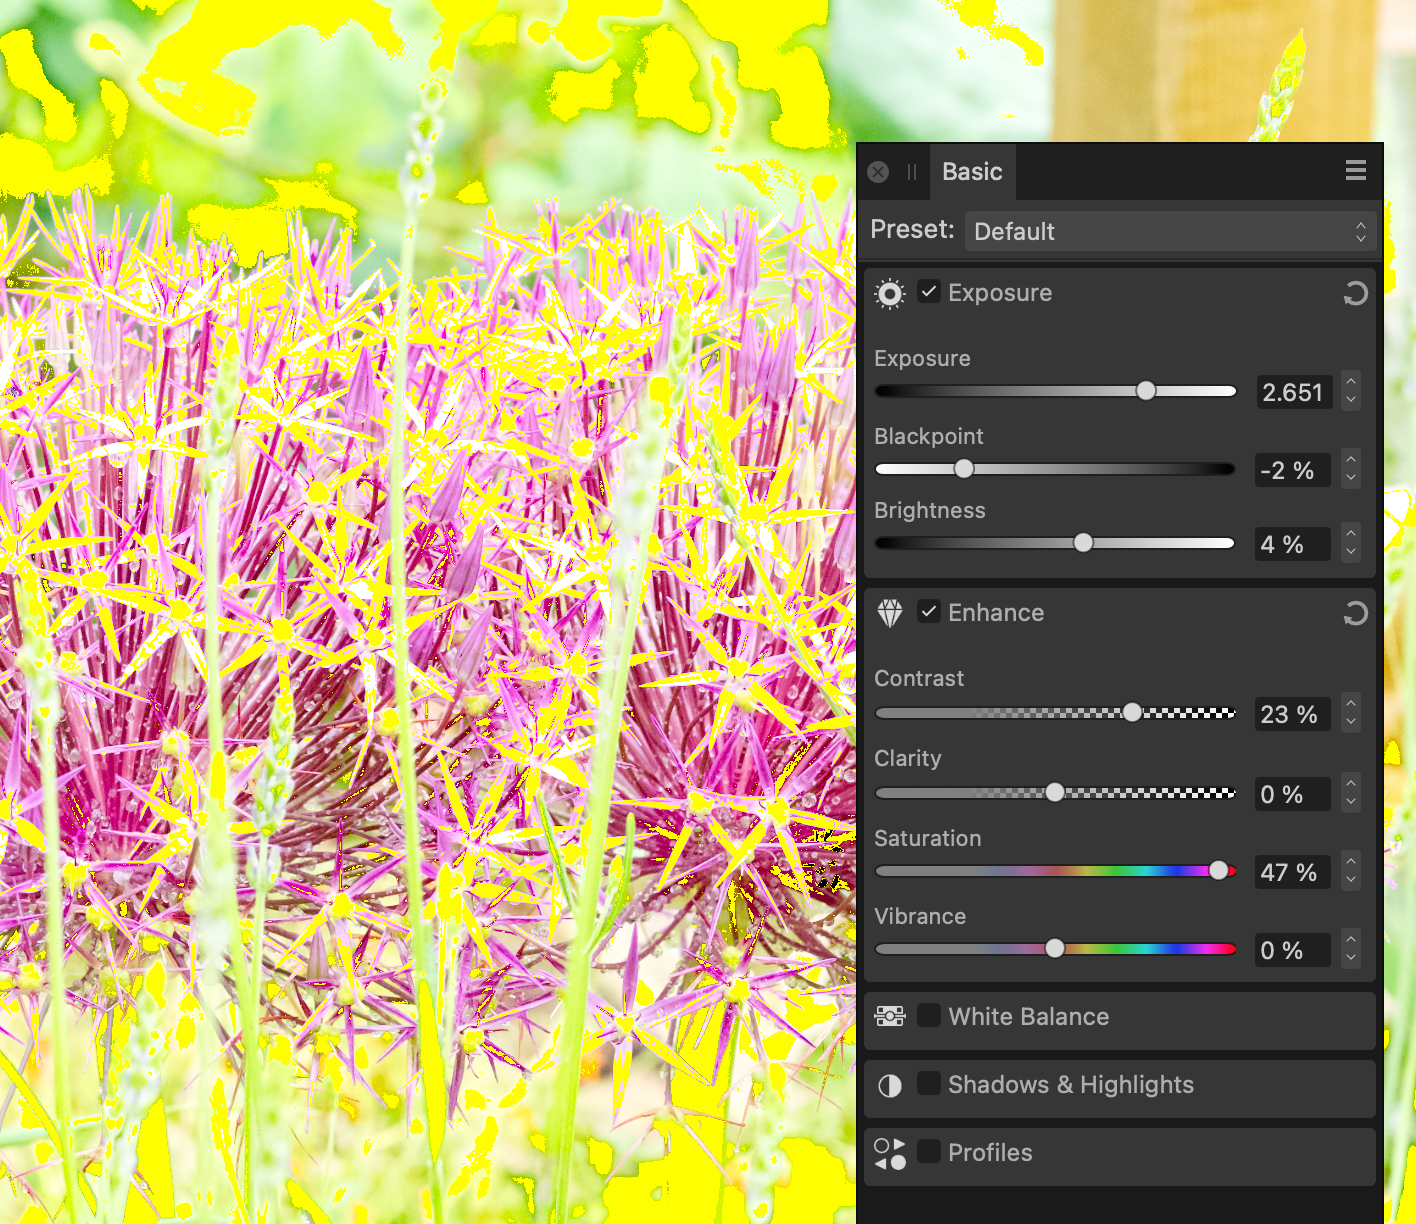
From the Help: Maybe the Show Clipped Tones button should say 'Show Clipped Midtones'. I only see clipped midtones if I boost exposure, saturation and/or contrast to very (approaching ludicrously) high levels:
-
It must be a Windows/Mac thing but on macOS, if I press Tab to toggle the UI then the only thing that does remain visible is the line at the bottom described by @JMichael in their original post 🤪
-
EXIF display error in Affinity Photo 2
h_d replied to Gregoir's topic in Desktop Questions (macOS and Windows)
@Gregoir You don't say what format the iPhone images are. If they're .heic rather than .jpeg, then it would make a certain amount of sense because both .cr3 and .heic images use QuickTime format. And the QuickTime specification for integer-format times is UTC rather than local time. I'm not sure how that squares with your time zone/daylight savings settings, but I think it's possible that Affinity Photo isn't accounting for them correctly. All the gory details are at the ExifTool QuickTime Tags page. -
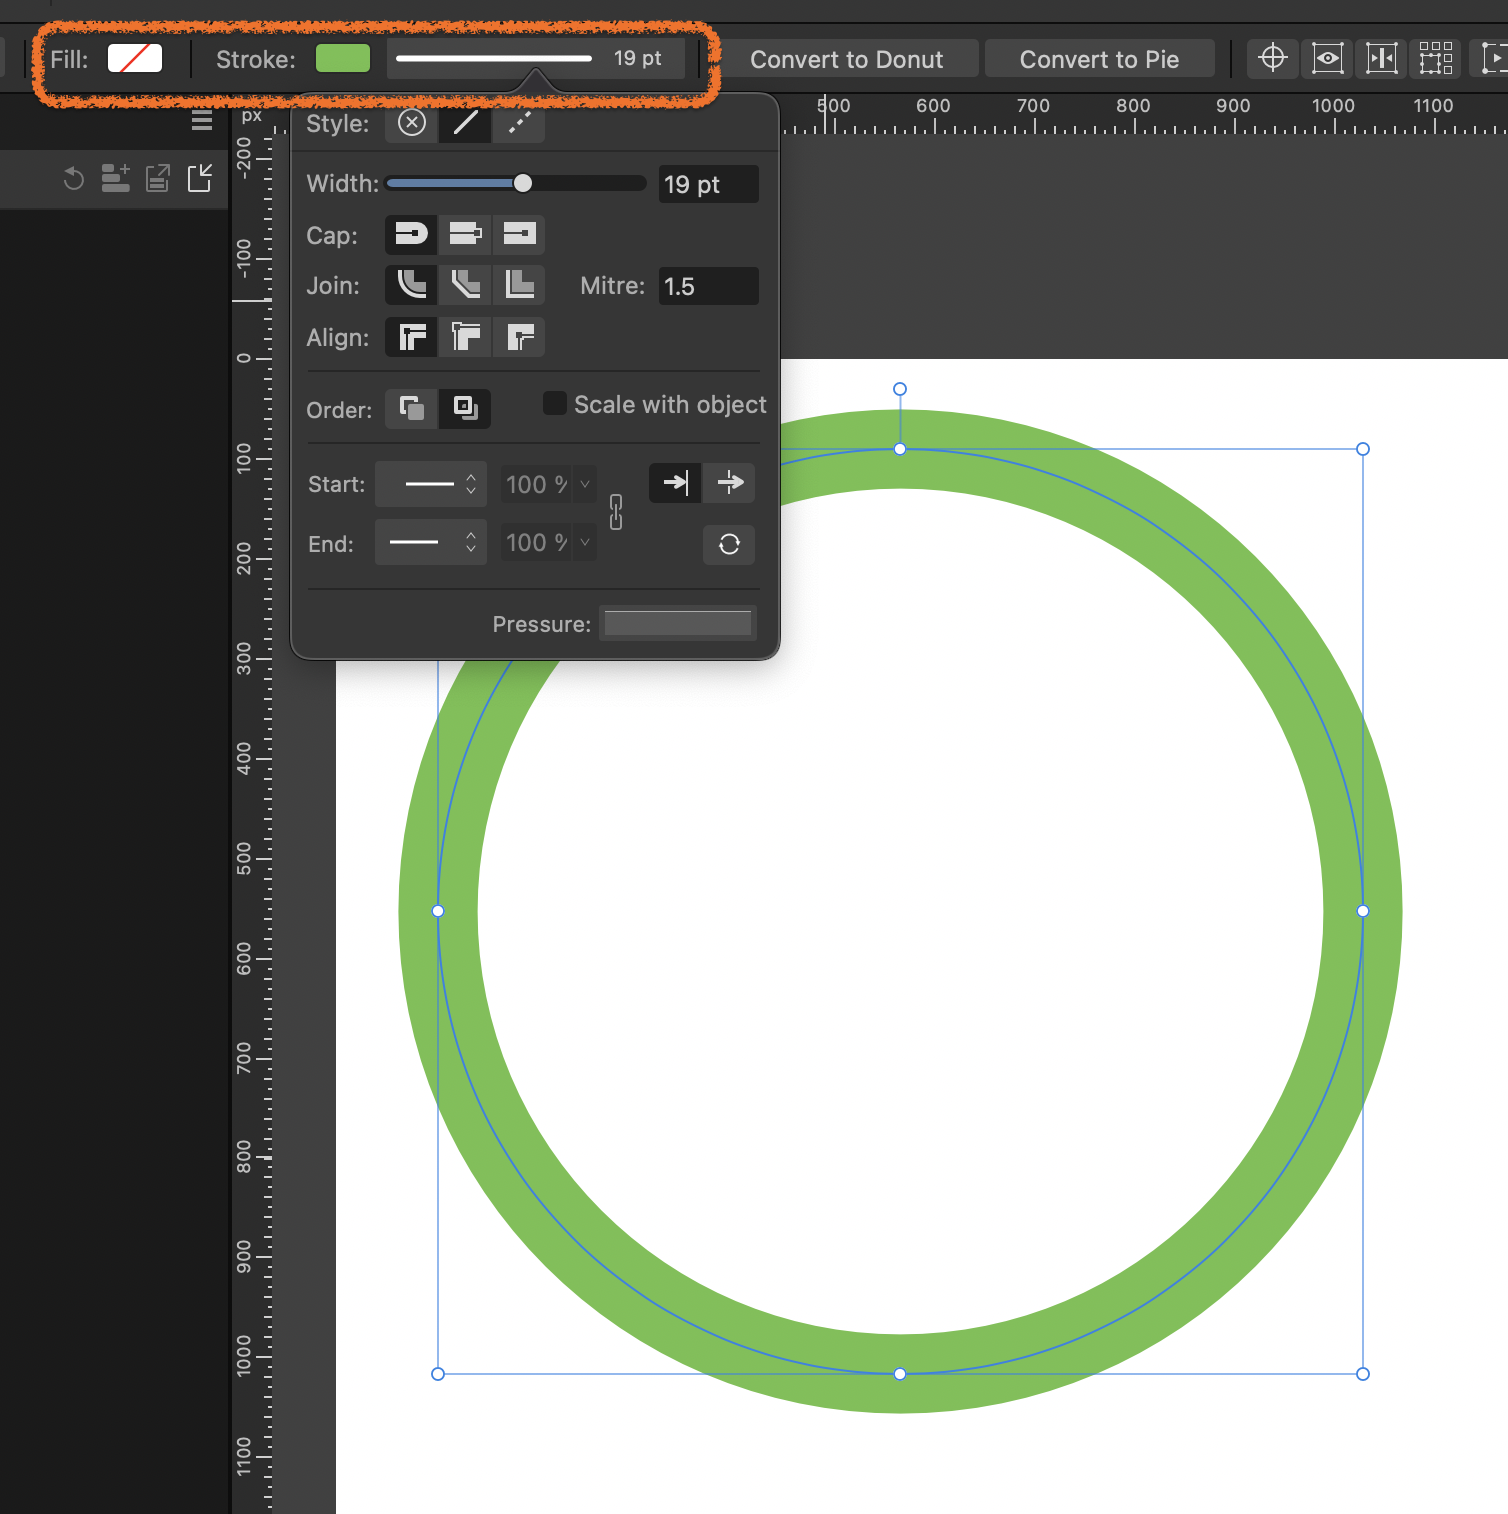
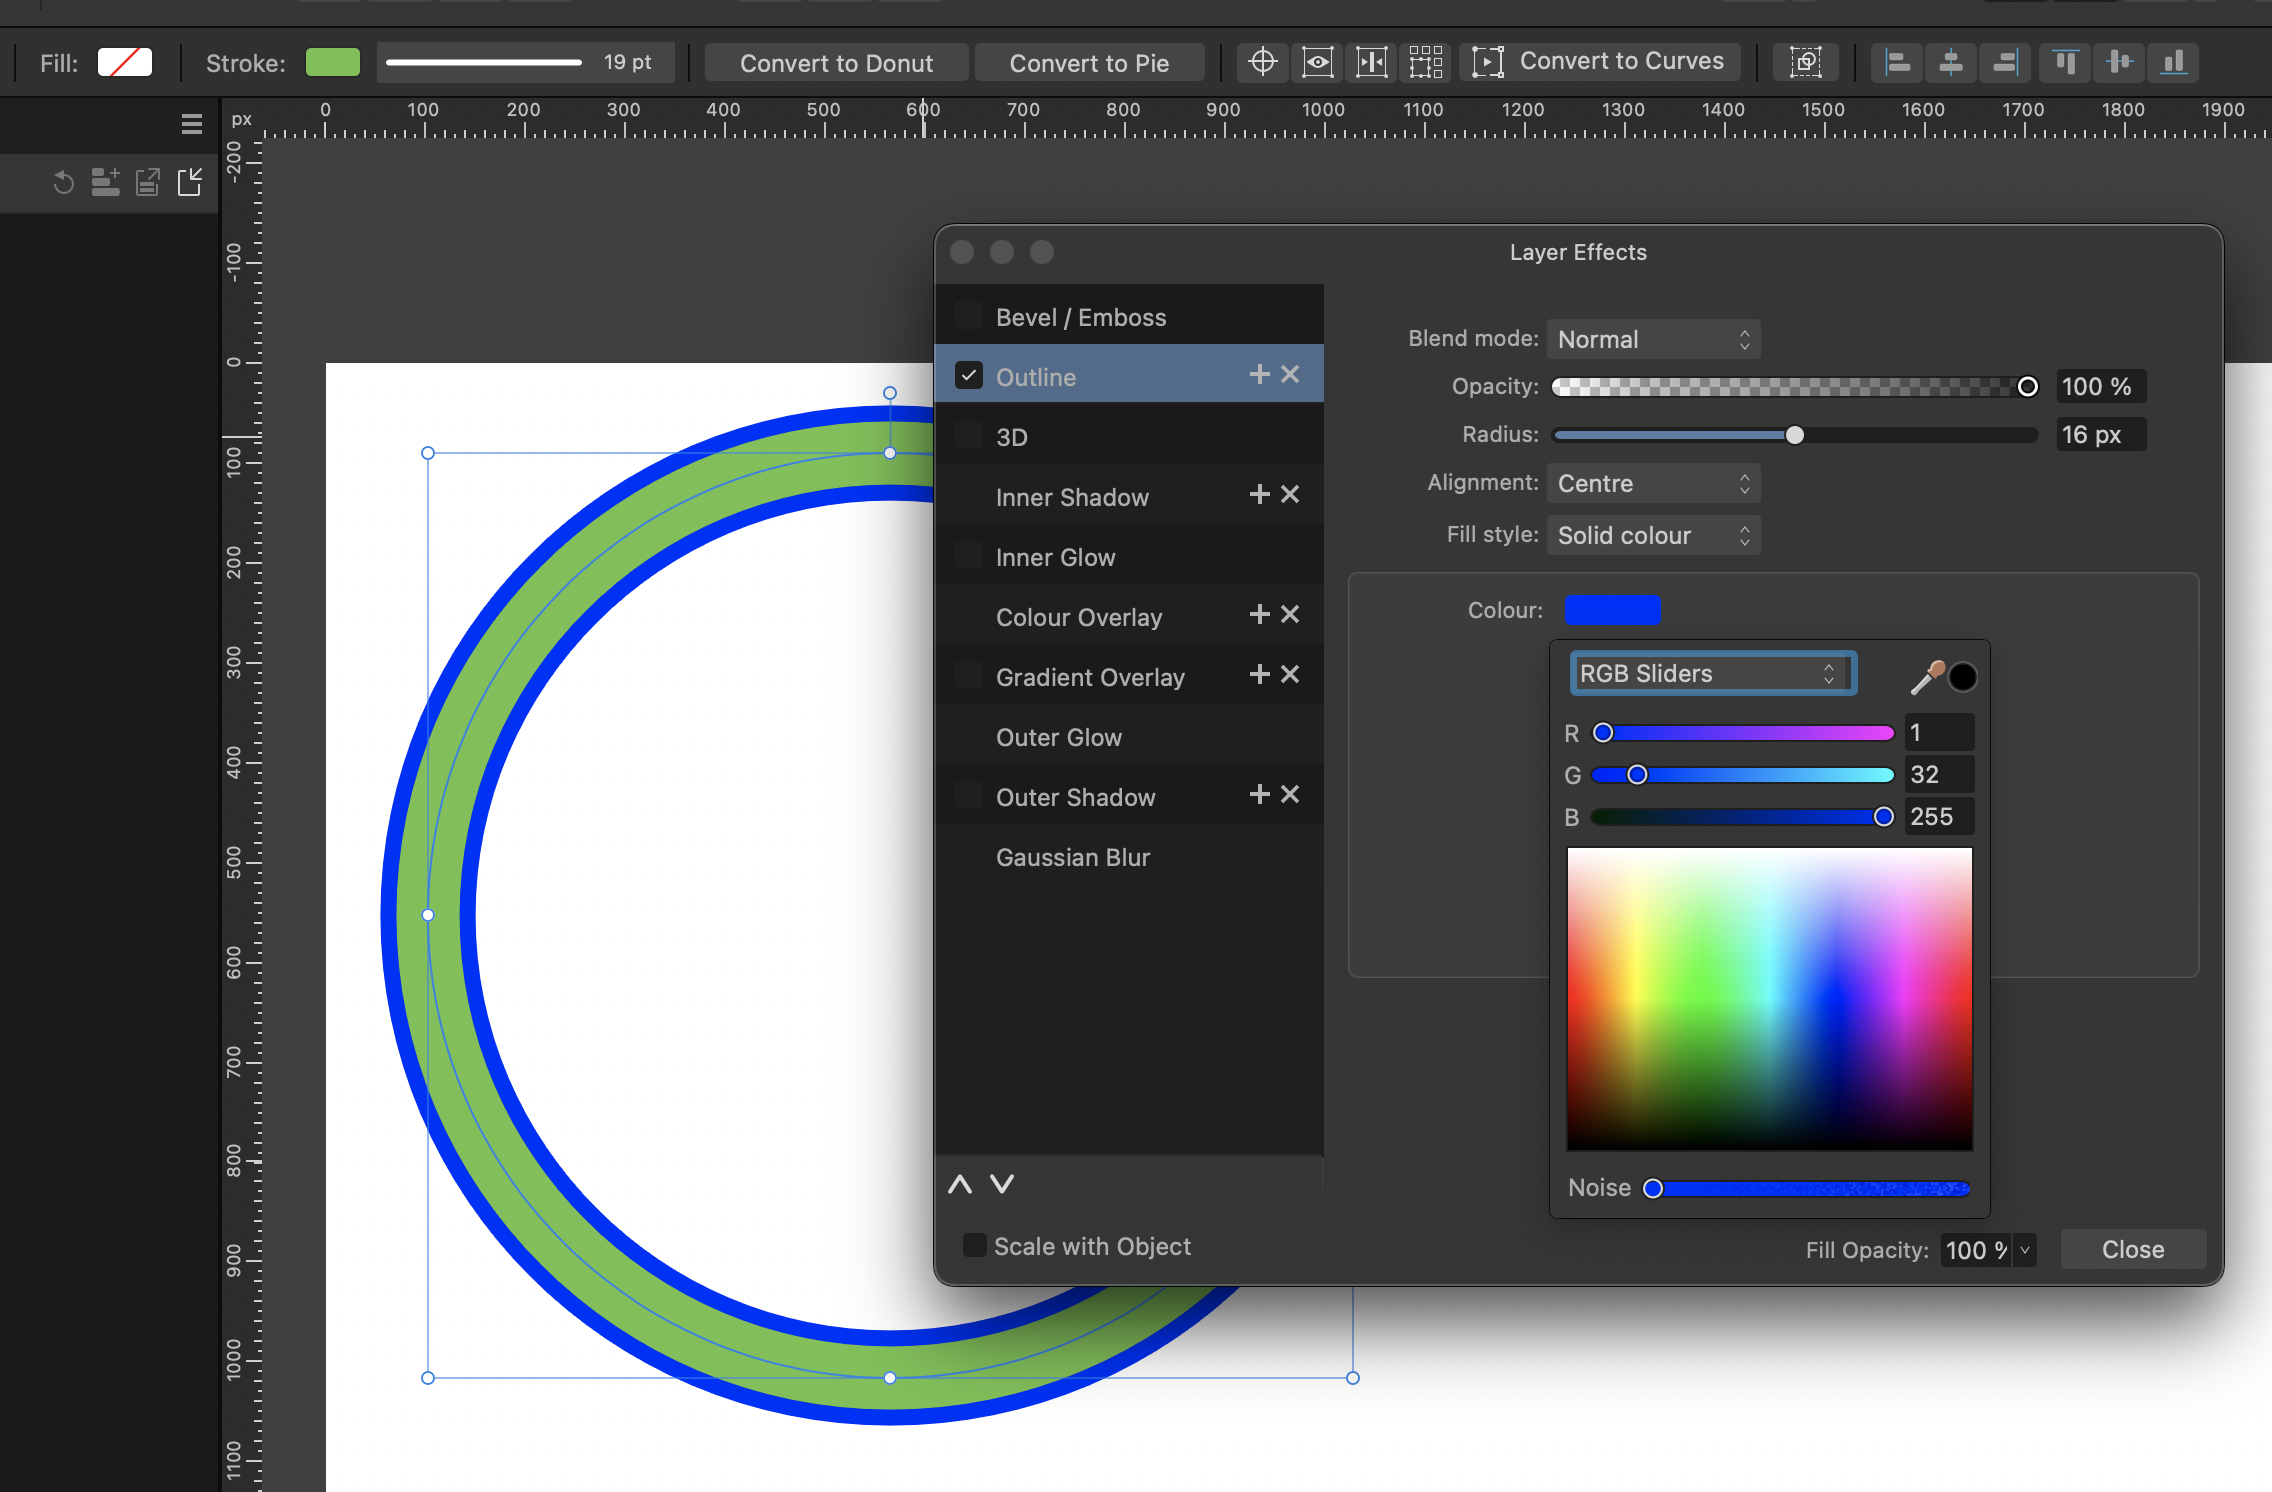
Affinity Photo V2 outline FX
h_d replied to jinnyjinny's topic in Desktop Questions (macOS and Windows)
If you just want a simple stroke, then use the Stroke controls in the Context Toolbar (highlighted in your final screenshot and below) rather than Outline in Layer Effects: Layer Effects (confusingly called 'Quick FX' in the menu) will only be applied if the object has a defined fill, or stroke, or both: And if the object has no fill, the Outline effect will be applied to both the inside and the outside of the Stroke.d
-
Or replace the carpet...
-
You could use the Selection Brush to select all the dark red cushions, then apply an HSL Adjustment. Optionally deselect, then adjust Hue and Saturation to modify the colour: Very rough attempt above based on the downsampled/compressed .jpg generated from the forum.
-
What happens: In Affinity Photo v 2.0.3, open an image in Photo Persona. Apply a Live Filter (I tested with Gaussian Blur and High Pass). Set the Blend Mode to anything other than Normal. Gradually reduce the opacity from 100% to 0%. The effect is lessened until the slider reaches 0%, when the effect is applied at 100% opacity. Video illustrates the effect with Gaussian Blur, Blend Mode set to Darken: Screen Recording 2022-12-31 at 11.57.38.mp4 What I would expect to happen: setting the filter layer's opacity to 0% should result in the in filter having no effect, as it does in Normal Blend Mode.