Search the Community
Showing results for tags 'positioning'.
Found 17 results
-
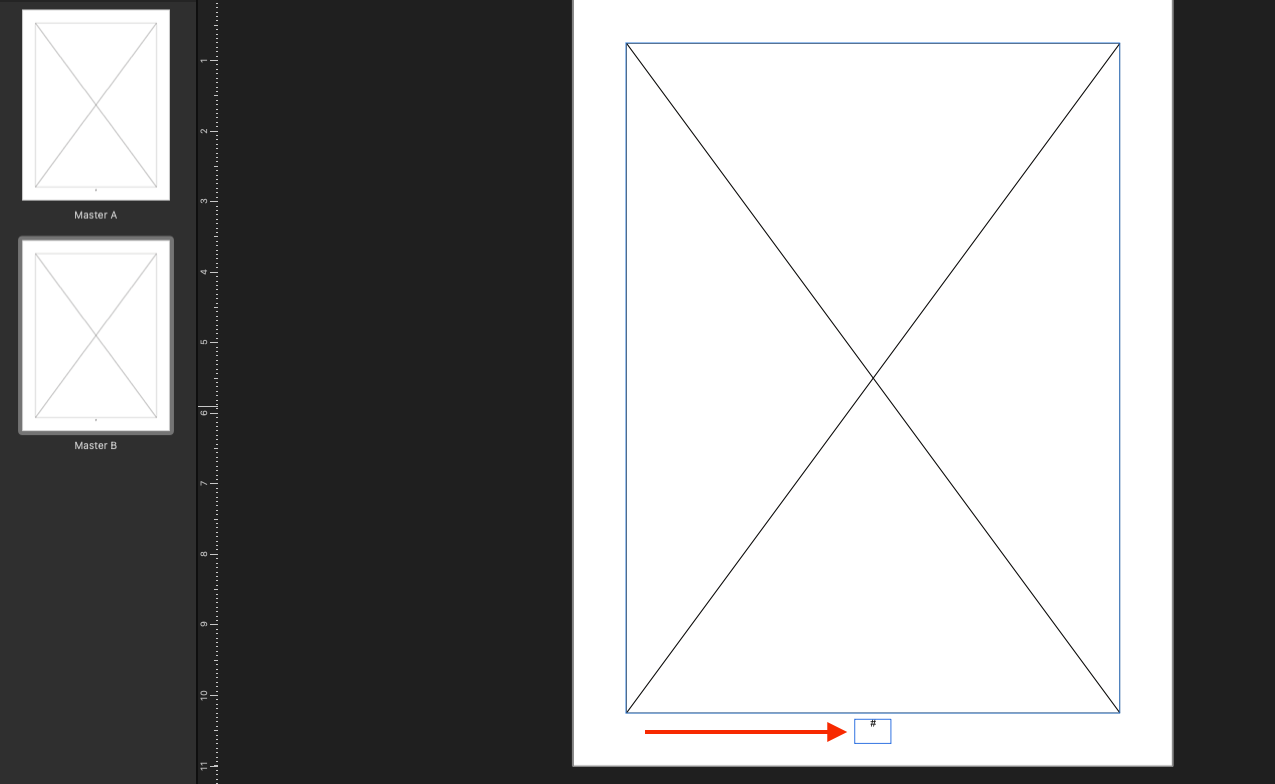
 I have page numbers on Master A and Master B. I want to make sure they are aligned. How do I find their position on the page so I can drag it to position? Maybe, there is another way.
-
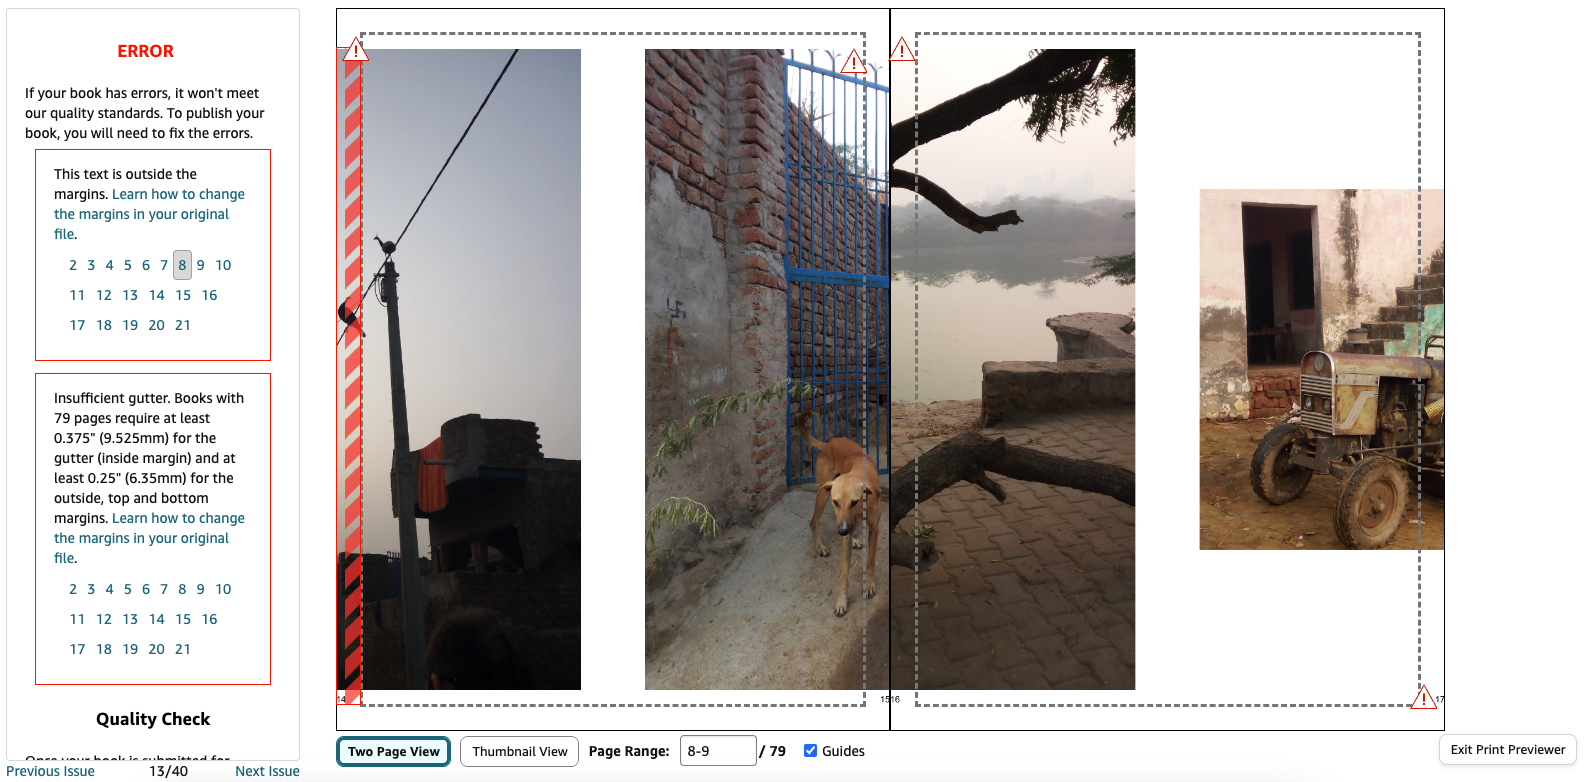
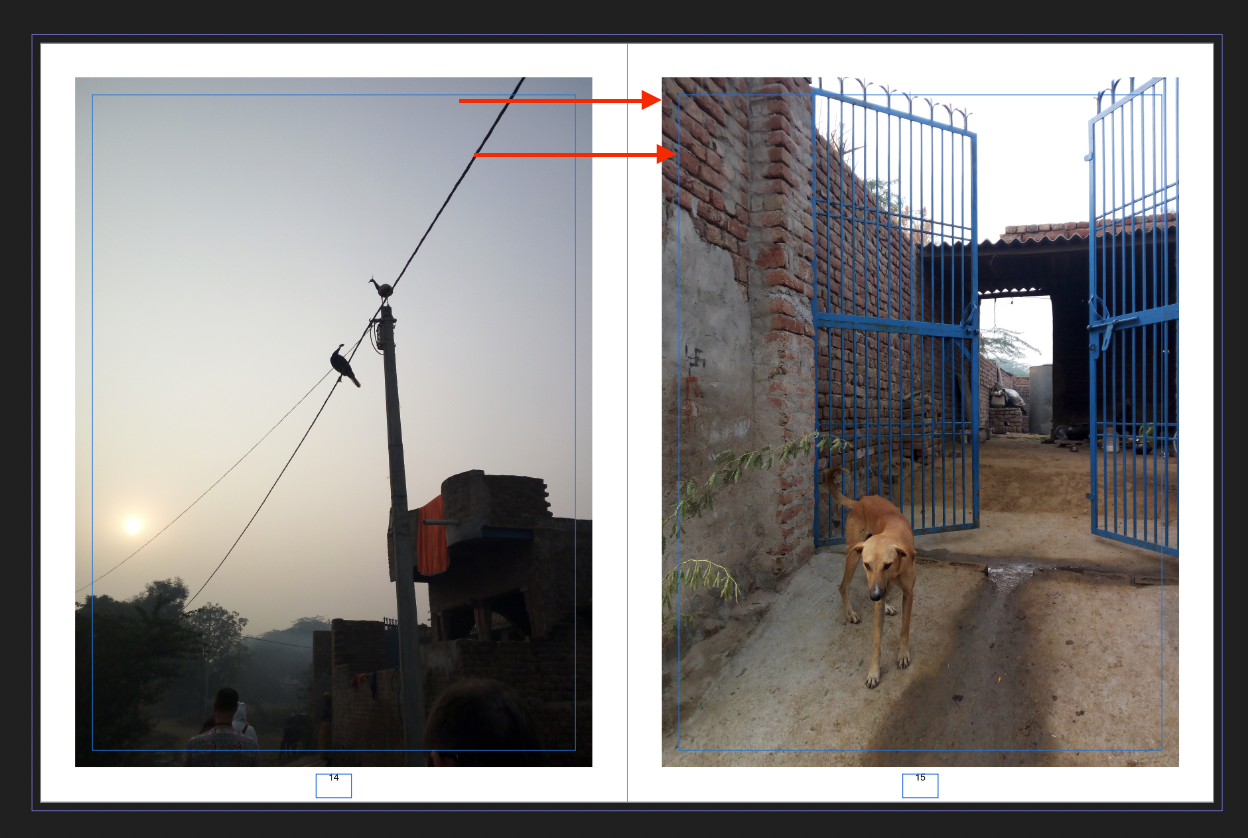
Been using Affinity Publisher for the 1st time over the last 3 days to create a photo book. Today, I submitted it to KDP (manuscript and cover) and I received the below error on their Preview. Please see attachment 1. Is the error because of the photo extending outside of the blue border as seen in attachment 2 with red arrows? Initially, I just dropped the photo into the Picture Frame Rectangle (set it in the Master template) without any resizing or position. Perhaps, I need to squeeze it within the blue frame as seen in attachment 2. If so, is there a way to do it bulk across my 150-odd images? There is a photo per page. If bulk editing isn't possible, what is the quickest way to push into the blue box without playing around with the edges?
-
 I would see only advantages in a function, that would allow me to swap the position of 2 objects. They don't even need to be the same dimensions. They don't even need to be the same type (image, group, font...). For a flyer I am arranging lots of objects. In my case images, that all have the same size. And I have to arrange them in a grid layout. Now I really "waste" a massive amount of time by moving them into the correct positions. Checking how the images look, if I swap 2 images - e.g. one pic from 5th row/2nd column to 1st row/ 6th column and the other pcitures vice versa. It would genius, to just select two objects and hit a command key and they will be swapped. It would save soo much time instead of dragging and hoping that snapping works fine. And that Publisher orientates on the adjacents objects correctly. Be For me: the fastes way (because of using shortcuts) is: cmd+c object1 - I wanna move from A-to-B cmd+v and move the duplicate of object1 to B - it's correct position (above object2), then cmd+x the duplicate, to see object2 again select and move object2 to the position of the old object1 cmd+v to get get the duplicate of object1 and do the same cmd+x, delete,cmd+v stuff for getting rid of the old object1 and having object 2 only I miss this option since years, when I started working with Affinity Designer. Thanks in advance!!! Schubi
- 18 replies
-
- 1
-

-
- affinity publisher
- positioning
- (and 1 more)
-
 Hi, I'm using Publisher 2 on two computers and I'm finding on some documents when I create on one PC then open later on the other that the text has moved vertically within the text box. I've checked baseline positioning in the character panel on both PCs and both are set to 0 - although I can correct for the issue by changing this value. Is there anything else that could be causing this? Thanks.
 -
Unless I'm missing a setting somewhere, objects created on a page will have the Y axis in relation to the page you are working on. The exception is unclosed paths / shapes, including straight lines, created by the Pen Tool which seem to have their Y axis in relation to the origin of the very first page in a document. This means that on p10 of my document the horizontal lines are showing an Y axis of 3044.8mm instead of 101.8mm! Oddly if you convert a rectangle to paths and then remove two of the nodes to create a straight line you get the correct positioning.
-
 Hi! I'm new to Affinity and this forums. Let me start congratulating the Serif them for their great products! Recently I bought the 3 of them very satisfied with them. I have one question though, Is there a way to create an element, say a rectangle, in a "pixel perfect" position? 😁 Every time I create an element, its created on "decimal or sub-pixel" position, let say 242.6 px (X Position) and 206.3 px (Y Position) then I have to manually fix those values deleting the decimal on each value. Personally I need a lot of "pixel perfect alignment". I had the same problem with the actual size of the elements, always creating a sub-pixel size elements, then I started to play around with the "Snapping Manager" checking and unchecking boxes until I found a correct combination of settings that allowed me to create full/whole pixel elements, and that's great! but now I'm stuck with sub-pixel positioning, and I can't find any other option that I can enable/disable in order to get "whole-pixel" positioning. Is there a way to achieve this? that when you create or move a vector element can be created or moved in a whole-pixel position or full-pixel increments? That would be great. Thank you all in advance! 😅
 -
Hey, guys, I cannot see any topic or solution to my question: Is it possible to set the text cursor as the center of the zoom while being in an active text frame? (I'm not sure how else to describe it ...) For example, coming from »Zoom to Fit«, with Ctrl++ I want to zoom to the cursor position in the text of a caption. I know that you can zoom to the text frame with Alt+Ctrl+0 (Zoom to Selection), but not to the actual position in the text. Instead, Ctrl++ zooms to the center of the text frame. Or am I missing something? Having to start typing to zoom in feels a bit prone to typos and imprecise. Cheers and thanks MrDoodlezz
- 1 reply
-
- 1
-
-
- text cursor
- zoom
- (and 1 more)
-
 I'm having a persistent issue with positioning some Tables on the page, and I can't seem to rectify it. I noticed while placing new tables that on occasion the table would align to the left edge of a column and is very difficult to change that behaviour. I think that layers are part of the problem - I've been able to correct most issues by fiddling with them, but not really understanding the problem in the first place, none of the fiddling made sense even though it worked. I've setup guides to regulate where the left and right edges of the table should be located. The right table edge snaps nicely to the guide. When I try to align the left table edge, the table appears to snap to guide as expected, but when I stopping depressing the mouse button, the whole table jumps back to the left margin and doesn't respect the already snapped right edge moving it left as well. I'm off to read about layers. While trying to deal with this I noticed that it appears my Master Page has been applied more than once - it appears in the layer list twice. Using the check marks to the right to change layer visibility seems to indicate that some of my content is using the first instance of the layer, while others are using the second instance. Any help much appreciated! Dale
 -
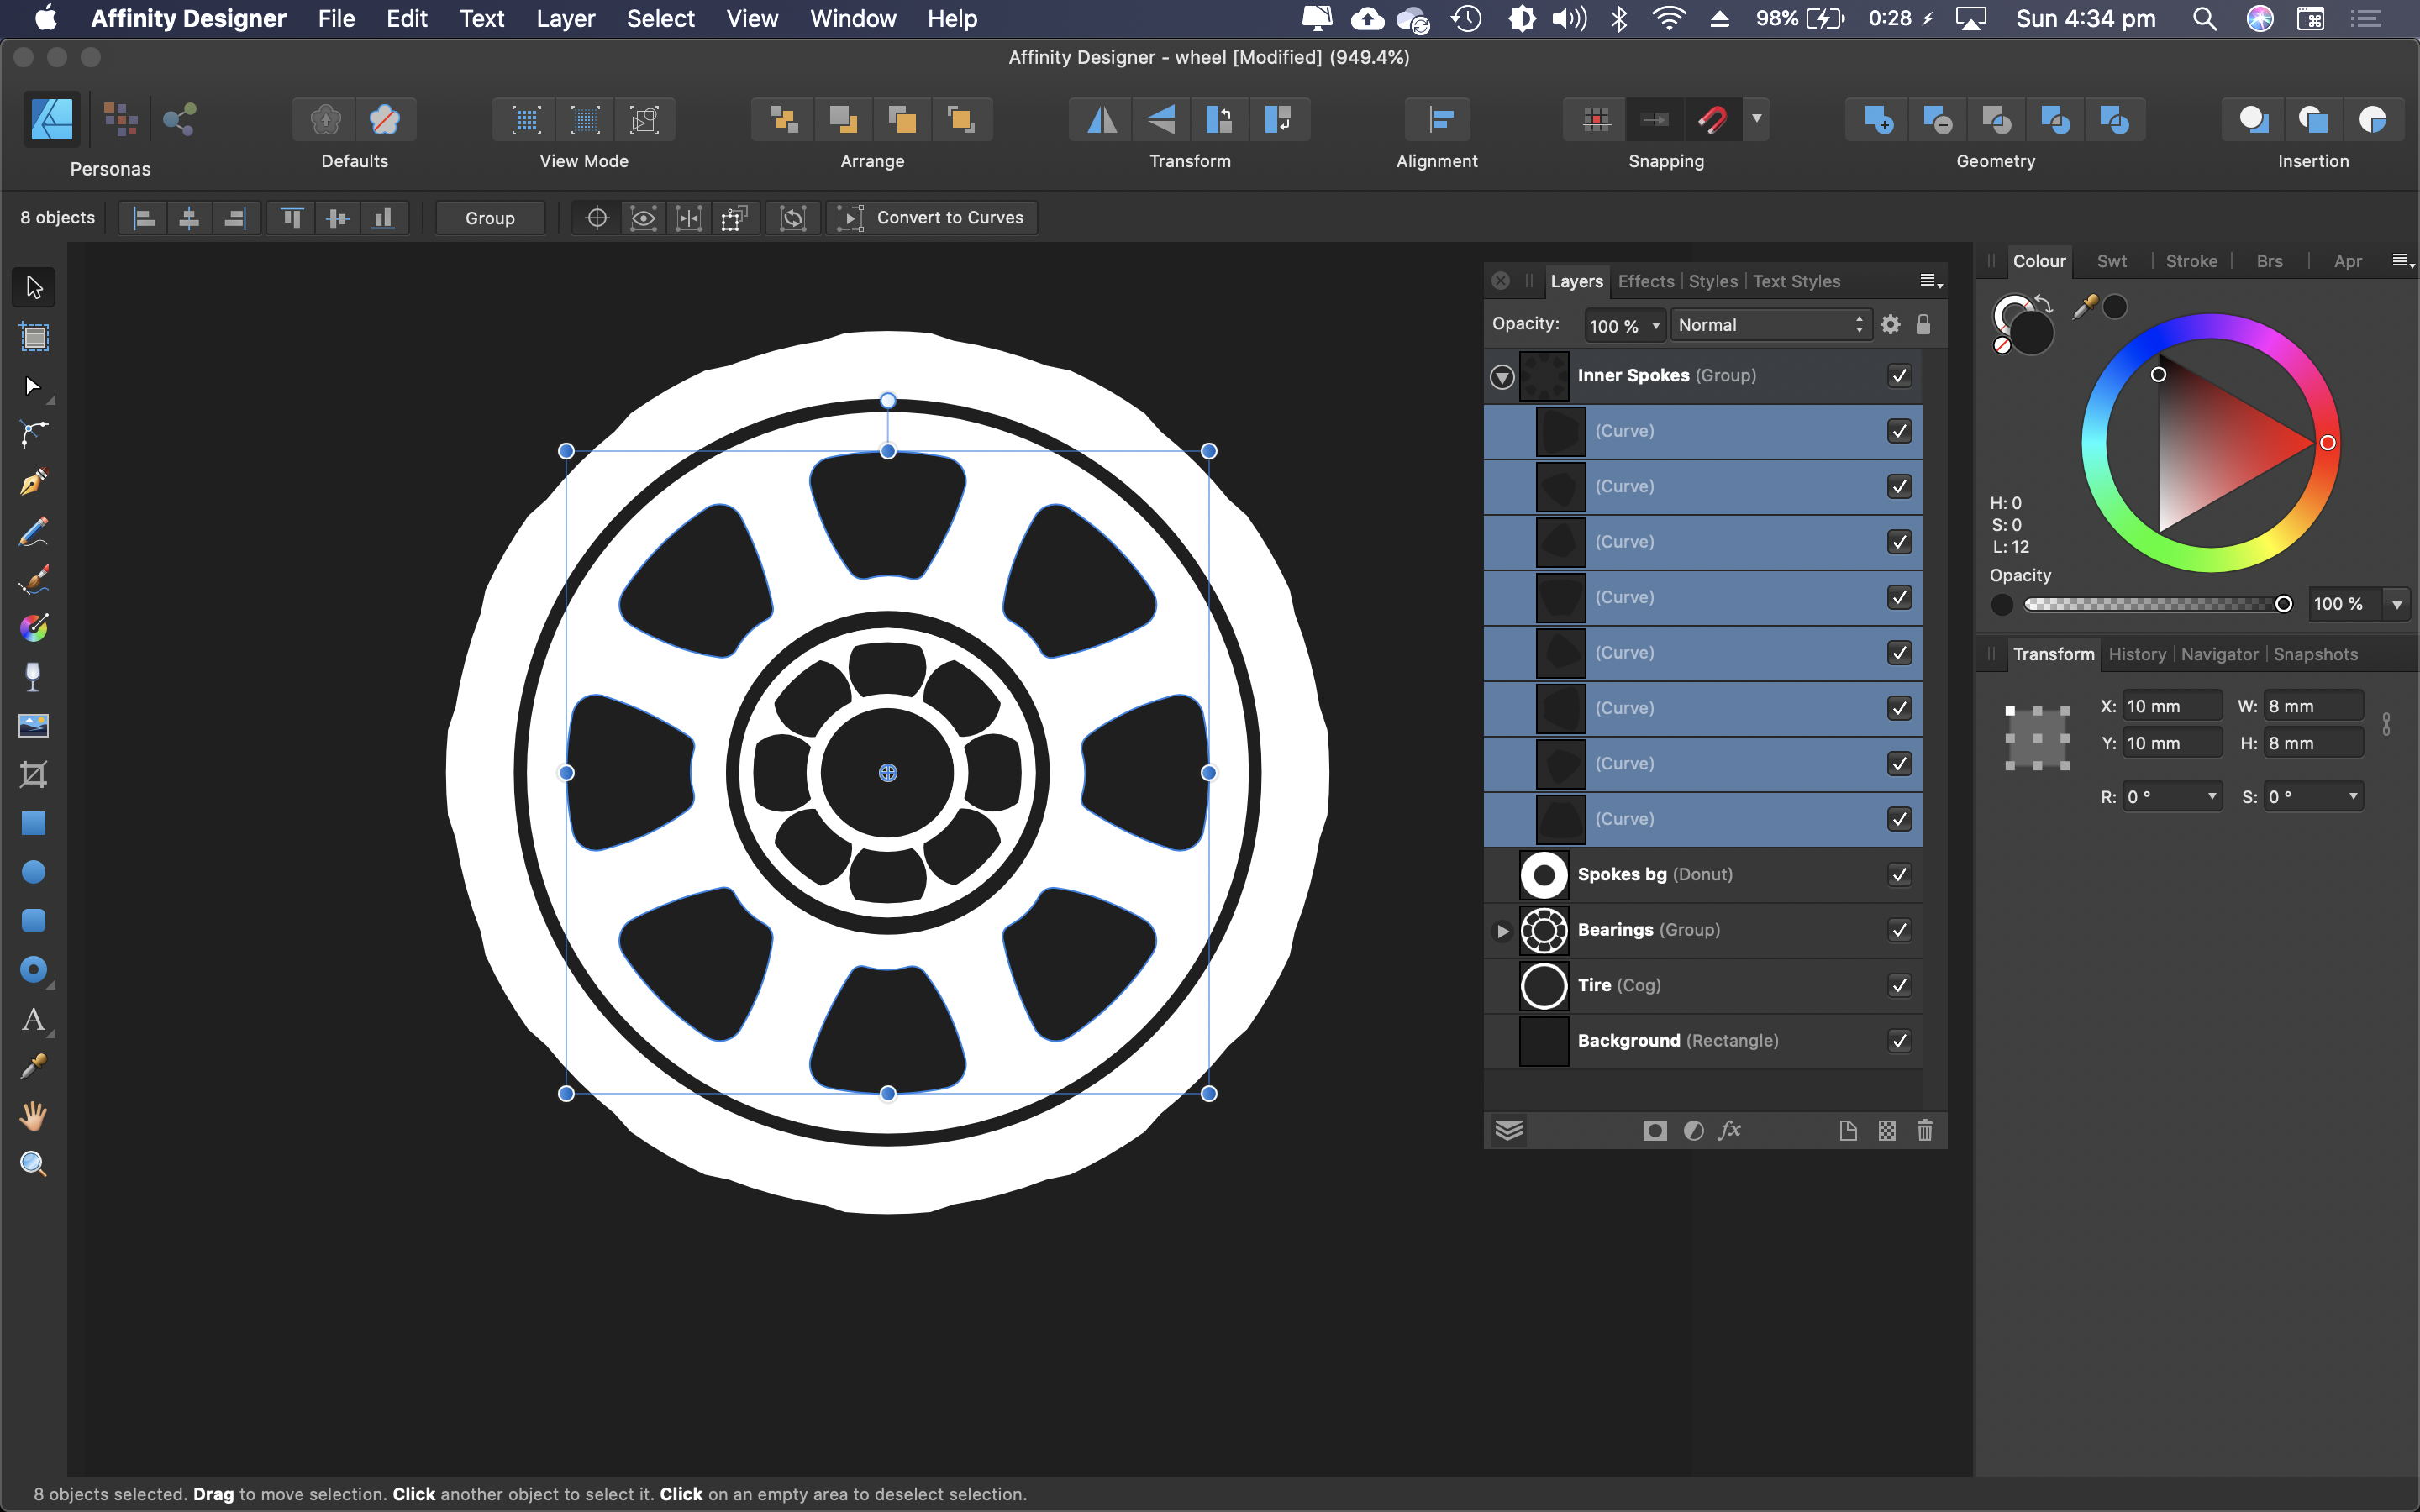
 Hi, this might be a silly question but I was wondering if there was a way to position a group of objects closer or further away from a central anchor point without changing the size like you would by holding ⌘ and scaling from the center except without actually changing the scale. For the image below, I would like to move all the inner spokes of the wheel inwards without changing their size. I realize I can do this manually one by one but is there a way to do them all at once?
-
 I started working with dropping photos into frames this week and ran into problems. Previously with some of the betas this worked but I noticed two issues with the MAS version. 1. When I try to select the slider Publisher won't let me grab it and disappears before I do so. 2. The slider will be located far off from the image. With some of the betas it was neatly positioned under the photo. Now there seems to be no rhyme or reason for it's position. I just end up using the preset framing positions located under the right click menu. At least this gives me some control but, or course, I can't be exact.
 -
 Guides still placed relative to upper LH corner only. 'sigh' Win 7 SP1, 64 bit, AFFP v.337
 -
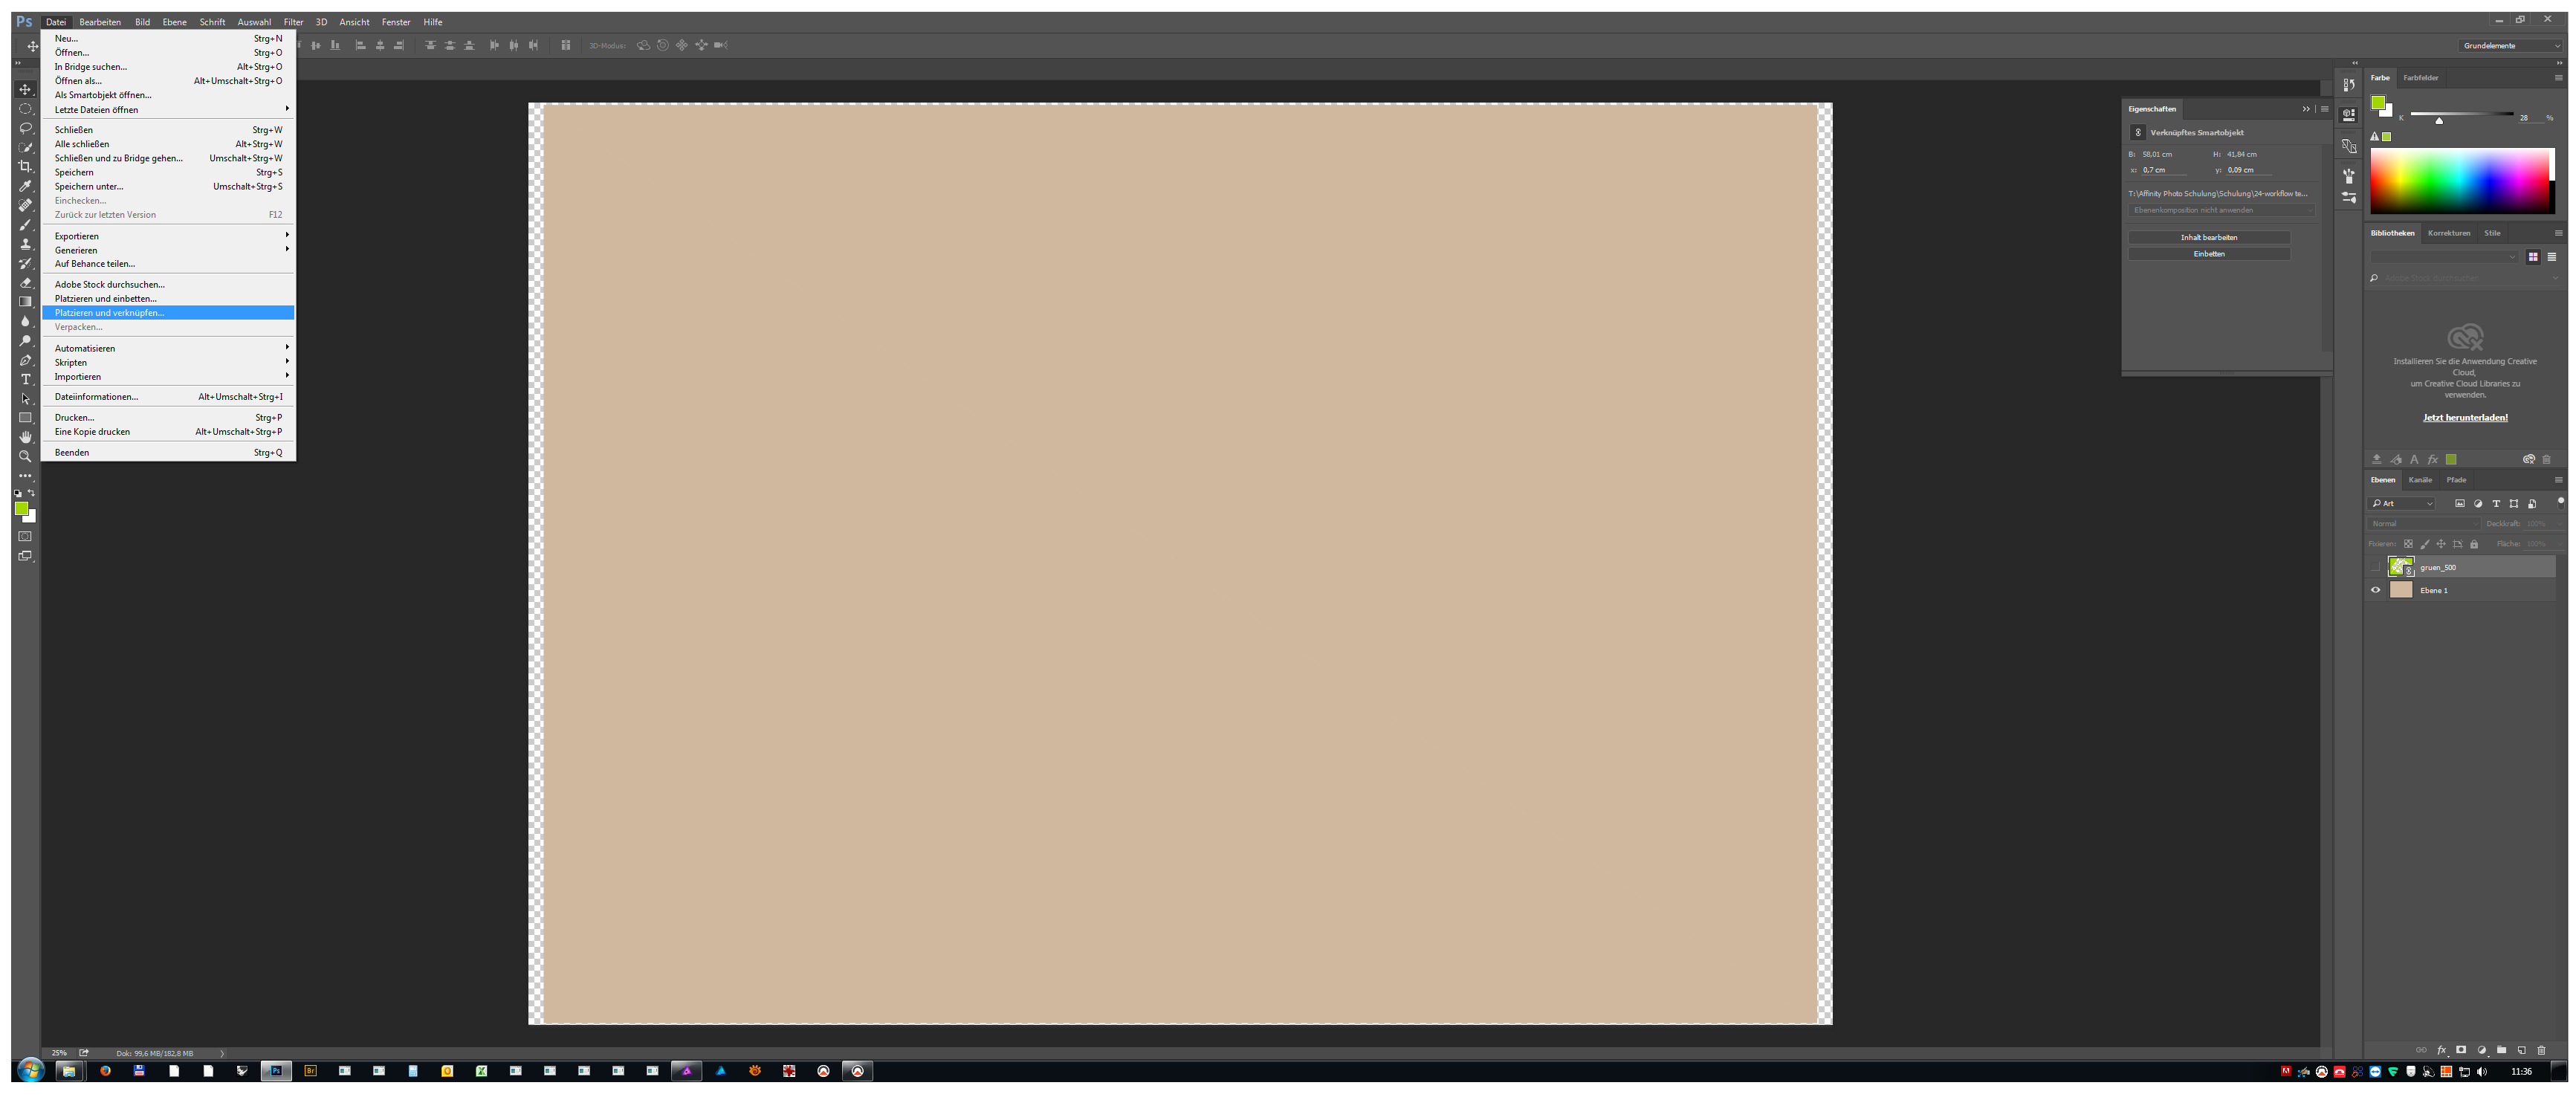
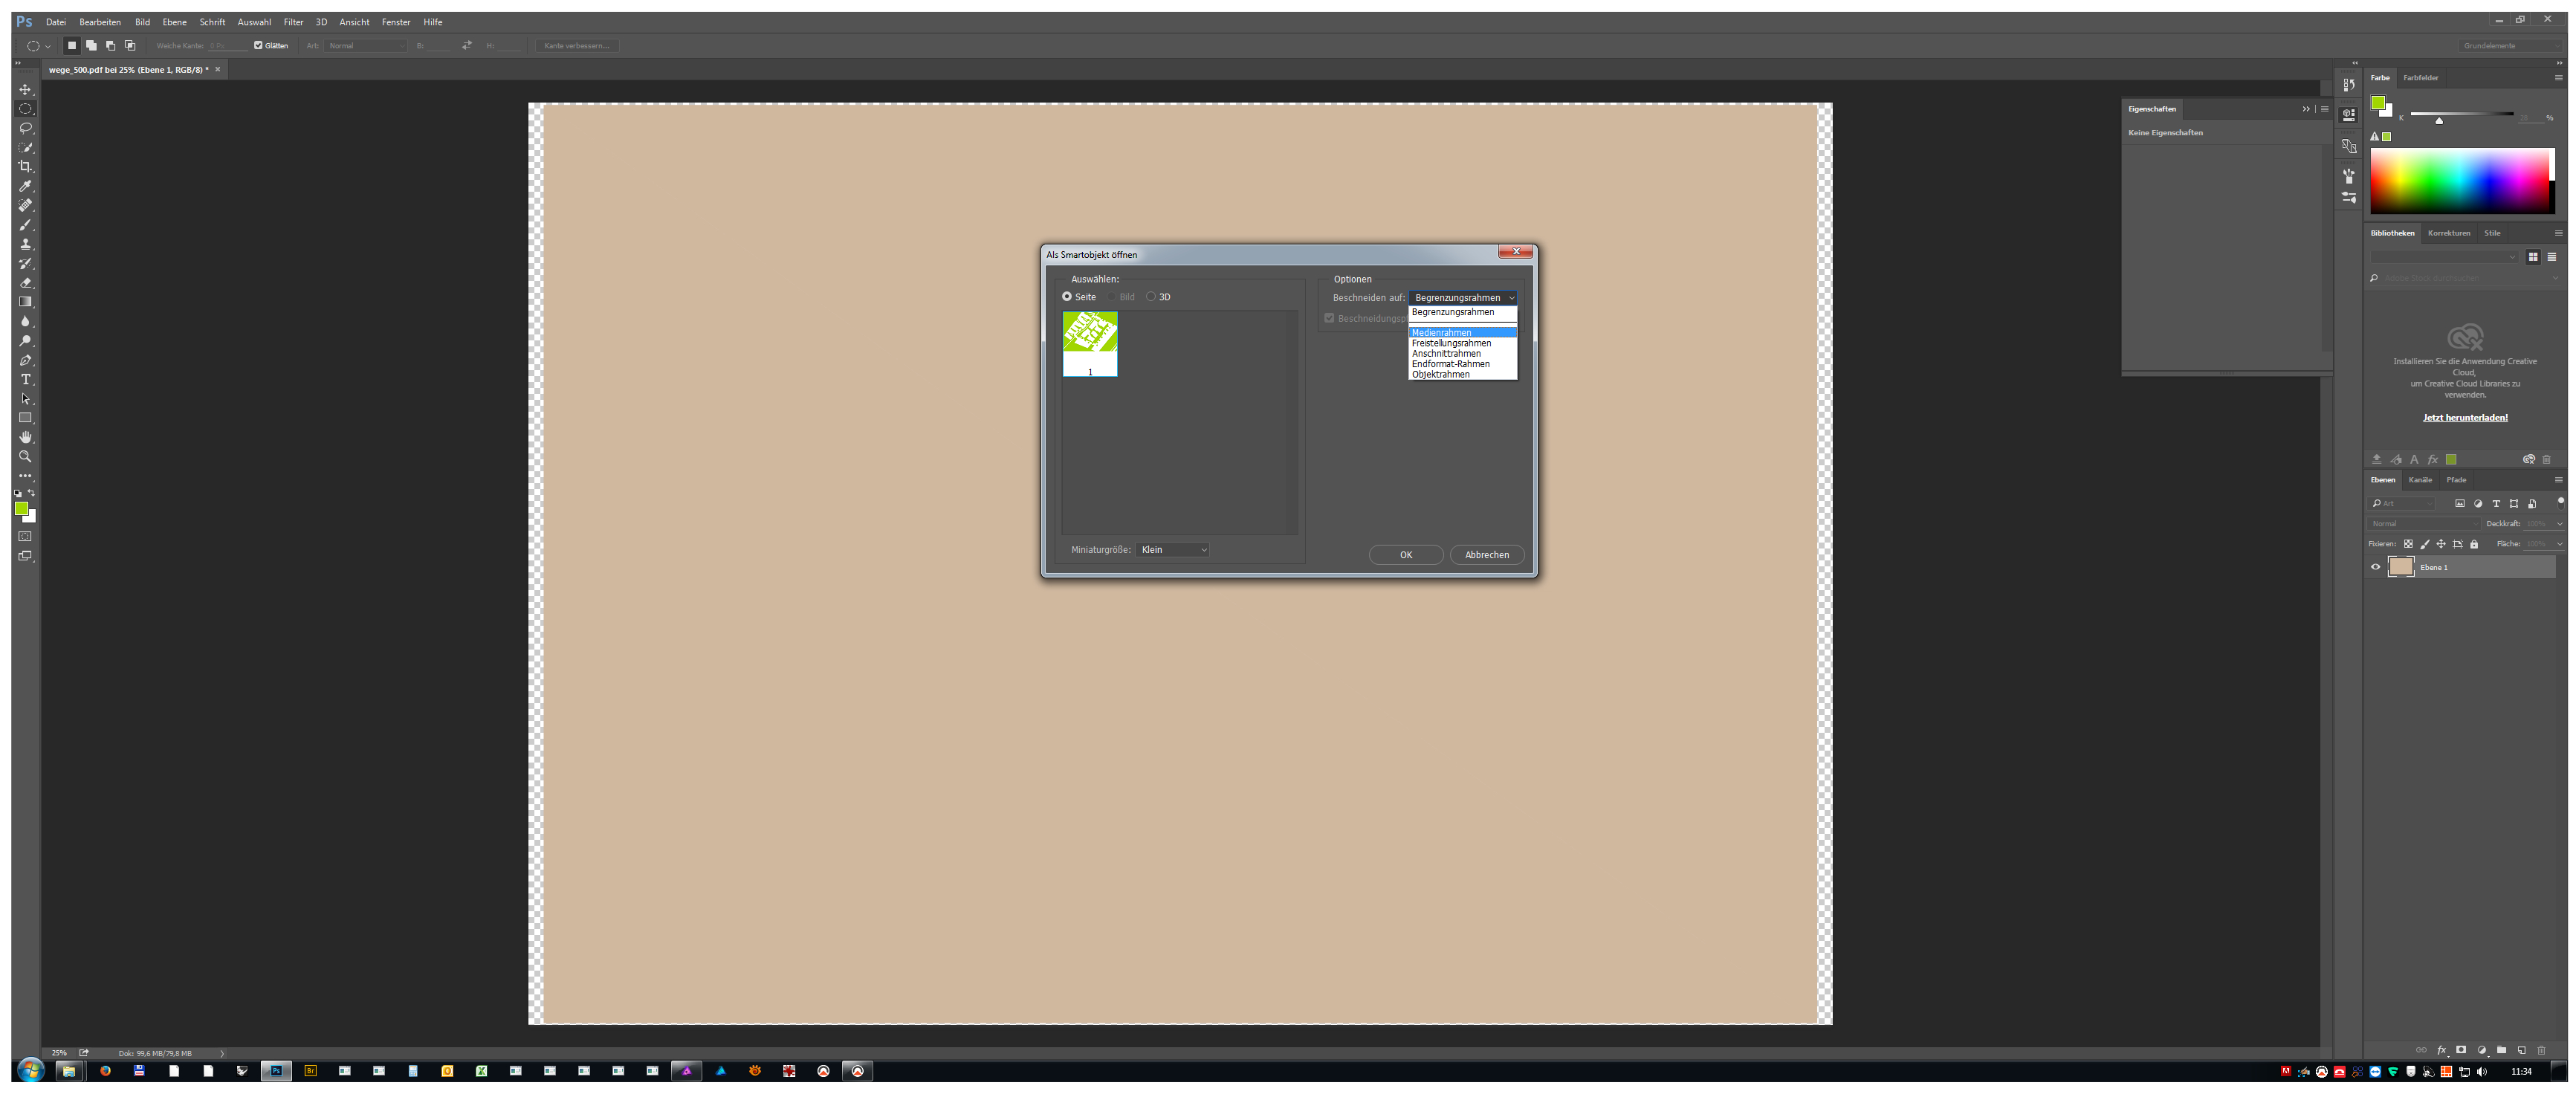
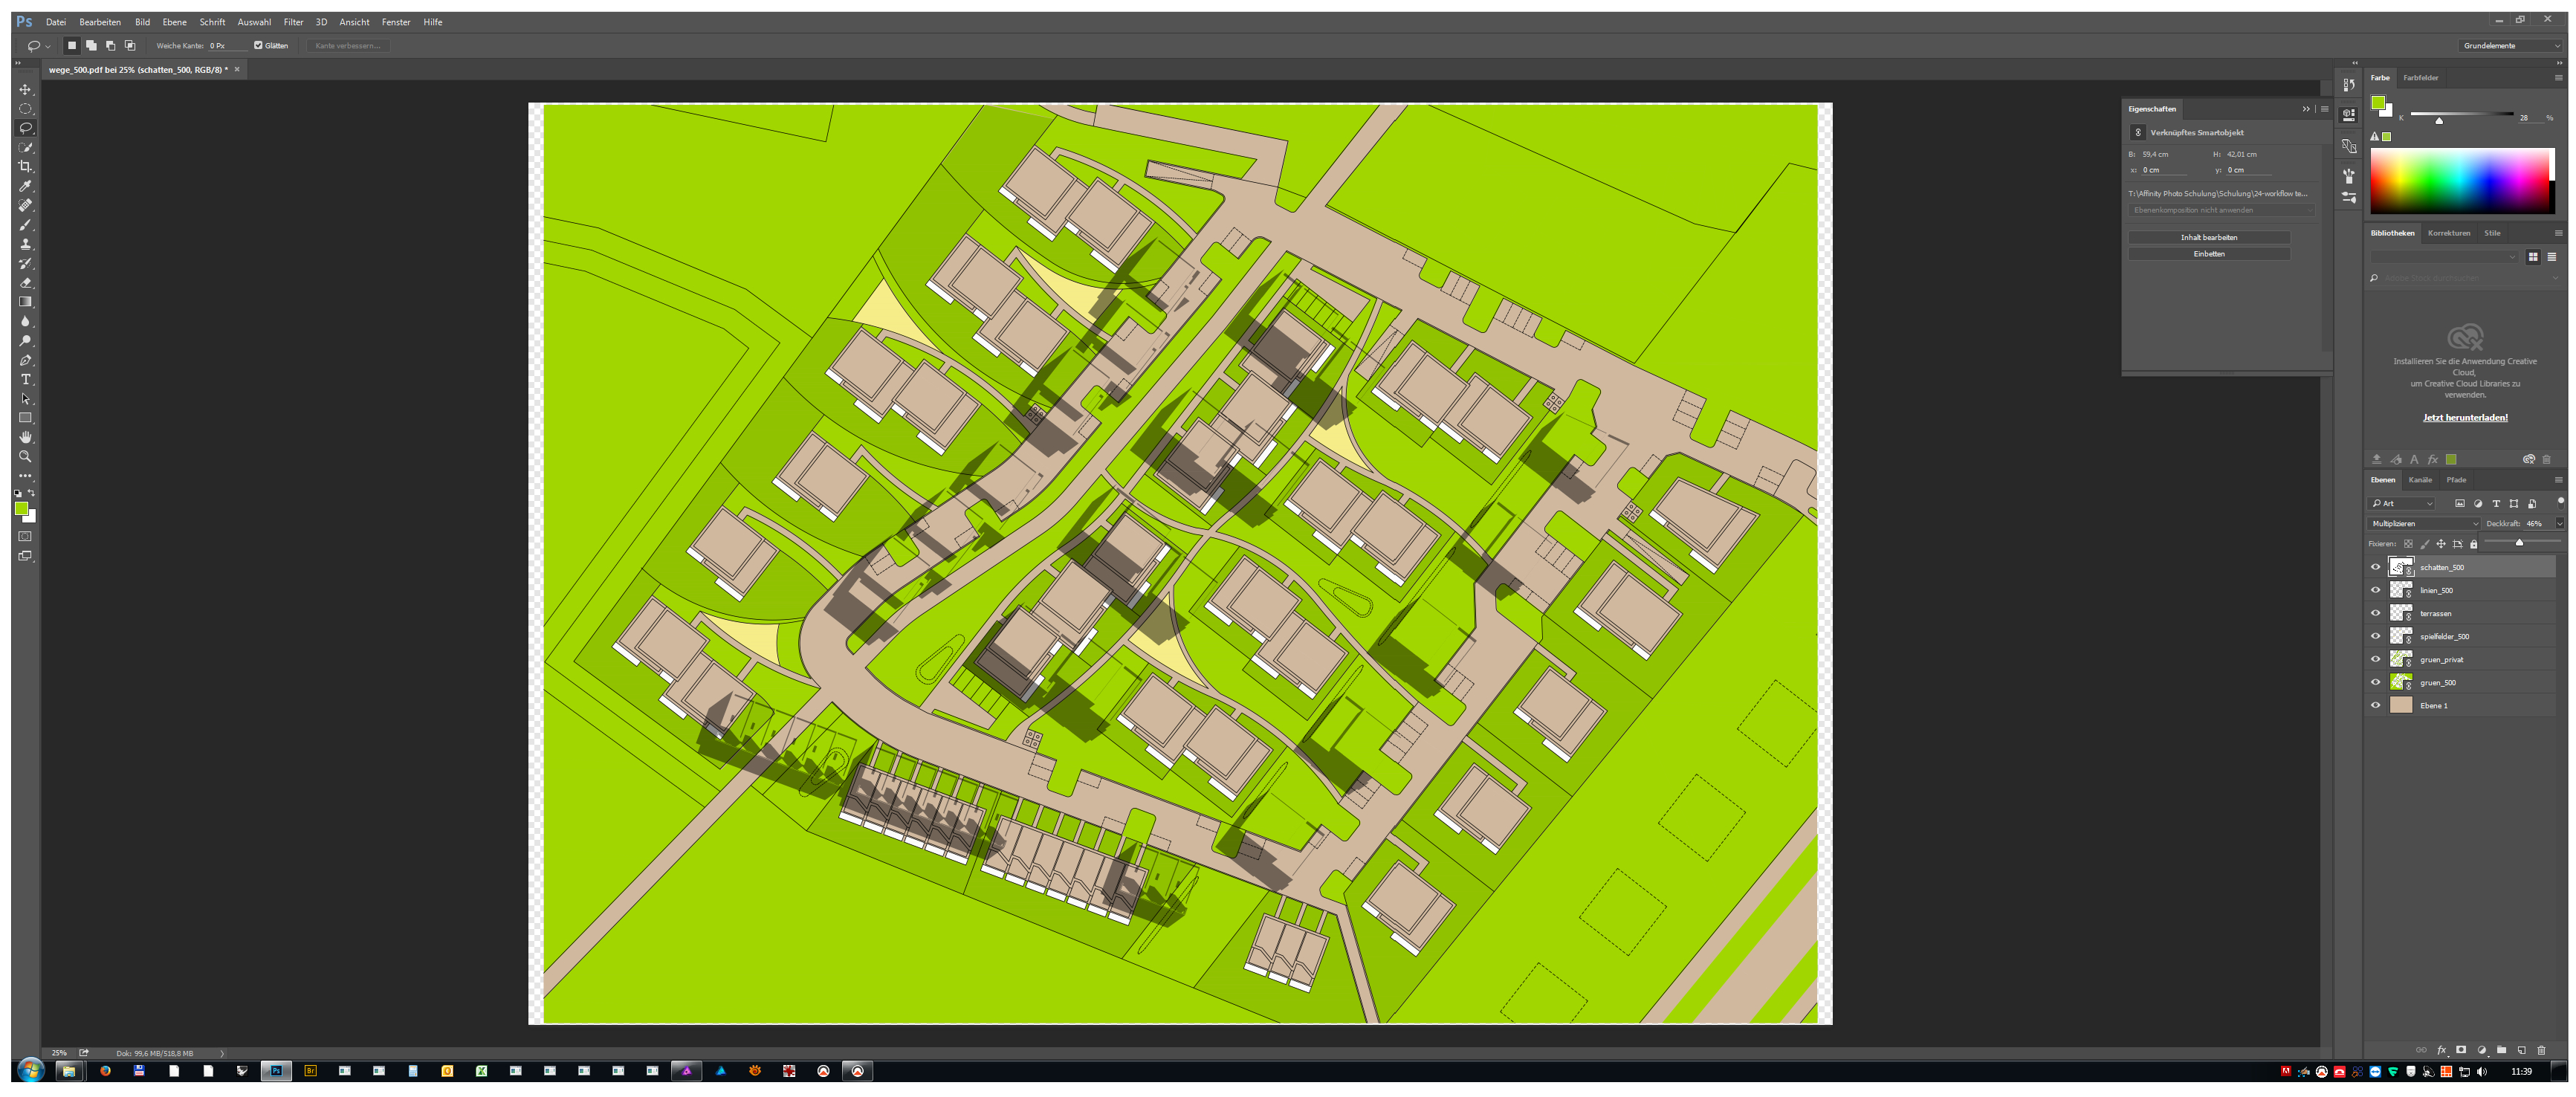
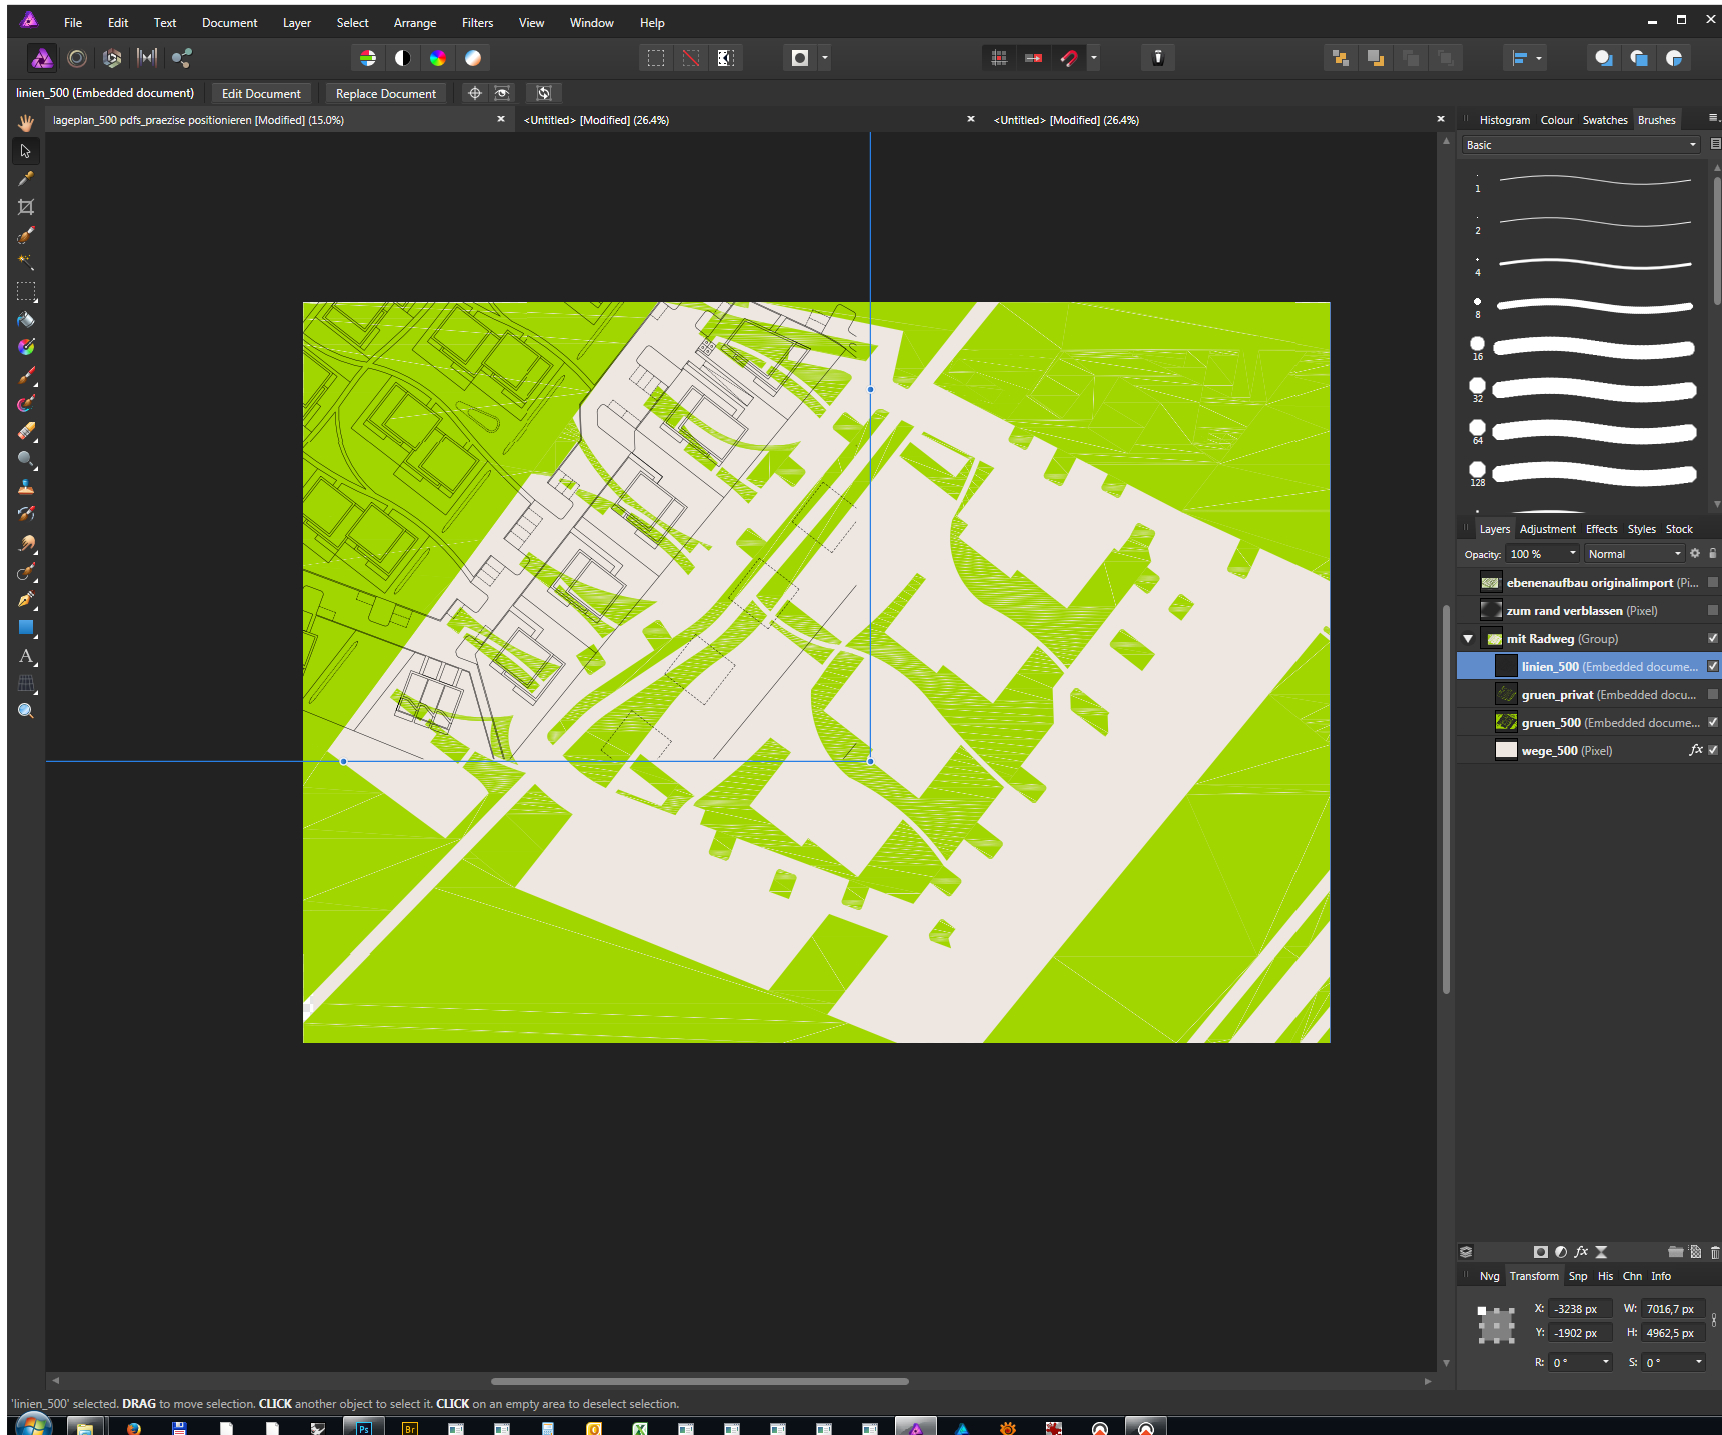
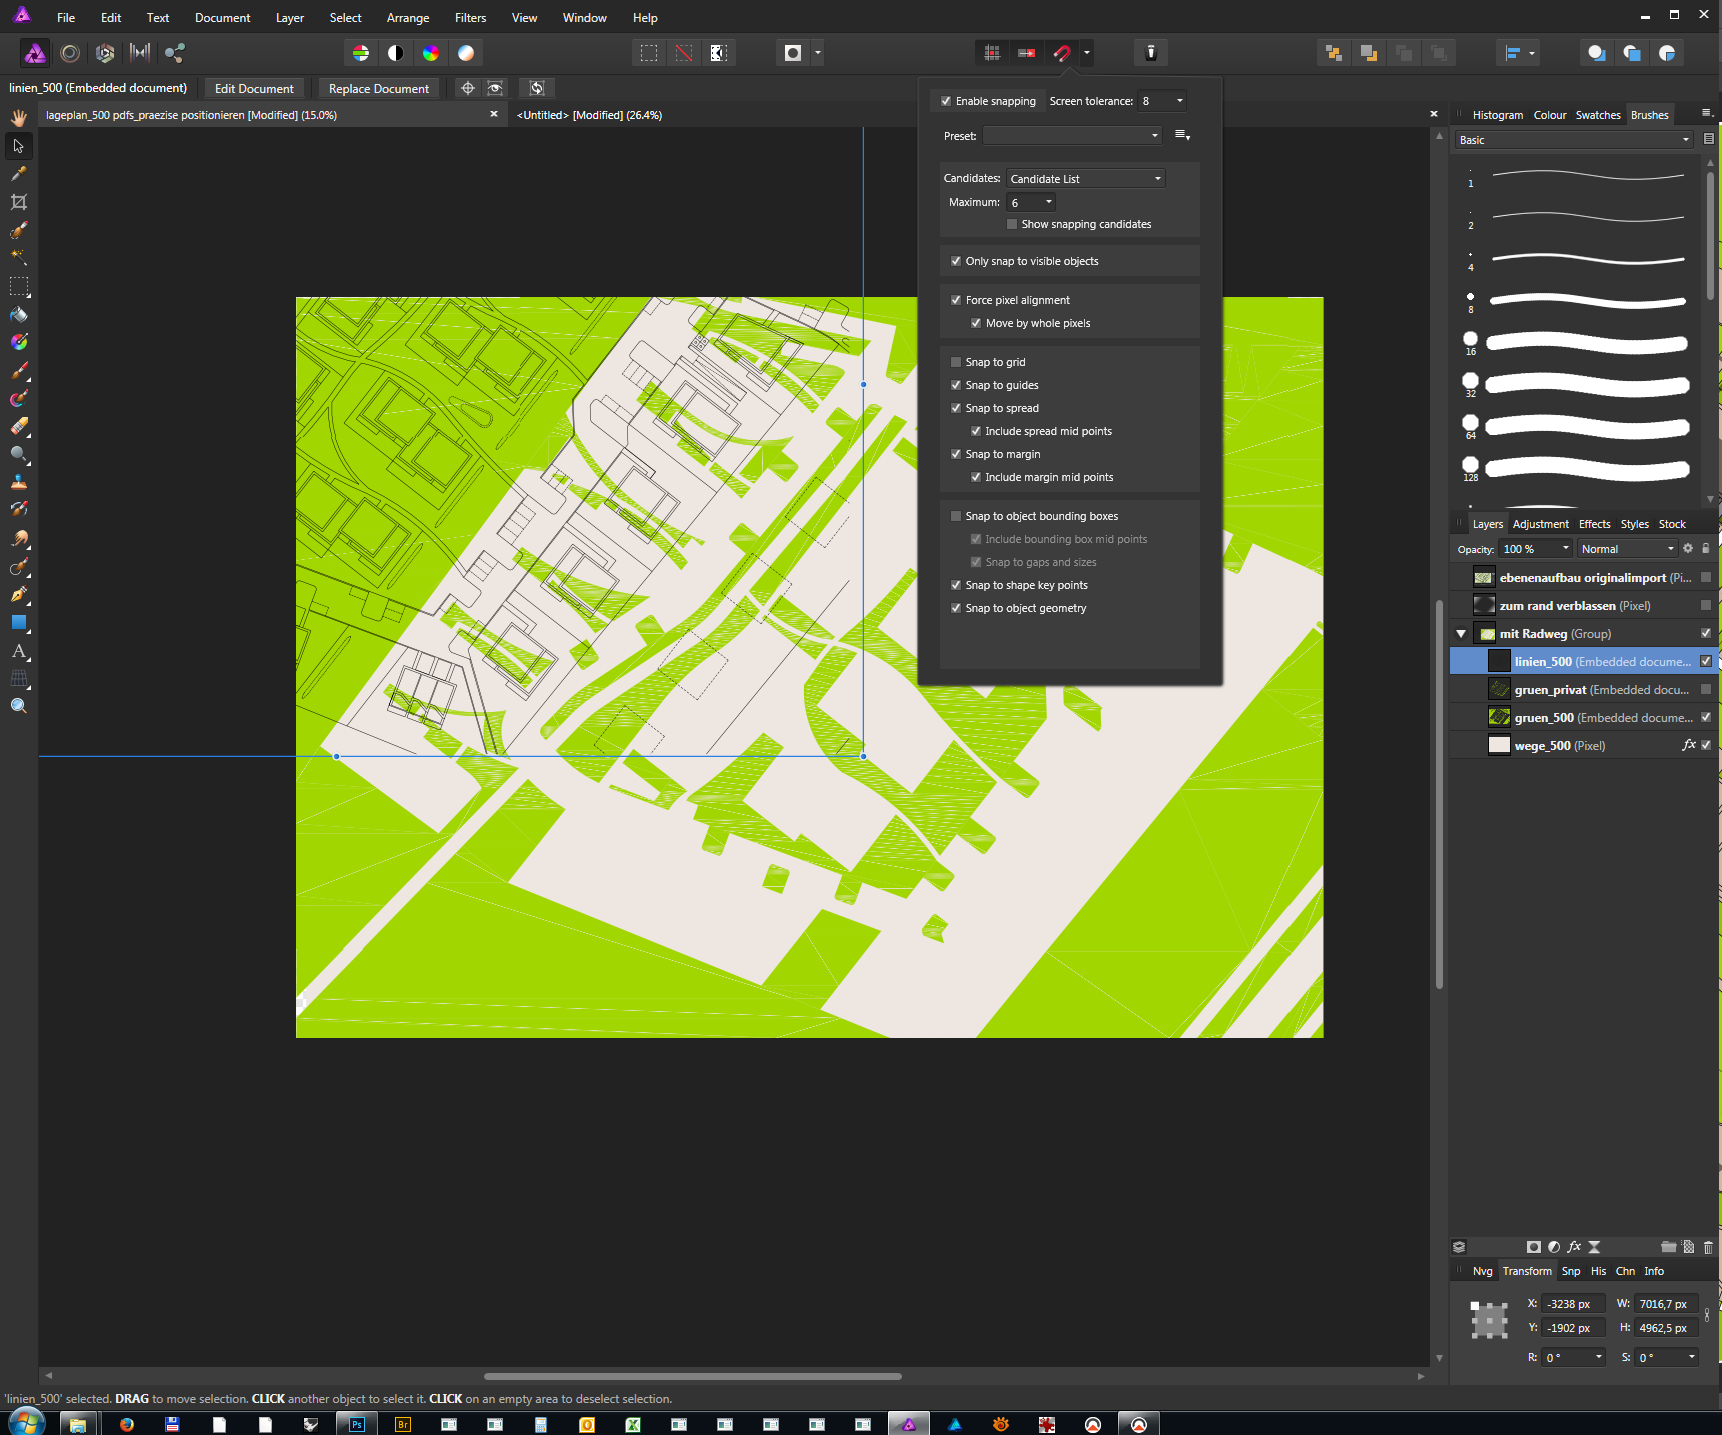
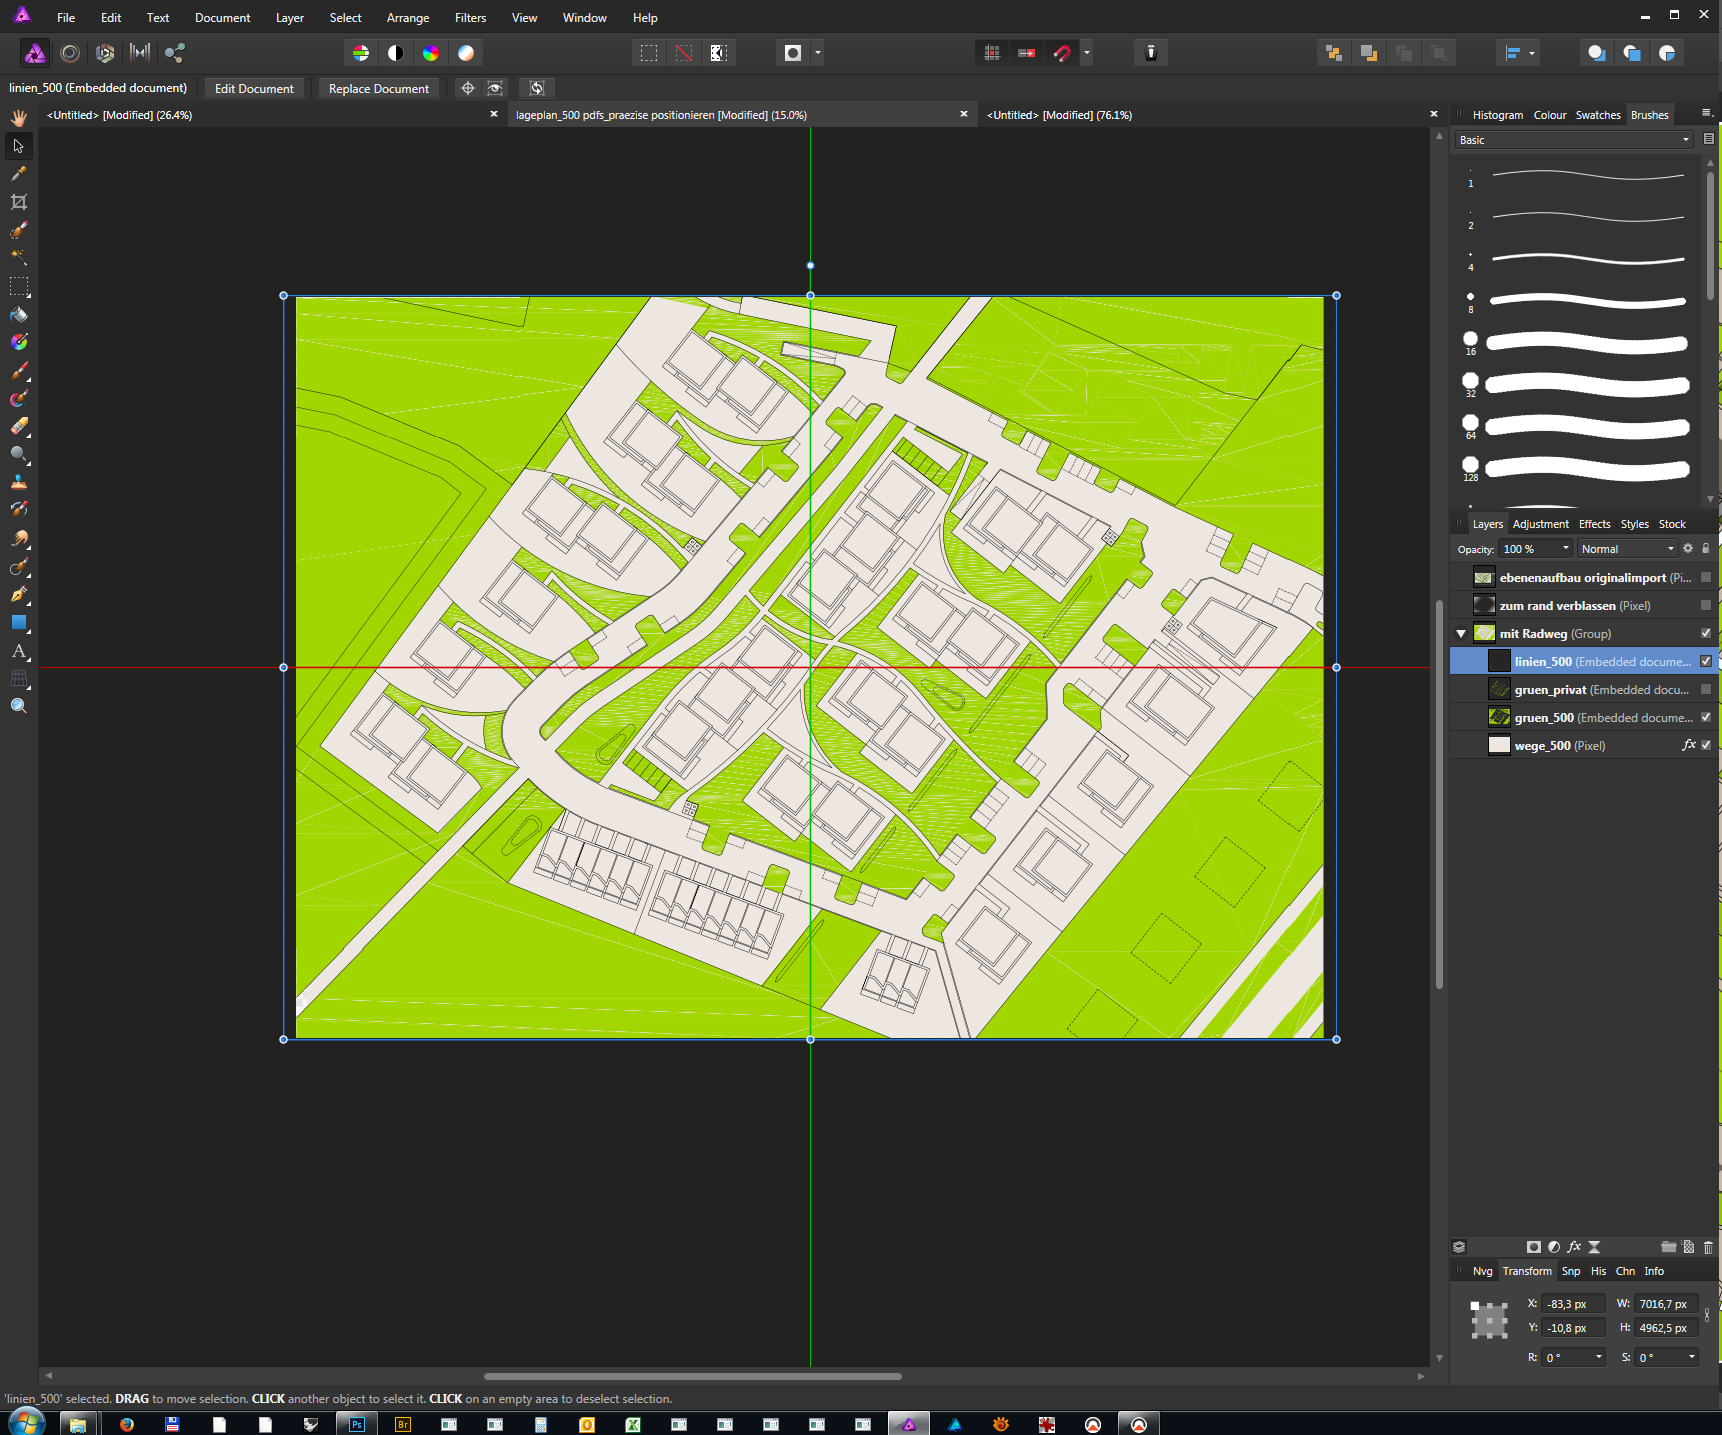
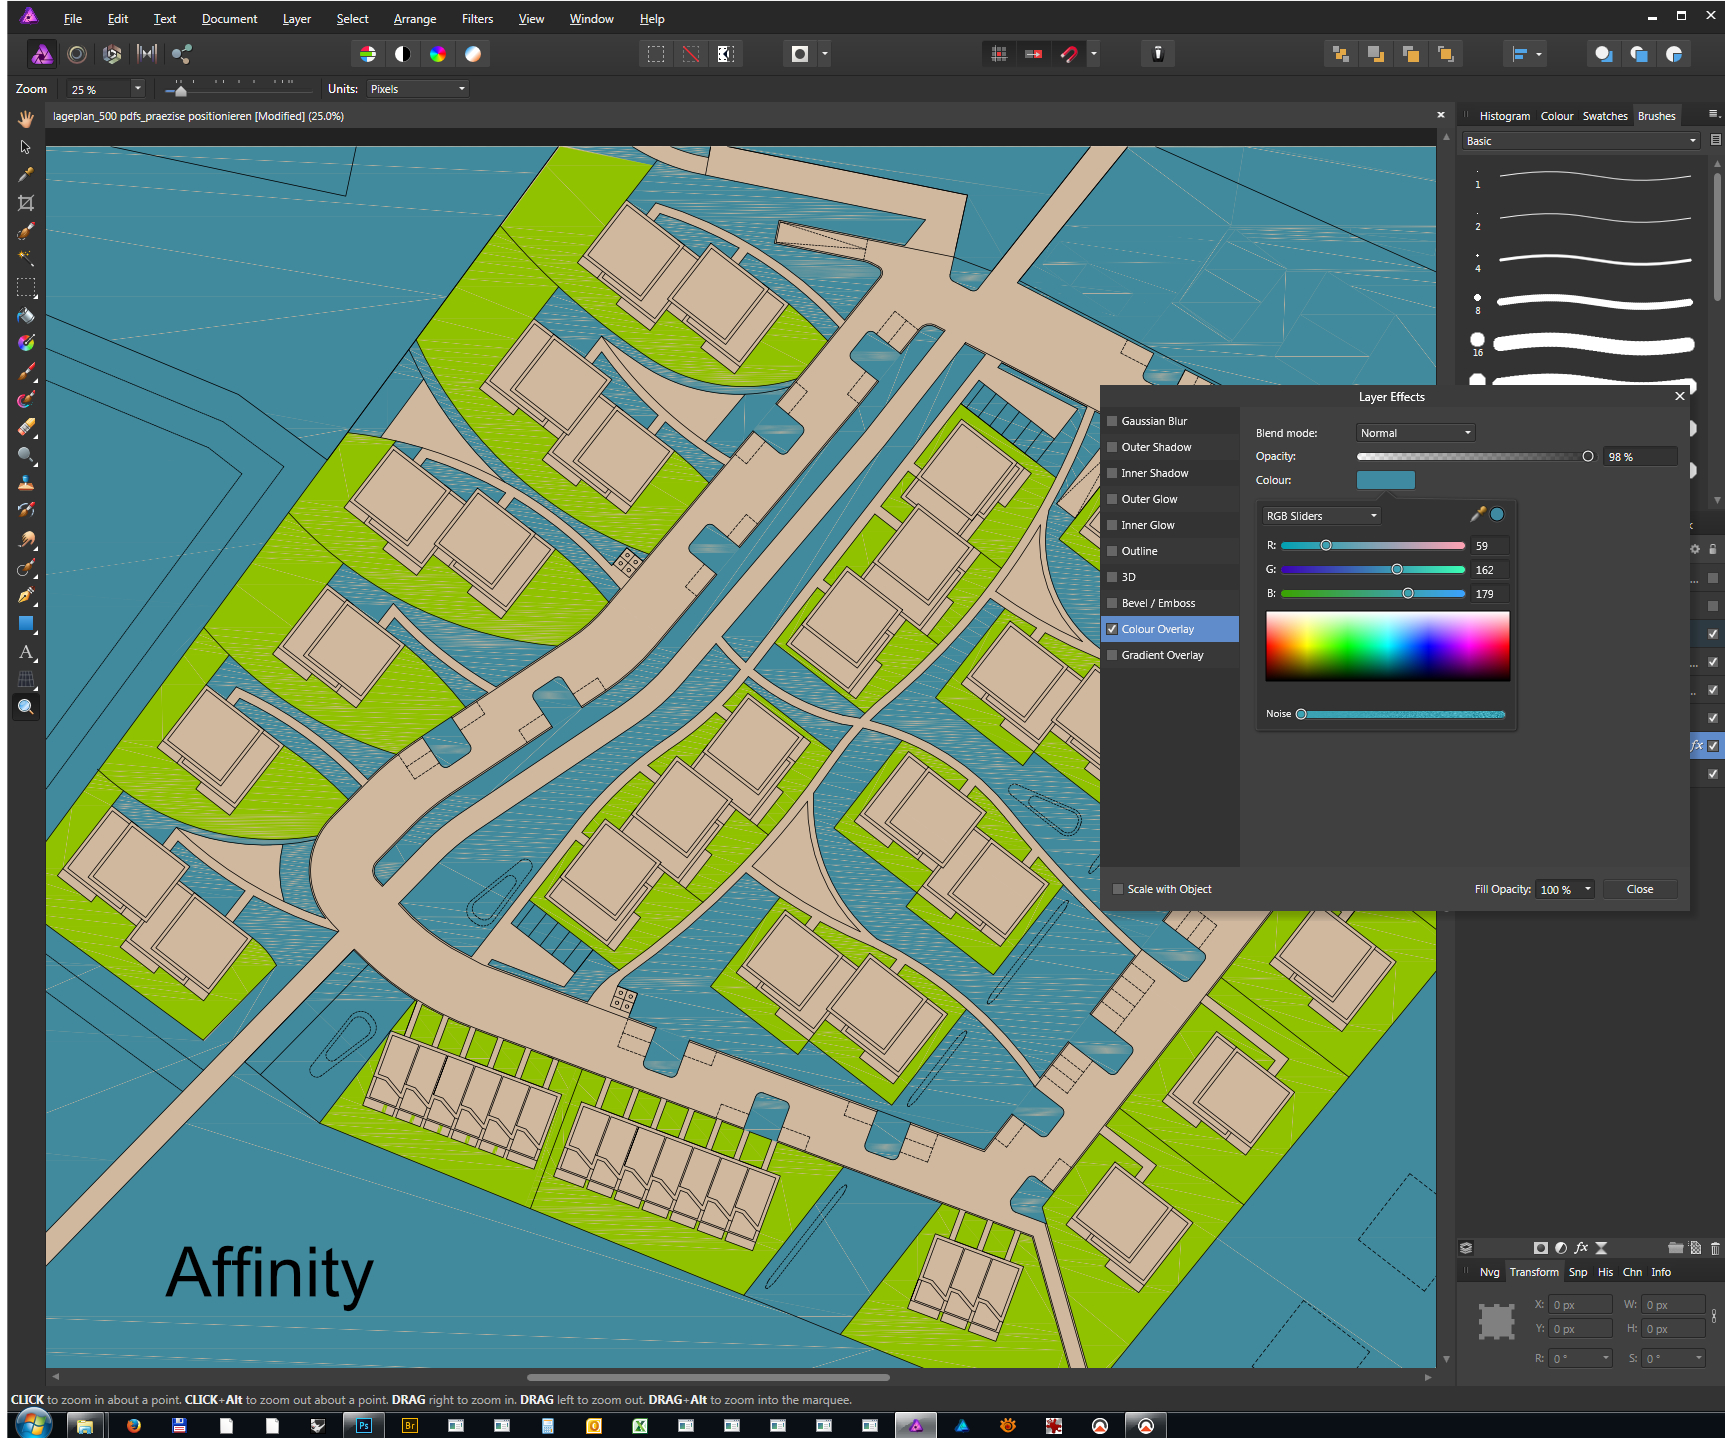
 Hi Everyone, I have some Questions about the perfect Workflow for Architects, Working with affinity Photo at first. We are a big Architectural Company, using untill now Photoshop and CAD Programms like Autocad and Revit, to produce Plans for Architectural presentations. A well established Workflow exists, Printing PDF Files from Autocad, with the used Layers, that later on can be refined in Photoshop thinking of colors, effects ore retouching things. 1. We export the needed PDF´s to a folder 2. We use Photoshop , using the PdF´s as linked embeded Smart Objects (and Photoshop gives an option to place them pecisely as i will show in my screenshots...) 3 Whenever the Plan changes, and beleave me the Plan can change a dozen times :-( , we only have to print the changed plans, replacing to older pdfs with new ones, and ......... bang... the Phhotoshop document updates because the linked smart objects now use the changed pdfs. Well i know linked smart objects do not allready exist in affinity PHoto, but i can place embeded pdf´s which fullfills my wishes half the way... this has to come in later releases of affinity Photo... now, i reproduced this workflow in affinity which we wish to switch to in the future as far as i could.. First Problem: How can i tell the placed pdf´s, to get imported exactly where i wish them to... (as i can in photoshop using the dialog box while importing and as i show in the screenshots ) ? Scound Problem: If theres no way to place the embedded pdf file.... is the way, using snaps as i show in the screenshots of my affinity workflow the only and best way ? What would you suggest to streamline this workflow ? Third Problem: When i dont Change the embedded pdfs, and i Plot them , everything seems fine. But when i use a Layer Effect (color overlay) which the architects use to change the Colores of the layer to the exact Color without thinking of it in the CAD Program, I Can see, that the embedded PDF in Affinity gets visible lines inside the Colored areas... And they get printed Too.... thats a real big Problem. When i open the embedded Pdf, i still can see its not a pixellayer, but a group of very many colored vector shapes.. but never the less. I dont mind , what affinity uses in the embedded Object, but when theres a colored area, there shouldnt be lines in there in any way.. it makes it unsuable. Is there a Workaround ? maybe instead of importing pdf´s, better to use eps files from the cad programm ? any ideas ? This is realy important, it has to be a smart workflow, because if not, my company using some hundred of Photoshop licenses will not be able to switch to affinity. So pleas give us a solution.. greetings from Hamburg, Tom The attached Images show the workflow in PHotoshop, and the workflow in affinity and one immage showing the jagged lines inside the solid color, using the color overlay effect on one of the embedded objects. I could also send you an eample of the used footage if this helps. gruen_500.pdf
-
 I have created a text frame and filled it. I now wish to duplicate that frame several times and position each frame accurately on the same page but can find nothing at the moment in the tutorials or forum which answers this. Also, very simple one, how do I select a frame to post it as an asset and if I do so does it also contain the text already within it when added?
 -
I understand the reasons why the rectangle is the dominant architecture of graphic design and UX. I work in data visualisation and analysis of network complexities - and often in that context circles are the reference geometry of choice - for good cognitive reasons. Right now when I need to base designs on circles I have to fire up Inkscape - which has a customisable polar coordinate grid plugin, and some very nifty arc, were and chord, modes on its circle line and shape tools that make graphical representations of number, proportion, kind and relationships quite fast (hours of very manual work and hideously hard adjustments and refinements) in most design tools that only think in rectangles. It would be fantastic to see Affinity designer provide tools that support layout geometries other than those base on rectangular (even isometrically so) geometry. My wish list.... - Definable polar grids (values and groupings for angle and magnitude) linear and logarithmic - movable origin. - Arc, segment and wedge tools for line and circle which positionable origin for freehand and parameter rotations. - Circular scale from selectable origins. - Special curves for point to point anchors inside and outside regular arcs - with numeric or slider adjustments of 'elasticity'. - distribution of selected line nodes along an arc (by degrees as an option).. - text-on-path that understands circular symmetries - left right, inside outside, etc... (so it isn't a pain to avoid anti-clockwise mirror text MajorActivities-A4.pdf RMIT Course Inforgraphic.pdf
-
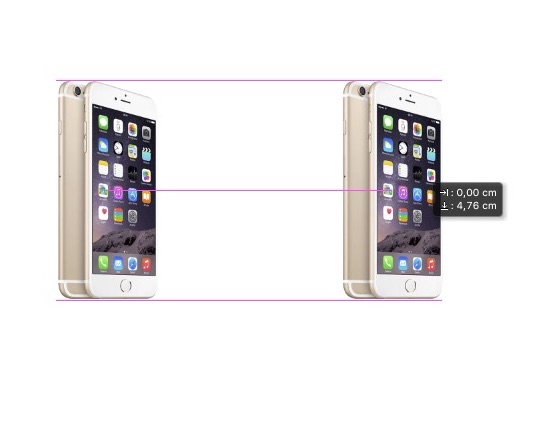
 Hi to everybody, Do you know if Affinity Photo includes the indicators for checking in real-time the distance between objects or alignment like in the attached pic? Thank you so much!
- 1 reply
-
- 1
-
-
- Object
- positioning
- (and 2 more)
-
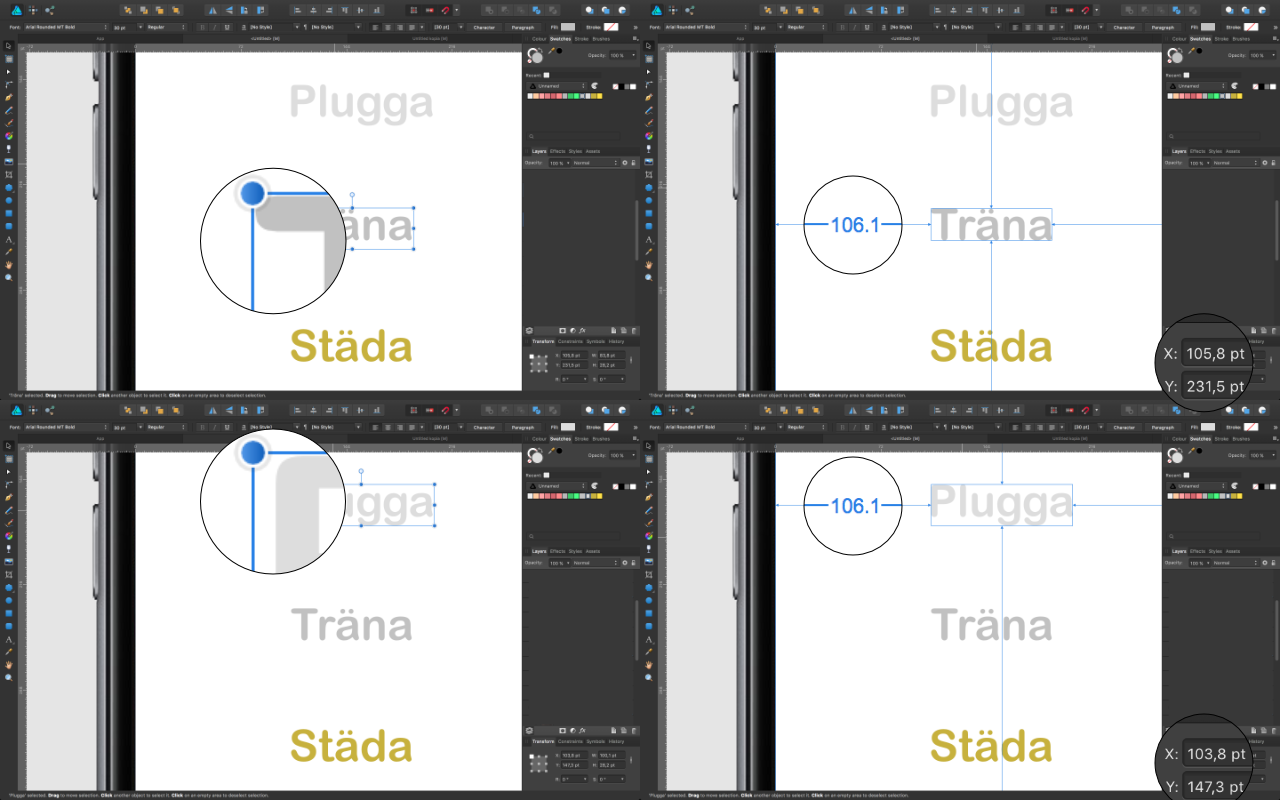
 I have a wondering about the boxes surrounding artistic text. In my example in the attached picture the text position related to the box surrounding it isn't the same for the different words. Why is that? And is it anything you can change? When to position text with the x-cordinates this becomes little of a dilemma. Naturally when you want to align text it's the text itself that you want to align but in this case it's the boxes that correspond to the x-cordinates. So my question is: Is this how it's suppose to be and i've missed something? And in either way, can i do something about it?
-
 Consider having 2 rectangles and wanting to create a circle in between them. How can you snap the circle evenly between the two? I'm looking for the snap lines, but don't see them (and enabled everything under the sun).