Search the Community
Showing results for tags 'Selection'.
-
 Is there a setting to change the way selecting objects works? How do I select one text box behind another, without first having dragged a selection around both, and shift clicking the top object? The bounding box for the top object doesn't actually have anything directly above the object that is below it. But in order for me to select the object below, I have to select them both and deselect the top one. Basically I have an ai that was converted to affdesigner. There are a lot of text objects that converted in strange ways and it's somewhat of a hassle selecting them sometimes. Here's an example. But sometimes it's even more strange because although the "a different text box" in this example, is smaller than the other box, sometimes it's converted in a way where even that small text box is really large. I forget what this was called in AI but I remember there was a setting for it. I think this was in addition to using the direct selection tool. I realize that going forward the best way to make the same kind of looking layout would be to use text box plus artistic text, but I'm dealing with several files converted from AI.
 -
This is a bug I experienced on my Windows computer only, an HP Omen desktop machine, 64-bit system, i7-7700K CPU 4.2 GHz, NVIDIA GeForce GTX 1080 Ti. I use both a mouse and a Huion pen tablet as input methods. This bug did not occur on Affinity Designer 1.6. So, what happens is that after 5-10 minutes of work, the Selection tool and the Node Tool stop working. I am no longer able to move or select any object in the document. I cannot even draw a selection marquee. The behavior stops if I restart Designer, but reappears soon after. This bugs make the new version of Designer unusable for me. I went back to 1.6 after noticing it, but that's inconvenient. I also have a MacBook Pro with the 1.7 on it and since I always sync files between the two computers, I can't really work seamlessly. I was hoping that the 1.7.1 update would fix the bug, but it didn't. It seems to me that it made it worse. The behavior occurs with all documents. Is anyone else experiencing this bug?
-
 This is a simple feature that I thought was already in Photo by default. It's very important and it's missing. I would like to be able to drag a marquee selection from the centre (circular, rectangular...), not just the corner. A shortcut would be nice, like in Photoshop (ALT + DRAG, ALT + SHIFT + DRAG for constraining proportions and so forth). While we are here I would also suggest the option for moving the selection temporarily while creating it (again in Photoshop would be by holding the Space Bar, moving the selection and then releasing the spacebar and carry on the selection creation). Thank you!
 -
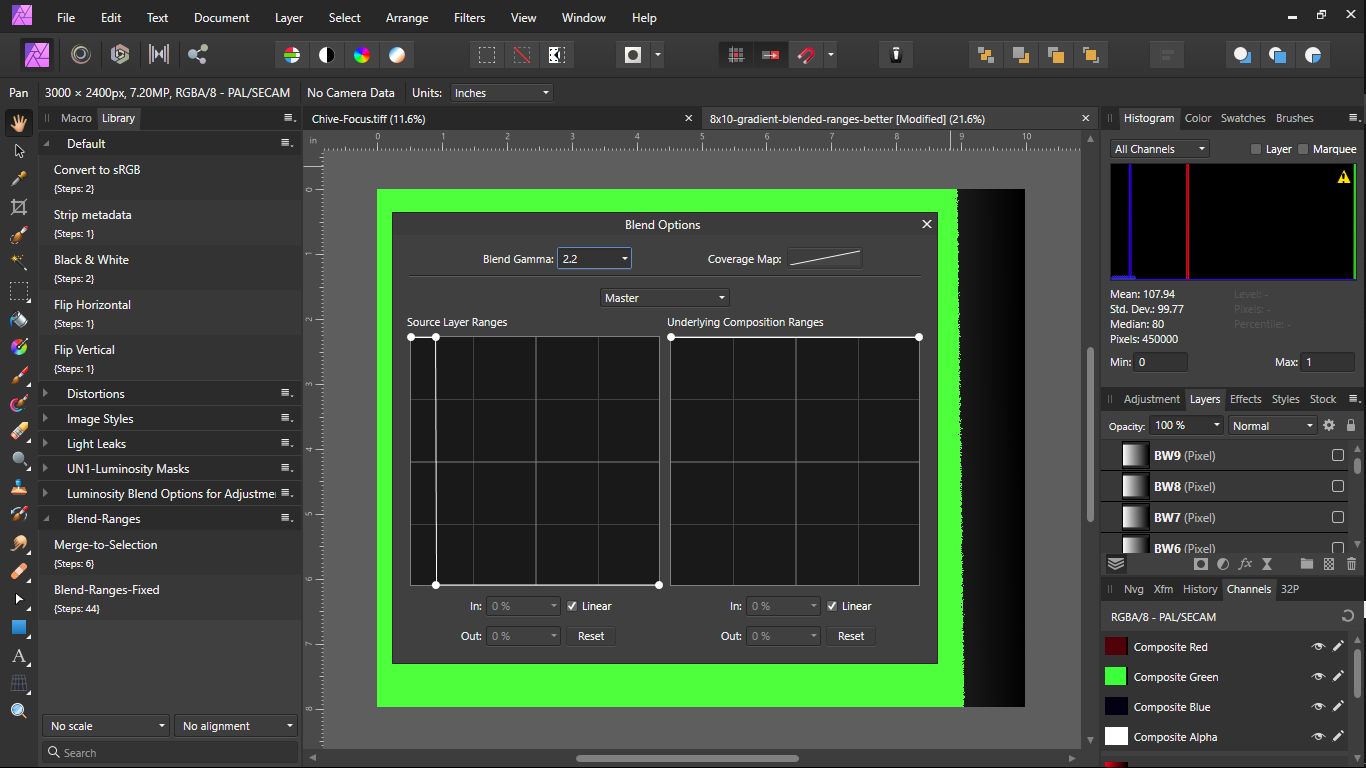
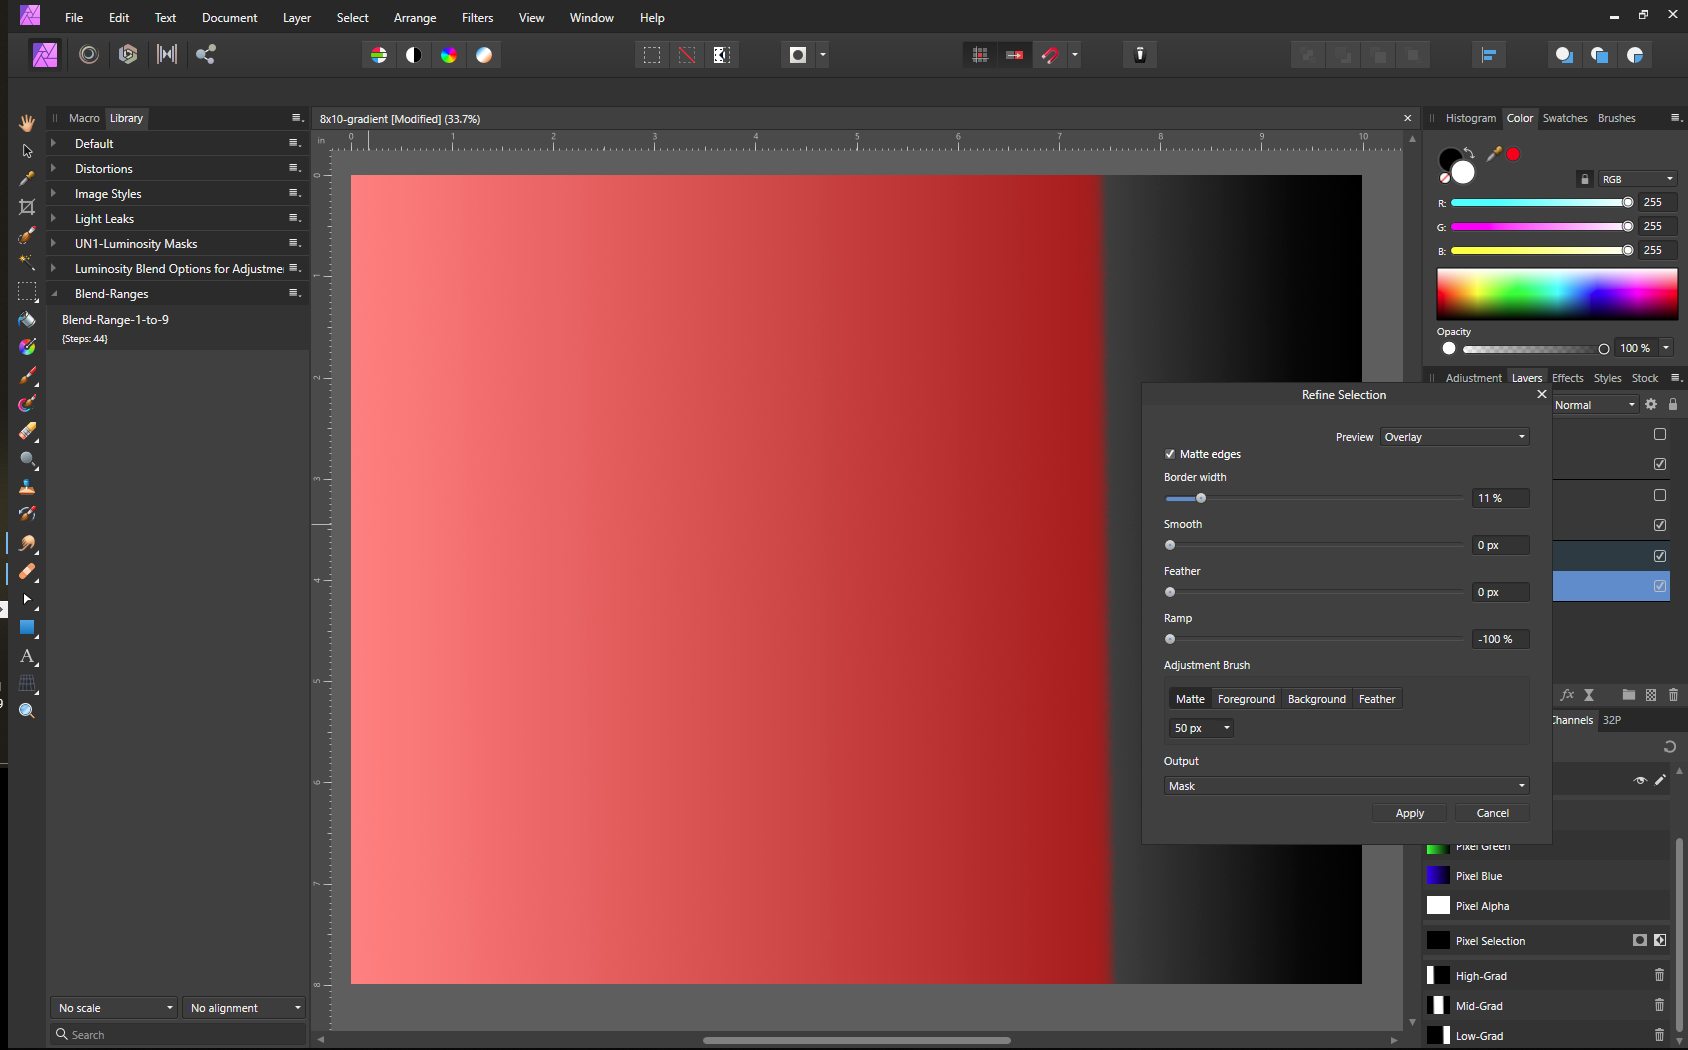
 I am becoming familiar with Tonal Range Selections, and comparing those with manually established blending ranges, using a grey scale gradient for testing. The three Tonal Range options, Shadows-Highlights-Midtones, while quick, do not seem to allow selection of the entire tonal range of the image. The three selections each have feathering at one or more edges, the leave part of the image left out of the selection. I tried using the Refine Edge options, which reduce, but do not eliminate the issue. Thus, I proceeded to develop a similar technique, using Blend Ranges (with a total of 10, of 10% each, for a combined possible selection of 100%). For example, here's the first 10% range, with a green fill layer underneath. I appreciate the 'smooth transition' that might have been intended by the feathered Tonal Range Selections, but find the lack of a complete selection using the provided method problematic. Since the Macro functionality of AP is limited, but at least does allow recording Blend Ranges with the recent update (!) as part of a Macro, that's the tack taken. Ultimately, as macros do not allow renaming a "Spare Channel" (nor does the focus of the name field shift, when using the right-click 'rename' option), I hope that some of these concerns might be addressed. I tried adding a Keyboard shortcut for the Spare Channel without success. Being able to edit Macros in an offline editor would be great. But, even the copy-paste-delete methods available in the likes of PS would be quite helpful. If indeed there is not an adjustment to overcome the banding I demonstrate, I am not sure if AP users are aware of this Tonal Range Selection being incomplete. My searches on this Forum did not find such a topic. I own many photo editing programs, and RAW converters, and am enjoying exploring Affinity Photo, the stacking and panorama features in particular. The many video tutorials are most appreciated as well! 8x10-gradient-no-selections.afphoto
- 4 replies
-
- 1
-

-
- blending range
- selection
- (and 2 more)
-
 Is it possible to select multiple lines or objects in Affinity Designer by color or stroke thickness? Like in Adobe Illustrator you can select all lines by a color fill or stroke thickness. This is very important for me to have this function to be able to select colors on my architectural line drawings and quickly change the thicknesses of a color group ive previously made a specific color. Thank you!
- 4 replies
-
- 1
-
-
- affinity designer
- selection
- (and 1 more)
-
 Hi, I've been working with Illustrator for over 20 years now, I've been at Affinity for 2 years with the designer that I like to use now, but sometimes I have real problems with the function, like selecting and positioning node points in an object that was cut out of another (typical for logos or icons) for a better understanding here's a movie. The question, how can I select the Q and position it even better later? ––––––––––––– Hi, ich arbeite nun seit über ca. 20 Jahren mit Illustrator, bin seit 2 Jahren bei Affinity mit dem Designer dabei, den ich inzwischen sehr gerne nutze, habe aber hin und wieder echte Probleme mit der Funktion, wie zB die Auswahl und Positionierung von Knotenpunkten in einem Objekt, dass aus einem anderen herausgeschnitten wurde (typisch bei Logos oder Icons) für ein besser Verständnis hier ein Film. Die Frage, wie kann ich das Q auswählen und später noch besser positionieren? qa.mov
 -
When I select something, the purple outline persists after deselecting things. It only disappears as I have selected more and more parts of the design.
-
 Ctrl-A doesn't work in the corner-tool to select all nodes. Ctrl-A does work in the node tool and on some on other places in the software. Ctrl-A here to select all nodes would speed up the proces a lot, 'cause than we don't need to zoom out when working in high detail, just to select all nodes.
 -
 Hey Guys, could anyone help me with affinity photo on IPad? I can‘t select any color with the color selection tool! Thanks for your replies Your I_like_cameras
 -
 Hi guys, yesterday I've updated to the latest version and now all of a sudden I'm not able to select what's in the layer. With the older versions I was able to hold Ctrl + click on the layer icon and it would select the shape of what's in the layer (no matter pixel or vector shape). After that I can do whatever I want to do with that selection, cut it from another layer, etc. Is there something I'm missing? There is no way to make this selection now and I've tried whatever came to my mind. Still nothing. I'll appreciate any help
 -
 Hello! The arrow keys and page up/down could be put to better use in the Layer Studio (or am I missing something?). 1 - When you hover the cursor over the layer studio, arrows and page up/down could select the next/previous item in the list. Left/right arrow keys could move up/down a hierarchy. 2 - Holding some modifier key (SHIFT etc.) while pressing up/down arrows could MOVE the selected element(s) in the list (as opposed to SELECTING next/previous). For both, it should not be necessary to click-set focus on the layer studio. Just hovering should do. Thanks! Best regards
-
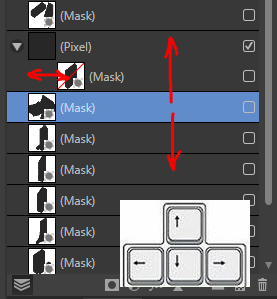
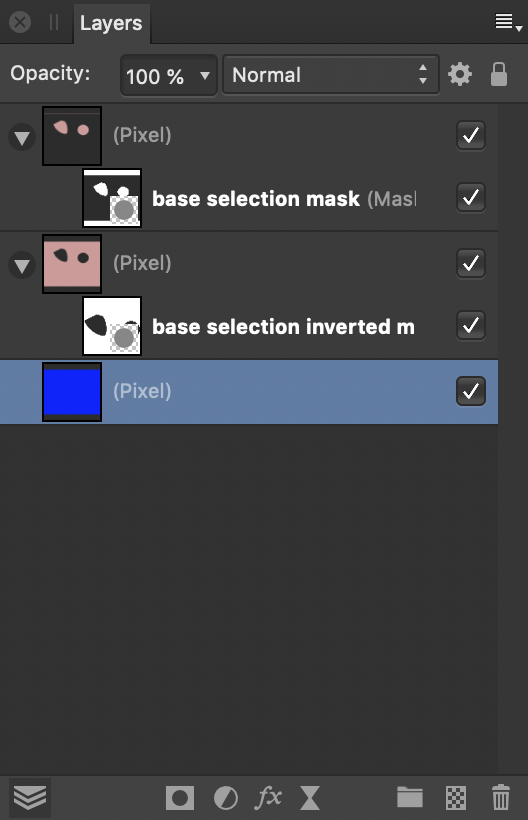
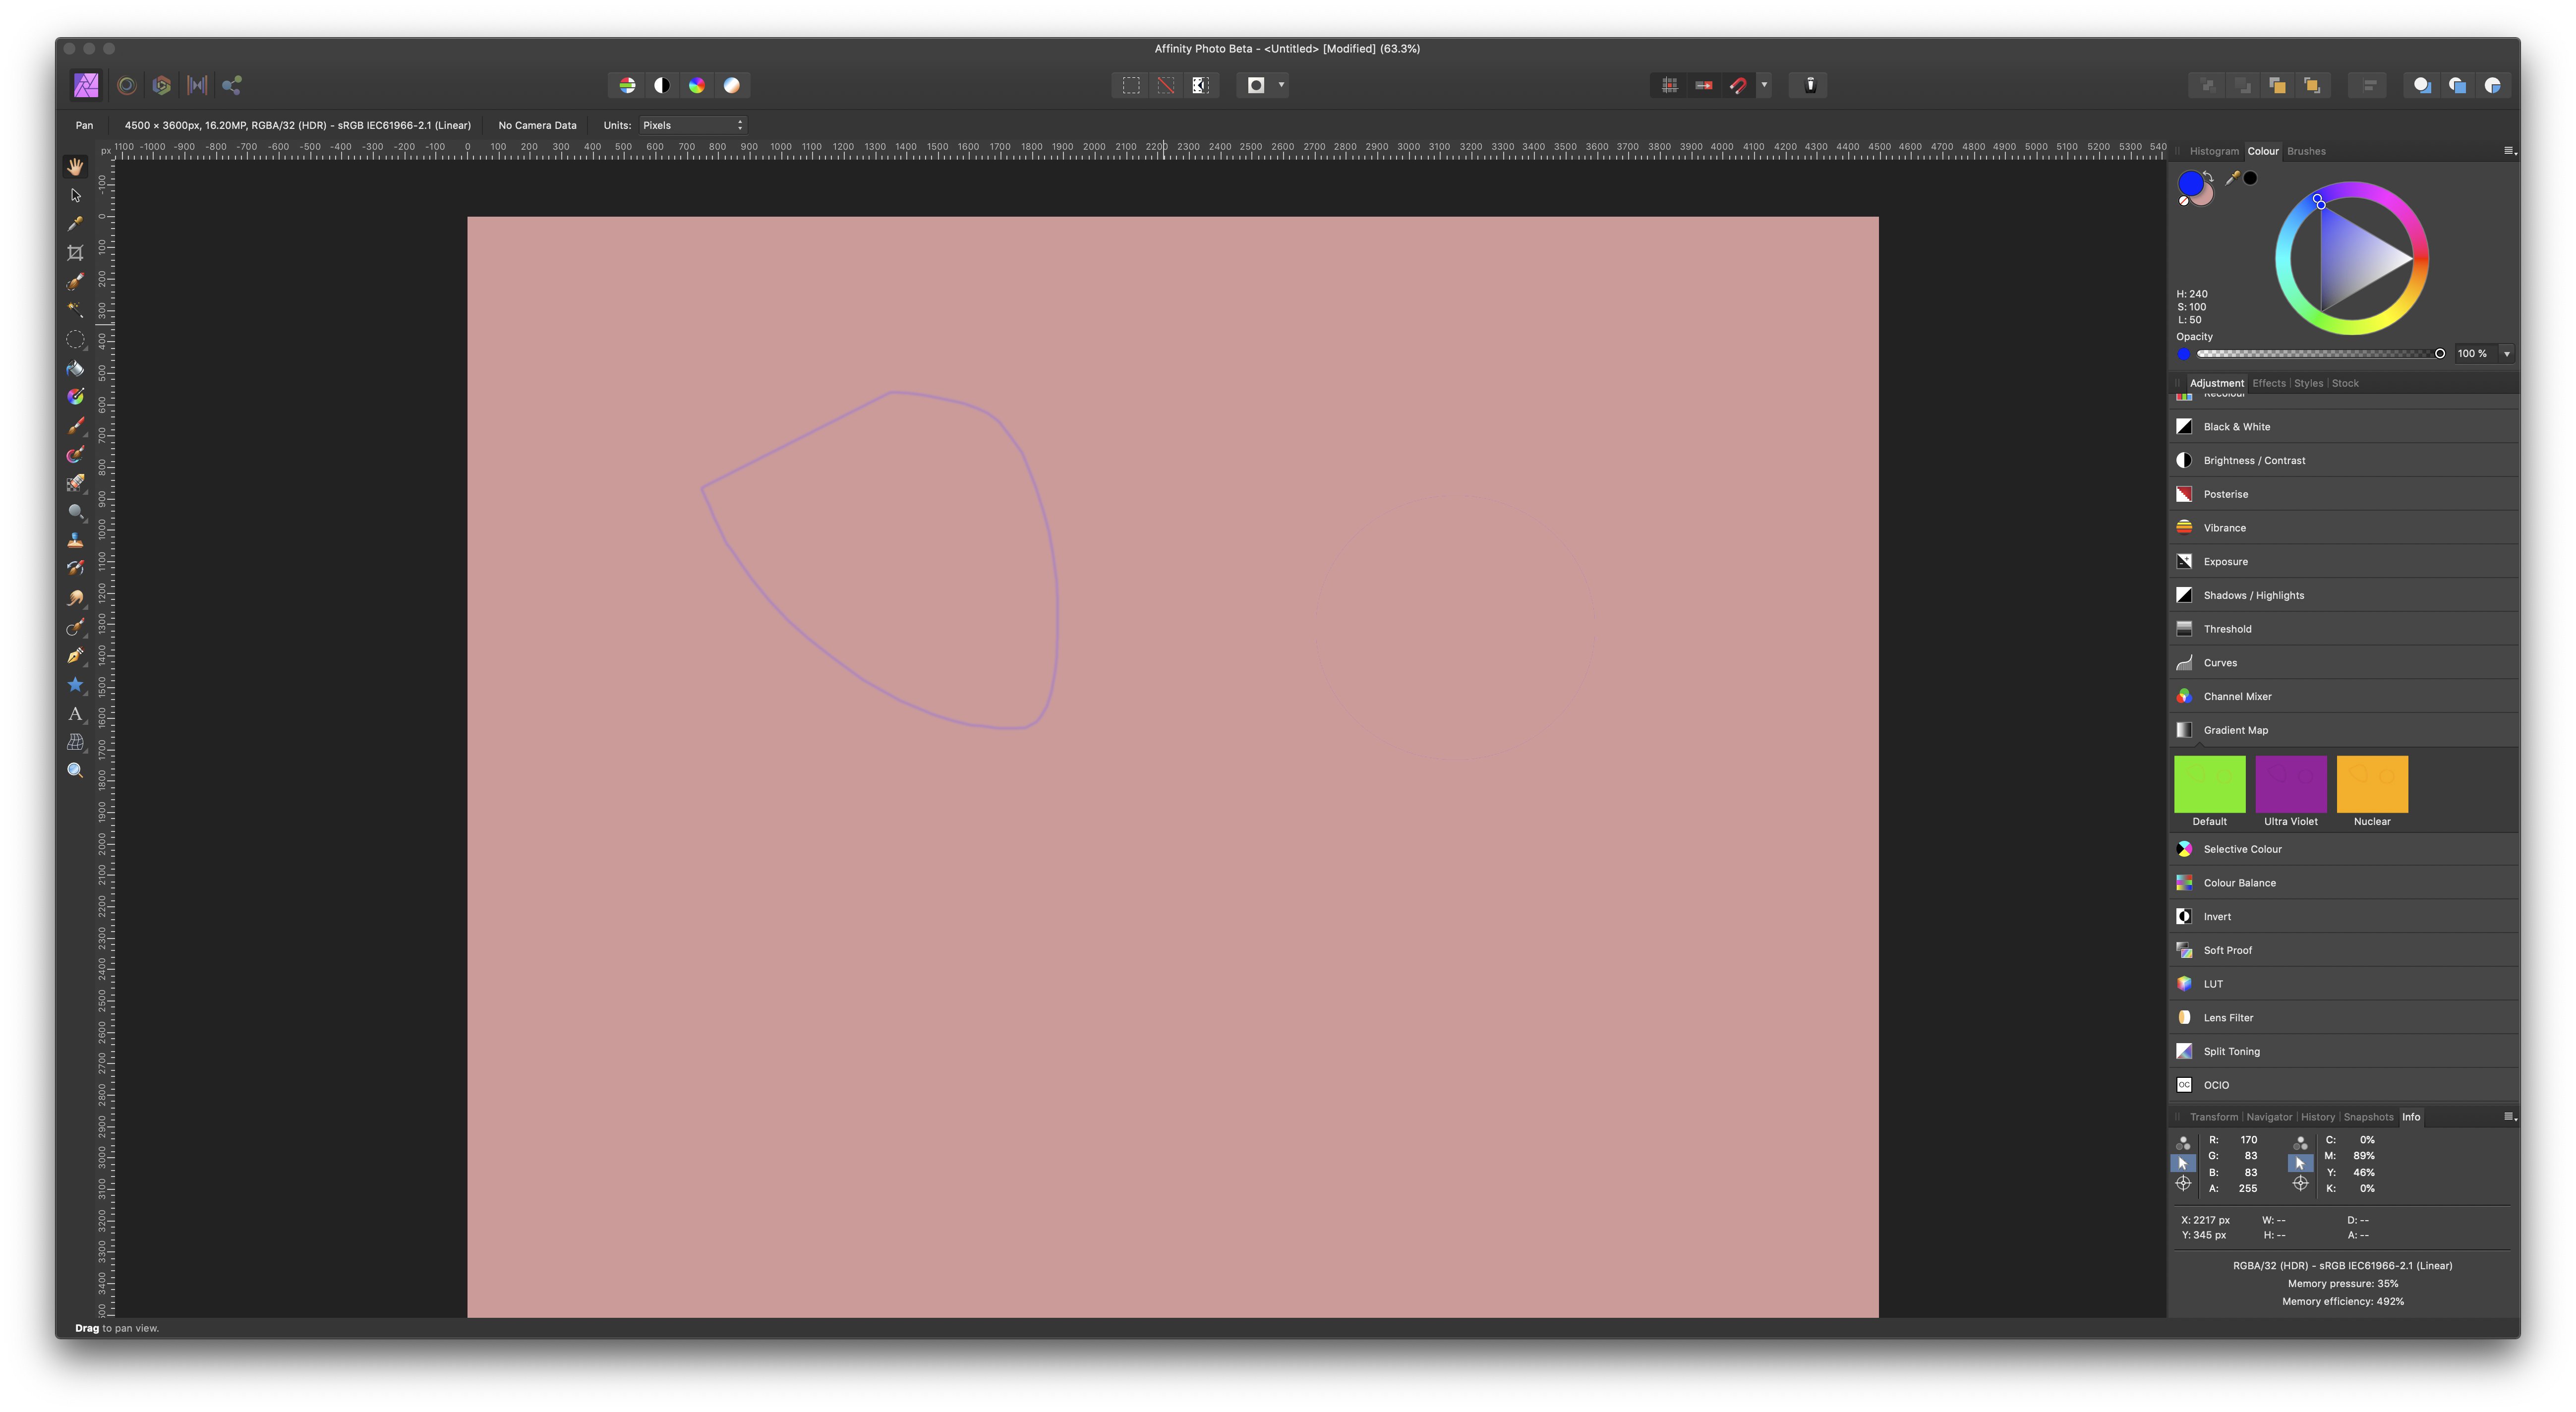
 I am trying to understand what is going on under the hood when I invert a selection. Situation: I have an image with a selection. The selection consists of two parts, one (at the left hand side) done with the freehand selection tool, the other (to the right) with the elliptical marquee tool. The freehand part has a blurry boundary, the elliptical part has a sharp boundary. I now want to create two layer masks, one from the selection and the other from whatever is outside of it. I use Invert Selection for that. The idea is to stack two layers with the original image, with one of the masks applied to each of them. Hopefully, each mask will let through just enough so that together they will blend into the original image. I expect normal blending mode should do the trick. My way of working is the following: - the original selection I save into a channel that I call "base selection". - I then invert the selection, and save the result in a channel called "base selection inverted". - I create a pixel layer and fill it with pink colour. - I duplicate that layer. - For each of the two layers I create a mask. The "base selection" channel I load into alpha of the first mask, the "base selection inverted" channel into alpha of the second mask. - I stack the two layers with normal blending mode. - I activate both layers and their masks. - Finally, to see clearly what is happening I create an extra blue pixel layer that I use as background. This is the resulting layer panel: I would now expect, perhaps naively, that I would see the original pink image back, since the masks are complementary and both let their own part of the original through. Instead, I see the following: Whereas the elliptical selection to the right is invisible, the blurry freehand selection to the left lets part of the blue background shine through. I now have the following questions: - how exactly is the selection converted into a mask through the channel? As I understand it, a mask is a mapping that tells what opacity to assign to each pixel of the (pixel) layer it is assigned to. White has 100% opacity, black is fully transparant. Fine. For black and white positions in the mask, this works. But if there is a position in the mask with "grey tonal value", an opacity between 0 and 1 is assigned. What is the formula for that? How is this "gray tonal value" determined, and once you have it, how does it translate to an opacity number? - How do the opacity numbers relate between a mask derived from a selection, and a mask derived from its inverse? Are they complementary, i.e., add up to 1 in every case? - From what I am seeing, it looks like inverting a selection does not necessarily lead to masks that are complementary in the sense that they can work together to restore a full image. They may leave spots with less than full opacity, if selections have blurry edges. This leads to the following question: is there a way to achieve what I am aiming for? Or am I missing the obvious here? Thanks to everyone who read through all this. I do hope you can shed some light. For reference, I attach the project (done with AP 1.7.0.128). Jeroen. selection inversion test.afphoto
-
Has hiding the selection line been asked about before? I used this a lot in PS and it was very helpful when tweaking/aligning the image portion to see behind the marching ants. Also, even though I'm impressed with the image adjustment tools, some buttons for moving a single pixel at a time would be useful as well. Thanks
- 6 replies
-
- 1
-
-
- marching ants
- selection
- (and 3 more)
-
Hello there, i can reproduce a crash of Affinity Publisher when i make a text-selection which goes over multiple pages. It´s a pretty long text which goes over ~20 pages. The interesting part is that i found only one position where this happens. If i make a text-selection over 2 pages somewhere else: it doesn´t crash. The selection goes a little bit crazy, but no crash elsewhere I am on .312 see no newer version but i have opend these files with some of the "newer" versions of publisher which were retracted soon after I´ve attached a screenrecording to see for yourself: 2019-05-22 02-01-13.mov
-
 Hi.. Is there any command similar to the Photoshop "Image - Crop" after making a selection? I want to crop and image to that seletion but i can't find how Thanks
 -
 Hi, I have a little Problem with Affinity Photo. I think the solution is simple but I can´t find it or understand it (not in the workbook, tutorial ?? where to find ? ) 1. I make a screenshot with the print key.on the keyboard. 2. Next I paste the screenshot created by Windows into Affinity Photo 3. Now I only need some parts of the screenshot. I want to make a rectangular selection and copy this part into i.E. word or another software. 4. Because the colors are very similiar (another Tools won´t work properly) , it is the easiest way to use a rectangular selection. Every time when I try to copy and paste the rectangualar selection it will always paste the whole screenshot. The rectangular selection isn´t copied at all. Is there any way to make a quick selection and copy this part of a picture into another software? At the moment I have to create layers and a background, next save this part of the screenshot, load it into another software. This Costs a lot of time. I don´t need to save these pictures on the harddrive. How can I do this in a quicker way? Is there any clue ? Regards, timbojones
 -
 Hello Team, Want to know if the add of Luminosity mask (Live) is planned for AfPhoto ? actually in beta cycle. Yes Luminosity masks will make life even better and easier for a lot of people, i've learned to use it and it makes a lot of things possible. I know people have said it is possible to mimic it but i'm actually asking about a native one and if it is planned to be implemented. Blessings !
 -
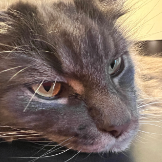
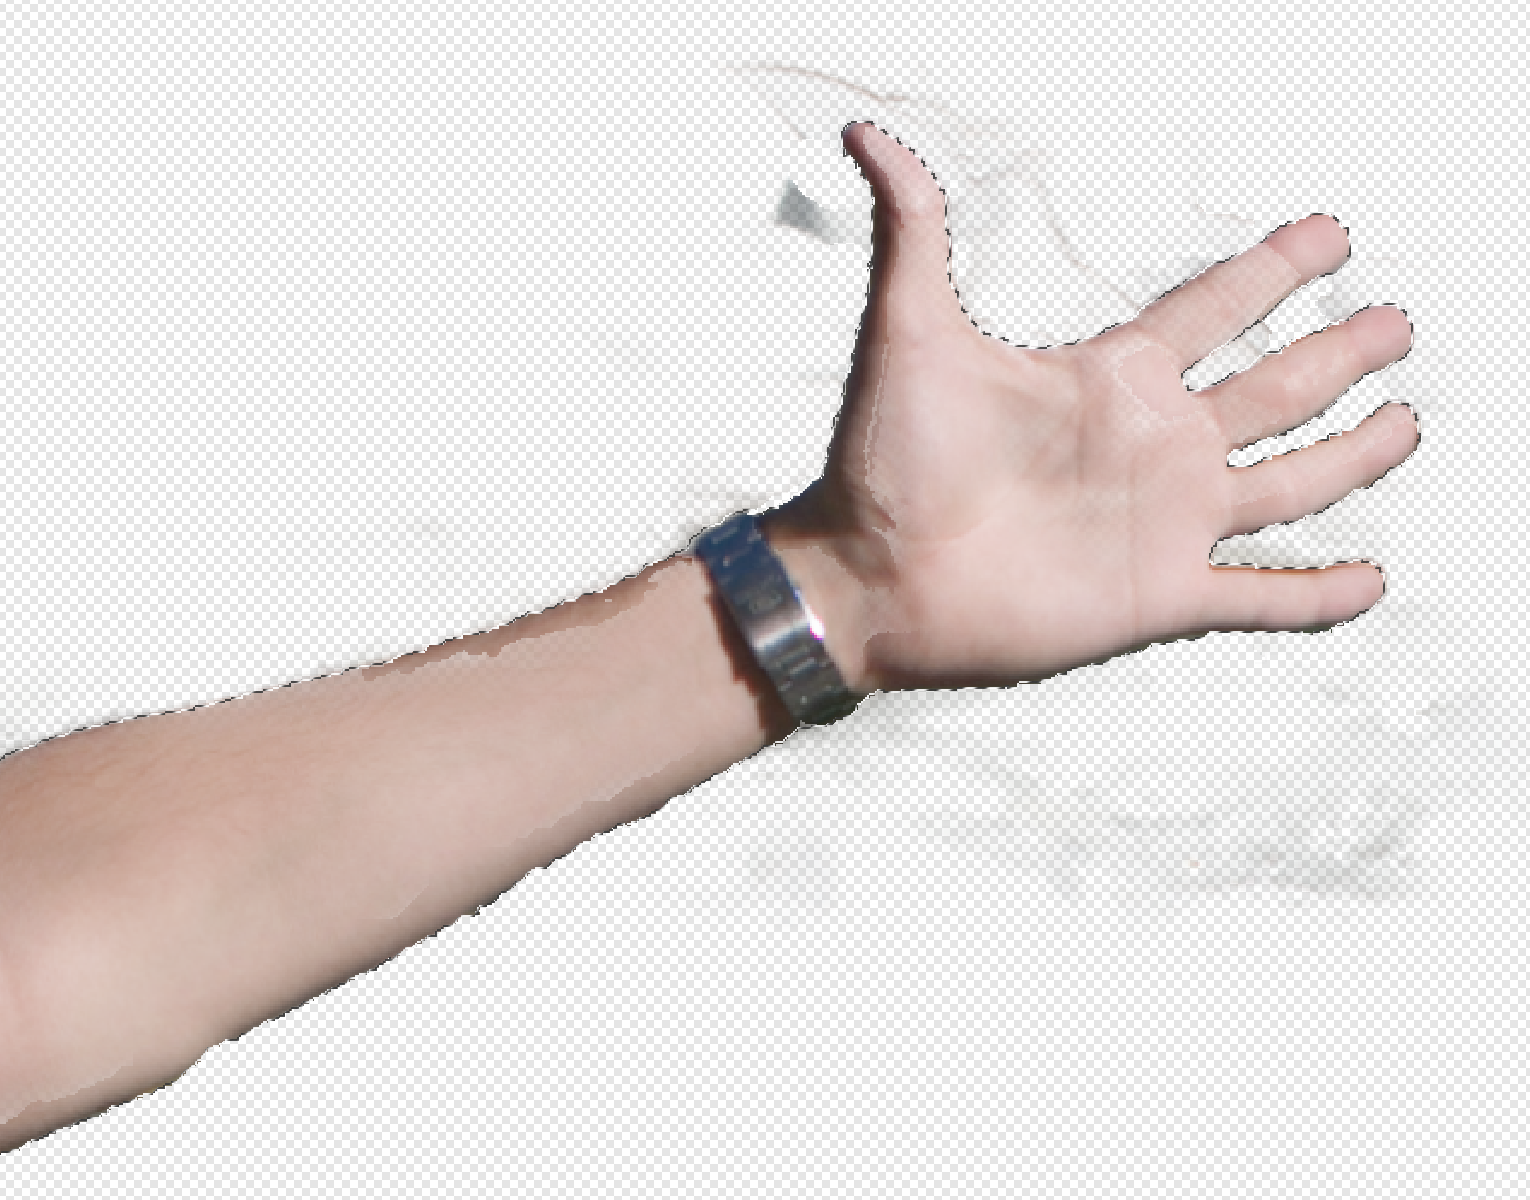
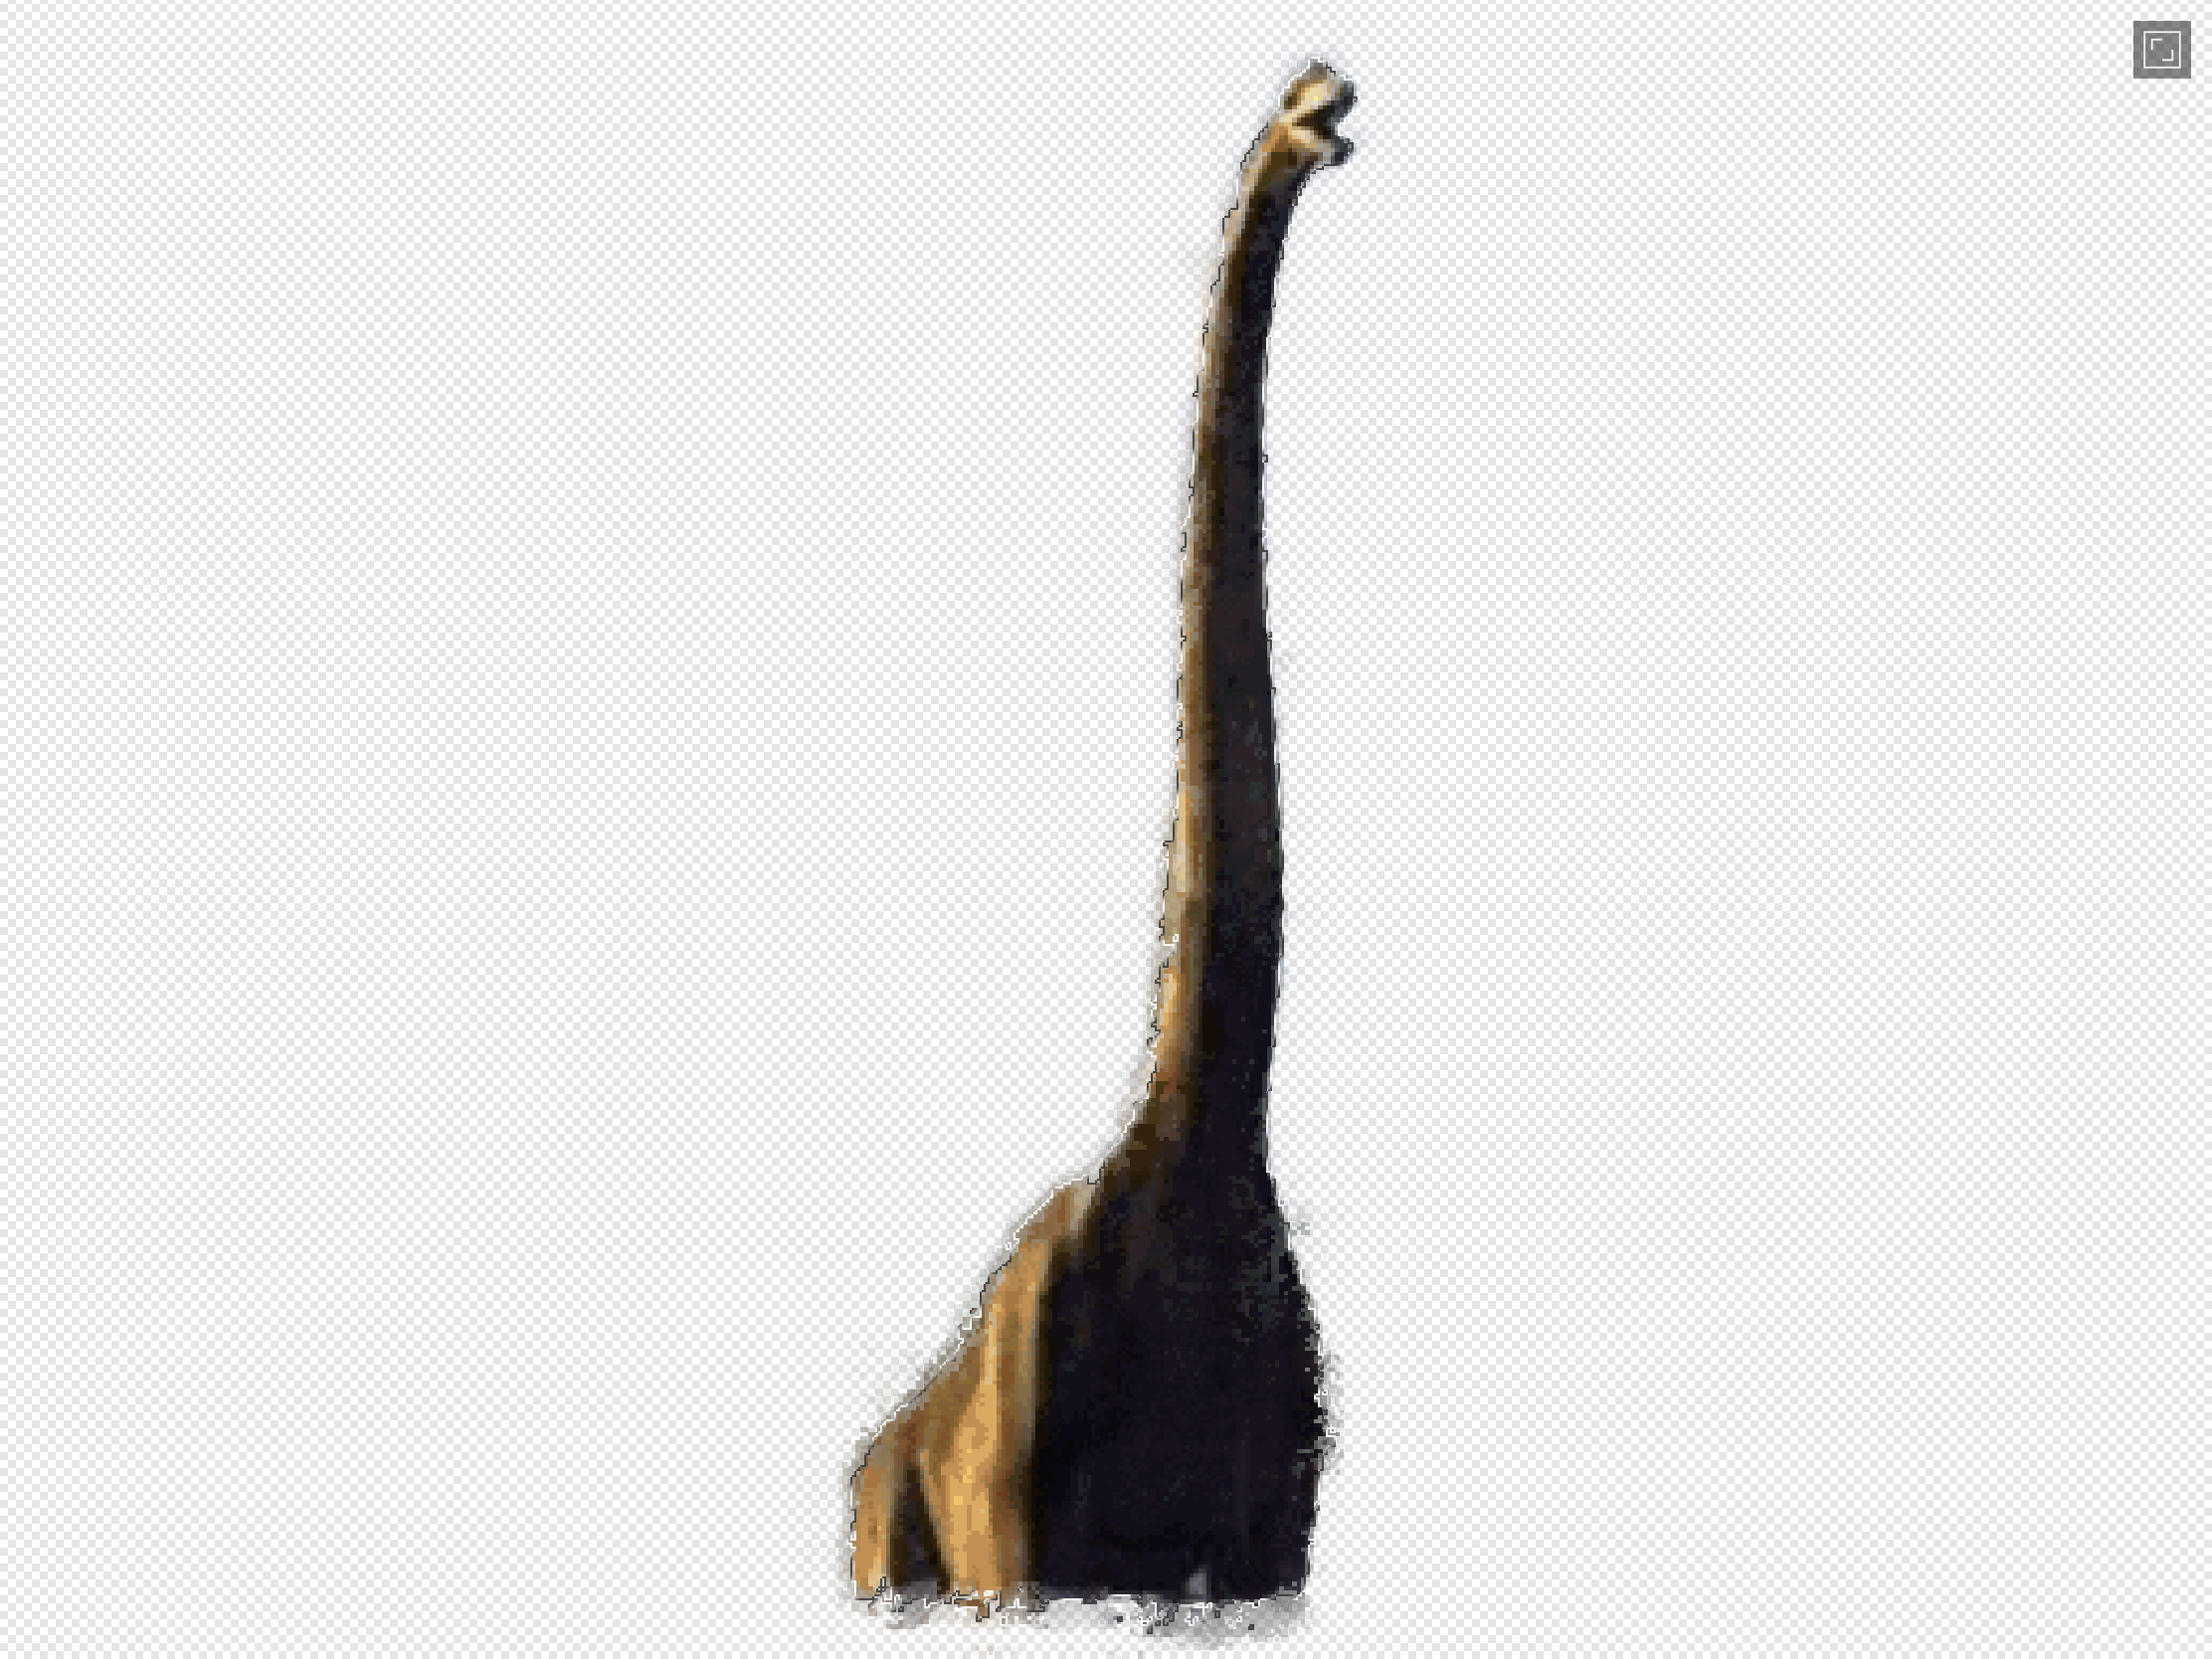
 Hi all! First of all, thanks in advance for reading and helping me out, if you can. I have been using Designer for a little bit more than a year now, but I never got to use Photo a lot. I recently came back from holidays and wanted to extract a person from a picture with Affinity Photo, and I'm having trouble with something that should be super easy, and I want to understand why is this happening and how to fix it. The problem is that after using the flood and wand selection tools, I have my desired outline selected, but when I copy and paste (cmd + c and cmd + v), the pasted image is like with a "weird opacity". I don't know how to solve or configure this, and I'm not too technical on image editing either (so apologies for the non-technical terms). I just want a simple selection and copying/pasting whatever is inside, in full, without opacity variation and without copying things outside the outline. I also used selection refining without any good results. It ended up removing selection I wanted, adding unwanted one, even while adding with the refine brush and removing with the modifier, it did whatever it wanted, so I went manually with the wand, varying sizes and snapping configurations. Here is an example for you to see what I'm talking about. The first one is the original image with the selection I want to copy and the second one is how it looks when I paste/mask it. If you see, the light/shadow areas are all wrong (like "low quality") and it even adds something outside the outline for whatever reason. Tried googling and searching with no solution Thanks all for your help!
-
 Hi I'm other applications it is possible to dedicate certain tools to finger gestures. So for instance if I'm currently using the vector brush tool and then draw a line with my apple pen, I can select the line by dragging my finger on the canvas without first tapping the selection tool. This makes the work flow much more convenient and it feels more like iOS than desktop. Please add that to a upcoming release!
 -
 Why does it select content outside the selection when using refine selection?
-
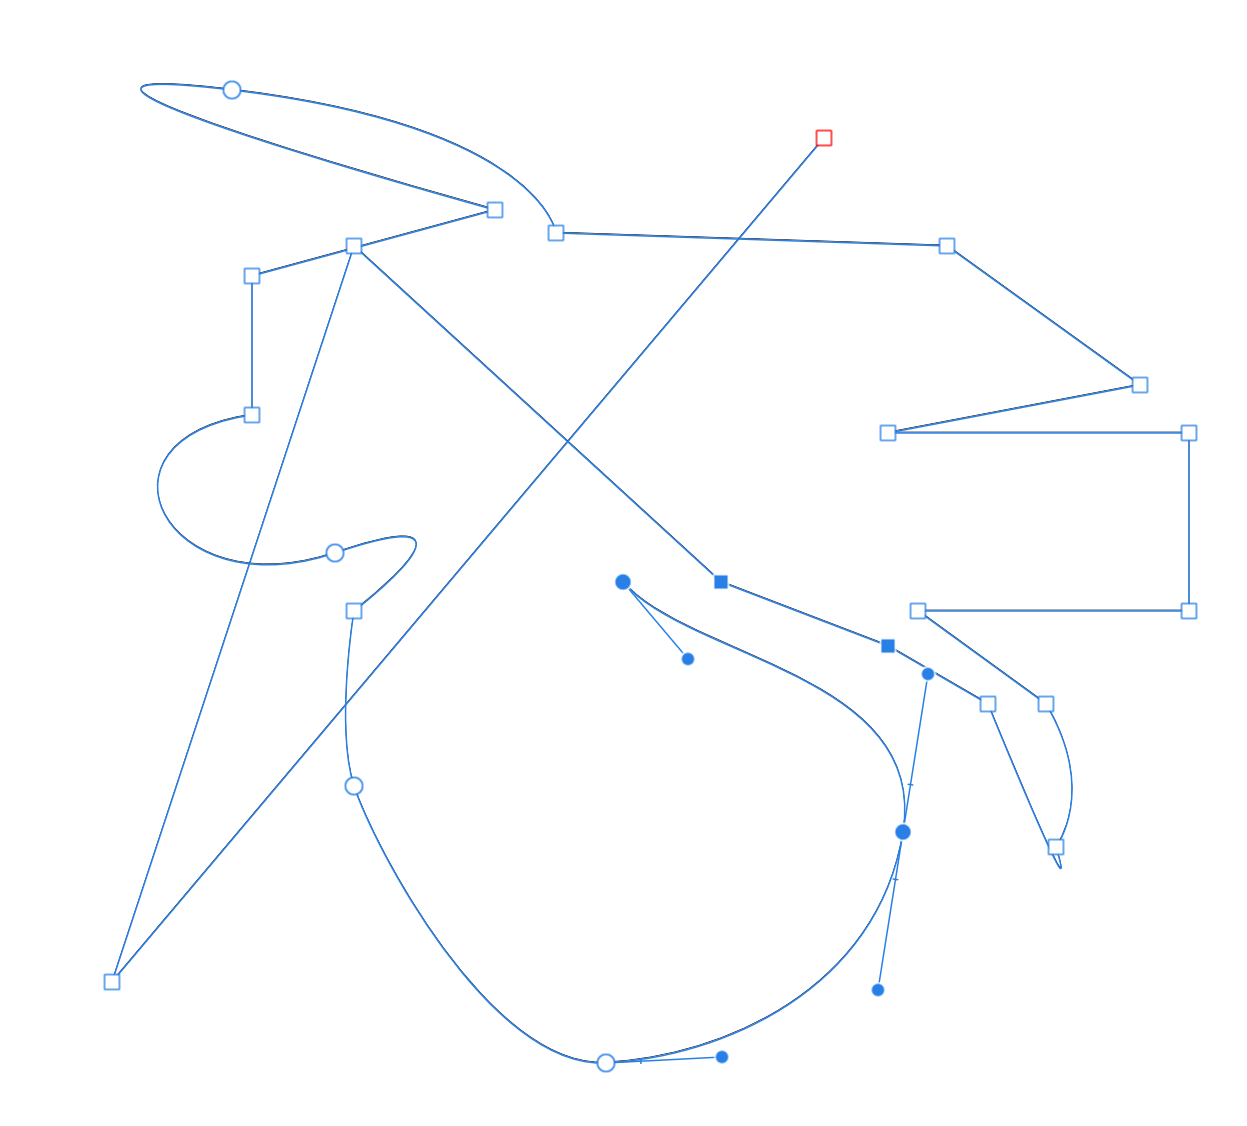
 Hi, I was testing out the Node Tool Selection Lasso. With Node Tool selected, Alt-Drag around the intended nodes to select on your open shape. Sometimes the lasso will select nodes not within the lasso boundaries. Seems to happen when starting a lasso and it is ambiguous as to which "side" the selection is going to be. I uploaded a screenshot of the entire shape I was playing with. Admittedly one would probably not be using a shape like this for anything, but worth noting how it affects the lasso selection. The two screen grab videos show the irregular behaviour. 2019-03-12_08-12-28.mp4 2019-03-12_08-17-17.mp4
-
 Windows 10 Home 1809, Publisher 1.7.0.257. The attached GIF shows what's happening better than I can explain it. Basically, selecting some cells from the bottom table actually selects some cells in the upper table, sometimes. Same document that I attached to this post: https://forum.affinity.serif.com/index.php?/topic/80965-spacing-between-table-cells-in-affinity-publisher/&tab=comments#comment-426146
-
 Bonjour Je cherche comment couper un morceau d'image avec l'outil "sélection rectangulaire" je pensais qu'il fallait juste sélectionner la partie à couper et ensuite "ctrl + X" mais ça ne marche pas, cela supprime toute l'image merci pour votre aide
 -
 How can I turn my curve into a selection so that I can continue working with it? Or is this function not yet available?
 -
 Dearest forum members I fell in love with affinity photo and -designer and am getting a lot of work done. Thank you devs. There is an issue with my way of thinking and I'm sure I'm just one little step aside. I scanned a ink splatter and wish to create a outline of it to print only the outline. The selection is easy and even giving it a stroke, but the moment I deselect the selection area, the artboard is empty. I tried to rasterize, tried to create a new layer with the selection selected and created a stroke but again, the moment I deselect, the artboard is empty. It's like I'm just doing some little mistake but can not find out what it is. The forum post show that a lot of designer wish to stroke a selection and some tips are not bad, but none of them work. I created a "style" but again, the stroke will not remain . Please help. Kindest regards Urs