creatinglightly
-
Posts
9 -
Joined
-
Last visited
-
 creatinglightly reacted to a post in a topic:
[Designer] Avoid overlap of blending modes?
creatinglightly reacted to a post in a topic:
[Designer] Avoid overlap of blending modes?
-
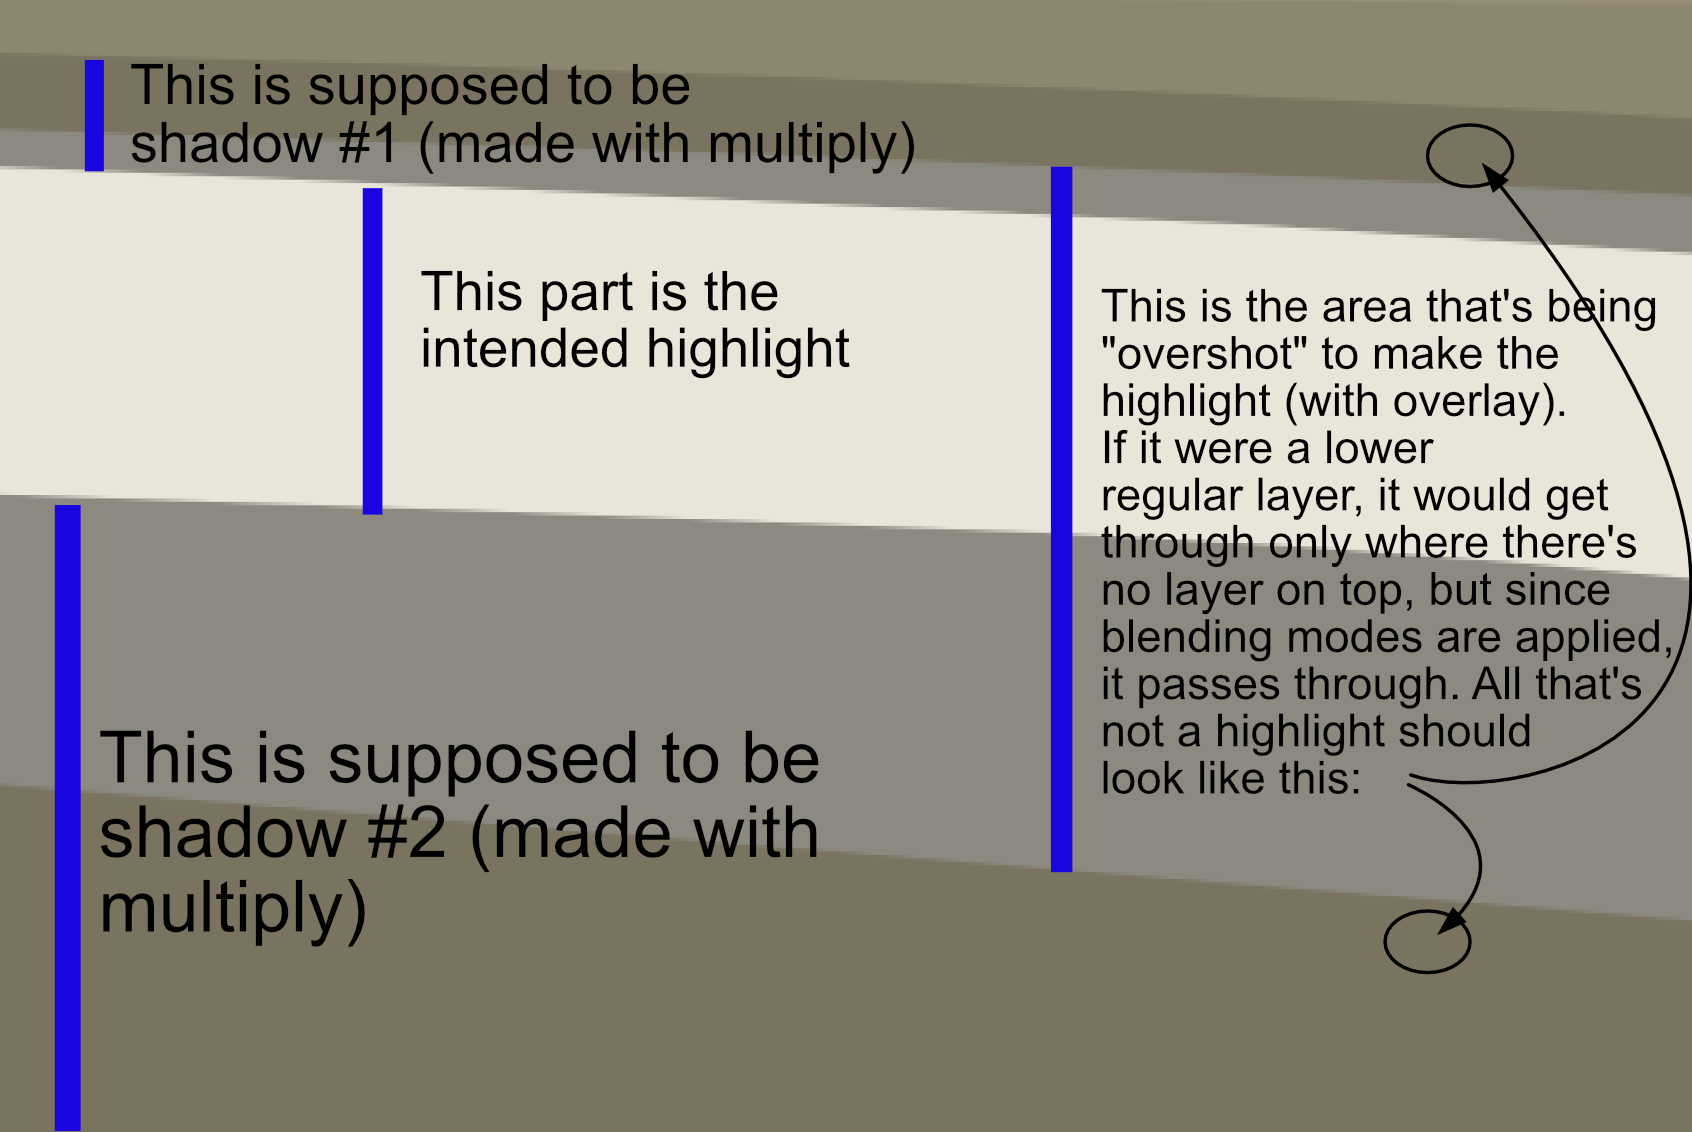
Hello everyone! I'm having a hard time with something I'd like to do in Affinity Designer and don't know if it's because I don't know how to do it, or because I'm understanding things the wrong way. Is there a way to use multiple blending modes but that between them they don't affect each other? I have a base layer (flat colour). On top, I have a shadow layer and a highlight layer with multiply and overlay blending modes respectively, but because of how I stack my layers, it's easier for me to do one layer and the other below it, instead of making them precise. In 100% opacity normal layers, this works because the top one hides the one below, but with blending modes they, well, blend. Is there a way for me to make them not apply to anything but the "base layer"? I tried masking a copy of the base layer but the blending mode wouldn't apply, and in any other way, undesired interaction between layers was happening. I'm adding an image to make myself more clear The layer panel at this time looks like this: - (Stuff) - Shadow group (with multiply) - Highlight group (with overlay) - Base colour layer Thanks a lot for your time!

-
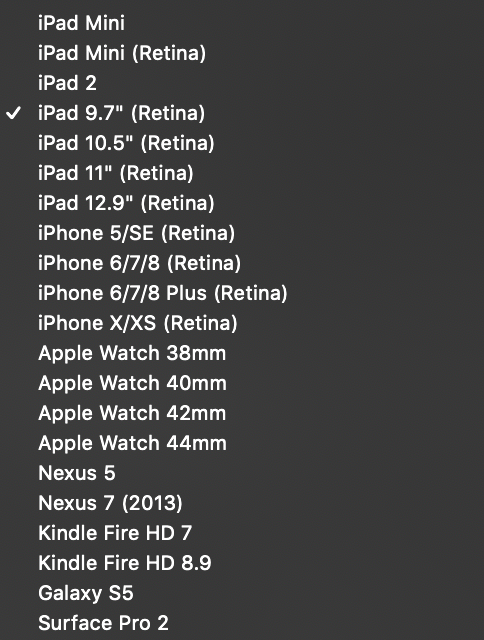
Hi all! Hope you're doing great! I'll try to be brief. As I pointed out in this twit, the non-Apple devices found in the preset dropdown in the Affinity suite are way too old. I don't even remember what screen, resolution or size these devices had, for this "preset suggestion" to be relevant to me anymore (I mean, just look at the release dates. Nexus 5 and Surface Pro 2: October 2013, Galaxy S5: April 2014, etc.) I believe the suite could have more useful presets by simply updating the models these presets refer to, so that we can have something more recent in mind when we choose what to work with. Thanks a lot for reading!
-
creatinglightly reacted to a post in a topic:
Export persona: exact slice dimensions
-
edee reacted to a post in a topic:
How Do I Crop and Resize a Screenshot in Affinity Photo
-
Dan C reacted to a post in a topic:
Help with selection/copy/paste
-
Thanks! Yeah, that's the one I followed originally, but I must have messed up somewhere Thank you all for the replies! I consider it a good welcome to the forums. I'll stick around. Have a great week y'all!
-
 creatinglightly reacted to a post in a topic:
Help with selection/copy/paste
creatinglightly reacted to a post in a topic:
Help with selection/copy/paste
-
Thanks for all the answers! I will probably have to do some homework to understand feathering and other selection settings, though! I was sure it was my problem and not the app's haha. What I still don't get completely is the following doubt I wrote about before: Thanks!
-
creatinglightly reacted to a post in a topic:
Help with selection/copy/paste
-
creatinglightly reacted to a post in a topic:
Help with selection/copy/paste
-
creatinglightly reacted to a post in a topic:
Help with selection/copy/paste
-
creatinglightly reacted to a post in a topic:
Help with selection/copy/paste
-
Yeah! That also is super weird, because I would think that the selection would copy/mask everything inside the marching ants and leave the other pixels out, but it did not and it just is weird. But I wouldn't call it a bug, but more probably a PICNIC (Problem in chair, not in computer) haha.
-
Thanks for replying, John. I inverted it and deleted the inverted selection, but as I expected, it deleted also things within my desired selection (that "lower opacity" part within the arm). Jules, Dan, thanks for replying. I guess I just messed up the selection by using Selection Brush Tool -> Refine (changing parameters to test, without understanding too much) -> Selection Brush Tool in add mode and that made the whole process mess up. By doing as Dan suggested (deselecting and using the Selection Brush Tool from scratch) it appears to be working as expected. I'm sorry about the noise, but I tried to follow the official tutorials in selection and refining and got into this problem. I believe that refining this is "easier" than refining hair, but I don't know actually how it's coded. Just to clarify and be able to close the thread: am I correct if I think that I could "loosely" select the whole arm with the brush tool , then refine (both by just touching the refine button and applying and using the refine brush to add/remove sections with different brush sizes) and call it a day? Because that is what (I think) I've done, but the result was not the expected one. Thanks again to all for taking the time to read and reply.
-
Gnobelix reacted to a post in a topic:
How Do I Crop and Resize a Screenshot in Affinity Photo
-
Hi! One easy way I found to do this is: 1) Use the crop tool to crop the area you want (just as in Photoshop), then press enter. 2) Right click in the resulting layer, and click Rasterize... 3) Use the crop tool again to enlarge the area. That will fill it with a transparency. Hope it helps!
-
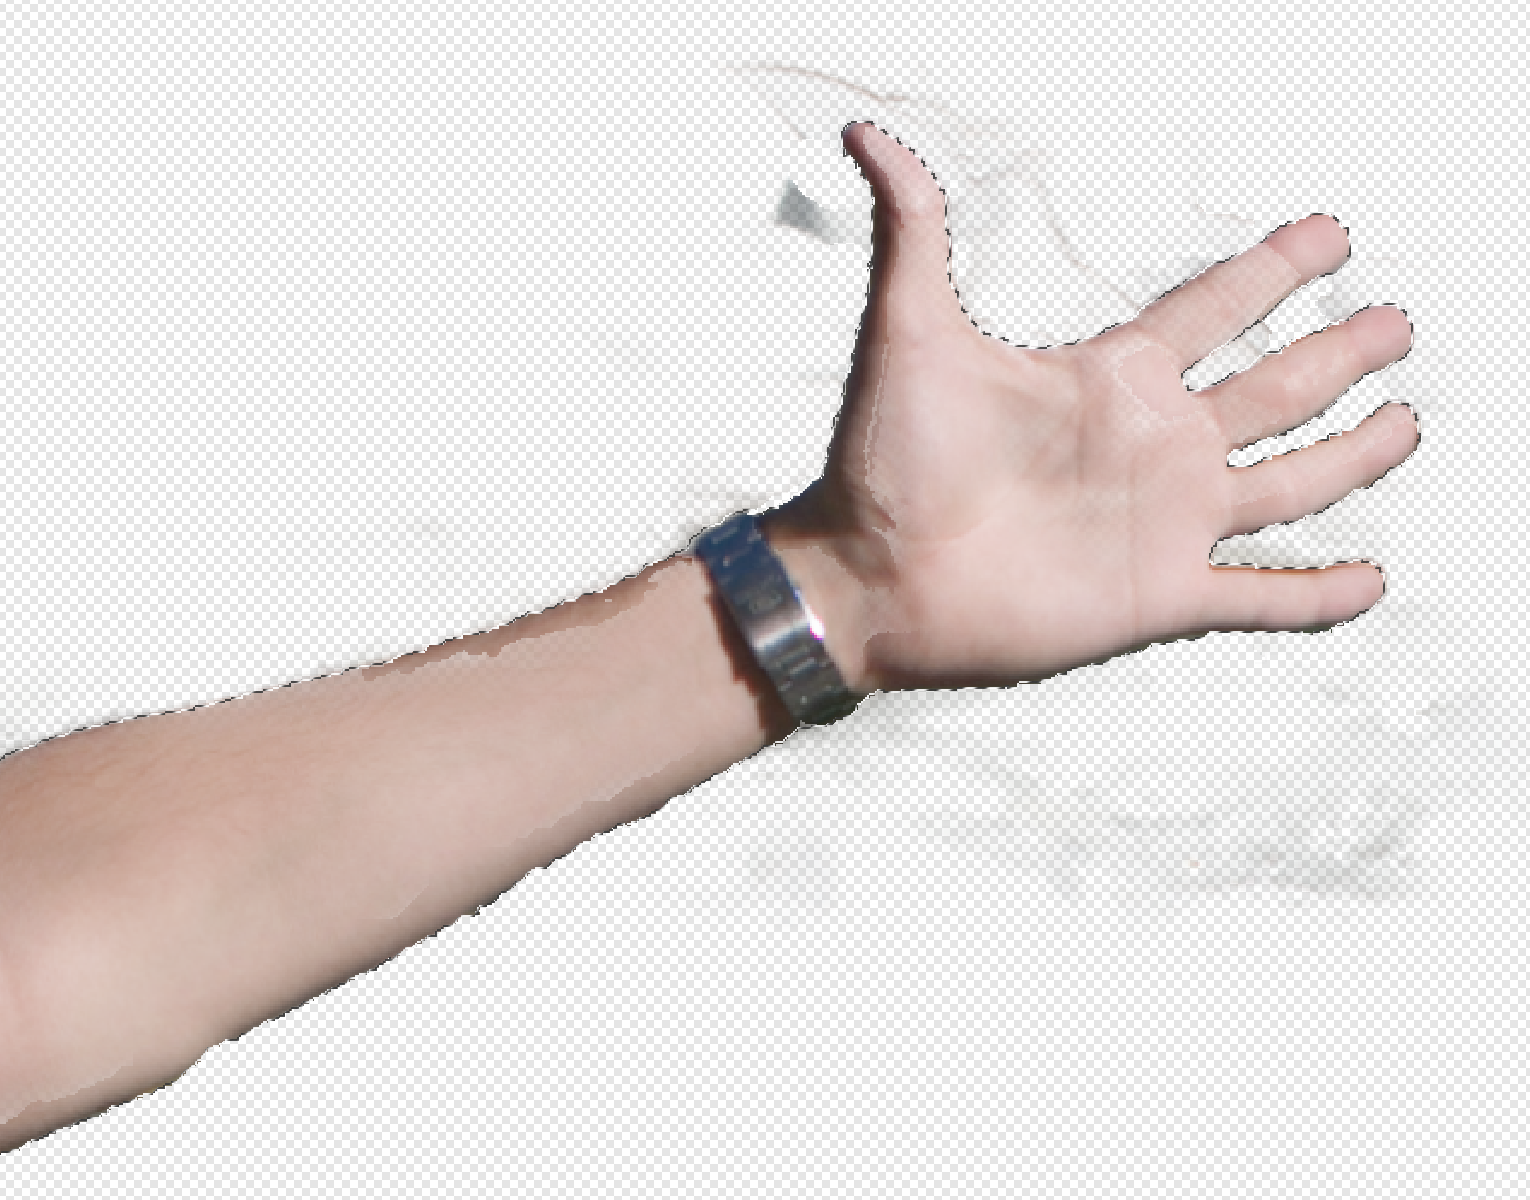
Hi all! First of all, thanks in advance for reading and helping me out, if you can. I have been using Designer for a little bit more than a year now, but I never got to use Photo a lot. I recently came back from holidays and wanted to extract a person from a picture with Affinity Photo, and I'm having trouble with something that should be super easy, and I want to understand why is this happening and how to fix it. The problem is that after using the flood and wand selection tools, I have my desired outline selected, but when I copy and paste (cmd + c and cmd + v), the pasted image is like with a "weird opacity". I don't know how to solve or configure this, and I'm not too technical on image editing either (so apologies for the non-technical terms). I just want a simple selection and copying/pasting whatever is inside, in full, without opacity variation and without copying things outside the outline. I also used selection refining without any good results. It ended up removing selection I wanted, adding unwanted one, even while adding with the refine brush and removing with the modifier, it did whatever it wanted, so I went manually with the wand, varying sizes and snapping configurations. Here is an example for you to see what I'm talking about. The first one is the original image with the selection I want to copy and the second one is how it looks when I paste/mask it. If you see, the light/shadow areas are all wrong (like "low quality") and it even adds something outside the outline for whatever reason. Tried googling and searching with no solution Thanks all for your help!