Search the Community
Showing results for tags 'Affinity designer'.
-
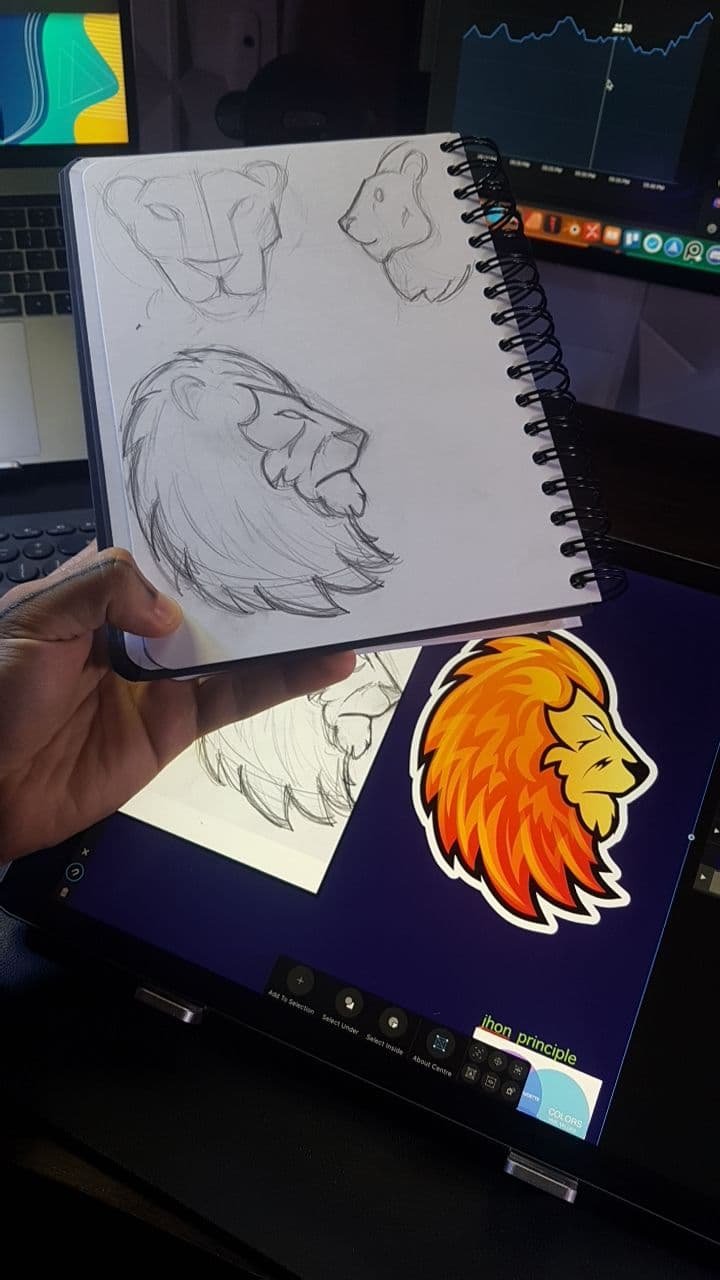
Hey people 🤩, here is a design done during my live streaming✒️, I show how you can vector a design done on paper in case you guys are curious to see my process, give it a check on my yt channel here is the link, enjoy! https://youtu.be/-IlzGoTKmGA 🤗

-
 I'm not sure if I'm not understanding the gradient colour selection dialog boxes. I have two artboards of the same poster side by side, one is my CMYK version and the other is RGB. I'm switching between them and trying to ensure that each one has the correct colours set. How ever, when I edit one, say RGB, then go to the other CMYK one the dialog box isn't switching to CMYK, so I tell it I want these colours to be CMYK. Then back over to RGB artboard and select the same item, but now the dialog box is saying each step is CMYK. I'm confused to say the least. Isn't it meant to show me the colour of the step selected and not the last colour used? Put two boxes next to each other, fill one with RGB and the second with CMYK (can be a solid or gradient), now go back to the first box and it's suddenly a CMYK. I'm losing the battle here (and my sanity slightly). Is it that a single document can't have CMYK's and RGB's? Thanks for any direction on this as I'm trying to get things out for clients and this is making my already late project later.
 -
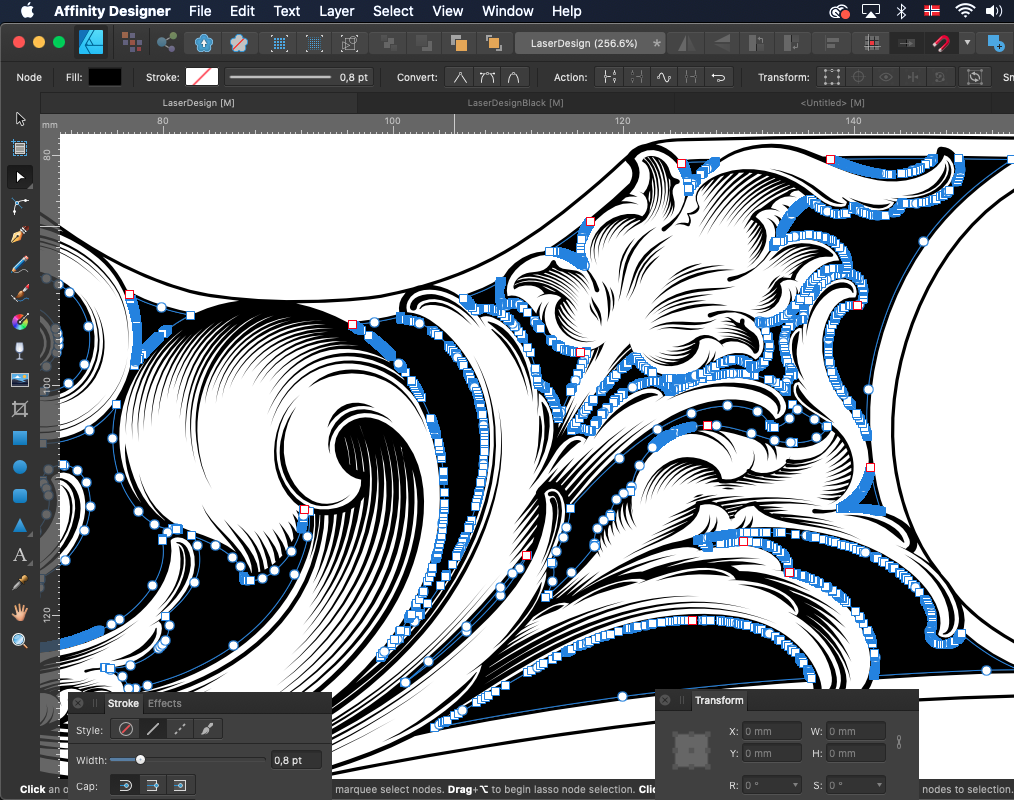
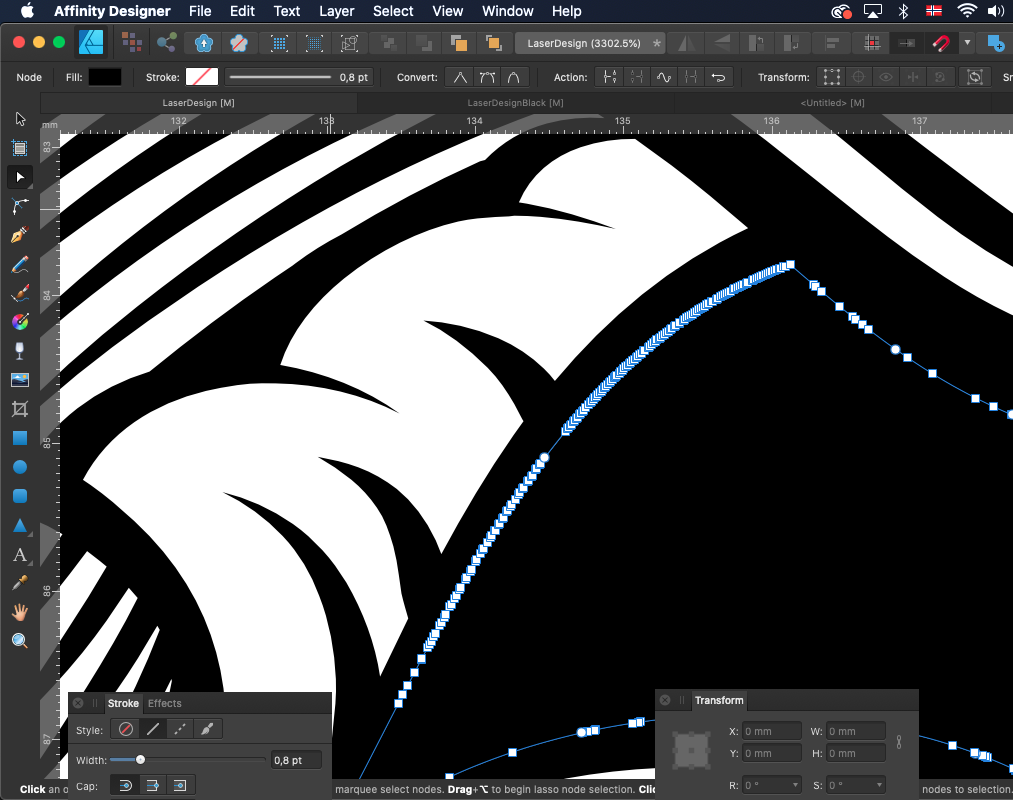
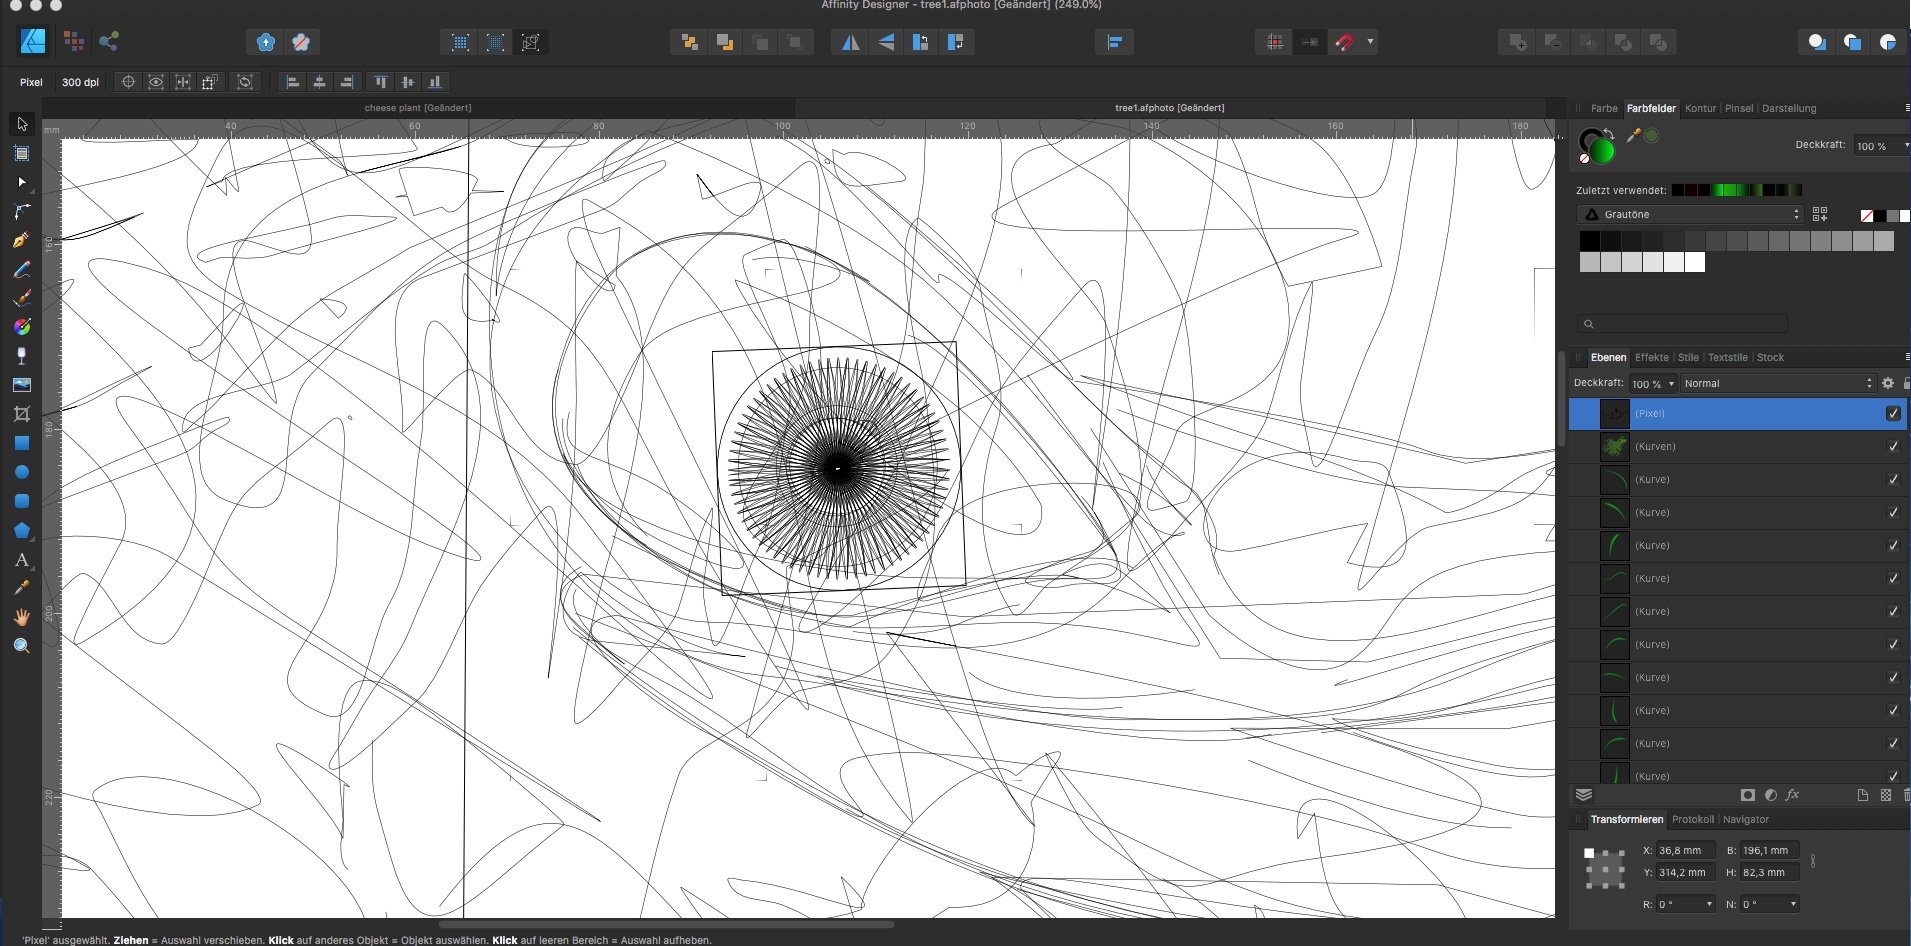
 Hi all, I´m working on a laser engraving design.. obviously and its fun! But I have a big problem.. It´s basically two layers now, one "outline" and one background" First I made the outline design with all the shadowing and expanded the strokes and used "add" to add them all together as one curve. Then I made the background All outside the outline but I made it a little bigger so I could have curves to fit exactly to the outline wnen using the subtract button. But when I use subtract it creates insane lots of unnessesary nodes (See screenshots) Is there any settings or reason why it makes so many nodes? It would take forever to try to clean up all this, as the laser engraver will go a little mental with all these nodes. I´m using a Mac Catalina 10.15.6 and Affinity Designer 1.8.6 Any help or tips would be very welcome 🙂
-
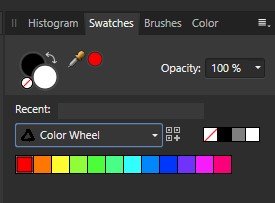
Just finished this palette I thought may be useful. Enjoy, - T V Color Wheel.afpalette
-
- 1
-

-
- affinity photo
- affinity designer
- (and 3 more)
-
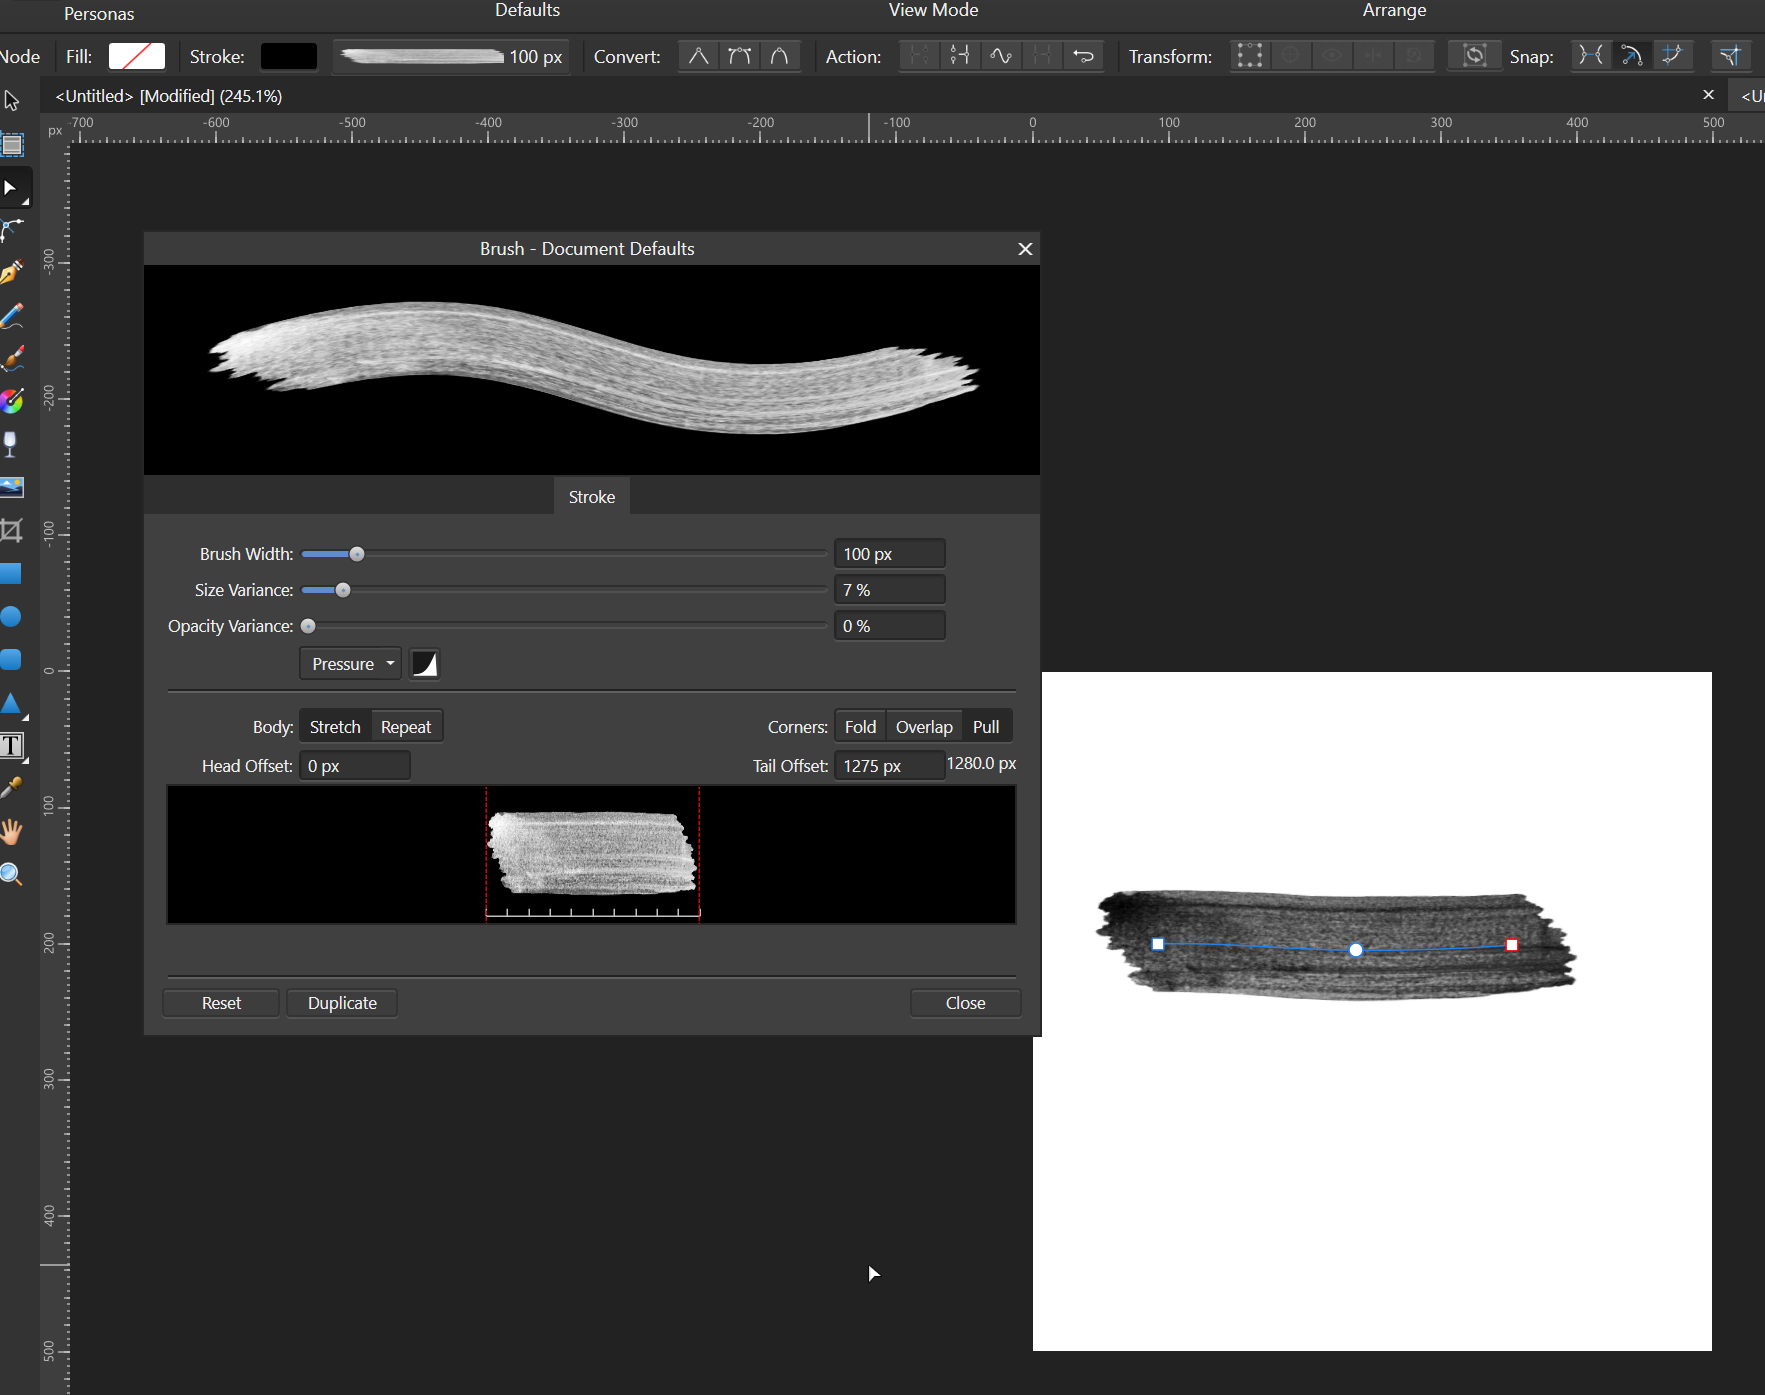
 I'm a recent convert to Affinity but I seem to have a problem with Affinity Designer on Windows. Assuming I have a new document and the first watercolour brush is set to a width of 100px, size variance 81%, opacity variance 100%. Select the first water colour brush and select the Vector Brush tool. (Context menu bar shows 100px width). Change the width in the context menu bar to 10 px. Paint a line (which appears at 10px wide, as expected). Type 'A' to select the node tool. The nodes in the curve are selected and the context bar correctly shows 10px: Click on the brush preview to the right of the fill and stroke to get the brush properties Click the properties button The brush properties dialog opens (called Brush - Document Defaults) with a brush width of 100px, size and opacity variance of 0% so it doesn't match either the selected stroke OR the document defaults! Start to change the Size Variance slider and the line in the document immediately jumps back to 100 px wide. So how do you change the properties (e.g size variance) of a brush stroke after drawing it without setting the other properties it back to other values? I assume that double clicking on the brush in the brush palette is supposed to edit the document defaults for that brush and that selecting the properties via the context menu bar should edit the properties for the selected brush stroke(s)?? Or am I doing something wrong? Thanks.
-
Greetings Team So I was making a nice glow behind some text by creating a gradient in a circle and then making it oval by scaling it down on the vertical axis. It looks great in app but when I export it forces the gradient back to a round shape which looks odd. I understand PDF may not support distorted or oval gradients but then it should be rasterized properly before it exports. In app... in PDF (CMYK conversion so the colour is different)... Thanks for your review on this.
-
 How make brtush works like daub spatula? grabs partly its colour from what i allready have. i want do my own brushes sometimes work same way even Designer i think paint mixer brush does in Photo. they have in affinity designer symbol what i post here. these premade brushes work this way but i can set any brush work this way. i checked manual no luck and i cannot add this tool to tool bar. really wanted use affinity designer for art. transfering files to program x to program y is silly. and missing such tool funny when designer is made for more art and photo more modifing and correcting photos. i post feature request if this dont found somewhere where i dont know.
-
I started off writing this as a question because I couldn't work it out, but a few times I accidentally got it to work although I couldn't work out how I had done it. (Affinity Designer Desktop v1.8.5, Windows 10). After much fiddling around I have worked out how to make it repeatable. (Admins: please feel free to move this to a better place in the forum if there is one). This is useful if you use a tablet and want to draw vector brush strokes in a mask in pressure mode, see the effect as you draw them and be able to edit them afterwards. Here is the explanation - there are three important steps which are not obvious but omitting them will leave you without editable vectors in the mask: Select the layer or group you want to add the mask to. I'll call this layer A. Click the Layer Mask button to add a pixel mask (even though we are in Designer Persona). This serves no actual purpose except that if it doesn't exist, this method doesn't work. Draw a vector brush or pen stroke (this creates its own layer above layer A). Create a group with this single curve (or more if you want to); the point is, it must be a group. Lets call this M (for mask) Make sure the group is open (i.e. click the triangle so that it points down and you can see the vector curve(s) in the group). Drag the Group M into the mask position of layer A. The vectors in group M are now a mask and the curves are individually visible and editable. A black 100% density stoke reveals anything below Layer A. Select the vector brush (or pen or pencil) tool and click on a curve in group M (select a curve in the group, not the group itself) in the layers window. No points in that vector curve should be selected because this will just extend that curve, unless that is what you want to do. Draw a new vector curve and it will be added to the curves in group M; i.e new brush strokes add vector masks in real-time. You can delete the pixel mask layer created in step 2. I have tried to record a video of the process (the context menu for the layers window doesn't show up in the recording but the actions were creating a group and later, deleting some of the vectors). Affinity Designer 2020-12-02 11-43-09.mp4 Note: if you don't create the pixel mask (step 2), group the brush stroke (step 4) or have the mask group open (step 5) when you drag it to the mask position (in step 6), you get the vector curves as a mask but you can't edit the individual curves or add any others. You can only do that if you drag the mask back out so that they become an editable group again and then re-drag to the mask position.
-
 I’ve noticed quite a few multiple feature request 'wish list' posting recently on the Affinity forums. I've an idea the posts might be born out of three areas of frustration (beyond people not reading the forum rules): Difficulty searching the forum to find the most relevant post. For example, 'knife tool' finds numerous posts, (12 forum pages worth!). Features/tools can be described in different ways. For example, 'cut tool', 'knife tool', 'scissors tool' etc. Essential/basic features have been missing or broken now for a long time. For example, true vector brushes, warp tool and faulty Boolean Divide operation.* I really thought Serif/Affinity were on the right track when they started off publishing a roadmap showing their future plans. At least it shared their thinking and priorities helping to manage users expectations. Of course with three main products and Windows, Mac and iPad variants, life is more complicated now. I'm not quite sure what the answer to all this is, ie to ensure Serif benefit and gain useful insight from any feedback and we (forum members) feel our voices have not fallen on deaf ears. I do feel this needs to be addressed as it's only going to get worse. There are already over 15,000 posts in the current Affinity Designer Feedback forum and even more (31,000) in the older feedback forum. At the end of the day I believe Affinity forum users need a quick and simple way to check that 'their' missing/broken tool or feature request has already been requested/reported and importantly has been properly considered and acknowledged by Serif staff. Thanks *(I recently managed to get over 900,000 objects dividing just 42 shapes. Although small credit to Affinity Designer, despite wasting a lot of time, it didn't crash, although it did take an equally long time to undo!) 😐
 -
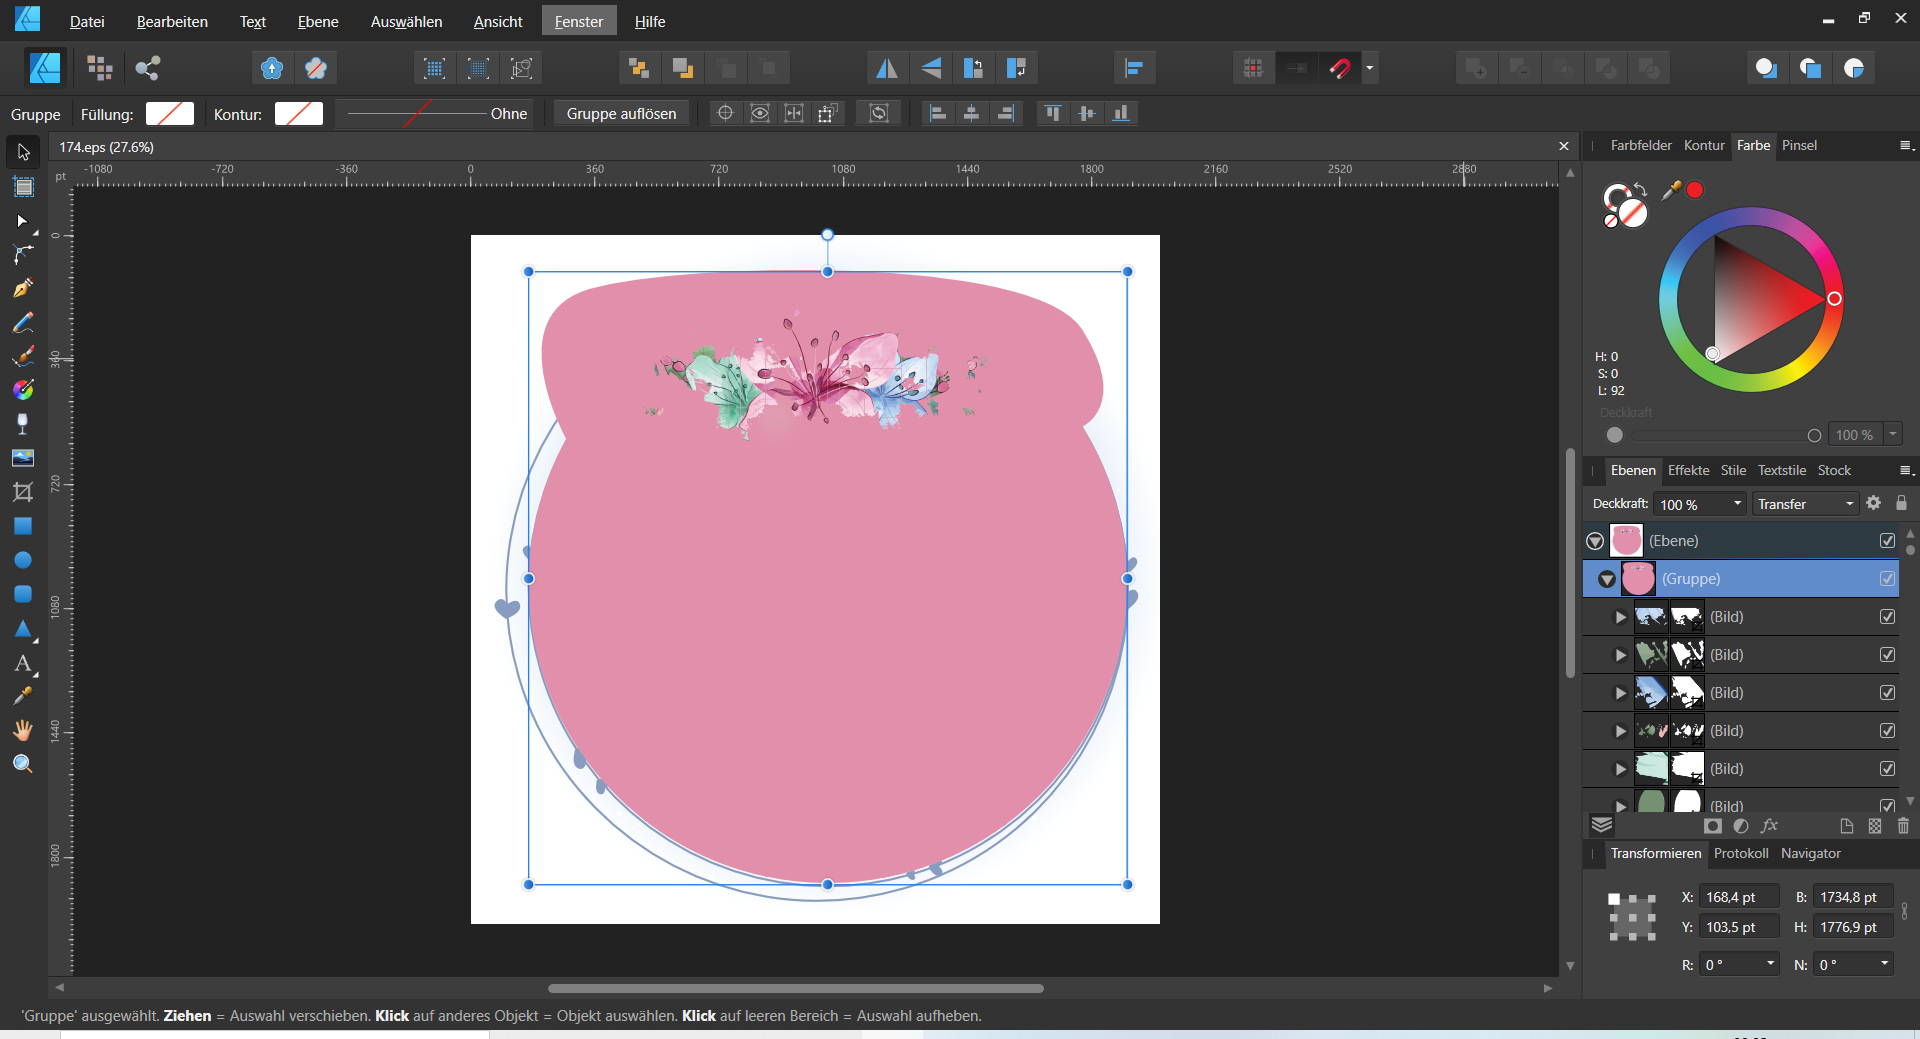
 Hi, y'all... I just purchased a vector image for my project. It looks like this (see pic bellow) if I open it on Affinity Designer. How can I edit the pic? I just need to make it smaller or bigger, and modify it for my project. I am very thankful for any hints.
-
About a month ago I launched a website for my games, and I want to share it with y'all. All of the layout elements were created in Affinity Designer, as well as the logo. https://mnemonicrpg.com/setting.html Things I'm proud of here that I created with Affinity Designer: The woodgrain background of the site, which is the exact same asset as the top menu bar, with some clever filters applied The book cover in the table of contents The parchment texture for the page's main content The logo It's gonna look different between mobile and desktop, but everything but the table of contents should be visible on both. Lemme know what you think!
-
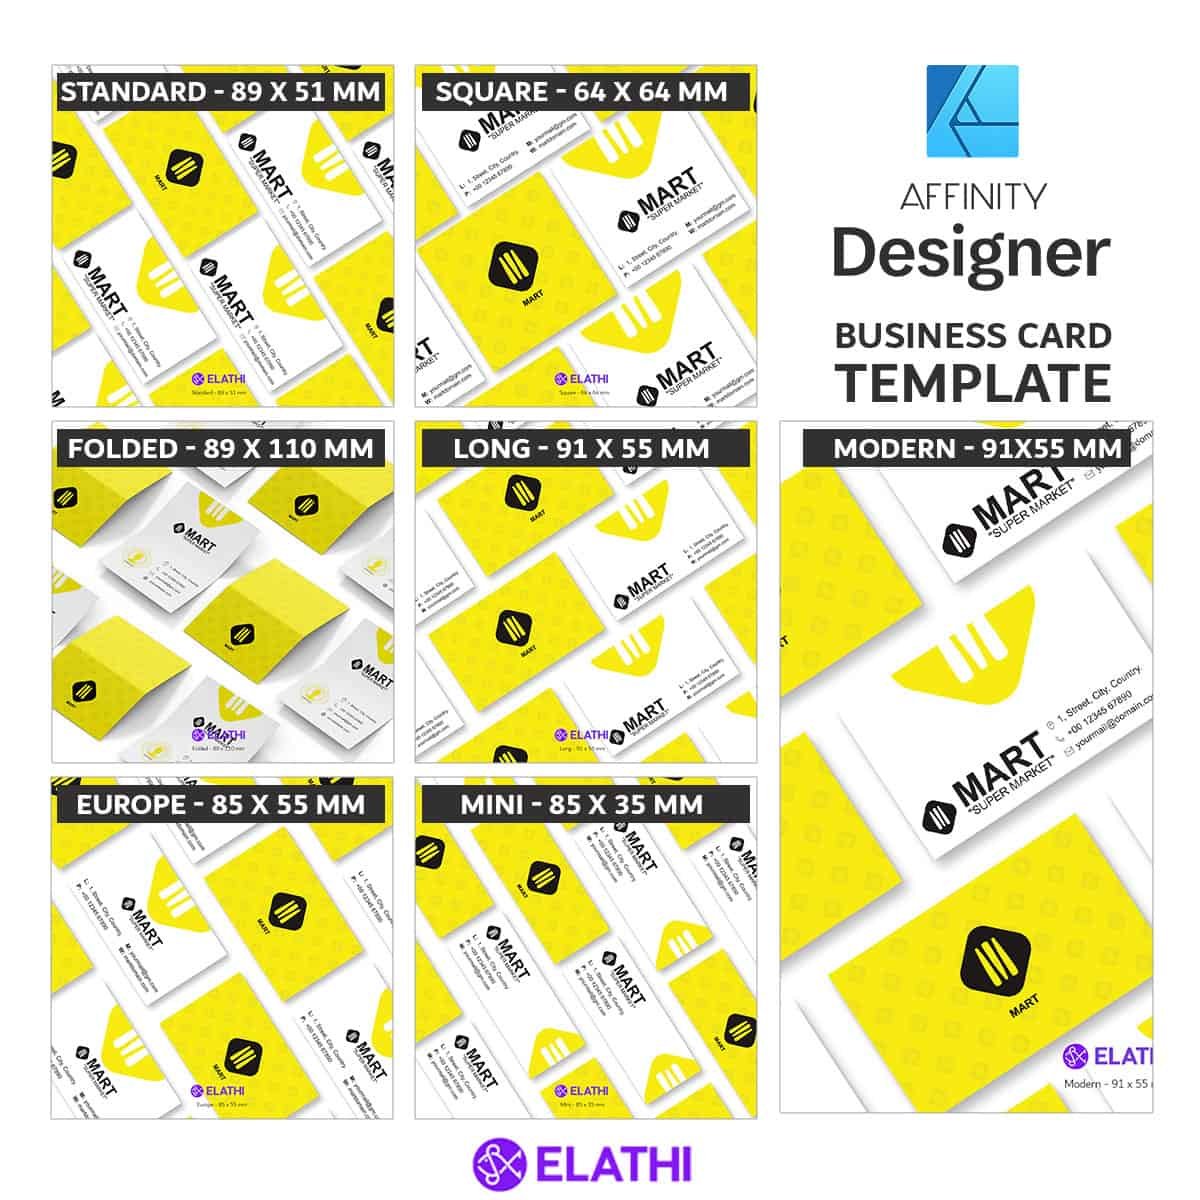
Download - Business Card Design Template (Affinity Designer) Template: Download
-
 Whenever I go to open up an Affinity document which another colleague has created, unfortunately all of the fonts do not automatically load in. To resolve this we have had to manually select the font for each section of text on every Artboard (please see attachment). This has become quite time confusing in order to do for each document now and I was wondering whether this was a bug or there's an easier way to resolve this perhaps? Any help would be much appreciated. Just to note, each of the fonts we use have already been installed, and we work on Macbooks. Thank you in advance, Kind Regards, Chris.
-
Just playing around with something different. I just watched Rio2 and fell in love with Gabi so I thought I could do that and if I printed and framed it, this picture would make a nice present for the granddaughter. Going to leave it for a few days then see if I can add more detail.
-
Just exploring the tools... goal was to evoke a feeling of foreboding....
-
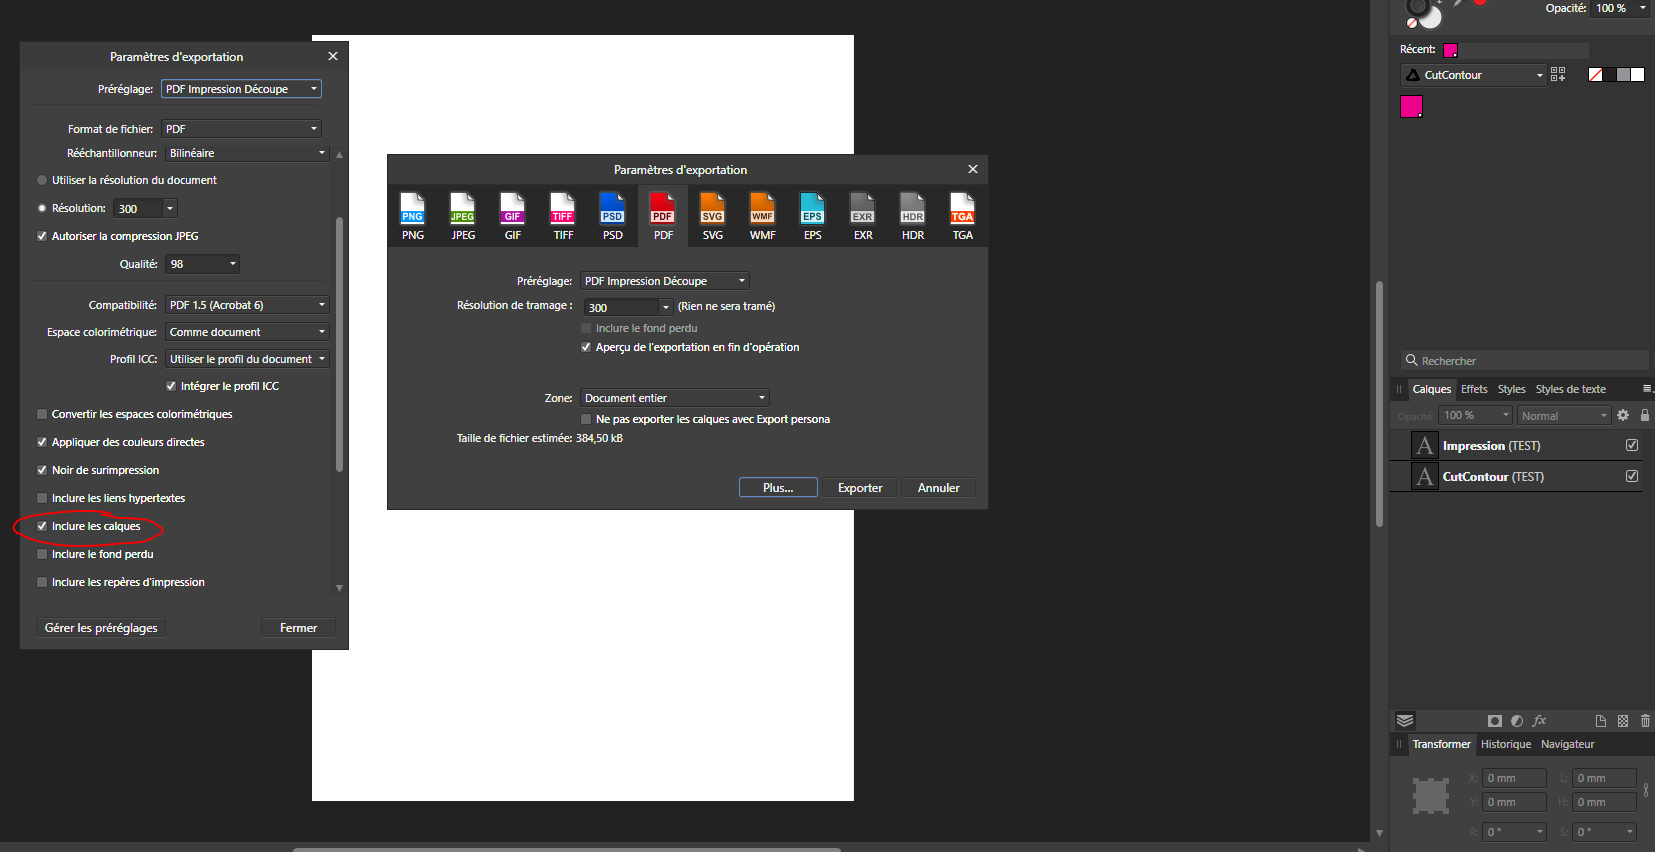
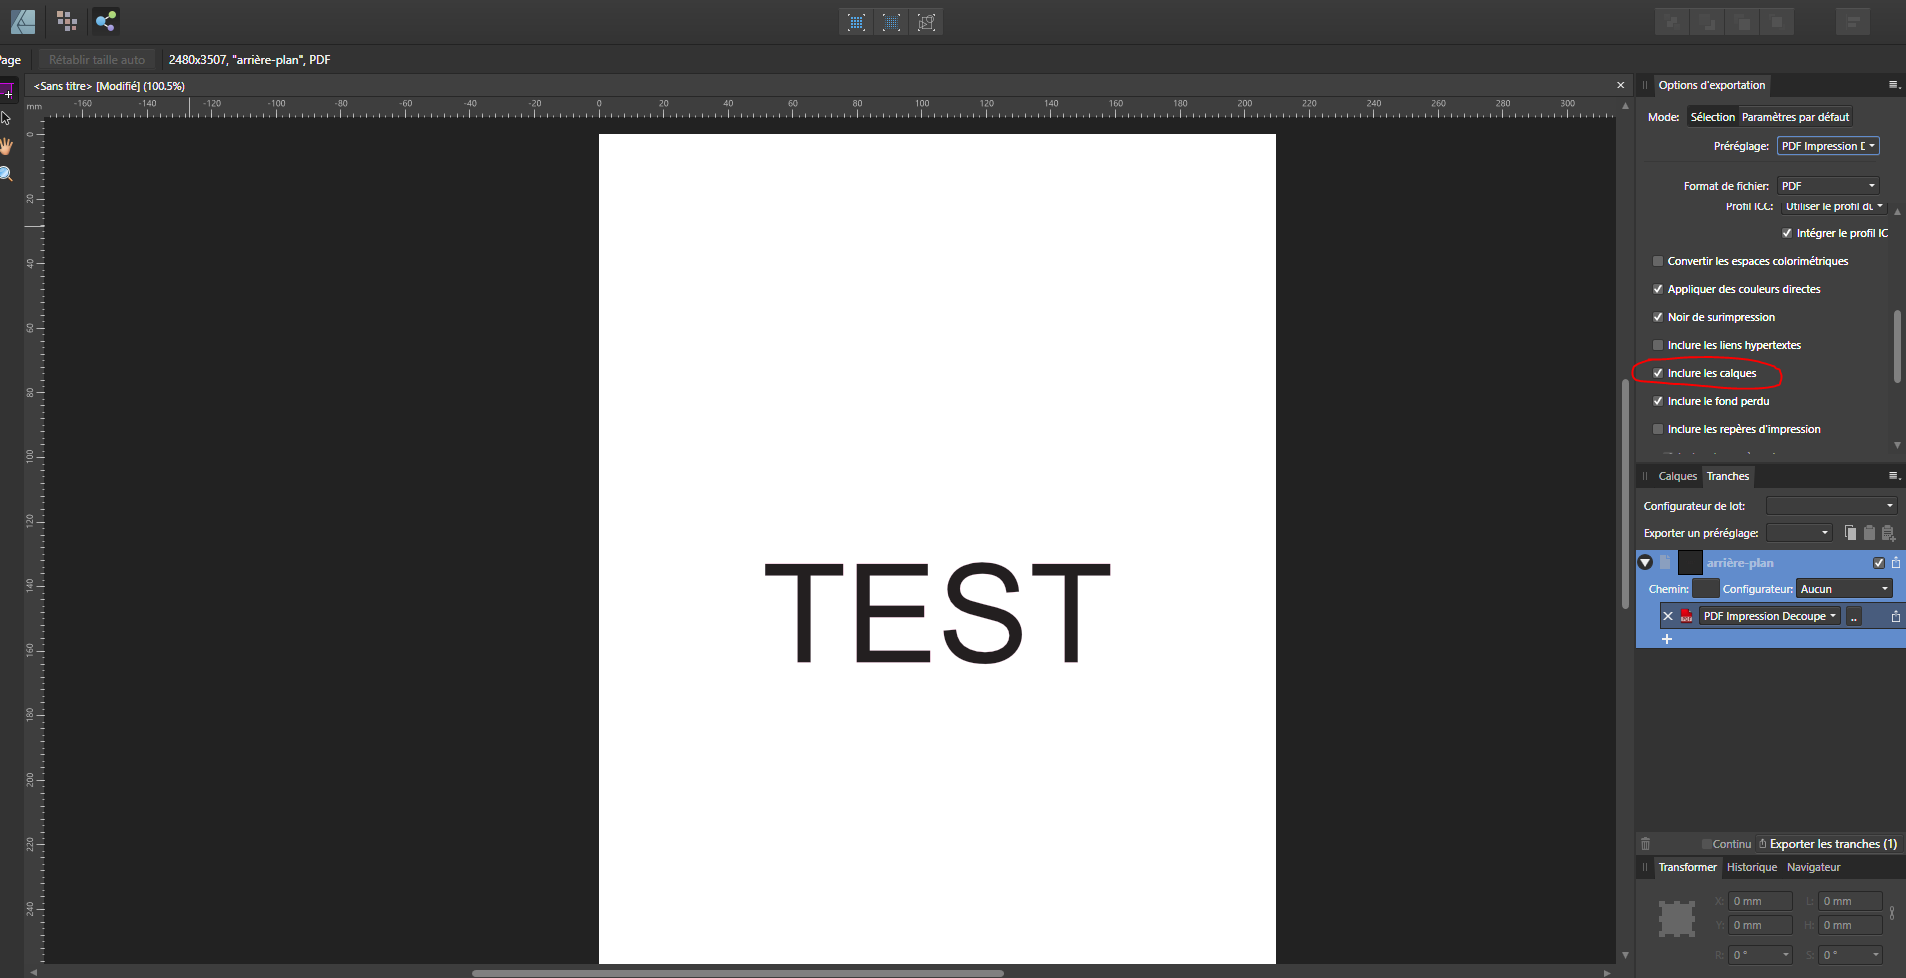
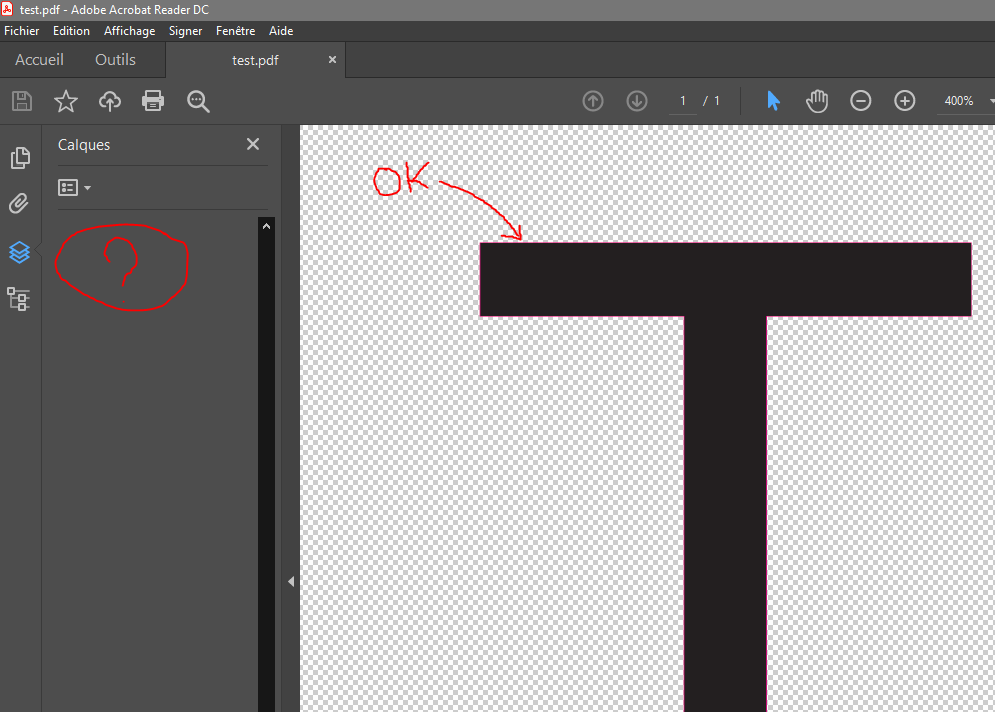
 I am experiencing a bug with the latest Affinity Designer version (1.8.5.703) : When exporting to a PDF file, the different layers are not exported as they should ... Once the PDF file is opened in Adobe Reader (and Adobe Illustrator) the layers preview pane does not show any layers. The bug is repeated as many times on Windows 10 version and this on two different computers. I specify that the bug occurs by using the menu> file> export ... as well as by using persona export ... This is particularly annoying when exporting PDF files with CutContour and cutting printing ... I hope you will solve the problem without difficulties and wish you good luck ... receive my full consideration. Guillaume
-
How do I access alternate characters in an Opentype font? in Publisher. or any of these tools. i know there is old thread about Designer but no luck such way.
-
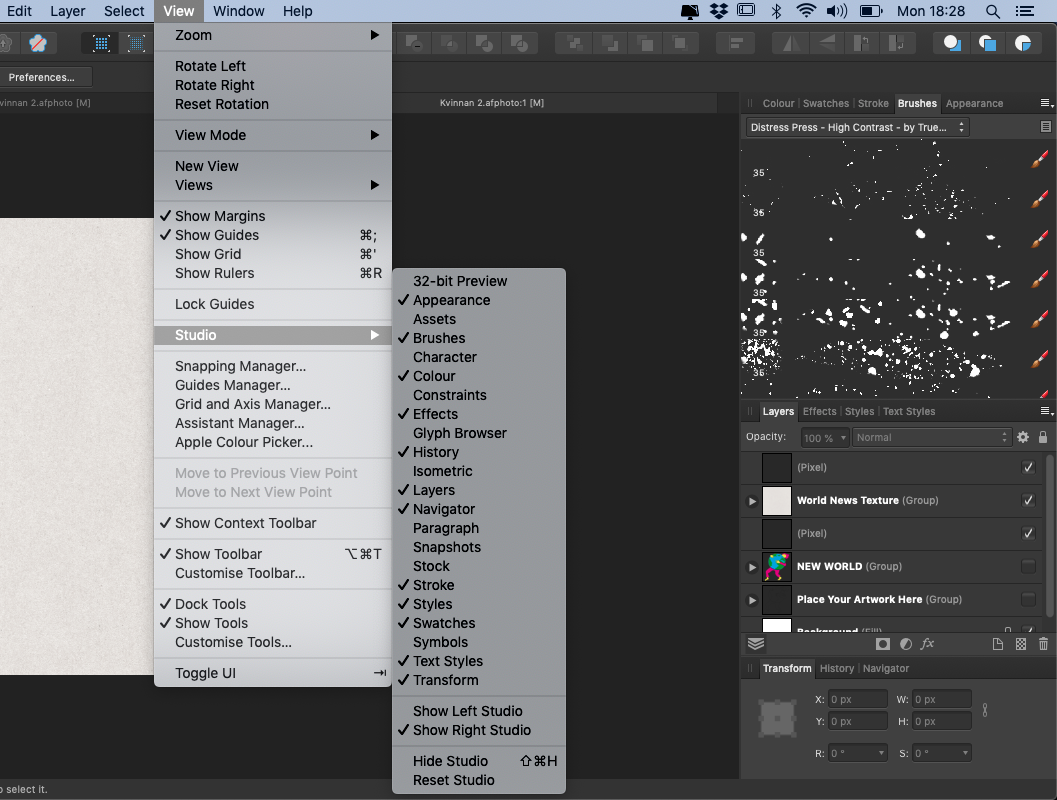
 Hello! I'm trying to install a macro for Affinity designer. But I can't fint "Library" under VIEW > STUDIO. Where is it? (I recently updated to 1.8.6) Thanks!
-
 Hi all, New to AD and I've been searching for some information on brushes and the scaling vector artwork in designer. I am working on a piece that may need to get printed much larger than initially thought. So far I have avoided any graphic brushes, but I have some elements where this would come in really handy! If I have a piece that started out as letter size, but now will be printed around 30x40in (or thereabouts) how can I ensure that the brushes I use to make some elements remain sharp and are not pixelated? Can I create vector elements and create a vector based brush? Instead of a png image use a svg (or other vector format)? I ask because in the past with AI (which I switched from) I created a jitter brush with my shape and painted along a path to sort of randomize some of the elements I placed. It was a fast way of filling certain similar areas in my piece. Thanks for any pointers and help with this?
 -
 I recently purchased Affinity Designer (both MacOS and my iPad), along with additional brush packages (Christis comix, chalkiest) and when I import the brushes on either version, they do not show up in the brushes window. However, when I import the fineliner brush set, it works fine. Any suggestions? Thanks. /pkyancey
 -
 Hello, A client is asking for the working file of a flyer I created on Affinity Publisher. Which would be the best export option to send them? SVG, EPS or PDF? I'm testing it out and I'm leaning towards SVG because it at least groups the text layers together. Whereas EPS does not group anything together and the layers are scattered everywhere, which I'm afraid will be confusing for the client to use. Wanted to hear others' opinions. Thanks!
 -
Time for something different, a Type VIIc U-Boot at periscope depth I wanted to try a split under/overwater picture, this has taken perlin noise to the extreme.
-
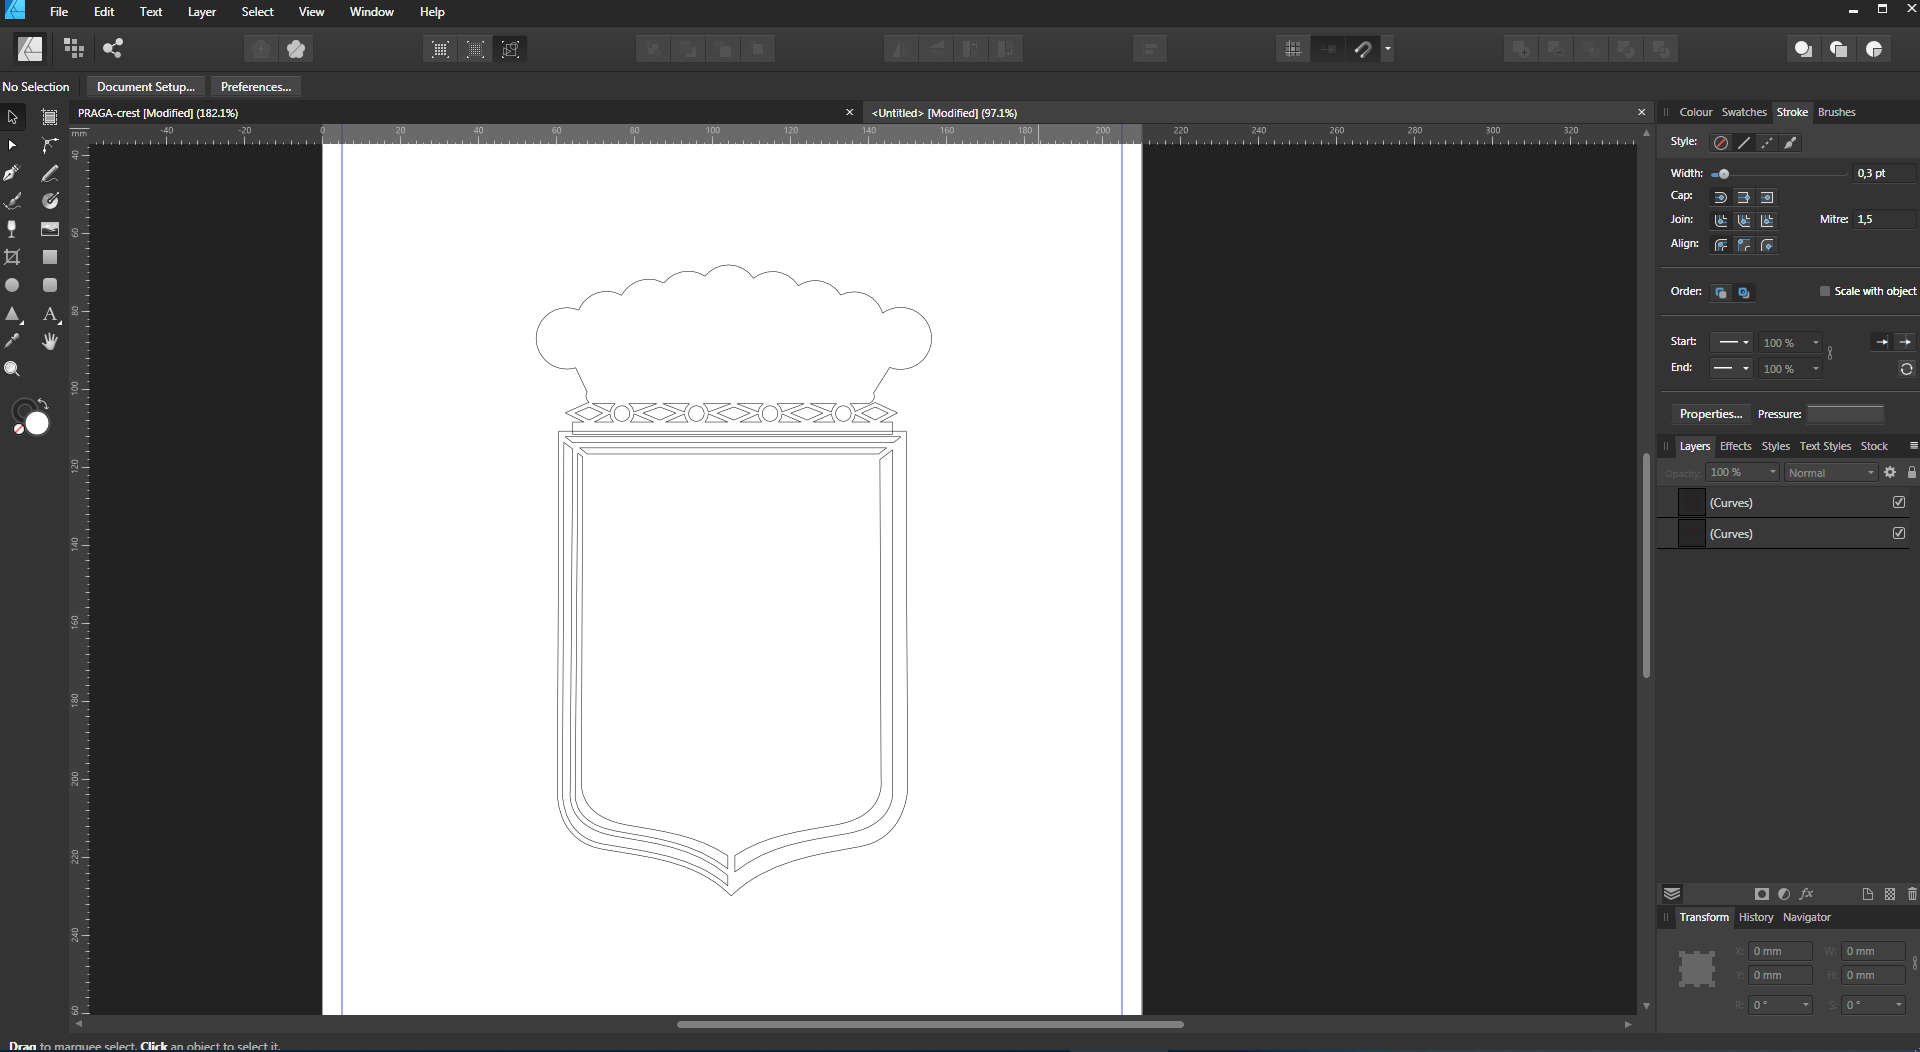
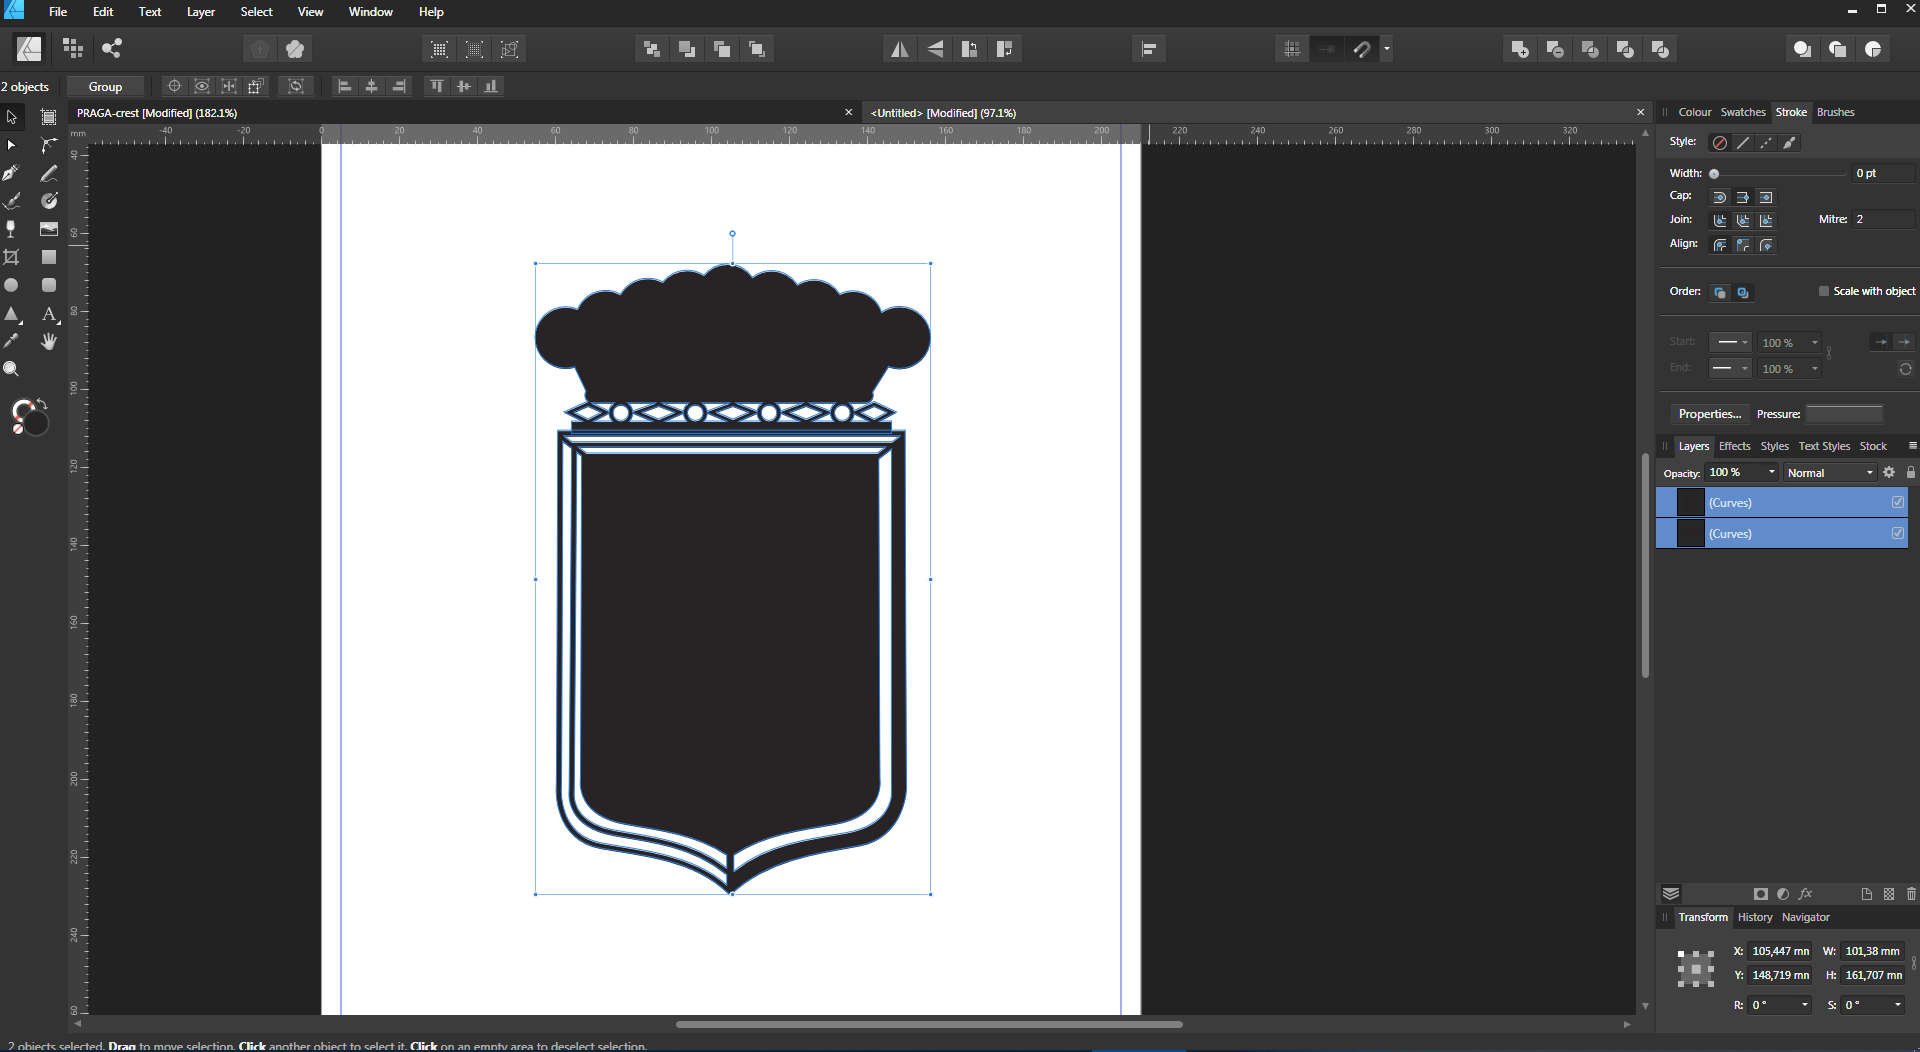
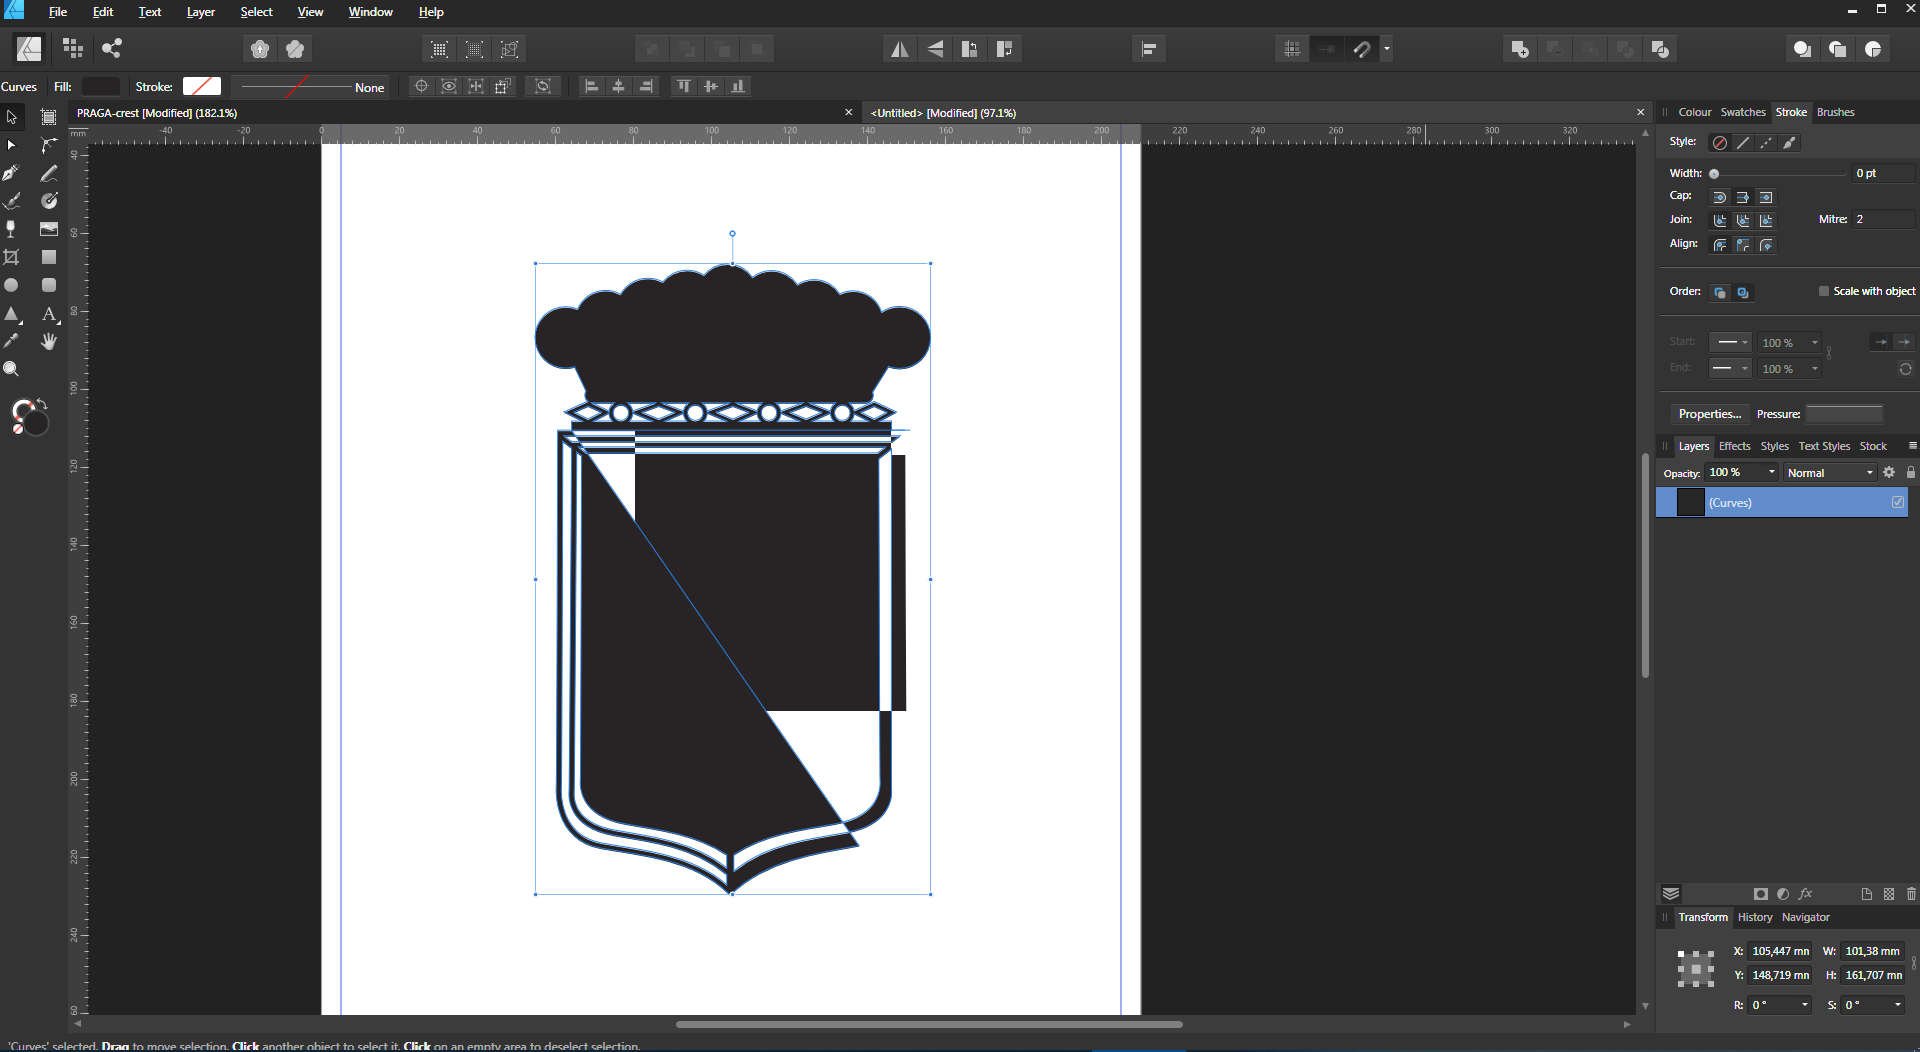
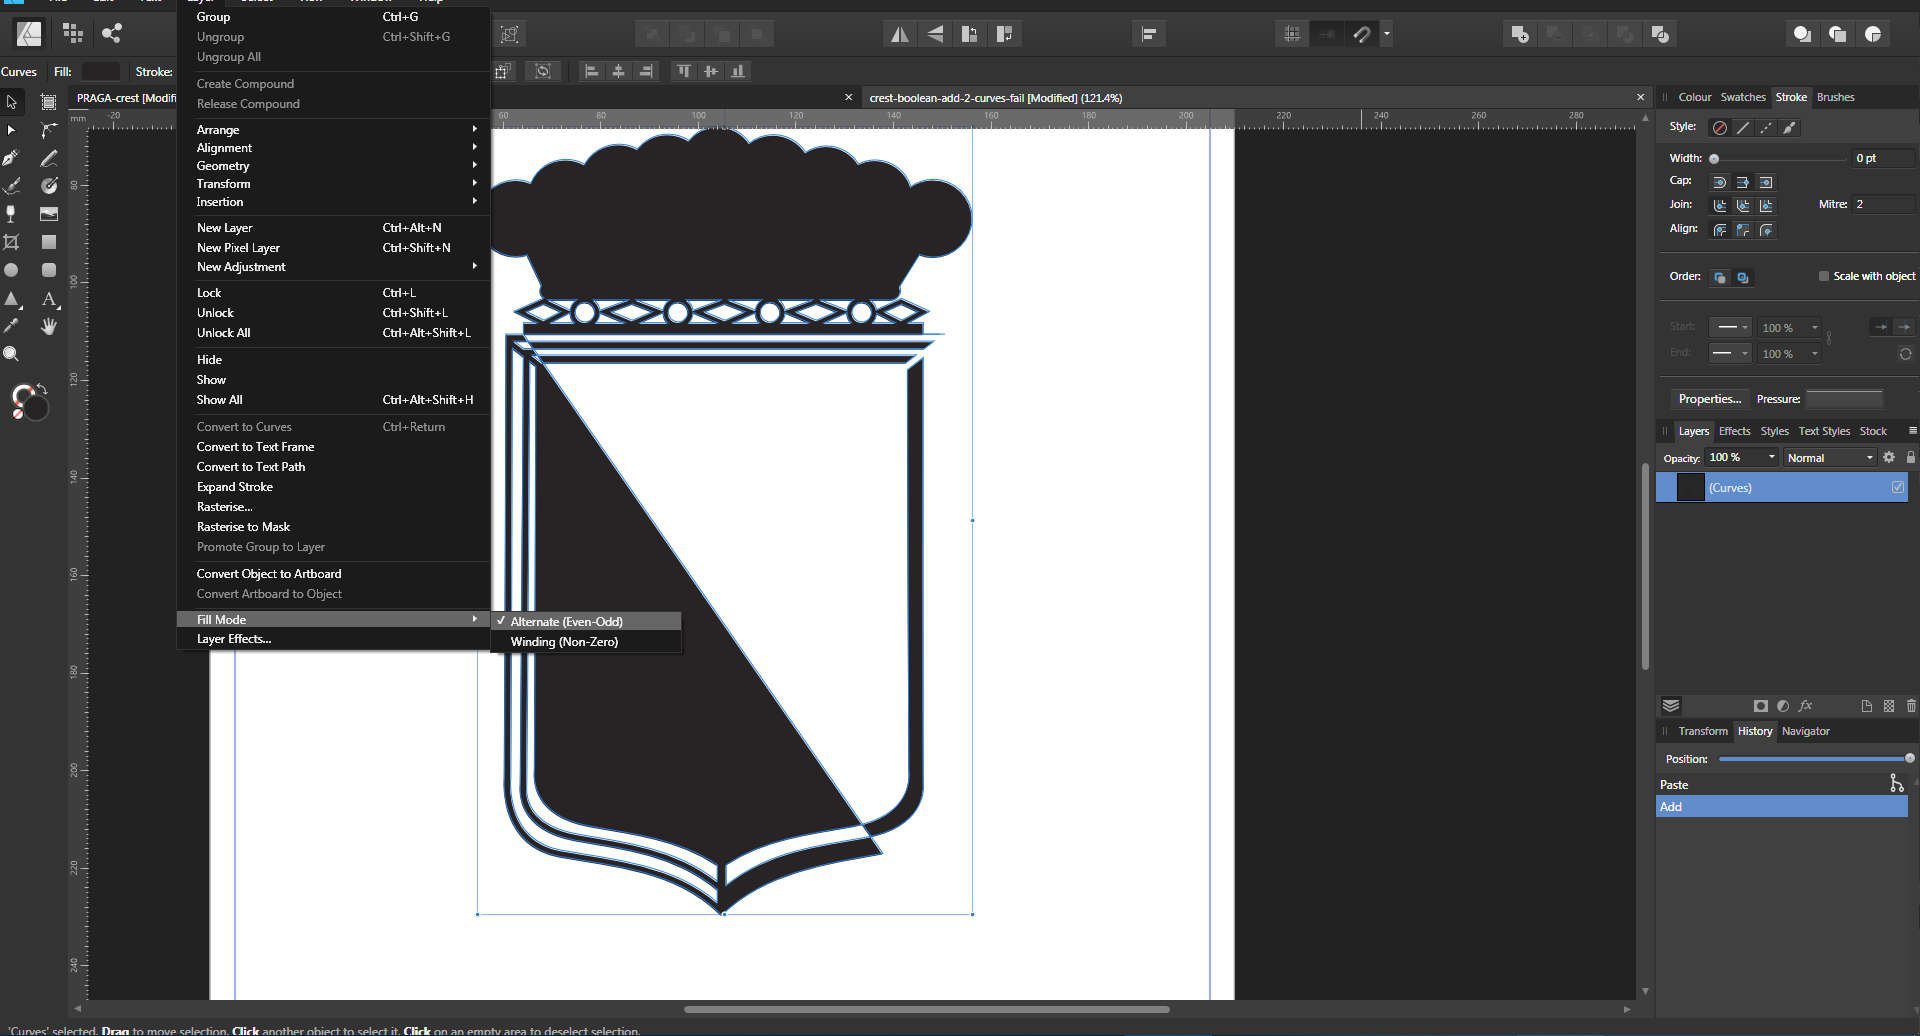
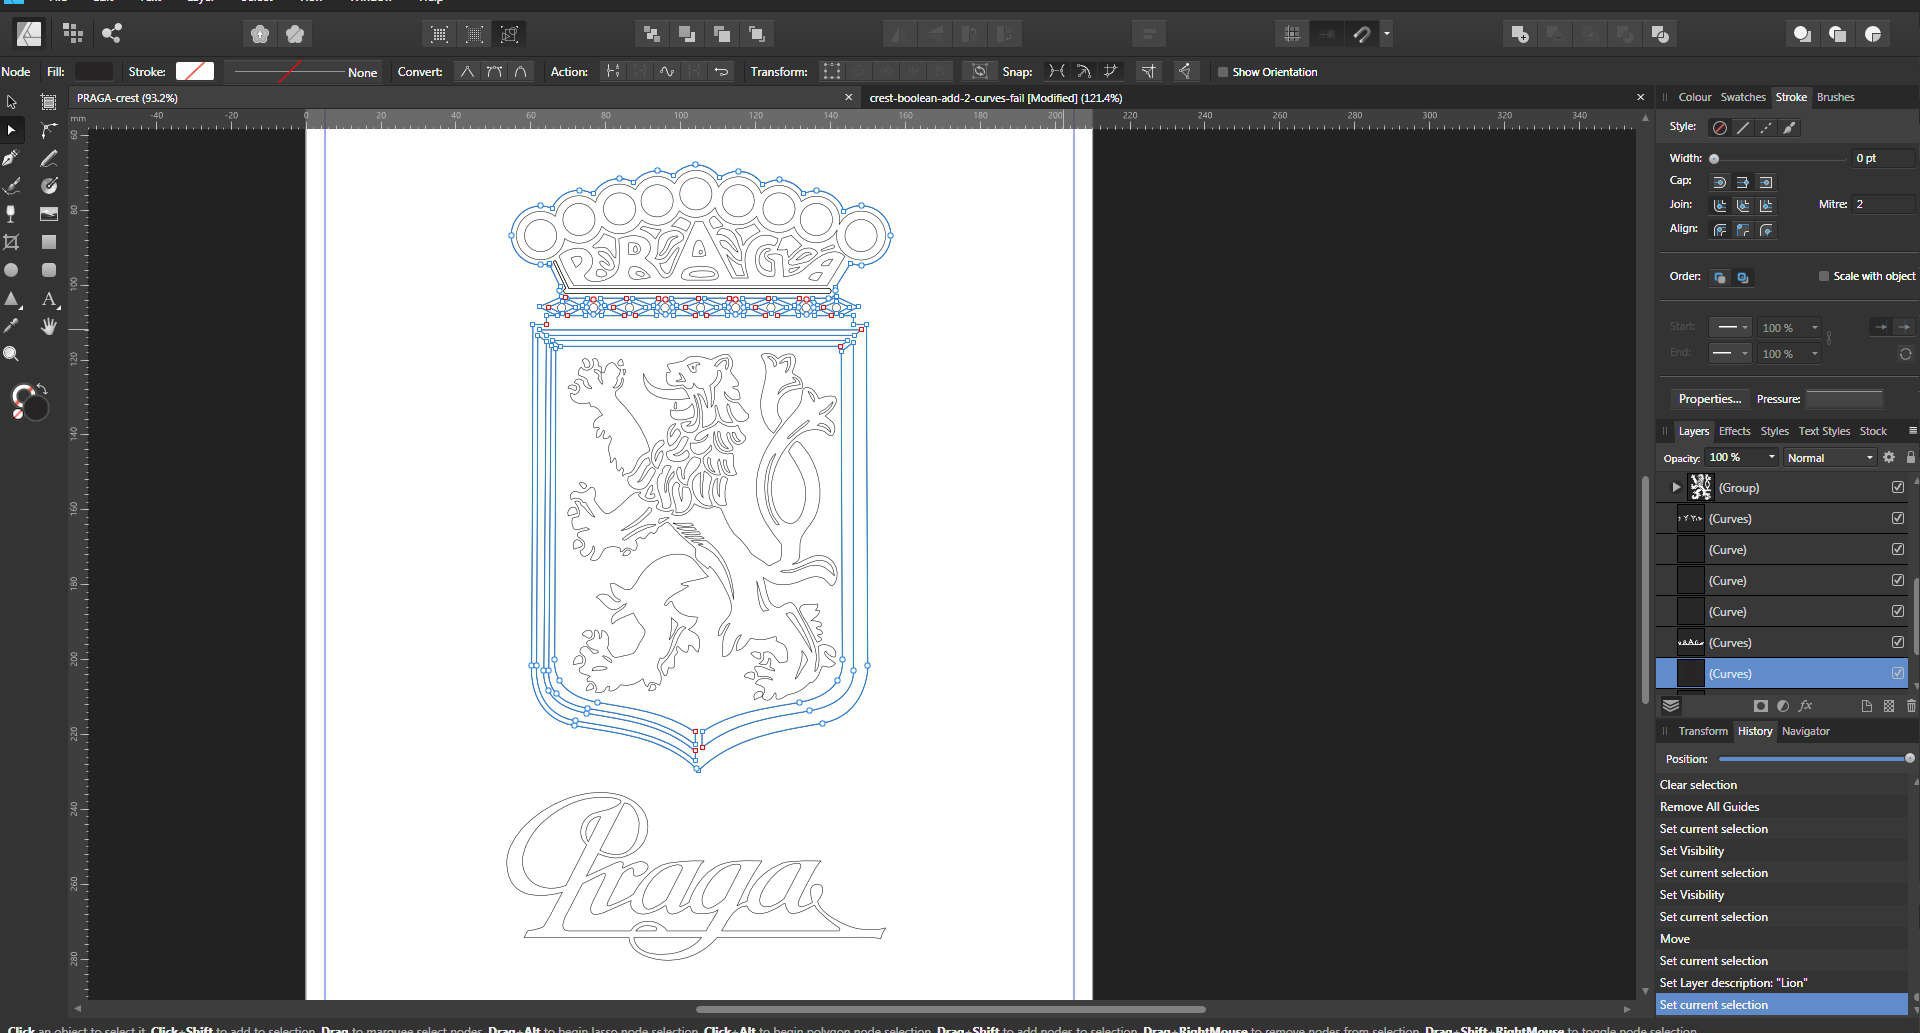
Hi. Attempted to create a simple crest, made two objects. Now trying to add them together, getting result as follows: Affinity Designer file in question: crest-boolean-add-2-curves-fail.afdesign Thanks for explaining why the ADD boolean fails and perhaps a solution how to fix that inside designer, it happens to me quite often. Nothing like that ever happens to me in Inkscape, VectorStyler nor Illustrator. Edit: After reversing the direction of one of the curves boolean ADD works and the result is as expected. So I guess the thread can now be closed. FYI: Winding Mode was set to Alternate (Even-Odd).
-
Has anyone seen any discussion of including some kind of line erasing tool like Corel's Virtual Segment Delete tool (see attached video)? I believe that I have mentioned the need to this tool at least a year ago but I have not seen or heard any serious talk. The more I use AD as my go-to software the more I am running into simple tools that I wish it had that would make my illustration life SO much better. VertSegDelKey.mov
- 2 replies
-
- 1
-

-
- affinity designer
- segment
- (and 2 more)