Search the Community
Showing results for tags 'Affinity Designer'.
-
 Hi Everyone, i'm not sure if it's a bug, but i use "insert filler text" a lot, so i decided to give it a shortcut. Usualy when i use the text menu i get classic "Lorem ipsum", but since i have created a shortcut i have what seems to me pieces of "Alice in wonderland". Is that known? Looks like an easter egg of some sort. Haven't found options to set it to "Lorem ipsum". Any idea? Thx ! Ben
- 8 replies
-
- 1
-

-
- affinity designer
- textholder
- (and 1 more)
-

affinity designer I Never Had To Say "I'm Batman" (AD)
VectorVonDoom posted a topic in Share your work
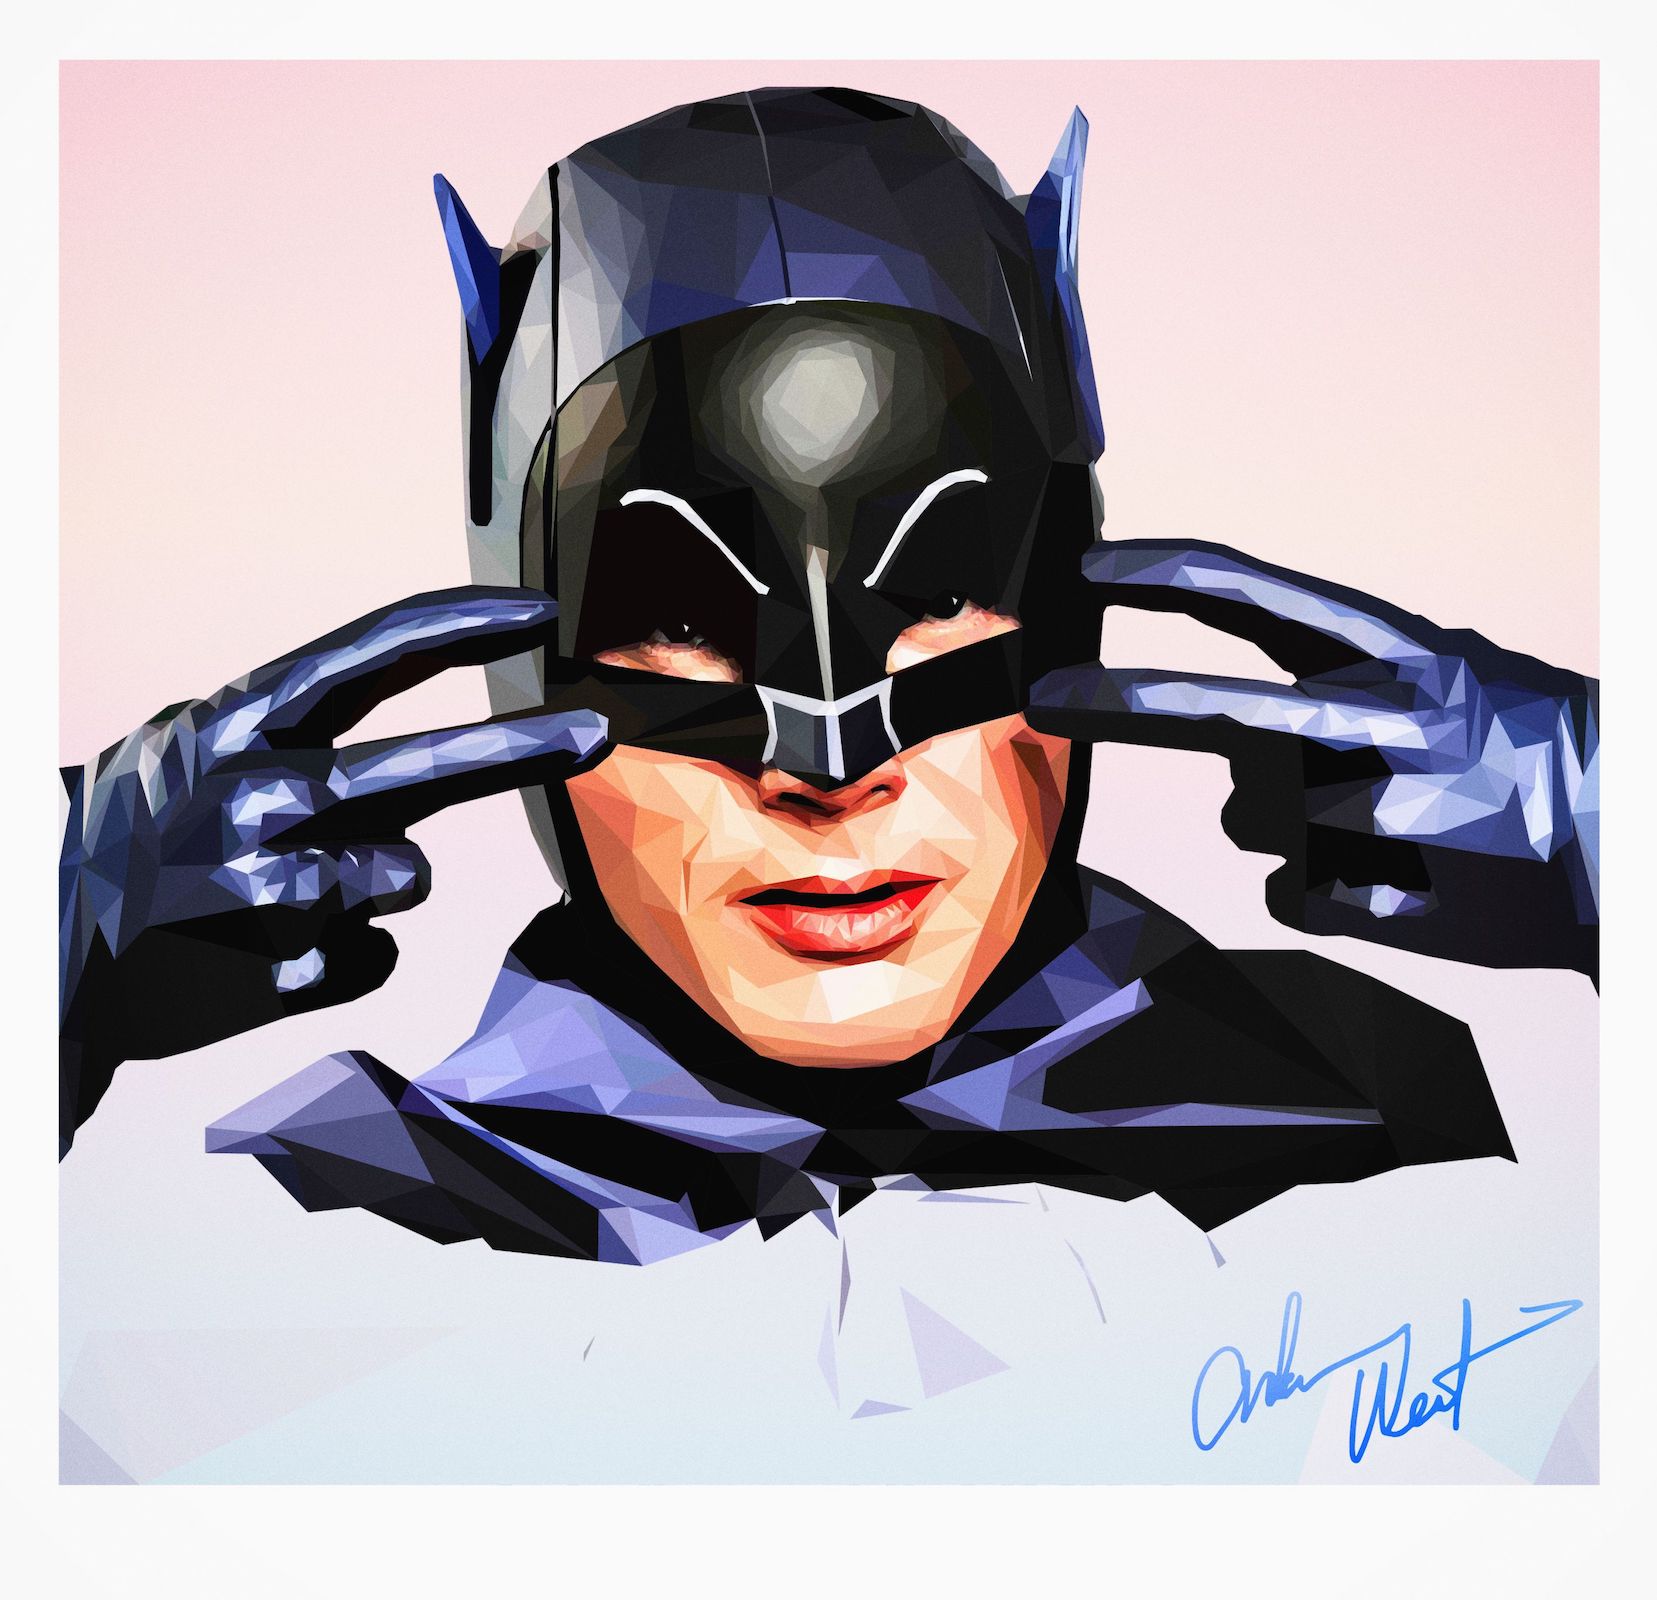
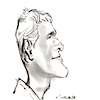
I wasn't going to do another but I have as they seem popular, my weekend project. I picked a really horrible quality image, like someone took a 100x100 and enlarged it. But, for the most part, it turned out just about OK (that's all the time I had and would look better cropped, if I'd thought I'd probably got rid of the hands, something for next weekend). I've include the afdesign file so you can view it, expand it (there's more to the image), improve it, have a laugh or anything else. It's for personal use otherwise I'll take my normal 99.99% cut. You'll see quite a few messy snapping points but they don't show up on the export. You will need to duplicate the batman layer and add a .1px blur to get rid of the micro gaps before you do export. That is his signature, I just live traced it in AI then added a gradient and some transparency. The image I've attached just has some Color Efex Pro film grain added. But if you want to do some low poly and also have AI then use that with live paint instead. You don't then need to create triangles very often just close shapes off so less errors, less cleaning up and generally quicker. Batman.afdesign
- 5 replies
-
- 14
-
-
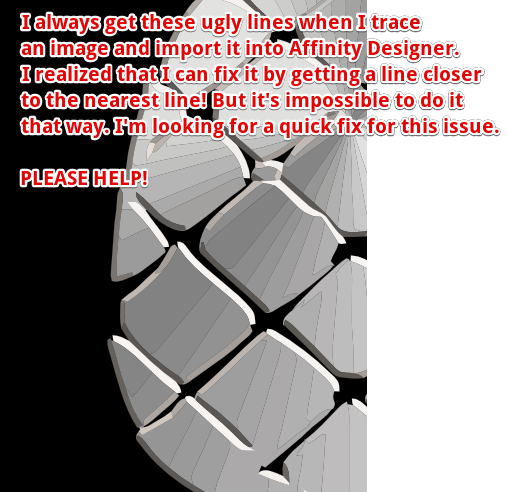
 Hi, Could someone please tell me how can I get rid of these lines that always appear when I import a traced SVG? Thanks a lot!
-
Just a bunch of icons for a telco.
-
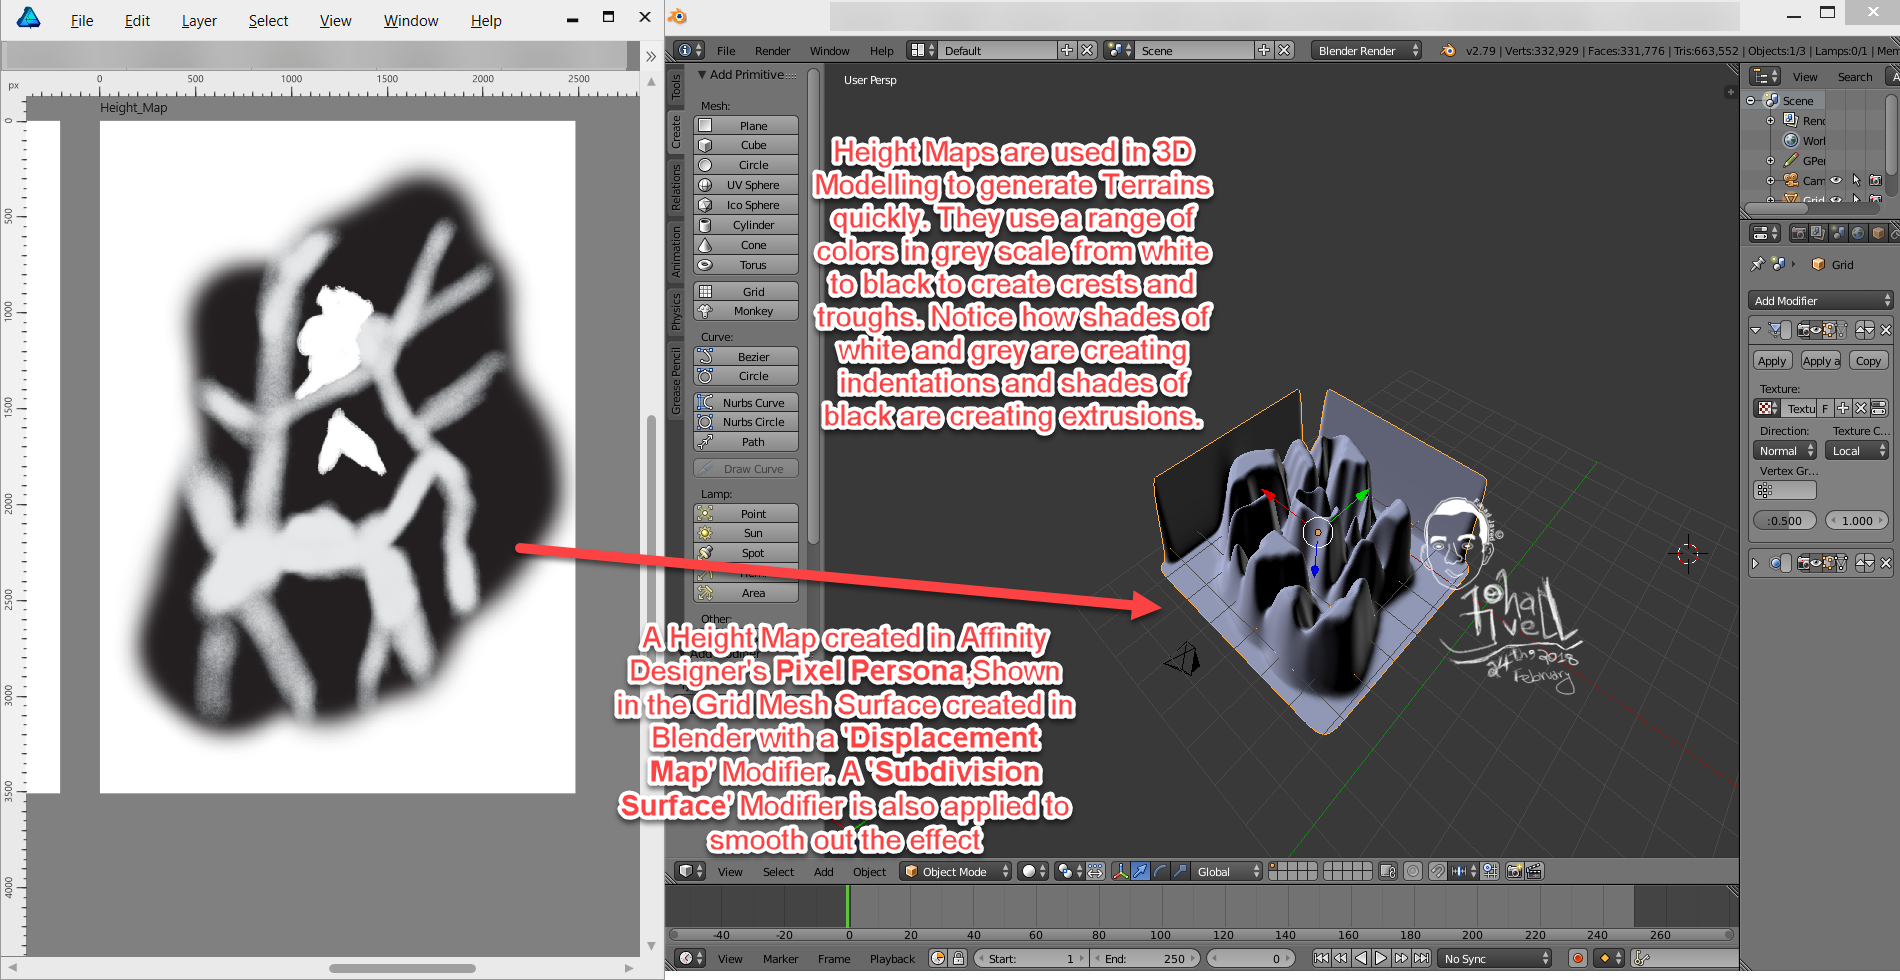
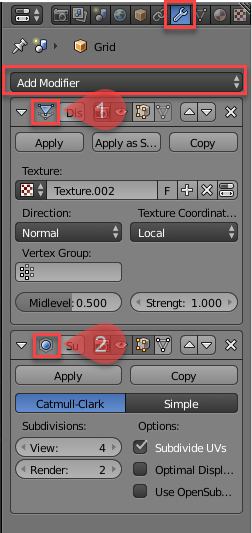
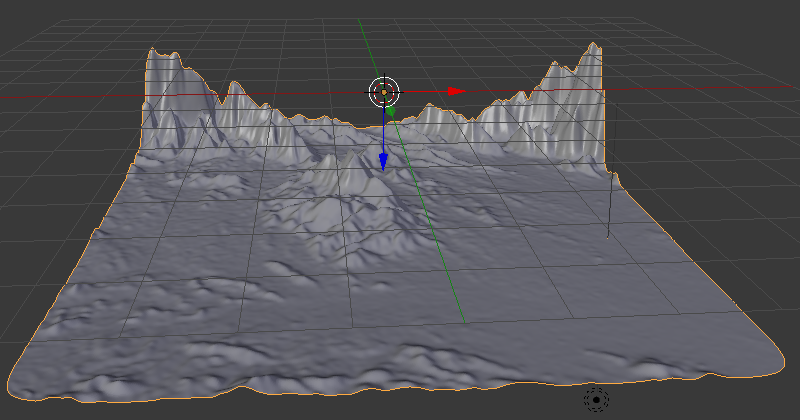
 The screen shot shows a roughly created height map in Affinity Designer's Pixel Persona[] using the Paint Brush tool[] and using grey scale values[] and how it is used in generating a 3D Terrain in Blender by applying this height map Image as a 'Displace'[] modifier on a Grid []Mesh Surface. For smoothness, i have applied a 'Subdivision Surface'[] modifier. Modifiers in 3D Modelling tools help modify an object's geometry. They can be accessed in the Tabs on the right side[] and have a 'wrench icon'[] . Just click the 'Add Modifier'[] dropdown to add the modifiers mentioned above. Notice, if you apply these modifiers by clicking the 'apply' button it will apply the effect and remove the modifier from stack of modifiers applied. If you want fine tune control over these without removing them from the stack of modifiers,don't apply them. [1] = Displace Modifier Added, [2] = Subdivision Surface Modifier Added [ >>>> [Source Files]] > The Height Map file in Affinity Designer has also been attached[File Name = Terrain_Height_Map.afdesign]. > The Blender Source File with the Height Map Applied has also been attached[File Name = Blender_File_with_Terrain_Created_Using_Height_map_from_Affinity_Designer.blend][Added on 27th February 2018] [ >>>> [Video File]] Here is a short video[around 3minutes and 26 seconds] that demonstrates the steps required:[Update: Added the Video on 26th February 2018] Blender can be downloaded from the following link: https://www.blender.org/ [ >>>> [Exercise]][Added on 27th February 2018] As an Extra Exercise,apply these concepts by making use of Real Terrain Height Maps[that contain Real World Elevation Data] generated by the following website for your own country or city: https://terrain.party/ Just search your city or country and press the Export Button[] to export a zip file that contains the height maps for the searched area. Extract the zip file and apply it to your own blender files. Notice how the grey scale values are used based on Real World Elevation data. Here is a sample of a terrain i generated using the Height Maps generated by this website: Happy Learning
- 1 reply
-
- 1
-
-
- greyscale
- fahadjaved
- (and 4 more)
-
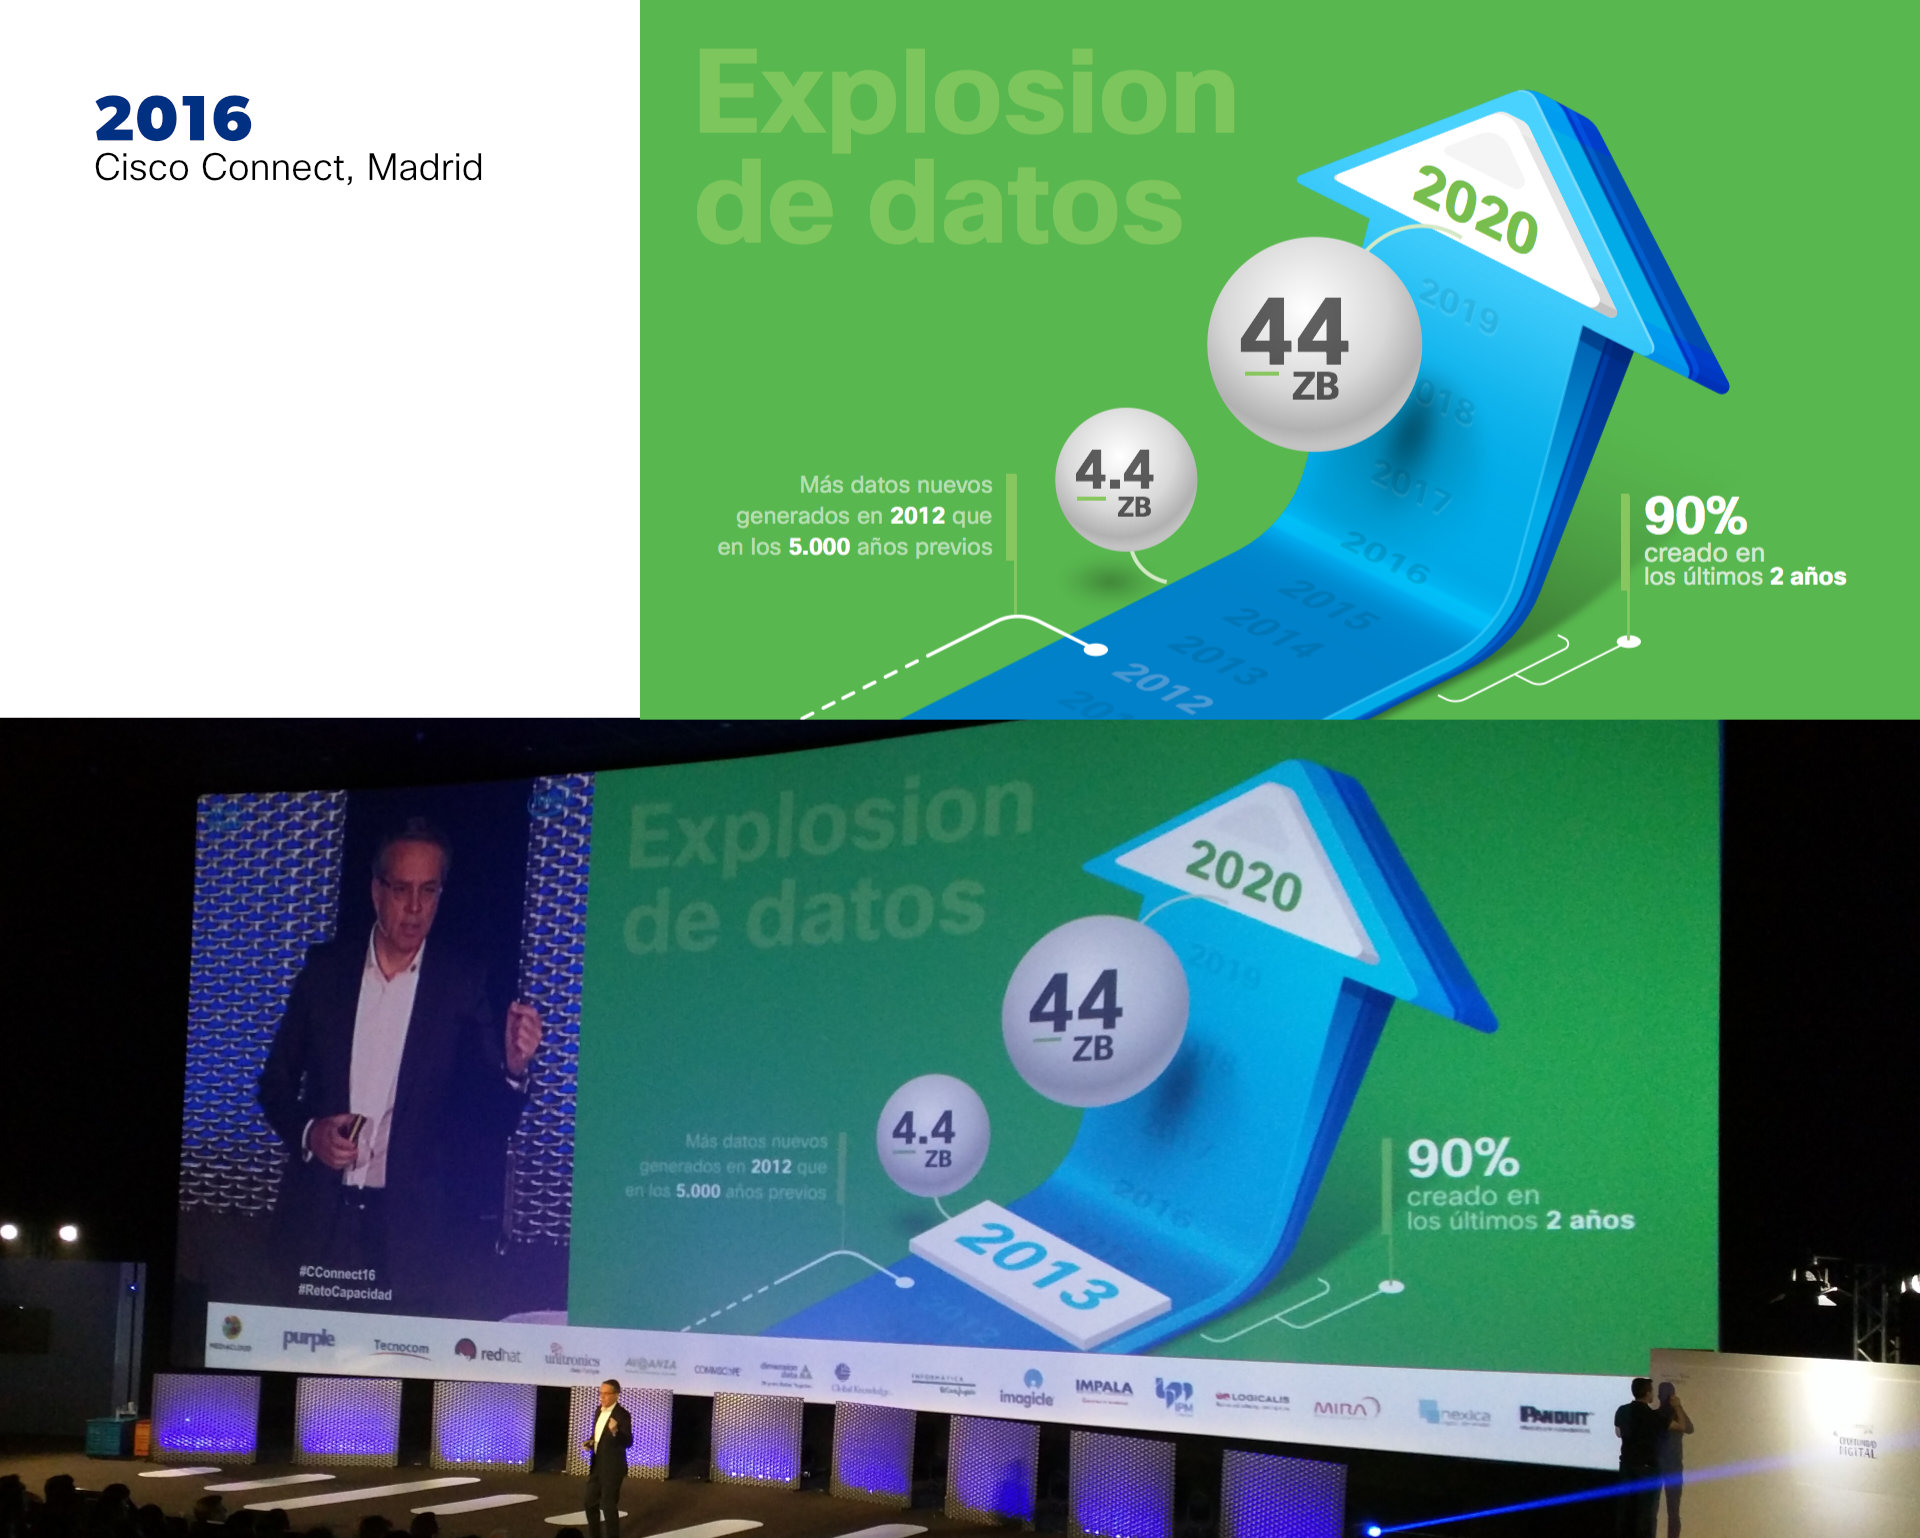
Hi, everyone! For the last 3 years I've been commissioned to design presentations for Cisco Systems general manager in Spain. I wasn't allowed to show it for a while, despite it being openly posted on their official YouTube channel (at least the speech). Now I can share some parts. Hope you guys like it. Have a great weekend. EDIT: Some of the icons are from Shutterstock with little editing (the blue outline ones).
-
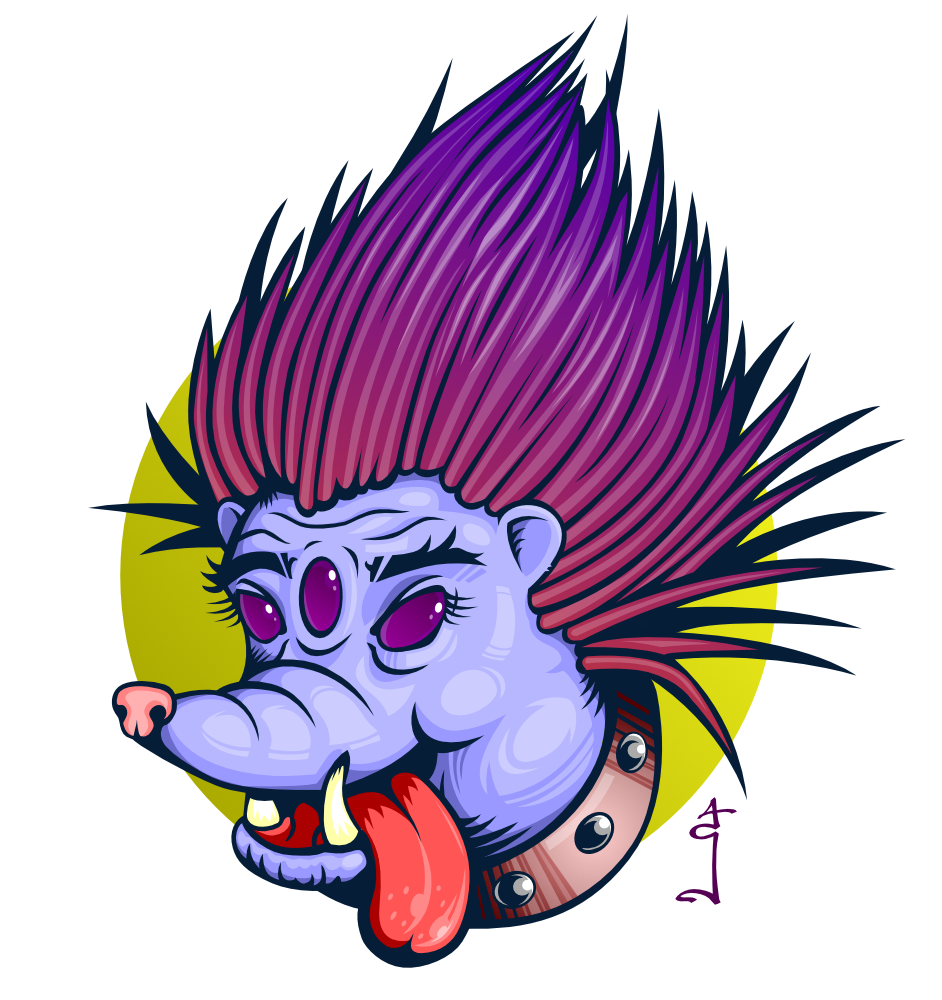
Another weird animal i've just drew. Its a hedgehog. With three eyes! AD is a joy to work with, if to talk about vectors.
-
Some Fan Art I did of Maxo Kream Instagram : CalvinCoolridge
-
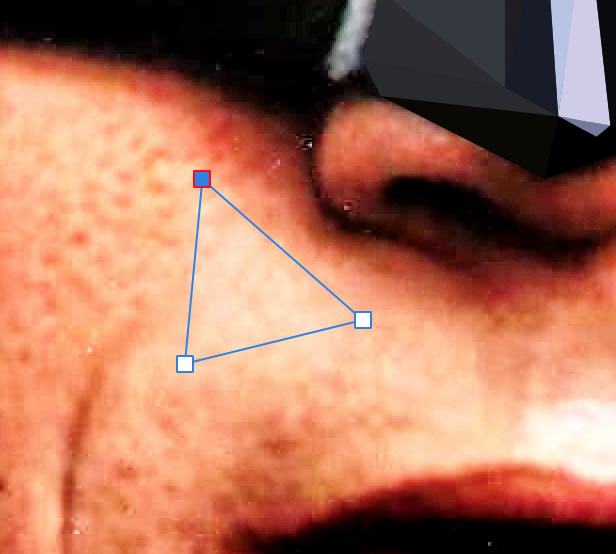
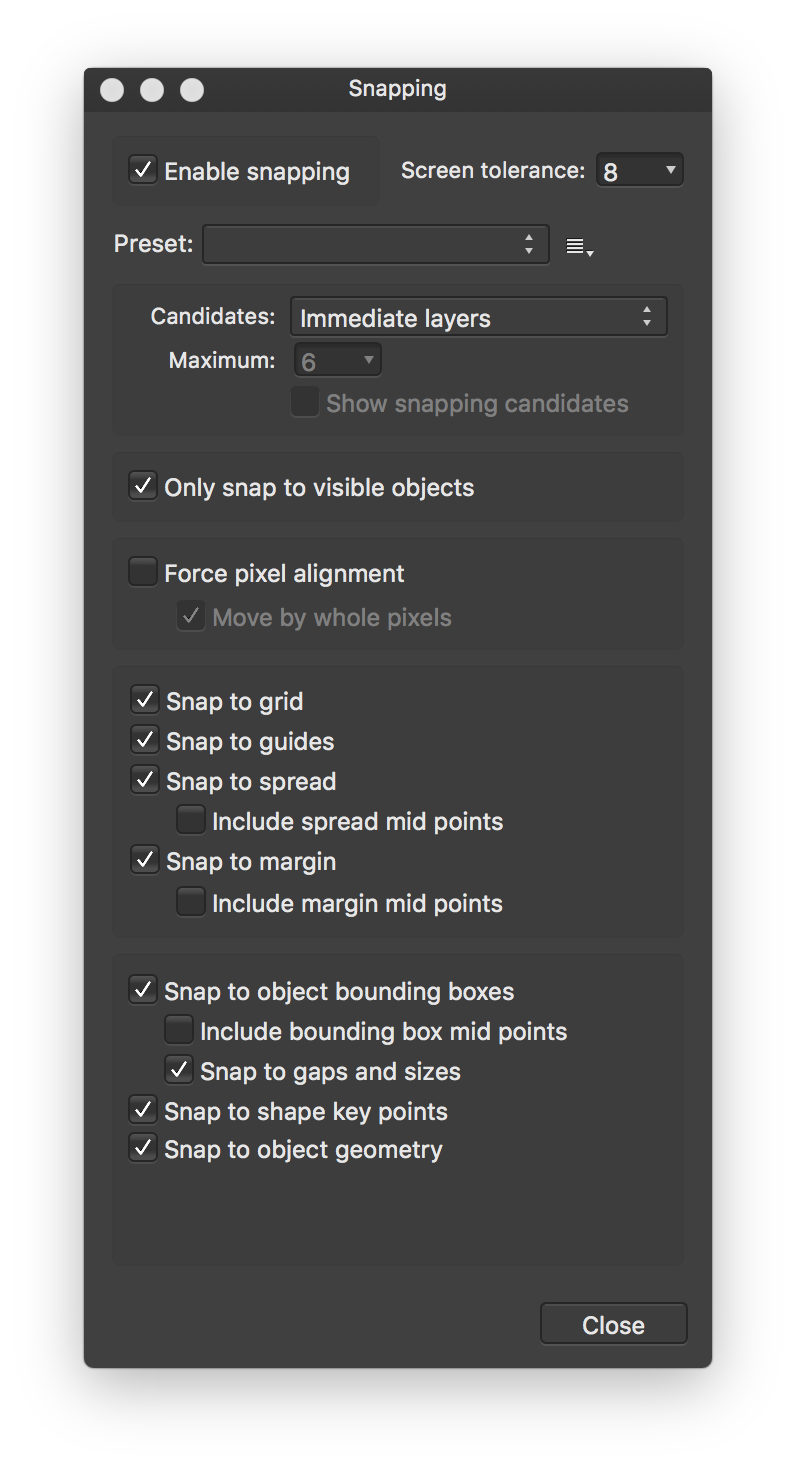
A few people have asked how to do low poly drawings in AD. So here's a very quick how to, it's not complicated to get started. Some aim for the minimum polygons and think that's the only way it should be done but there's aren't any rules, do it how want, have fun. There are variations on the theme for example using quadrilaterals and gradient fills but generally it's triangles and flat fills. Pick a image. Find one that a decent size, say 4MP+. Having well defined edges makes things easier as does it having plenty of contrast. The less contrast there is the tougher it is. Open the image in AD. The layer should be locked, if it isn't lock it. Setup AD snapping to make life a lot easier. View>Snapping Manager..., tick Enable Snapping. I don't normally use snapping in AD so not sure the optimum settings so had most things ticked. (image below) With the pen tool (keyboard shortcut P) add your first triangle with no fill, no stroke (you don't have to keep resetting to none, just the first time). The idea is to break the image down in to areas that are a pretty similar colour/brightness (image below). That's the non-technical part and you just have to get the hang of it. You can either draw one and fill it... or draw a few then pick them in the layers palette and fill them. Obviously if you've a big area of exactly the same colour, eg black in the shadows, then you can do what you want as you're not going to see any triangles. Fill the triangle using the Colour Picker tool (keyboard shortcut I) to sample the colour. Set the radius to 5x5 so you're averaging an area rather than picking a single pixel. Sometimes you'll need to make it smaller, if it's a huge image you might be able to make it larger. (image below). If you later see you need to alter the colour of a polygon just change it back to no fill so you can re-sample. Once you add the first triangle group it and put subsequent ones in to that group. It's then easy to toggle visibility, for example to compare what you've done against the original. Obviously each triangle needs to fit up against its neighbour, no gaps, hence having snapping turned on. Toggle the reference image to spot the places you've left gaps or not snapped properly, there will be some. Normally you'll use larger polygons say on large areas of skin then smaller polygons where you need details like eyes and mouth. If it's a complicated image then break things down in to a few groups. If you do that make sure you select All Layers from the Candidates drop down in the Snapping dialog. Once you're done but see horrible micro gaps between objects when you export then duplicate the poly layer and perhaps add a tiny amount of blur to the background one (normally don't need to, duplicating is enough) and they'll disappear.
-
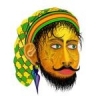
I truly could use publisher today. This is the workaround I have to do to produce a 12 Mini page booklet with printer spreads 4.5" x 6" How soon can we get Affinity Publisher.
-
 Hello I run Affinity Photo 1.6.6 and Affinity Designer 1.5.1 it used to be easy to switch from one to the other, by simply clicking on edit in Designer when I was in Photo and edit in Photo when I was in Designer. Now I can't even import a Photo file created by Affinity Photo into Designer unless I convert it into a jep. What am I missing ?
 -
Yesterday i just doodled randomly in AD's pixel persona and came to this guy. I thought it is a pelican or something like this but i now think it's more of a crow. He likes it dark'n'heavy. Made a sticker with it...
-
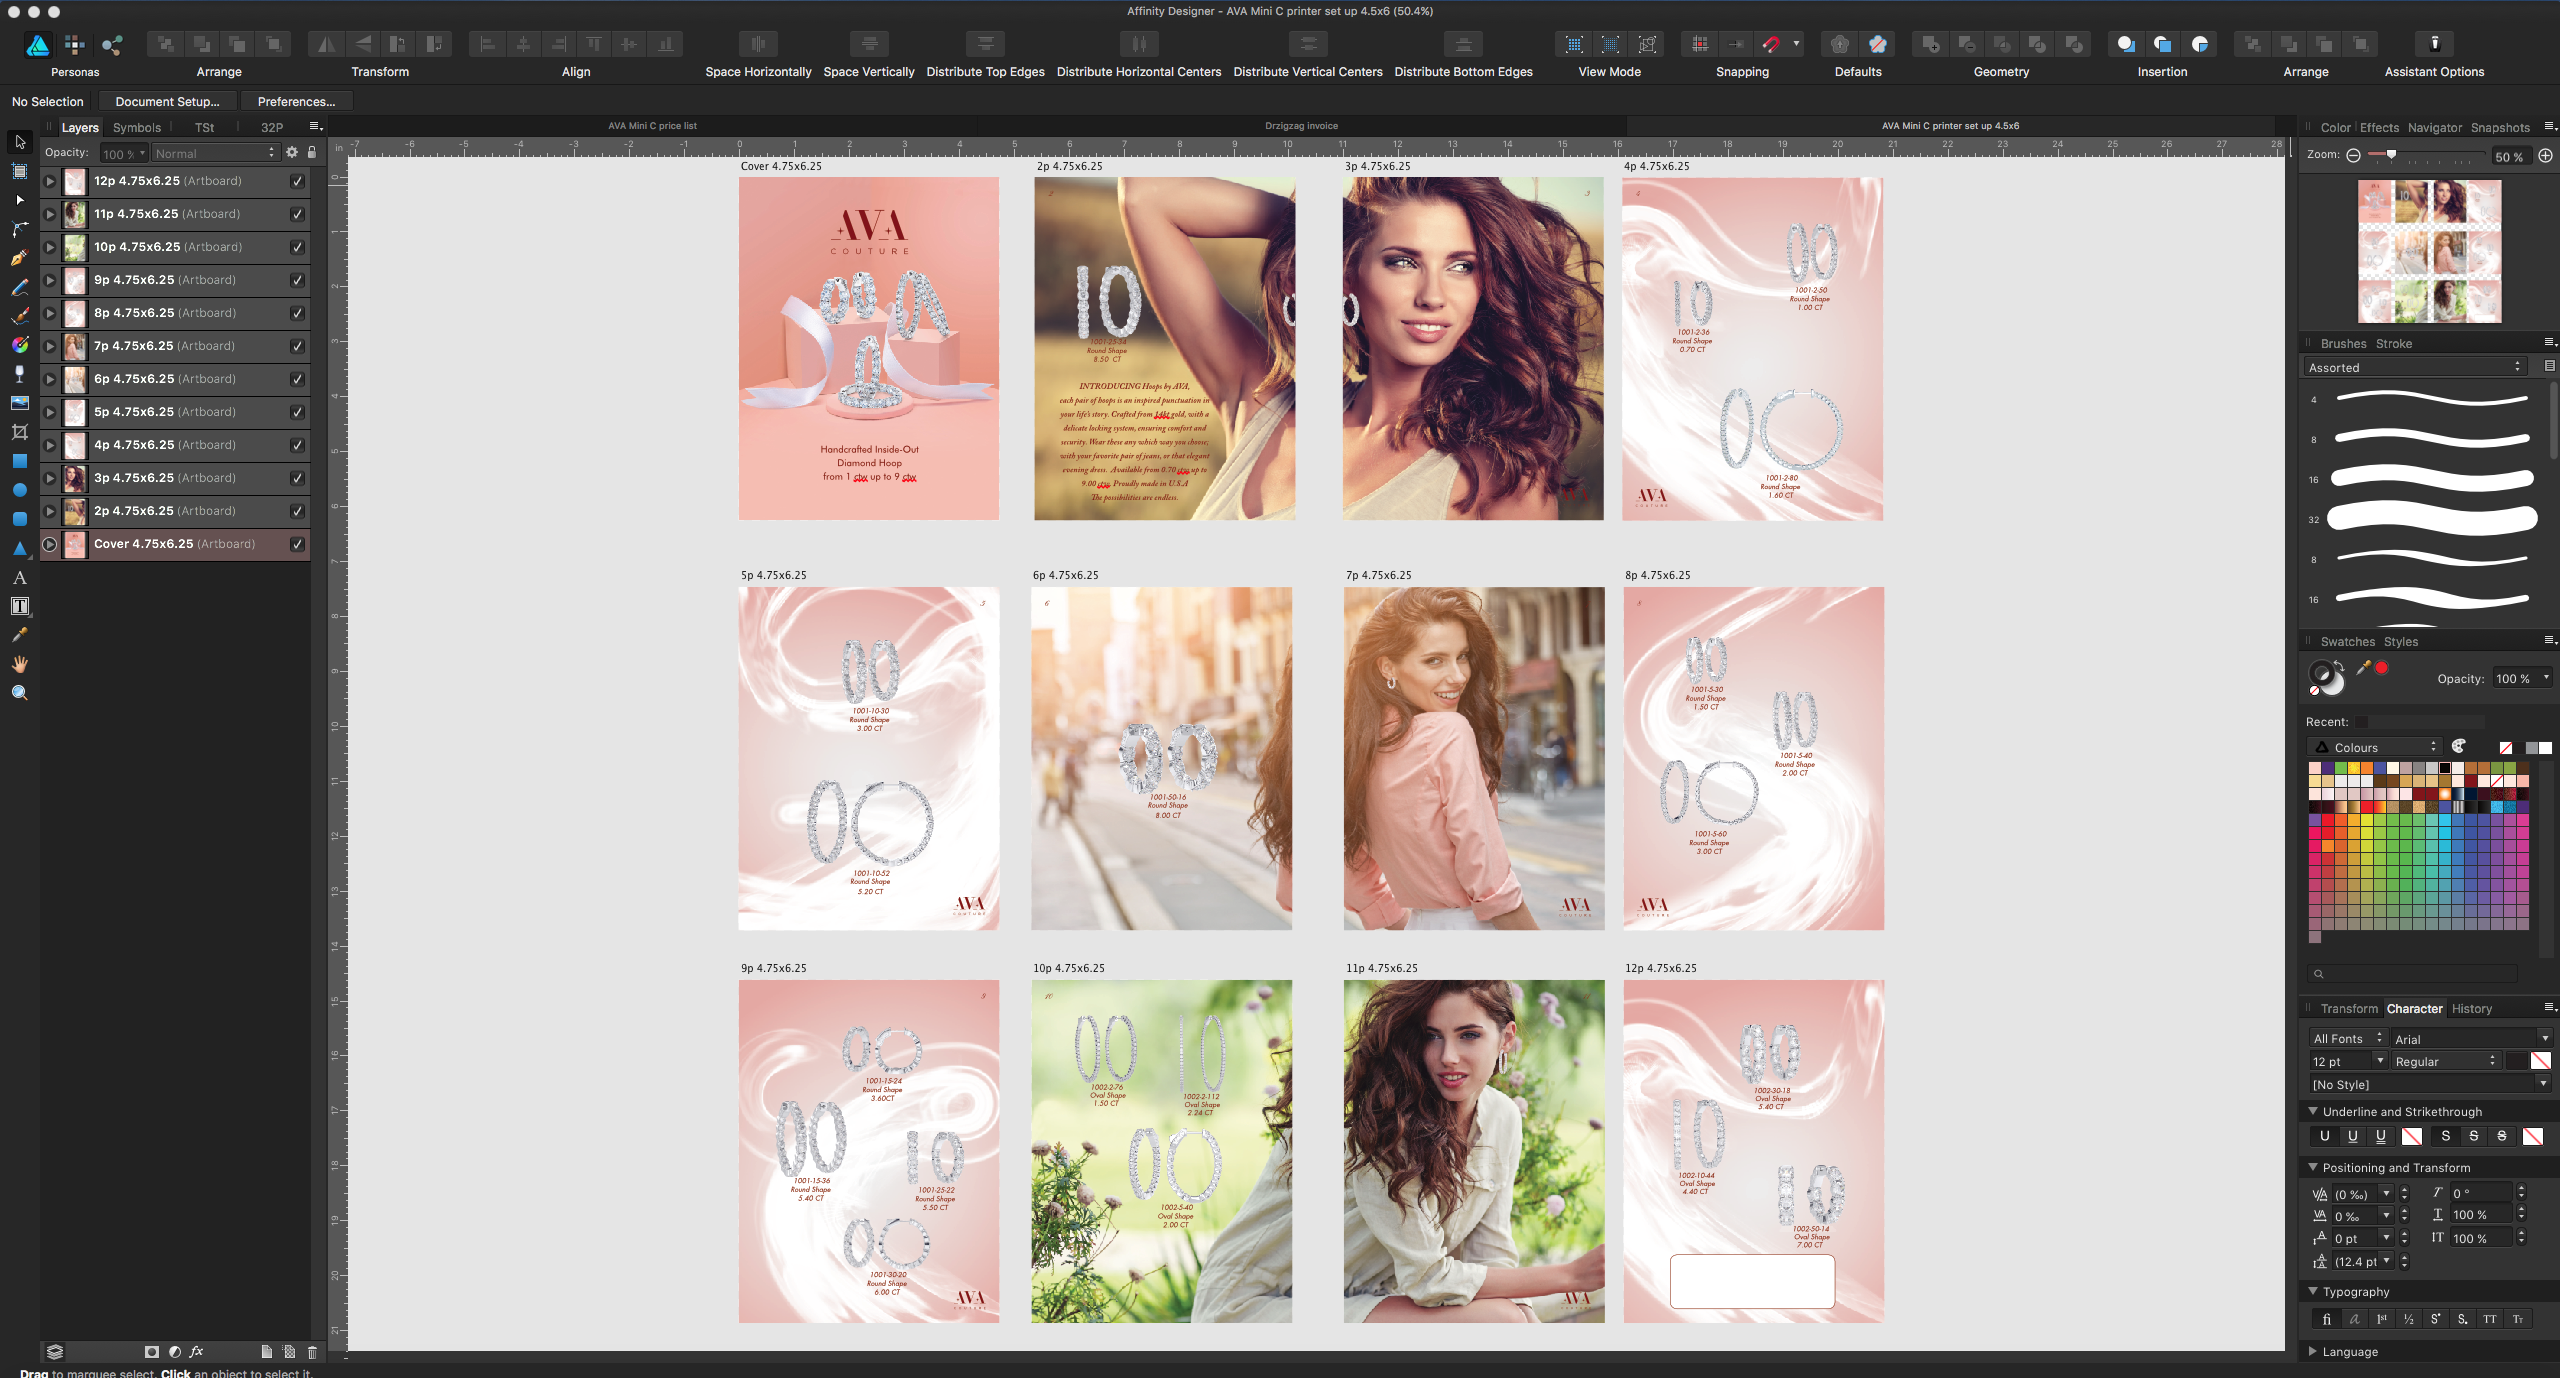
No idea why I'm posting this but I suppose it's a vector person's idea of doodling and seeing what you can do with a single conical gradient, well two because of the centre. It's good practice for creating them though. Perhaps it will become a fad (not likely). I've included the styles as you'll all want to use them in your projects. sillystuff.afstyles
-
 In this short tutorial I demonstrate the Geometry operations (add, subtract, intersect, divide, combine) in Affinity Designer 1.6.0 (destructively and non-destructively) with some samples. Keep on drawin' Norbert
-
- 3
-
-
- geometry
- operations
- (and 6 more)
-
 I've gotten a lot of help here over the past few months and now I have another question. I created a logo, and with the help of this forum was able to set it up so that the line thickness, 3d effects, and gaussian blur effects, all scale with the image when I'm changing it's size. Now I need to know, is there a way to make the text under the logo scale with the object, because right now when I shrink it down, the text is part of the group and the font size doesn't change.
 -
Hey how're you doing? I made these 3 a couple months ago for a Keynote presentation. Have a great day.
-
Thought I would just share this one...took a little break from vectors Created in AD pixel Persona at A4 (300dpi) with a little help from some texture brushes
- 8 replies
-
- 26
-
-
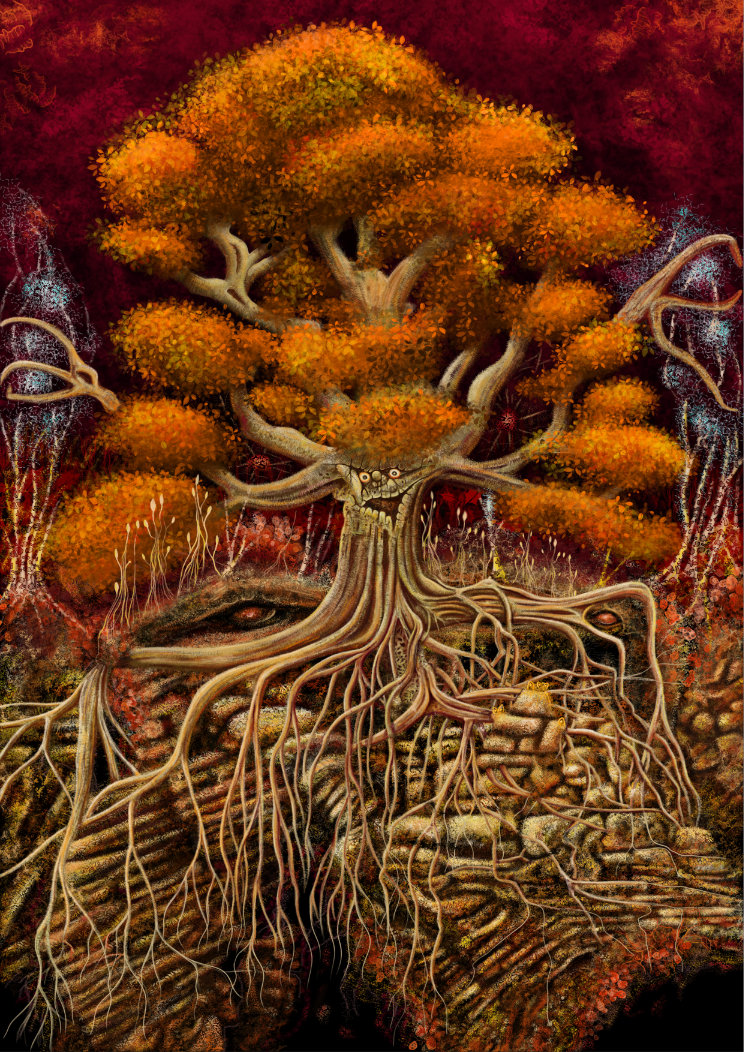
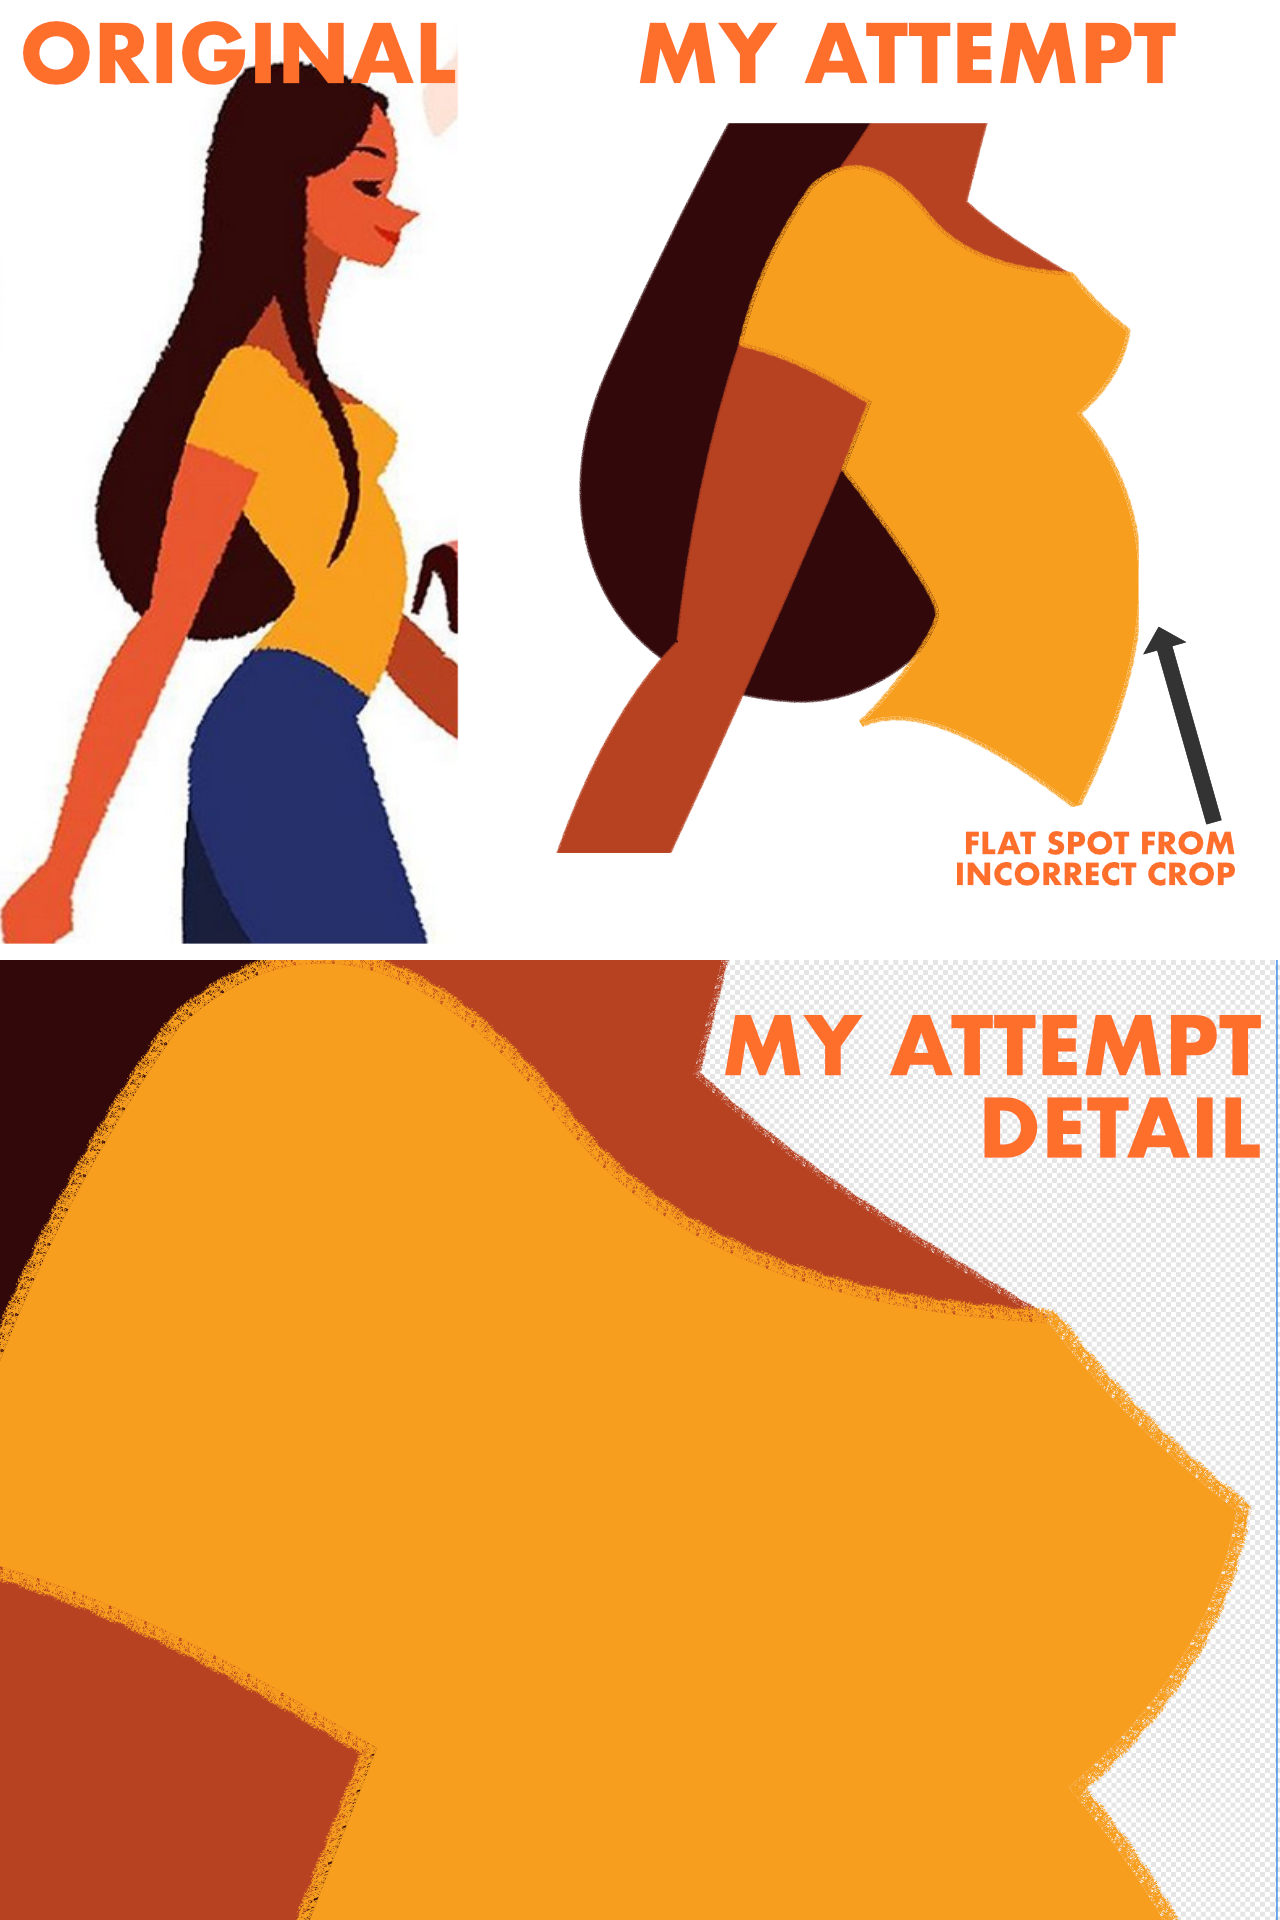
 Hey everyone, I was wondering if anyone knew how to recreate the rough effect shown in the attached image in Affinity Designer? I have included my attempt at the effect but as you can see it doesn't look the same. I could probably achieve a similar effect in the Pixel Persona/Affinity Photo when using a drawing tablet but I wanted to keep the smooth bezier curves that you get when using the pen tool. My attempt was achieved by adding a stroke to my shape using the DAUB Moloch vector brush but as you can see the effect doesn't look the same, instead of being one cohesive element as in the original illustration, in my attempt it looks like the stroke and fill are 2 completely separate elements with the stroke sort of just sitting on top of the fill (I hope that description makes sense). Is this a matter of finding the correct vector brush or is this style achieved another way? The original artwork is by Donghyun Lim, I'm not trying to rip off his illustration but just thought copying it would better illustrate the problem I'm having achieving the same effect.
-
 hey guys, here is a tut on how to work with textures a member for the forum helped me out with, also in the youtube description is a texture pack of winter textures for you to use Using_texture_in_Affinity_Designer_Downloadables.zip
 -
 1.) In Designer, I often use guides to align elements in logos I design. But in alomost every case, I only need them once, and then want to get rid of them to not disturb me further. Why is deleting guides so complicated? Why can't I just hit the delete key to remove it? (Rule: If nothing it selected, and the most recent mouse click was on a guide, remove that guide). I think Inkscape does it somehow like that. Or remove a guide by dragging it back to the ruler. Maybe less dangerous then the delete key, and still intuitive. :-) When working with a big file (wich several artboards), I suddenly noticed that horizontal guides vanish as soon as I touch them a second time. I found this extremely useful. but it does not apply for vertical guies, and it does not work in other files. So it looks like this "feature" is a bug?? 2.) Why aren't guides global to all artboards? This would be very useful for some applications, like putting elements on the same position on multiple pages of a ducument.
 -
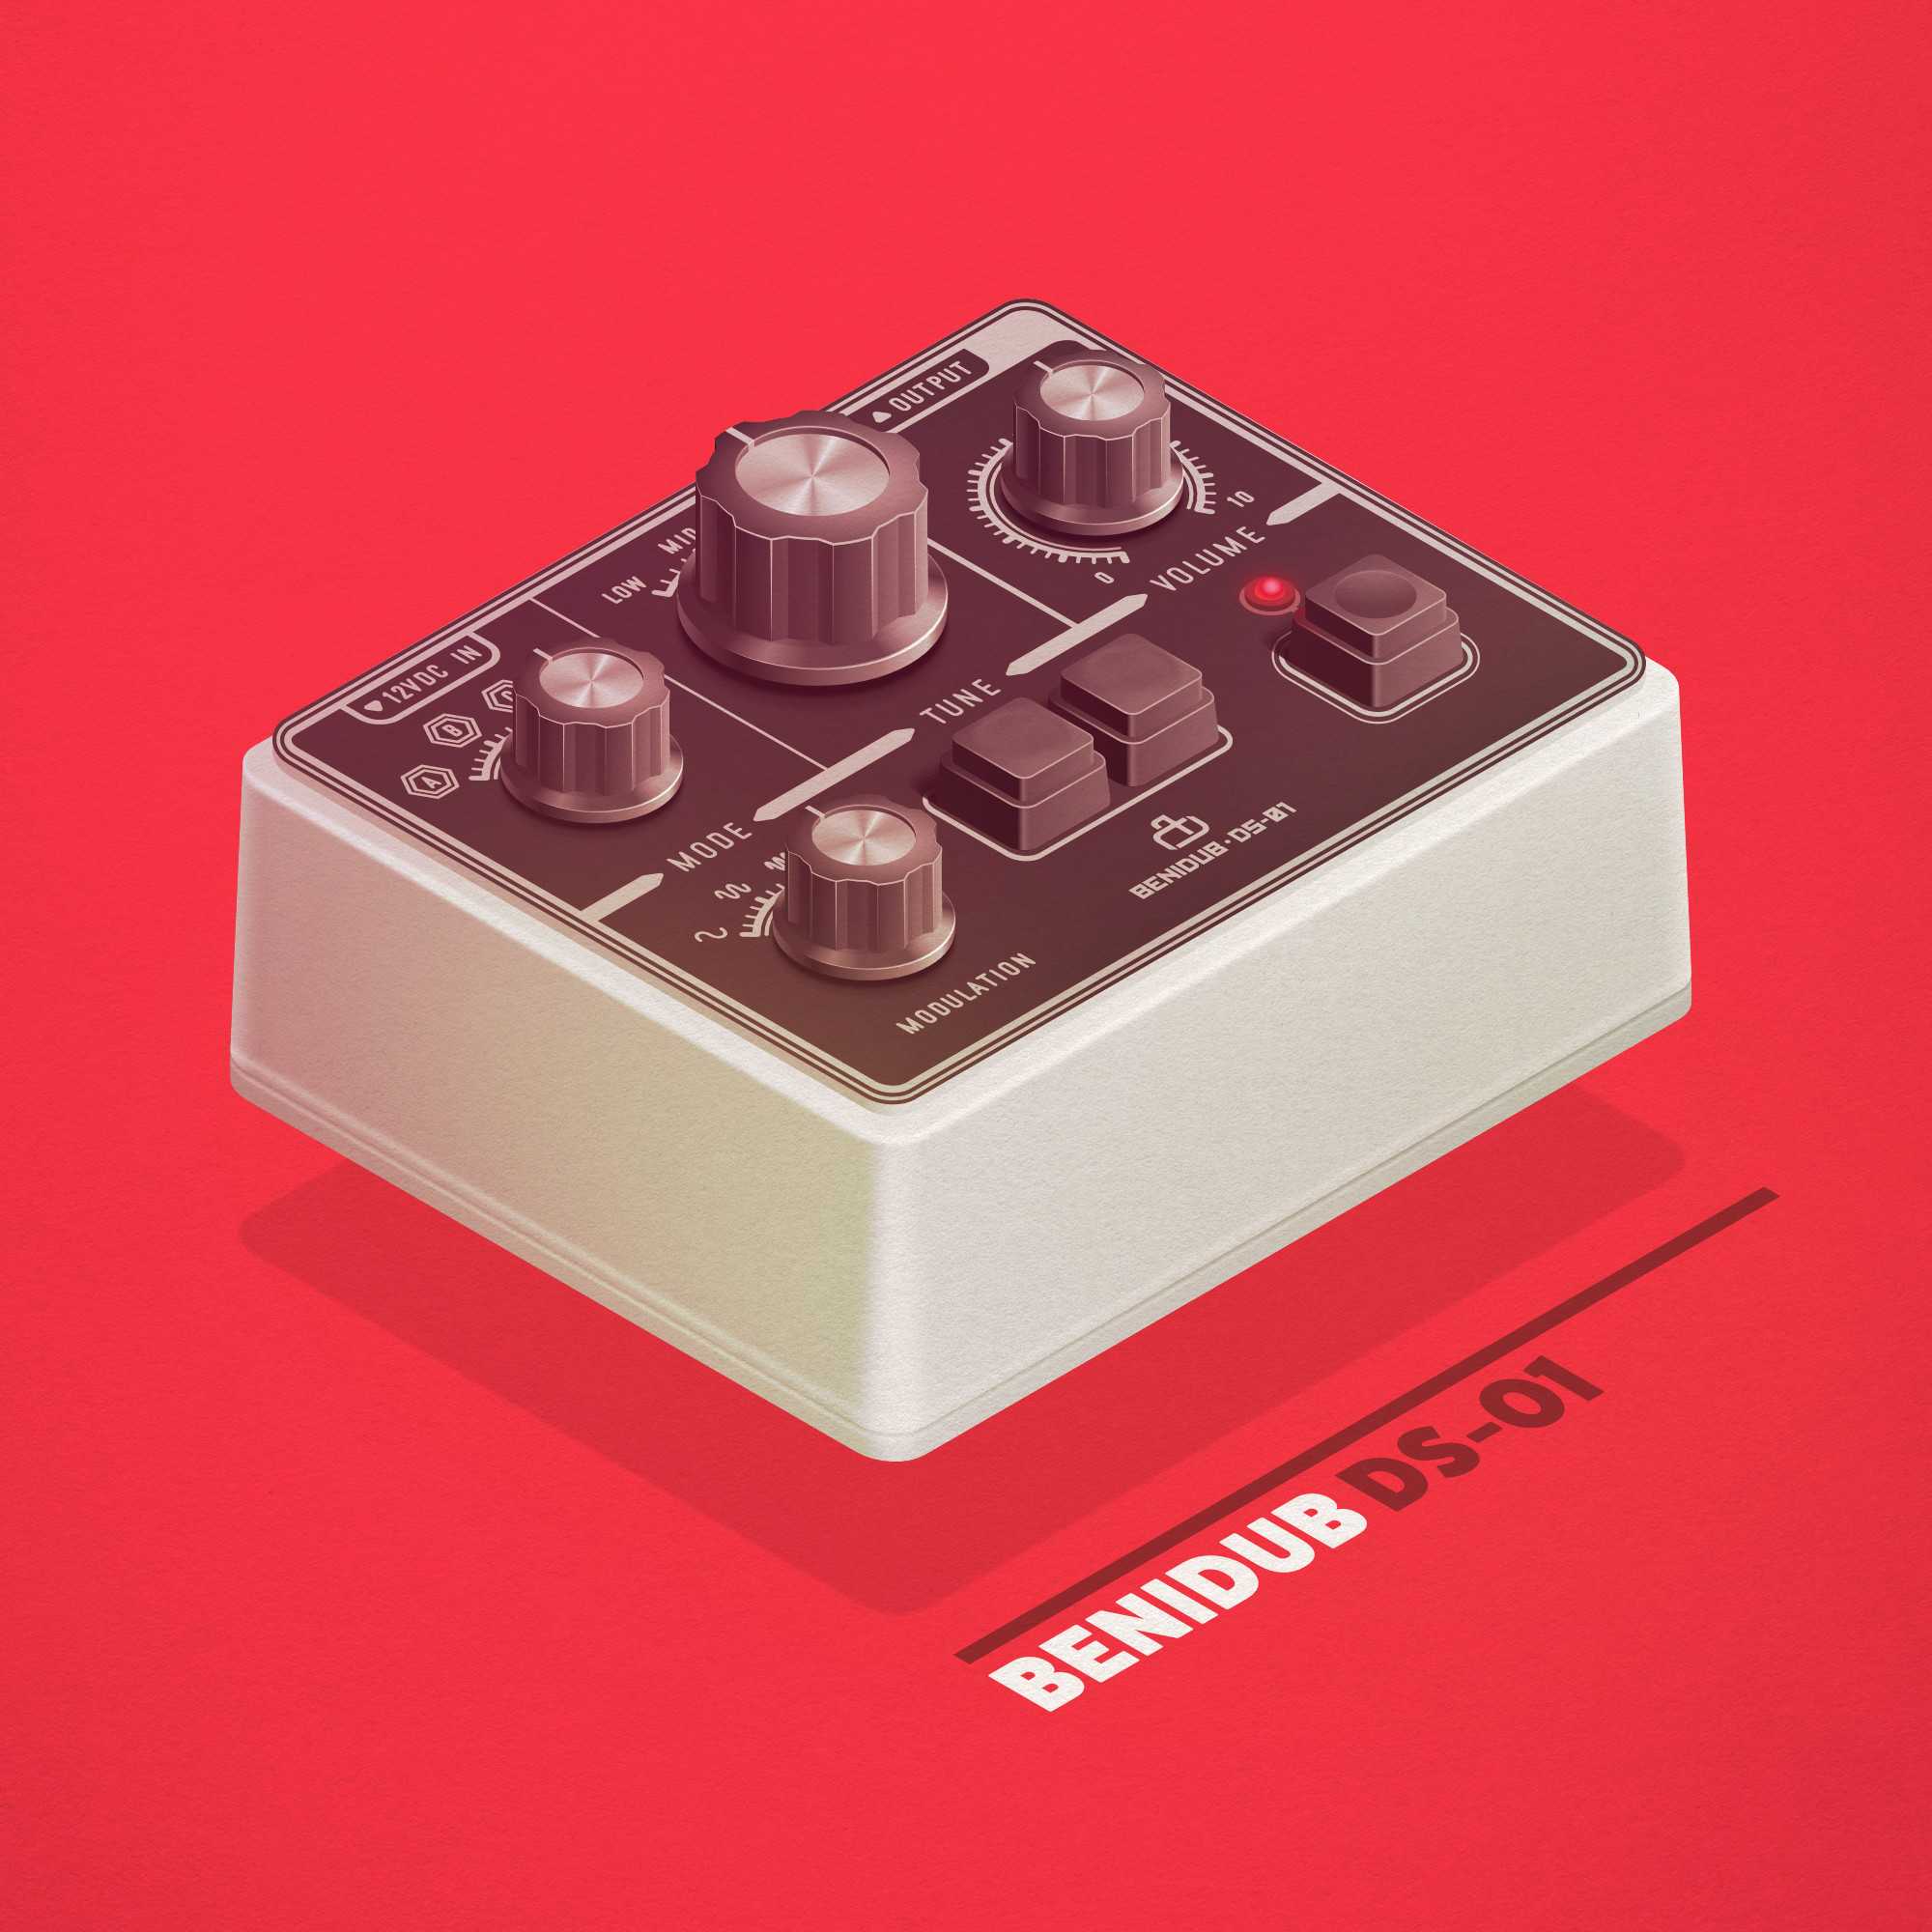
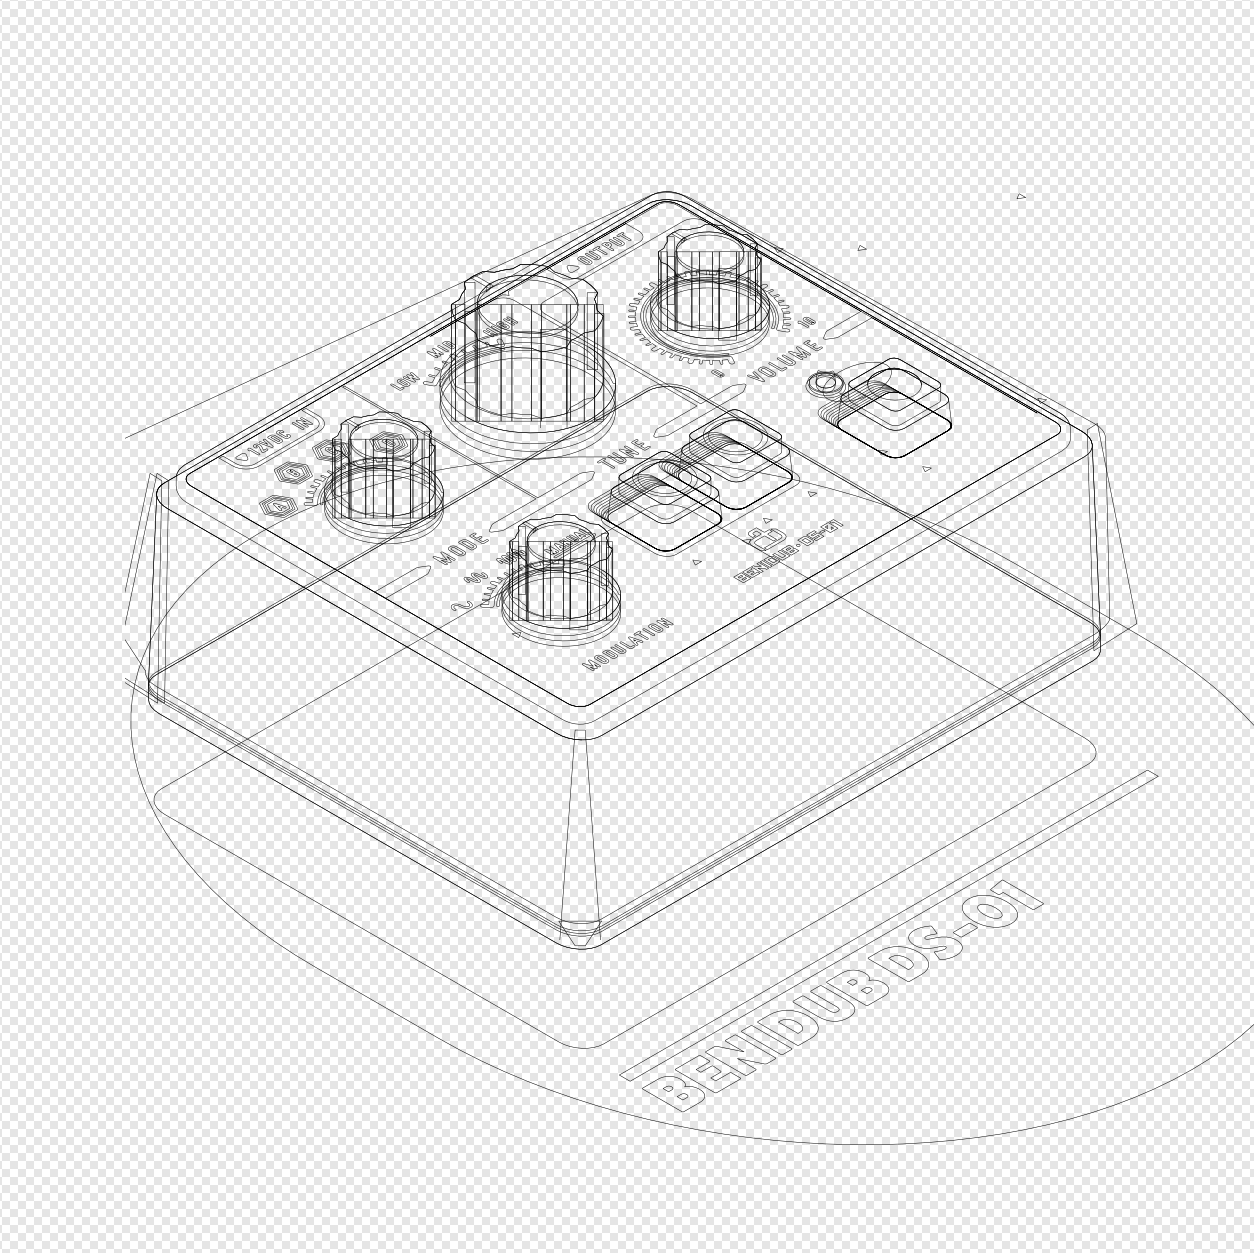
This is a DS-01 unit, manufactured by a guy named Benidub.
-
Hi everyone! I've been playing around with this brand which I work for since 2003 (yep, not a typo... I'm getting old). These 3 are different stages of the last iteration of the logo. We relaunched the brand late 2014, around the same time I switched to Designer. The (mildly) interesting thing is that they represent very well my daily dilemma working with Designer: Should we always go as far as the software allow us? What I mean is this: the 2015 version is, in my opinion, better as a logo than the most recent ones. What do I see in the 2018 version? That I had A LOT of fun with Designer that day. Have a great day!
-
 Hello! A picture probably says more than thousand words. Please have a look at the attached image. I'm trying to recreate this "polygon" look. I know how to create a gradient over several objects by selecting them at the same time. Is it possible to add these artifical "steps" over the gradient's colors? Similar to the orange-to-red gradient in the attached image. Or is it all done manually? If you know any other hints on how to create this or similar polygon looks, I'd be happy to know them as well!
-
 In this tutorial you will learn how to work with clipping masks in Affinity Designer. It's a simple and enjoyable process, once you know the basic rules. Here is the link to the tutorial - watch If you find the video useful, please it. Thanks!
-
 Hello Folks, What am I missing? This makes no sense. I am sure I must be doing something wrong here. When I try to "Expand Stroke" on a line created with the Pen or Pencil Tool, "Expand Stroke" does not work. It probably has to do with a custom brush being used. Do some custom brushes don't expand? Thank you in advance for your time.