Search the Community
Showing results for 'photoshop plugins'.
-
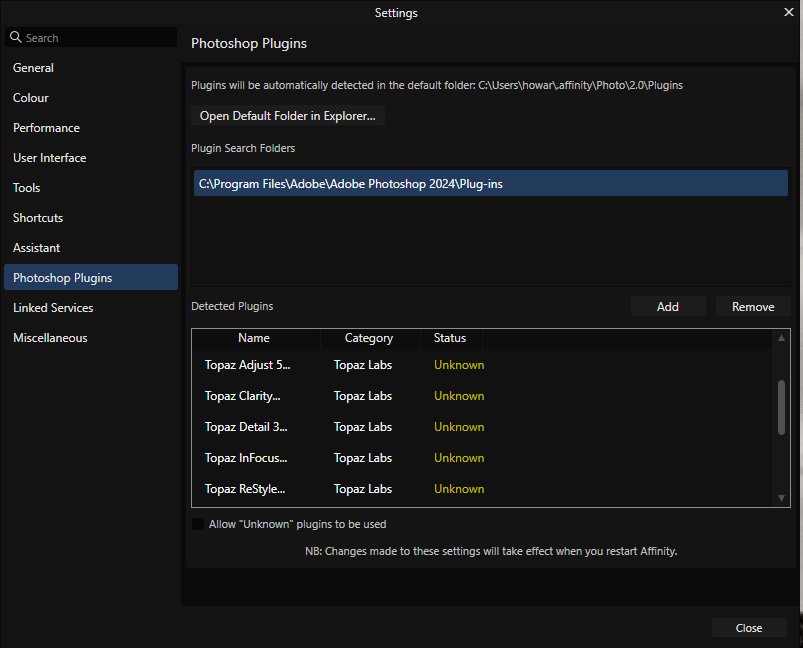
 Running 2.3 on Asus VivoBook 15 AMD Ryzen 7 with 20gb ram. My photoshop plugins run in Photoshop, and used to run in earlier versions of V2, but now they ldon't even appear in the filters>plugins menu. When I go to the menu the filters drop down window just closes. I have tried deleting the old path to the plugins and instead going straight to the PS 24 plugin folder, but that hasn't worked. I think I may have asked this question before, if so I apologise. Anyone have any idea about why this is happening (or rather not happening) and how it can be fixed? Thanks
-
 Hello, is it possible in affinity ipad, to change the hue/saturation/color for a layer only, though a quick UI, like ctrl+U in photoshop? For now I go in filter, and have to apply it manually to a layer, then flatten it, it’s a lot of clic. Thx
 -
 There's something productivity-focused about CorelDraw. It is not interested in throwing UI at you (even when you expect it most) and seems to push you straight to work more quickly and it does indeed seem plausible to create things much quicker than in AI. However it could also be an InDesign replacement depending on the complexity of the document. The problem I've had with AI is that it required subscription-based plugins to actually do most technically challenging things very quickly. So not only we would be paying for Adobe, but also the plugins. Vectorstyler in this respect seems to look at the most popular baseline programs and seeks to address these shortcomings.
 -
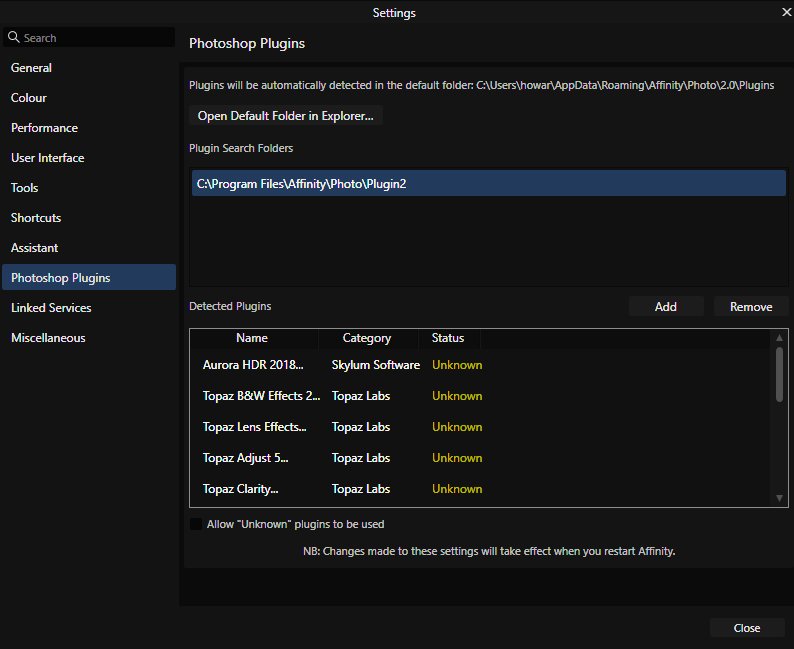
 I just updated to 2.3.1 and all plugins are greyed out. I had the .msix installer, tried the .exe installer. Removed every plugin I don't use (although every plugin worked fine before updating). I verified settings -> Photoshop Plugins -> Allow "Unknown plugins to be used was enabled. I tried removing any possible duplicate listings. Win 11 Ver. 23H2 Build 22631.3007
-
 When buying the whole suite, the Studio Link feature in Publisher is SUPER powerful. It would make things even greater if this functionality would encompass 100% of the separate other two apps, now it is only 95%. Such as slices in AD, and Photoshop plugins in AP, and perhaps one or two other features. Its almoost there, it would be great if in the future Affinity would be able to be just 1 super flexible super app thats all that is needed ..Why have 3 apps when most people buy all and could use practically all features in the super app Publisher (maybe better called 'Affinity Suite/Collection' or so.. It is currently not the most logical implementation, that Publisher has Photo and Designer, but Designer does not have Publisher, but does have Photo.. Then one could buy the seperate apps and have only that app in the left top corner, if one buys all, one simply has 3 icons in the top left with full features. Or if one buys two one has two icons.. Would be much more clean & intuitive
 -

Luminar Neo not working
Richard127 replied to Richard127's topic in Affinity on Desktop Questions (macOS and Windows)
Just spoke to Skylum and the answer was... Yeah, there's no problem with Photoshop plugin "it's all been fixed" "and we don't support Affinity Photo". Thanks guys! -
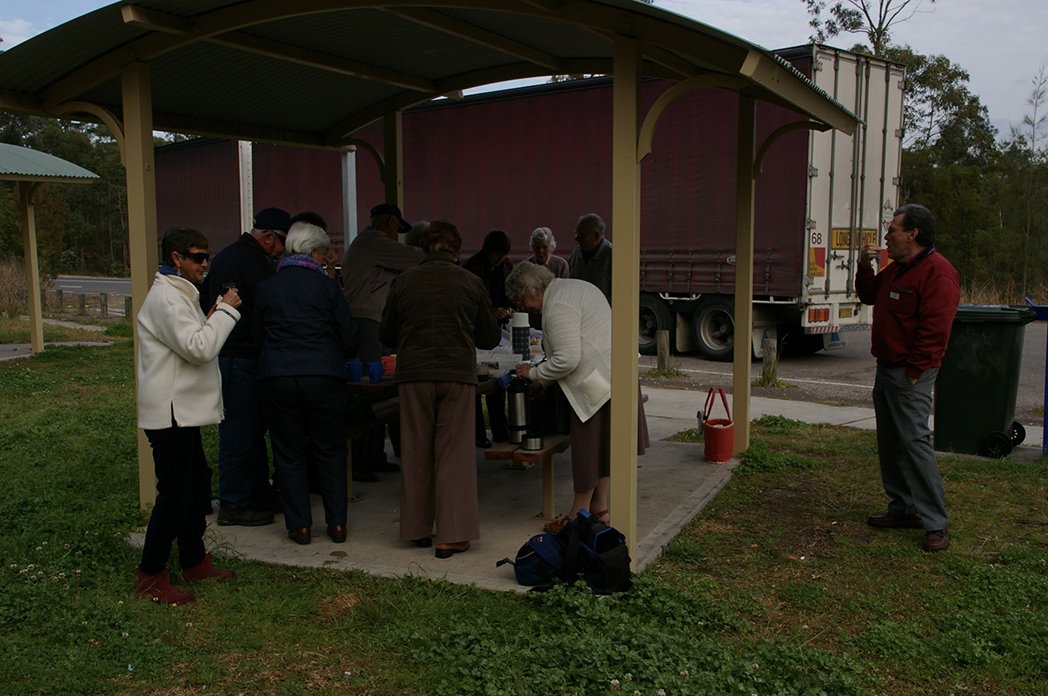
 I am using a Mac running Mojave 10.14.6 because that is the highest OS I can use without having to pay Adobe a subscription for Photoshop. That also means I am still using version 1 of the Affinity apps. Once I can shed Photoshop I will update my OS ans start using v2 of Affinity. I have made the switch to Affinity Designer and Affinity Publisher reasonably successfully but seem to be stuck on Photoshop and find myself staring blankly at my Affinity Photo screen at a complete loss to know what to do. Please don't refer to me to Affinity Photo for Beginners tutorials as they deal with such basic things that I am at a costant risk of being bored to death. What I would like to do is tap the huge experience of those who inhabit these forums for help with particular tasks. That way I will get more and more experience of the app so that eventually I feel more confident with it. So I plan to propose particular tasks one at a time over a period of time. The first task: fairly frequently I have a photo (or some other graphic) that is badly under-exposed. My Photoshop solution is (1) to create a levels adjustment layer, (2) select that layer by clicking on its thumbnail while holding down the Option key, (3) paste a copy of the photo into the adjustment layer which automatically converts it to grey, (4) invert that image using Command-I to make it a grey-scale mask with lighter shades over the darkest areas and darker shades over the lightest areas without my having to calculate it all, (5) click on the layer thumbnail in the Layers pallet to bring up the adjustment window, (6) move the right-hand triangle at the bottom of that window towards the centre while watching the image to know when I have lightened it enough. Then I simply flatten the image and save it. That process takes a matter of seconds – perhaps 30 seconds at the most. It takes much longer to describe it! But what is the comparable process in Affinity Photo? I have attached a sample photo (Sample 1.jpg) and show the result of my adjustment (Sample 1 adjusted.jpg). All help appreciated.
-
I am slowly getting to use AffPhoto more and more, but still find some tasks frustrate me when I find them so easy in Adobe's behemoth. My latest problem… From time to time I get a .jpg that is clearly a sceenshot of some other format that supports transparency, which .jpg does not. I want that transparency. When putting this posting together, naturally I couldn't find as good example. So I built one of my own, which I have attached. In Photoshop, all I needed to do was go to Image/Adjustments/Replace Color… and click on the grey of the checkered background. Because another grey in the image is very close to it, I needed to dial the Fuzziness down to zero to distinguishe betyween them. But then all the little grey squares were selected and I could then dial up the Lightness to 100% and, mostly, the grey squares woud disappear. (Oops! 🥵 My constructed example is not so good on this, betraying the fact that it is a constructed beast, created from an AffDes image! But I am sure you follow what I mean.) Having thus given the image a completely white background, it is relatively easy to select all the background using Adobe's Magic Wand Tool, invert the selection so that the main image is all that is selected, hit Command-J to create a new layer of just the main image, delete the original Background layer and save the result as a .png. Job done. How can I achieve the same results in Affinity Photo?
-
Bug: I can't find if this has been reported yet, but opening a PSD saved from Photoshop will not recognize a variable font such as Roboto Flex.
-

Luminar Neo not working
CJH replied to Richard127's topic in Affinity on Desktop Questions (macOS and Windows)
Got to add, it didn't work anyway. Standalone works, plugin in either Affinity Photo or Photoshop 2024 does not -
Luminar Neo not working
CJH replied to Richard127's topic in Affinity on Desktop Questions (macOS and Windows)
I've just loaded it into a newly installed Photoshop 2024 and it does the same thing there -
 I just purchased Affinity Photo 2 because I heard it's the best alternative to Photoshop/Lightroom. However, after installation, I'm noticing none of my DNG files are opening in Affinity Photo 2. I'm getting a "The file type is not supported." message with no other information. The DNG photos were taken on a Samsung Galaxy S24 Ultra phone, not sure if that matters. Any words of advice would be appreciated. Do i need to install a plugin that I was not made aware of?
 -
 Hey, I must say I do really like where the software is going and I think its pretty close to make the switch from photoshop but there are definitely some major pain points left. Huge improvement from A1 however. --------------------------------------------------------------------------------------------------------------------------------------------- 1. General Performance is not acceptable yet We tried recently making the switch from photoshop, Affinity 1 was very slow but 2 still has some big issues which lead to a lot of frustration When I copy a layer it takes a easily a second or longer for the layer to display its icon in the layer list as example on a basically empty file This is hugely disorienting since I don't know if my hotkeys work or If I did the right thing until a second after, which is very frustrating. Other things also seem to have small lags. We are on high end PCs with about the strongest single thread cpu you can buy and this is just an empty 2k image with 2 layers. I can't imagine how much worse this is going to get on a larger file. Ive had up to 3 sec waits for the image to show up. This is a big dealbreaker. --------------------------------------------------------------------------------------------------------------------------------------------- 2. Painting workflows are very inefficient and slow compared to photoshop There are 2 big differences that make Photoshop much much faster to use right now for using the paint brush and painting. We are not painters but even for us this is a massive slowdown. 2A. Color Picker is somehow not hotkeyable. Using color picker within a fraction of a second to pick a color and being ready to paint is a action you do unending times. Having to scroll over to the side with your mouse to click on the color window is very slow and adds up massively even in just a single session. I was in disbelief at first that you cannot call up the color picker. You can see how I can quickly switch colors in a second in photoshop and keep painting in comparison. In Photo, I have to swipe all the way, double click the color swatch, and manually confirm to close the menu, then swipe all the way back. This is a software to change colors of pixels on a canvas. Not having a baseline set hotkey for changing colors is very odd. This should not be an optional hotkey but baseline hotkey. Same for photshop, I don't understand the world where "crop" is more important to be on "C" than literal Colors 2B. Brushes can't be changed on hotkey? I must be mistaking some hotkey but that is completely crazy to me. Right click does nothing and I am really supposed to: - Mouse all the way over to layer panel - Switch to Brushes tab - Select the Brush I need within the drop down menu - Switch Back the layer panel Lets say we make a custom layout where the brushes are closer, but still this is a low of mouse path. We are not painters but switching a brush with right click is infinitely more efficient than this right now. Any real painter who uses brushes all day must have a massive speed downgrade from photoshop. Both of these things comebined make a completely massive difference in speed compared to photoshop. Great: I want to praise here however the amazing brush library which I find is the best affinity feature. They are high quality and photoshop is completely embarrassing itself to not provide something even close to this. --------------------------------------------------------------------------------------------------------------------------------------------- 3. Selections are very bad to work with I got extremely confused when trying to work with selections and had to give up on multiple attempts. 3.A Selections don't allow copy or cut and paste which is extremely inefficient. I don't even know how I am supposed to work with them. I just had to give up. I want to just crop a rectangular thing for this post and I literally can't figure it out. In photoshop I just select a rectangle, copy paste or cut paste to new layer, done. - Here I select a rectangle. Cut paste - Nothing. Copy paste to new layer - Nothing. - Ok lets try invert the selection to erase the other parts as a dirty workaround. Keep ing mind that the (up to 3 seconds delay, jesus) for showing my new layer icon in the layer stack make this a multitude more confusing as I don't know whats going on until the icon gives me confirmation. 3.B Also, Selections also do not support shift-adding multiple. I kept trying all hotkeys, and just couldn't figure it out. After a bit of searching I found that there is a button to add the selection. This works but is very inefficient compared to shift adding multiple. Edit: It seems you can switch the mode around, however having to click this every time is very tedious. --------------------------------------------------------------------------------------------------------------------------------------------- 4. Layer Visibility 4.A Smart Objects are hard to identify and understand Ok I tried now another cropping of a simple icon. Wow this is all confusing and unneccessary. I try to now crop it with my new found knowledge of Ctrl + Shift + I Dosnt work. Trying it multiple times, dosn't work. I get very confused. Turns out a image is not a pixel layer and can't be affected by a selection. It seems like in photoshop, if you copy paste in anything from clipboard, it is pixel, but if you drag in, it is smart object. This here seems to be some sort of smart object? However in photoshop the icon is extremely visible to be a smart object with a big icon. Here it is very understated. This should be more noticeable to not be editable. Smart objects / "Images" should not have a pixelated background if they are not pixel layered. The pixel layers also have a very noisy layer icon, which undermine all other icons. Pixel layers are the "standard" and should be lower opacity. Non standard layer types should stand out compared to the pixel layer, right now it all blends together making it hard to read. 4B. Layer Visibility Toggle Please switch visibility icons on layers to the left like in photoshop if possible. This is important to click and are being clicked many many times. Having the icon be all the way on the right adds to around 25% more mouse movement relative to the screen, really messes with photoshop muscle memory, and seeing the layer type icons is far less important than the visibility. Here we have a "hide" hotkey but not a "toggle visibility" hotkey. 4C. The Layer icon is hard to see The new layer icon is hard to identity. It is very low contrast and dosn't have a "+" 4.D The layer renaming field is too big I constantly rename layers by mistake instead of clicking them. The selection area is just too large and requires too much precision to not click it by mistake. --------------------------------------------------------------------------------------------------------------------------------------------- 5. Tool Confusion As new user, trying hotkeys for known tools is very unclear which tool you are having right now in your hand. Many tools have the same cursor icon as example. Suggestion: When selecting any tool, briefly pop up for 0.5s on the top or left on your canvas the name of the selected tool with the name as on the toolbar hover, quickly informing you what you actually pressed or have in hand, idealls with the icon shown. This would be a great usability improvement and help learn the tools. Or maybe it can be next to the cursor when switching tools. However right now its very confusing to what you actually are toggling through and you constantly need to glance to left and check what actually goes on. This is only marginally better on photoshop but a long standing issue there as well, however photoshop in general has better cursor icons. Affinity also dosn't show the current brush style well. 5.B Pressing "V" toggles back to previous tool This is super confusing. In photoshop if I press V I stay on dragging. Here I suddenly go back to paint bucket or whatever. This can be very disorienting. --------------------------------------------------------------------------------------------------------------------------------------------- 6. The alt+scroll rotation needs to be optional The alt + scroll rotation of the canvas dosn't seem to have any setting or bool somewhere and this really messes with muscle memory. We all constantly rotate and its very frustrating, all people in the team keep complaining about it. There should be navigation settings. --------------------------------------------------------------------------------------------------------------------------------------------- 7. Layer Styles? Layer styles are invaluable in photoshop. Sure, doing some cheesy bevel and glows etc might be very year 2000 but that's not the point. The default examples also seem to imply this idea and seem to be neglected or deemed not important. This concept that layer styles are for cheesy word-art effects is completely misguided. Layer styles are extremely useful for tons of everyday things such as having a color overlay, or a simple glow, simple corrections. They are on double click in photoshop for a reason and widely used. It is a must to quickly be able to change the style of a layer, even if its just a color overlay or drop shadow --------------------------------------------------------------------------------------------------------------------------------------------- Conclusion: Overall the jump from 1 to 2 is very impressive and It's "almost there" but there are some very important fundamentals which still need to be sorted out. Also Serif will have to act on the new Era of AI, Photoshop content aware fill was already one of the best features but now AI inpainting will be a massive advantage if Serif is missing the AI train, these things are not going anywhere, but first the core needs to work well before luxury stuff should be worked on.
-
 It's quite likely I added it thinking about it, more so as there isn't one in the Pixel Perona of Publisher. I think the keyboard shortcut in Photoshop is Cmd H so that may be more appropriate for those Photoshop users with muscle memory...
 -
 Hello everyone I have a problem and the printing company we work with wants an EPS file from me. He is using Photoshop and cannot open the file properly. He can't process it any further. How can I save the EPS in Affinity Designer so that it is compatible with Photoshop?
 -
I have been trying to use DXO VP3, Luminar AI and Aurora HDR as a plugin for Affinity Photo. They all show as active on my plugin bar but VP3 and Aurora do not open and no signs that they are trying to activate. Luminar AI appears to load but jams and I need to Force Quit the Affinity program and re sign in. The Nik collection works fine except for Perspective. Is this normal or am I doing something wrong in the settings of my plugins? Thank you,
-
 I'm running some tests in order to try to exactly match the sharpening applied by photoshop when downscaling an image, so that I can have the exact same results when using photo. What I noticed is Photoshop rounds up the pixels and Affinity uses decimals. How can I have Affinity Photo use full pixels when downscaling? I believe what's actually happening is upon export Affinity photo is rounding down the value instead of up. My image is 1007,8 pixels tall and Photoshop is correctly rounding up to 1008 and affinity is rounding down to 1007 which is far less desirable and accurate. Thanks D
 -
 Following… I use this in clip studio, blender and photoshop all the time. Please add it.
 -
 Oh, yes of course! I forgot that Downsample limits the dpi when exporting. So, I don't need to go to Photoshop to resize the image. 😁 Thanks!
 -
(Same big tree -image) Okay, but if you reduce the image (50 %)(570 dpi) in Publisher and don't use Downsample, the PDF size is 33 Mb 🤨 . If the image has not been resized and Downsample is off, the size of the PDF is 9 Mb. Not good. I've been taught that if you're going to enlarge or reduce an image by -20/+120 % of the original, do it in Photoshop. If the dpi is more than 300, then it is of no use (except for drawings), it is unnecessary "weight".
-
(Link does not work, 404.) The same one-page document (big tree). Simplified (you don't change the settings); if you want a Press Quality PDF (CMYK) file in InDesign, you choose the Press Quality preset. Same selection in Publisher (press ready). Publisher exports a 9 Mb file and InDesign 8 Mb (rounded). If InDesign's "maximum" image quality is 100(?) and Publisher's is 98, i.e. lower, why are Publisher's PDFs bigger? It doesn't matter in Prepress.. but... Another surprising thing is that if you import the image into Publisher and don't change its size (100%), everything is as it should be. But if you change the size, for example, to a smaller one, then Publisher will increase the resolution of the image (dpi). What is the cause and why does InDesing not do the same? That's why I import the image at 100 percent and reduce or enlarge it to the size I want. Then in Photoshop I resize the image to match the final size of the image in Publisher. If it's pointless, tell me 😁
-
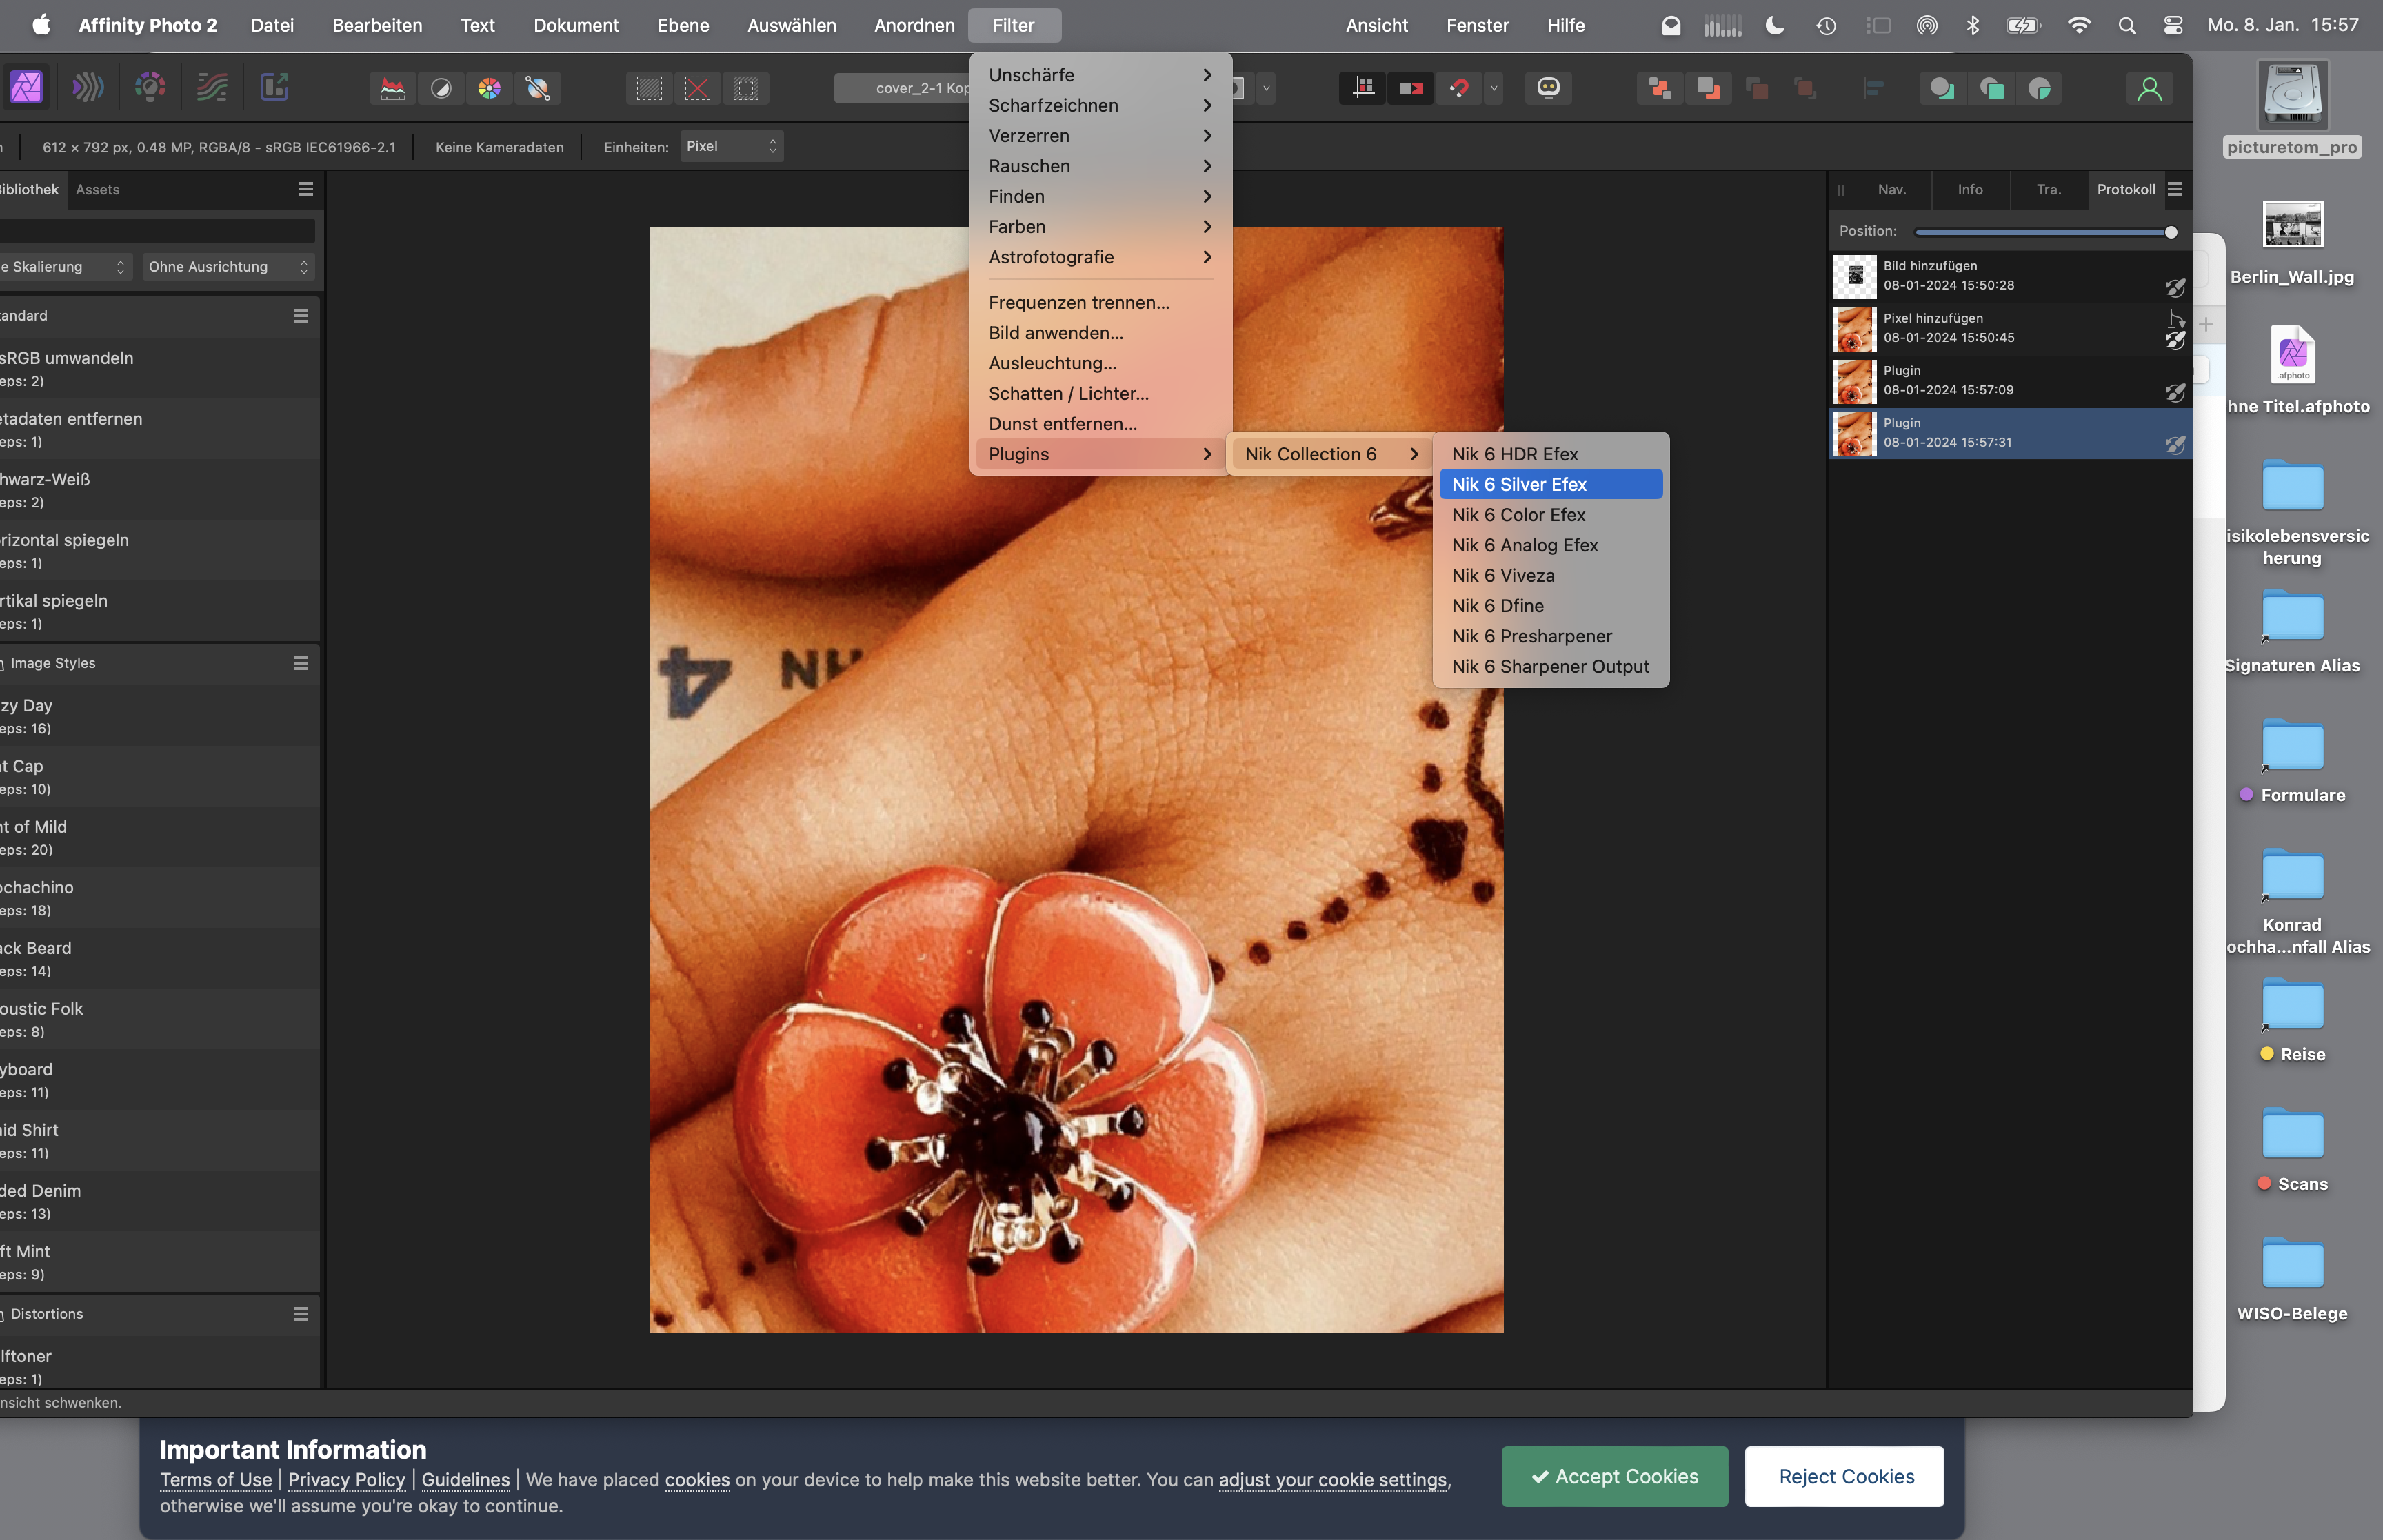
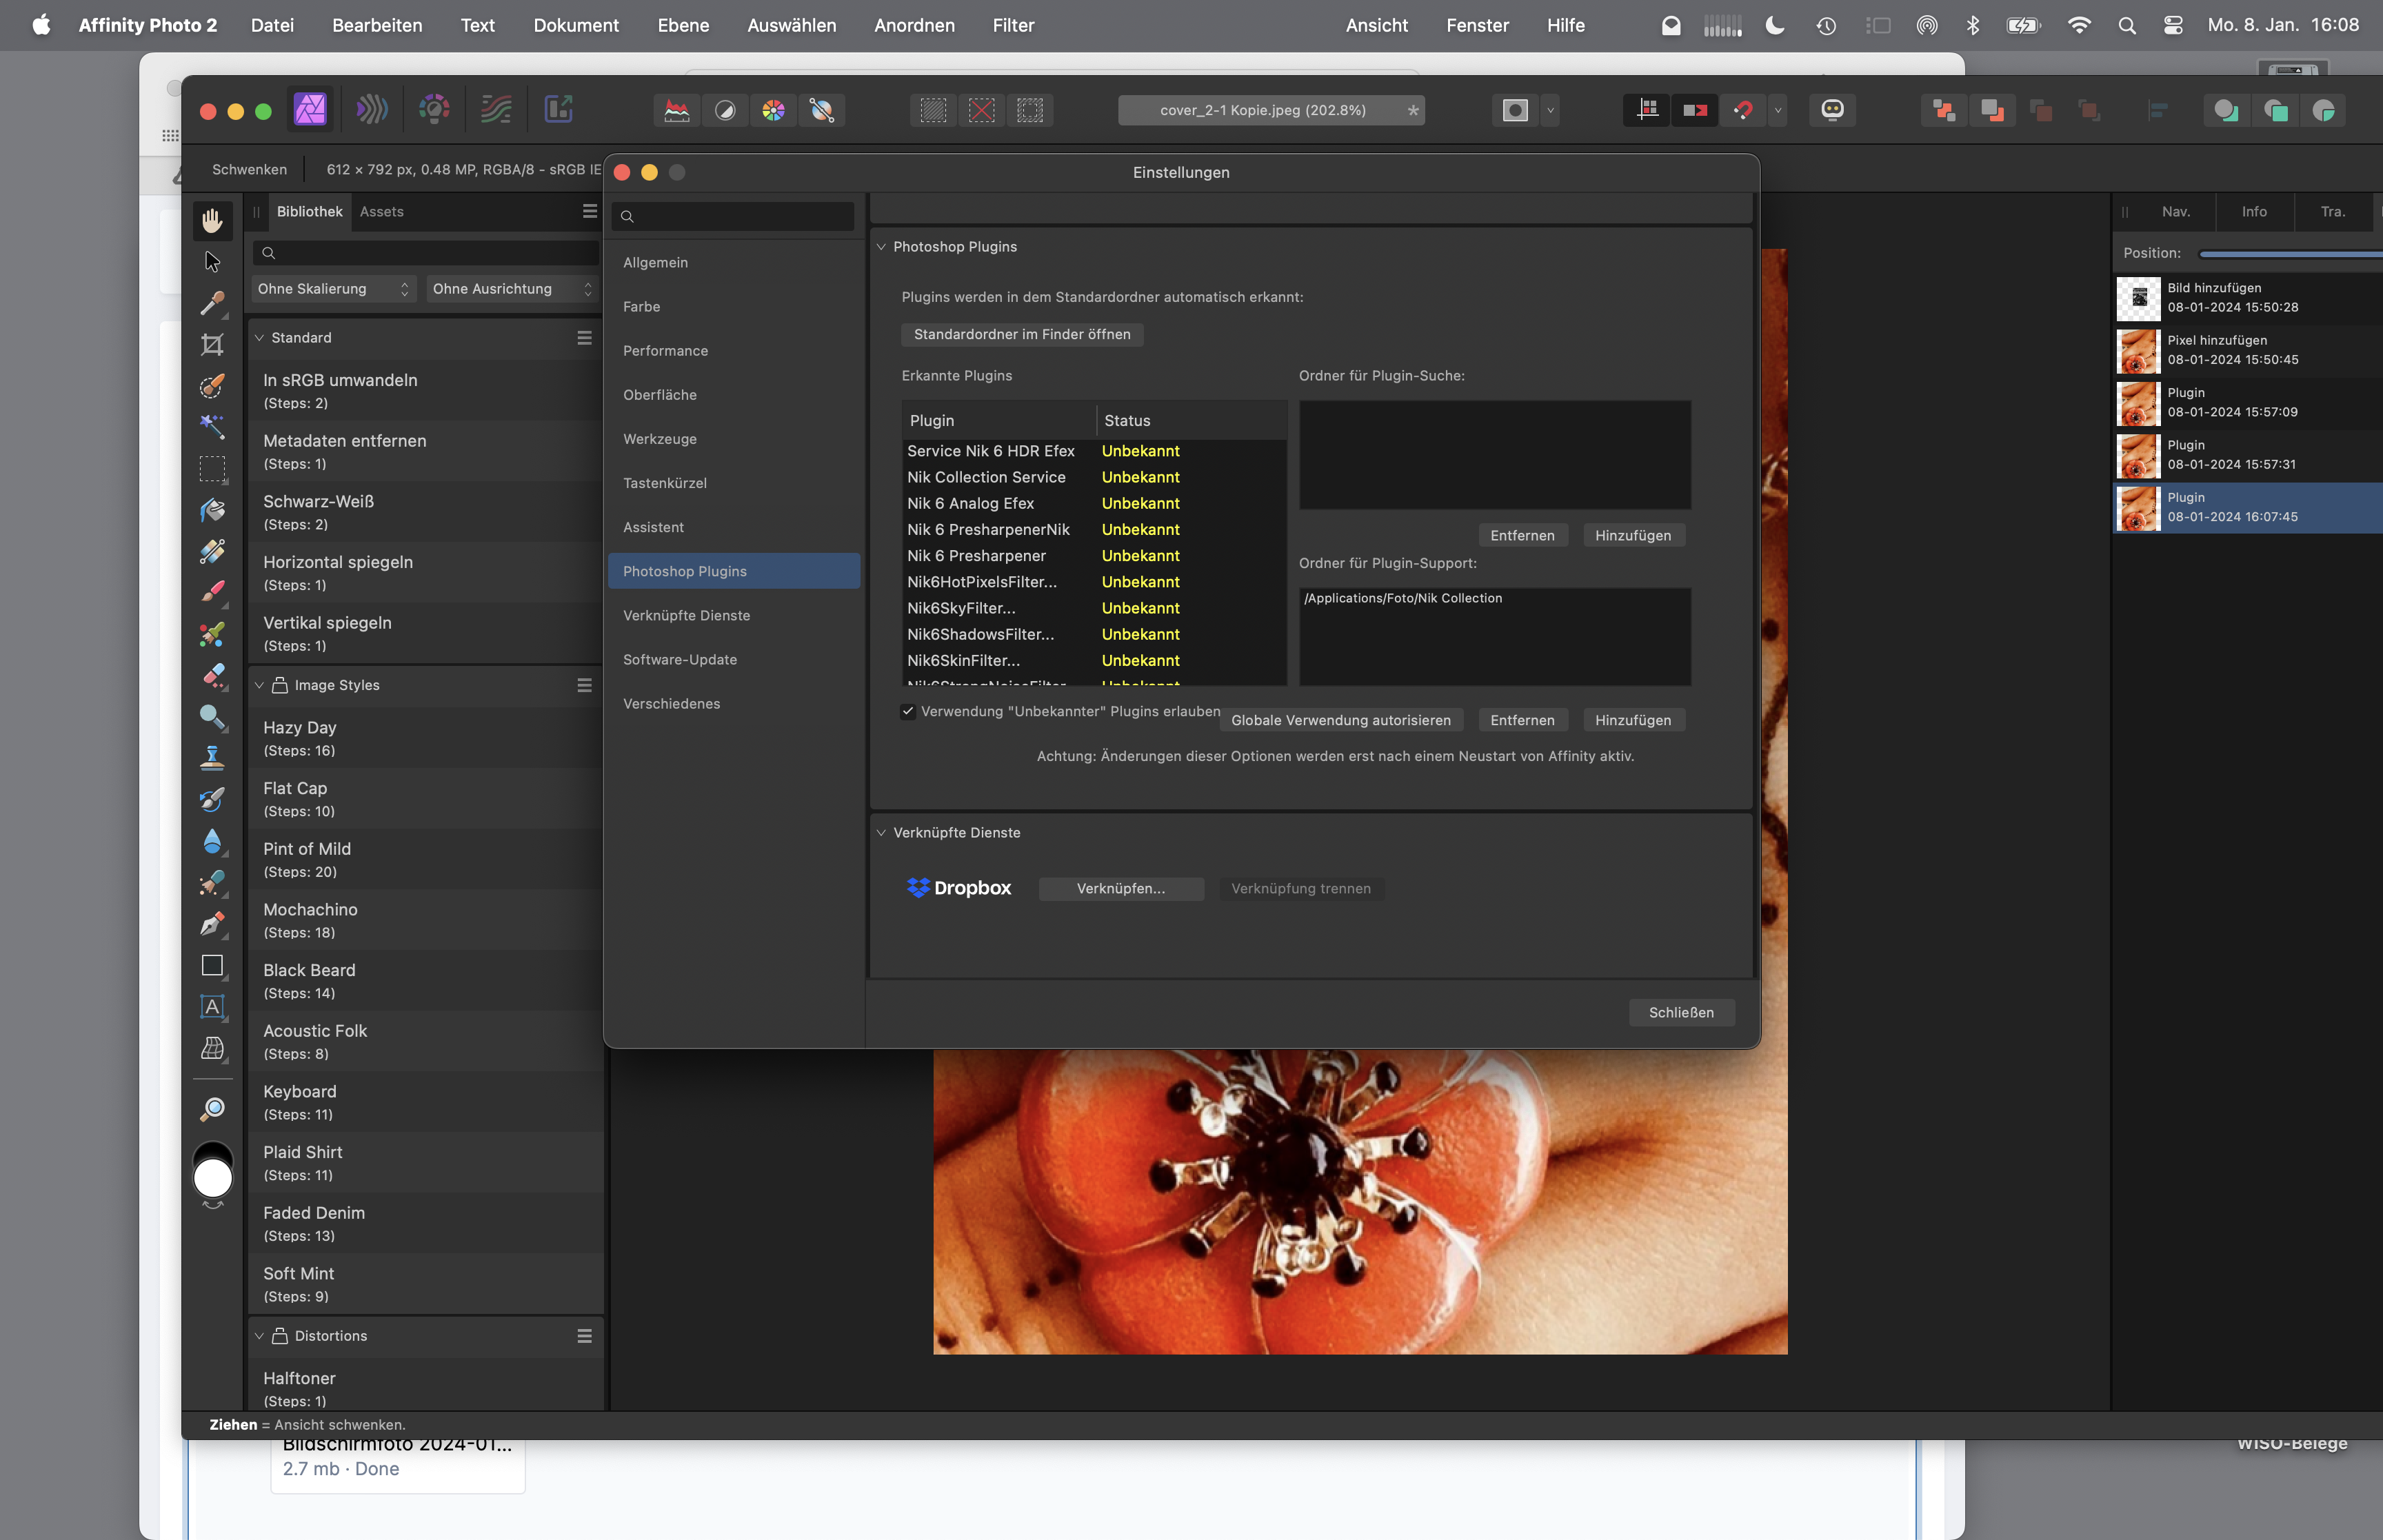
 I am new to the professional use of Affinity in conjunction with the Nik Collection. After the automatic installation of the latest Nik Collection, the plugins are displayed in connection with an image, but they have no function (plugin will not start). Does anyone have any idea what has gone wrong here? Technical data: - Affinity Version 2.3.1 - Nik collection version 6 - MacOS Sonoma 14.2.1 - MacBook Pro Thanks for your help! Tom
-

AI generative Fill in Affinity
WMax70 replied to WMax70's topic in Affinity on Desktop Questions (macOS and Windows)
Although Affinity has merged with Canva and might plans to incorporate AI to gether with Canva, they still have a long way to go to match Adobe's progress. Adobe has eg FireFly AI, (https://www.adobe.com/nl/products/firefly.html) which allows users to alter parts of images and integrate with Photoshop. Most impressively, Firefly is continually improving through generated images and text input. Currently, for me it performs better than both Midjourney and Dall-E, making Adobe the dominant frontrunner again in the image creation market. Personally, I am now using Photoshop again since a year and started with Capture One a couple of years ago after Affinty keeps ignoring good color correction options and good raw import. I started to use Photoshop again more intensive while using Affinity less due to its lack of professional progress and strong features like quality raw conversion, precise color correction, options to calibrate with colour corrections cards, good visual masking and AI. Although I really appreciate Affinity's speed and inutitive setup, it fails to compensate for necessary essential features. For me it's not about free from licenses, but speed and essential pro features to enable pro workflows.- 467 replies
-
- 2
-

-

-
- artificial intelligence
- ai
- (and 3 more)
-
 I'm still mostly using Illustrator. The Astute Graphics suite of Illustrator plugins add a ton of stuff that really give value, but more importantly, it adds a few must-have vector tools (like deleting a point on a curve and healing). I've been buying the Affinity software and other adobe-competing products just to support having another place to go to. I feel that opening up AD to functionality plugins similar to the AG suite may be just what's needed to break the hold illustrator has. Even if Affinity grows to cover all possible features, plugins would get your users there sooner, and plugins might also help in figuring out how certain features should be. Alternatively, if simplicity in UX is a goal, leaving some of the more advanced features to plugins may be a good way to fight off bloat. I'm sure these things are being discussed, and I don't expect this post to really change much, but still I hope someone considers these viewpoints. (I searched for a "main" AD plugins thread, found lots of small ones so I decided to make one for this viewpoint. Hope that's ok.)
 -
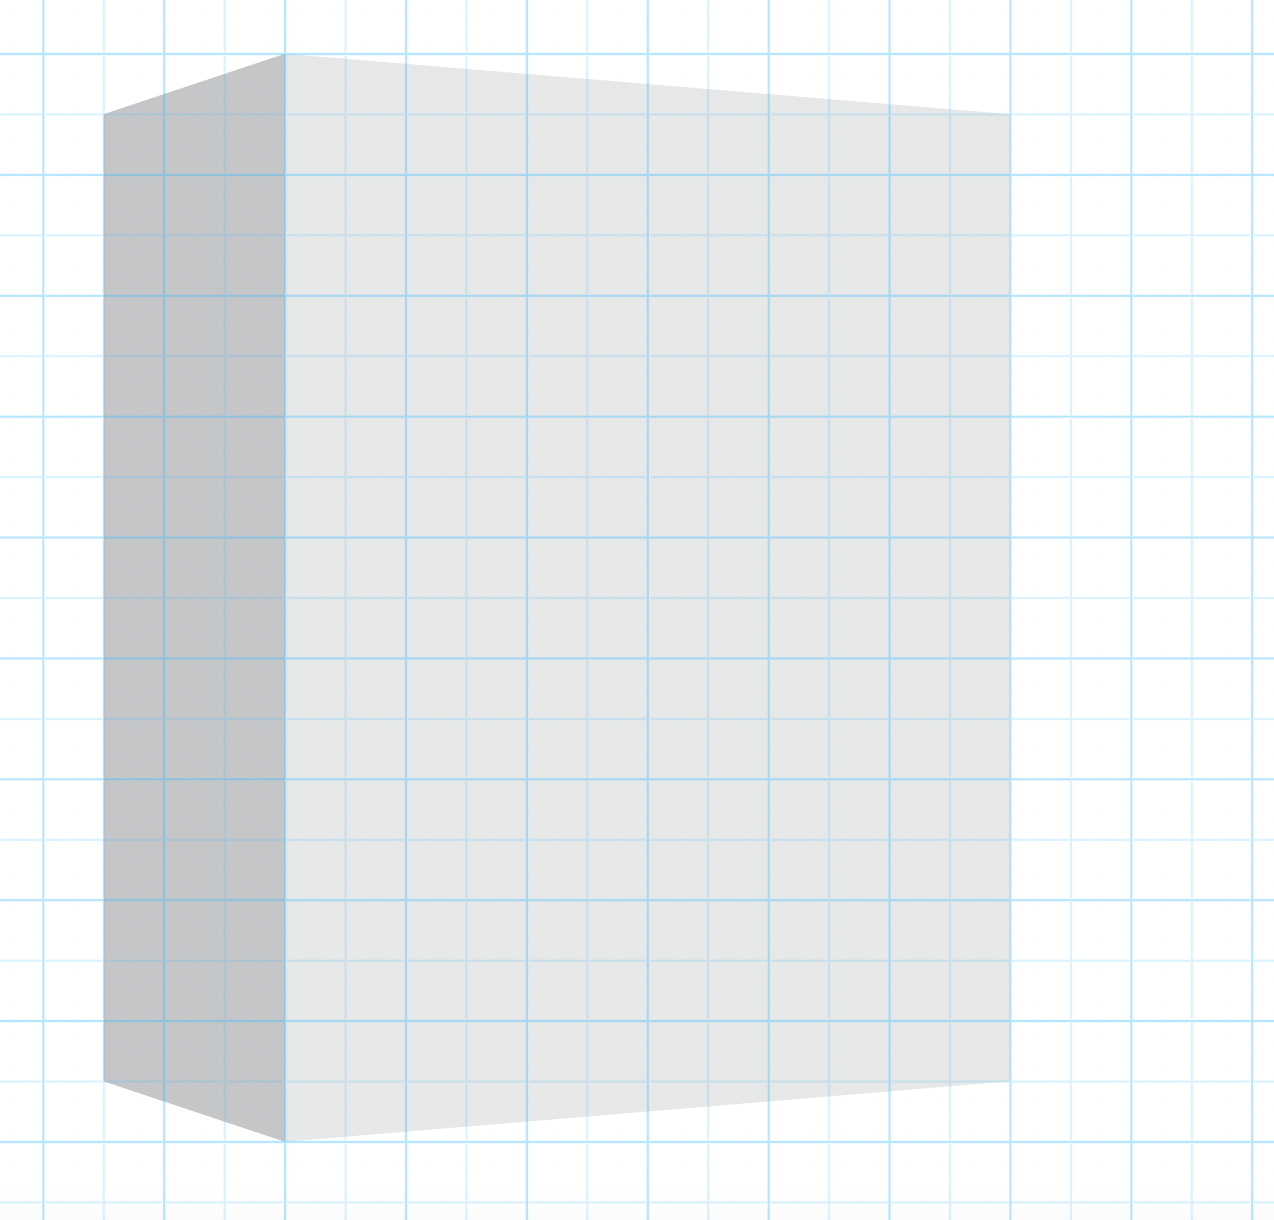
 I am trying to make my own simple vertical box mockup with perspective that I want to use with my existing Designer artwork. How would I begin? My method is not working. I created my simple mockup with shapes as placeholders but I wasn't sure where to drop in the artwork. Do I add the perspective effect on the artwork (.afdesigner file to allow future editing) I place? Or does the placeholder have the perspective? Seems a little tricky. In Photoshop mockups, you would only open the smart object and drop artwork there and save out and it will update the finished mockup doc.