
Bigby
-
Posts
51 -
Joined
-
Last visited
Posts posted by Bigby
-
-
Phenomenal work.
")
-
Thanks.
Yeah, that one actually crossed my mind as I was looking for ideas.
-
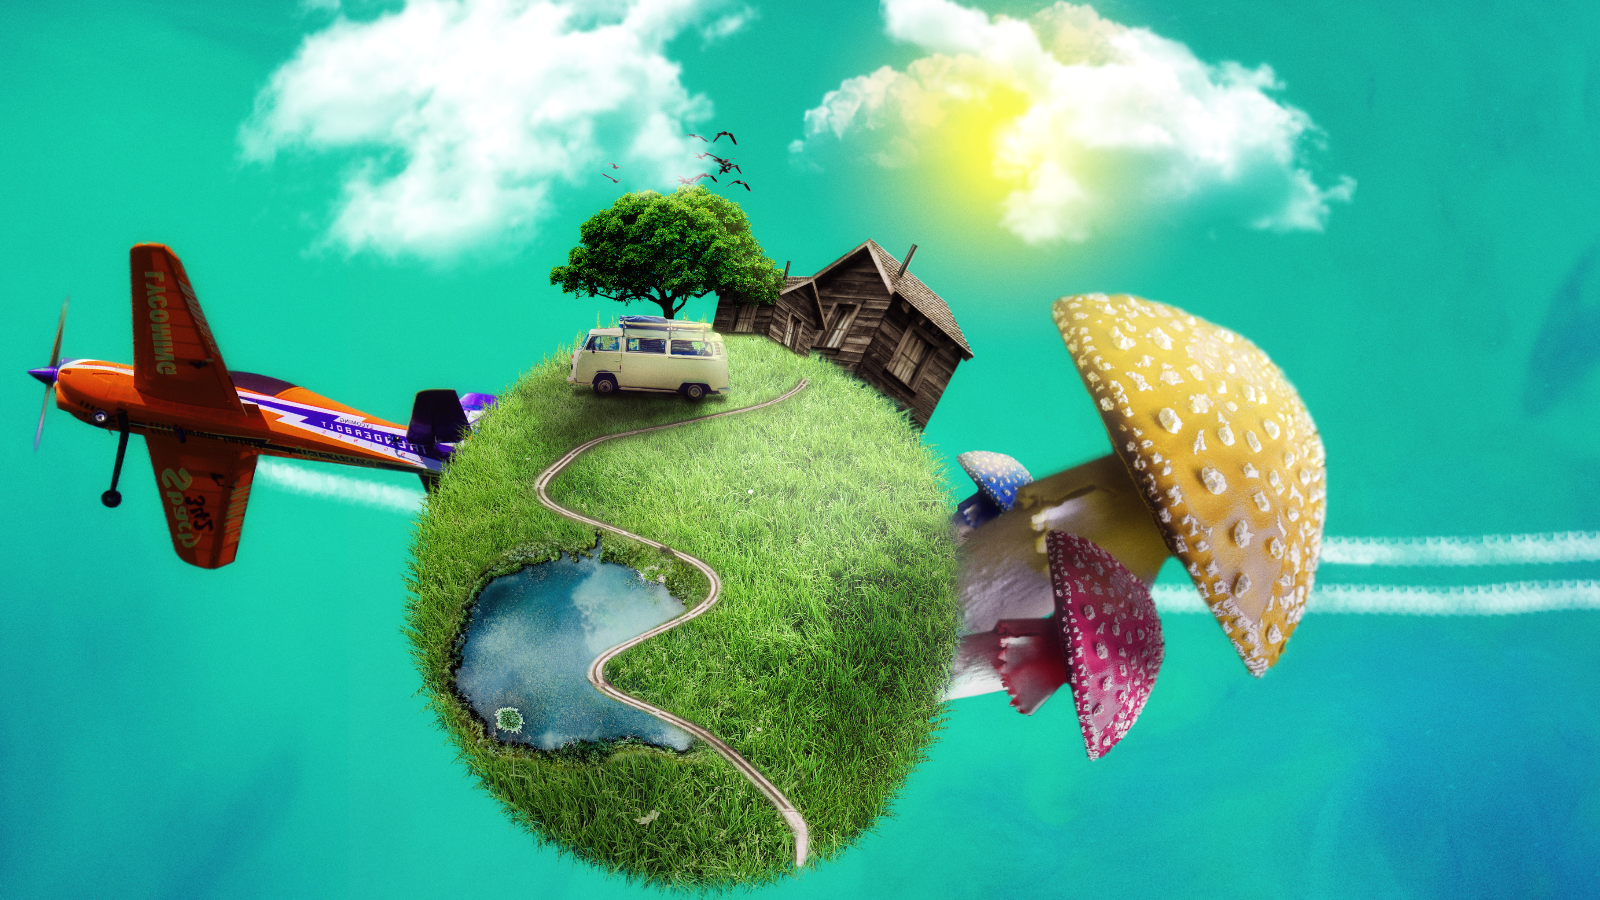
I've finally finished my latest composition. It was quite a challenge to create this mini planet along with all the elements on it. Lots of trial and error to see what fits and what not. However, I'm pleased with the final result.
Welcome to the New World and enjoy your stay.
- GDPR-365024, Madame, Kevin Martin and 8 others
-
 11
11
-
Great news! Congrats everyone at Serif. Well deserved.
-
-
Two best companions set out on a journey full of twists and turns. Their next stop - mysterious Motel.
I've had a lot of fun doing that manipulation. I hope you enjoy it.
- Madame and AffinityJules
-
2
-
15 minutes ago, SoCalBagpiper said:
I just replaced it. Can ya see it now?
Yep.
Good concept and execution. Keep it up!
-
Something went wrong. I can't see the image.
-
-
Well, the pen tool is my way to go, but it's not very convenient with more complicated, larger objects. ; )
-
I just select my objects, use refine selection and carefully brush the edges when needed. That's when all of these artifacts, "dirt" and even some transparency show up. But I will try with different brush settings and see how that works out.
-
Same for me, most of the time.
-
There's no need to rush things and I'm sure the same people asking for the immediate release of Publisher would be the first ones to raise the pitchforks if something's wrong with it.
QuoteInstead you produced something we don't need
You can only speak for yourself.
-
16 hours ago, Rick G said:
Looks good to me! Even the reddish around the face is appropriate
Yep, that was the first thing I've noticed.
Good job.
-
-
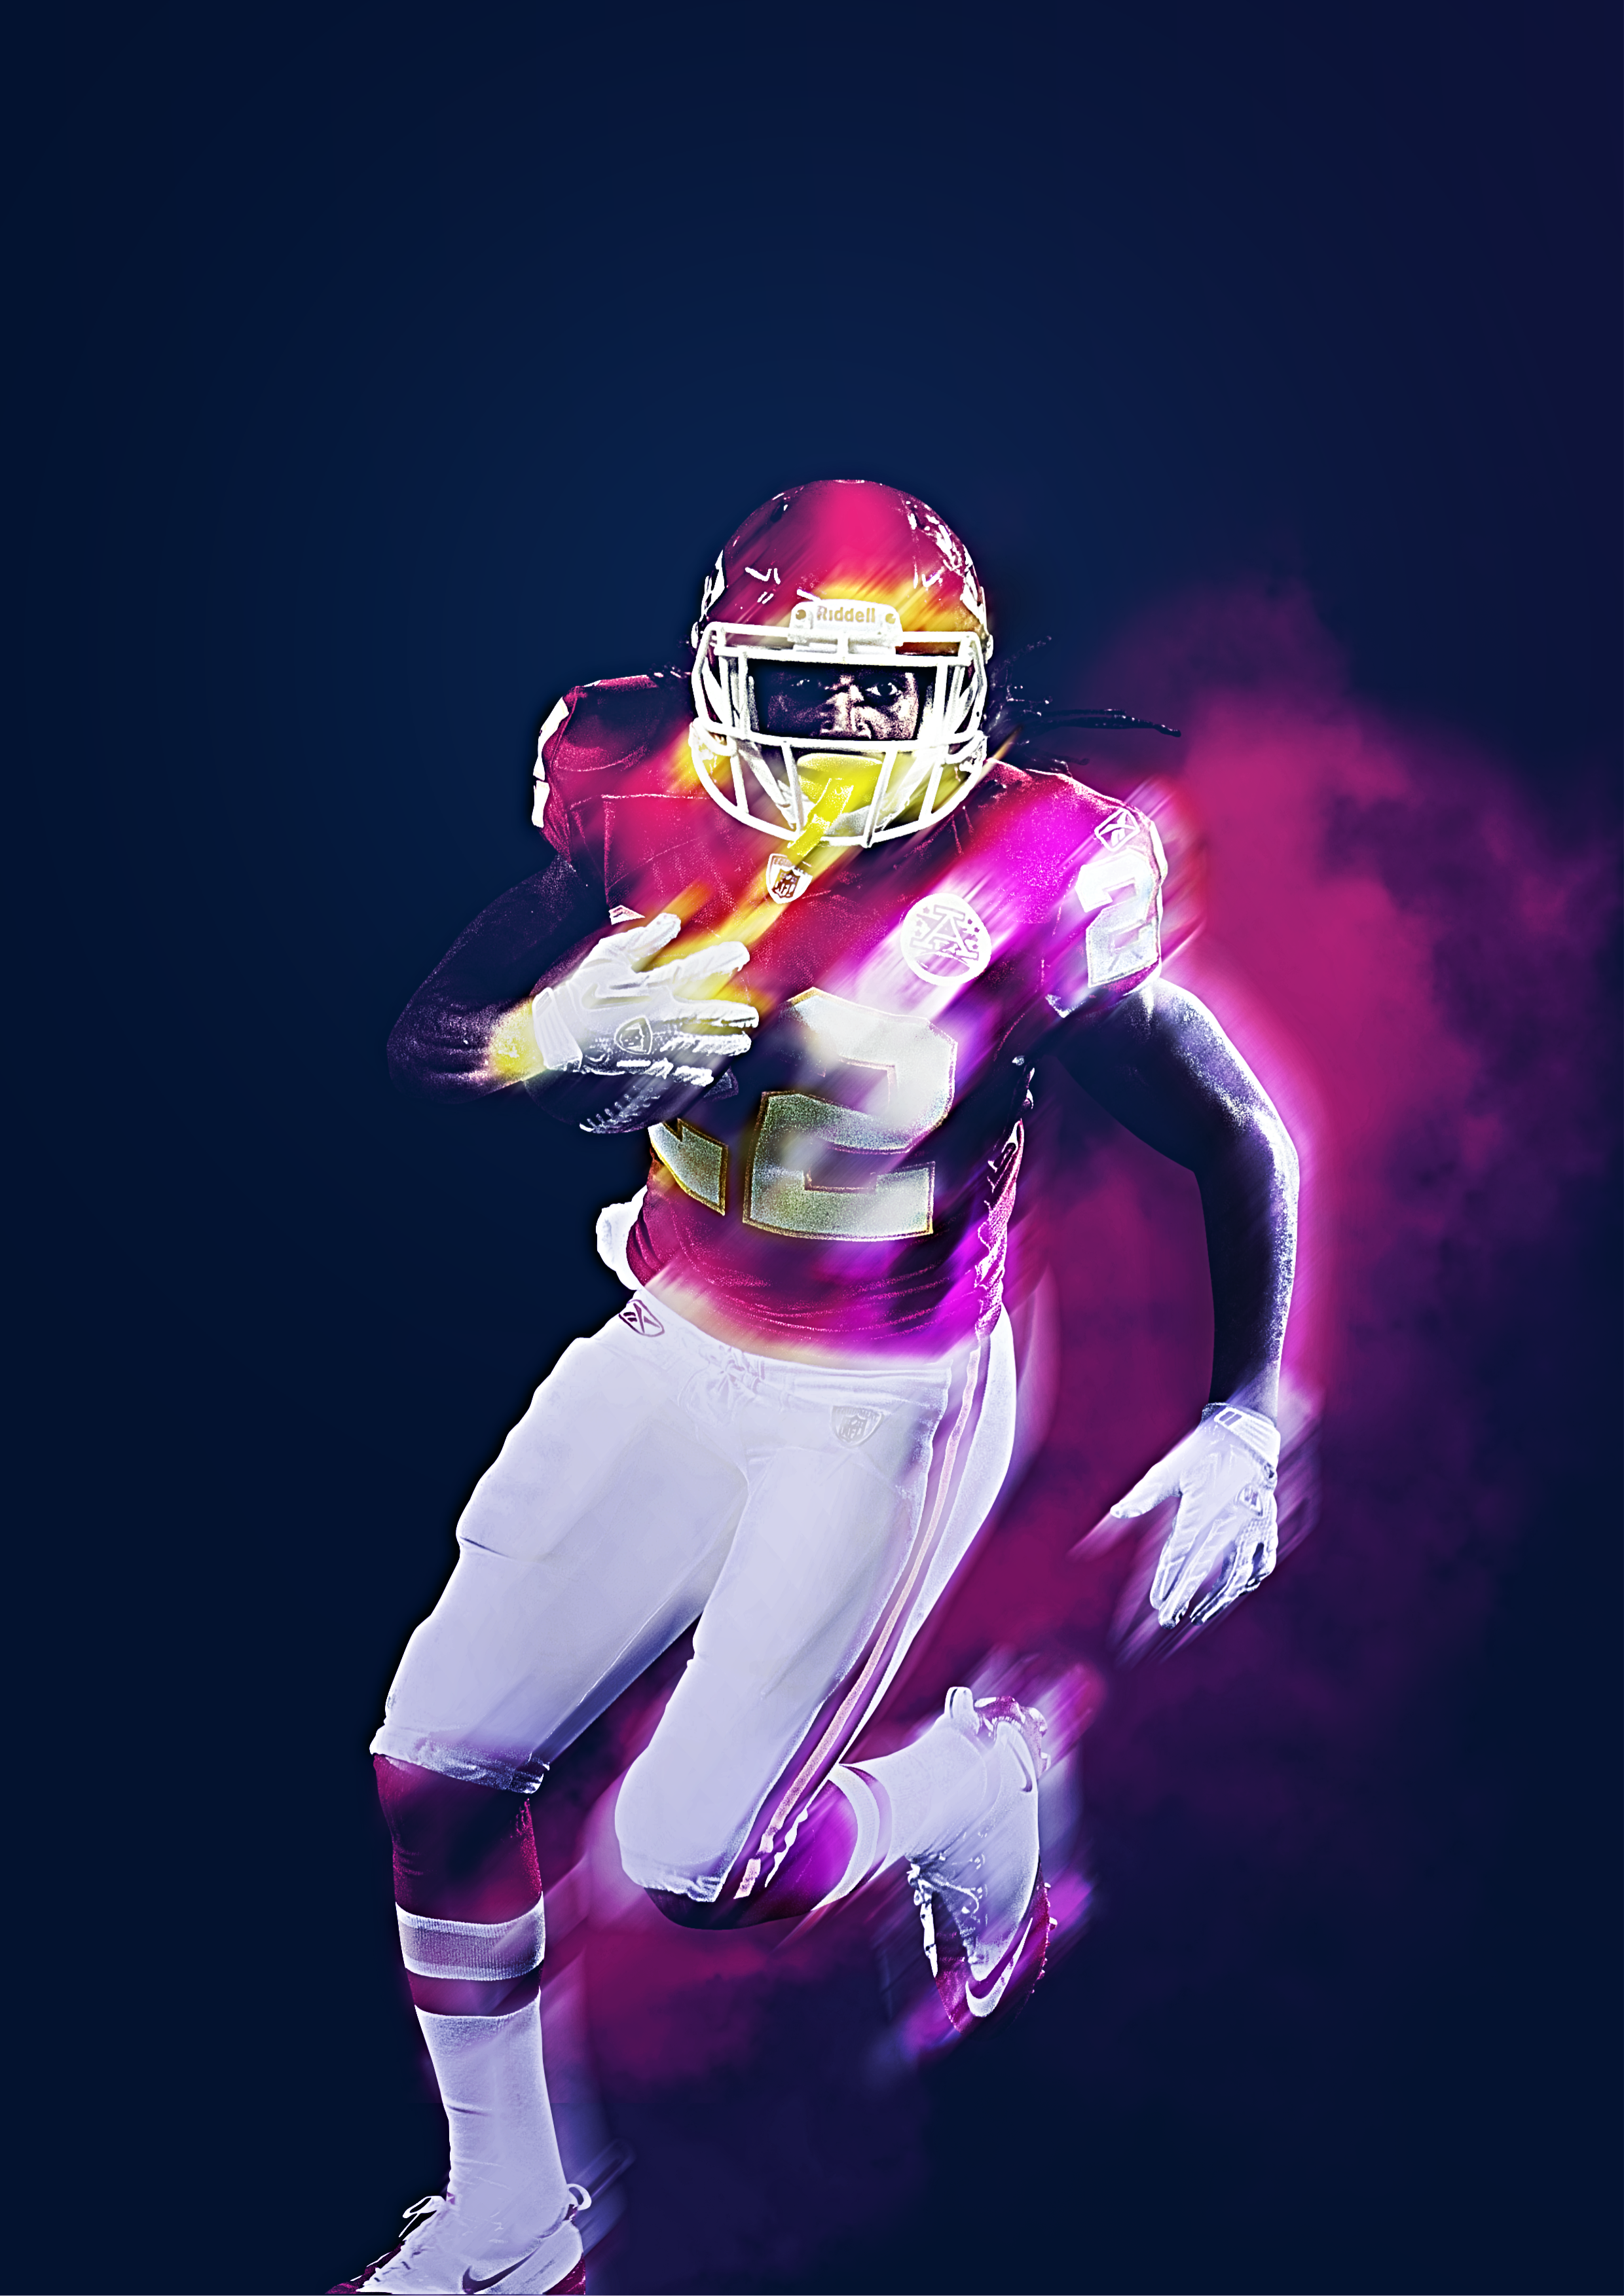
Another project done. I love transforming these rather bland pictures into something that can please one's eyes (or at least I hope it does
).
For anyone that's interested in "making of":
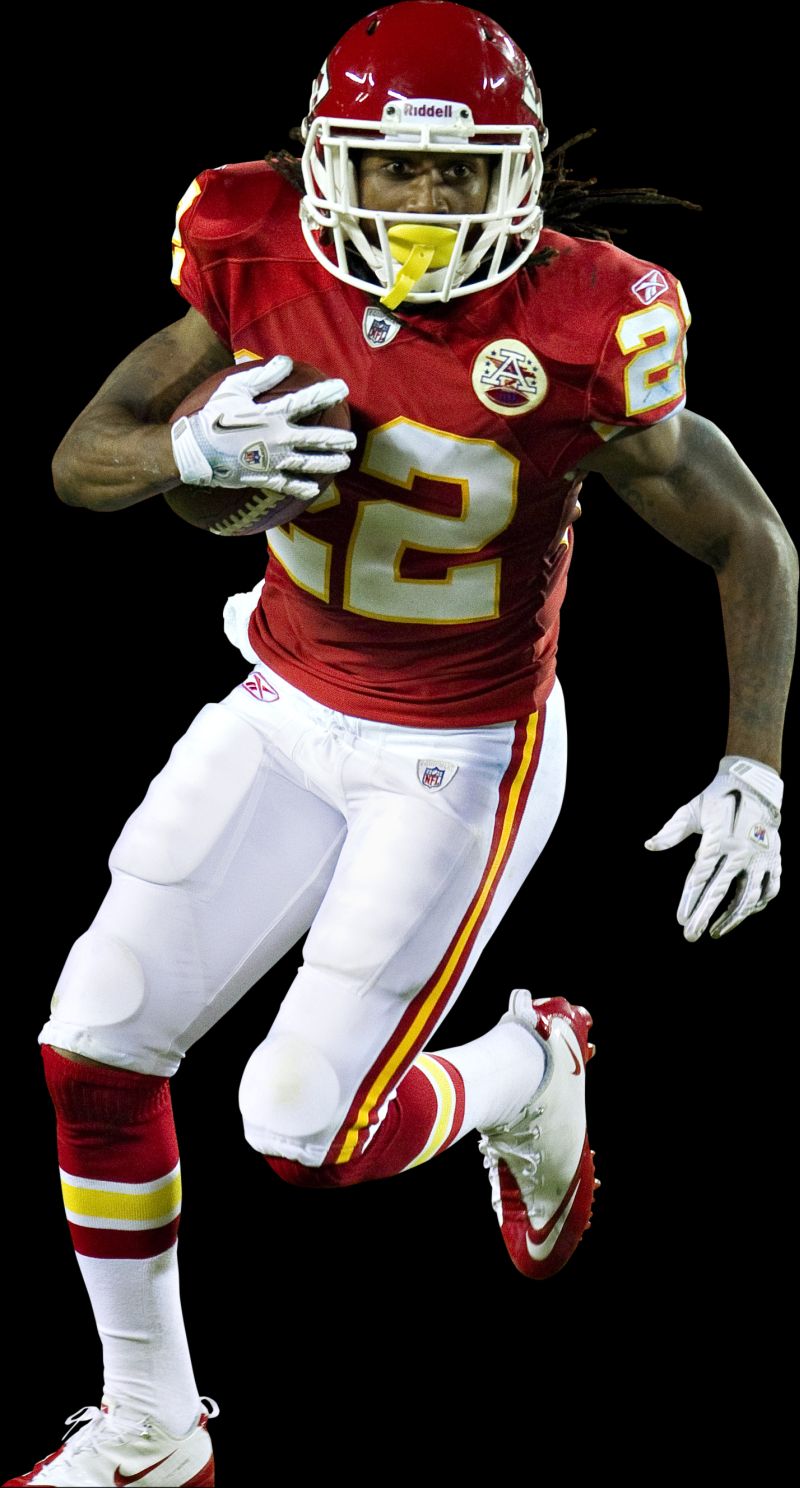
First I made a dark-coloured background, put my model on top of it, duplicated the model two times, used motion blur on both of these new layers with blend mode set to Lighten, and then adjusted it with curves to bring some colors, darken the shadows and make the highlights shine more through the blur.
Next step involved masking some unwanted elements like blur around the face. I only wanted the light trails coming from the motion, which I then enhanced with low flow, 0% hardness brush. Also, an HSL adjustment on the second copy of the model.
Smoke was created with simple brush from Brusheezy.com.
After that, I created new layer filled with 50% gray, set to Overlay mode, and then played around with dodge and burn to make the image more "dramatic"
.
It looked somewhat blurry due to all those effects - fortunately High Pass(created from yet another model copy with Overlay blend mode, 5 px radius) and Clarity filters did the job just well.
From that moment it was a matter of balancing the composition (all layers merged together) with Curves, Vibrance (Normal mode, 100% opacity) and Black&White (Multiply, 50% opacity) adjustment layers.
For some finishing touches I used two Gradient Maps - first set to Lighten with dark blue and pink colors, second one black to blue, opacity 50%, blend mode Overlay. Tweaked with a bit of masking.
All in all, it took me about 2 hours.
This is before:
This is after:
- AffinityJules, bodobe, VectorWhiz and 1 other
-
4
-
Football mostly. Valencia CF fan.
I just think that sports theme gives a lot of creative freedom.
-
Testing new brushes and different styles.
-
Good job.
-
Who doesn't, right?
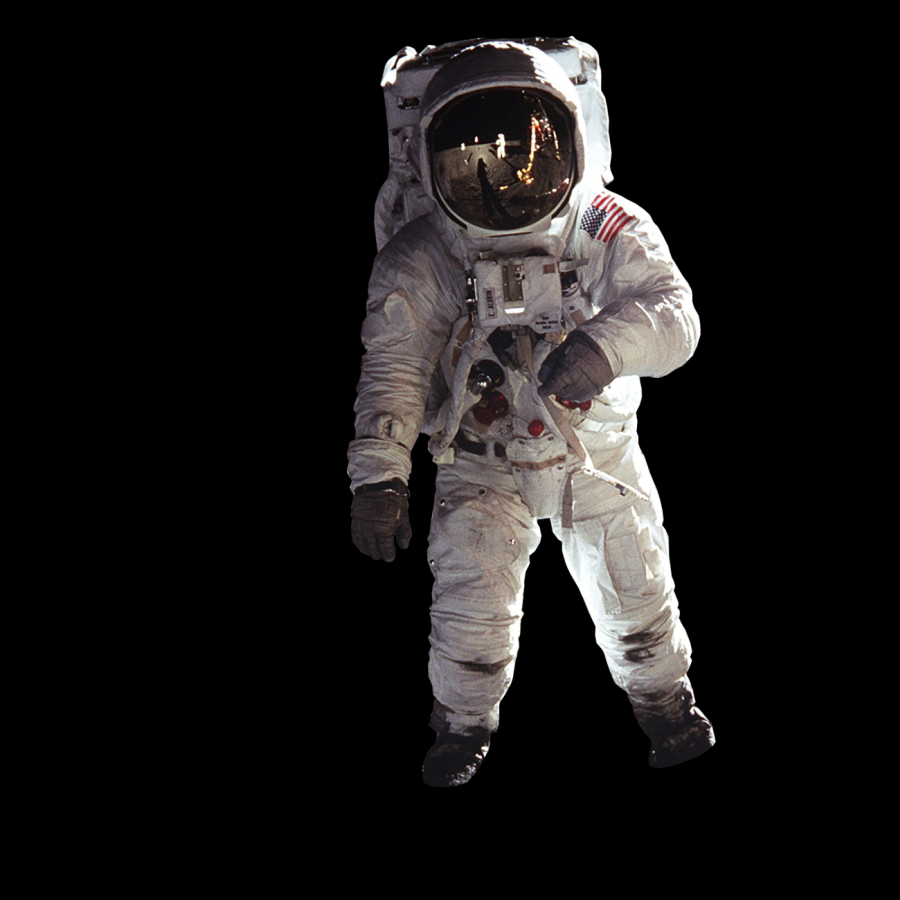
I could literally spend hours watching some space footage and pictures.
-
Love your work, Andrew.
-
Here's another composition that I've just finished. This one involved a lot of coloration and balancing the tone of the background to match the model (at the beginning through curves adjustment on a desaturated layers). There's also a great deal of painting on a space suit and background to make it stand out. That's when different brushes and blending modes (such as glow or colour) came in handy.
The final result is exactly what I've had in my mind.
For reference - I've included an image that served as a basis of my comp.
Tell me what you think.
-
Nice work.
It's really awesome that such a powerful app can be used mobile, anywhere, anytime.
-
")


Helping Hand
in Share your work
Posted
There's no end to your imagination, right? Great job.")