firstdefence
-
Posts
11,711 -
Joined
-
Last visited
Everything posted by firstdefence
-
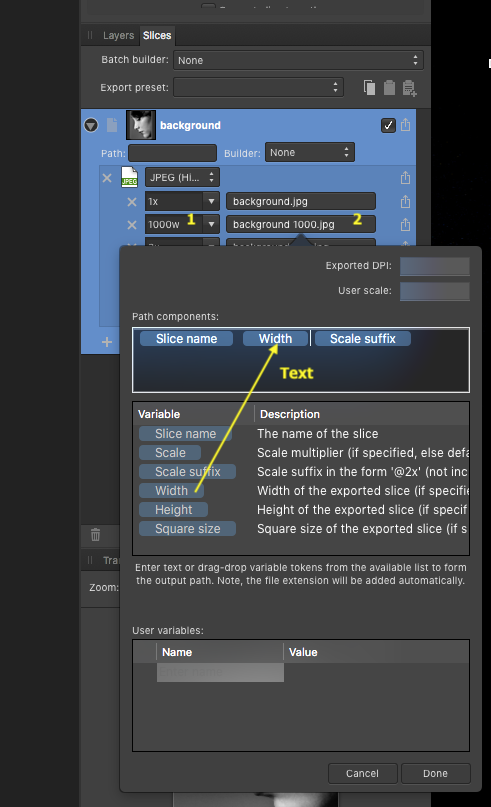
 Hi David, by clicking on the name you can modify it, a simple method is to use the Width and Height variables to get a unique name, you can add spaces between the variable tags. At the bottom you can create custom variables, I haven't used these so I'm unsure what can be used in the value section. Hope this helps. There appears to be no information about variable values and how they should be configured, so, unless someone has some in-depth knowledge about this area it's pretty much useless, you can't even get an idea of what variables are supposed to look like from the small list of pre-made variables. I also think the user variables input is bugged because it's difficult to type a name. You can type one letter then you get a blue button, the variable input allows you to type more characters but only one at a time and you have to double click to input another character, this renders this option pointless. This area needs a lot of work to get it slick, understandable and useable. Amendment: the custom variable input works ok in the 1.8 beta.
-
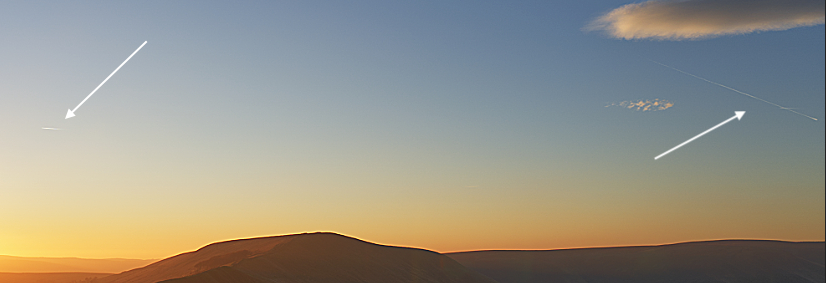
I don't have the workbook but as a side note, if the tutorial doesn't mention it I would inpaint out the plane trails as well.
-
Apologises if I wasn't clear. The SuperPNG is technically a plugin but is actually more like an PS extension/script which means it doesn't show in the Filters dropdown, what it does is it adds functionality to the PS open command, it's more of an actionable script that can be activated using a shortcut key and a PNG file, consequently this plugin will never show in Affinity because Affinity Photo doesn't understand what it actually is. With regard to the 3D work, which 3D app are you using? maybe we can get an alpha channel to export with the PNG or as a side file.
-
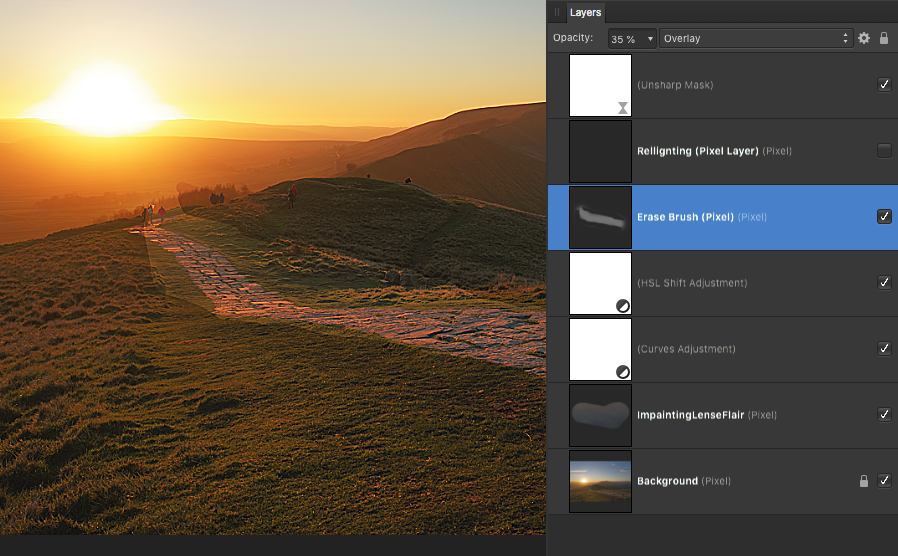
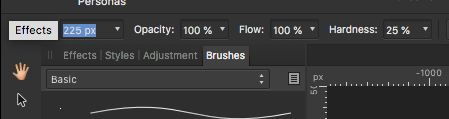
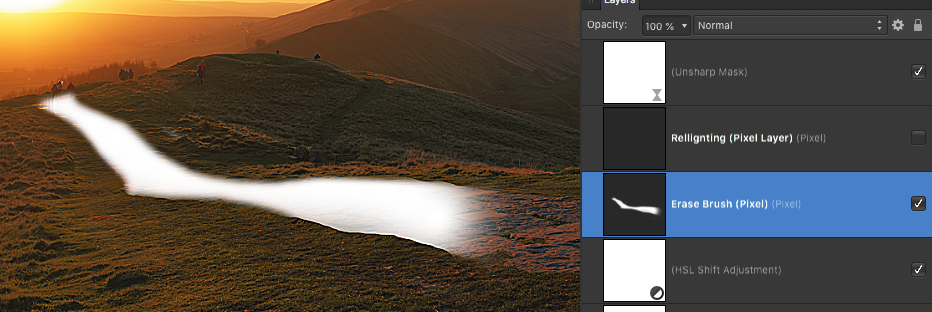
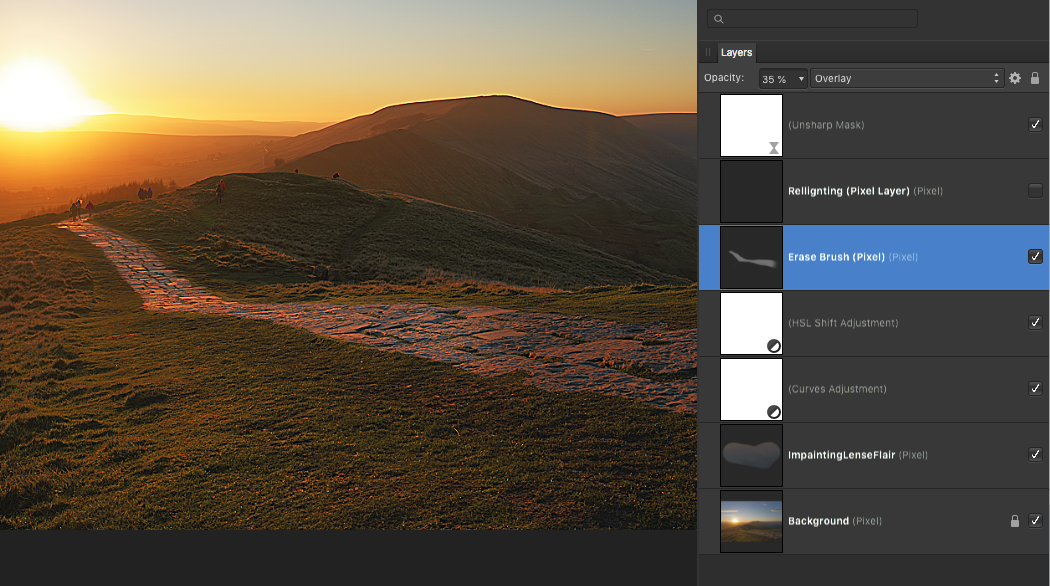
See the screen grab Fig.1 below, set the layers to look like they do in the screen grab, the erase brush layer is actually your relighting layer and as you can see in the screen grab I've set it to blend mode: overlay and opacity to 35%. This gives you approx the effect you should have. You need to neaten the Erase brush layer up to follow the path better so it doesn't show those overlapped edges. Fig.1 Set a Basic Erase brush up like this in Fig.2 and tidy the erase brush layer to look more like Fig.3 Fig.2 Fig.3 I've changed the blend mode and opacity to show you how it should look, just change it back to Overlay and 35% opacity after you have done tidying it up. It should now look more like Fig.4 Fig.4
-
Yep working fine on High Sierra too.
-
Workbook pages 373-376
firstdefence replied to PaulD's topic in Pre-V2 Archive of Desktop Questions (macOS and Windows)
Just add text above the image. Fig.1
-
Not Exporting
firstdefence replied to tARAtzu's topic in Pre-V2 Archive of Desktop Questions (macOS and Windows)
Also add Operating System and Affinity Photo version being used. -
HSL glitch
firstdefence replied to ll15's topic in Pre-V2 Archive of Desktop Questions (macOS and Windows)
Welcome to the forum ll15, Try resetting the studio, (main menu at the top of the affinity app) View > Studio > Rest Studio -
Workbook pages 373-376
firstdefence replied to PaulD's topic in Pre-V2 Archive of Desktop Questions (macOS and Windows)
The main difference between the screen shots is the top screen shot has a mountain "image" layer at the top, while the bottom screenshot has a mountain "Pixel" layer. Without the screenshots having titles I don't know which is which but you could try rasterising the mountain image layer. -
Not Exporting
firstdefence replied to tARAtzu's topic in Pre-V2 Archive of Desktop Questions (macOS and Windows)
Have you tried using the Export persona? How big is the file? can you save the document and reopen it? -
Have you tried flattening the image prior to export by going to (main menu at the top of the affinity app) Document > Flatten (bottom of dropdown menu)
-
Welcome to the forum abkaye, What Operating System are you using? Could you upload the image you are using when it crashes so we can test it our end?
-
You can also inpaint with a selection from (main menu at the top of the affinity app) Edit > Inpaint With the inpainting brush you can have blur problems near high contrast areas, using the > inpaint option can help mitigate that issue because by using refine selection you can feather parts of the selection and keep other area's sharp.
-
Take a screenshot of Affinity Designer Preferences > Performance tab and a brief spec of your system.
-
Welcome Screen Missing
firstdefence replied to Robin L.'s topic in Pre-V2 Archive of Desktop Questions (macOS and Windows)
You'll never forget that now lol! -
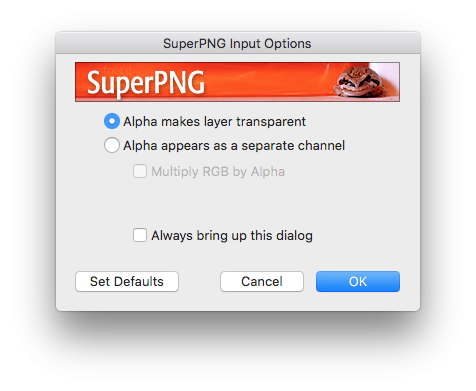
For reference: https://www.fnordware.com/superpng/ SuperPNG requires holding down Shift when opening a PNG file, else PS opens the PNG file. This is the window PS shows when opening a PNG using the Shift key.
-
Welcome Screen Missing
firstdefence replied to Robin L.'s topic in Pre-V2 Archive of Desktop Questions (macOS and Windows)
Go to Help and click on Welcome... There is a small check box on the welcome screen to keep it opening on startup Bottom left of the welcome screen. -
Win7 => Linux Mint
firstdefence replied to Danel's topic in Pre-V2 Archive of Desktop Questions (macOS and Windows)
You're welcome. There was also this enthusiastic post which had a very optimistic title but ended up deflating quickly... -
Win7 => Linux Mint
firstdefence replied to Danel's topic in Pre-V2 Archive of Desktop Questions (macOS and Windows)
There is an ongoing attempt to get Affinity Photo to run with wine but as of yet it's not been successful. A better option would be to use VMware like VirtualBox which you can install on Linux Mint and then install a windows release and then install Affinity Photo on to the virtual windows.. https://www.itzgeek.com/how-tos/linux/linux-mint-how-tos/install-virtualbox-4-3-on-linux-mint-17.html -
If you check your firewall for connections from Affinity Photo it will likely give an IP address such as 104.17.209.102 this brings up a cloud flare error 1003 page.
-
If it's an M.2 they are pretty quick drives, approx 3 x quicker than a standard SSD.
-
That could be a redraw issue. If you move the canvas out of sight, i.e. out of the workspace area and then move it back do the objects appear on the left side?
-
Very true, intermittent glitches are a pain.
-
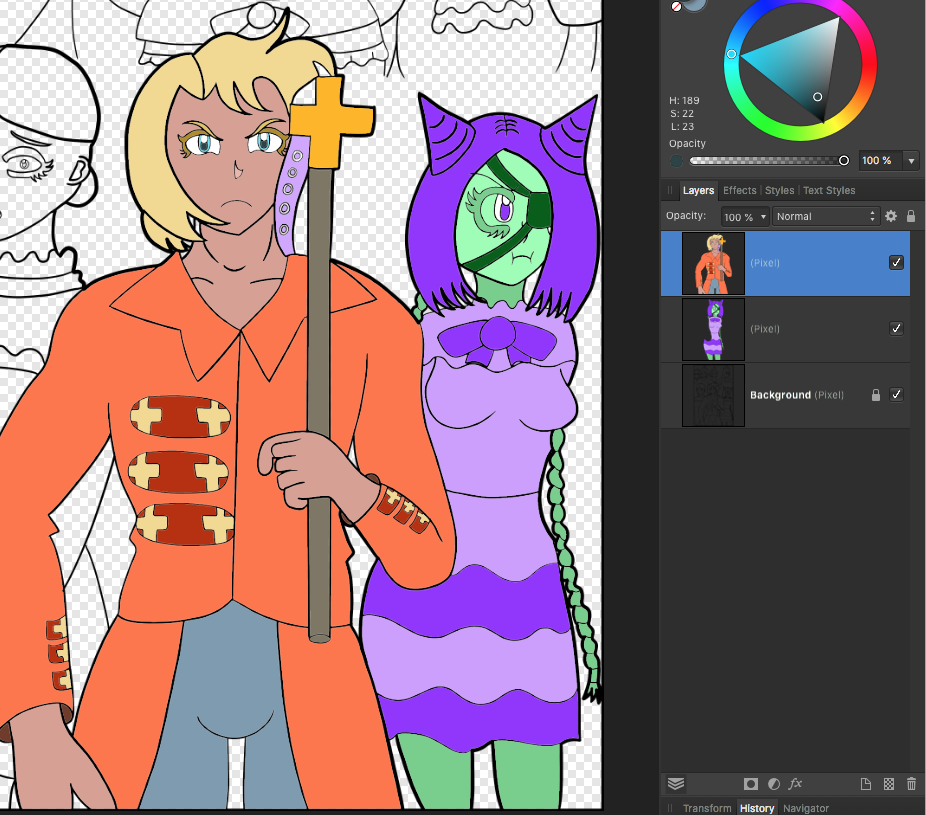
You could even use the flood fill tool and set the tolerance to about 80% to get a clean fill, create a pixel layer above the line drawing and set the flood fill tools source to Current layer and below. Use a separate pixel layer for each character. example.afdesign
-
From my younger school days, I always thought I was going to be a sunbeam, because that's what Jesus wanted me to be, apparently I used to tell the teacher I didn't want to be a sunbeam, I wanted to be an astronaut I also used to wear an astronaut helmet in protest hahaha! I was a weird kid.