
Tatyana
-
Posts
95 -
Joined
-
Last visited
Reputation Activity
-

 Tatyana reacted to StuartRc in Inktober 2020
Here we go again!
Brushes
Some of the brush sets used are available in the forum
Textured Pencils set
inkPainter Sketcher set
Organic Pattern Set 1
Colours
01-07 inktober 2020 Colours.zip
Base Shapes
The base shapes are in resources under:
Assets:Rock Monster World Plants
Assets:Camouflage I
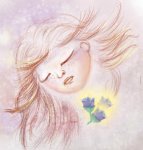
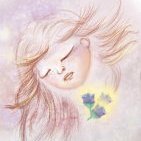
01 Fish
Using Sketch and Concept brushes
Original:500 x 500mm 300dpi
Upload 1771 x1771 px
-
Tatyana reacted to StuartRc in Rock Monster World Plant Shape Assets
Vector Assets: Rock Monster Plant Shapes Composites and Textures
Added Vector shapes as asset Library from Rock Monster World:
The full set consists of 2 extra categories (Textures 02 | Grunge) consisting mostly of compound curves
Asset File : Rock Monster World Plants
...Subcategories
1. Tube Plants
2. Ground Plants
3. Creepers
4. Flower Head
5. Composites
6. Textures 01
....samples as below and .zip file for installation:
Assets_Rock_Monster_World_-_Plants.zip
-
Tatyana reacted to smadell in Pastel Watercolor Effect
I recently watched one of @dmstraker Dave Straker’s InAffinity tutorials about “Pastel Colour Grading…” and it gave me some ideas. So, thanks to you for the inspiration, Dave!
I’ve attached another macro for creating a specific Artistic Look – this one called a Pastel Watercolor Effect. The attached file is a macro category (even though it only contains a single macro); you can import it into the Library Panel in the Desktop version of Affinity Photo, and it is compatible with the iPad version as well. (In my own preliminary testing, the macro works fairly well on an iPad, although there are some issues with missing items in the dialog box that appears for setting parameters.)
When you click the macro, it creates a number of layers inside of a group. The group is called “Pastel Watercolor Effect” and it can be turned on and off by simply showing or hiding the entire group. When you invoke the macro, you will be presented with a number of options in a dialog:
1-6] Lighten Color - Cyan, Magenta, Yellow, Red, Green, Blue
All of these color ranges are initially set to a value of -200%. As you move each of the sliders to the right, that particular color range will be selectively lightened. If you set any of the sliders all the way to 100% then that color range will go to white.
7] Set Amount of Pastel Blurring
This slider defaults to a value of 25 px. Setting it higher or lower will adjust the amount of “smudging” that the pastel layer displays.
8] Set Intensity of Outlines
This slider defaults to a value of 0.7. You can set it to values between 0 and 2, with higher values giving you darker and more intense outlines. If you set the Intensity slider to 0, the black outlines will effectively disappear.
9] Adjust Brightness
Brightness defaults to a value of 20%. You might want to increase it if (i) you have increased the outline intensity significantly, or (ii) to compensate for changes (particularly decreases) you might make to the Contrast.
10] Adjust Contrast
Contrast defaults to 0%. Adjust this to taste.
I’ve attached 2 photos (below) to show Before and After versions using this effect. Included in the photos are the settings that were used (which are a bit different from the default values).
* * * * * * * * * * * * * * * * * * * * * * * * * * * *
As with all of the macros I have submitted, please note that I am only one person and have tested this on a limited number of images on a single computer. There is no way to have foreseen every possible scenario. I am hopeful (but obviously won’t guarantee) that you’ll like the results.
If you do like the macro, please keep it and enjoy it. This is “pay it forward software,” the happy result of an abundance of learning gleaned from the members of this forum who are so generous with their time and expertise!
Pastel Watercolor Effect.afmacros
-
Tatyana reacted to StuartRc in Vector Texture Toolkit: Rock Monster World
Vector Texture Toolkit
When working on latest project: Rock Monster World.I needed a tool to create textured backgrounds using only vector elements.
Added a truncated version to resources hope you find it useful!
Contents
The Toolkit contains various elements to allow for the construction textured backgrounds using vectors but some aspects will need to be refined independently according to requirements (Size for instance!)
A. A set of simple styles that define transparency
B. Set of vectors (These are contained on a separate artboard)
C. A set of vector assets sub-dividend into 4 categories. (I was a bit concerned about the number of nodes here!...as their are compound paths included!)
D. A layout artboard with containing mask
E. An artboard containing irregular vector shapes. (and some textured compounds!)...does not reflect exactly the assets panel!
It will require a bit of experimentation to create what you need..
Export as bitmaps or Multiple artboard file to be re-imported to other files using the place tool
There are some 'basic' instructions included in the file
There are some samples here!
Sample images as below:
Textured image
Vector Elements
Packaged Files
Vector Texture Toolkit 2.0.zip
-
Tatyana reacted to Andy05 in Classic engraving effect (copperplate engraving) for Affinity Photo V. 1.x & 2.x
I had to edit some images for a client, who wanted to embed them into some kind of bank notes. The motives on them used to be classic copperplate engravings. So I created some macros for AP, some of which I want to share with the community.
Requirements:
The image needs to be square format (it will get resized to 3000 x 3000 px) The image needs to be flat (only 1 layer) The styles provided in this post need to be added prior to starting the macro I got an error message when trying to upload the files (probably due to their size, hence some google cloud links:
Engraving Styles (2.2 MB) - https://drive.google.com/file/d/1aHP4golVVLoidsw_aLs_EcMltfsM3oIu/view?usp=sharing
Engraving Macros (1.8 MB) - https://drive.google.com/file/d/1mMbZFTd-fLDuACyRCa7bne7cd0wksYUu/view?usp=sharing
The macros and assets have been moved to Gumroad. (https://thargoran.gumroad.com/l/engraving_effect)
t's still for free—just enter the code APforum2023 (I'd appreciate some stars rating nonetheless).
Sorry, but the free period expired.
-
Tatyana reacted to carl123 in Wrapping a label round a bottle or mug in Photo
x+(150*a)*sin(360*x/w)
If I understand you correctly the above equation is a good place to start for what you want to achieve. It should effectively reduce the spacing between the characters on the left and right side of the text frame to simulate a label on a curved bottle.
1. Centre the text frame horizontally in your document (Important)
2. Add the equation and adjust Slider A
(text will become wider and the effect may look a little strange at times)
3. After you apply the equation, reduce text frame width to desired width which should help the text look more natural
You will need to experiment with different values for slider A for different text frame sizes
I have no interest in placing labels on bottles but if you (or anyone) can improve on the above please post back with the steps / results
-
Tatyana reacted to Patrick Connor in Affinity Creative Sessions: Lockdown 2020 YouTube Live events in May
Coming today, 14 May 2020: Composing a professional and beautiful editorial layout in Affinity Publisher with Emily Goater
Join Serif’s new in-house Affinity Publisher product expert, Emily Goater, as she spends her Lockdown 2020 session creating a real-world magazine, with proceeds going to the NHS. She shows us just how easy it is to create eye-catching covers, simple and effective inside covers and stand-out feature pages in Affinity Publisher.
In addition to her final project PDF, Emily is providing her gorgeous illustrations that she made for this project in Affinity Designer for iPad for FREE (personal use only). You can download these at: https://affin.co/LD2020EmilyGoater
Emily will be available on YouTube’s Live Chat for this session’s premiere on Thursday, 14 May 2020 at 4pm BST, or view the video on demand later.
Watch it HERE
Videos will be available only at the Affinity YouTube channel
-
Tatyana reacted to Patrick Connor in Affinity Creative Sessions: Lockdown 2020 YouTube Live events in May
Coming today, 10 May 2020: Helsinki Bridge, Illustrating from a reference image in Affinity Designer with Isabel Aracama
In #10 of our free daily inspiration sessions, join designer and illustrator Isabel Aracama as she walks you through the creation of a vector illustration inspired by a reference image - in this case, Helsinki Bridge.
Learn how to adapt reality into a colourful, painterly drawing and how to change the mood of the artwork by tweaking colours and blending modes.
Isabel will also be available on YouTube’s Live Chat during the session’s premiere on Sunday 10 May at 4pm BST, or view on demand later.
Watch it HERE
Videos will be available only at the Affinity YouTube channel
-
Tatyana reacted to Patrick Connor in Affinity Creative Sessions: Lockdown 2020 YouTube Live events in May
Coming today, 8 May 2020: Using Atmospheric Perspective for concept paintings in Affinity Photo for iPad with Paolo Limoncelli
In this session, UI/UX designer Paolo Limoncelli explores atmospheric perspective and how to use it to create concept art in Affinity Photo for iPad. The output will be a thumbnail sheet with four concept landscapes, a good starting point for inspiration and following steps.
Paolo will be available on Live Chat on YouTube for this session’s premiere on Friday, 8 May 2020 at 4pm BST, or view on demand later.
You can also get the tools Paolo uses in his session for free (personal use only). His DAUB® Concept Tools Mk IV is a set of 12 tools designed for concept art and speed painting. These are available at https://affin.co/LD2020PaoloLimoncelli.
Watch it HERE
Videos will be available only at the Affinity YouTube channel
-
Tatyana reacted to Don Lee in Pixel Persona X Wacom, Statues Painting Practice
I am trying to learn CG illustration, this is totally different to the way I used to paint. That's more similar to oil painting, but I have no idea about that. I only tried watercolour before. But I‘d love to try new things, it's feel so good for now, especially drawing the light, the shadow and the grey part.
-
Tatyana reacted to Bman in My 1st Flat Art
I think everyone does at least one howling wolf. I decided to get it out of the way first. Inspired by many that came before it.
-
Tatyana reacted to Patrick Connor in Affinity Creative Sessions: Lockdown 2020 YouTube Live events in May
Coming today, 2 May 2020: Colour grading for dramatic portraiture in Affinity Photo with Ivan Weiss
In this session, portrait photographer Ivan Weiss walks you through a typical workflow for colour grading and adding texture to enhance a dramatic portrait.
Ivan will be available on Live Chat on YouTube for this session’s premiere on Saturday, 2 May 2020 at 4pm BST, or view on demand later.
Ivan also gives you access to a custom LUT and two custom colour and texture overlays that he uses in his session (for personal use only). These are available at: https://affin.co/LD2020IvanWeiss
Watch it HERE
Videos will be available only at the Affinity YouTube channel -
Tatyana reacted to Patrick Connor in Affinity Creative Sessions: Lockdown 2020 YouTube Live events in May
Coming today, 3 May 2020: Work from home: creating a 2-colour screen-print in Affinity Designer
Join award-winning illustrator and designer Pierre Kleinhouse for his Lockdown 2020: Affinity creative session where he creates an illustration around the theme of ‘Work from home’, which is intended to end up as a two-colour screenprint for a t-shirt.
Pierre will be available on Live Chat on YouTube for this session’s premiere on Sunday, 3 May 2020 at 4pm BST, or view on demand later.
Pierre also gives you his sketch and finished Affinity Designer file for his illustration (for personal use only), which is available at: https://affin.co/LD2020PierreKleinhouse
Watch it HERE
Videos will be available only at the Affinity YouTube channel
-
Tatyana reacted to Patrick Connor in Affinity Creative Sessions: Lockdown 2020 YouTube Live events in May
Coming today, 4 May 2020: Astrophotography workflow in Affinity Photo with James Ritson
Join Serif’s in-house Affinity Photo product expert, James Ritson, as he explores a start-to-finish workflow for stacked astrophotography imagery in Affinity Photo, using techniques such as tone stretching, synthetic flat frames, structure enhancement and masking.
James’ special session will be live streamed! on Monday, 4 May 2020 at 4pm BST, or view on demand later.
For this session, James has also provided his astrophotography macros (for personal use only). You can download these here: https://affin.co/LD2020JamesRitson
Plus, he’s written some pretty cool articles about the Affinity Suite on Affinity Spotlight
Watch it HERE
Videos will be available only at the Affinity YouTube channel
-
Tatyana reacted to Patrick Connor in Affinity Creative Sessions: Lockdown 2020 YouTube Live events in May
Coming today, 5 May 2020: Speed and motion: illustrating a car in Affinity Designer with Chris Rathbone
Top sports illustrator, Chris Rathbone, uses his Lockdown 2020 session to show you how to create an illustration of a car that focuses on motion, speed and energy.
Chris will be available on Live Chat on YouTube for this session’s premiere on Tuesday, 5 May 2020 at 4pm BST, or view on demand later.
Chris has created illustrations for a host of clients and agencies within the sports industry, including Formula 1, NBA, Formula E, the Grand National, Tour de France, the Goodwood Festival of Speed, Ferrari, RedBull and Puma. He has also created illustrations for leading magazines such as CAR Magazine, Top Gear and Match of the Day.
Watch it HERE
Videos will be available only at the Affinity YouTube channel
-
Tatyana reacted to Patrick Connor in Affinity Creative Sessions: Lockdown 2020 YouTube Live events in May
Coming today, 6 May 2020: Editing a landscape photo in Affinity Photo with Matt Donovan
Landscape and travel photographer Matt Donovan runs through his process of editing a landscape photograph in Affinity Photo, covering basic luminosity masks, saturation adjustments, the Orton Effect and other techniques.
Matt will be available on Live Chat on YouTube for this session’s premiere on Wednesday, 6 May 2020 at 4pm BST, or view on demand later.
If you want to follow along with Matt and try out his techniques, he’s provided an image (for personal use only), which is available at https://affin.co/LD2020MattDonovan
Watch it HERE
Videos will be available only at the Affinity YouTube channel
-
Tatyana reacted to Patrick Connor in Affinity Creative Sessions: Lockdown 2020 YouTube Live events in May
Coming today, 7 May 2020: How to create a vector skull illustration using Affinity Designer with Matt Searston
Join Serif’s in-house Affinity Designer product expert, Matt Searston, as he spends his Lockdown 2020 session going through various tools in Affinity Designer to end up with a vibrant, social media-ready skull illustration.
Matt will be available on YouTube’s Live Chat for this session’s premiere on Thursday, 7 May 2020 at 4pm BST, or view on demand later.
Plus, he’s written some pretty cool articles about Affinity Designer on Affinity Spotlight
Watch it HERE
Videos will be available only at the Affinity YouTube channel
-
Tatyana reacted to ChristiduToit in Lockdown Liners - Raster/Pixel Brushes
Hiya folks! 🖖
I'm sure we're all dealing with the same stresses and frustrations brought on by the COVID-19 chaos (my country has been on full lockdown for a while now).
It's important to stay busy to stop the cabin fever from kicking in, so I decided to create a little custom raster/pixel brush pack for Affinity apps - free for all!
The brushes are not too complex, mimicking some traditional inking tools we all know and love, such as brush pens and fineliners.
Perfect for those 'run-and-gun' illustrations where you just want to get to work and avoid the option-paralysis brought on by having to go through hundreds of custom brushes first.
Included in the "Lockdown Liners" brush pack you'll find:
1 x HB Pencil (inspired by the Palomino Blackwing 602 pencil)
1 x Precision Eraser (inspired by the Tombow Mono eraser)
4 x Fineliners in Broad, Medium, Fine, and Ultra Fine (inspired by Pigma Micron technical pens)
1 x Brush Pen (inspired by the Tombow Fudenosuke Hard Tip brush pen)
1 x Gel Pen (inspired by the Sakura Gelly Roll)
Fully compatible with Affinity Photo for desktop and iPad, and Designer's Pixel Persona for desktop and iPad.
*Best used with a drawing tablet or iPad with Apple Pencil to take full advantage of the pressure sensitivity that the brushes offer.
I'll likely make a few tweaks to the pack as I go along, but I'll be sure to update it on Gumroad when I do so that everyone who has already downloaded it can be notified.
Hopefully you can create some cool work with the brushes to help pass the time while we're all stuck indoors - if you do, be sure to tag me on Instagram, http://www.instagram.com/christidutoit, I'd love to see what you make!
Here's the download link to the brushes on Gumroad: http://www.gum.co/lockdownliners
As mentioned, these brushes are totally free to download and use, just type $0 in the price tab and click "I Want This!".
Stay safe out there!
- Christi. ☠️
-
 Tatyana reacted to hashms0a in Brush Sets - Lines (Vector and Raster Brushes)
I made those brushes in my old projects, time to share them here.
Enjoy!
MS-Lines_AD_AP_Brushes.zip
-
Tatyana reacted to Multi4G in Save a blurred image - Affinity Photo Tutorial
Learn how to sharpen blurred images with this little trick. It uses different methods from unsharpen mask to contrast and clarity. But then only applies to effect to the areas needed, so it looks even sharper as result of a optical illusion.
-
Tatyana reacted to StuartRc in Project Brush Set 13/15: Textured Pencils | Ink Sketch Brushes A2
Textured Pencils
Added a set of 30 Textured Pencil Raster Brushes to Resources
Sample set as displayed
Updated for Affinity 2 but retained version 1 brush set
Affinity 01
Affinity 01: Original Brush set (Sample sheet removed)
Affinity 02
Affinity 02: Updated version 2 set with adjustment to dynamics to include Distance and Interpolate (Sample sheet as below). Replaced Linear Paint 01 with better nozzles!
These Brushes are a bit different from my usual offering.
1. They are small
2. Rely largely on setting the blend mode to Average (something I learnt from Sketchbook Pro!)
3. Resize as you wish
4. Updated to consider Affinity 02 Brush Dynamics
5. Included samples of Base Textures
Sample Sheet
Enjoy!
Affinity 01
Project Brush - Textured Pencil.zip
Affinity 02
PB 15 - Textured Pencils A2.zip
Ink Sketch Brushes
Added a new set to supplement these brushes from the Project Brush 13:Ink Painter Set (which is now complete)..a bit out of sync as I started them quite a while ago!
A set of 35 Ink Sketching Raster Brushes to Resources
Sample set as displayed
1. These are essentially the same as the Pencil Brushes but with adjustments to the brush dynamics and less texture..There are 2 other sets that supplement these in the InkPainter Project set (Ink & Linear)
2. Similar to brushes produced by Jake Parker for initial Inktober Project 2016
3. If you need textures/Patterns There is a set available Camouflage assets (here) ...which is also out of sync...and maybe in the wrong place!
Sample Sheet
Affinity 01
inkPainter - Sketching.zip
Affinity 02
PB 15 - Textured INK A2.zip
-
Tatyana reacted to olaveiras in Papy Soup fanart - 3D composition in Affinity
Six months ago I did some shitty renders of my 3D zbrush modeling of the fantastic illustration "Papy Soup" from Jean-Baptiste Monge.
Now I did again using renderpasses + Affinity Designer. To clarify, renderpasses are 2D images with splitted infos of an image (just shadows, just color, just shinning, etc)
Besides having achieved better results, I enjoyed and played a lot with this fun workflow with Affinity easy use. I have strong feelings about using Affinity Designer in future projects.
full project with 3d crap if anyone get interested: https://www.artstation.com/artwork/rR8X2e
-
-
Tatyana reacted to Jhonatan S in GRAPHIC ART - WOMEN`S Day
I've enjoyed a lot, doing this art piece.
mixing my both skills, design and illustration
for the international women's day!
done with affinity designer on ipad pro!
Instagram profile
Visit my Youtube channel
-
Tatyana reacted to CVA in Neomorphism Style using Layer Effects
"The neumorphic effect is a combination of the current famous flat UI and the old skeuomorphic principles! The components have a dark box-shadow on the bottom and a light box-shadow on top; the combination of both creates the effect of the elements pushing themselves through your display."
Quote Source
We are going to create a Neomorphism Style graphic like this one using Layer Effects. We are going to be working only with three colors, one Main Color, A Shadow color and a lighter highlight color.
We are going to be working with the following three colors
Lets start by creating a blank document. In my case, an A4 Horizontal.
Lets select the square shape tool and fill the whole document and give it the MAIN color. This will be the background of our image.
Now create a rounded square shape
Now while having the newly created shaped selected. Apply the following settings to the "Bevel / Emboss" section of the "Layer Effects". Sorry for the misspell ..LOL
Now apply the following settings to the "Color Overlay" section and close the window.
You can use the Shadow color to write text over it. And you can save the settings as a Style and apply it to any shape or text you want, as shown below.
Bonus, if you tick the "Invert" option on the Profile of the "Bevel / Emboss" you can create an inset effect. Also, you might want to activate the "Scale with Object" box at the bottom left of this window.
And this is the result with the Inverted profile selected
Sorry for the crude tutorial but I did it kind of quick. I hope someone find it useful. And if you want to read more about this please visit the following links.
Design trends: Neumorphic design
Neumorphism (Soft UI) in User interface design - Tutorial