Search the Community
Showing results for tags 'soft proof', 'affinity photo' or 'mac'.
-
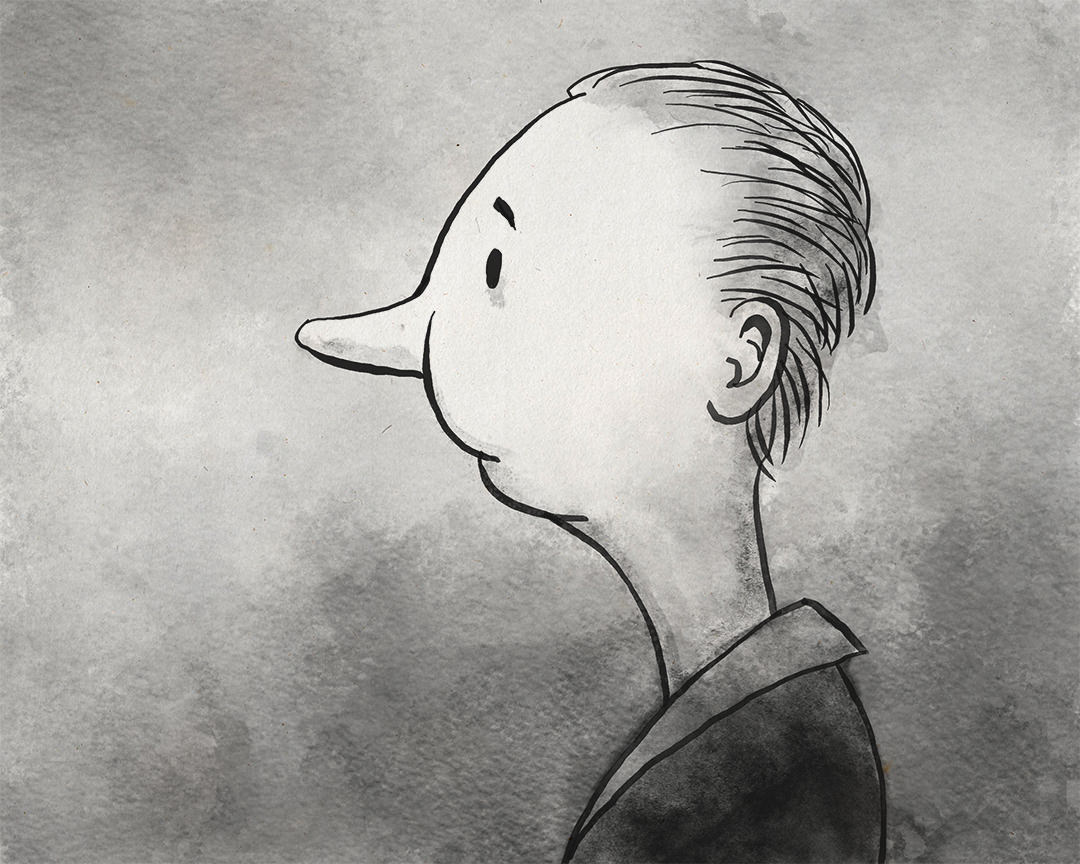
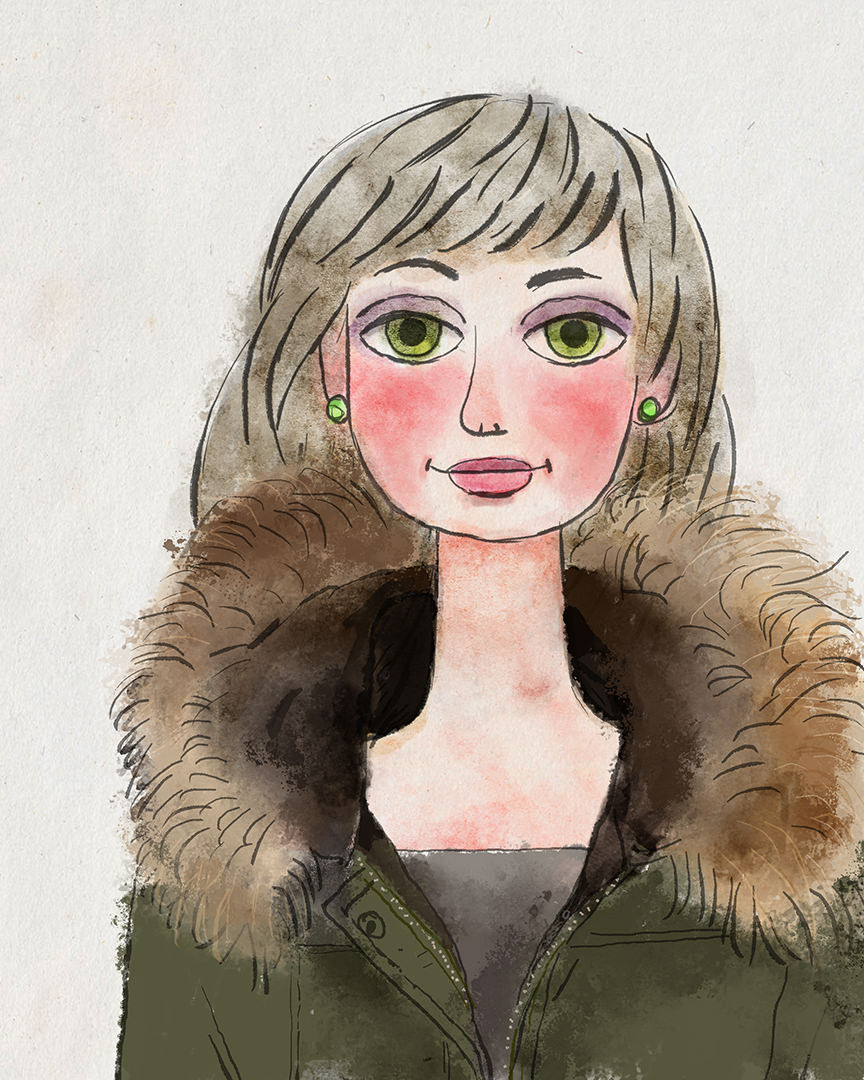
I am not much of a vector illustrator. Only bitmap, really. That is why I love DAUBs brushes. 110% right for me! These are my very first illustrations done in AP using Daubs brushes. First one i painted in Grayscale at 300 dpi. This second one is RGB at 300 dpi. Hope you like what you see :)

-
Set up for landscape and this happens :o Regards. Sharkey
-
 Please, I ask if i can write arabic with Affinity Photo ???
 -
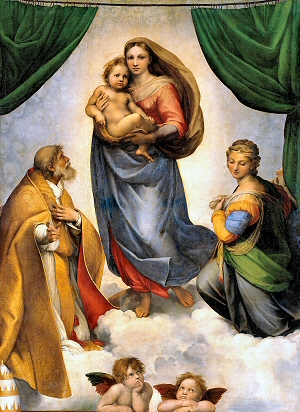
Every year i make up a little 'Happy New Year' video, using the two bored-to-death putti (the posh name for cherubs in paintings) from Raphael's Sistine Madonna. This year I decided to be mean and not send any Christmas cards; instead I've made a video, which I shall post on social media a bit nearer the day. I used AP to extract the eyes and mouths (yuck -- that sounds awful!) from the original image. With a combination of pixel painting and mesh warping, I made half-closed and closed eyelids, and various mouth shapes for the dialogue. I used AD to make a couple of end caption texts. Then I recorded the different bits of dialogue (on my smart phone, then copied to my laptop), which I edited with Audacity to make female and child voices. Some time ago, I bought an animation package called Anime Studio -- it was one of the 'other' third-party products that Serif market from time to time. It's mind-numbingly tedious and utterly non-intuitive to use, but it's the best means of animating mouths (and eye-blinks) and syncing them to sound. All the bits and pieces came together for the final 'cut' in Serif's MoviePlus X6, which is great for this kind of thing -- quite the opposite of the animation job. Anyway, here's the finished product: https://youtu.be/hwQvSqbr-iA. Merry Christmas!
- 1 reply
-
- 2
-

-
- merry christmas
- video
- (and 4 more)
-
 Hi, In diesem Affinity Photo Tutorial zeige ich wie man aus Zeichnungen von Kindern Weihnachtskarten oder Anhänger machen kann. Viel Spaß dabei. Euer Jack In this Affinity Photo Tutorial, I show you how to create christmas cards or labels from drawings of your children. Have fun Your Jack Foto / photo: eigenes / self made Link to YouTube Tutorial
-
- 1
-
-
- Affinity Photo
- Tutorial
- (and 6 more)
-
 Hey guys, I was able to drag n hold an vector/image onto another vector/image and an purple color indicator will flash once at the bottom object to indicate you can now snap your current selected image/vector base on the bottom vector/image. But now I can't, in not mastered in AD or any other illustrator app, so I not sure where to chance the setting to able it once again. Please help, it's urgently needed!
 -
 Is there such a guide to download. In the store maybe? As a beginner I find my self going screen blind after spending so much time going between the online help menu and my project. It would be nice to have a hard copy and maybe there is one and I'm just missing it. To be able to read through certain sections away from the computer would be beneficial in my case. Obviously I know I could load and shoot the sections in the help menu, just thought I'd inquire. Thanks anyone,,,
 -
I have recorded my first macro "BlueSketch" (attached below). It is doing this: if you import a scanned sketch, graphite on paper like mine, it is sometimes hard to use the digital tools to trace it. It can be hard to see what is sketch and what is digital linework. The macro adds a new raster layer on top of the sketch, fills it with blue, turns the layer into Colour mode, and adds new empty top layer for your linework / inking. Just like the layer function in ClipStudio, where I use it all the time. Put the macro in the Library and the BlueSketch is instantly done. I hope it works for you the same way it does for me. BlueSketch.zip
- 4 replies
-
- 2
-
-
- BlueSketch
- macro
- (and 1 more)
-
 Itried Affinity photo a long time ago. At this time, Affinity Photo was not abble to substitute Photoshop for my use. Since then, impossible to test any new version. I always get a "Trial period expired". Inthat forum (https://forum.affinity.serif.com/index.php?/topic/30384-tried-affinity-photo-but-crashed-each-time/?hl=trial) people at Affinity was telling " Affinity Photo 1.5 should be out soon and there will be a new trial available in case you want to give it another try." Great news ... but no way. I downloaded Trial and i continue with the same "Trial period expired" .... Having a closer look i saw that Trial is 1.4.3 version and not 1.5 ... could you fix this ?
 -
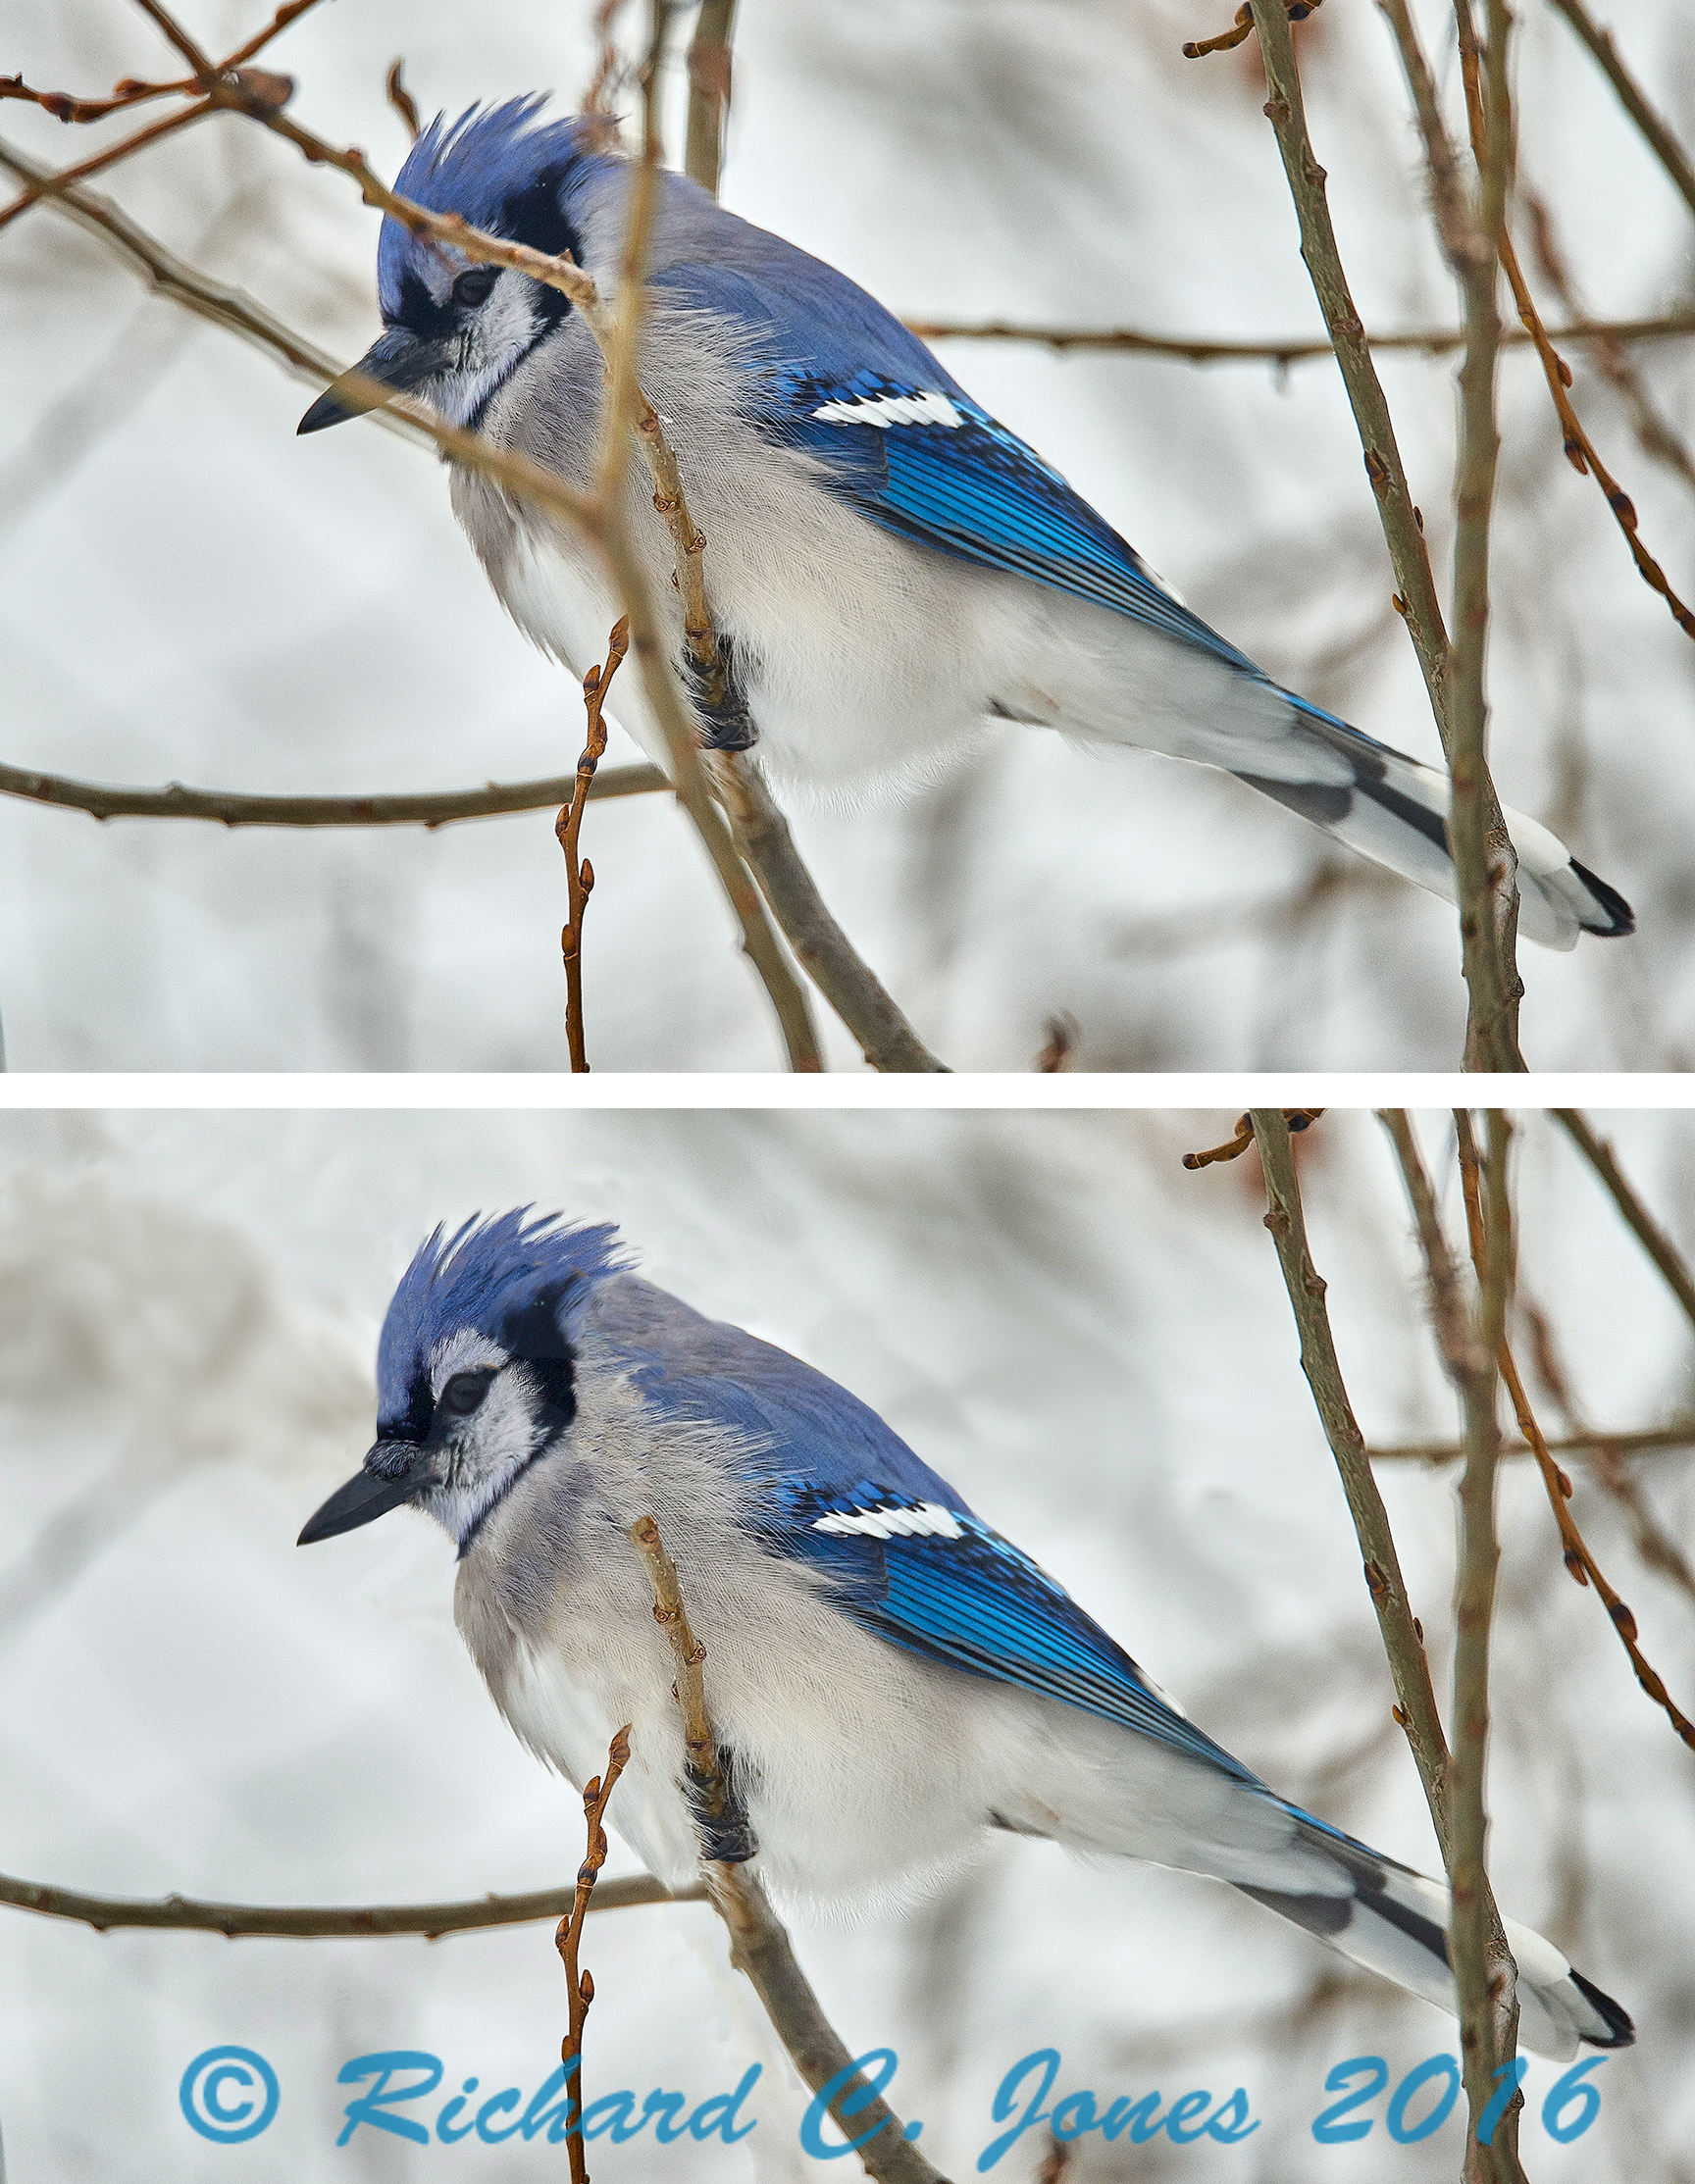
• One of the many reasons I like the near by marsh is that new species will appear every now and then. Some will stay but many are just popping in for a snack or nap as the marsh is on a bird's migration route. This fellow showed up for just a few moments on its way to where ever. It was not there when I came up at 13:00. I spotted it and took two shots at 15:29 later that day. I had a look at the histogram and saw it was very fine, I wanted to take more of him…but never saw it again. This northern Shoveller granted me his profile:
-
• Having a boring corporative Christmas event to shoot that day at 10:30, and since I was up and ready quite early, I went to the close by marsh to see the sunrise. I had a good (but too short) time with the light and the birds though most foliage is down. Cold, crisp, clean air granted me some cool light conditions. As always, 600mm ƒ4 @ ƒ8 on D810 combo. Have a look, have a good time! C&C welcomed… Part 2 is here: https://forum.affinity.serif.com/index.php?/topic/29470-ap-•-early-morning-birds-at-the-marsh-•-part-2/ 1 2 3 4 5 6 7 8 9 AP was used to clean up debris from the water surface!
-
• Shooting swans in flight is not much of a challenge anymore but Kingfishers are an other thing. These darn little things are so swift… and constantly moving… as if there were not enough letters in their alphabets to write: "stay put for five seconds"! Forced to fish closer to my shooting position by the clearly visible layer of ice building up on the waters of the marsh, this fellow was perching on a fallen tree and was aiming its dive at about one hundred meters from the lens, — the first two takes. The two others were from +/- two hundred meters as it was reaching the other side of the source river. As usual, shot with a 600mm ƒ4 @ ƒ8 on a D810. C&C welcomed and appreciated. 1 2 3 4
-
 CORRECTION This is not a Wood Duck female but a Mandarin Duck female. I don't know how to edit, correct the title • Right, so my sons are telling me that this time I react like a teen-ager because I fell in love with this brown- eyed, small, super cute female Mandarin Duck (surpri- singly similar to the Wood Duck Female!). I had a second chance at shooting this highly seductive "girl" and I was not gonna let it pass me by! She is still in the process of getting used to (and finding her very own little place into) this marsh populated by Mal- lard ducks and others, Swans, Egrets & Herons, so many Coots, occasional Gulls and Crows, etc… so she was staying too close to my shooting position where she feels safer I shall suppose. The quite variable light conditions on the day are well re- flected in the renditions. This time, shot with a 300mm ƒ2,8 @ ƒ8 on a D 810. C&C welcomed and appreciated… here we go: 1 2 3 4 5 6 7 8 9
 -
With the new release of AF macro in AF photo, I think it would be really cool to have an ability to convert Photoshop actions to affinity ones. I don't know how you would do this, and I don't know if its even possible, but hey, its just a request :D
-
Well I'm noticing a colour drop in the file as it shows here. Don't know if its me or the site. Anyway this was done again with the repaint brush to remove foreground clutter caused by twigs crossing the subject. I didn't include the before shot to save space.
-
The repaint tool alone is worth the price of admission. It has increased my workflow significantly. This image got the same treatment as my earlier posts to remove foreground clutter.
-
This is to illustrate the benefit of not passing up a shot because of clutter. Every time I do heavy PP, the software will teach me something new. I just love this stuff! I did it in the beta version of Affinity Photo and find the unique "Inpainting brush" to be a wonderful tool for this kind of editing.
-
 I was working on an Affinity Designer (Mac OSx Yosemite )document for three hours without saving (yes I know!) when AD crashed. So I reopened the working document. I don't remember seeing an option to recover an autosaved file but is possible that it was there and that I missed it. Anyway the resulting opened document is the last saved version of three hours earlier. I haven't closed AD yet because as I understand I will loose the autosaved file. Following answers in this forum I looked for the autosaved files in: ~/Library/Containers/com.seriflabs.affinitydesigner.beta/Data/Library/Application Support/autosave There I found two ".autosave" files. Opening the first it told me that it couldn't open it because the file was already open. So I closed the opened AD document and went back to the autosave folder to find only one ".autosave" file. When trying to open it an AD message window tells me: "The file is a linked file, but the parent file could not be found." According to Finder the autosave file is there in the autosave folder with 323.7mb but according to AD it is just a link. Is there a way to get to the actual file? I would appreciate any help. Thanks
- 1 reply
-
- 1
-
-
- autosave
- affinity designer
- (and 1 more)
-
I spent most of the day working with spare channels today. Something that's always been a little bit cumbersome in a layer based app. Since you do live previews of the R,G,B,A channels this also slows it down noticeably when I'm going into the Channels tab (that's why I leave it tucked in behind the Layers panel). A dedicated Spare Channels panel would be great (tiled view, list view) to quickly swipe the pen over, right click and load a selection, or save a selection when right clicking on an empty part of the panel. A bit like the Styles or Swatches panel. Normal clicking and dragging would allow moving the layers around to organise them for easier findability. It's really a workflow enhancement to have the luxury of seeing these separately with bigger previews while leaving the regular Channels panel alone.
-
• This strikingly handsome Wood Duck showed up last year at the nearby marsh. Alone of it's kind and just for 4 days, I had some good luck shooting many cool takes of him but none of his female! Here is one… This time, I got a very beautiful Mandarin Duck female, she too is alone, without her mate, and playing hard to get but I was not gonna give up on this chance. Apparently landed some hours before, she was trying to hide under anything that offered shelter. In this case, she was staying too close to the cache for me to get a good horizontal, flat angle to shoot her. For now, I will do with these… 1 2 3 4 5 Have a look, have a good time!
-
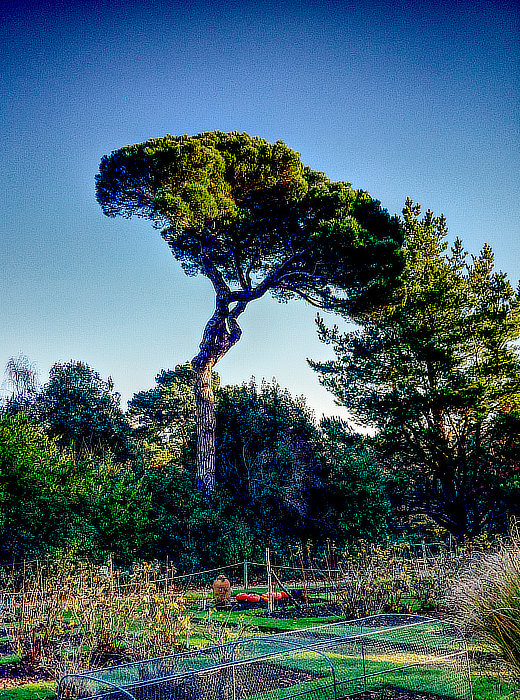
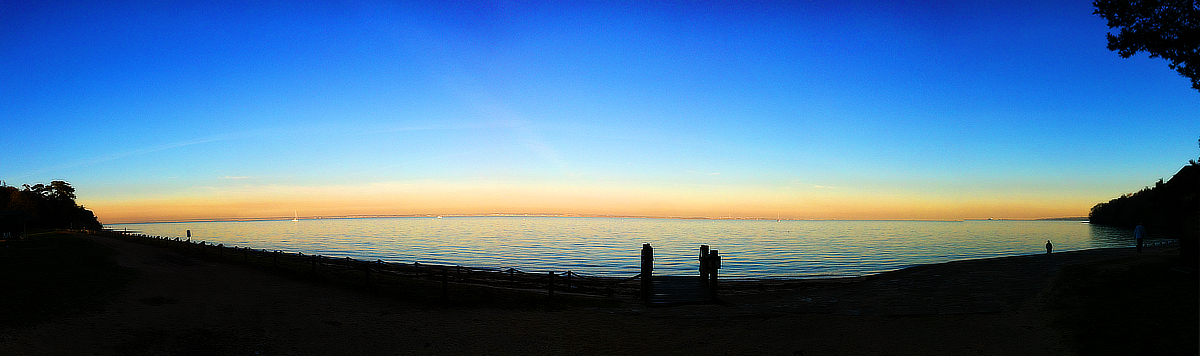
Living on the Isle of Wight, it's very nice to drop into a Stately Home or other historical site on the way home from the shops. Osborne was Queen Victoria's holiday home, with its own beach. I didn't bother taking my camera because I have so many photos from previous visits; I did have my phone though, and took one or two snaps (well, 149 all together!) I had AP's HDR and panorama in mind ... I've mostly used the presets on the HDRs, but this first one is a little over-sharpened, and there's a lot of grain in the sky; I'll smooth that out in future editing. The panorama gives a view of the city of Portsmouth across The Solent. the "sunset" (we're looking north-east) is probably pollution haze that's been exaggerated by cranking up the saturation!
-
 I am getting more and more fond of Affinity Photo for editing and filtering my photos. I am happy with the raw development tools, I use Camera Raw mostly the Affiniyy tools behaves the same in both raw models. In the editing / retouching / filtering part i also feel comfortable since Photoshop and Affinty behaves about the same. Layering adjustments and such...I am getting more and more grips of it. I want to get further into the filtering things to get the moods and expressions right in my photos... (just like I do in CameraBag Photo)... This is my first editing / filtering / retouch all done in Affinity Photo.
-
Hi, In diesem Affinity Photo Tutorial zeige ich aus der Serie Foto Optimierung wie man das Foto Toskana Wolken verbessern kann. Hier geht es nicht um große Effekte, sondern um viele kleine Verbesserungen, die dann hoffentlich für ein besseres Ergebnis sorgen. Im Wesentlichen geht es um Dodge & Burn. In this Affinity Photo Tutorial, I show you from my serie photo optimization how to improve a photo. There are no great effects, but many details which hopefully improve the result. Main thing is dodge & burn. Ciao Jack Foto / photo: eigenes / self made Link to YouTube Tutorial
-
 I'm reading in three Nikon NEF (raw) files as an HDR stack, tone mapping, with the Assistant set to create a 32-bit result. After this, in the Photo Persona I'm using the Straighten tool in Crop. That leaves some areas at the edges that I then attempt to fill in with the Inpainting tool, which causes a couple of kinds of problems: Once, it filled in with a strange web of black wavy lines. Once it filled in but parts were semi-transparent. Several times, it's gotten up to about 80% Inpainting Brush progress bar and it just gets stuck there. Menus still pull down, etc, but it's frozen. I tries using Color Format to convert to a 16-bit, and I don't get a crash but do end up with odd behavior. Remember that this is transparent area at the edges due to the rotation. In the top right corner, it simply refuses to inpaint. On the left side, it did, but left some partly-transparent parts. On the bottom right, it inpainted perfectly. It's pretty quirky. This is with Beta 1.5 RC4, on a Touchbar MacBook Pro with the 460 GPU, running the latest Sierra Beta (10.12.2 Beta -- 16C53a).
 -
Hello So i have trying out the Affinity Photo trial for windows. I was actually waiting for the Affinity Designer Trial for Windows. In the mean time i decided to create a simple button using Affinity Photo.