Our response time is longer than usual currently. We're working to answer users as quickly as possible and thank you for your continued patience.
Search the Community
Showing results for tags 'colour'.
-
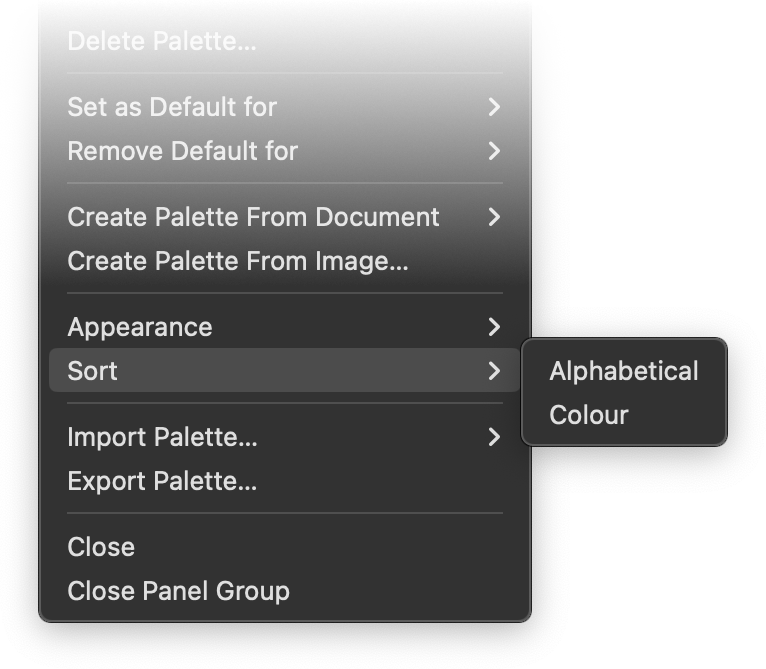
 Hey everyone, I've been wondering for a few years now why there are so few sorting options for the Swatches palette: Alphabetical and Hue – that's very limited when compared to the options offered in other software, especially one of my favourites, Aseprite. The options in Affinity are somehow very sparse, even though colours play such an important role in our line of work. Aseprite: Affinity: More questions: Can anyone confirm that Document Palettes/Swatches cannot be sorted at all? I’ve tried in all three apps (Mac), the expanded menu as above does not appear in any of the apps. I also think the option to generate gradients between to swatches would be a great addition, just like seen in the Aseprite menu. I also know there are tons of websites that offer these options, but if I had one wish, I'd like to see some of these features in one place without distractions – preferably directly integrated into the apps. Cheers Dennis
-
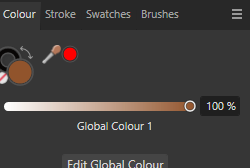
 I can't find any way to change either the noise or opacity setting of a global colour. The "Edit Global Colour" pop-up doesn't have these options and changing the noise/opacity just sets it for the currently-selected layer. I've tried double-clicking in various places and different menus but can't figure out what to do. Am I overlooking something obvious, or is this a trick that has been missed?
 -
The entire Affinity suite has a weird blue shift in colour. every UI element and therefore the importet Media has a blue colour shift. This has happened, since I moved to a TV as a Monitor, which doesnt have any Colour reprodution issues, accept for Affinity Software. The middle dot has all RGB values set to 255, but is still blue shifted.
-
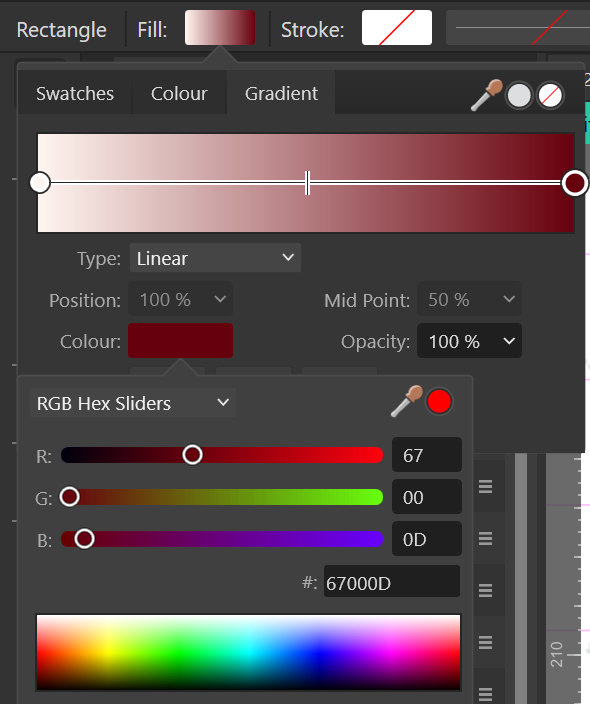
Problem Right now, gradients are the most tedious thing to create and edit in Affinity. The problem is that all pop-ups close when you Alt+tab out of Affinity or click outside the program in another window). Aany edits you want to make are nested 3 clicks deep in pop-ups, which you need to do for each and every time you add a colour to a swatch. This means that whenever I want to source a colour from another window/ application (e.g. using Microsoft Powertoy's colour sampler), I need to go these 3 clicks deep (and occasionally also switch to RGB hex) to paste colour values. Proposal Add a gradient studio which streamlines editing gradients. Also see the discussion below:
- 12 replies
-
- 7
-

-
- gradient
- gradient studio
- (and 3 more)
-
 I usually work with HSL sliders when working with colours when I make adjustments. This means I don't have access to the Hex value box. Please add a Hex value box input so I don't have to switch to RGB hex as often.
 -
 I have a simple JPG generated by some software, and I'd like to replace one colour (straight black or white) with another, or make it transparent. So far, any attempt to use the colour replacement brush tool have not given any result, and my search on the forum found its use to be an as yet unanswered question. I was hoping this brush would act as pick-and-replace tool (if pixel is <colour set> then replace with the colour set as front) but evidently I have this wrong. As I have both AD and AP, here are my questions: - which is the best to use? - what is the exact process to replace a specific colour x with a colour y? (layer select, any settings that can mess it up, which brush to choose, how to choose the colour to change and set the colour it will be replaced with). - just in case I come across this later, is there also a way I can control the *range* of colours accepted for replacement (the cat example isn't universally the same orange). I'm clearly missing something simple, but I can't seem to identify what.
- 16 replies
-
- 1
-
-
- colour
- replacement
- (and 1 more)
-
Could you add a flatten transparency command like Adobe Illustrator's? The way it works is that it converts the vector object with transparancy to a non-transparent vector with a colour that matches the one it had when opacity was applied. For more info see this thread: https://forum.affinity.serif.com/index.php?/topic/175099-flatten-transparency-set-opacity-to-100-and-use-the-colour-closest-to-the-transparant-colour/
- 14 replies
-
- 4
-
-
- flatten transparency
- opacity
- (and 2 more)
-
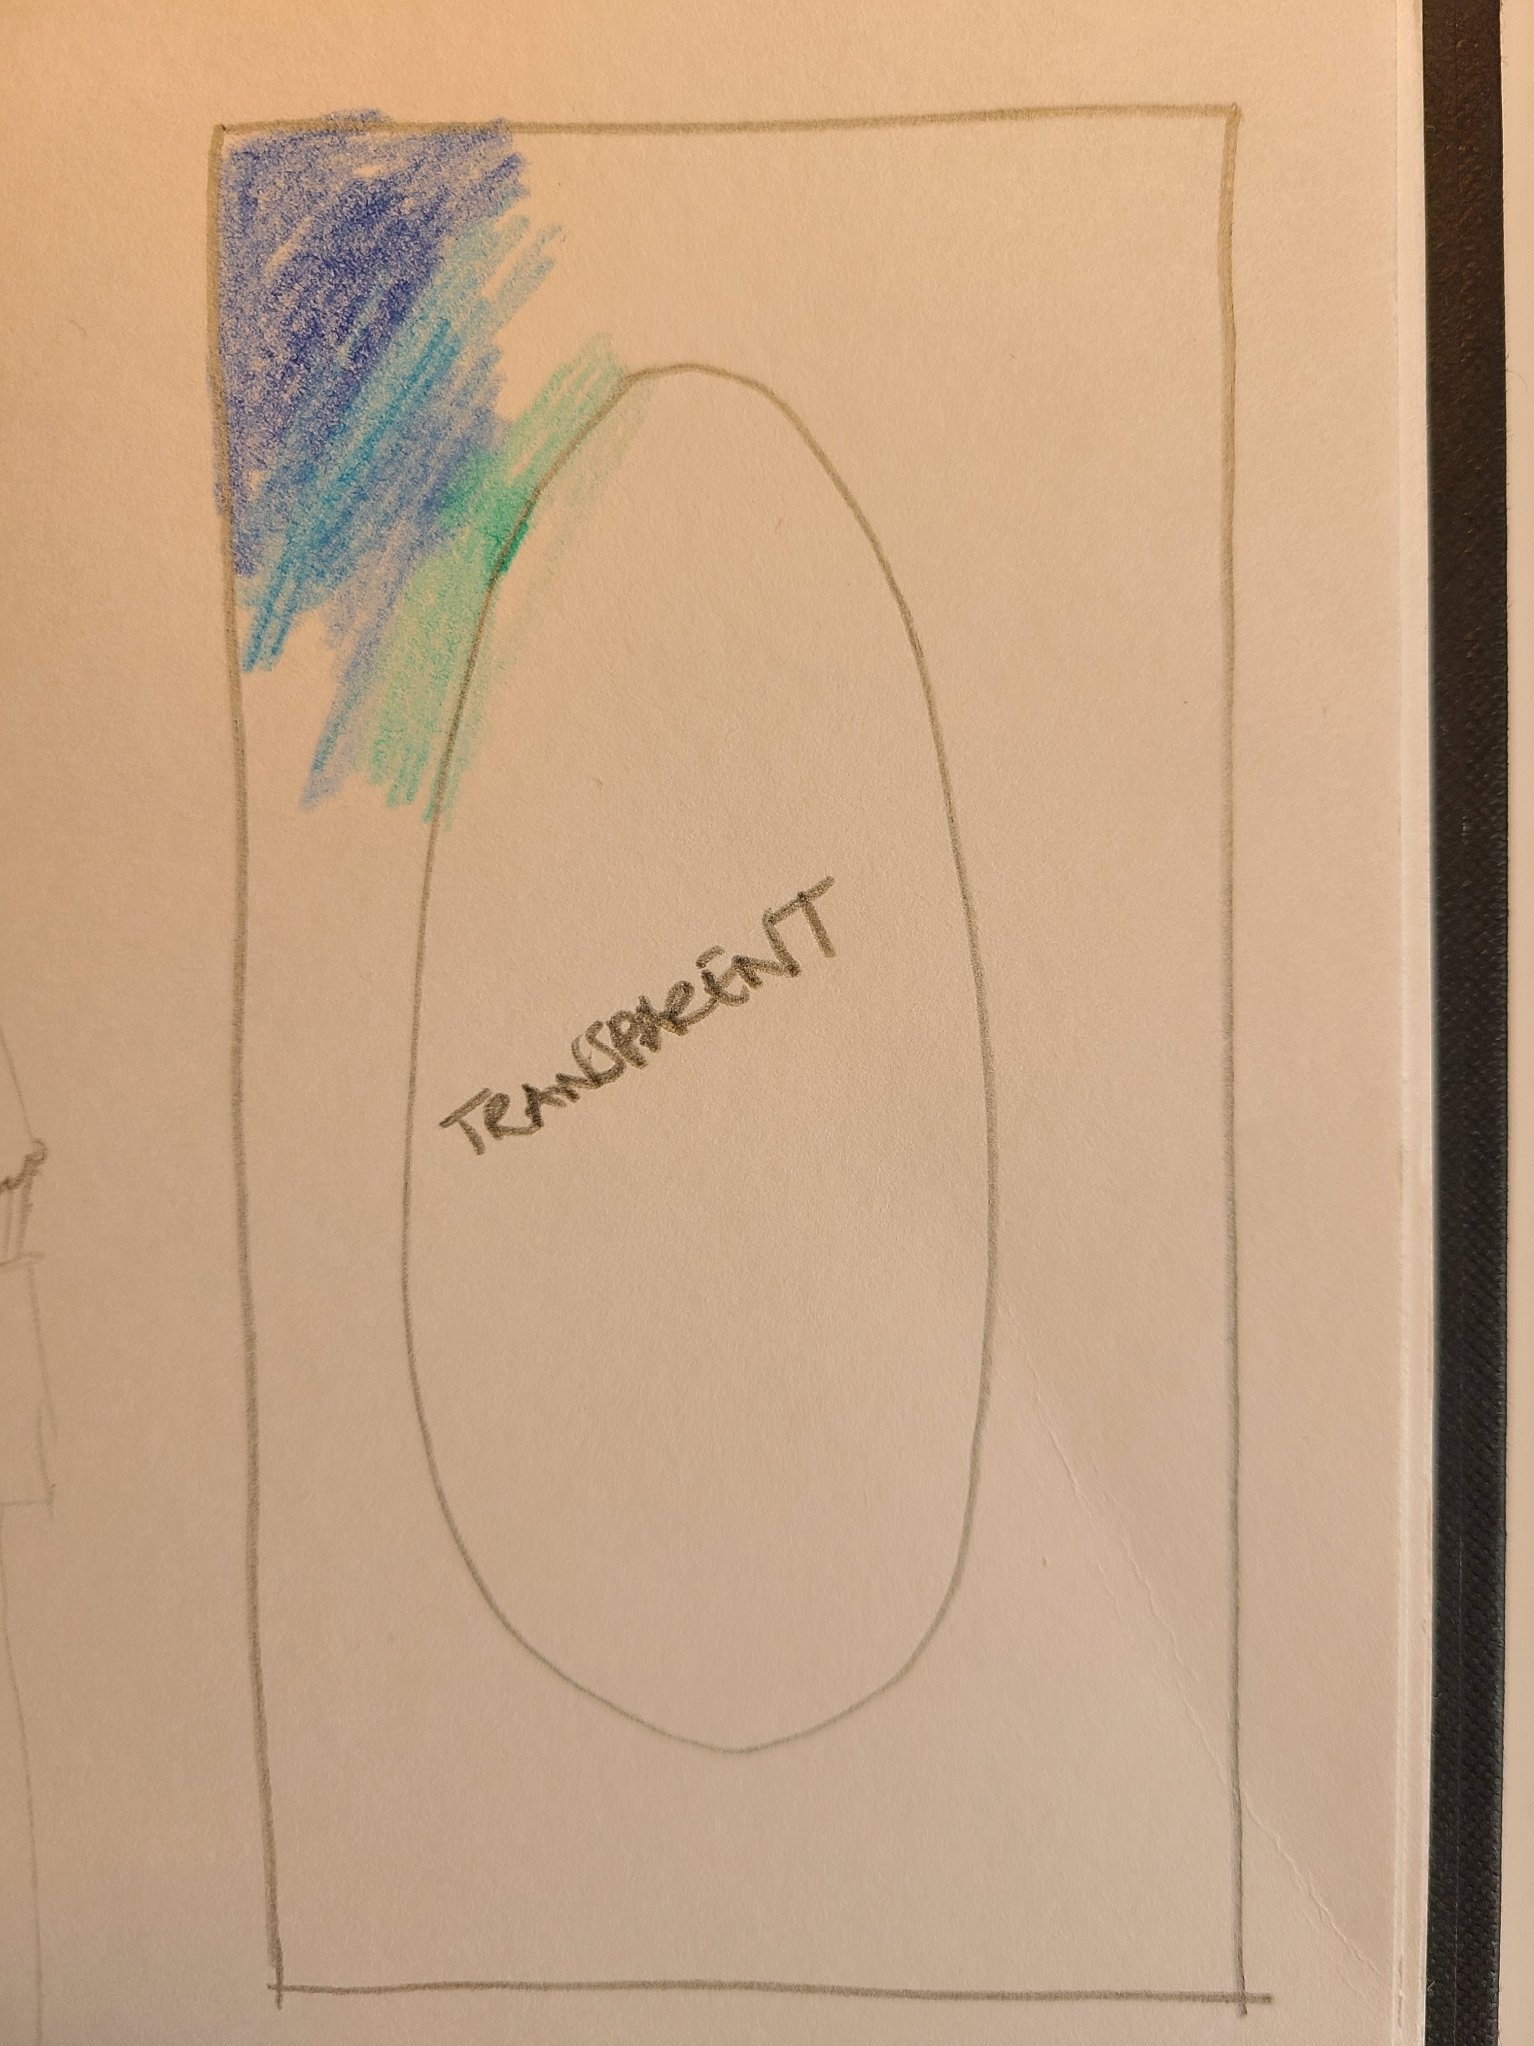
 I'm gonna start by apologising, I am not gifted at illustration, digital or otherwise! I need to create a colour gradient like the photo I've attached - transparent centre in an oval shape, with a gentle gradient going out on all sides. How would I do that please? I got the shape cut out ok, but I couldn't get the right style of gradient pattern so that the colours looked like this all the way around. Any and all ideas greatly appreciated, thank you!
-
 Is there a way now to organize the colour panel better? I have hundreds of colour swatch groups that I would like to organize better than the current one long list approach. Nameable folders or something similar would be ideal. Cheers for any response. 🙂
 -
 I have been searching for a while now, but cant find any "select same colour" feature. All I can find is a feature request post from 4 years ago asking for this. Surely this rudimental feature has been implimented by now. Selecting and replacing a colour is one of the main benefits of vector work, to not have this seems crazy to me. I know the dev team is small and your product is so superior to Adobe is so many ways, but missing fundamental features like this makes it unusable for real world projects. I hope I am being a dullard and a select same colour feature is available. If not please add it to the top of the list of features in the next update.
- 54 replies
-
- 10
-
-

-
I have coloured in images on a previous version and now with the current version, I cannot find and use the colour bar at the top right once I select the painting tool. All I get is grey scale. There used to be a range of colours I could click on and apply to my drawing. Apologies if this is the wrong section of the Forum as I did try the Help but didn't get anywhere. I have attached two files completed on the previous version. I want to do the same with a new drawing.
-
 Hello. When I want to change something's color that uses one of my Global Colors it automatically changes color tool to Tint. It annoys me because there is only one slider and nothing else and I must switch it manually to Wheel every time when I want to change color of certain object without changing the Global Color. Can I somehow change it to use automatically Wheel for example? If not - it would be a nice, user friendly function.
-
Why is it so difficult to just fill a rectangle with a colour. Nothing works after over an hour trying everything?
-

Virtual colour strips
PeterBreis posted a topic in Affinity on Desktop Questions (macOS and Windows)
I am a retired designer getting into the Affinity 2 Apps after a lifetime of working with Adobe's Apps. I got the licences for all 3 Apps for all platforms (I have all 3 + Linux) Apple, Windows and iOS. Given my varying qualities of displays and that I do not want to go to the considerable expense of screen testing hardware, nor to paint and light a workspace just for this, does anyone have any thoughts on using an on-screen colour strip to help adjust my eyes and use as a reference whilst working on colour images in the Affinity Apps? I was even thinking of creating a custom neutral grey desktop with an accurate colour strip and sample image. -
 The first mocup is from V2, and the colours doesn’t match how they are suppose to be. The second mocup are from when I used V1. Everything is correct, and the colours also matched when the book was printed. No I am afraid to use V2 for my book designs in case the colours wan’t match when printed. Help, anyone??
-
Is there a way to flatten transparency from within Designer? I know you can do this on export, but what about modifying your current document? E: For the feature request refer to:
-
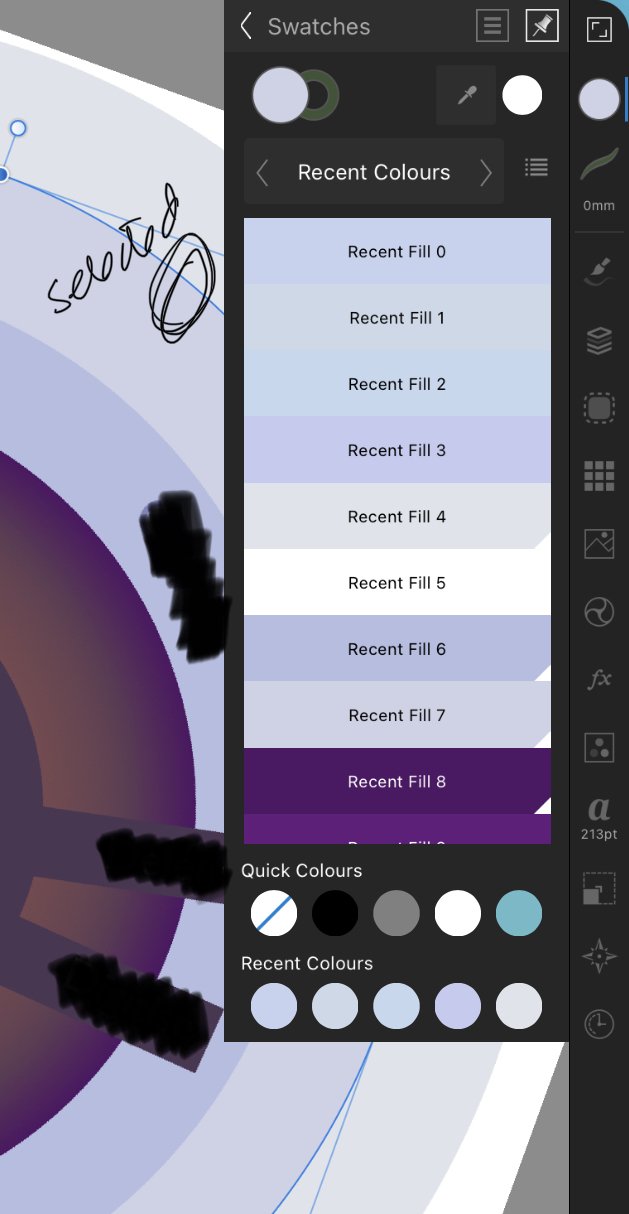
 This is Designer for iPad v1.11.12. (I never bothered updating beyond this.) I filled the selected shape by touching Recent Fill 1. And left the object selected. (There are only 9 fills in the list, so you're seeing them all, btw) You'll see, below, the selected colour is NOT highlighted, in any way, in the panel. Not in the recent list at the bottom, and not in the swatch panel above. It's consistent across all the panels, including document swatches. Can anyone tell me if highlighting selected objects colour in panels now happens in Designer for iPad 2? Thank you.
-
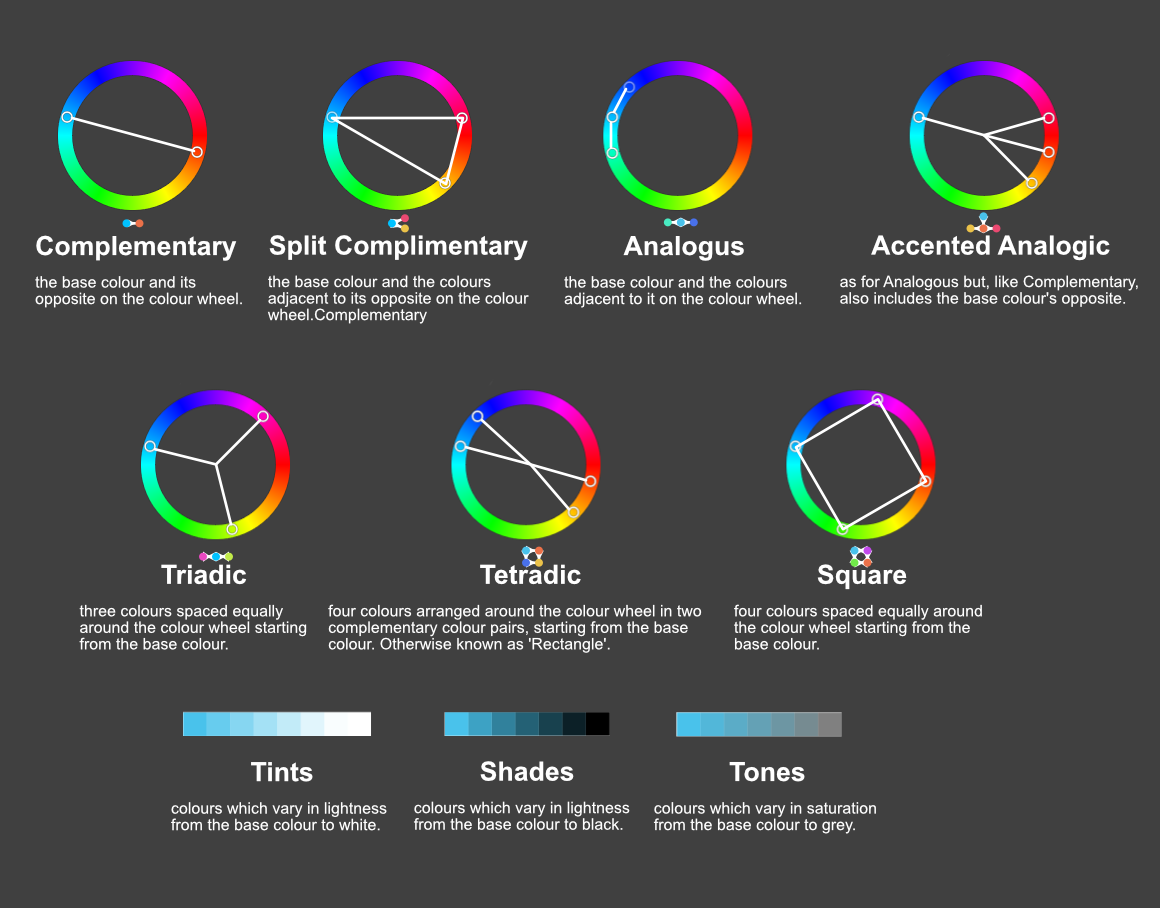
Here is a more visual representation of the colour chord options which are available within the Swatches menu after right clicking on a colour and choosing Add Chord to Swatch. The text as well as used colours are from the documentation.
-
 Hi all This has been the week of figuring out how to get my colours sorted in Affinity Photo. There is no direct support for the ColorChecker Passport from X-Rite in Affinity Photo unfortunately but I did figure out how to do it with some help. If you use X-Right ColorChecker Passport these are the steps on how to do it. This might be painfully obvious to some people but for me it was all entirely new and took a while to get my head around so I hope that this is some use to people. 1. When you are shooting your photos in a location take a photo of the ColorChecker Passports colour cards and the white card. Make sure they are in the same place as your subject matter and are properly exposed. 2. Import all the photos from your session along with your pictures of the ColorChecker. 3. Open your photos of the ColorChecker in Affinity Photo crop them down if you like and export them as 16 bit Tiff files. 8 bit might work but I have been going with 16 4. Open ColorChecker Tiff photos with the new beta version of ColorChecker Passport Camera Calibration software in the ICC tab. 5. Export your ICC profiles naming them something so you know what photo shoot they go along with. 6. Close down Affinity Photo and then re-open it to refresh the ICC database 7. Open your photos from the associated photo shoot and go to the Document tab and select Assign ICC Profile and select the ICC file you just created. And if all goes well your colour is mostly corrected. 8. Now to set the white balances correctly. Go to White Balance in the Adjustment section. Click the Picker button and then click on the photo that you took during the photo shoot of your white card. This will then automatically make the adjustment. I hope that helps some folks. I did not understand any of this stuff three days ago and it was no fun trying to get my head around it for the first time. If anyone has tips on how to improve upon this workflow please share. I am by no means an expert on this subject. All the best!
- 12 replies
-
- 8
-
-
-
- icc
- colorchecker passport
- (and 5 more)
-
I would like there to be an option in the colour picker to apply sampled colours of filled objects to the selected object's fill colours. Similarly, sampled strokes should be applied to the selected object's stroke colour. This is how it works in Illustrator and bypasses to have to check whether fill or stroke colours are active to determine to where your colour ends up going. For any non-vector objects that were sampled, the colour should still be applied to whether the stroke or fill is currently active. This saves quite a lot of time if you need to apply colours to newly created objects it helps if you can sample them from objects that were already created. This proposal does not cover stroke widths (or appearances in general, which the tool currently does not sample). For that, see:
-
I prefer using the 1 column width toolbar, but it comes at the cost of not having a fill & stroke colour widget there. I prefer to have it there, because it gives me a clear indication on first glance. And it stays there regardless of the studios I have opened. It is also the closest to the canvas and since you already glance the tools to know the active tools, it would be the ideal place to add this. Hopefully this will be reconsidered! Also, see the discussion here:
-
Please add an option to disable the colour wheel from rotating when selecting a different colour. I want to have the orientation fixed, so I can more easily predict where I need to move the picker to.
-
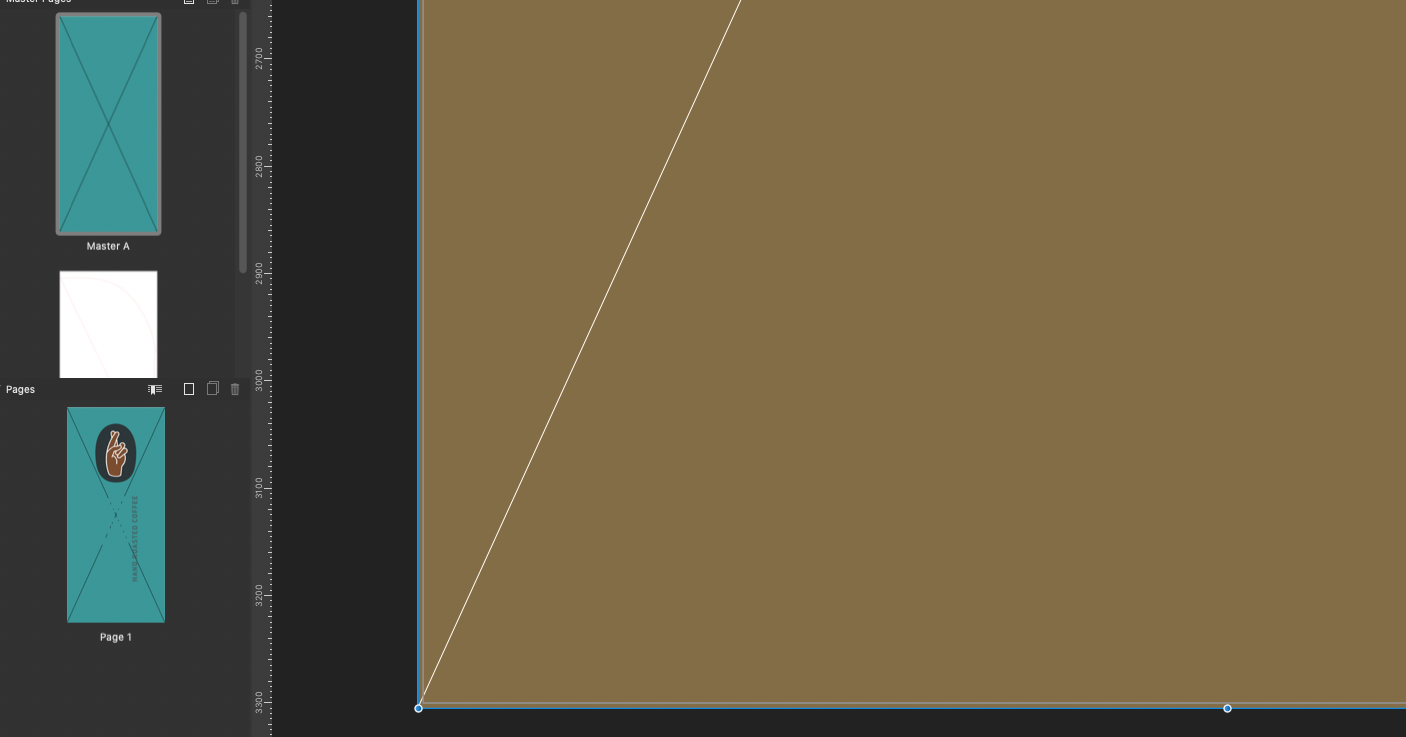
HI, I have created a master page with a colour background, but it displays differently on the page to which the master is applied? I am attaching a screenshot of of the master page A (aqua colour) the page on the right is the actual page colour as it displays.
-
 I want to make text that looks like it has been written with a gold. Can some one please tell me if and how I can achieve this? I've attached some examples.
-
 Hi guys, I can't find a field for entering hex colour codes in Publisher. Same problem Affinity Photo and Designer. Someone can help?