Search the Community
Showing results for tags 'affinity photo' or 'photo' in content posted in Share your work.
-
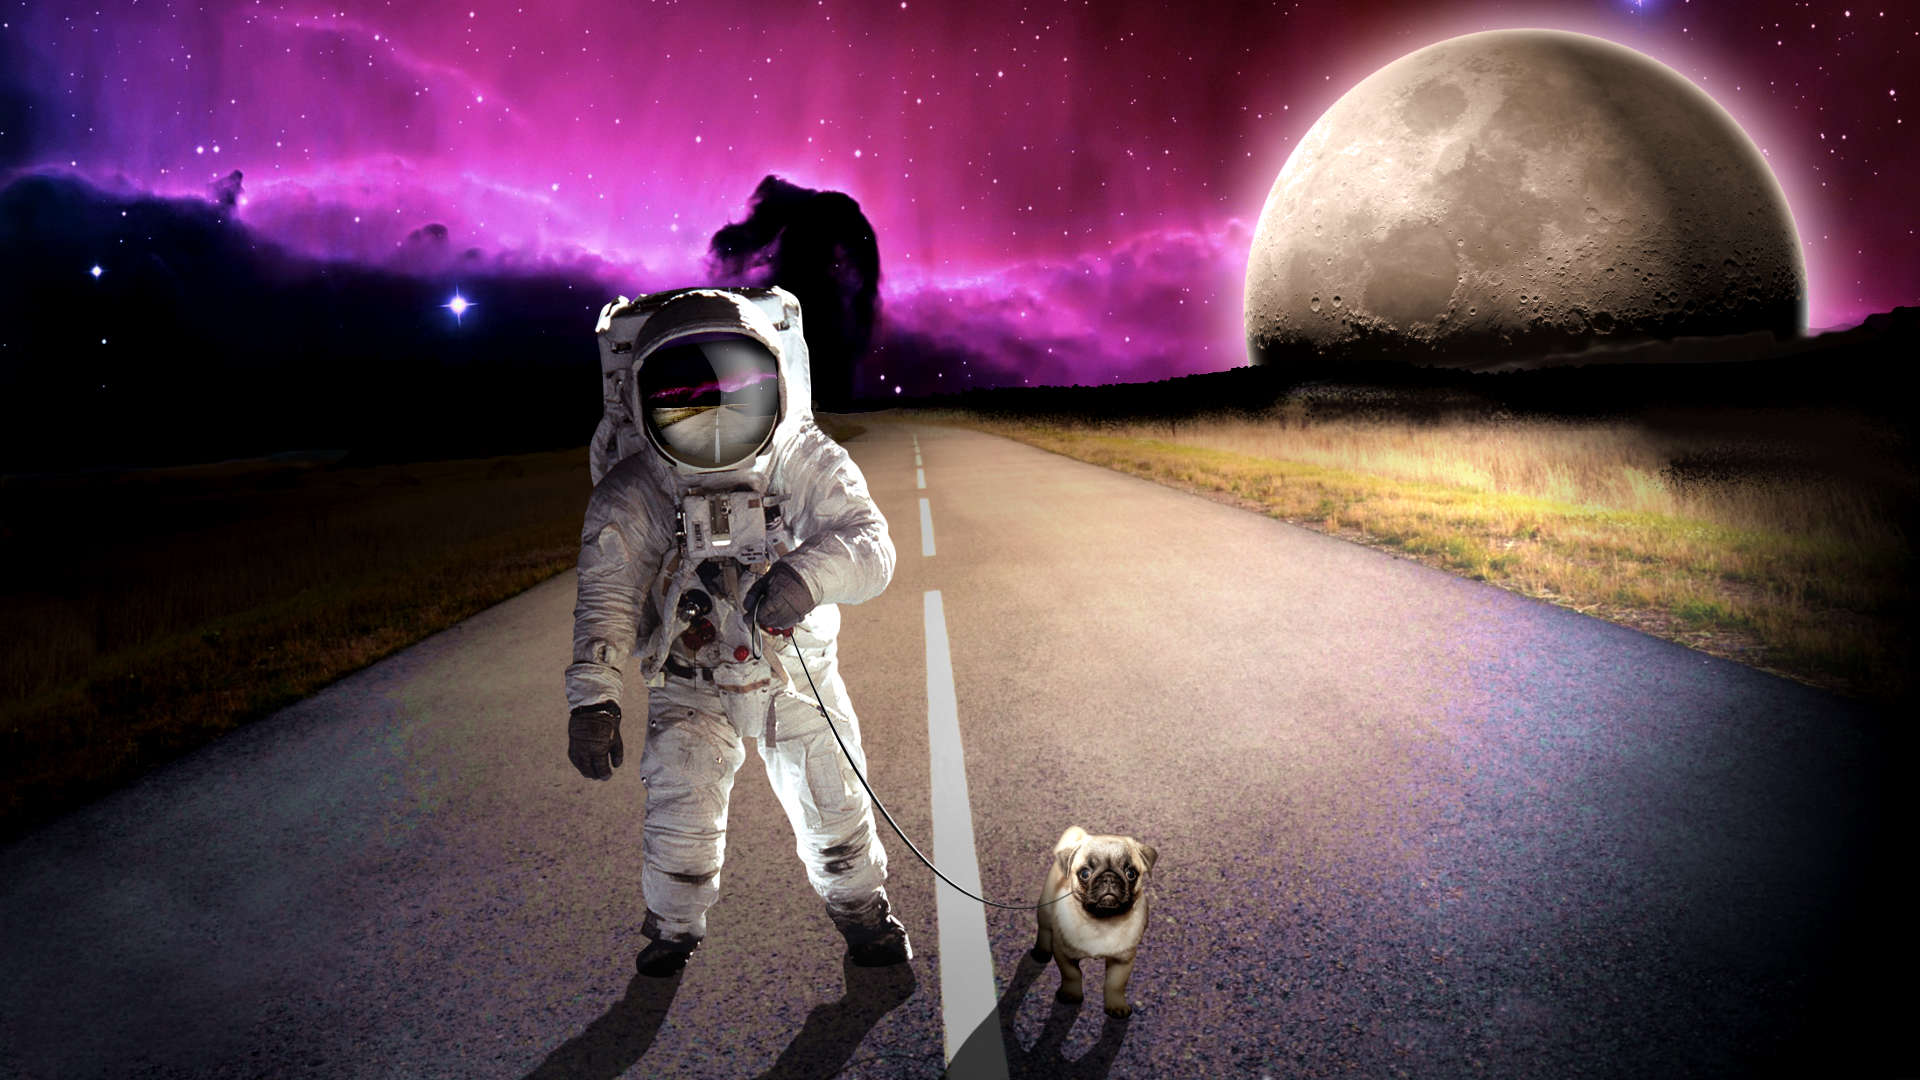
Photo Manipulation with AP (Full HD wallpaper), do you like it? Free images used from pixabay.

-
Messing around a bit with watercolours and some blenders. I recently repainted this picture from scratch using the new Watercolour Set, using much more refined tools. Now textures are subtle but perceivable and the final result is more credible. Affinity's engine has been growing a lot since 2015!
- 7 replies
-
- 13
-

-
- painting
- watercolours
- (and 1 more)
-
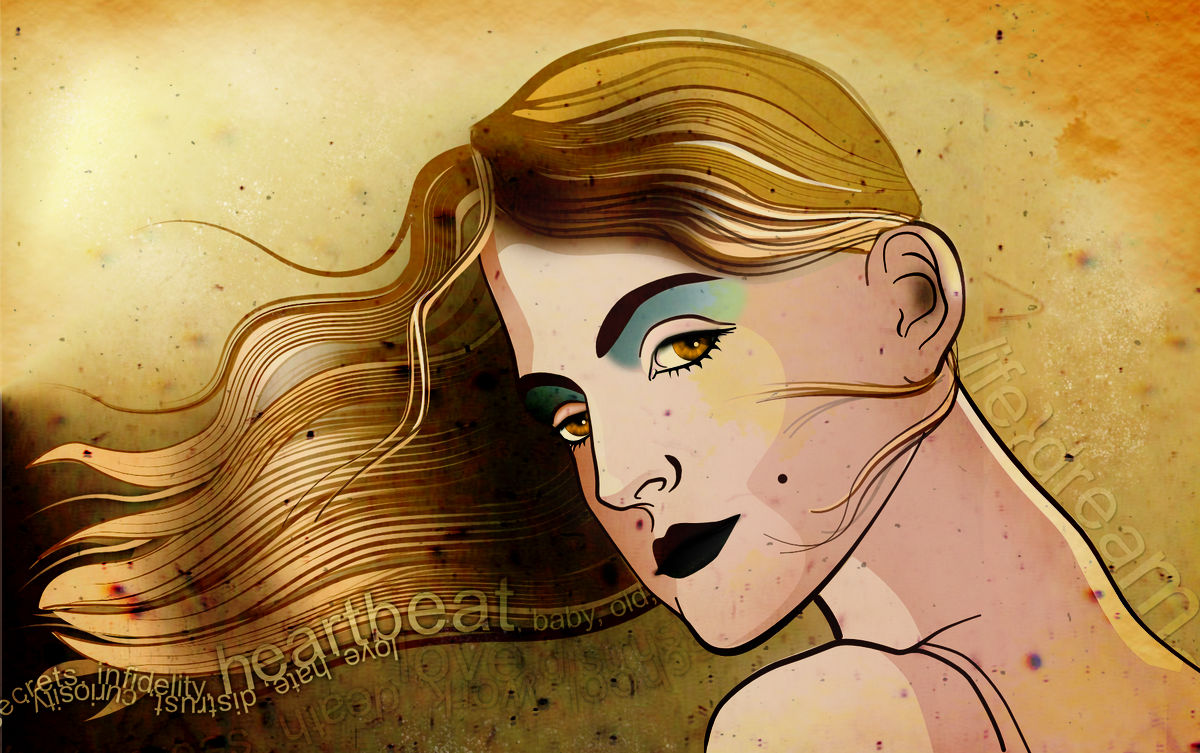
Hello my name is heli herrera, It's my first time in this forum, I made this test of photo manipulation, hope you like Greetings from Brazil Credits: Images used http://www.bigstockphoto.com/ http://tigers-stock.deviantart.com/ http://mysticmorning.deviantart.com/ http://kuschelirmel-stock.deviantart.com/ http://krisderp.deviantart.com/ http://kassmir.deviantart.com/ http://hybridgothica.deviantart.com/ http://frostbo.deviantart.com/ http://gf-stock.deviantart.com/ http://brunilde-stock.deviantart.com/ http://alp-stock.deviantart.com/ http://9j1kabir.deviantart.com/
-
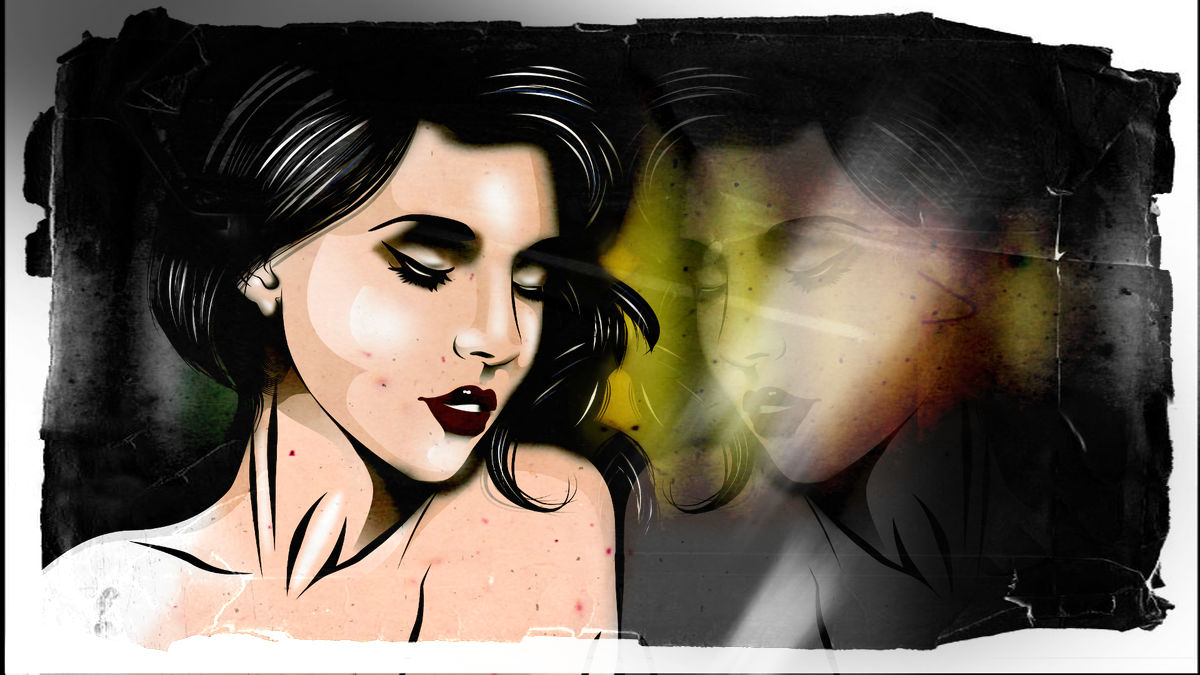
 So, Diving into some Affinity Photo. I had a Couple of hiccups, but I am enjoying Affinity Photo so far. Still working this one out, but I am at a stopping point, so I figure I would share what I have so far. Stock Photograph model credit to Fae : http://faestock.deviantart.com/
 -
I try (test) Affinity Photo beta with different motives. Here are two cats from a children's book. Not really ;) , I just try several illustrations to ‚explore‘ AP. Previously Pohothosp was my home in graphics, now it’s AD and AP. That's a bit strange, but… very, very good. What is your own experience?
- 11 replies
-
- 4
-
-
- illustration
- kinderbuch
- (and 1 more)
-
Using a photo from my last post, I wanted to show what can happen when you let Affinity Photo do it's own thing. The first image is the original RAW photo with no changes. The next is my attempt to learn a little more about AP and make adjustments to improve the photo. And lastly is the image produced by AP with no help from anybody. I used all four of AP's auto adjustments and I for one am very impressed with the results. Although it is a little on the cold side, AP managed to pull out a great deal of detail and correct a lot of the indistinct elements. As I said on my last post, the photo is a macro image of a small cut and polished stone. The entire image area is just slighly larger than a US 25 cent coin. The new release of AP is certainly worth a look.
-
This is my first photo from the new release of Affinity Photo. For those who might be interested, the photo is from a RAW file opened in AP, slightly adjusted and then developed. The image was then exported out of AP in 3x which resulted in a 219 MB PNG file with the image at approx 48 x 36 inches with a resolution of 288 ppi. I then squished it down to upload to the forum. The image is a macro photo of a small agate stone that has been cut and polished. Affinity Photo handled the whole thing like a trooper. No hesitation, no slowness, no fuss, no bother. I really like this program. Since I have zero experience or talent in this area, I am really pleased at the result. Thank you guys at Serif. Nice job !
-
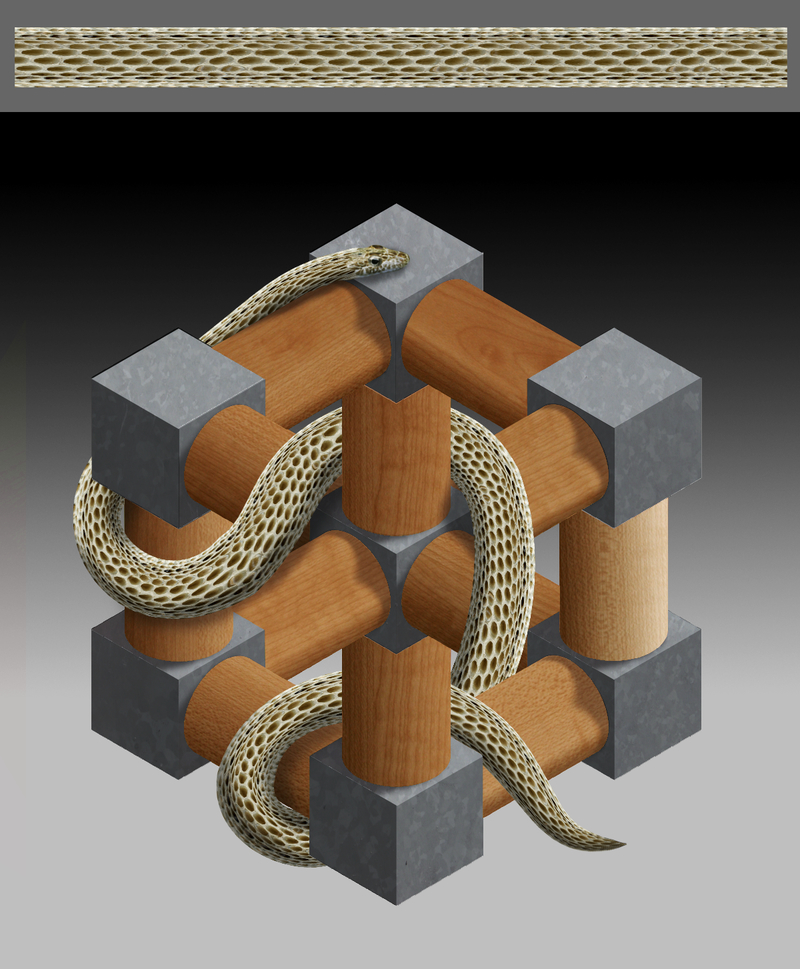
This is my second full image produced with Photo. Once again it is quite simple and, once again, it is focused on familiarising myself with a small set of specific tools. My previous image (the egg) focused on pen and brushes. This image focuses on vector shapes, boolean operations, fills and mesh warping. The snake was created from the rectangular texture shown in the inset above. I used the wonderful Mesh Warp Tool. This is an amazing tool!! The ability to define where you put the mesh grid yourself is just terrific. Whoever developed this gets my five star award ...... so if someone from Serif is reading this please pass this on to them. :) I also played with the Deform Filter but failed utterly to comprehend its workings and got hopelessly lost. So I shall have to hope that there is a tutorial on this later. :unsure: This really is a great app! :) :)
-
vector drawing (AD), edited with APh (effects). I try Affinity Photo beta, and what can I say ... it’s damn good! :rolleyes:
- 4 replies
-
- 1
-
-
- drawing
- illustration
- (and 3 more)
-
Ok so my mum asked me to fix some photo's to put into new frames on her photo wall. They had all been trimmed in the past to fit oval place holders. One of the photos had a face obscured by a shadow......here we go. 1. The shadow of a tree is blocking my face (one on the left). I duplicated the layer, removed everything except my face from the new layer. Brightened the layer a lot, and the blended it into the base layer. 2. With this one i needed to fill in the blank areas and restore the photo. The clone tool was used to fill the edges, and i adjusted the contrast. I could have used the clone tool to repair the scratches but went to Snapheal for speed. Back to affinity photo and i used layers and the selection brush tool to fill areas with some colour. These were then blended using Multiply and an opacity of around 20-30% .....with more time i would have tidied things up a bit, oh the joys of a paid job and kids to keep me busy.
-
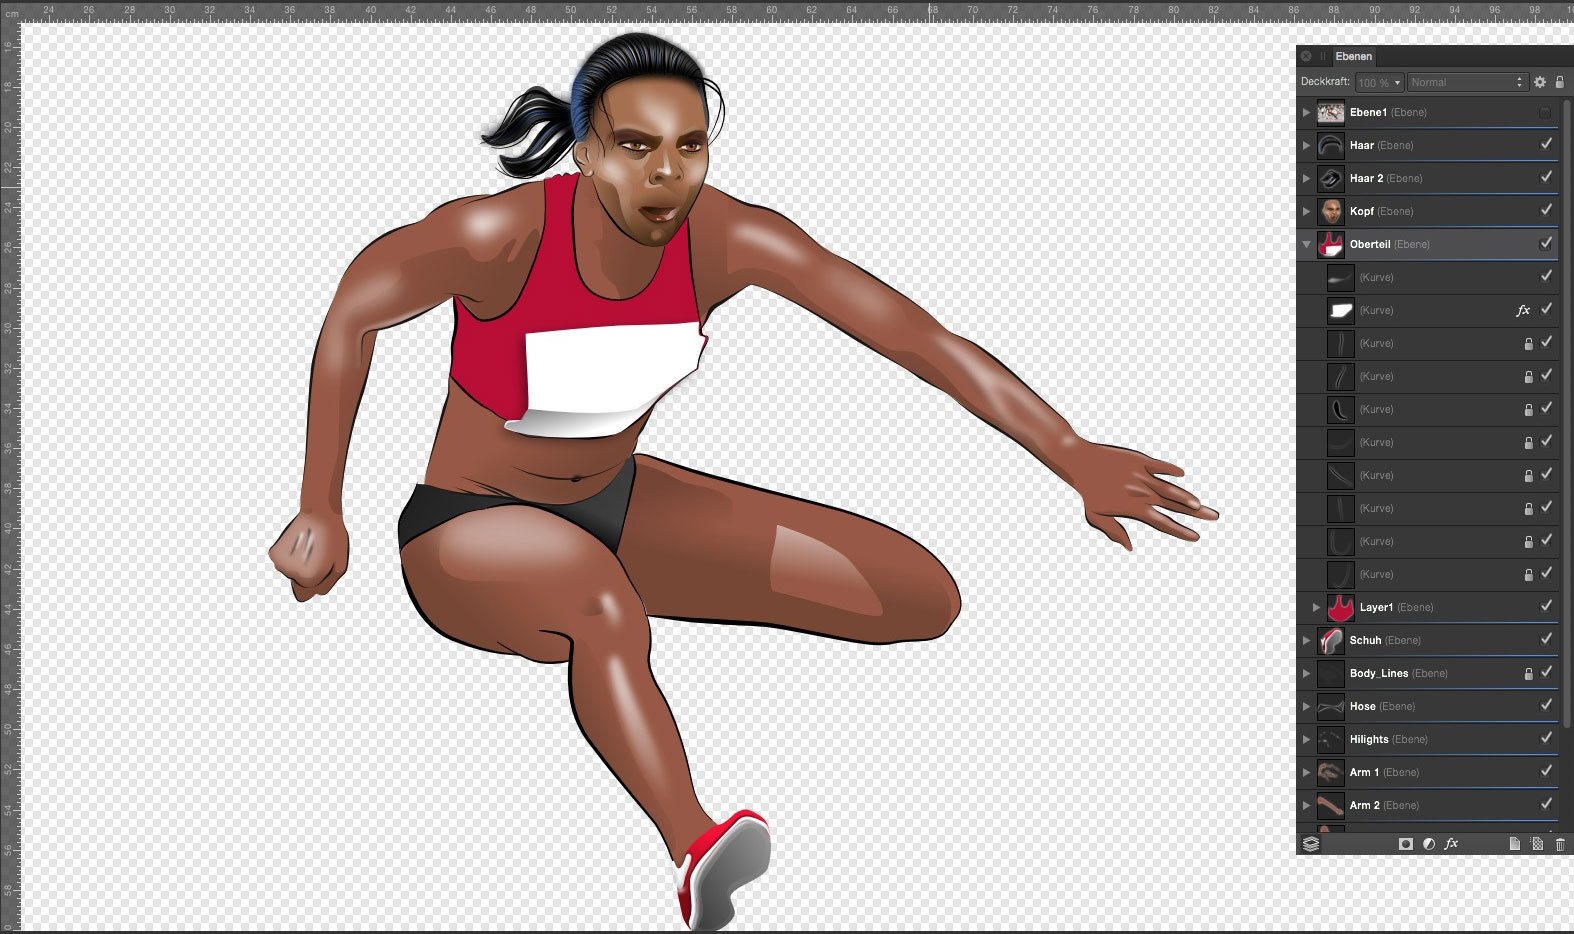
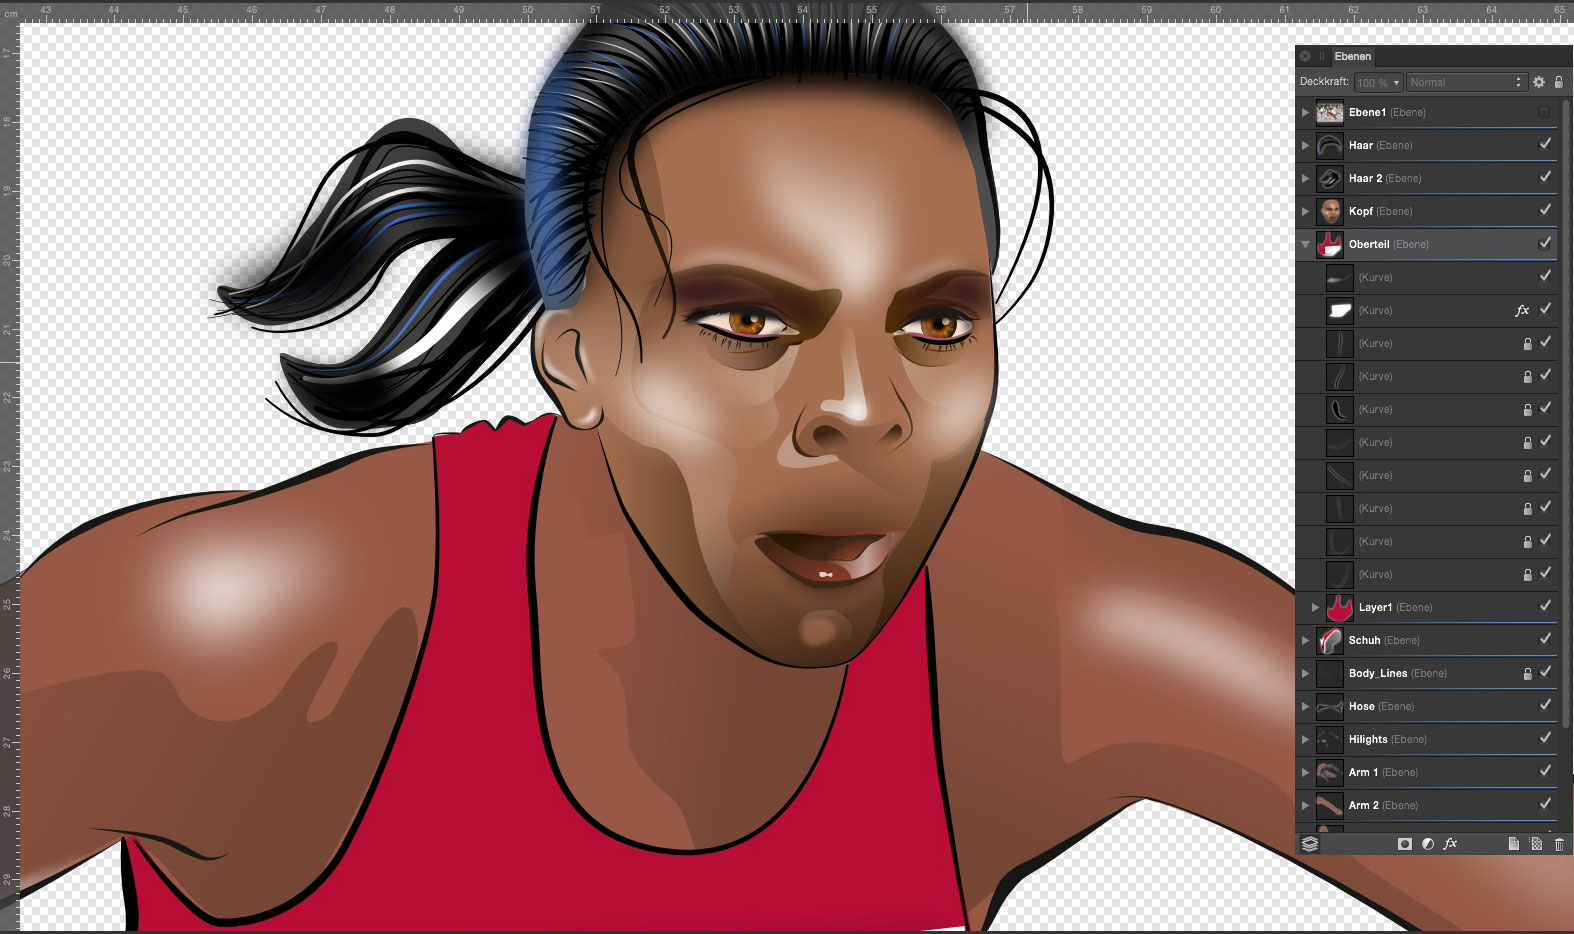
First steps for a sport project (mockup), still in progress ...
-
Recently I had a client for a portrait shoot. She is an actress and someone really talented and full of crazy ideas. The resulting images where very good and but I wanna do something different so I played a bit with Affinity Photo and this is the result.
- 2 replies
-
- 1
-
-
- photography
- black and white
- (and 1 more)
-
Used the develop persona to tweak this (took it in a café this morning) Nice tools.
-
Hi, My take on a classic. Made the shots dramatic to enhance the feeling of old and prestige. Rendering time was quite short about 5 min each. POST in Affinity Photo Beta. ;) For more pics check my behance + a modeling timelapse. https://www.behance.net/gallery/24002497/Classical-Violin? Cheers, Vlad
-
Hey guys, Here is something I done in Modo today. Post in Affinity Photo Beta. Everything went smooth apart from those live filters hanging and slowing things done.... A LOT!!!! Render time about 2 hours with Modo Renderer. Hope you like it :) Cheers, Vlad
-
affinity photo Toying around with T-Rex -Affinity Photo
ronniemcbride posted a topic in Share your work
-
Taken today in Abu Dhabi...
- 1 reply
-
- 1
-
-
Downloaded the software this morning after seeing it on Facebook. Took some getting used to. Everything done in Affinity Photo except liquify. Check out the before and after images.
-
As luck would have it my friend Shelly Cannon of http://www.shellycannon.com texted me out of the blue today to touch up this photo for her real quick. She wanted the colors softer and whatnot. First time ever using Affinity and pretty happy with how it turned out. I think if she had a higher resolution photo to supply me with and/or it wasn't on the brown background I could've done even more with it. Original: Basic touched up and colors how she wanted them: And then for fun and to explore more of Affinity's features I dropped her into a photo from unsplash.com and did some more color work and added two light sources:
-
This was a picture that I shot I had been wanting to retouch for quite some time. I am just posting the final image only. I know this model and dear friend. I know she would not want me to post a picture of her before so out of respect I will not. Anyway, I used the two techniques explained in my youtube video this week on Frequency Separation and the Inpainting Brush. Check them out if you haven't. Frequency Separation: https://www.youtube.com/watch?v=OOgg2n-VY-o Inpainting Brush : https://www.youtube.com/watch?v=z8_Ot1fT9BY
-
affinity photo 2D IMage converted into 3D Alaglyph Image
ronniemcbride posted a topic in Share your work
You need red blue 3d glasses to see this one in 3D :)