Search the Community
Showing results for tags 'Affinity photo'.
-
 I started work on a photo in AP (v2.0.3) and then needed to work on a vector overlay so selected Edit in Designer... which launched Designer and then displayed this error message. Any idea how to interpret it? Neither application shows any of the file I was working on so is my previous work now lost?
-
 I've attached a screenshot. The plugin worked in Version 1 but no longer works in Version 2. Plugin Launch Crash.mov
 -
 Hello, im trying to use my graphics tablet with Affinity Photo. It recognizes the pen and i can erase with it or click on things but the brush tool isn´t working. It worked for am moment and stoped, i tried turning on and of Windows Ink but it didn´t change anything. In Affinity Designer everything works fine.
 -
 Hi, In this Affinity Photo tutorial I show how to create a manipulation of a noble monkey. This effect also works with your own photos, maybe pets or people. For a kind of art or for funny effects or for a gift ... I wish you fun with the video. Ciao Jack
-
- 1
-

-
- affinity photo
- tutorial
- (and 8 more)
-
Hi, In this Affinity Photo Tutorial I show you how to improve the contrast and coloring of a low-contrast photo on a rainy day. For me, this day was emotional but the photo was disappointing because of the rain and the low light. So I found a way to rescue some of my impressions of my hiking day. I wish you fun. Ciao Jack
- 2 replies
-
- 1
-
-
- affinity photo
- tutorial
- (and 5 more)
-
 Photo_A7oIL2ISYx.mp4 I uploaded the video it just happened now AGAIN 😭, Ctrl + Alt + left mouse does it weired thingy again now am forced to work with Krita "am not a robot the UI is frustrating 😒" since PS is a lagging Piece of **** Also while working on AFPhoto It does a weired hanging thingy I can't find the viddeo now "Share X does weired things with videos 😒" it hangs and only allows me to use shorcuts "Not that it bothers me 😎 I know most by heart what I does bother me is when I want to interact with the application to save it frustrating!" Ummm there are 2 solutions that work "wating about 20 mins I swear I don't understand *** Make's it work again" or closing AFPhoto and reopening Now I am installing beta 2.1 and also i read the bug fixes before coming here screen shot I don't think that's my issue though finally it happens with both Huion pen, mouse. I am sure if I used a keyboard with my s-Pen when screen streaming it'll be the same thing
-
Attached is a document I created for simple astrophotography stacking, editing, and layering. Procedure to stack and edit astrophotography images using Affinity Photo 2.pdf
-
 Hello, While I was using the Brush Tool, I need to use the symmetry and I found out that the symmetry can't be snaped to anything center of the canvas or anything.I'm not sure if thats a bug or its just a missing featur, but because of that the tool becomes almost useless if you can't operate it properly.
 -
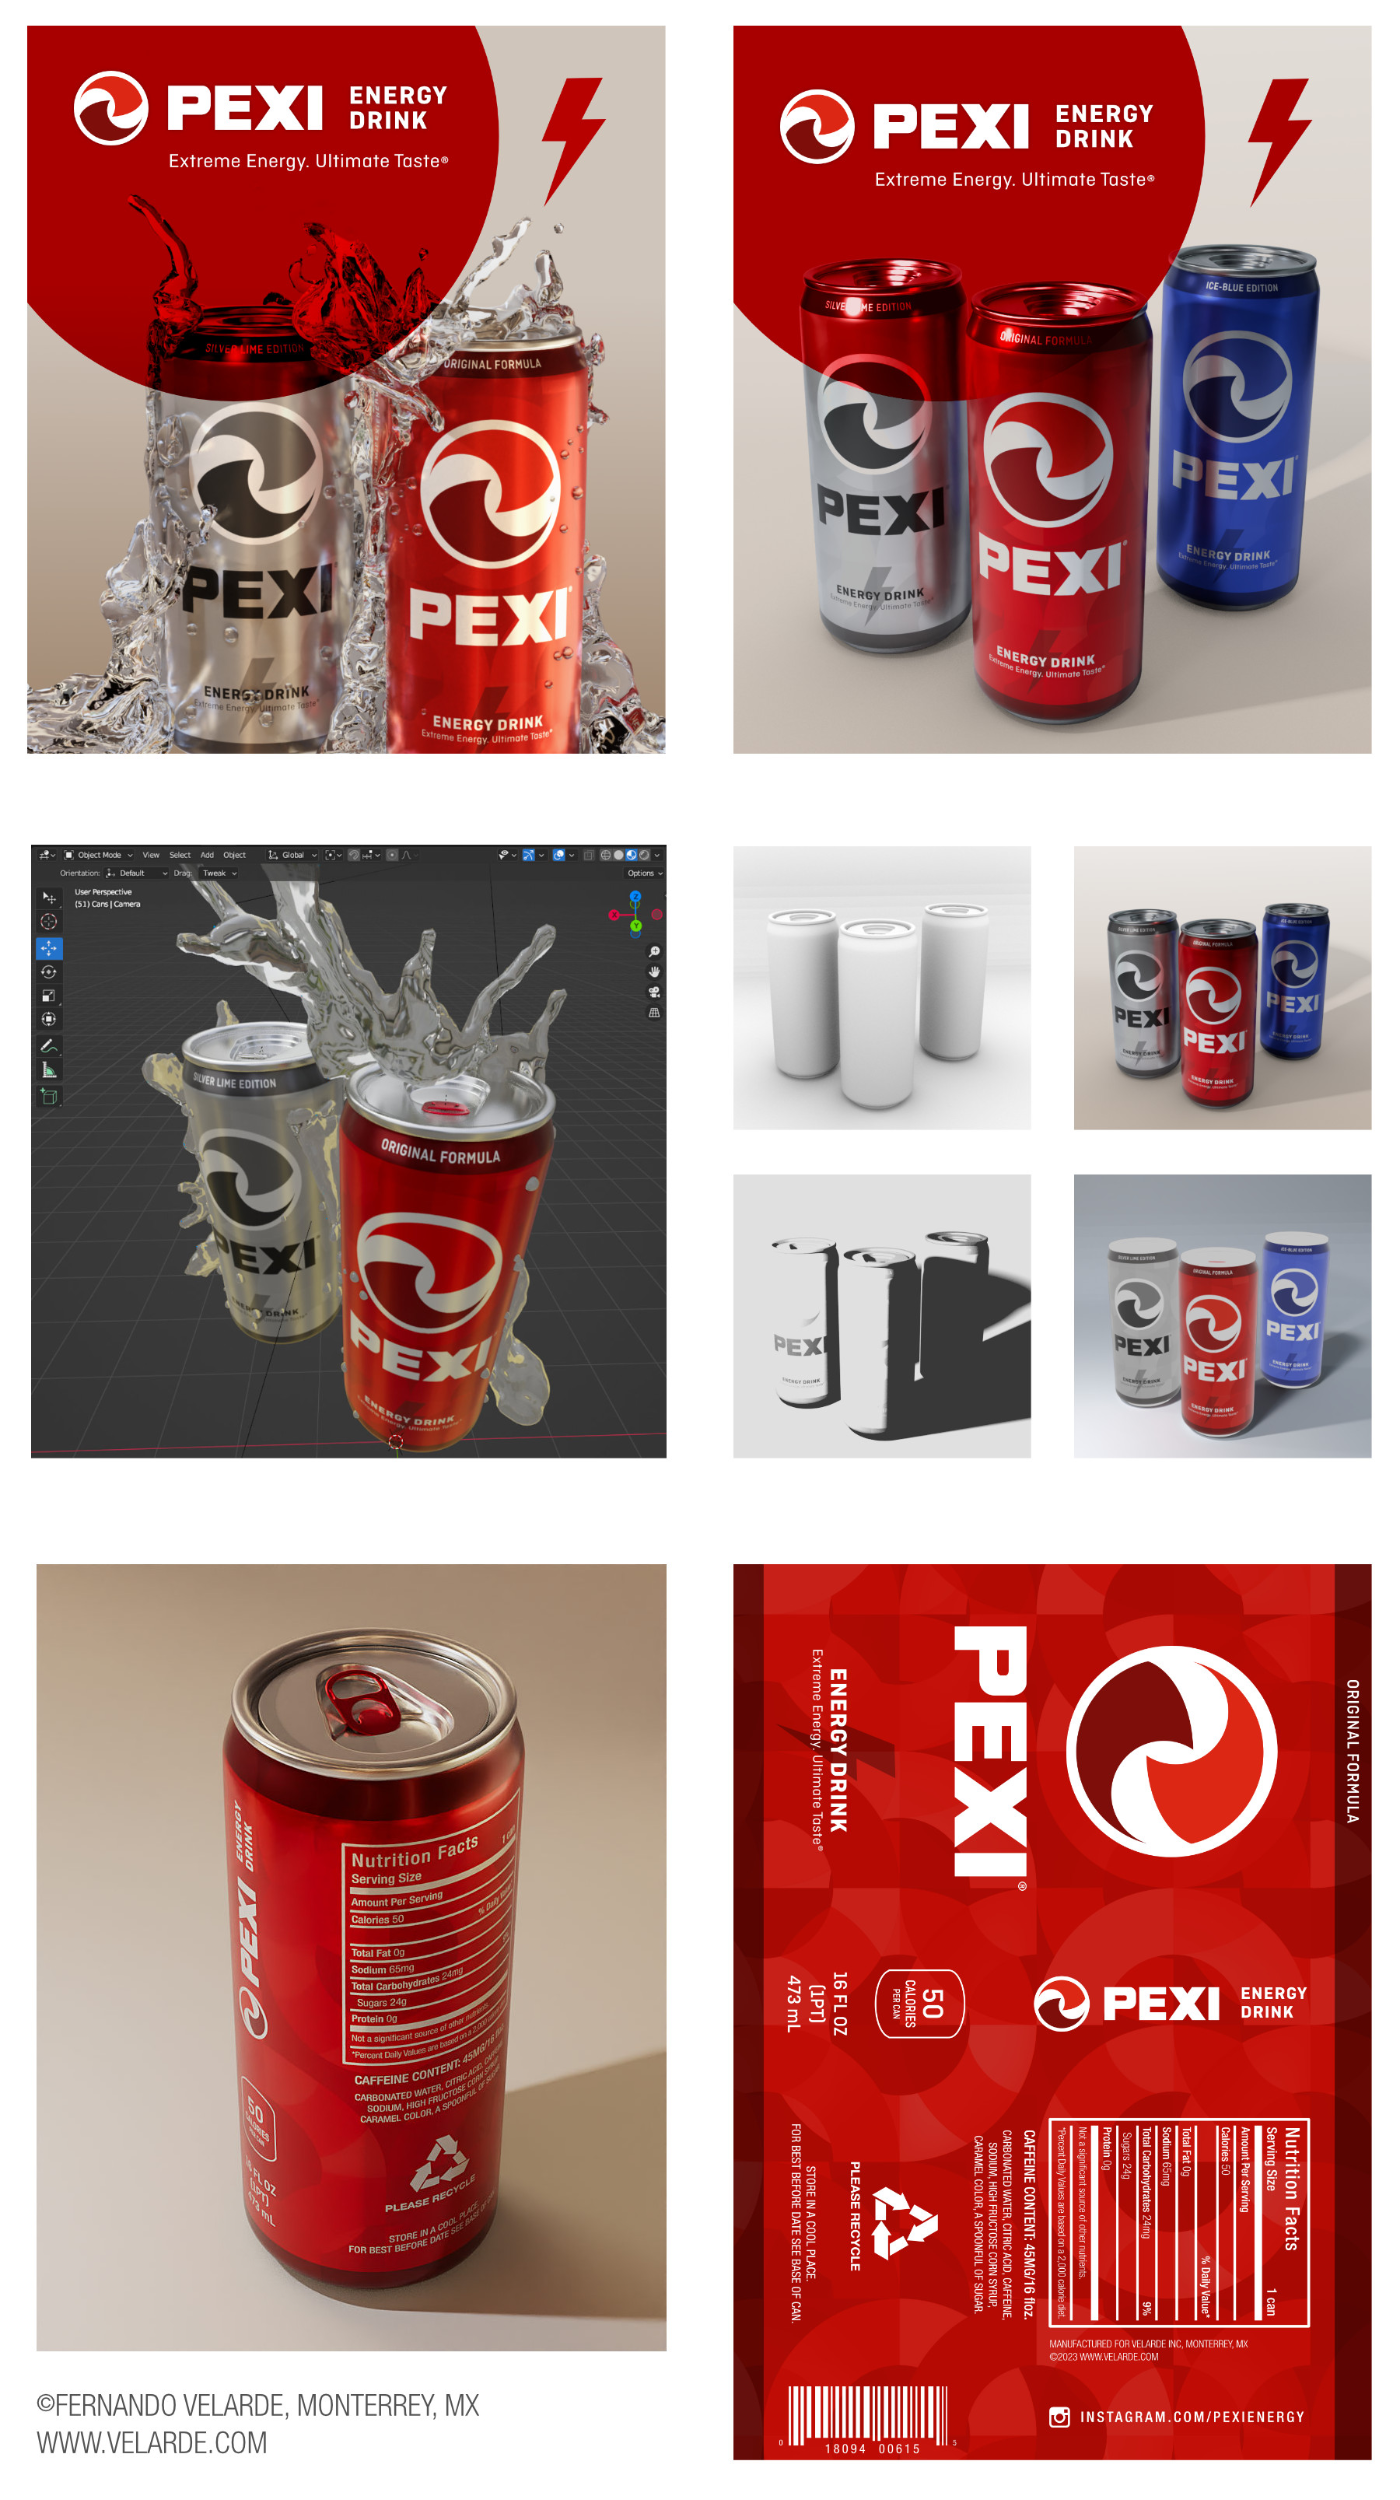
Hello: Here's another packaging exercise done in Blender. The can textures were done with Affinity Photo, as well as the final promo images. Also some color retouch and composting of several Blender passes to enhance the render. Let me know if there are any questions. Sharing some of the images of the process. P.D. Hopefully can work in an animation soon...
-
As the subject says I'm trying to copy a rectangular section of a pixel layer and it creates the impression of there being an extra layer which I didn't create and doesn't appear in the layers panel. For some reason OBS didn't record the popup menus but hopefully the sequence of steps involved can be understood. The source file is a 2048x208px webp image which loads as a locked pixel layer. Can anyone reproduce this? 2022-11-22 17-17-13.mp4
-
Closing APh with the red dot shows the layer panel but no picture anymore. 1230516342_Bildschirmaufnahme2023-02-22um21_39_47.mov
-
 Hi. I'd like to learn how to paste objects from other photos to one photo, e.g. I've got the original photo and I'd like to copy a person from other photo and paste it to the original. Of course it has to look real (select, copy and paste is something I already can do ). So the object fits into the photo, shade, color, light, W&B, how it interacts with the ground it's standing on etc. I know it's a pretty difficult so I'm not asking you to show me how to that, but is there any tutorial/course, free or paid, doesn't matter on this topic? The thing is, I don't know if this whole process has it's own name? How to even google it?
 -
 Hi, I have searched and not found any answers to this, so here goes. I am using a 2017 MBP, with the latest Affinity photo/designer etc. I also have a 4 year old XP-PEN Artist 15.6 with the latest drivers etc. The issue is they don't speak properly to each other. Using the tablet does not allow quick keys or pressure and tilt on the pen. Does anyone know if there is a solution, or if I need to update my 1) MBP, 2) Tablet, 3) or change software (Not using Adobe products as I won't subscribe anymore). Any help or ideas greatly appreciated.
 -
 Does anyone have any video link to any tutorial on how to copy/steal colour from one image on to another using Affinity Photo ?
 -
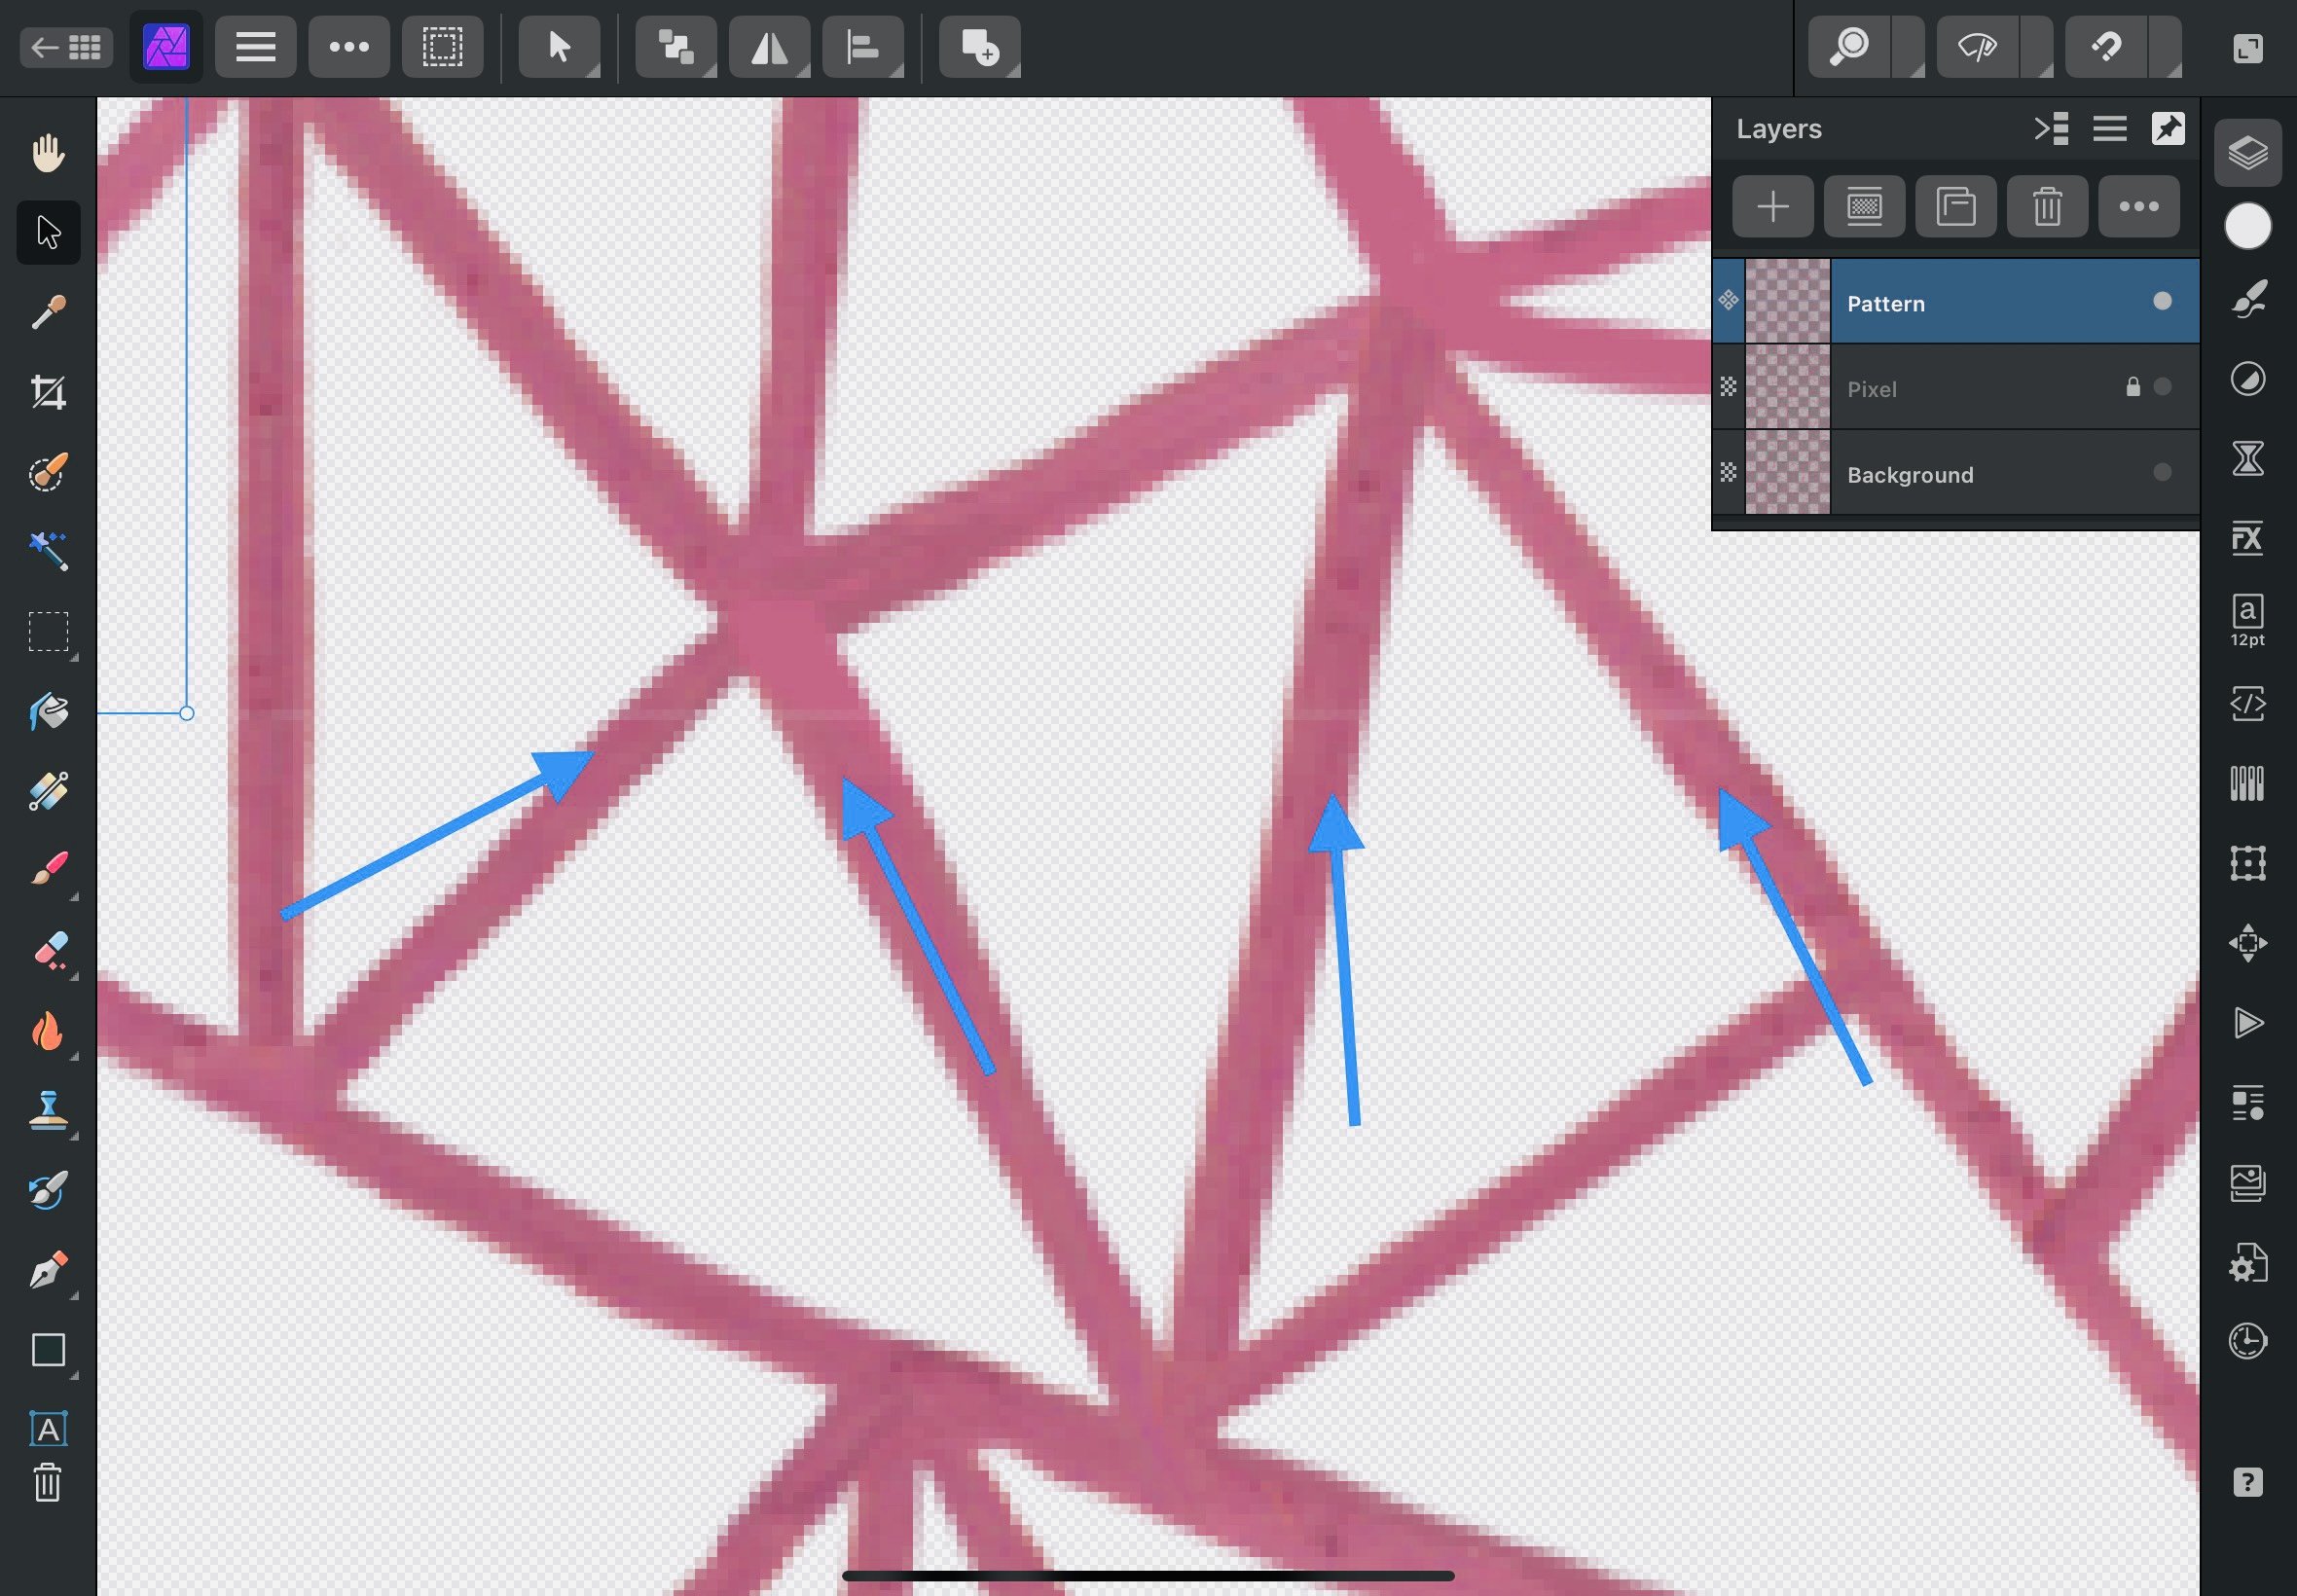
Hi, I’m having trouble with reviewing my pattern tiles (1890 x 1890px at 150dpi). I am getting a pale line throughout my pattern in the pattern layer and the pixels running on the edge of my tile seem to lighten automatically. Even though the change is quite faint (as shown in the photo), it’s not suitable for printing. My pattern tiles are 1890 x 1890px at 150 dpi and the colour of the pixels along the edge change which is becoming very frustrating. What am I missing? Thanks so much, Liz Hussey
-
 I have V1 Affinity Photo and Affinity Designer (I don't have an Affinity Publisher). Will users who have AP and AD licenses get a discount on upgrades from V1 to V2? I just didn't buy the entire Affinity bundle as I never needed a Affinity Publisher. I would like to point out that I have 2/3 programs from Serif. A discount when purchasing V2 upgrade for V1 users would be a nice appreciation. I use Affinity Photo and Affinity Designer for fun, it's my hobby in my spare time
 -
 I just purchased Affinity Photo and can't wait to ditch my subscription to Adobe CC2018. However, I mostly work with text and am having trouble finding tutorials to answer my questions. First up: how do I create a stroke around text to make the font fatter? Thanks
 -
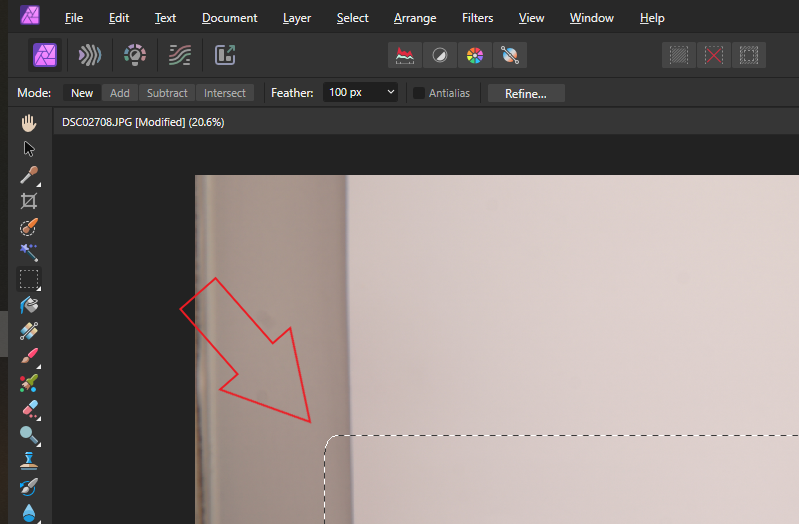
 Hi, today I experienced something new (see screenshots); Pasting selection make transparent border. Pls explain the reason and how to change back to "normal".
-
 I've been using the trial to test out Affinity Photo (Affinity Photo 2.0.4 on Windows 10), and I keep encountering semi-random stutter using it - like, the framerate of the application gets really low for a second or so. I was encountering this CONSTANTLY when I was adding a bunch of shapes to a document, like almost every time I would drag anything anywhere. To test a little bit, I created a new document with just a single image layer in it and nothing else, and if I just select the image and wiggle my cursor up and down, my cursor will occasionally stutter in the same way, even though I'm not even moving the image, just my cursor. This doesn't happen if I don't have the image selected, interestingly. Overall really happy with Affinity so I'm hoping this is solvable, would love to switch over to it as my go-to photo editing software!
 -
Hi Guys, I wanted to ask you guys a question, now that the background removal functionality is also embedded in iOS 16 and in the photos APP where you just have to long press on the image and the Photo APP automatically removes the Background for you. However it is not perfect, the end result often has some areas where you have to tidy up things either Paint out unwanted areas or paint in areas that have been missed. Now to do this what I do is for areas that have not been removed, on the background removed image I add a Mask and paint in with Black to remove the unwanted areas, and areas where I have to bring in the missed areas I add a Black Mask to it and then Paint in white to bring in the missed areas, and here is where the problem arises. So what happens is, after you remove the background using Apple’s Software the image is automatically resized to a new ratio and size, and for my task of bringing in missed areas I have to place the original image (Without the background removed ) on top of the background removed image but they do not fit/overlap on each other properly, because the original ratio of the original photo is different and the size and ratio of the background image after the removal becomes different. So my question is, what can I do ? How do I make sure both the image become of the same ratio so that perfectly overlap on each other ? I hope you guys understood the question clearly ?
-
 I am happy that so much progress has been made. However, WARP is so awkward it's infuriating. I was really hoping for warping images in Designer, i.e. perspective. I can warp images nondestructively only in photo but only one way is allowed. I can import it back into Designer and the images behaves as it should - it warps, it moves etc - but it is not the perspective I was hoping for. For the time being my workflow remains the same, which is a bummer. I would like to see image warping coming to Designer as well.
- 7 replies
-
- 1
-
-
- warp
- affinity designer
- (and 2 more)
-
 Hi, Warp layers in Designer is great, but why didn't you add it to Photo ? Same thing for measure tool... These two features are the ones I miss most since I left Photoshop. I hope you will add them Thanks
 -
 I know this was missing in V.1, but was hoping that page rulers would be added to V.2 apps. The desktop version has page rulers (View > Show rulers), but not sure why the iOS version does not. If I am missing something, please let me know. If not, please add page rulers like the desktop version has.. Thanks!
 -
 Hey, I'm in some serious need of help. I was working on a project earlier when suddenly I got an error message that it could not be saved because "because primary storage is out of space." which isn't true. I have all of my Affinity files stored on iCloud which has lots of space. I've also tried saving older projects even in Photo and I've gotten similar errors such as "File was lost" or "Access to the document file was lost while performing initial loading". Some files can be opened but upon editing them and saving them, I am met with another error message and forced to quit my document. I have rebooted my iCloud drive on my Mac which fixed my issues for about a day and I'm met with the issue again. Any help would be greatly appreciated
 -
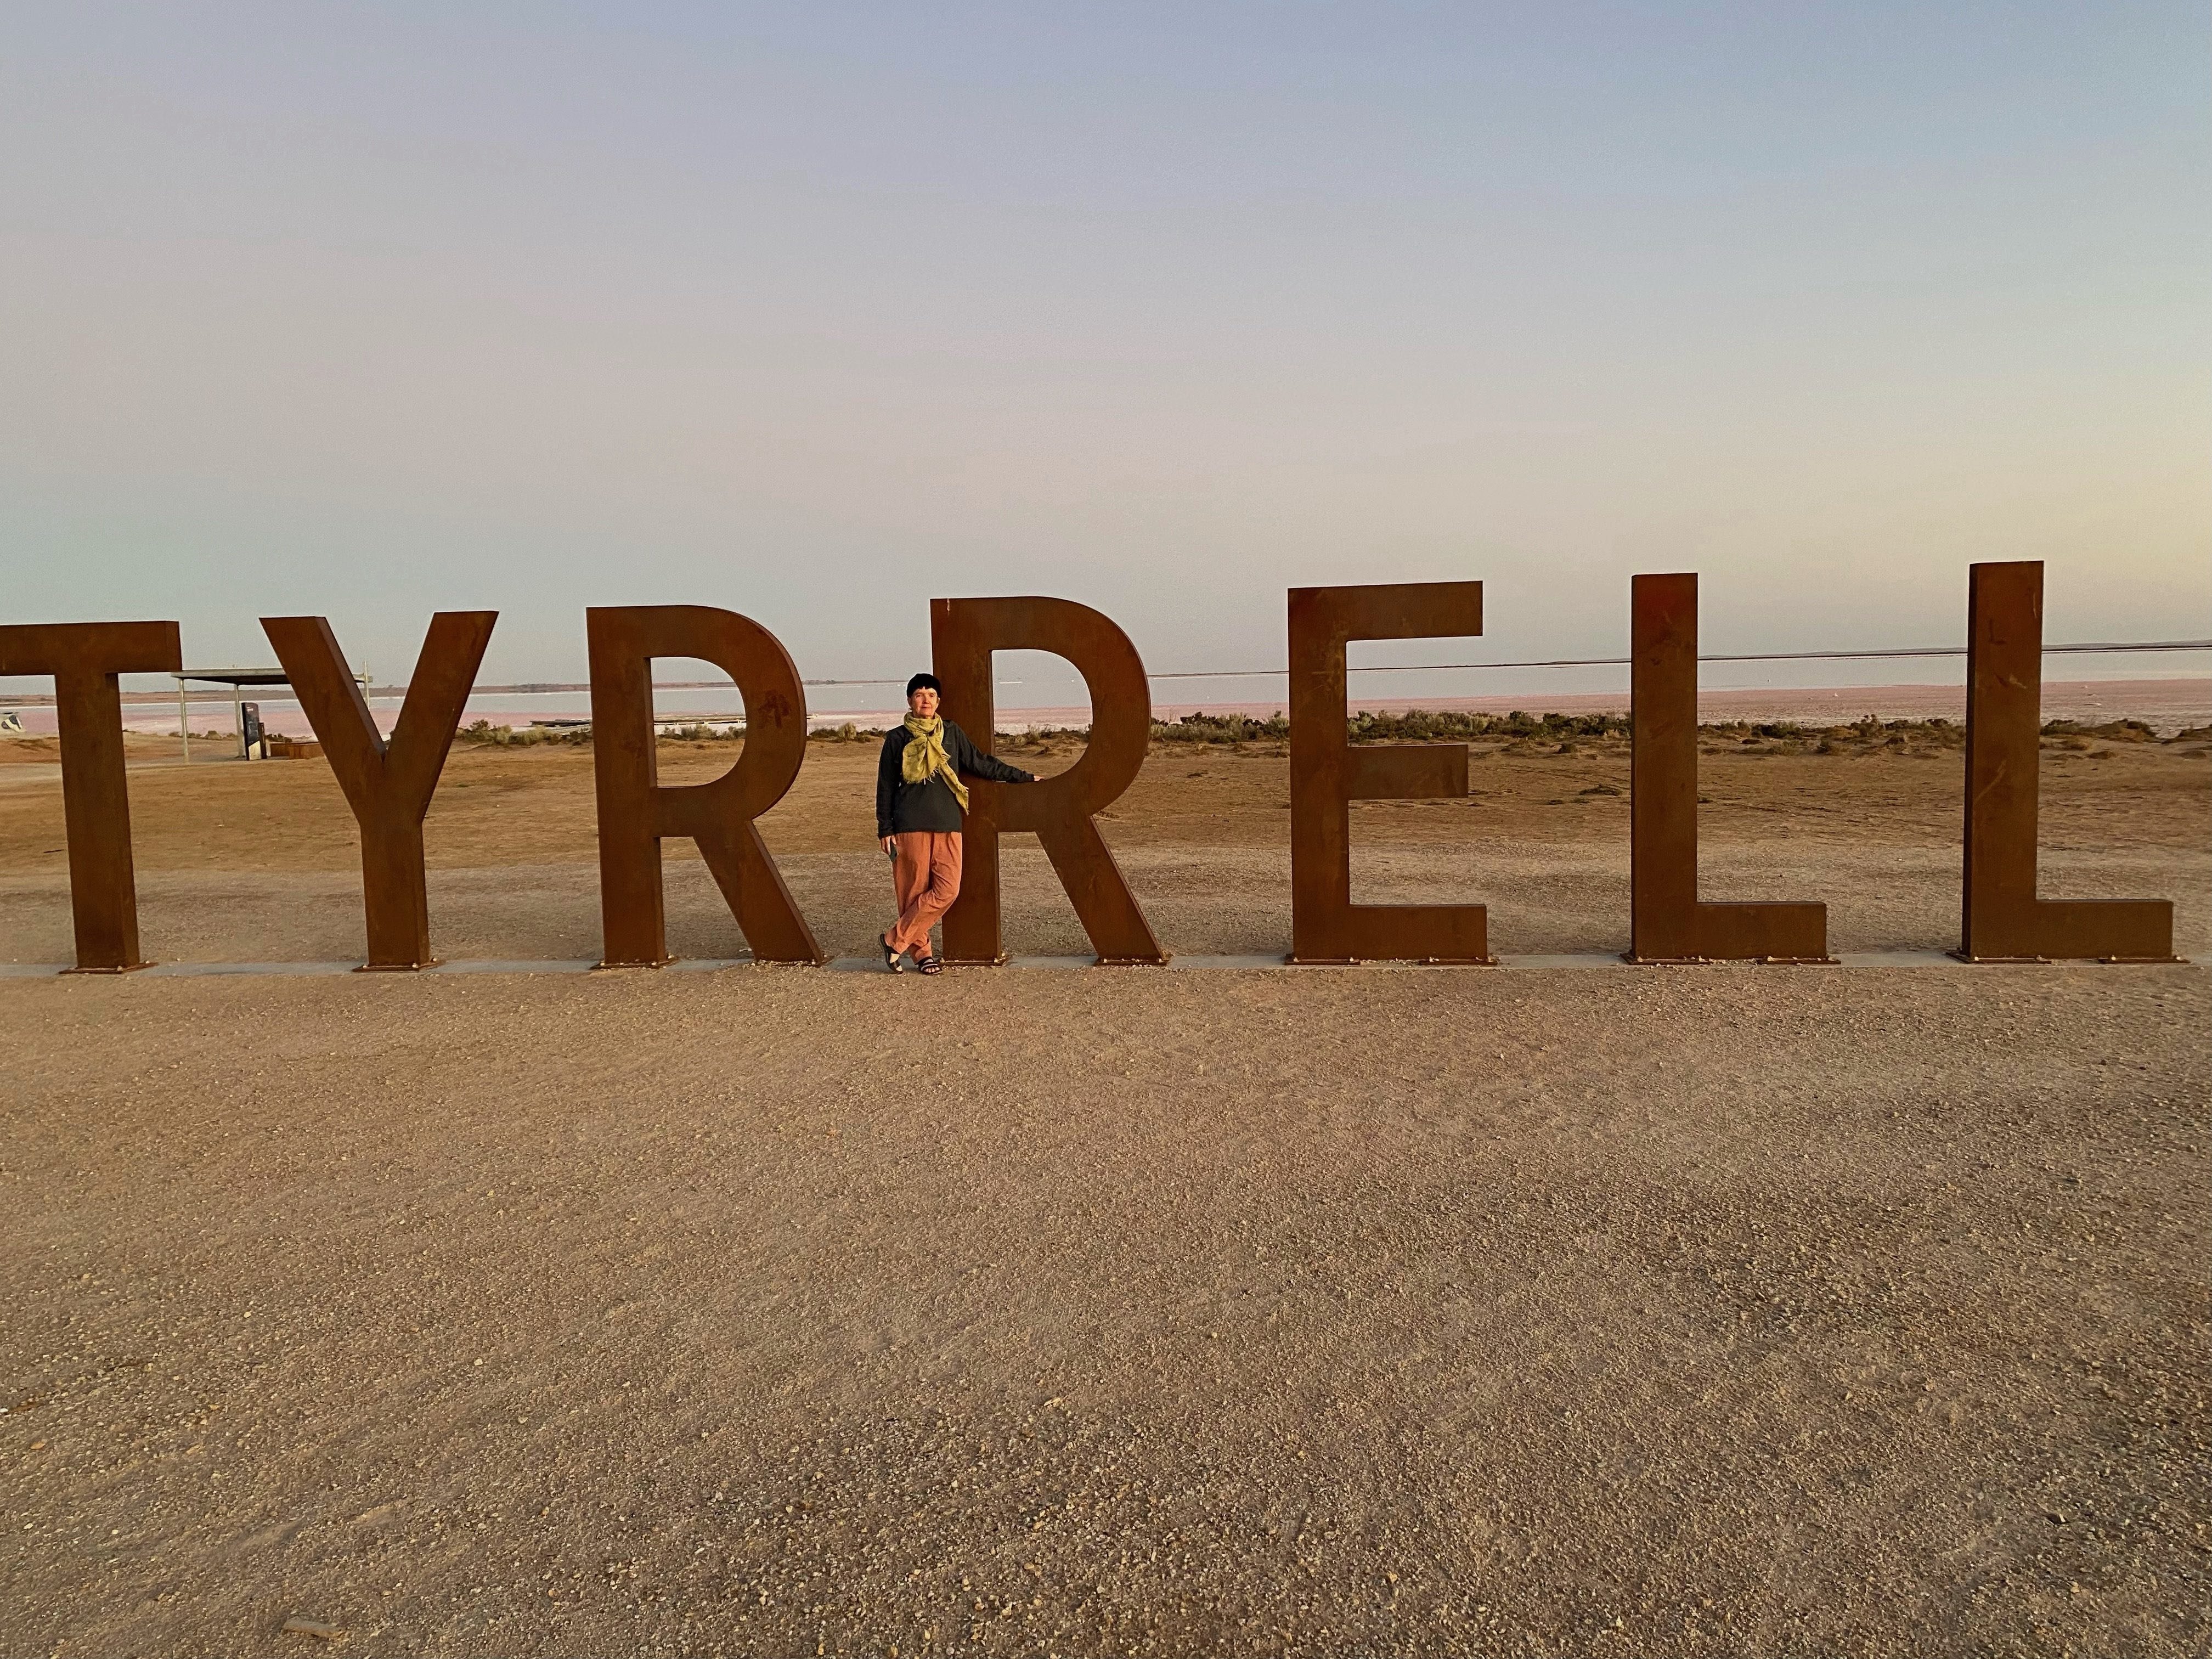
 Hi, I'm trying to modify the attached photo to "alter" the text. I can use text and distort it OK to appear to be the same perspective. What I'm unsure of it how to pick up the colours of the rusty steel in the original letters and paste them on to a standard text character. I understand how to use the colour picker, but that only samples a single colour of one pixel, not the whole area. Image attached. If I've not made myself clear, please ask.