larsbre
-
Posts
23 -
Joined
-
Last visited
-
 PeterPeterPeter reacted to a post in a topic:
Shortcut for applying macro
PeterPeterPeter reacted to a post in a topic:
Shortcut for applying macro
-
Sempervivum reacted to a post in a topic:
Shortcut for applying macro
-
Carmo reacted to a post in a topic:
Gradient from swatches for gradient map adjustment
-
LukeWatts85 reacted to a post in a topic:
Shortcut for applying macro
-
BeauRX reacted to a post in a topic:
Shortcut for applying macro
-
kirk23 reacted to a post in a topic:
Shortcut for applying macro
-
JoelP reacted to a post in a topic:
Gradient from swatches for gradient map adjustment
-
 larsbre reacted to a post in a topic:
Affinity Photo for Windows - 1.9.0
larsbre reacted to a post in a topic:
Affinity Photo for Windows - 1.9.0
-
Affinity Photo for Windows - 1.9.0
larsbre replied to Patrick Connor's topic in News and Information
You can download it at https://store.serif.com/en-gb/update/windows/photo/1/ -
Affinity Photo for Windows - 1.9.0
larsbre replied to Patrick Connor's topic in News and Information
Really great new features, I love a lot of them, especially divide blend mode for correcting color casts. Congratulations for this new version. I have two questions that might be answered: I have asked myself whether it is possible to use the astrophotography stacking option also for milkyway pictures with landscape in the foreground (like e. g. with sequator https://sites.google.com/site/sequatorglobal/ or similar software) or is it only suitable for deep sky photography as it is shown in the tutorials? Furthermore, could you comment on your plans with the timelapse function because this is a feature that I am really looking forward to and it has been within the betas and has been removed in advance of the release. Thanks for your great work again! -
Bryan Driffill reacted to a post in a topic:
Shortcut for applying macro
-
ESPR reacted to a post in a topic:
Gradient from swatches for gradient map adjustment
-
Hey guys, I really love to use Affinity Photo. One feature that I would love to see would be the option to select a gradient in the swatches panel as setting/preset for a gradient map adjustment layer. For example, using the color picker tool of gradient map to select a color in the swatches panel is very anoying and laborious.... If there is already an option or workaround for this, please let me know. Kind regards, Lars
-
- 3
-
-
Varying behavior of vivid light + high pass
larsbre replied to larsbre's topic in V1 Bugs found on Windows
Thanks Gabe for your effort. Any news regarding this? -
Frozen Death Knight reacted to a post in a topic:
Shortcut for applying macro
-
larsbre reacted to a post in a topic:
Varying behavior of vivid light + high pass
-
Varying behavior of vivid light + high pass
larsbre replied to larsbre's topic in V1 Bugs found on Windows
Thanks for your response, this gives a workaround for the moment. This concret example may be a rare special case that does not seem to be very relevant to many but in general: shouldn't the effect of a blend mode be independent from color depth? (And as far as I can tell, it did not matter up to now, at least I didn't experience this before version 1.8.2). So there might be a general issue in the code for blend modes that can have also other effects. Not sure, just a suggestion to have a closer look at.... -
Varying behavior of vivid light + high pass
larsbre replied to larsbre's topic in V1 Bugs found on Windows
Yeah, I know the other techniques for "high pass". Nevertheless, this was working properly in Affinity Photo without artefacts before, it is working properly in other software like GIMP or Darktable and is still working properly for jpeg files in Photo 1.8.2. Even if these "bizarre results", as you call it, are desired by Serif (I have high doubts that this is the case...), there should be the same artefacts for jpeg files directly in photo persona and raw files coming from develop persona.... -
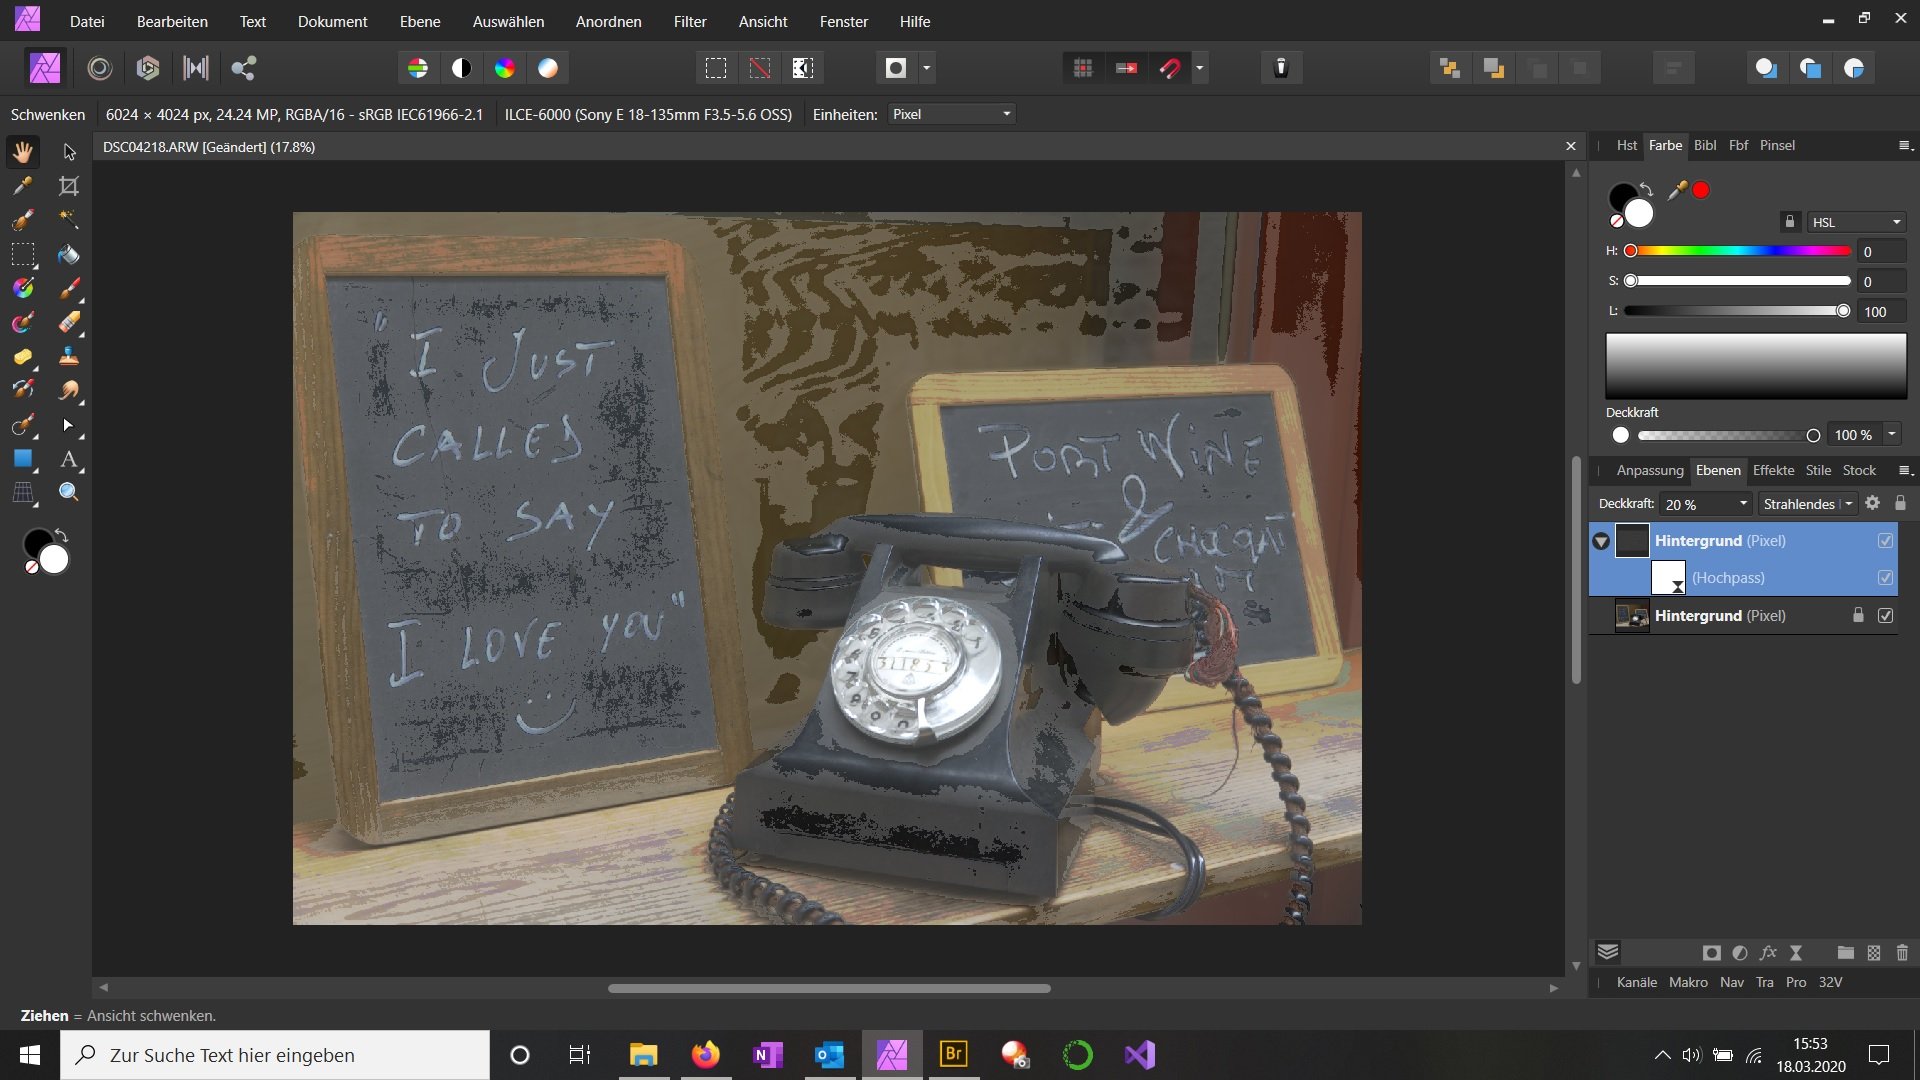
To increase the local contrast of an image, I apply the following approach in the photo persona: 1. Duplicate the layer 2. Set the blend mode of the upper layer to "vivid light" and the opacity to 20% - 30% 3. Apply "high pass" live filter to the upper layer with radius 100 px and monochrom checked This was working fine for both jpeg files and raw files coming from the develop persona for all versions before 1.8.2. For version 1.8.2 however, this leads to strange artefacts when using raw files from develop persona: Jpeg RAW I also tried a workaround by using only one layer (no duplicate) and applying the "high pass" directly to the lower layer using "vivid light" as blend mode for the "high pass" with the other settings (radius, opacity) as above. This works fine for the jpeg file but same unsatisfying result for the raw file. I have tested this for numerous jpeg-raw combinations and you can find 3 pairs attached. Images.rar

-
larsbre reacted to a post in a topic:
1.8.0.514 develop lens selector not working for manual lens
-
I agree with the comments above, the selector should give me full control in case of manual selection. Maybe for the automatic detection more data is required, but manual settings have to be independent from exif. I just used exiftool to give you some information to work with. Nevertheless, it seems to make progress. Good job guys, thank you for taking care!
-
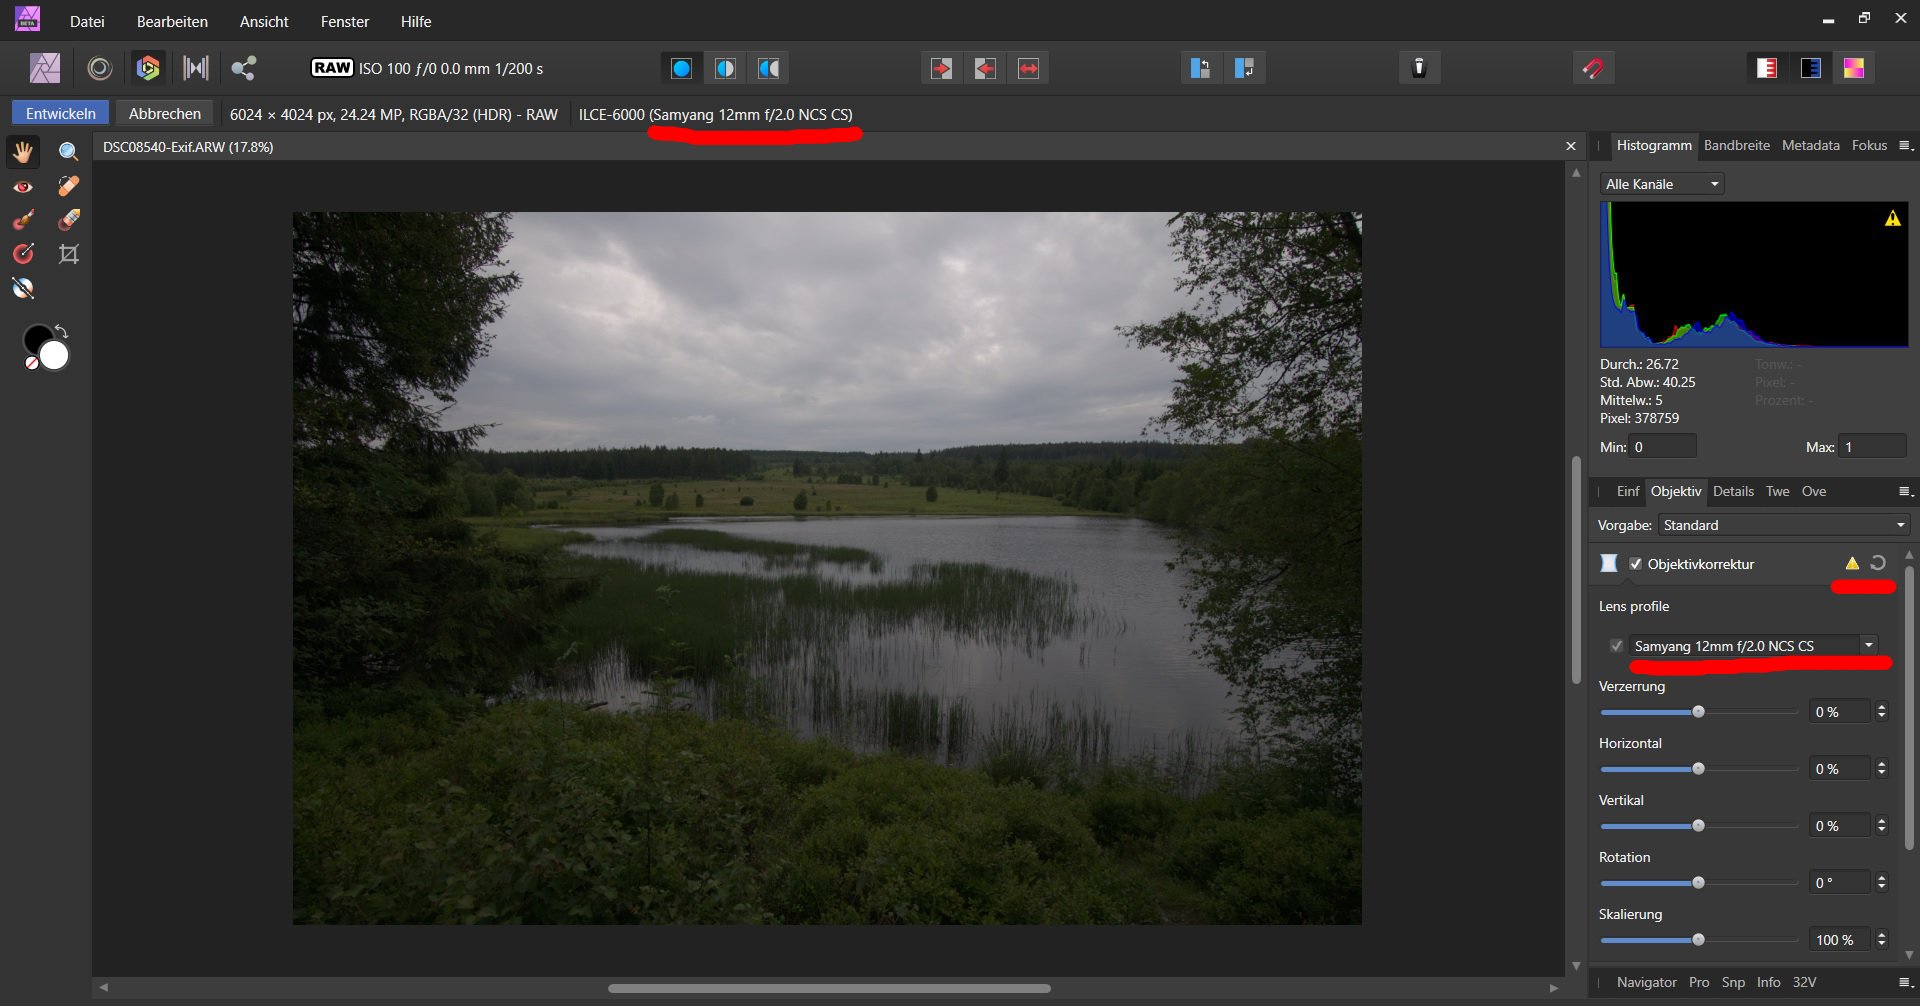
First of all, thanks for including the lens selector option in the develop persona. I really appreciate this tool and also like that you consider customer suggestions (not self-evident for every software company). However, I don't get the correct functionality for manual lenses like the Samyang 12mm f/2.0: When I load my image, I can select the lens but no corrections are performed and there appears a yellow sign in the dialog box. Updating the settings does not lead to any action, as well. I also included the name of the lens via exif-tool but this has no effect either. I have attached the raw files that I used (...-Exif is the one with the lens added by exif-tool) DSC08540.ARW DSC08540-Exif.ARW
-
larsbre reacted to a post in a topic:
Non-destructive RAW development (all RAW adjustments in separate sidecar file)
-
larsbre reacted to a post in a topic:
Non-destructive RAW development (all RAW adjustments in separate sidecar file)
-
RAW Files Complete Settings Save
larsbre replied to Jbrunetti's topic in Feedback for Affinity Photo V1 on Desktop
Yeah definitively a great feature that may also allow batch processing of RAW files! -
Is there a possibility for assigning a keyboard shortcut to apply a desired macro? This could speed up workflow significantly compared to clicking in the library panel...
- 29 replies
-
- 12
-
-
Yeah definitively a great idea! For now, a workaround is the possibility of using macros to reuse settings.
-
Lensfun Fun
larsbre replied to BiffBrown's topic in Pre-V2 Archive of Desktop Questions (macOS and Windows)
Any news on this yet? -
Lensfun Fun
larsbre replied to BiffBrown's topic in Pre-V2 Archive of Desktop Questions (macOS and Windows)
Same for me. Editing the exif-data manually has no effect for pictures taken with my Samyang 12mm. -
Saturation within develop persona not workin
larsbre replied to larsbre's topic in [ARCHIVE] Photo beta on Windows threads
Seems to be wokring for me now, great job guys!!!