

PaRunk
-
Posts
163 -
Joined
-
Last visited
Posts posted by PaRunk
-
-
Hello Old Bruce,
Thanks for your answer.
Yes I know this function. But it is much too complicated if I have to change more than just one contour. Therefore an additional function for reversing would be much better.
Above all, I know the function with the invert line from Illustrator. There it is possible to change the direction of the brush.
-
Hello,
a question about creating vector brushes: Would it be possible to use an svg file instead of a png file to create vector brushes?
From my point of view it would be a much better option, because I would like to create real vector brushes that allow unlimited scaling without losing sharpness.
This is very important for me, because I often create graphics, which I often have to enlarge in the end; sometimes up to a factor of 10 of the original size. Unfortunately, with the current vector brushes I often reach the limits of quality.
Of course I could draw my graphics bigger, but I usually draw my originals on A5- and A4-blocks. Later on, however, I want to use them much larger for banners and posters and must not lose any of their sharpness and quality.
-
Hello Affinity Team,
I really like the vector brushes in Designer. But what I noticed is that the settings in the brushes unfortunately only work if you use a graphics tablet. I find this a disadvantage compared to users who only work with a computer mouse and are forced to buy a graphics tablet.
Would it be possible to adjust this so that it can be used with a computer mouse?
I also find the function Pressure works differently than in the option window Strokes. There you can set your curve to get a very special style, save it (unfortunately only for the document you are currently opening) and use it even when using the mouse.
I would also like to have a few more settings in the vector brushes.
First of all there is the possibility to adjust soft edges, as it is also possible in the pixel brushes. At the moment I always have to add a mask with a soft edge to the strokes to get the desired result.
And as a second setting option to reverse the drawing direction. At the moment you have to set each brush so that the starting point is on the left and the end point is on the right. The Invert function is intended to change the starting point to the end point and the end point to the starting point.
At the moment I have to create each brush twice to always have a mirrored version. -
Unfortunately I cannot test this, because I come from the print media sector and have never had anything to do with CAD or similar programs and probably will not have anything to do in the future.
I have specialised in image and graphic design for the last twenty years. Of course I also do typographic work. Therefore I am mainly familiar with a large part of the programs that are standard in the printing industry.
I find the Affinity products, despite some missing and not yet perfectly working functions that I know from other programs, very innovative and in some functions much better than in other programs. This also includes this function. I had to get used to it and I don't want to miss this function anymore.
-
Admittedly it has been quite a while since I had used DrawPlus. Had bought it privately to be able to work at home from time to time. It was a cheaper alternative to the Adobe programs, because I am not a friend of the subscriptions.
Since Affinity's products have been available, I only use them privately, as an alternative to the Adobe and Corel programs.Furthermore I had also used this programme mainly for creating vector graphics. I had hardly used the function for cropping image elements and did not know that this function could also be used to create vector masks.
Nevertheless, I find the cropping function in AD much better today to be able to crop objects. Here I can create my clipping as I know it from image editing. And if it should be a path to create a perfect clipping, I can use the path tool.
-
Hello, Eddy-2,
I just opened myself in DrawPlus and looked for the tool. You probably mean the tool "Studio for cutouts"?
You can also do that in Designer. This feature in DrawPlus is a pixel-level masking, except that you can't see it in the layers palette, as it is in Designer.
To do the same in Designer, you need to switch to PixelPersona. There you will find the selection tools, with which you can choose the object you want to be masked.
After you have selected the object, you can refine this selection with the command "Refine selection", optimize it and then create the masking from there. The "Refine Selection" function is the new interface with the same and additional tools you know from DrawPlus.
I'm going to record a few videos to show you the function. Hope you can see everything and it will be a help to you.
-
Hello Eddy-2
yes, the description in the help is not that helpful if you are a beginner and never had anything to do with graphics programs. I also think that maybe you should add some pictures in the description, so that you can understand it better.
Otherwise there are the tutorial videos, in which I think it is described in more detail.
If you take a closer look at it, in Designer you even have up to four different types of masking that you can use.
There are the masking layers, which can be created based on pixels. To do this, first select an object you want to mask in the layer palette and then click on the symbol for masking layer at the bottom. After that you change to the pixel persona and can then use the brushes to mask areas on this layer with black and make them visible again with white.
Then there are masking types, which would be the same in function, that would be the vector crop tool and the one in your example with the green object. Here you create a crop. I would use these masking types mainly if I want to mask a group or a complete layer, for example to show only a part of an illustration.
The fourth type of masking would then be the cut mask, as in your example with the red object. Here the main object is used as a kind of mask. In contrast to the other masking types, the most flexible and most frequently used masking type is the one used in vector programs. It has a similar property as a group in which you can continue to edit all the objects in it, with the difference that all the objects in it are only visible in the area of the topmost object, which you use as a mask.
This would be a rough description of the different types of masking in Designer.
-
Hello Affinity Team,
I have a question: Could we perhaps add an additional function for the function Flow around text.I would like to have the possibility to use the stored selections (reference channels) in an image as well as a reference for text wrapping.
Such a thing is possible in the Adobe programs, as I can create and save several alpha channels in Photoshop and then select them in Indesign in the menu Text wrap around in order to use them as references.
The sense in this function would be, for example, if one fills an image on the complete background, but the text should not cover certain areas, but should flow around them, one could create these alpha channels or reference channels in advance.
Of course I can also create the shape by editing the path, but with complex motifs it takes quite a long time and I would have to layer the image several times to free the objects in the image with masks to get the desired result.
-
Yes, in AI the included brushes are all real vector brushes, these are created from vector objects. No matter if watercolour, coal or other brushes. All are vectors. You can see it best when you look at the drawn brush lines in high magnification. Then you can see the single vector areas.
Probably real pictures were used there, then converted into vector graphics and saved as brushes.
Of course, if you use these brushes, it will be visible at some point, even if the magnification is too high. But if you use them in real size or a bit smaller, they look like real brush lines.
But in AI you can also use pictures as a template for the brushes like in AD.
But because of the possibility to convert images into vectors in AI, you can convert them and use the flexibility of the vectors.
-
Hallo ra.skill,
yes, the pattern brush is also available in AI. Unfortunately I have not listed it here, because I have worked with it rather less. But this one would also be a brush that I might miss.
What is very important for me is that a vector brush can be created from real vectors, so that I can use the advantages of unlimited transformations without loss of quality.
It is also easier to convert these brushes back into vector objects, since there is no such thing as converting pixel to vector in AD.
When I am currently creating new brushes in AD, I have to create all PNG files in a very high resolution (at least 2400 dpi) to avoid sharp edges when enlarging.
In addition to this, with the current vector brushes I cannot create brushes where I can use graphics as objects that do not deform when curves are drawn, and where the object underneath is sometimes suddenly cut off when the curve is tight, which should not happen. To get around these problems with the vector brushes I have to use pixel brushes, but unfortunately this limits the flexibility of scaling.
-
Hello Affinity Team,
I am missing two special brush types in AD among the vector brushes, which I have used very often in Illustrator.
I miss the possibility to create calegraphy brushes. Maybe you could add these additional settings to the even brush tips (angles and roundness).
Then I'm missing a special brush that gives me the possibility to create created graphics into real vector brushes with additional setting options.
For the already existing vector brushes, which are more like bitmap brushes, where a bitmap is connected to a vector line, I am missing some additional setting options like direction scaling and mirroring. In addition, Illustrator also allows you to create vector graphics as image brushes.
In AI you can also convert all kinds of brushes into vector objects, which is very important for me. And the creation of brushes is much easier in AI.
I'm going to attach some videos from AI, where you can see which brushes and functions I mean.
-
Hi,
yes I know all videos that have been published. I find the way of duplicating actually very good. But when it comes to exact equal distances and enlargements, I unfortunately do not get the desired result with this method. You have to move and enlarge everything manually, which takes a lot of time. Especially if you want to create more than 20 duplicates at the same distance and resize them.
Therefore an additional function would be, in which one can enter all data by input and thus create a larger number of duplicates and stand in the same distance despite additional transformation.
-
Hello Affinity Team,
it might be possible to extend the function "Duplicate selection". I would like to have the possibility to enter the number of duplicates, the displacement (horizontal and vertical), rotation and size.
The reason for this is that in the current type of duplication I do not get exactly the result I want.
If I duplicate an object, then move it over the transformation window and change it in the size and duplicate it again, the next duplicate will be moved and enlarged, but not at the same distance and also the magnification is much larger than desired.
So, if I specify that the object should move 3mm and enlarge by 0.1mm, every further duplicate should move and enlarge by exactly the same values. But unfortunately this did not happen.
When I use the duplicate command again, the subsequent duplicates become much larger in distance and size than the values entered.
I attach a file, in which my problem can be recognized and how I imagine the result.
-
Hi MEB,
thank you for your feedback. Yes, I should have attached the files. Unfortunately, these were just tests and I didn't save them.
But I just tried to recreate the second file. This time the error is not in reducing the size, but in increasing it. I have created a picture of it and attach this and the associated file. -
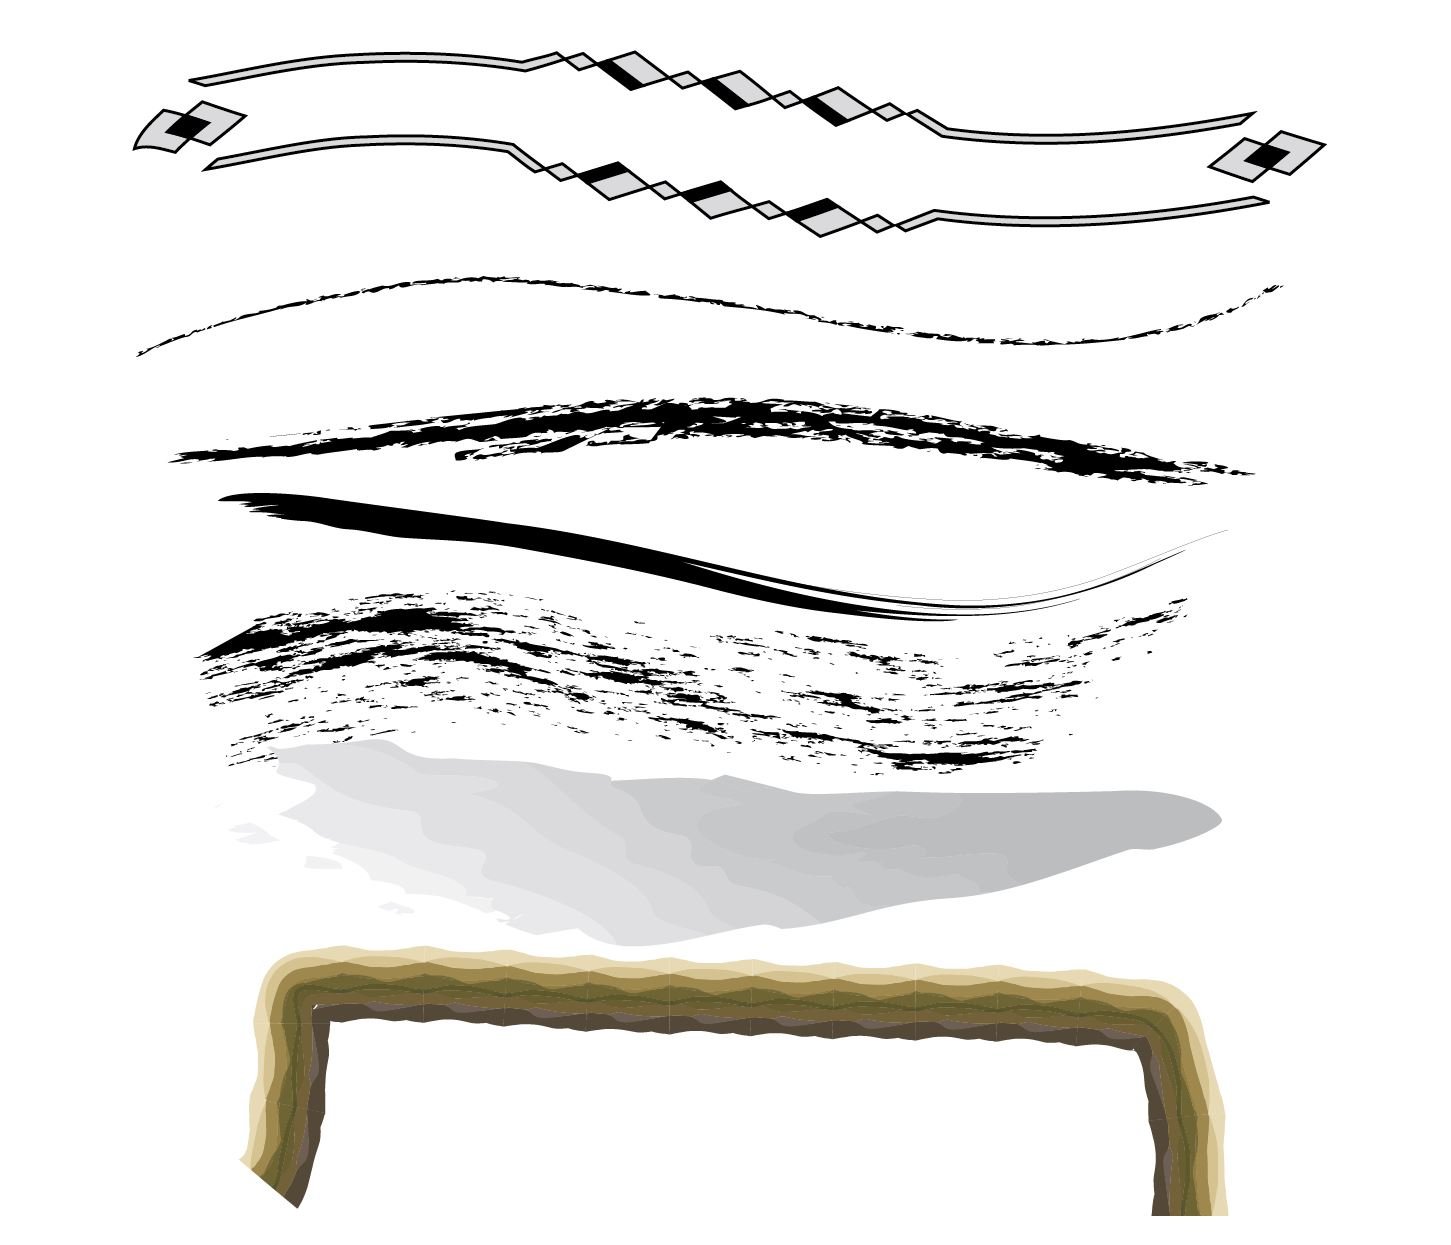
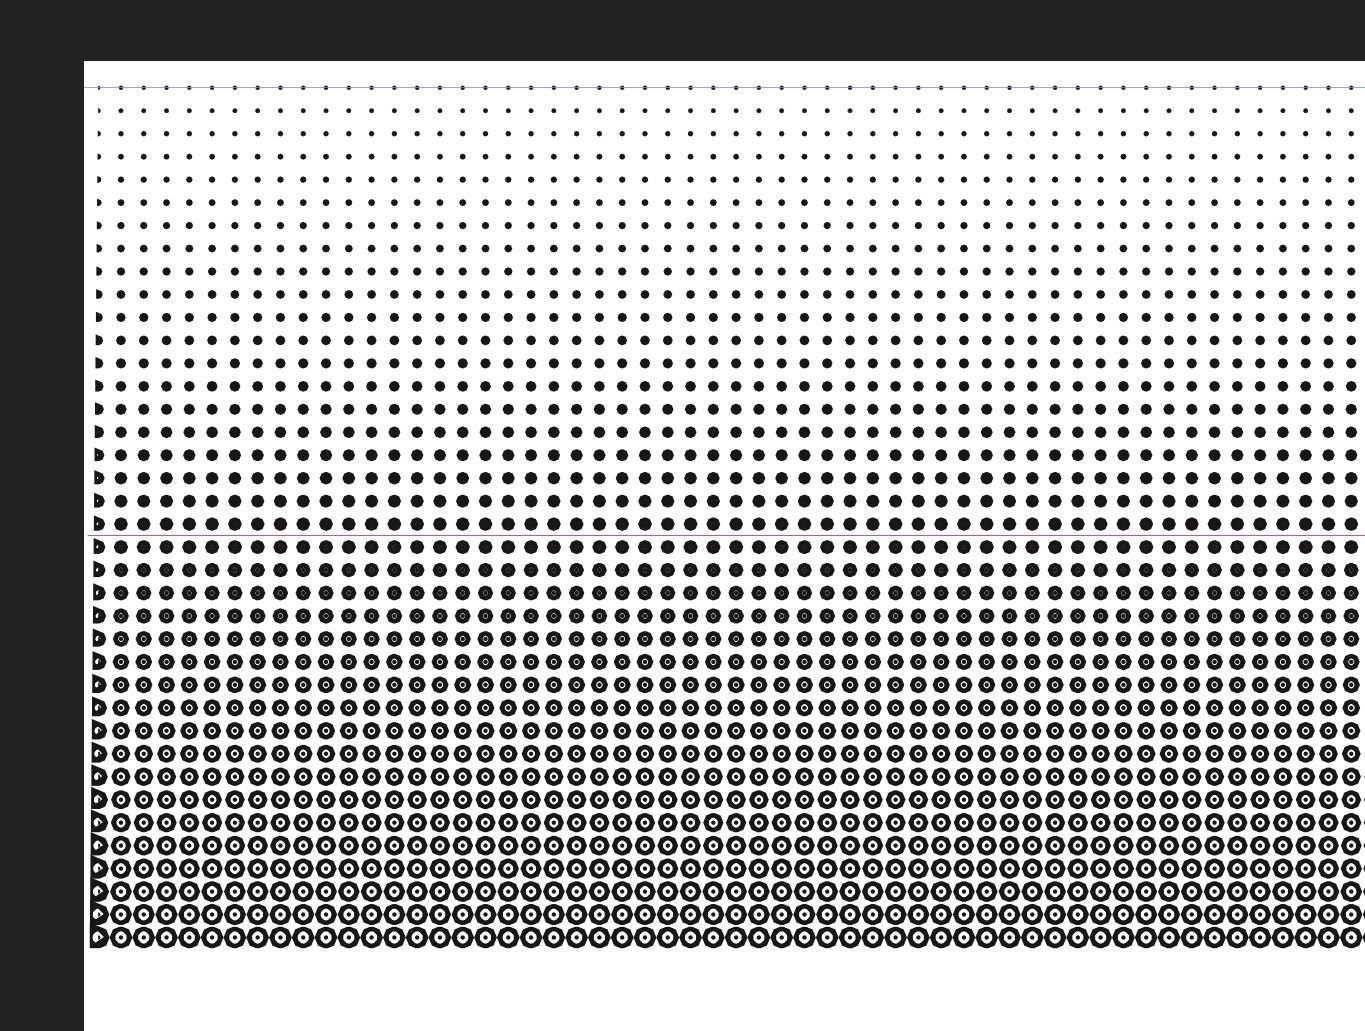
Hello everybody,
I was just about to create a halftone screen from vectors in Designer. But now I have a problem.
My approach:
1. I first created a 1pt dotted line.
2. I converted these to get individual surfaces.
3. Then I duplicated it (Ctrl + J) and moved it.
4. Then I created more duplicates with Ctrl + J.
5. Now I have started to give each duplicate a contour, which I have always strengthened by 0.1 pt.
But from a contour thickness of 2pt a distance forms between the surface and the contour, which increases further and further when I increase the contour thickness (see attached picture).
I think that shouldn't really happen when you're reinforcing a contour.
Put a pink line where the problem starts. I'll also enclose my file so that you can take a closer look at it. -
Here is another result with the wrong implementation of the corners.
This time I combined several objects.If I move the line outwards, it works. But when I move the line inwards, not all corners are implemented correctly.
-
OK thanks.
I just noticed and wanted to point out that this has not happened yet. -
Ok, I guess I got this mixed up.
I would have been really happy if my problem mentioned had already been fixed. -
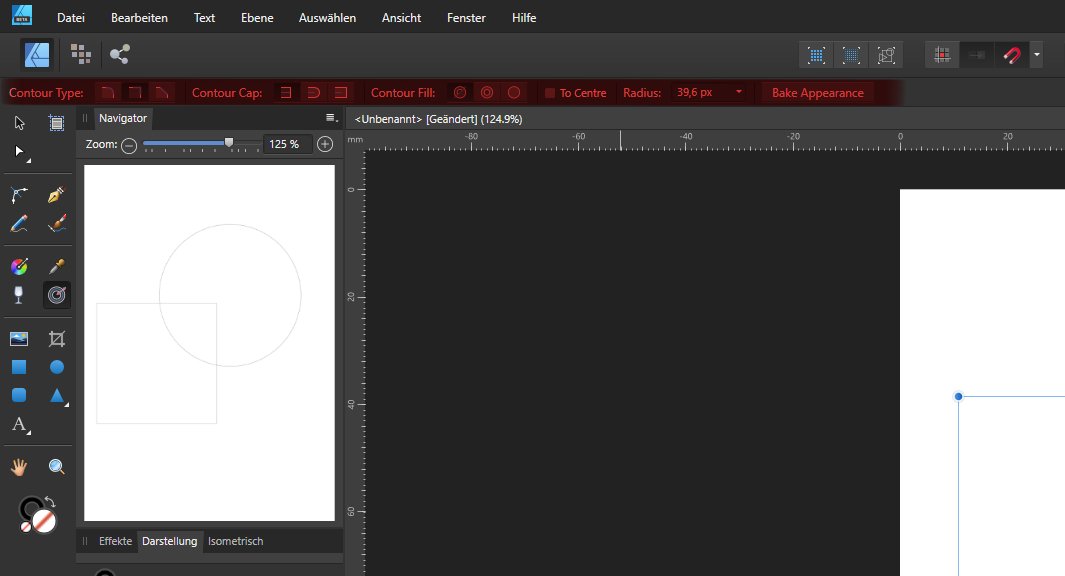
I just noticed that there is a problem if you select a different Countour Type, especially when you use the tool again, and suddenly other corner types appear at some corners. Sometimes, as shown in the video, there were no correct corners and before I had recorded the video, two corners remained round and the other angular.
The function that you create a clone by pressing the Alt key did not work for me with this tool. -
Just tested the new contour tool.
I like it very much. But on the one hand I noticed that the translation into German is missing in the context bar and below, where the key commands for the tool are located. -
Hello,
It's good that the Divide function has been revised.
Unfortunately, it doesn't work as it should.
Therefore I added three videos. Once when executing in the designer, which did not achieve the desired result. And the second video by doing the same function in Illustrator and getting the result I wanted.
In Designer I lose my contour object, which is also completely split up. So I have to laboriously combine all the surfaces again so that I get my contour line again or I have to make a copy beforehand and remove all purple and blue surfaces that I don't need after performing Divide.
In Illustrator, my outline object remains and there are no additional blue areas underneath. The remaining blue areas are then individual.
Tried another way to get the result you wanted (video 3). First I duplicated the contour object; I then subtracted the duplicate from the blue area and then applied the Divide command to the blue area. But then suddenly surfaces appear again on the surfaces that were previously removed.Actually, only the blue areas should remain and be separated from each other in order to have them all individually.
-
Hello everybody,
so so far I have not yet seen that this function is available in AD. I would also like this function very much because it is very helpful.
I find it interesting that this function in Draw Plus, which Serif unfortunately only developed for Windows users before the new development of the Affinity programs, existed. The same goes for the Shape Builder tool. However, these functions weren't really mature and didn't work quite as well as in AI.
I really hope these two tools can be found in AD soon and work just as well as they do in AI.
I am sure that we are probably already working on these and a few other functions that many users want, and that they will only be gradually integrated into AD when they really work properly. The development of all these functions takes time and there are still one or two problems here and there with existing functions that still have to be resolved. -
Hello,
just discovered another problem with this feature.
I once sketched a contour here with a pencil.
After that, I converted the contours to get surfaces, which worked fine.
I then merged these into one object, which also worked.
But now comes the problem. I put another area behind my contour graphic in order to get new areas with the Divide function. That only partially worked, the upper object, which should be the contour, has now been completely disassembled, which should not be.
If I do the same work in Illustrator, the upper surfaces are used as a kind of template and are retained for the same function. Only the areas below are divided up.
I'll attach another file, with which the problem described above has occurred.Have created two groups. The graphic above is the original version. The graphic below is the result of what was created after applying Divide. That is not the result that should arise.
Normally after applying Divide you would look the same as the graphic above, only that the bluish areas are now separate.
-
Thank you for your response.
Yes, I had no doubt that your development team can solve this problem. I can also understand that it is not easy to find a quick solution.
The developers are really busy and if you look at the reports in the forum, there are still several problems in all programs that they have to solve.
In addition, there are also many suggestions for improvement, requirements and requests for other functions.
I am also one of the users who supports you by uncovering problems and making suggestions for improvements and extensions.
I have been a big fan of your products for many years, because I see great potential in them and use them almost every day to implement my creative ideas.


Enhanced functions and improvements for vector brushes
in Feedback for Affinity Designer V1 on Desktop
Posted
Hi Hokisai,
the brush used by Old Bruce is located in the brushes acrylic paint But almost all brushes that exist in designers are not real vector brushes, but in reality image brushes. PNG images are used as a template, these are then placed on a path. Depending on how you make the settings. Usually the images are distorted along the path.
The only brushes that can be called real vector brushes are the even brushes.
I'm not sure if these are even included by default as templates. Otherwise you have to create them yourself.
Alfed's suggestion to first draw the line and then adjust the print line only works if you use the pencil or pencil and then white the desired vector brushes. I find this a bit cumbersome, but at the moment it is the only possibility if you want to use the vector brushes with the mouse.
With the actual vector brush the subsequent adjustment is not possible.
The real vector brushes, as they exist in AI and Corel, are currently not available in Designer. But I and other users in the forum have asked for them.