
ianrb
-
Posts
469 -
Joined
-
Last visited
Posts posted by ianrb
-
-
On 3/11/2019 at 8:00 AM, kaffeeundsalz said:
What does "Affinity needs to have something a bit more basic" mean?
Easy way to explain : Lightroom >click on the Graduated filter icon >drag out the tool the suit >add adjustments to suit . Many different graduates can be added to the same image. And yes; limited compared to Affinity but so easy to do.
On1: Works very similar; however because it is layer based there are more uses than my older Lr5. To blend two files together is so simple >two images as layers >select the tool >drag it out >adjust to suit >job done
It were three mouse clicks to add this simple grad to blend these files [how many clicks needed with Ap; if the user knows them all!!
That's what I call more basic / easier to use Ian")
To be honest; I tried to add a grad to an image late last night but gave up thinking a fresh mind would help . No! That's how I ended up back on this page . For some reason I never received a notification of your comment @IanSG (??)
Another good point with On1 is the larger layer icons -- so easy to see when compared to Ap as I suggested for Ap recently . The On1 way is very good IMO; limited in some / many ways to Ap; but I (and others) was experiencing too many dramas with the program so I moved to Ap. Now it's open I might add the grad there (eek sorry)
-
thanks for your honest thoughts @Wosven & @firstdefence-- not sure I like it much now myself
. There is certainly more of a story in the original edit. Was more about trying the Affinity Orton way as explained by James; and fiddling with those gradient tools
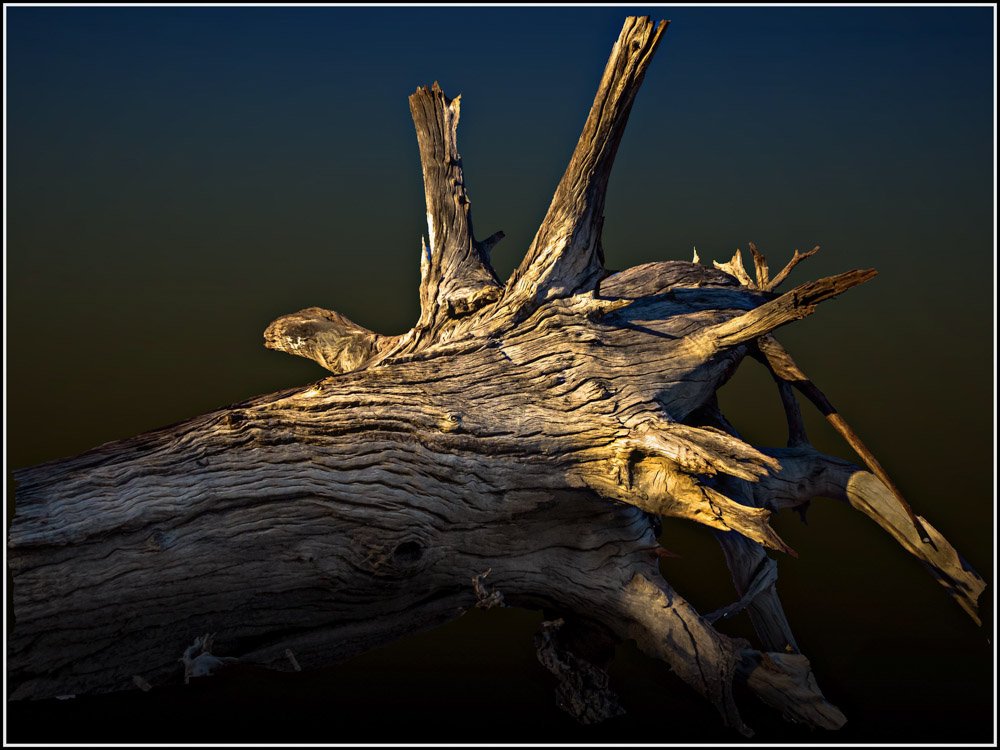
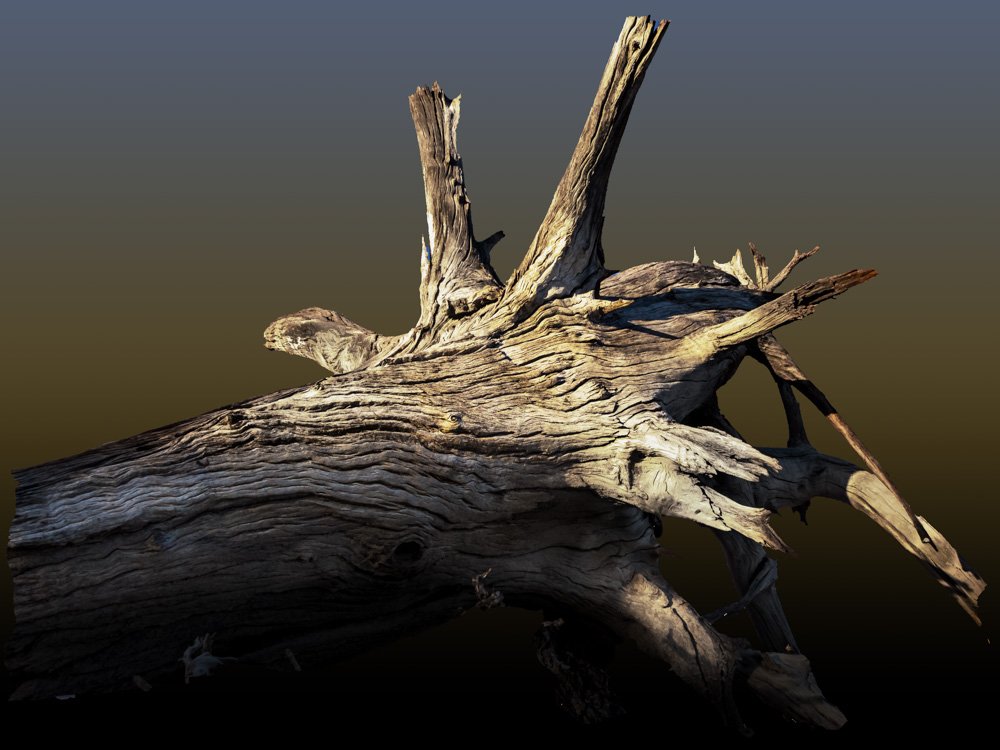
The area behind the dog is a salty and smelly water hole / lagoon / billabong off the Murray River. Extremely dry here for 18 month; however that log was under flood water a few years ago. I have recorded some amazing salt patterns there
I meant to mention the shadow under the log: >add shadow >duplicate layer >remove shadow from bottom layer >add mask to top layer >brush out the top layer to leave the still adjustable shadow
wish I had and knew these tricks 30-40 years ago --- I had a mini lab then
Cheers -
5 hours ago, IanSG said:
I found using the gradient tools was one of the least intuitive things in AP, but once the penny drops it's an amazingly powerful tool - maybe this is a case of no pain, no gain?
Thanks Ian . That's why I have not bothered too much with the grad tool -- not sure it was much easier to understand in the older Ps apps. Not a tool I use a lot outside of Lr5 unless I'm feeling very motivated to adventurous; or totally bored :lol:
Something like the very easy to understand / fast to use On1 2018 layers Masking Bug would be great ( hint hint Serif ;))
And yes, @firstdefence's instructions were the best help I had. -
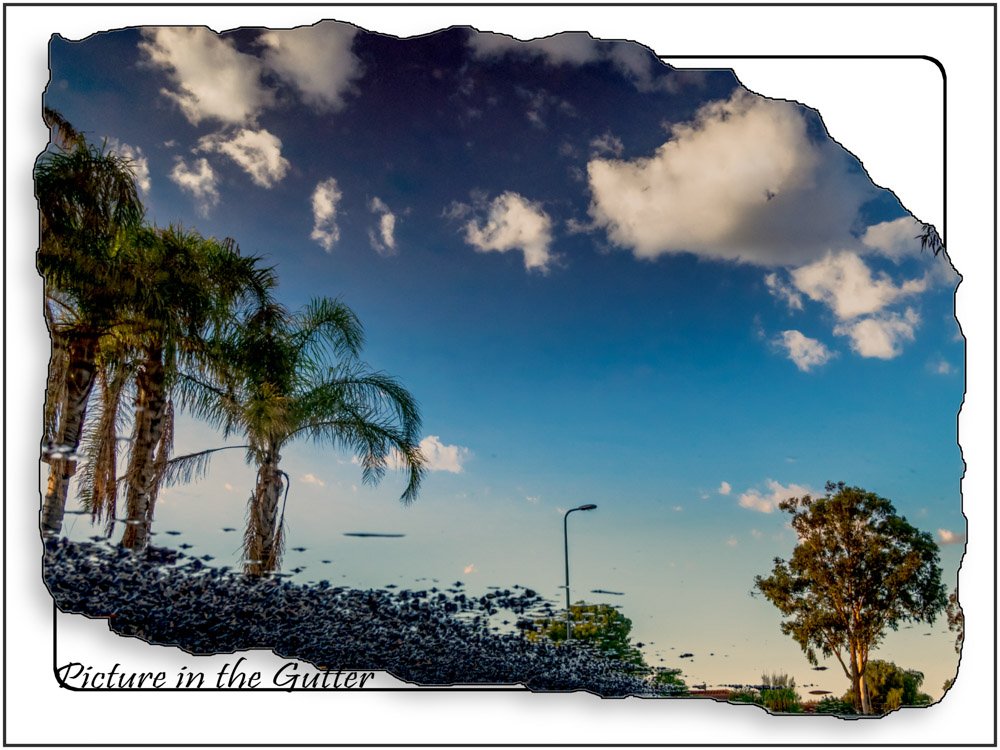
bit of spit and polishing ; and still ''without care in the world''1] original raw file -- just as well I have some idea about editing
2] as edited yesterday3] orton effect and background colours added in Affinity (yep; used the graduation toolPana Fz300
I have used the Orton effect for years and there many way to do it; however this is based on James's video click
Little trick to add shadow under log ONLY >add FX shadow to dog/log section >deplicute >remove Fx from bottom layer >add mask to top layer >brush away top layer to leave only the bottom part of the log and the shadow --- something I taught or perhaps retaught myself today .
You could paint in the shadow but that didn't work for me
suggestions comments questions welcome- Lovemonkey and John Rostron
-
 2
2
-
-
7 hours ago, Dan C said:
It sounds as though this may be an issue with Lr5, as the image is sent from one app to the other, it may be being compressed etc in order to be transferred.
Thanks for your thought. I was wondering similar --- never noticed the difference with other apps like Pse12/nik/acdsee/coral (???)
-
As posted on the Affinity FB page
Without mentioning everyone; many thanks to all above. Sort of sorted.
As with Ps; sometimes the "powerfulnes" overpowers the basic needs of many users.
And yes my friends ---- everything is easy ---- once it has been learnt and understood .
I still feel Affinity needs to have something a bit more basic --- grab it / drag it / edit it as is used in my older Lr5 and On1.
ended with up this for no other reason than I wanted something different; not that I have any really need for the file. Photography is just something I do these days for something to do .
Cheers
-
Curley one for the weekend -- I have had similar problems with On1/Lr5 so this is not only an Ap/Lr thing. But still as had to explain / show
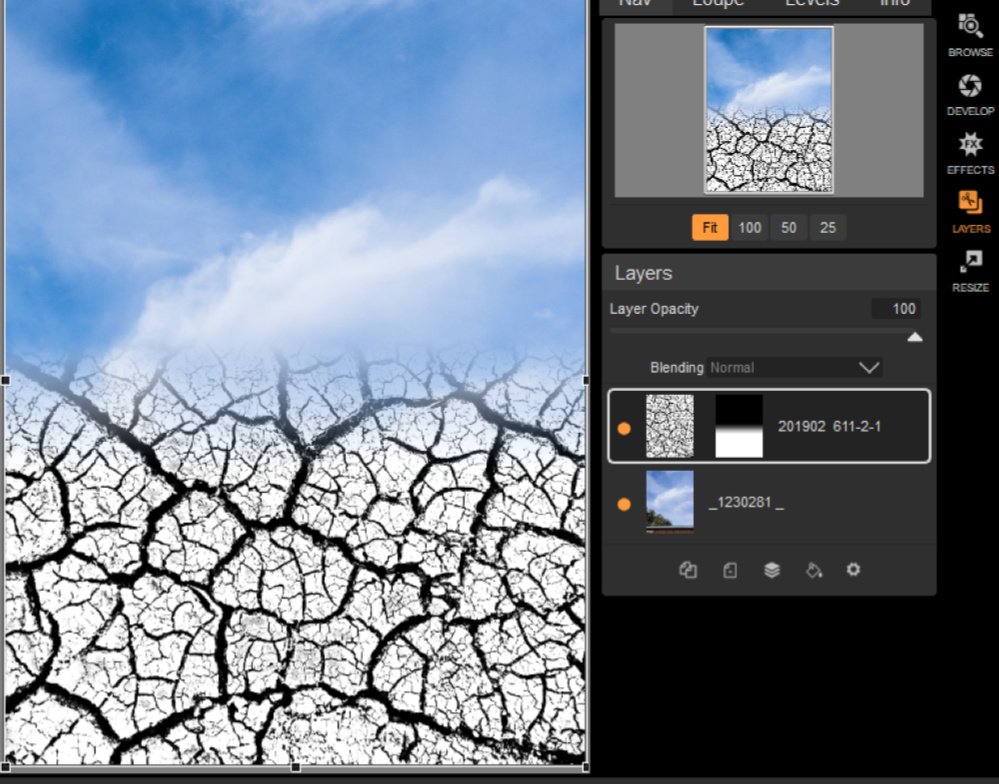
When a LR edited raw file is sent to Ap (edit in > photo); the image on the Ap screen looks grainier . However the 16bit Tiff in Lr does not have that grainier look; not even when saved back to lr . It seem just a screen thing
These screenshots sort of show the problem
Any ideas?? -
James will show you some modifiers
-
Thanks for the ideas and thoughts
LOL (not) ; just a few minutes in On1 2018 and I have more or less as I had in mind but I'm totally worn out trying in Affinity . I'm thinking Affinity would have more adjustments but On1 wins the basics battle hands down even if Ap is winning the overall war.
I get it sort of right in Affinity but then cannot do it again . Hopefully Affinity will be looking at better ways to do such a simply edit
Tomorrows is another fresh day; I will follow the above instructions then -
Bit of a long coming rant
Is it really that hard / completed / confusing for others or am I just the dumb one ?.Other programs like lr and on1 make it so easy even if I haven't use On1 for ages and have likely forgotten how it worked.I call the whole grad tool thing "best to leave it tool" as i did with Ps programs --- easier the paint in / mask in the files or coloursJust seems impossible to make an easy transparent gradient to blend 2 files together or add a colour or adjustment to say one edge .Honestly; videos I have seen tend to jump in at the deep end or don't mention a transparent gradient
I would really appreciate it if you can explain the basics of making a simple transparent grad in Affinity Photo.
Cheers
-
Got it now; all makes sense
many thanks -
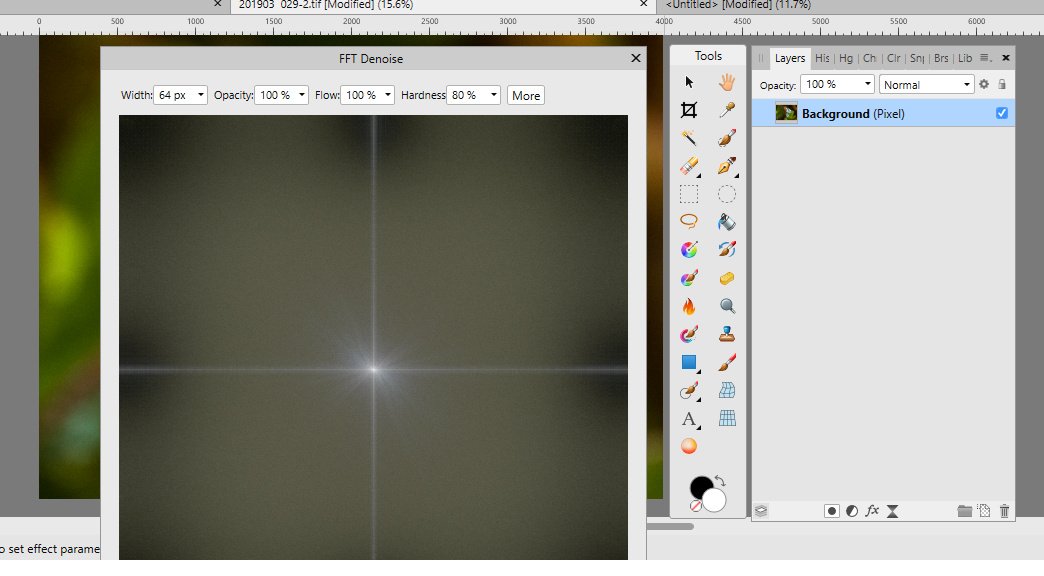
Thanks for the the replies --- since posting I have had to reboot the computer as Affinity was crashing and now I can enlarge the pop-up window with Ctrl + scroll; however I still only get one dot in the middle as in the screen shot. I cannot get the multiply dot as in the video or ''zoom out to get more dots'' . Have tried an older noisier file / zoomed into image with no joy
My pop-up window still seems far larger than in the video -
I find the blue tick boxes a bit too small and hope they could be enlarge to around the size of each name panel
If I can do it Serif can do it
-
What am I doing something wrong --- watched james's fft denoise video but I cannot get a similar window to his. My panel is very big -- just realizing that I do get large similar panels [blend range) most of the time
How do I ''zoom in" as James puts it
SS of my screen
Cheers
-
this could be a photo taken by any tourist visiting the Lock on the murray river, although it's very unlikely they didn't use raw capture so their photo would somewhat edited off the card
My edited photo did not really work for me so I decided to move and enlarge the ducks
Not a hard edit once you have an understanding of layers and layer masks
These are only a guides to tools and settings
> duplicate the layer > select top layer > use the hand selection tool around the ducks leaving plenty of space > move the selection to suit > enlarge if require (needs to look normal) > feathering will help blend it in > add a layer mask > set very soft brush > 50% opacity > brush around the ducks with the black brush so the birds and water blend into the main image > using a lower opacity brush will make it look more natural .
That's about it. Nothing has really be changed as everything was there. Just making a more appealing photo, or momento of something seen.
Very often the "way it was" can be very boring . Horizontally rotating the file is another to change what was there.
tips and shortcut > I usually make a duplicate layer before doing anything > duplicate > move the locked layer to the top > rename "spare original". Great way to check your progress or duplicate again if needed for whatever reason in the edit -- a macro/action is handy
Brush tool B >> set white and black Alt+B >> move (layer) M >> to enlarge the selection at the same ratio Hold ALT while dragging corners >> Brush Opacity 1/2/3-8/9/0 >> duplicate layer Ctrl+J >>
Your comments suggestions questions welcome
Yep the file has been rotated -- if I didn't show you and you were not familiar with the area you would never know
If readable, the houseboat name could be removed or flipped back
.
-
While have you online; could you explain forum notifications?
sometimes I get an email (as requested), sometimes I get told only when I open the forum, and sometime like this thread I get no notification . Yep; I did click follow but after submitting
The "notify me of replies" is ticked and green at the bottom of this panel
As for the annoying stroke line --- just file it in the "annoying box" until the problem is mentioned again by someone else
-
Thanks 1stdefence -- "upload the file'' (??)
I have likely deleted all but the original and new edit --- Sorry . I will play around and see if I can make it happen again
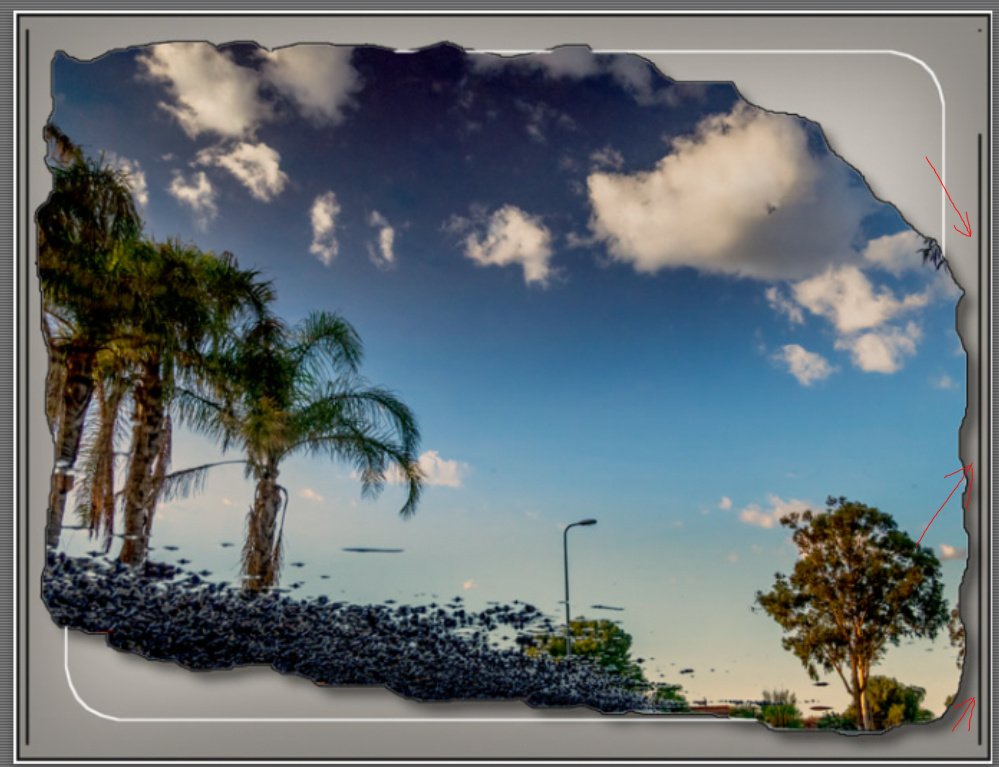
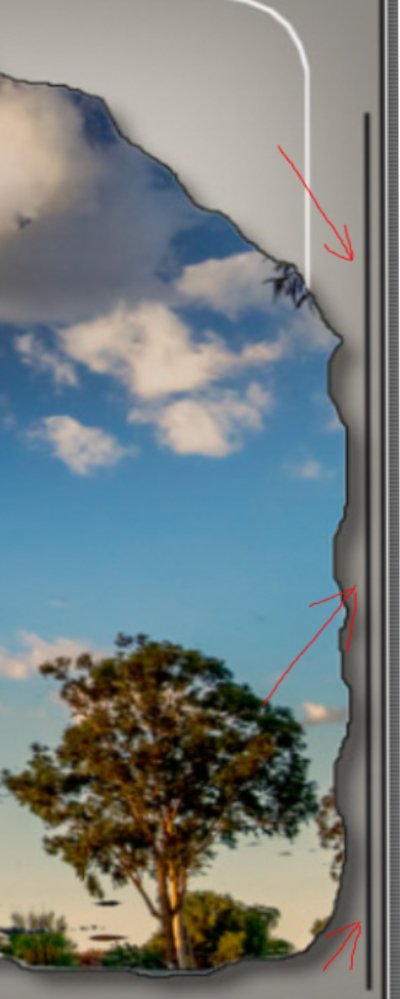
I have a feeling the line could be part of a deleted (unclicked) Fx outline (plus shadow???) around the original file . As I said, I did a lot of fiddling around with different ideas however that doesn't explain why the line is not on the re-saved Ap file but still shows on the saved win/lr5 file.
This is a re-edit just to see what happens -- no dramas at all but it was a far simpler edit -
in lr5 and win10 I have an unwanted stroke line as marked in image 2 and enlarged in image 3
There is no stroke line showing in Ap -- Image 1 is the Ap screenshot
Turning off layers makes no difference. Some layers have been deleted
I did end up with quite a few layers --- there may have been a program crash (or 2 ) during the editing (??)
More of a mystery than importance to me
Cheers
For IT "wizzkidz" --- 2 things I have not been able to adapt to not having is a smart brush, and not been able to adjust brush sizes with the scroll wheel .
I'm dreaming of the next Ap version having both! . But scroll wheel is #1 --- Please!
-
I would find it helpful if each new thread needed to have the actual version/program as a tag. No point for the likes of myself with Photo only looking too much at Designer threads
Cheers
-
-
Not sure if this is an answer for the above
Make a selection -- say a square > select > outline (near bottom of list) > set the required width (hold cursor over window and use scroll wheel for narrow strokes) > fill with colour. Lower values of width may not show until ''apply'' is clicked
use a new/separate layer so it can be edited
questions / comments welcome
Cheers
-
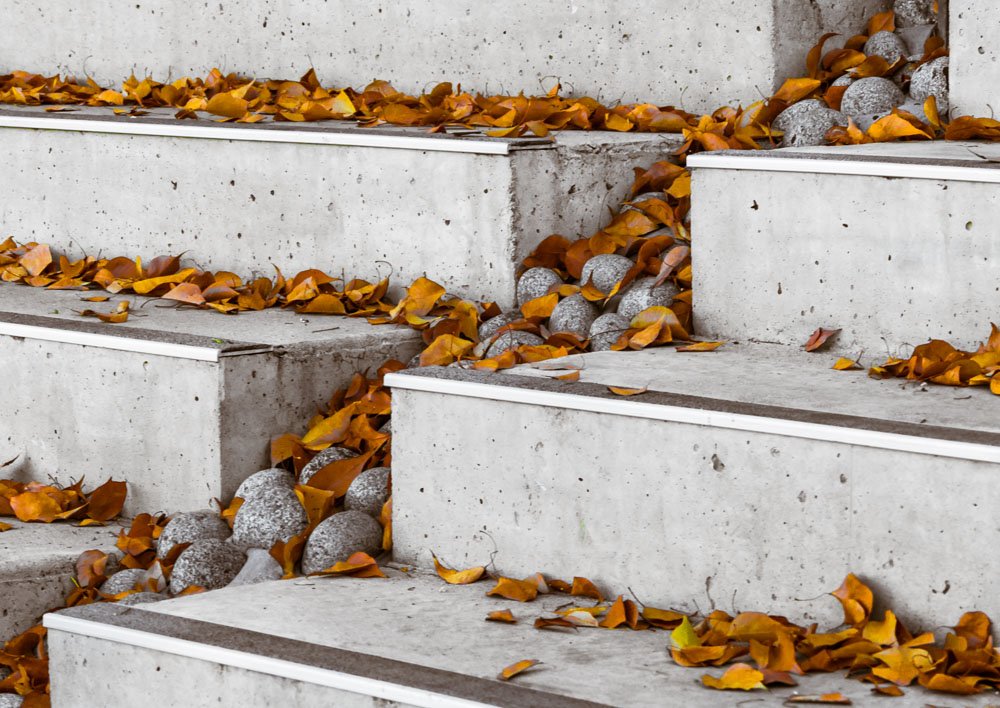
best or better way to select the leaves and mask out concrete steps? -- not sure where it will be going after that (??) Thinking I need more leaves (??)Links ??
Thanks for looking in -- 2nd pic is why the brain is not working atm -- expecting 46c wed; 45c thurs 45c; fri a cool 39! Record here is 46.9c or 116f !!
-
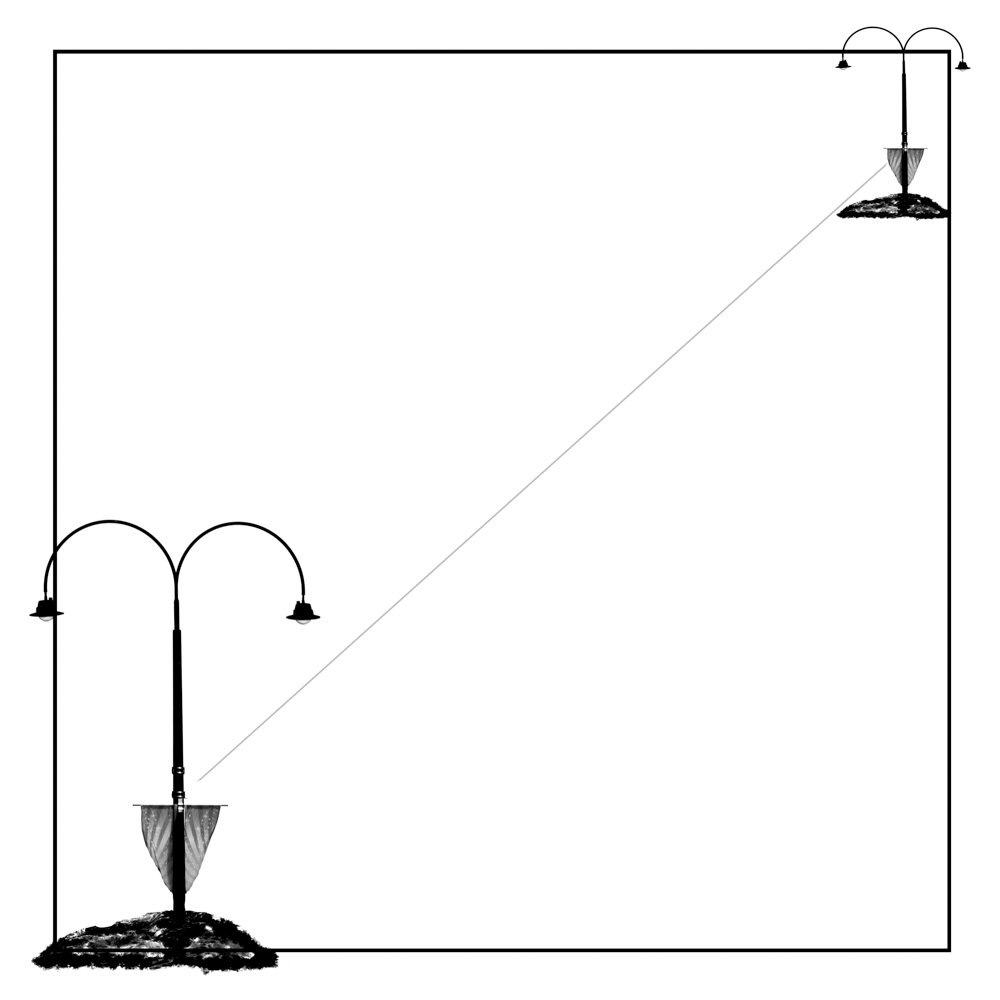
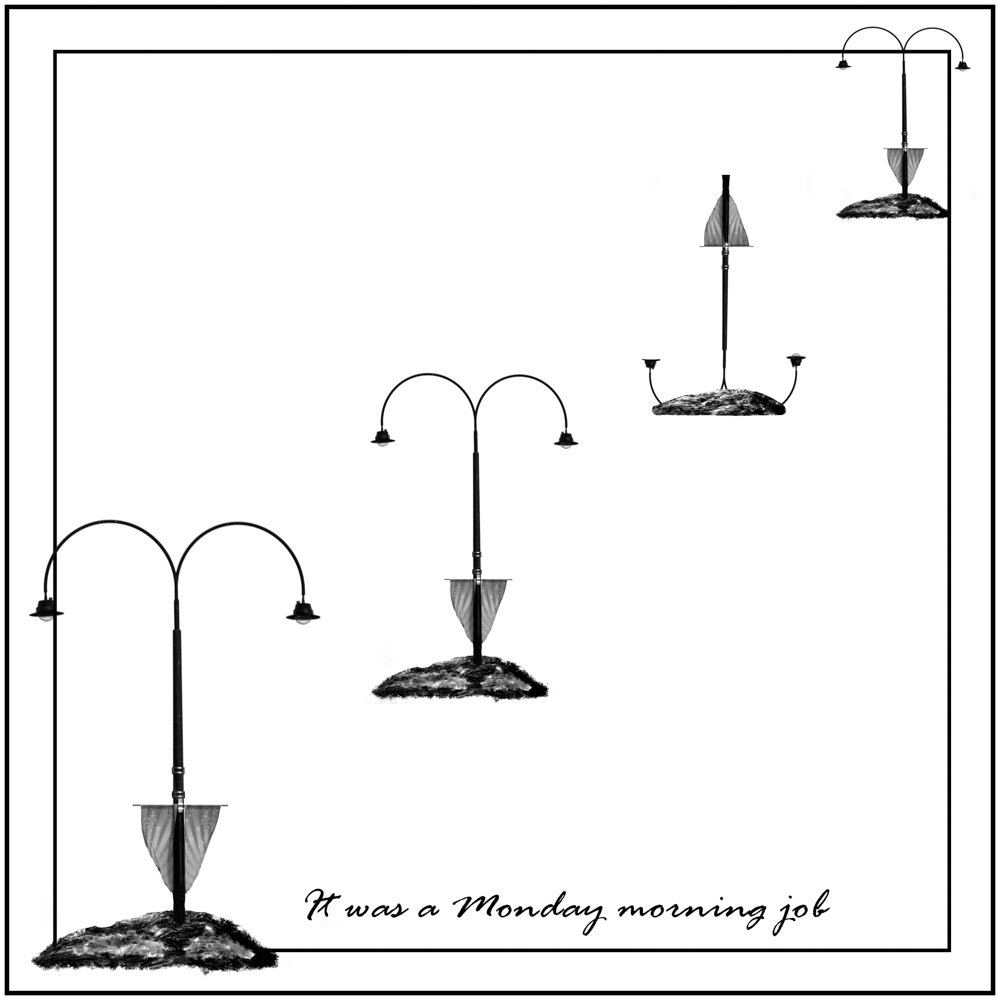
And how the light pole from an earlier "Inpaint brush" thread was used.
Sharing more the ideas than the how it was done which was more a guessing as I go learning exercise, however I'm happy to answer any question when I can . "string line" is another variation while I was playing around.
Pana Fz300 + Affinity photo
Whoops; they ended up wrong way round
")


Transparent gradient. ANSWERED thank you
in Pre-V2 Archive of Affinity on Desktop Questions (macOS and Windows)
Posted
No; very interesting. Thankyou")