user_0815
-
Posts
385 -
Joined
-
Last visited
Everything posted by user_0815
-
 For these things I use a rectangle as a mask. If you fill the rectangle with a gradient from a Color o transparent, it will have that effect. You can adjust the gradient in the rectangle anytime by selecting the rectangle and then switching to the gradient tool.
 -
Problems printing processed photos
user_0815 replied to Jhjennings's topic in Desktop Questions (macOS and Windows)
Yes of course, the user should know how the printer works. If I knew the printer's profile and that it accepts cmyk without converting, I'd try that first. When in doubt or if I didn't have the printer's profile, I'd send it as RGB. -
Problems printing processed photos
user_0815 replied to Jhjennings's topic in Desktop Questions (macOS and Windows)
IMHO no need to re-do the entire editing in cmyk color. An over-simplified explanation for color profiles is that they are an instruction for a particular device, how to present the color information. You can edit in RGB, which makes sense since a monitor works in RGB (red green blue pixels). For printing, you should export as cmyk as the printer works as cmyk (Ink: cyan, magenta, yellow, black). On export, define cmyk in the export menu and convert to the particular "profile" for that printer you intend to use. (Most printers kan convert RGB images in to their own cmyk profiel on the fly.) In your case it is quite possible that you edited for a good look on your old display. If that display now has a colour shift or some kind of imbalance (not calibrated), you might have editied to counter that. The printer does not have that shift or imbalance, so the image will look different. -
Glare ray reduction
user_0815 replied to ms.fuentecilla's topic in Desktop Questions (macOS and Windows)
Usually for this stuff the Curves or Levels tool works well by using a large soft brush with a very low flow around 1-5. Painting it in takes a while but from my experience it gives very good results. Another way is to use the clone stamp tool in different blend modes like luminosity, saturation, colour or hue. But that can get a bit tricky in some areas. Sometimes it makes sense to combine them. -
In my experience, at this time none of the ai selection tools are as good as a well done human made selection. Nether in Affinity nor from adobe or apple. The results also depend heavily on the individual image, the subject, the background and the lighting. Sometimes I use them to get a quick rough selection but usually it's "better" to use the selction tool, flood fill or pen tool and optionally refine it. The more you use them, the quicker and easier it gets imho.
-
Thank you for uploading that video. Now I understand your request much better. The way you can do the resizing is almost the same. (see video attached) Open the resize menu (Document > Change document size) Uncheck "Resample" and type in your calculated size (or the factor x 0.783 whichever you prefer) to the dpi or Millimeter Click on "Change document size" to confirm. The image on the screen does not change visually but the measurements in mm and dpi are adjusted. Regarding the measurement I could not reproduce any wrong results. Neither did I encounter any errors in this regard in the past years using Photo almost every day. However, getting the pixel dimensions of the wheel is just identical as you are doing in in PS. 1905-.mov
-
I would be interested in that and if possible please leave a post here so I won't miss it. Also please attach the original fle you are measuring from, so that we are measuring from the same data. (Grabbing a screenshot will result in different measurements.)
-
Problems with blotchy whites once exported to jpg
user_0815 replied to Keve's topic in Desktop Questions (macOS and Windows)
I have never come across this kind of issue. However, have you tried using a softer brush for inpainting, cloning etc...? It might avoid these sharp edges. These edges are also visible at the edge of the flower (white on green). Personally I'd do less sharpening but add some clarity to keep a crisp look. Clarity is basically just a form of sharpening but with a larger radius. So other than the clarity adjustment you can also use unsharp mask whith a large radius like 10, 20 50 or 100 px depending on the desired look. -
I assume you have checked to embed all fonts on export. To get around the missing text, you could adjust the export settings to not embed the fonts but convert them to curves. That doesn't solve your orignial question but might let you continue your work for now. (Current devices like iPhone should still be able to recognise and copy that text if you need that.)
-
Why is some text black and some grey
user_0815 replied to BobD's topic in Desktop Questions (macOS and Windows)
The upper text has a 0.2 pt white stroke applied to it. -
Loading RAW file of photos into Affinity Photo 2
user_0815 replied to Fuji 1's topic in Desktop Questions (macOS and Windows)
I have done panoramas with up to 50 raw files without crash or overly long lag. No idea why you can’t have 20 raw files open. Sometimes I do work with multiple files open with several GB each, so Photo is actually capable of handling large amounts of data. (M1 max, 64Gb) one lag issue I had was related to the Info panel. If that is open and live filters are used, photo would take minutes to process anything. But I don’t think that applies to the develop persona when opening raw files. -
If you bought it in the Apple App Store within 14 days, try to get a refund. Go to the App Store in the section purchased apps. There you can click on „report a problem“. You don’t need to state a reason, just apply for a refund.
-
Fully agree. With the 3 finger drag you can flick the object by keeping two fingers down and flick with the third one. I often do that on my MBP trackpad for longer distances. The object will roll like a marble. 😄
-
I used to have an Apple trackpad but found it not ideal for photo editing although it seems to be quite good for other things. IMHO it’s not precise enough for selections, masking and moving etc. (regarding the Apple mouse I have the opposite opinion as the previous posters. I just like it a lot and would not want any other mouse. Except for the charging port of course. )
-
Also an active soft-proof layer causes test to be rastered.
-
Shifting specific colors to others
user_0815 replied to CaroleA's topic in Desktop Questions (macOS and Windows)
With the HSL adjustment you can't define a specific RGB colour as a target colour. You'll have to either eyeball it or place an info point which shows you the resulting colour at that spot. (See the info panel.) If you want a precise colour as a result, I would create a fill layer set to Colour and add a Colur Range Mask to it which works like the HSL tool. The mask defines which colour will be affected. The Fill layer is the colur which will replace the original one. -
Using "traditional" layers in AD
user_0815 replied to MickM's topic in Desktop Questions (macOS and Windows)
My initial thought was also towards Layer States. Afaik you can save queries to select certain objects, which means you can define groups in this sense. Not sure whether it is available in Designer though. -
I chose to believe that they are busy at work trying to improve things that people have complained about in the past years. A merger is not an easy process and grabs lots of manpower. In such a time the staff is simply not able to work in their usual routine. Many things are being re-ordered. Including marketing. I have experienced that first hand more than once. If they come up with the next version or anything new, great. That's the most likely scenario imho. If they actually did stop their service, I can still worry later but not now. Unfortunately we simply don't know. Keep calm and carry on. That's my personal opinion.
-
Perhaps the color-range mask would do that? Not sure whether that was available at that time.
-
Hiding text frame edges in Preview
user_0815 replied to PaoloT's topic in Desktop Questions (macOS and Windows)
I'd totally support that feature request for optionally hiding the bounding box / edges or whatever that's called. Imho it's not a technical thing but a usability improvement. Sometimes I don't mind, but often times I find those boxes distracting from my work and I keep clicking or pressing space to hide them temporarily. Yes, technically you can call it objects and so on... But in my actual workflow it would really help reduce distraction hence make working easier, better and more enjoyable. These kind of features create great user experience and usability. Just my opinion. -
This is how I move just the selecton without the pixels. selection.mp4
-
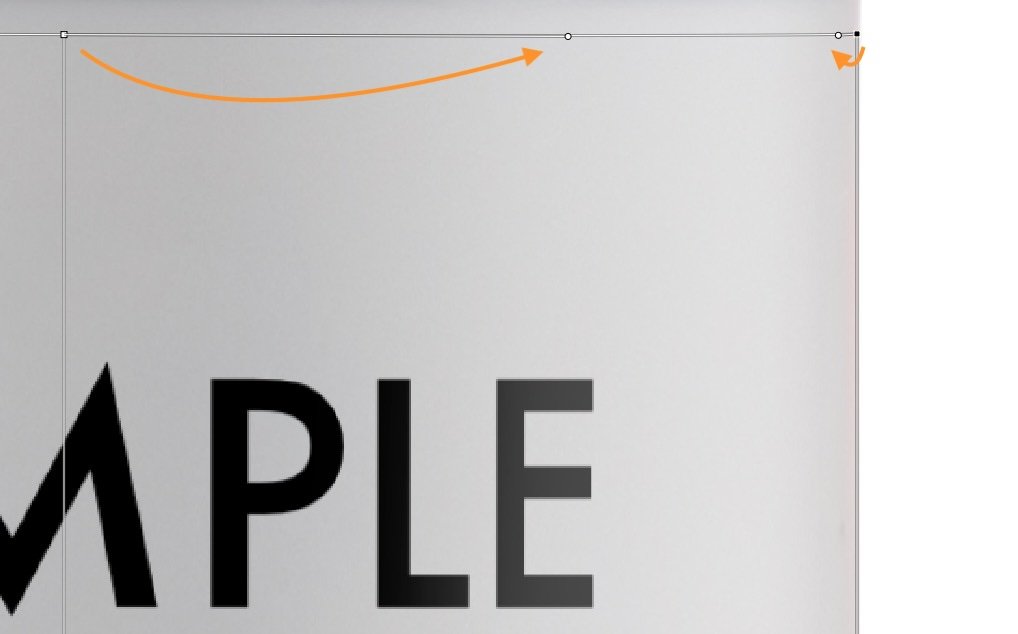
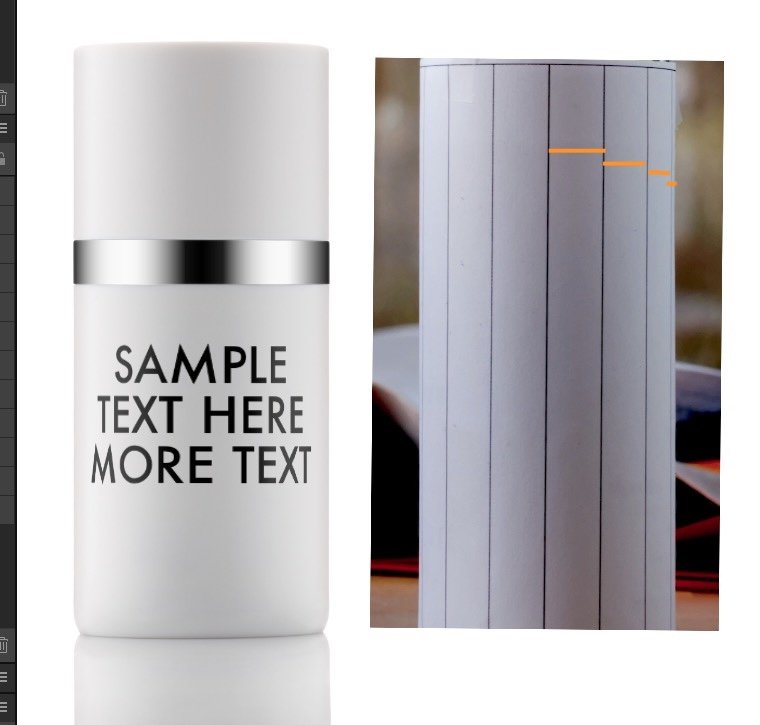
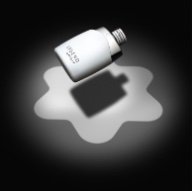
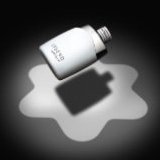
I've experimented a lot with this kind of stuff and there is a fine line between realistic and the feeling that something is off. There are many things to consider if you want it to make it look real. Not only the wrapping around the object it self but also perspective, tilt, lens distortion and lighting. For example, just the wrapping around a cylinder is quite a challenge. When I tried it, it never looked quite right. So I took a piece of paper with some lines on it and took a photo. Then I tried to recreate it in Affinty Photo which led me to the conclusion that I need to adjust the handles in the Mesh Warp tool to squish the outer sides which requres a middle anchor point. And this was just square on the front perspective. In your case we have a top down perspective, a wide angle lens and a slight tilt to deal with as well. From the glass bottle there are no reference points to place the lable so that it would be "level" on the bottle and in the correct perspective. This makes it really hard and almost impossible to get it right with eyeballing. My suggestion is, if you can re-shoot the bottle, take two pictures. One blank where you will later place the mockup lable. The second one should be the exact same but with a paper on it where the lable should be. Ideally this paper would have lines or a square pattern for reference. Or just a blank label. With that, you then know how the edges of the label should bend and converge. Of course, later add the exposure and contrast adjustments to darke the sides etc... label.mp4

-
Publisher – wrong trimbox dimensions
user_0815 replied to petrchutny's topic in Desktop Questions (macOS and Windows)
Maybe you can substract the oversize from the bleed... I had 0.03mm too much in the vertical dimension. 55.03 mm insead of 55 mm. So I set the bleed from 3mm down to 2.985 mm (3 minus 0.015 mm). The export now shows exact 55mm. My print shop accepts oversize because he requires a "minium" bleed instead of an "exact" bleed. So I can't verify whether this workaround actually works in practice for those who need the exact dimensions. -
Moving the selection with the selection tool only moves the selection. You'll have to switch to the move tool in order to move pixels – or alternatively hold cmd (ctrl) and click-drag as a shortcut.
-
When I make a selection from a path, usually I duplicate (cmd-J) the path before clicking the Selection button. Just to have a backup in case I want to change it later. More often I use the path as a mask by clicking on the Mask button in the context tool bar. As you know, this preserves the path and can be re-used as needed.