Grumpy1954
-
Posts
22 -
Joined
-
Last visited
Recent Profile Visitors
1,152 profile views
.thumb.jpg.02ba769a6966a1cba8182a17b854112e.jpg)
-
That's great news, as I'm having exactly the same issue. Thanks for bumping it with the devs.
-
 John Rostron reacted to a post in a topic:
Resize an image to a fixed maximum size
John Rostron reacted to a post in a topic:
Resize an image to a fixed maximum size
-
 Thank you for your work on these macros. When I downloaded them it turned out that they were not quite what I was after, but I still think that thanks are due for time and expertise spent in their creation.
 -
Having exactly the same problem as Zelkun, Unsplash just crashes, pexel does nothing and pixabay works perfectly. Crash report shows exactly the same as shown previously. Using the latest version, on a 3-4 year old MacBook. All suggestions gratefully accepted

-
Double Exposure Repair
Grumpy1954 replied to Grumpy1954's topic in Pre-V2 Archive of Desktop Questions (macOS and Windows)
Wow, that's great, hugely impressive. Many thanks I hadn't thought of using masked adjustment layers, I'll give it a go with some of the other double exposures. -
Double Exposure Repair
Grumpy1954 replied to Grumpy1954's topic in Pre-V2 Archive of Desktop Questions (macOS and Windows)
Many thanks for the reply, your suggestion sounds good to me, I'm convinced. 😁 It's not as if I haven't got enough to be getting on with improving all the properly exposed scanned photographs. Although it's reassuring to know that the actual process I'm attempting is difficult in itself, rather than my lack of knowledge or ability. -
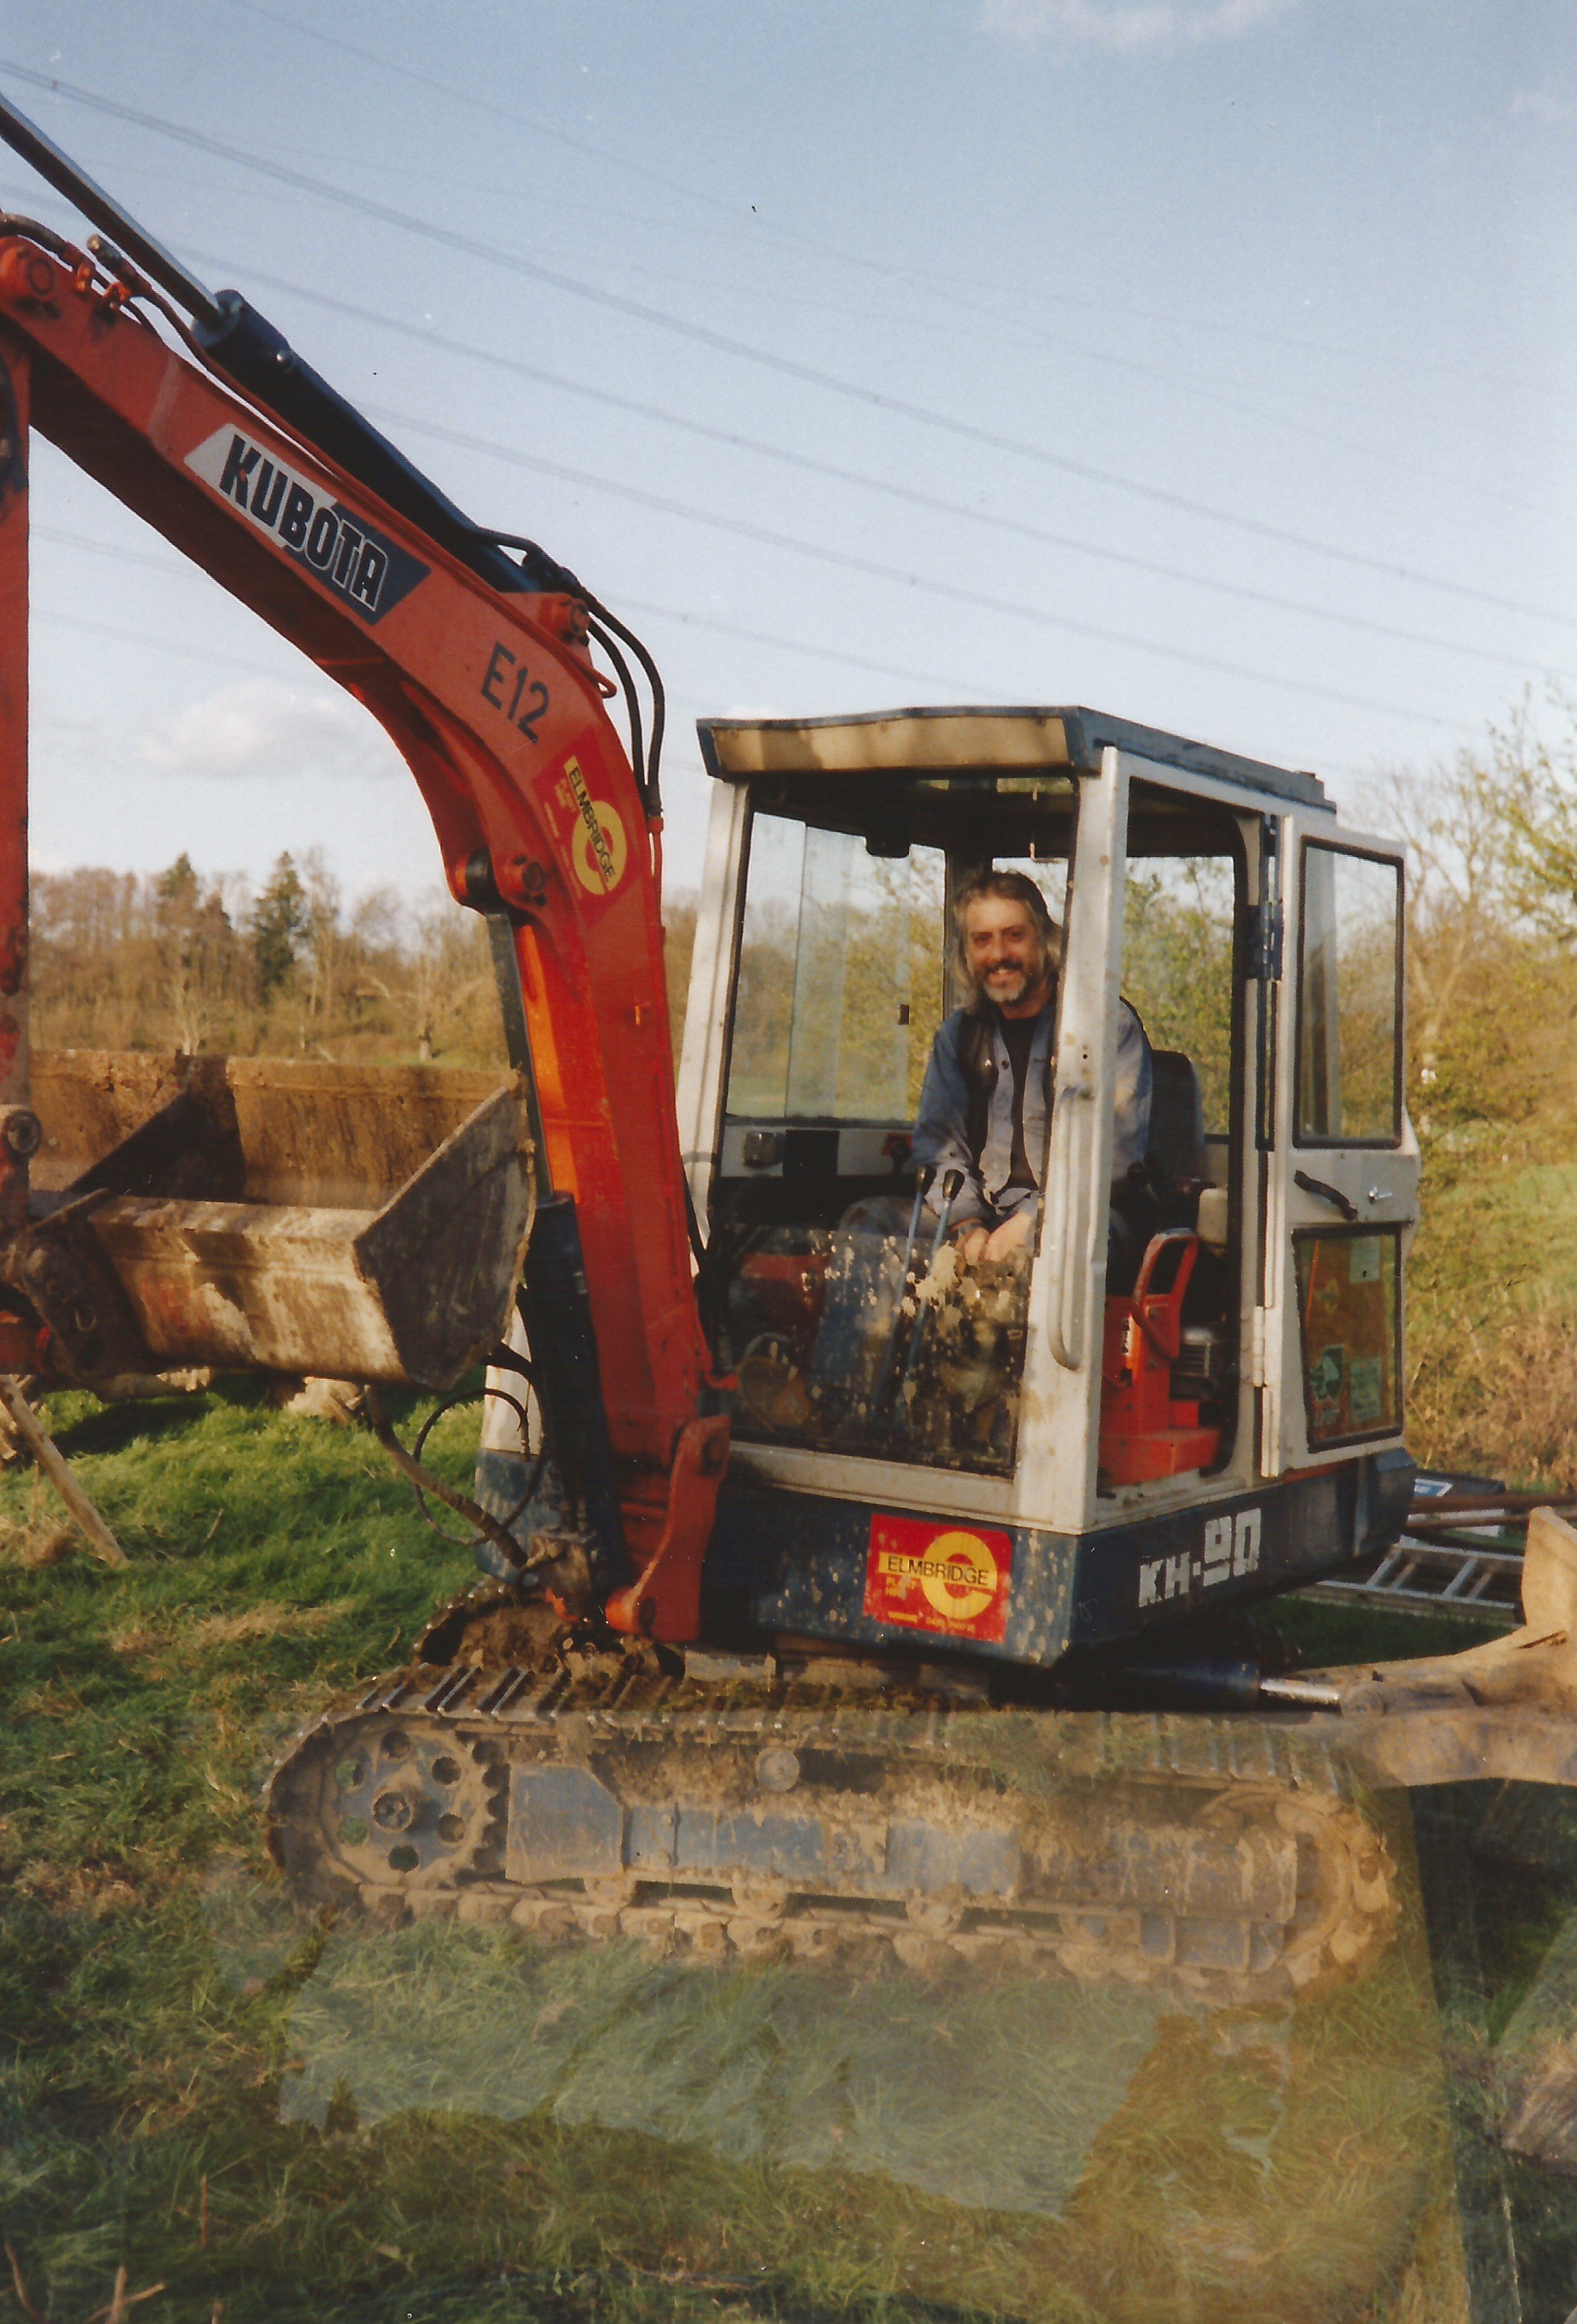
I've been taking the opportunity afforded by lockdown to go through and scan the hundreds of photographs that I've been meaning to put onto the NAS for years. Quite a few of them have been double exposed, in those days I couldn't afford a decent camera, and in any case my skills were such that it would have been a bit of a waste. There's so many of them that I'm guessing that the camera didn't always wind on properly. Anyway, what I'm asking is if there is an easy way to remove double exposure? I'm assuming not, given that the original source is a physical piece of glossy paper, rather than pixels. I've had a play with cloning, patch tool and inpainting, all of which work where the correct image isn't too complicated, replacing vegetation for example. But anything much more involved and it just doesn't look right, although that could be my lack of technique. I've attached an image which should make it all clear, one picture worth a thousand words and all that. The offending area is around the tracks and blade of the excavator. The grassy stuff is easy, but the tracks are proving a right pain. All suggestions gratefully accepted, although I rather suspect that it will come down to lots of minute adjustments and industrial quantities of patience. I did have a trawl through the forum, but everything I found related to creating, rather than removing, a double exposure. Or just not bother, an option which is looking very attractive at present.
-
SrPx reacted to a post in a topic:
Grass brush for AP - updated to v.0.2
-
Manofjesus reacted to a post in a topic:
Grass brush for AP - updated to v.0.2
-
Just found these, and they are exactly what I needed. Many thanks for your generosity
-
Thank you for these, very good of you to make them available to everyone
-
I've watched several of these on YouTube as well: clear, concise and easy to follow, everything a good tutorial should be.
-
yet more plastic
Grumpy1954 replied to Grumpy1954's topic in Pre-V2 Archive of Desktop Questions (macOS and Windows)
Fair enough, I was wrong on the recycling issue, I thought that it was the same as cling film. I will retrieve it from the rubbish bin and put into our soft plastics recycling. But the point that it is unnecessary in the first place still stands. -
Hello, Today I received my copy of the Affinity Photo Workbook, with which I am very happy. I am, however, less happy with the fact that it was shrink-wrapped, with plastic that is non-recyclable. I worked in the book trade, both in bookselling and publishing, for nearly thirty years and we would never, ever, shrink wrap single copies, there is simply no need. At a time when there is huge concern about the level of plastic use throughout the world it is very disappointing to see yet more being generated to by this completely unnecessary procedure. I assume that as the book has been out of stock that it has been undergoing a reprint, so all copies will be wrapped, meaning that much more plastic needing disposal. It would be nice to think that this is the last time that this will happen, and that Serif can make a contribution to reducing the appalling level of plastic use by discontinuing this practice.
-
love-sietspl reacted to a post in a topic:
Problem pasting from Chrome
-
Greyscale merging
Grumpy1954 replied to Grumpy1954's topic in Pre-V2 Archive of Desktop Questions (macOS and Windows)
Thanks for the reply. Simple answers: no and yes. Despite all the times I've watched that tutorial I hadn't made the connection between James clicking the equations box and the change from colour to greyscale. The world is suddenly a happier place, and my sanity is restored. Thanks again. -
Greyscale merging
Grumpy1954 replied to Grumpy1954's topic in Pre-V2 Archive of Desktop Questions (macOS and Windows)
Thanks for the second reply. I can see what you mean, and I probably didn't explain myself very well. When I drag the greyscale pixel layer on to the Apply Image panel, it doesn't change from colour, like it does in the tutorial. I'm probably being very dense here... -
Greyscale merging
Grumpy1954 replied to Grumpy1954's topic in Pre-V2 Archive of Desktop Questions (macOS and Windows)
Thanks for resolving that issue. I've just tried again. and yes, there is a greyscale icon and a colour icon. But the main image doesn't change regardless of which layer is selected, that's what is confusing me. Whereas it does in the tutorial. -
I've been trying to learn how to do greyscale merging by following James Ritson's video on the topic. As with all of his tutorials the approach is admirably clear, but I'm having a real issue with one particular step. When I create a greyscale layer of, in this case, the blue channel, instead of a a greyscale and a colour layer, the thumbnails show as two colour layers. When I move the new layer down, as per the tutorial, they both change to greyscale. So when I then do the next step of apply image, there is no difference between the two. Yet James's video clearly shows one layer in colour and one in greyscale. I done this over and over again, following the tutorial almost frame by frame. I'm quite prepared to believe that I have missed one vital step, but if so then I've no idea what it might be. The only thing I can think of is that James says he is using an HDR image, and I am using a jpg. Would that make a difference? I hope that I've made myself clear, happy to provide any necessary clarification. Thanks in advance for any help that anyone may be able to provide.