R C-R
-
Posts
29,869 -
Joined
Everything posted by R C-R
-

Getting Out of Text Mode
R C-R replied to TomHu's topic in Pre-V2 Archive of Desktop Questions (macOS and Windows)
No it should not, because the next tool one wanted to use could be anything, not just the Move Tool. But if that is what you want, try double-clicking on an empty part of the workspace window. -
PNG is a raster only format, meaning the graphic is just a grid of pixels. For your image1.png, the grid is 512 by 512 pixels & each of those pixels can be only one color. That's why it has jagged edges, which you can easily see if you zoom in far enough or use viewing software that allows enlarging part of the image. For example, this is what the magnifier built into Apple's Preview app shows:

-
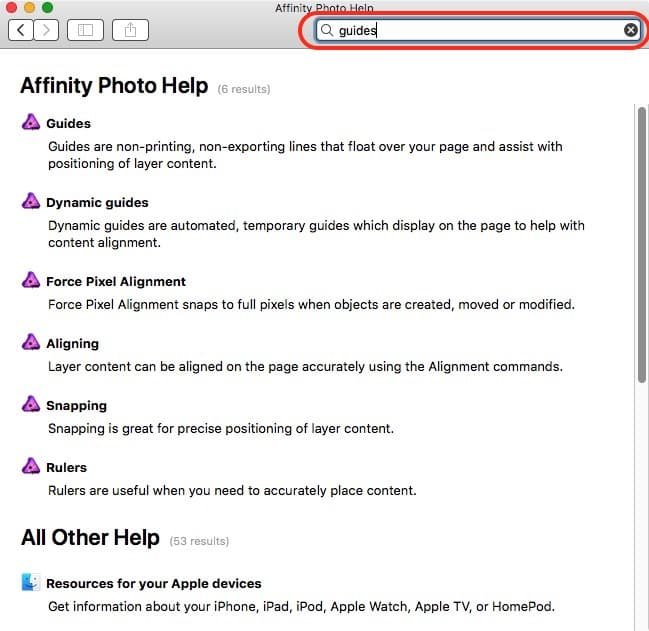
It seems to be working OK in High Sierra: However, sometimes it takes a while to update from the 'more on the web' message. Updating is indicated by a thin, hard to see blue line just below the header section that grows from left to right like a very thin progress bar.
-
Getting Out of Text Mode
R C-R replied to TomHu's topic in Pre-V2 Archive of Desktop Questions (macOS and Windows)
Same for me. One of the things I like most about Affinity is it does not clutter up the UI with Apply & Cancel buttons when there is no need for them. -
But also missing anything that is maintained by the OS. Also, Migration Assistant does not really copy everything. It is smart enough not to copy caches, temp files, & anything that is specific to a particular Mac model or to an older OS version.
-
Cut a Path
R C-R replied to Mushr00m's topic in Pre-V2 Archive of Desktop Questions (macOS and Windows)
Not for me, not with the OP's file or with others I have created myself or downloaded from other forum users complaining about the same problem. I am not sure why it is different for you, but it most certainly is for me. I am using the current 1.6.1 build for Macs, so maybe that explains it? -
Cut a Path
R C-R replied to Mushr00m's topic in Pre-V2 Archive of Desktop Questions (macOS and Windows)
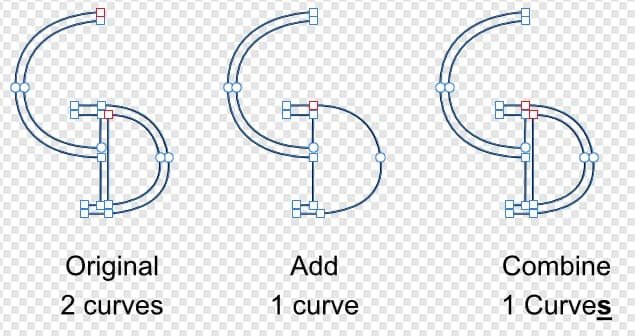
It does not for me. Leaving everything in "Winding (Non-Zero)" Fill mode, after the add I get this: Then, after the subtract I get this:
-
Cut a Path
R C-R replied to Mushr00m's topic in Pre-V2 Archive of Desktop Questions (macOS and Windows)
That does not work with the original file without an extra step because the two Curves layers are set to use the "Winding (Non-Zero)" Fill mode. But if after the subtract, the Fill mode of the final Curves layer is set to "Alternate (Even-Odd)" it will result in a single Curves object with the desired white on black effect. Personally, I still prefer the method I mentioned above, but only because for things like this I usually want to break apart & regroup the various curves for further editing. -
But it does not work for the open recent list & most likely for several other things as well, since some of them are at least partially stored in files maintained by the Mac OS rather than the Affinity app. (For example, I think the Affinity recents list is derived from info stored by the OS for each app, the same list that is used to show recent files if a user right-clicks on an app's Dock icon.) The traditional way of moving to a new Mac with minimum hassle is to use the Apple-provided Migration Assistant app. I can take quite a few hours to do the transfer but once set up no user intervention is required, so a lot of users (myself included) plan to run it overnight, or at some other time when they will not be using the computer(s). The biggest benefit is it allows users to start off almost seamlessly from where they left off on the old Mac.
-
Cut a Path
R C-R replied to Mushr00m's topic in Pre-V2 Archive of Desktop Questions (macOS and Windows)
I wasn't sure how much of the top section you wanted to remove so I took it no farther than this: happy shopper fix+history.afdesign includes the history of what I did to get that far, so you can scrub back & forth in the history panel & hopefully see the steps I took. Everything is a separate curve except for the mouth -- the smaller shape was subtracted from the larger one to create the Curves layer for that. The key step for the second Curves object in the original was, after the subtraction broke it apart into individual curves, to select all of them except the bottom one & set their fill color to white. It took less than a minute to get this far (minus my false starts).
-
I was busy making this when the newer posts beat me to it, but I'll post it anyway:
-
To provide a quick way to provide more screen space for the document view when desired.
-
By "iCloud folder" do you mean the 'badged' iCloud Drive folder that looks like this in the Mac Finder? If so, I think that is a consequence of how Apple implements sandboxing for these special application-specific 'badged' folders. They can only be created on an iOS device running that specific iOS app, so for example for Photos or Designer, only supported iPad models running the iOS version of the Affinity app can create the badged folder. Because sandboxing in iOS limits direct access to the contents of those folders to the app that created them (I suppose for security reasons), on a Mac, you can't circumvent that limitation by changing the default app that opens them to anything else -- that is 'baked into' every item in those folders, so to speak. To workaround this Apple-imposed limitation, you can create one or more regular (unbadged) folders on your iCloud Drive, either on the Mac or in the iOS Files app, & move or copy files from the badged folder to one of those folders. I created several of these folders, with names like "Affinity Native files" (for afdesign & afphoto files) & "Affinity imports" (for afbrushes, afmacros, afstyles, & such), but you can use whatever scheme works best for you.
-
Those dotted lines are known as "marching ants" & show selection areas. To remove them, choose "Deselect" from the "Select" menu.
-
At least on the Mac version, you have to right-click on the spare channel's thumbnail in the Channels panel -- if you click on the channel's name or anywhere else to the right of the thumbnail, you won't get that last item in the popup menu. IIRC, this has been reported & acknowledged as a bug that will be fixed in some future update.
-
You have not (as of today) missed anything. The Vector & Photo Personas won't work without the not yet released 1.7 versions of Affinity Designer & Affinity Photo, respectively. (Affinity Publisher Beta is a 1.7.x version & thus not compatible with 1.6 or earlier versions of the other apps.)
-
Affinity workbook
R C-R replied to Kar's topic in Pre-V2 Archive of Desktop Questions (macOS and Windows)
Enter the link exactly as shown on the page, without any extra prefixes or suffixes & tap the Return key. Do not click on Google or any other search engine suggestions that appear below the URL field where you entered the link, or move the mouse pointer over any of them. -
If you mean the width & height 'calculator' popups, they allow users to enter dimensions in any of the listed units they want, without changing the document's default units.
-
Then that is the same thing I was talking about, the folder with the Affinity Designer icon "badge" on it. From what I can tell, the iPad app will only open .afdesign files placed in that folder, but not other file types, which is why the .afstyles in it are greyed out.
-
I am still not sure what you mean by "iCloud Designer folder." Is this a folder you created on your iCloud Drive & named "Designer" or something else, like maybe the "Affinity Designer" folder that has a "badge" showing the app's icon on it?
-
Are you saying you exported an .afstyles file to an iCloud Drive folder or something else? Like I said above, if I export one of them to the local "Designer" (or any other badged) folder, it is greyed out, presumably because those badged folders are sandboxed by iOS such that anything other than a native document format file (like .afdesign for the Designer folder) can't be accessed from them ... or something like that. I see the same thing -- Sunset & Rainbow just show unfilled outlines.
-
Help with Combining Curves needed
R C-R replied to Moksh's topic in Pre-V2 Archive of Desktop Questions (macOS and Windows)
Not really what the OP is looking for, but just for giggles, I created a partially hand drawn Symbols swirl.afdesign version using three instances of a shape originally made from a 120° donut shape. Editing the shape of any of the curve instances changes all of them, creating some interesting & always geometric patterns.- 13 replies
-
- 1
-

-
- curves
- expand stroke
- (and 2 more)
-
All I can tell you is I don't get the green + symbol when I drag an .afstyles file from the Files panel folder I created on my iCloud Drive. I also tried adding an .afstyles file to the 'On my iPad' Designer folder (the badged one) & dragging from that folder from Files, but it was greyed out & I could not drag it at all. I am not sure where your "Designer" folder is located, but if it is somewhere other than in your iCloud Drive, that might explain the difference.
-
Downloading Affinity app
R C-R replied to Jess Adams's topic in Pre-V2 Archive of Desktop Questions (macOS and Windows)
Are you double-clicking on the app? -
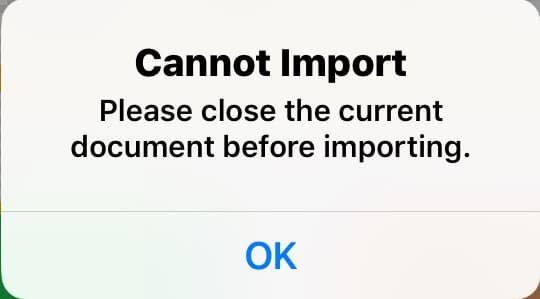
The usefulness of the new in iOS 12 Shortcuts feature would be enhanced greatly if the Affinity iPad apps had built in support for at least a few app-specific features, but so far the only shortcut I have found that works with either of them is the OS level "Open in..." action. Setting that to either Designer or Photo works, but only if the app does not already have a document open for editing. If there is one open, the shortcut fails with a "Cannot Import" message (from the Affinity app?): So minimally, it would be great if the Affinity apps supported a 'close' action -- not the Home screen close that discards unsaved changes but the close for editing/return to Home screen one. Obviously, other app-specific actions like 'create new project,' 'add to project,' & such would be great as well, but just a 'go to home screen' one enable several useful shortcuts, like adding selected images from the Apple Photos app in one shortcut. (I think that is what prevents the "Repeat with Each" shortcut I was talking about here from working with more than one photo.) So, is there any chance of the iPad apps getting this kind of support in the next few months?
- 6 replies
-
- 1
-
-
- shortcuts app
- shortcuts.app
- (and 1 more)