

justwilliam
-
Posts
189 -
Joined
-
Last visited
Reputation Activity
-

 justwilliam reacted to A_B_C in Layers and Masks Concepts
Hi everybody,
no offense, but I feel there’s a little confusion about concepts and terminologies here … basically you have to discern between pixel layers, object layers, image layers, adjustment layers, and mask layers.
Pixel layers. A pixel layer is basically a container where you can perform pixel based editing tasks like painting, erasing, selecting by a pixel selection marquee, and so on. Object layers. Then there are object layers, falling in different categories: smart shapes (rectangles, cogs, arrows, …), vector paths, text objects. Object layers become pixel layers, when they get rasterised (Layer > Rasterise …). Image layers. Suppose you created an empty document. Now place another file in that document (File > Place …). Then you will see an image (layer) appear in the layers list. An image (layer) is considered an object layer, just like a vector path, a vector shape or a text block. It retains most of its properties until it gets rasterised. I say “most of”, because the colour profile that may be embedded in the placed file gets converted to the colour workspace of the document, for example. Adjustment layers. These layers are used to perform non-destructive adjustment tasks (Brightness and Contrast, Curves, Black and White, …), and the range of their efficiacy depends on their position in the layers hierarchy. Basically, an adjustment layer that is nested to another layer (to a pixel layer, for instance) affects just the layer it is nested to. (The same applies to groups.) Otherwise it affects all layers beneath. Nesting an adjustment layer A to a layer B is performed by dragging A onto B in the layers list. Mask layers. A mask layer that is nested to another layer determines which parts of this other layer will be visible or invisible or semi-opaque. Otherwise it will determine the visibility (opacity) of all layers beneath. Masks are indeed unlike darken or lighten layers (i.e. layers which blend modes are set to “Darken” or “Lighten”). Paint on a layer set to “Darken” with a black brush, and you will usually see a black stroke appear. Paint on a mask with a black brush, and you will hide parts of the layer(s) affected by the mask. Excuse me, if I am not clear enough … I hope that makes sense … and please note, that the in-app help files (Help > Affinity Photo Help) are very valuable, when it comes to getting clear about questions like these. I just can recommend to have a look.
Cheers, Alex
-
 justwilliam got a reaction from Frankentoon Studio in Would anybody be interested in a Character Design book for AD?
Enrique,
Perhaps the iBooks format’s possibilities for ‘interactivity’ are one of its strongest suits; not only for video (screen recordings?) and slideshow (small series of perhaps 3-7 images showing progression of a specific stage in design?) embedding, but also in the layout and tools available. For one example, many newbies (myself included) were faced with an enormous number of terms which are quite new to them and Apple’s built- in ‘define’ tool can come in handy or you could provide links in the text so that clicking on a term takes you to a glossary which you have created just for each volume. This way no one needs to learn each and every term but has the ability to learn those which are relevant to the lesson at hand. You can also provide ‘links’ to the ‘extras’ available on your website (specialty brushes, palettes, styles, fonts, etc., which you have on offer). You would be able to promote another volume of your ‘collection’ right in the text of the volume currently being used; i.e., “to learn more about facial expressions, download Volume 4: Facial Expressions”, if you see what I mean. Altruistically speaking, the iBook format would allow you to help a huge number of people along the way to learning both Character Design and (by default) Affinity Designer (without the usual associated high cost). Financially speaking, the iBook format also provides you vast marketing potential. Hopefully you will find a balance between that of honestly helping people to learn Character Design for a fair and reasonable price and that of creating an income source for you that is enjoyable for you.
I have a small book on photography which I have been working on for a couple of years that is nearly complete and two follow-up books with more advanced information which are nowhere near complete. When Volumes 2 and 3 are nearer to readiness I have already planned to offer the first volume as a free iBook and then wait to see what reaction it gets before offering the other two (at a price point of about €2.99 - €4.99). I started this process more as a challenge for myself and since I learned all that which I know through the kind help and example of others (and some through ‘happy accidents’) I want to give away the bulk of my work for free. In effect, holding back, and charging for, some more advanced tips and techniques for the subsequent volumes is just something which I feel will provide a way for anyone who felt helped by the first free volume to make an ‘after the fact donation’ for it. Silly me.
I assume that you asked your last question (in your post script) to the forum at large. My answer would be the obvious one: “developing one’s own style”. Most of what any of us has learned in life we have learned through imitation (language, for example); a small part we have added to this through some ‘eureka!’ moments here and there. So, creating variety or expressions we can easily learn from another; but to develop our own style is something that but few achieve. Musical or comedic improvisation is not at all ‘improvisation’ but rather it is calling upon what one already has and adapting it to a new situation. Eminem, BB King, Prince, Robin Williams, Beethoven, Maxfield Parrish, Van Gogh, Bob Dylan, etc. developed their own style - was that something that they learned? However the more differing styles that we each see and learn the more likely we each are to have those ‘Eureka!’ moments and, possibly, develop our own unique style. (Peter provided you with a very abbreviated list of some of the very people who have done so who also happen to be on this very forum.)
-
justwilliam reacted to MEB in Can you convert a line to a shape?
To convert a line to a shape, select it, then go to menu Layer ▸ Expand Stroke.
-
justwilliam reacted to MEB in El Capitan Photos..
Hi marcholtsberg,
Welcome to Affinity Forums :)
Affinity Photo's extension is not yet available in the Mac App Store version.
You must install Affinity Photo Costumer Beta to make the extension available in Apple’s Photos or just wait for the next Mac App Store update.
Just remember to keep the Mac App Store version installed since it's needed to run the Beta.
-
justwilliam reacted to MEB in Brushes
Hi GaryC,
Yes, just download and double-click the .afbrushes file to install them. You can get some Affinity Brushes here (Brushes section).
You can also import Photoshop .abr brushes. Go to the Brushes panel, click on the menu icon on the top right, then Import Brushes... and finally select the .abr file from the dialog.
-
justwilliam reacted to MEB in Tutorials: Affinity Designer Quick Start
Hi Geordie,
Welcome to Affinity Forums :)
You can find links for more learning resources here.
-
 justwilliam got a reaction from peter in Horror story book cover.
warwick,
As you have openly invited criticism and already recieved a bit, I thought I might add some of my own (take it for what it is worth and, btw, I am not one of the more 'lovely' people here :rolleyes: )
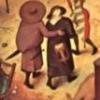
As a reader of both 'Creepy' and 'Eerie' magazines in my youth, I am a fan of this type of illustrative art for just such a use as yours.
What I see in this work is exemplary of that period even down to the colours chosen. The same is true of the chosen fonts, although I do agree with what has been already said regarding the number and disparity of the fonts and that three fonts is one too many. Perhaps were the text 'Strange Ingredients' made slightly smaller and moved to the left to allow for the 'Five Horror Stories' text to be positioned to the right of it using these same two fonts (but perhaps even matching the colour and even 'boxing' it in on its own) it could eliminate any 'busy' feeling with the text. Such a box was used at times for the publishing house's logo or name. But that is just an idea to ponder and may not be effectual or to your tastes. I do not, however, see any problem with the black line (and solid colour as opposed to the texture in the main art) separating the title from the art; in fact, such a 'device' was often used in the pulp fiction genre.
As I said, I think that the colours are perfect for this type of book cover illustration and for that 'retro', early '70s period, 'cheap paperback' (if you will excuse the term) feel, but I felt very distracted by the 'apparent' highlight in the red area above and to the left of the head; it drew my attention to that spot repeatedly which is not something I would imagine that you intended. Perhaps the author's name could be positioned to fit on the left shoulder of the figure with only the skin as its background if its current position is not required by the publisher or something. This could also alleviate any tension between the texts while at the same time highlight the author's name even more. The red colour and the 'cracks' seen in the artwork at the top could also 'cross over' into the area where you have the title if you do decide to eliminate the black 'border' line; this was also a widely used 'style' or 'effect' in pulp fiction book covers. These are merely my humble opinions and they may find no one in agreement with them, but I thought I might share them with you.
That being said, I think it appears quite professionally done and remains a wonderful cover for a book of horror stories - it entices me to want to read them.
(Here is what I meant regarding 'a box of its own' in fitting with this genre; albeit in a very, very quick and dirty fashion:)
-
justwilliam got a reaction from Frankentoon Studio in Would anybody be interested in a Character Design book for AD?
ikarvs,
As you mentioned in your original post that you were undecided on the format(s) for this project, I thought that I might suggest the iBook format for a number of reasons:
Those who want to learn Affinity Designer (and even Affinity Photo and the hopefully relatively soon to be Affinity Publisher) are all already using a mac.
The iBooks format easily allows for imbedded video and 'slide-show' type of content.
The iBooks format allows for you to push updates to your content whenever tools and techniques happen to change in Affinity Designer.
The iBooks format would allow for a 'basic' version to be offered free and additional 'books' can be offered which cover further techniques, tools, and topics more in-depth; an iBook which consolidates all of you presently offered iBooks (and future updates) could be offered at a discounted price over the cost of purchasing the books individually. It could work something like below but with your breakdown of volume content, of course:
"Learn Affinity Designer" - FREE
"Learn Affinity Designer - The Pen and Node Tools: Advanced" - €3.99
"Learn Affinity Designer - Boolean Operations: Advanced" - €2.99
"Learn Affinity Designer - Gradients: Advanced" - €2.99
"Learn Affinity Designer - Brushes and Styles: Advanced Use and creation" - €4.99
"Etc., Ad Infinitum"
"Learn Affinity Designer - The Complete collection" - € (priced at something like (Total number of ibooks - 1) * 0.65)).
As you create new content for individual books the consumer can delete their present version and download the newer. If the 'Complete Collection' version was done as a whole then the same would apply for it.
I am sure there are other advantages to the iBooks format which could benefit both you as the content creator and the content consumers. Likewise there may be some disadvantage to this format which I am unaware.
But, if the consumer finds the content useful, clearly presented, reasonably priced, and (to some extent) entertaining in the first free 'book', then you could be on to a winner. Looking at the two files you provided has piqued my interest and I would certainly download the first free book - whether I or anyone else would pay for more from the rest would obviously depend only upon your creativity, talent and teaching method. :rolleyes:
-
justwilliam reacted to zeebaf in Tutorials: Affinity Designer Quick Start
Tutorials: Guys at tutsplus made great tutorials for free
It's worth watching in
https://webdesign.tutsplus.com/courses/affinity-designer-quick-start
Thanks to tutsplus
-
justwilliam reacted to MEB in How to make "Round-trip" edits from Apple Photos to Affinity Photo and back again:
Hi bjuraz,
In Aperture you can either right-click on an image then select Export ▸ Original... to export the RAW file to the Finder and then import to Affinity Photo manually or set an External Photo Editor in Aperture ▸ Preferences..., Export tab (on top). This last option lets you send the images in PSD or TIFF (both 8 and 16 bits) but it doesn't work quite well with Affinity Photo yet since we don't support layered Tiff's (coming later), and we don't overwrite PSD's by design (meaning Aperture can't keep track of the edited image after you save it since Photo will only allow you to save it in Photo's native format .afphoto).
-
justwilliam reacted to MEB in Bullet form in text box?
Hello iFatty.
Welcome to Affinity Forums.
Bullets weren't implemented yet it in Affinity Designer. You will have to create them manually for now :huh:.
Place the cursor where you want the bullet, go to Edit -> Special Characters... (last entry), go to Bullets/Stars section in the new pop-up dialog (use the arrow on the bottom right to show the rest of the sections) and pick one.
-
justwilliam reacted to Callum in Snapping On even if its OFF!
Hi Evtonic3,
It seems as though you still have a snapping setting enabled on the Pen Tool I have included a screenshot of where you can find this Snapping setting so yo can turn it off :) Hopefully that should resolve your issue.
-
 justwilliam got a reaction from davemac2015 in Downloadable Affinity Photo Help 1.5 Epub for IBooks (Updated Dec 7, 2016)
Going to run downstairs and download it to my iPad immediately! (OK, I'm too old and out of shape to 'run' downstairs, but I will make my way down in the quickest manner possible just in case the link is taken down for some reason [i hope not]).
Thanks jeffkovitz!
-
justwilliam reacted to MEB in High and low frequency layer wont blend
Hi Julie,
Welcome to Affinity Forums :)
You forgot to change the layer blend mode of the Hight Frequency layer to Linear Light.
-
justwilliam reacted to MEB in Reverse paths
Hi btribble,
Welcome to Affinity Forums :)
Select the path, change to the Node Tool, then click on the last icon (Reverse Curves) in the Action section on the context toolbar (right above the work area).
-
 justwilliam got a reaction from Affinity Jack in Affinity Jack Tutorial: Transformation (English Subtitles)
Watching your latest video has quickly become a traditional Saturday activity!
Well done as always and I hope you continue. :)
-
justwilliam reacted to A_B_C in Coffee Cup Graphics
Well, justwilliam, I am sure you have seen the Shear input field on the Character Panel … but honestly, in most cases it is not recommended to slant fonts using the shear function. It regularly distorts the intended design. The “D” in my example has already passed away, and the other glyphs are obviously feeling sick as well. So it’s definitely a better idea to search for appropriately slanted fonts or even draw them yourself … ;)
But your design is a pretty good start, my congratulations! And it’s a really nice idea to surprise your wife that way …
Cheers, Alex :)
-
 justwilliam got a reaction from A_B_C in Coffee Cup Graphics
I am working on some preliminary designs for a coffee cup and a T-shirt or hoodie graphic for my beloved wife which relate to her beloved little summer car. (There is no actual 'club' or if there is then she is the only member!)
I will likely look online to see if I can find more appropriate fonts before I can start to complete these, but I have a question regarding how I can 'transform' the font. In the first of the attached files (the Black, Red, and Yellow one) I could not find a way to make the letters 'lean' in the way that I had wanted; I succeeded in getting the larger four-letter text in that graphic to lean but only by actually drawing them but I was hoping that one could simply add text with the Text Tool and then 'transform' it somehow. (I wanted the other two words to lean in much the same manner as the four-letter text.)
Is this not possible or was I merely not clever enough to find my way to the right tool?
BTW the Blue and White one is for a T-shirt or hoodie and the other is for a coffee cup for her - she really loves her new Lada! :rolleyes:
I thought to put this in the Share Your Work topic but, as this question was the main reason for posting, I put it here; that being said, I am certainly always open for suggestions and criticism on the current state of my somewhat primitive efforts.
-
 justwilliam got a reaction from Jakerlund in Coffee Cup Graphics
I am working on some preliminary designs for a coffee cup and a T-shirt or hoodie graphic for my beloved wife which relate to her beloved little summer car. (There is no actual 'club' or if there is then she is the only member!)
I will likely look online to see if I can find more appropriate fonts before I can start to complete these, but I have a question regarding how I can 'transform' the font. In the first of the attached files (the Black, Red, and Yellow one) I could not find a way to make the letters 'lean' in the way that I had wanted; I succeeded in getting the larger four-letter text in that graphic to lean but only by actually drawing them but I was hoping that one could simply add text with the Text Tool and then 'transform' it somehow. (I wanted the other two words to lean in much the same manner as the four-letter text.)
Is this not possible or was I merely not clever enough to find my way to the right tool?
BTW the Blue and White one is for a T-shirt or hoodie and the other is for a coffee cup for her - she really loves her new Lada! :rolleyes:
I thought to put this in the Share Your Work topic but, as this question was the main reason for posting, I put it here; that being said, I am certainly always open for suggestions and criticism on the current state of my somewhat primitive efforts.
-
justwilliam got a reaction from A_B_C in How to Remove an applied Style
Can one simply create a 'style' that does nothing and then if you want to 'undo' a style which you have applied much earlier on in the project you could select that layer and apply the 'empty' style. I have not tried or tested this, but it sounds as if it might work.
-
 justwilliam got a reaction from anon1 in How to Remove an applied Style
Can one simply create a 'style' that does nothing and then if you want to 'undo' a style which you have applied much earlier on in the project you could select that layer and apply the 'empty' style. I have not tried or tested this, but it sounds as if it might work.
-
justwilliam reacted to A_B_C in Honeycomb pattern = Problems!
Oh no, the best idea is to use a triangular grid of appropriate size … all snapping problems gone … :D
I guess, Ben is going to be mad at me, since I did not suggest this in the first place … LOL … ;)
-
justwilliam reacted to A_B_C in Skew vertically
And if you want to do it numerically, have in mind that vertical skewing is geometrically equivalent to rotating and horizontally skewing a shape … :)
-
justwilliam reacted to Hans in Affinity Designer - Layer isolation mode
Option click on a layer in the layer panel switches to 'isolation mode' showing only the selected layer content. That is a very useful feature which could be enhanced by allowing to set a different temporary background colour. The chequered background makes it very hard to see/edit white objects.
-
 justwilliam got a reaction from tjg in Meow...
Wow!, wonderfully textural sky and with harmonious tones throughout; going all the way white with the light of the sun and positioning the left of the Lion close to centre beautifully balances the composition.
Although I personally tend to prefer monotone over colour, your economic colour manipulation merges marvellously with this majestic cat.
Very well done, as always!