JimmyJack
-
Posts
1,350 -
Joined
Everything posted by JimmyJack
-
Okay.... how about the inverse. Instead of clicking on the twenty layers I want to hide, is there a way to click on just the ONE layer I want visible that will hide everything else?? (edit: Ah... I think Alt clicking kind of does it. But As soon as you click off of that particular object everything comes back)
-
Question about bleed
JimmyJack replied to Wieger's topic in Pre-V2 Archive of Desktop Questions (macOS and Windows)
Wieger, You CAN see your bleeds when you work IF you're in "regular" page layout mode. Just unclick Clip to Canvas under View > View Mode. If you are using Artboards than no you can't see them as you work. But both can export as PDF with the bleeds, seen or not. On export click on More and find Bleeds and Printer Marks. Wilfred. Try Preview, Adobe Reader, or opening your file in Safari. (Ha, simultaneous post :) ) -
Arcs in Golden Spiral
JimmyJack replied to truegold's topic in Pre-V2 Archive of Desktop Questions (macOS and Windows)
Ah, so you went with the straight up math... 1 to 1.618. Nice. Are those pieces connected? -
Arcs in Golden Spiral
JimmyJack replied to truegold's topic in Pre-V2 Archive of Desktop Questions (macOS and Windows)
Thanks crab! So that's how it's done :) So... if you want to be perfect AND your square(s) layout is perfect, then, with AD snapping, putting is the quarter circles should be ..... well,...... a snap :lol: . You could use the Convert to Pie function, but it's just easier, imho, to draw out the full circle and delete the 3/4 you don't need. Then join up the ends of each arc. But if 99.85% perfect is okay, it'll take you a fraction of the time to draw just one continuos curve (also using snapping). -
Arcs in Golden Spiral
JimmyJack replied to truegold's topic in Pre-V2 Archive of Desktop Questions (macOS and Windows)
Hey John, Make sure your handles are pulled out constrained to horizontal or vertical. Most importantly though... make sure the handles are in Smooth Mode (iow not independent of each other). Take a look at mine to see how far I pulled them out. I'm sure there is something mathematical... I just did it by eye.
-
Thanks MEB. I assume Master Pages is something more for Affinity Publisher?? Dizeyner, At least you can do one of the scenarios you asked about. You can embed a document, make copies of it throughout your project. Any changes to the original will be reflected in each instance. Watch. (Important to mention: You aren't actually changing the actual source document, just an embedded source. And you can have multiple embeds of the same file which are then independently editable.)
-
Furthermore.... if u right click on an object you have a Create Style option in the drop down too.
-
Yup, that's the method I was using. and Yup, I was afraid of that (overlapping/enclosed objects) and Yup, Divide is a bit screwy. Very frustrating. Matt says he IS aware. The next question is.... how many "special cases" do you have? Even a couple dozen might be worthwhile to re-subtract on an individual basis. If we're talking typography Counter spaces..... fugetaboutit. Or (and I hate to suggest this) if your background is all one color give all the overyling geometry that fill... -_- . Edit: ABC.... for some reason I didn't see your link after my post on that thread. Ha indeed :D!
-
Yeah the eyedropper functionality is ...... (mmmm, trying to be nice).... not good. There is the method crabtrem mentioned. But even then it still only picks up a fill color from the pixel you're hovering over. Another workaround is to go to the object you want to emulate, hit cmd-c, go to the new object and hit shift-cmd-v (edit > paste style). A little clunky I know, but at least you get fill (even a gradient), stroke, transparency etc. Smoothing....... um, no. "not yet". Drawing off canvas: In regular page layout mode you can make your default grey background white and unclick View > View Mode > Clip to Canvas. You'll still have a tiny rule around the page but you will be able to draw in the surrounding area. In Artboard mode, you can draw in the surrounding area by default.... BUT, you can't change the background grey (as far as I know) and any object that intersects the artboard will get clipped (items fully outside the artboard are fine). Please log your requests in the roadmap/request section as posted above.
-
Okay, I might have a solution. But before I try and type it out....a couple questions. Are your shapes all separated from each other? I mean in terms of space on the page (I realize there are on their own in the layers panel). Or do they overlap? What kind of overlay are we talking about? A clean image across all object? Or is there a blending method involved that gives each shape a different effect?
-
Cut and Paste
JimmyJack replied to Petej's topic in Pre-V2 Archive of Desktop Questions (macOS and Windows)
Give your drawn selection a fill first (on it's own layer), THEN "Paste Inside" :) . -
Picture inside a unique shape
JimmyJack replied to LisaE's topic in Pre-V2 Archive of Desktop Questions (macOS and Windows)
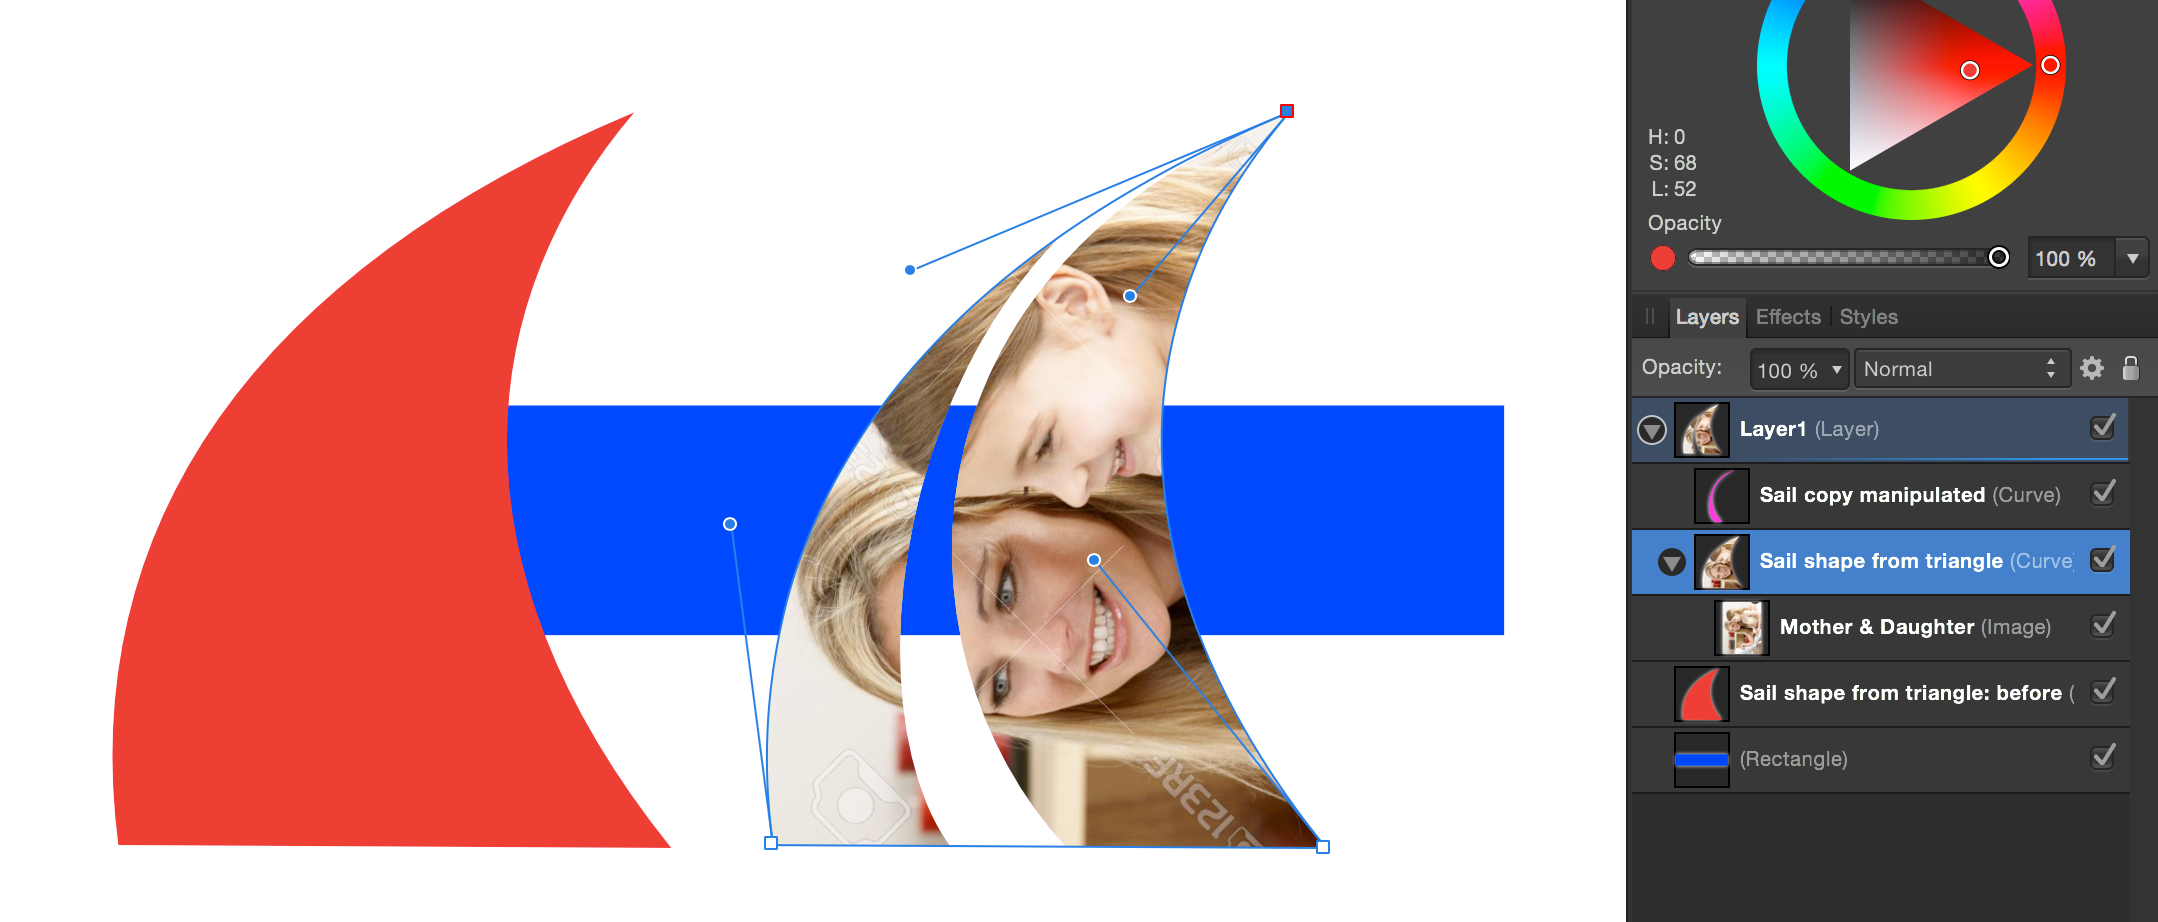
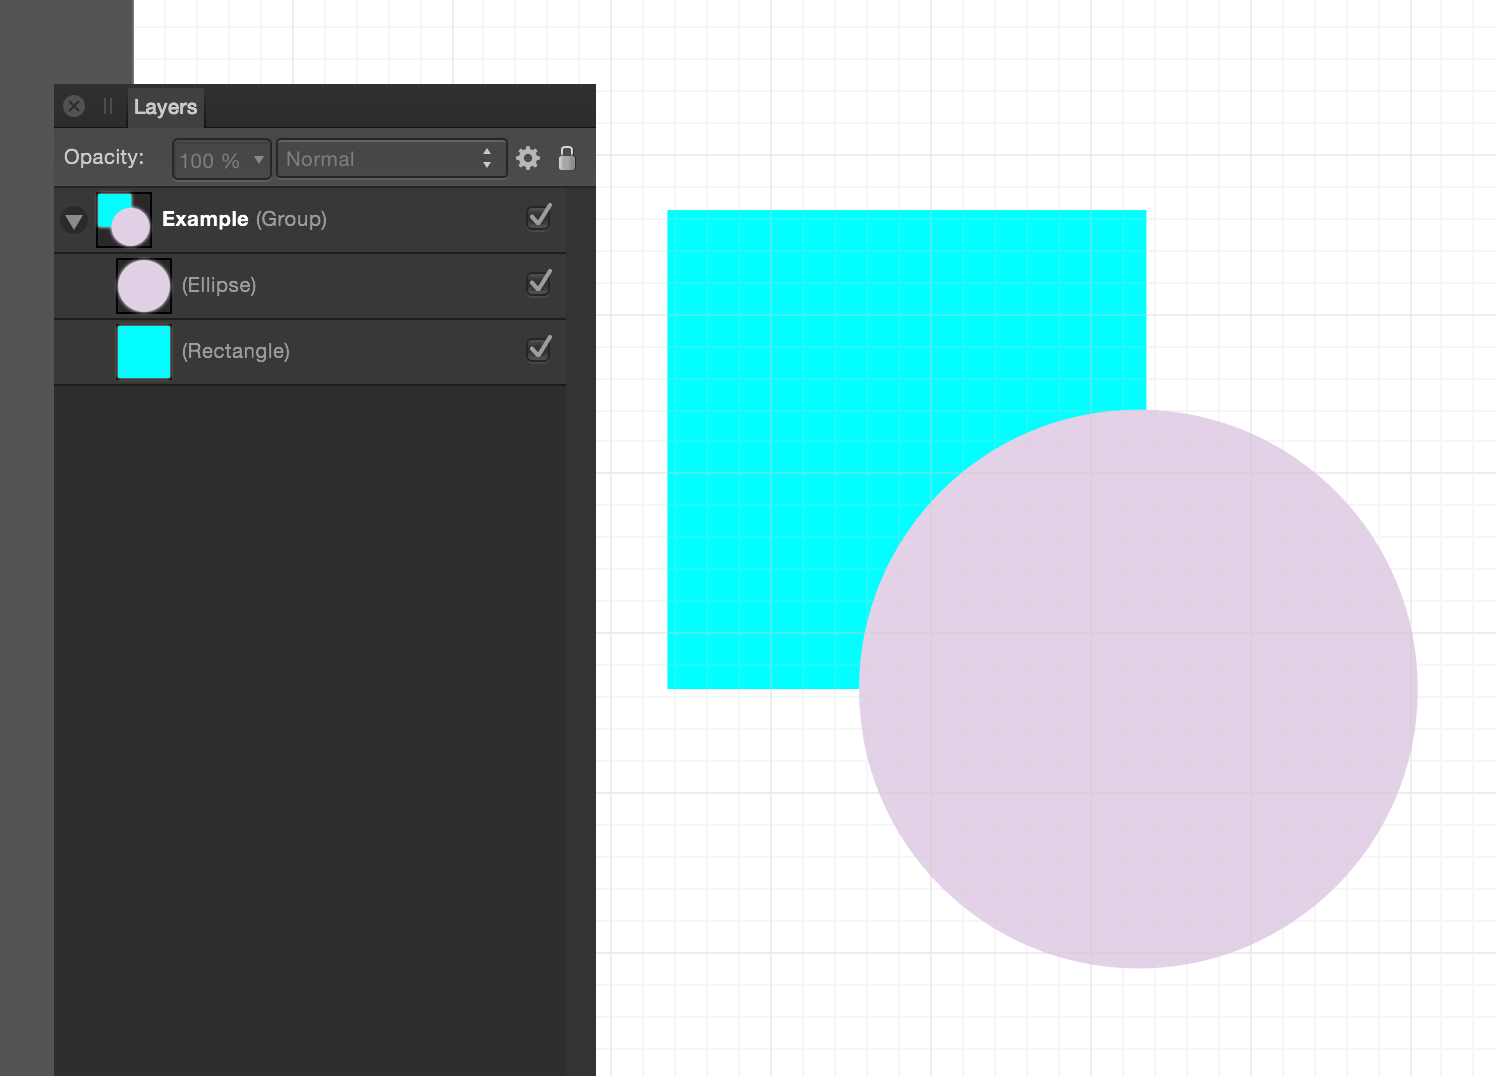
Good options both. Interesting that you guys saw ovals.... the human brain right!! I started with a triangle :P . Along with no masking (not that that is a bad thing at all!!)... this method retains transparency on that middle section, is non-destructive and totally editable. (it's important that this is done within a layer.... I'll explain at the end) 1: INSIDE A LAYER make a skewed triangle and bow edges in and out ..... image 1: I have the handles visible. The red is just a plain fill duplicate so you can see it clearly. 2: make a copy of the triangle and move the points/handles to make the middle cut out shape. Place it above the original and set the blending to Erase. See image 2.... handles showing on the manipulated triangle. 3: Place an image as a clipping child under the original triangle. The blue is just to show that the middle "cutout" effect works. Okay, so the layer thing is important because of a bug.... I think. Outside of a layer, Erase leaves an edge artifact.
-
I took your original image, as is, to http://www.autotracer.org (It's a very simple free online conversion site. No preview and only basic options.) Saved it as a 2 color, "smoother", eps (svg works also). Opened in AP and saved as png (attached) You could, of course, do some modifications in AP first.... i.e. levels, brightness/contrast, posterize (oops... I meanThreshold. sorry, old habits) etc. to alter your vectorization results. Edit: For right now, while we wait for this function to be folded into Designer....There are plenty of options... From free apps in apps store (as you mentioned...image2vector....which I can't seem to figure out either. Or it just stinks) to $5 apps (Image Vectorizer. Haven't tried it.) to more robust $50 apps and online services like Super Vectorizer and Vector Magic
-
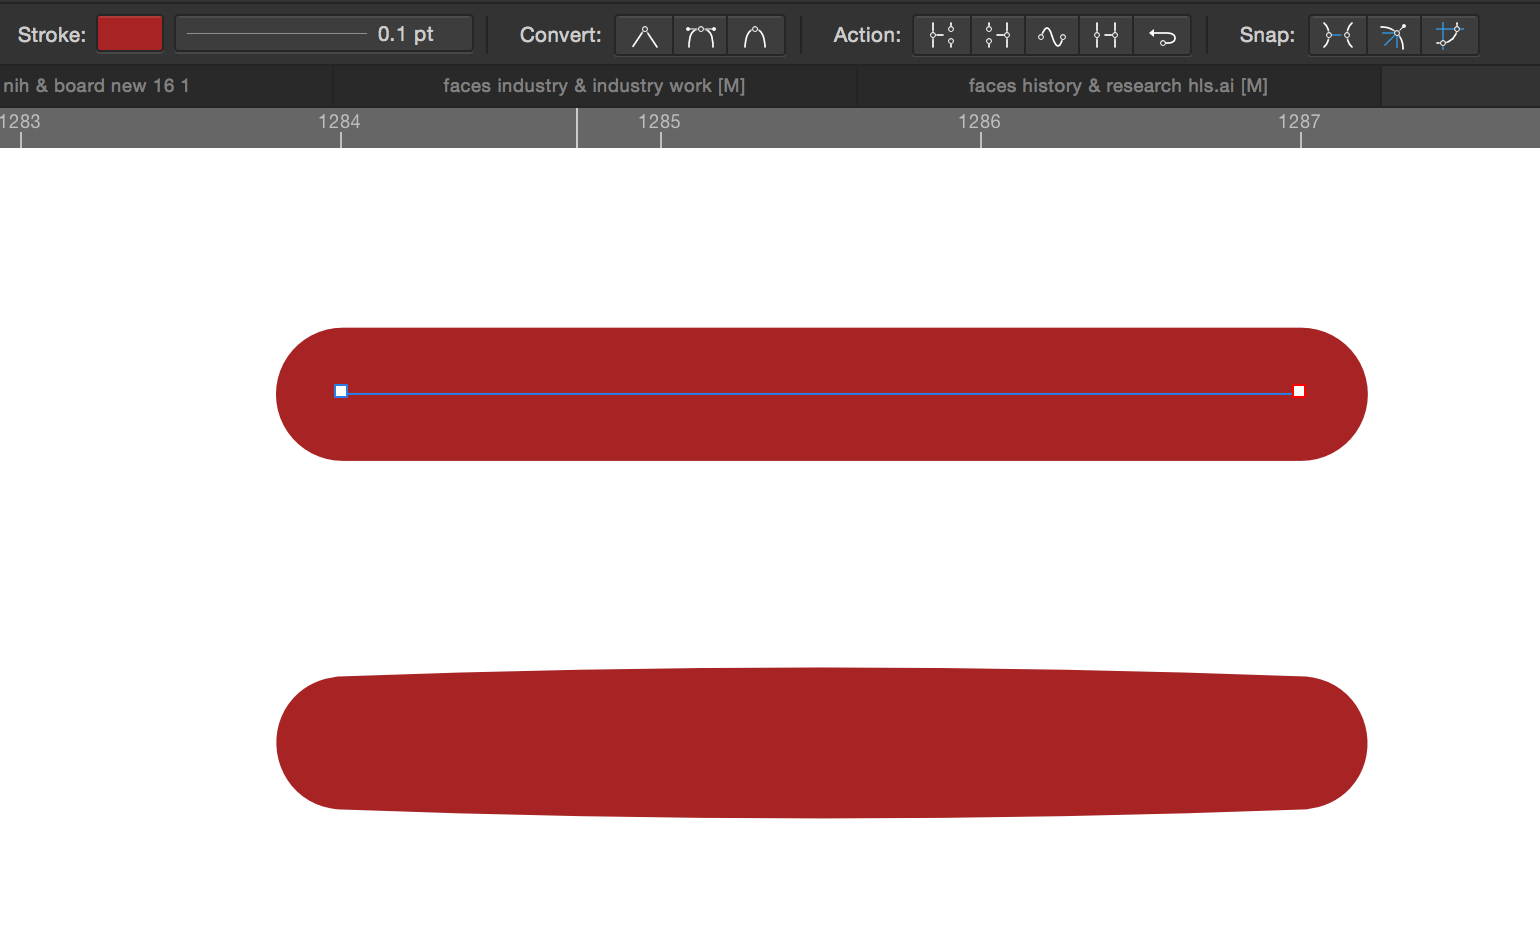
Woosaj, thanks for the post. Yeah, that's the process alright. I still can't quite replicate... exactly. I notice that you're at a pretty small scale.... expanding a 1pt line. See my result at that size below.... still straight (ruler is in pixels). I only start to get those bowed edges when I go really really small. See second image..... line is at .1pt. At that size my line is just 3 pixels long......but, eventually, I do get them ;) ! Last image are the two examples at actual pixel size.
-
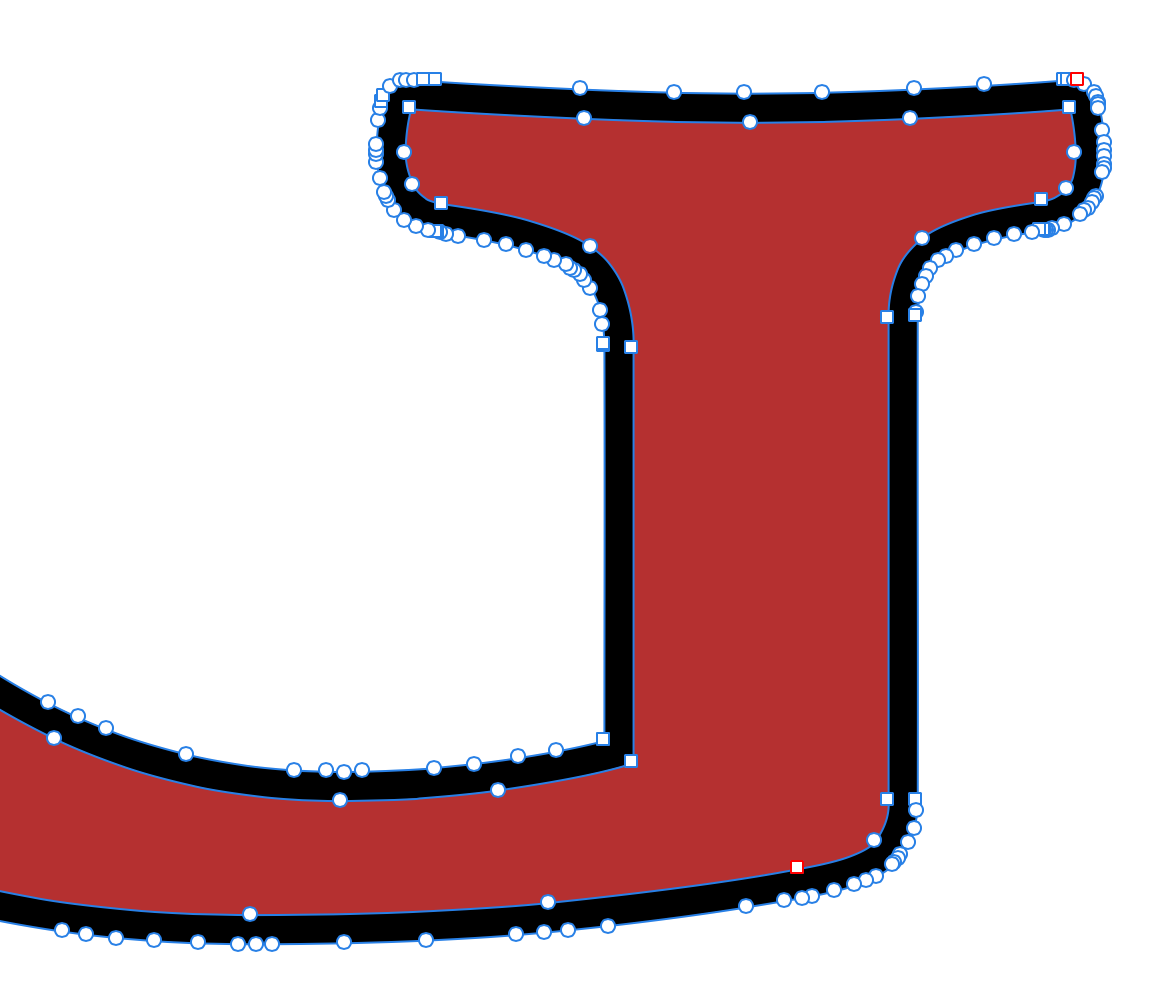
I think the issue with the OP's example is that the top and bottom edges on the pink object are not straight. I can't recreate that result, so not sure what's going on there. But Expand Stroke does needs some work. It creates way way way too many points on curves.
-
How to hide shape outline?
JimmyJack replied to pomme27's topic in Pre-V2 Archive of Desktop Questions (macOS and Windows)
AhHa... fantastic! -
How to hide shape outline?
JimmyJack replied to pomme27's topic in Pre-V2 Archive of Desktop Questions (macOS and Windows)
Sorry.... this is what I see. No idea where the setting is (if that's what it is). Your image is with everything deselected??...i.e click off of the objects onto the white?
-
Artboards - must be me....
JimmyJack replied to TheRogue's topic in Pre-V2 Archive of Desktop Questions (macOS and Windows)
One thing to consider, at least for the moment. (just learned this myself today :)) If you create an artboard(s) from within an existing document (by the expanded move tool process) you will lose the use of your guides. But if you enable the artboard at doc setup they still work. From that starting point you can then add more as you go and they will still work. They are aware of the issue... -
No guides when using Artboards??
-
We can do this to a certain extent now using ARTboards. They were only recently added in the last update. While not fully flushed out as of this release, you can...... Position object off of the artboard. Items that are partially off the artboard will be clipped by it's border (kinda nice), but will show up fully if completely outside the page. Also.... I don't believe you can select a bunch of artwork and resize an existing artboard to fit. But you can select art and make a NEW artboard to those exact dimensions.
-
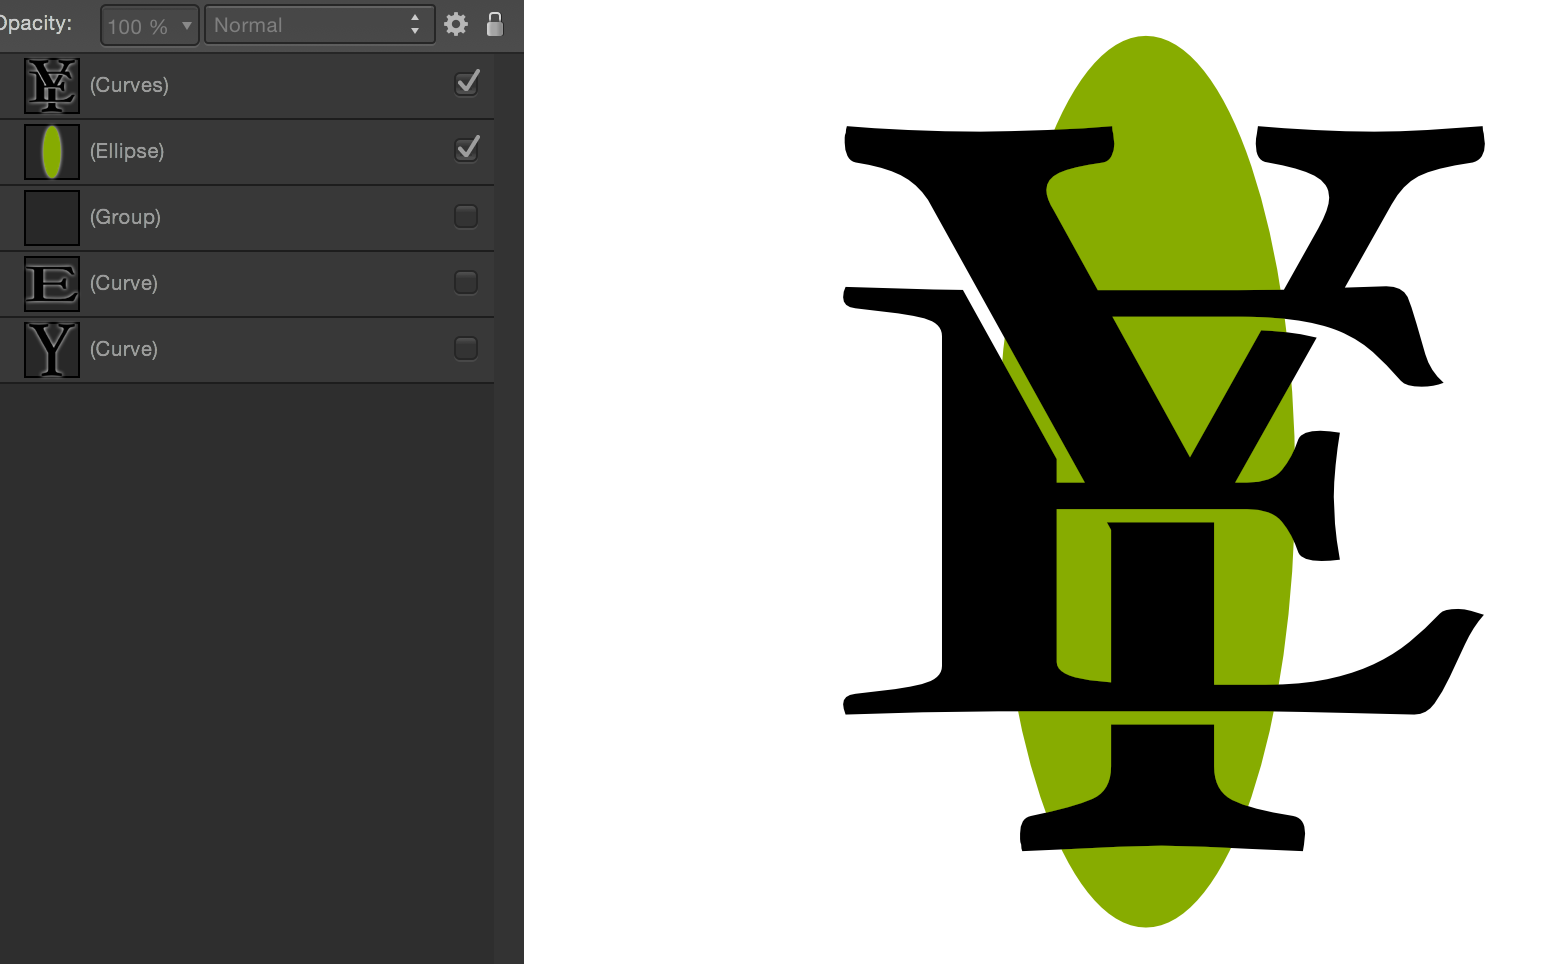
Better still.... 1: Convert a copy of your letters to curves 2: Isolate the bits of the curves that span the areas that need to be knocked out. This way you can easily build in the little extra you need and you won't have to contend with the tiny artifacts from the first method. 3: Now apply stroke, expand stroke, boolean subtract the overlap. You now have the pieces in their final state to subtract or erase or whatever.
-
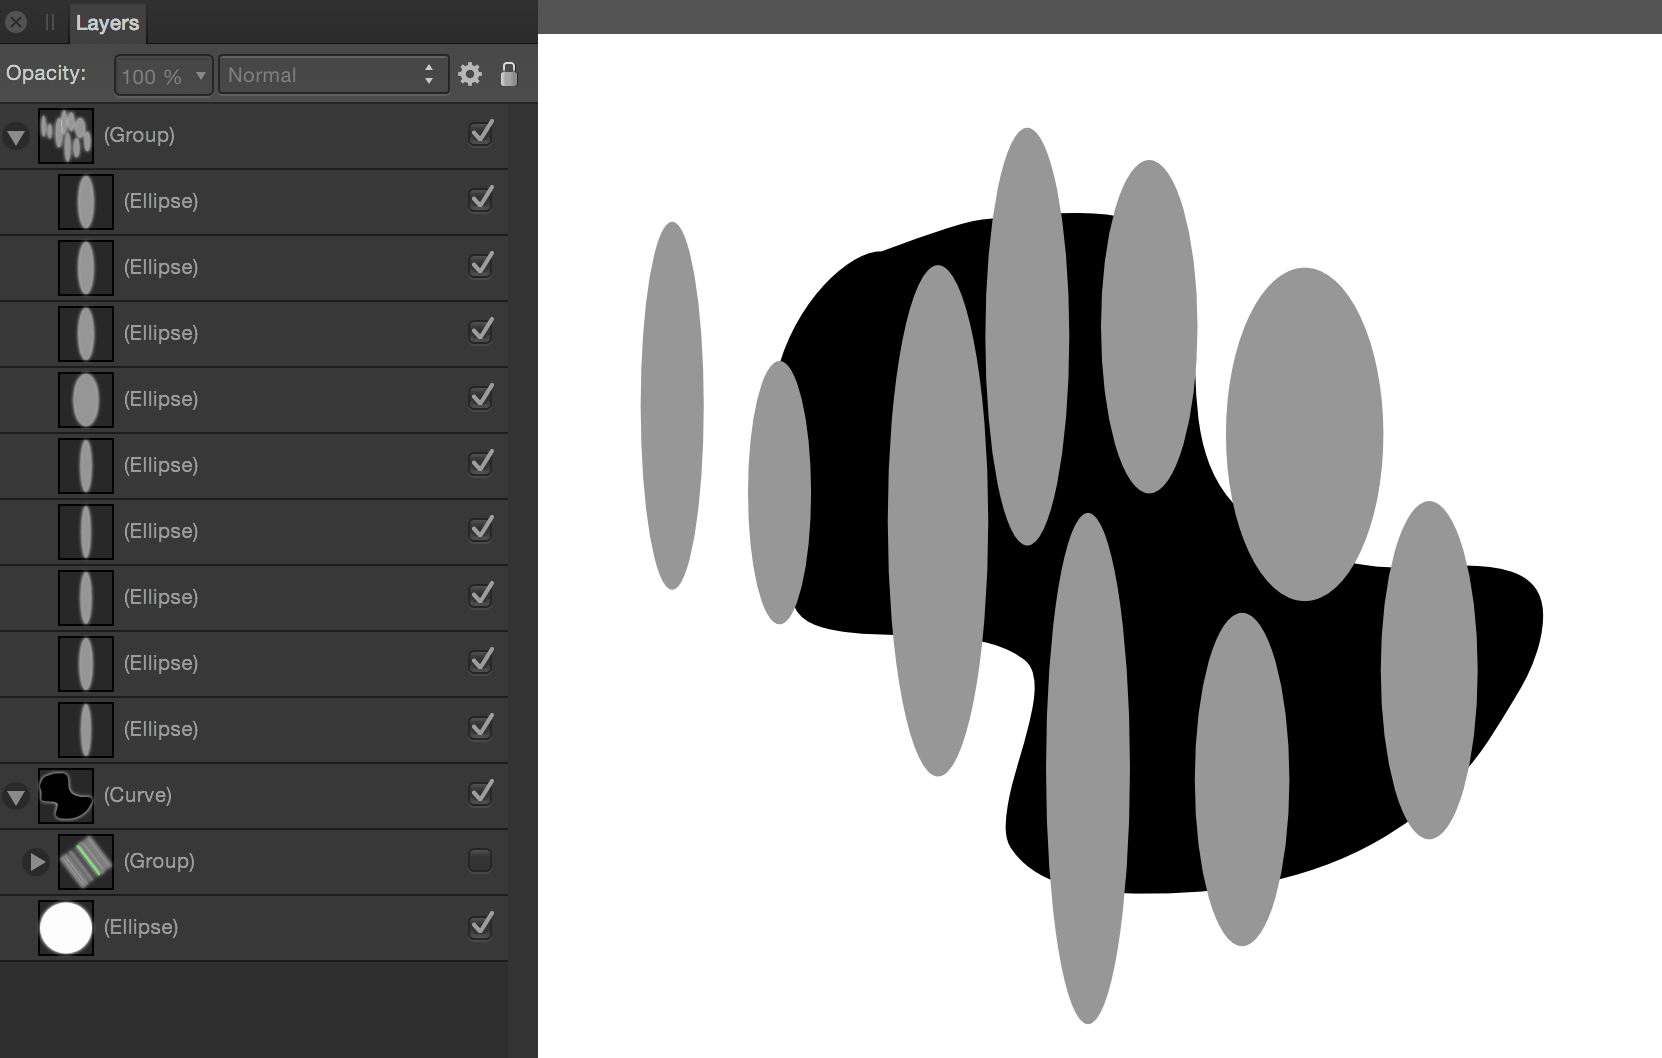
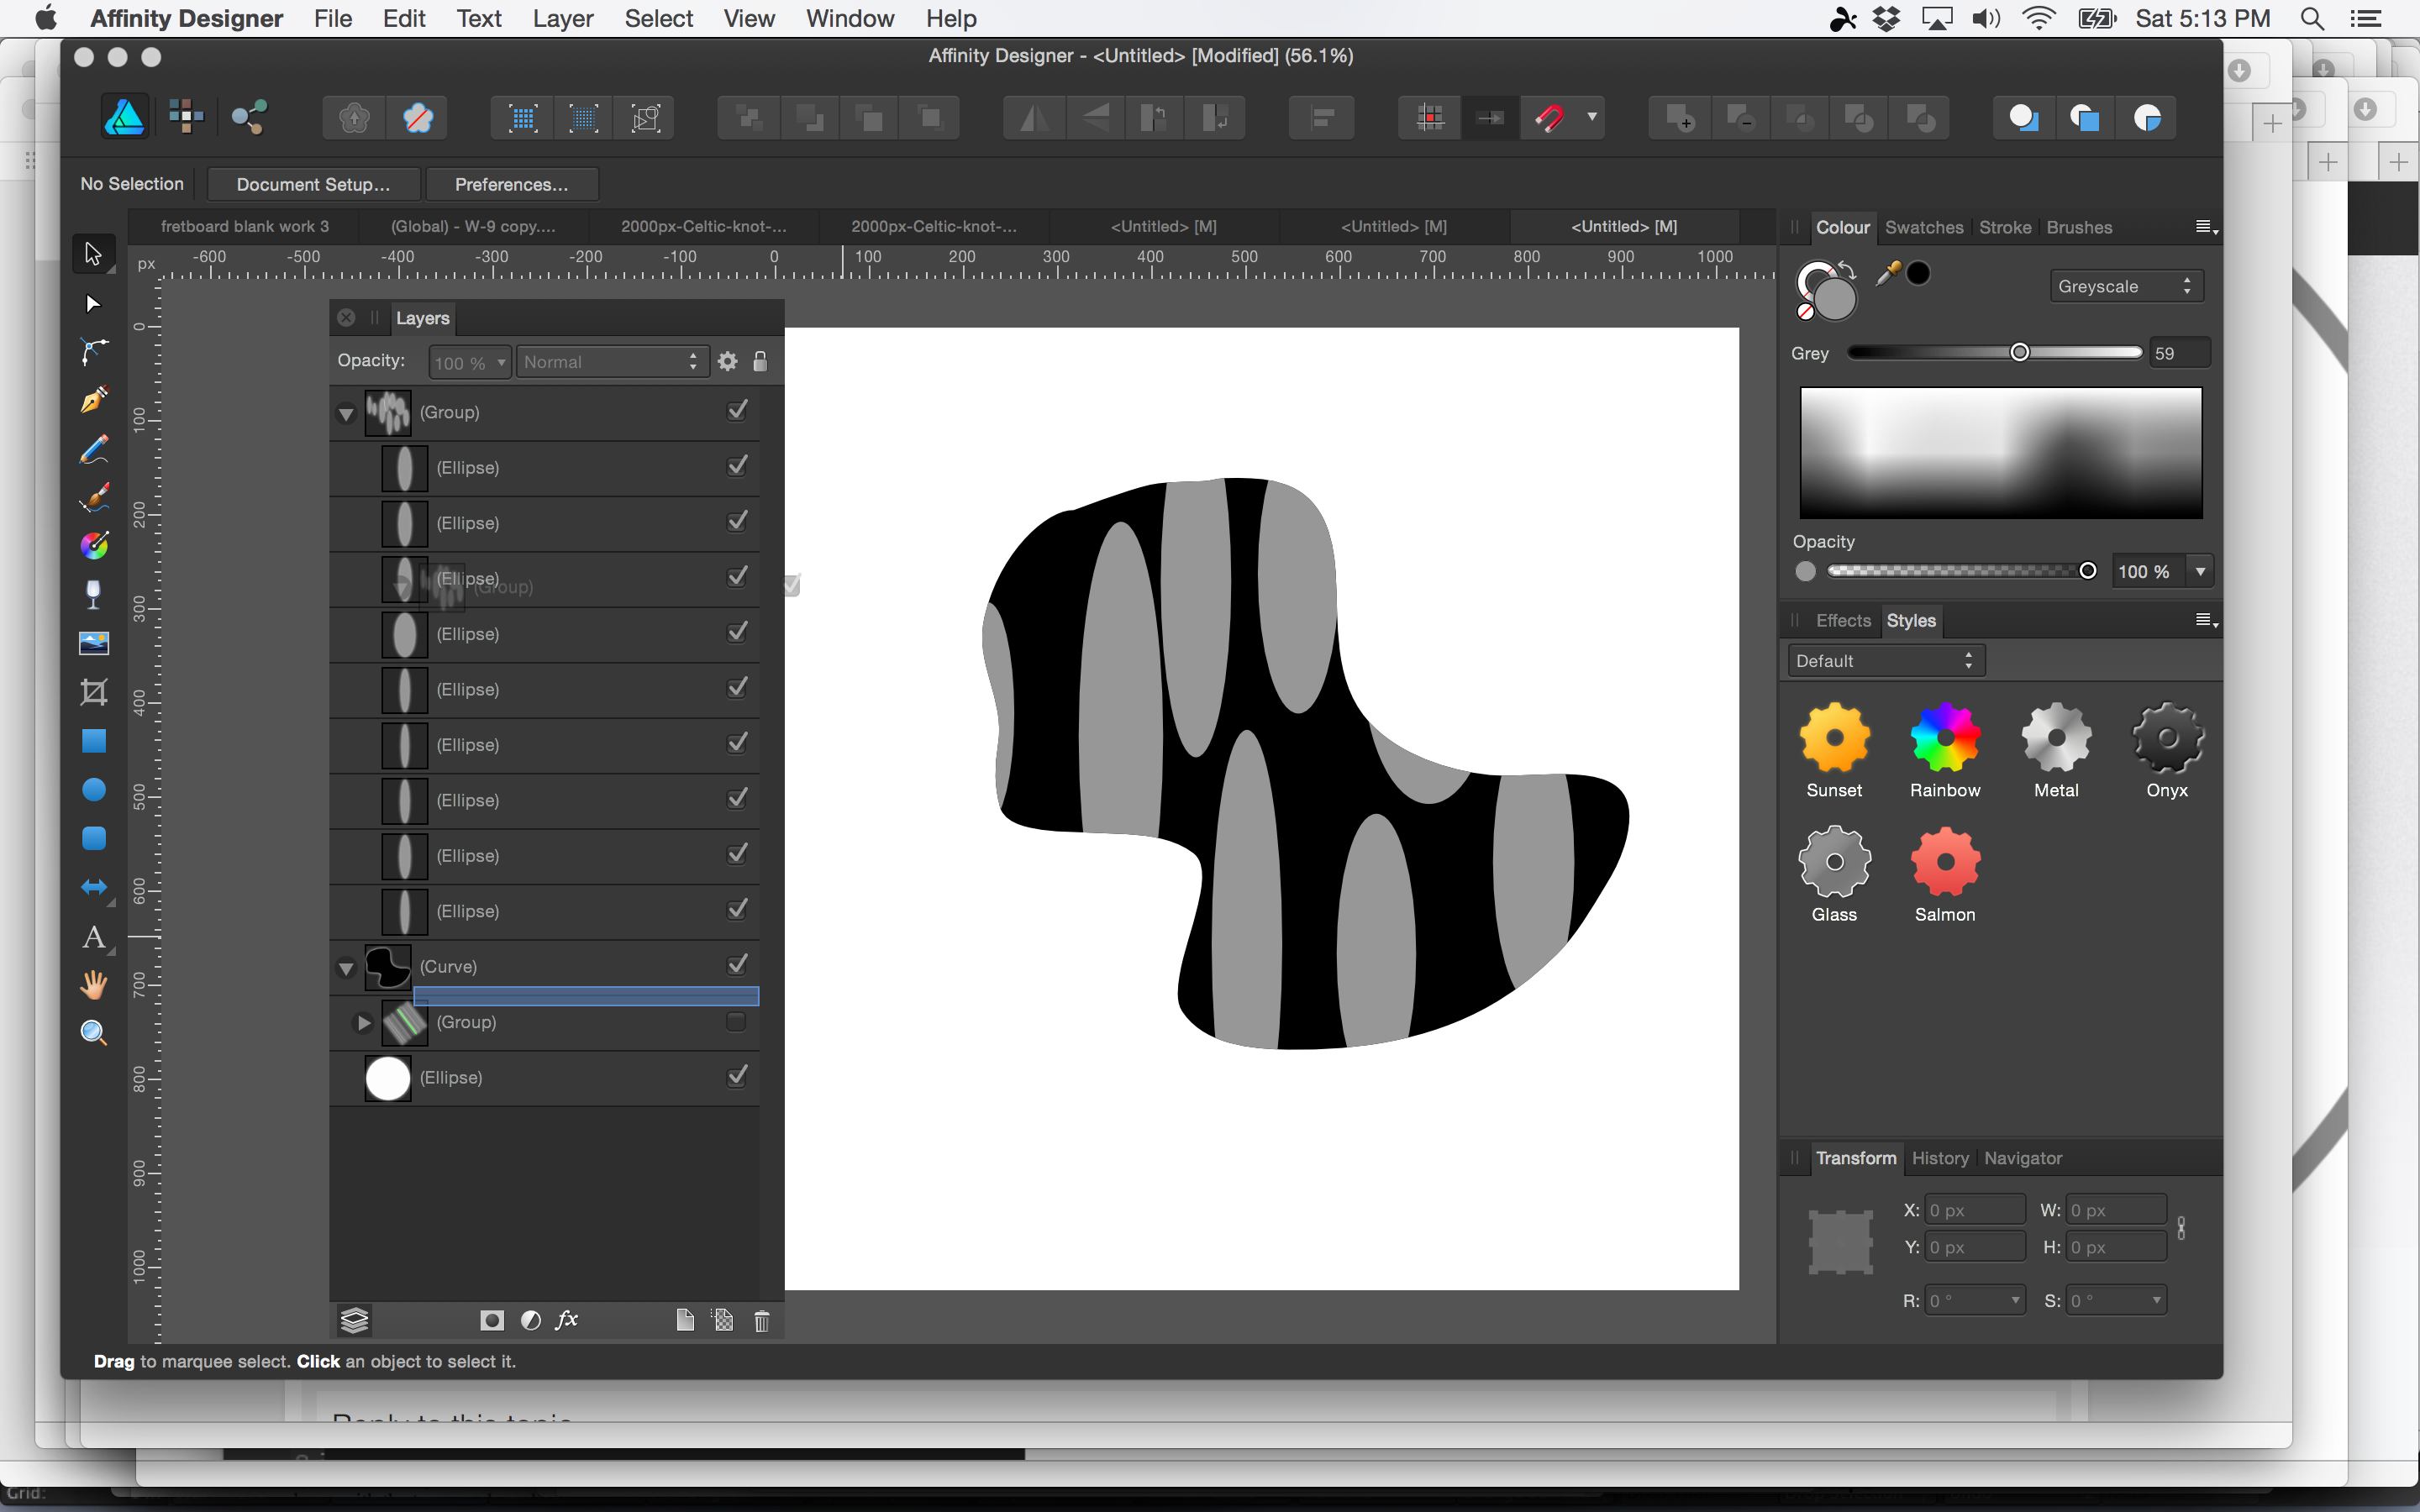
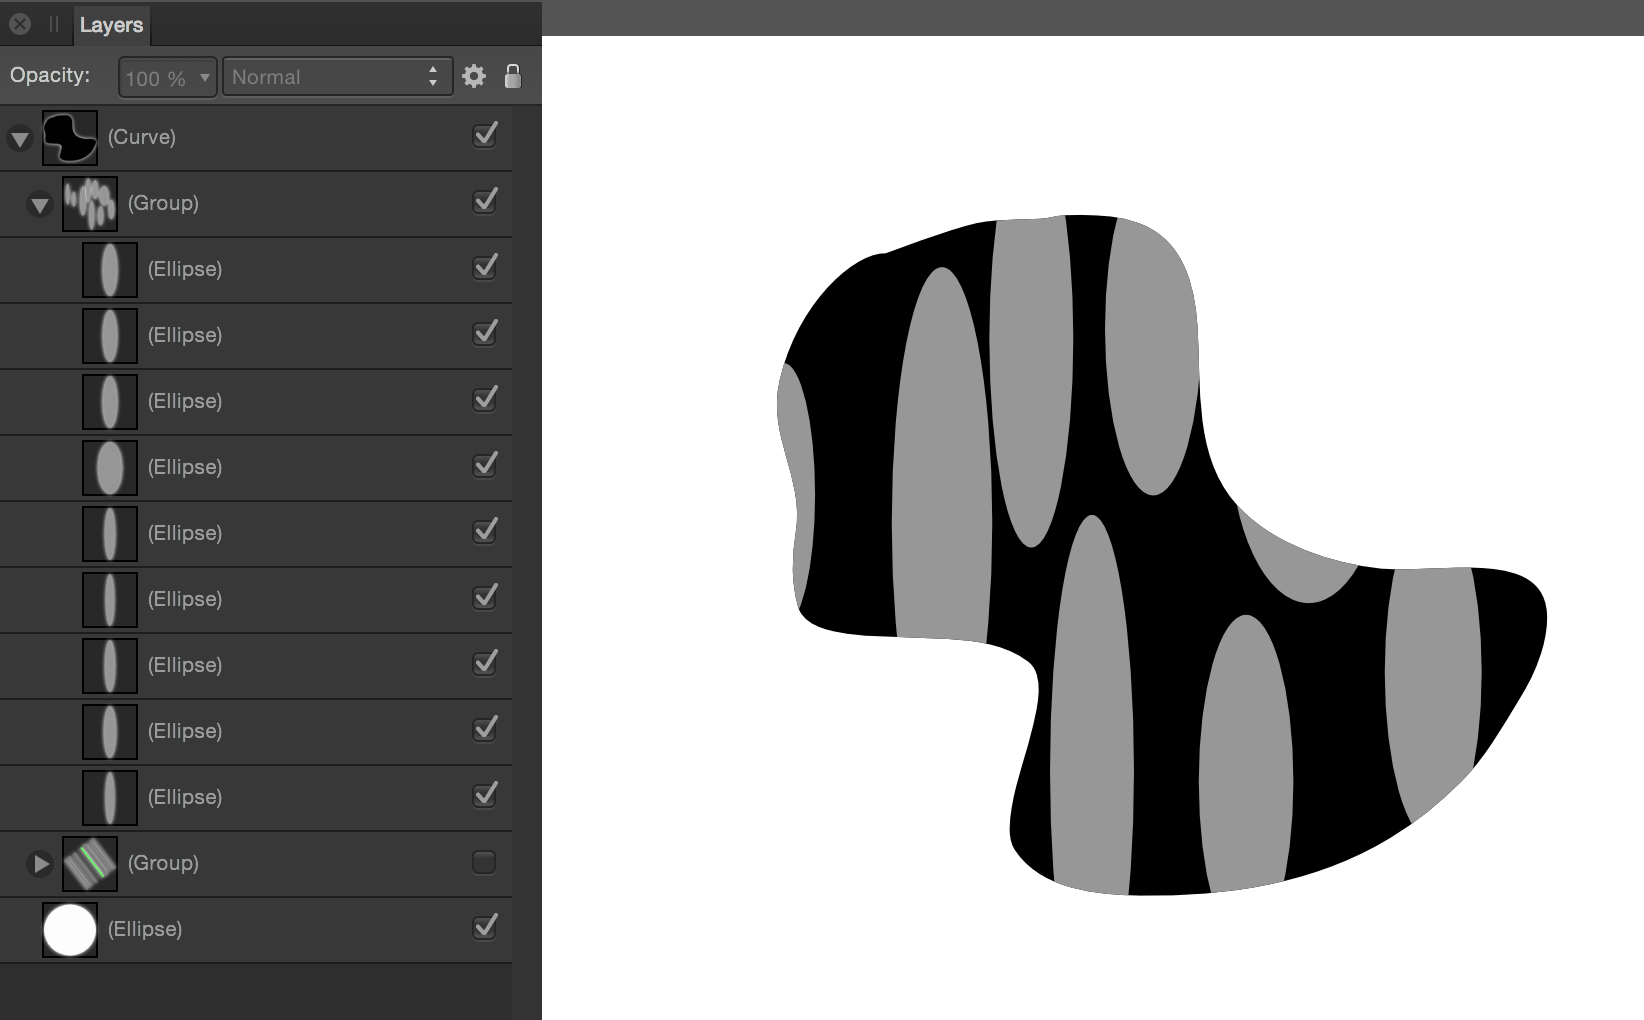
I'm not sure I follow the problem. I didn't use divide at all (the divide result you're getting sounds odd in it's own right though). The shapes, as a group, are just embedded under the black shape. NOT just underneath.... nested underneath!! See the third picture. Can you post an image or file? Attached images: 1. bunch of ovals, grouped, on top of black. 2. Oval group in it's new nested position. 3. In the middle of moving the group.... see the blue line in layers palette? You can already see the effect
-
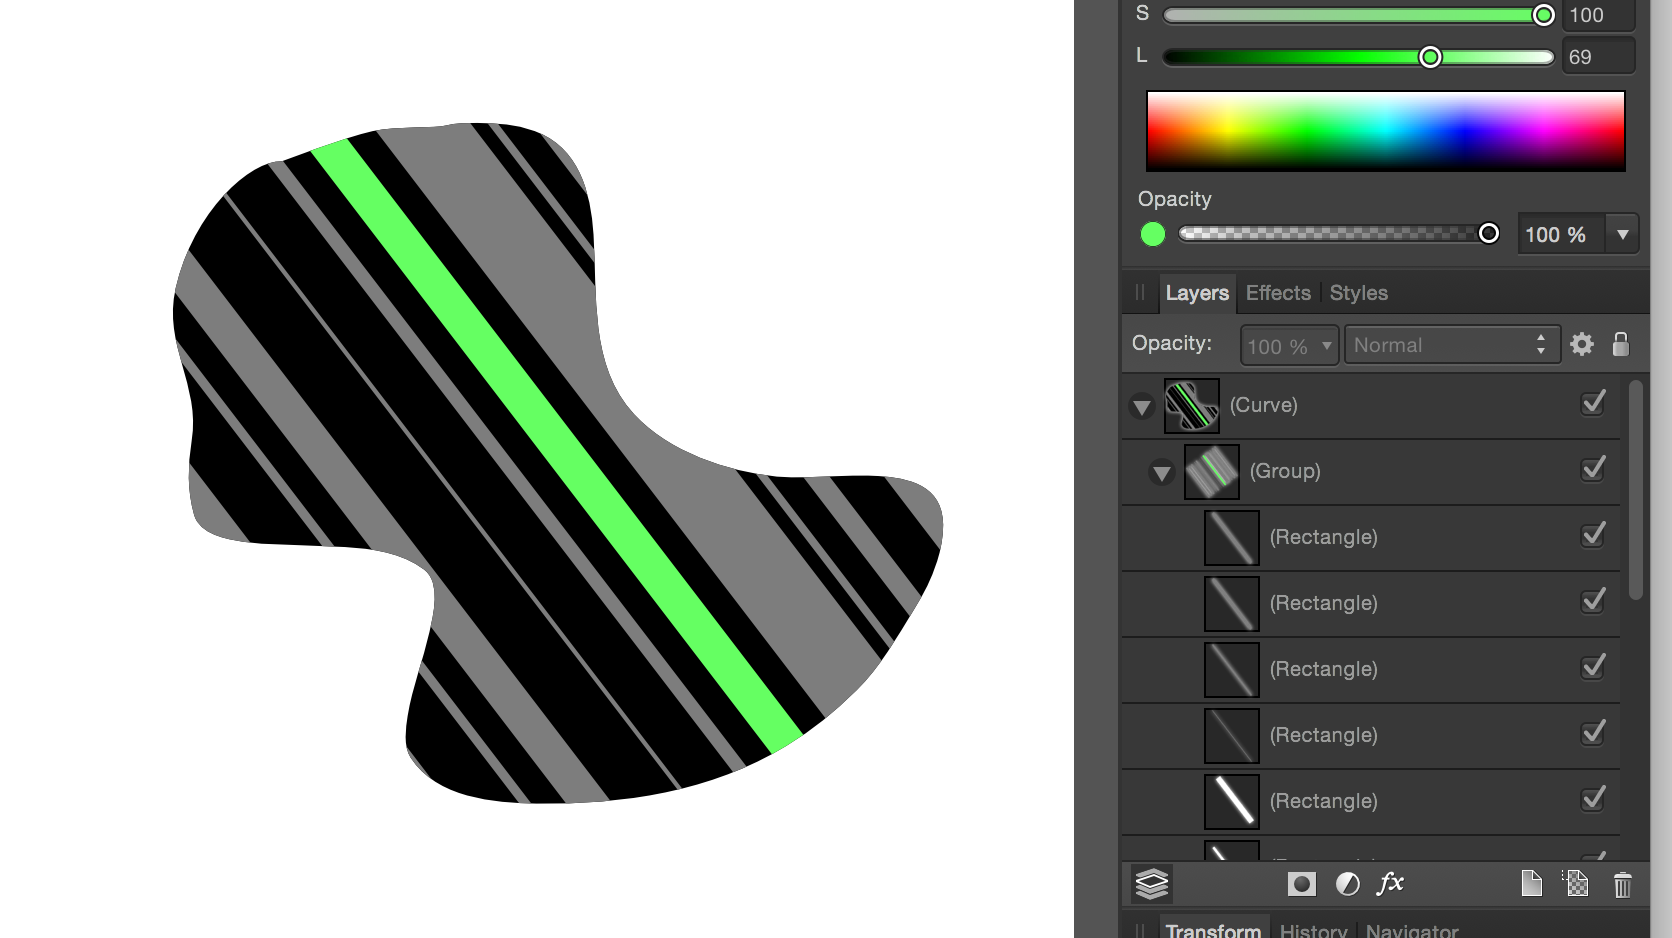
Each of those stripes are individual objects grouped together. They can be as different as you want them to be. :)
-
Blah! ;) Do you mean something like the attached? Black blob with grey stripes..... If so, make your stripes bigger than the black shape and then move them to be a child of the black shape.
-
You can get perfectly uniformed exclusions with the instructions above with one (or two) additional steps.... Question first (only comes into play in the end steps): Do you have a preference in using masks or are booleans okay? Basic process: 1) Convert your letters to curves 1) Stroke your letters ( :D.... sorry that sounded funny)... click "draw behind fill" just so you can see better. 2) Expand stroke and use a copy of each letter to boolean subtract the overlaps. Now you have a perfectly uniform thick outline shape running around each letter. 3) use these shapes to either create masks or boolean subtract the areas to be removed. You can do this a number of ways.... labor intensive or really quickly using booleans again. A) Labor intensive: you can add points and cut up the shape into the pieces you need. or B ) B) Quick: use booleans again to get the pieces. BUT be careful here because the boolean will create pieces which are exact to the underlying letter shape. If you use these to mask, or for a final boolean subtract, they MAY leave tiny artifacts. To fix, add a point on the end of each piece and drag out a tiny bit. -------- This might be coming across as confusing. Tell me if you get lost and I'll post some images :) .