pomme27
-
Posts
214 -
Joined
-
Last visited
Recent Profile Visitors
2,503 profile views


-
How to fix "overflowing text frame" error
pomme27 replied to pomme27's topic in Desktop Questions (macOS and Windows)
Thank you both. I didn't draw the association between the bounding box and "what's actually painted". Also, I missed the superscript setting. Much appreciated. -
Most of the time I know how to fix the above error. But other times I just make some adjustments until the error goes away without really understanding what was causing the error. Just to help my education, can anyone tell me why I am getting the "overflowing text frame" error in the attached example? Visually, everything looks fine to me, and I can export to PDF without any loss of content. I'd still like to know what's causing the error though. Thx. Test.afpub.zip

-
How to identify where a particular style is used?
pomme27 replied to pomme27's topic in Desktop Questions (macOS and Windows)
Thank you both. I will give these options a try. -
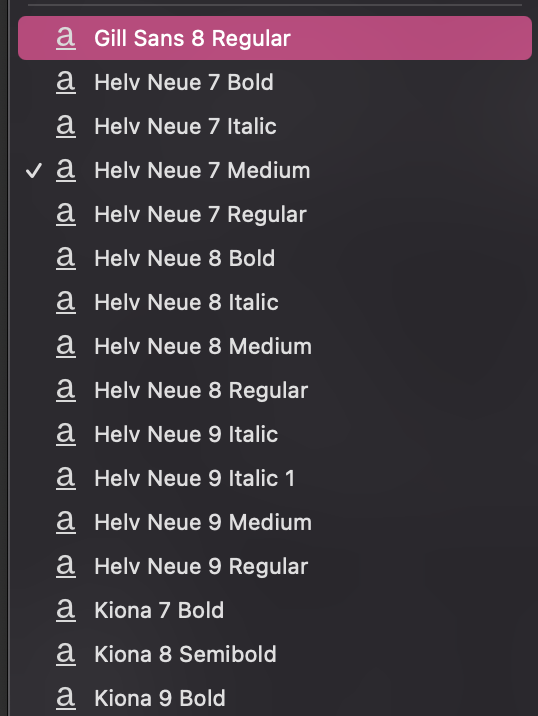
I defined some character styles in Affinity Publisher. See attached image. For a given style (say, Helvetica Neue 7 Medium), is there a way that I see where that style is used in my document?
-
I tried Ariel, Courier New and Times New Roman, but no luck. I don't have most of the other fonts.
-
I want to type the "livre" symbol (₶) into a text field in Affinity Publisher. When I try to insert the symbol, either via Edit > Emoji or by using the unicode value U+20B6, a rectangle appears in my Publisher document. The actual symbol does not appear. It works in Mac applications, however, and on this forum: ₶ ₶ ₶ ₶ Is there any way I get it to work in Publisher?
-
How to create a table in Affinity Publisher?
pomme27 replied to pomme27's topic in Desktop Questions (macOS and Windows)
Thank you for the hint. I clicked "Ignore Baseline Grid", and that turned off the "Use Baseline Grid" tick mark. The vertical alignment feature now works. Much appreciated.
-
How to create a table in Affinity Publisher?
pomme27 replied to pomme27's topic in Desktop Questions (macOS and Windows)
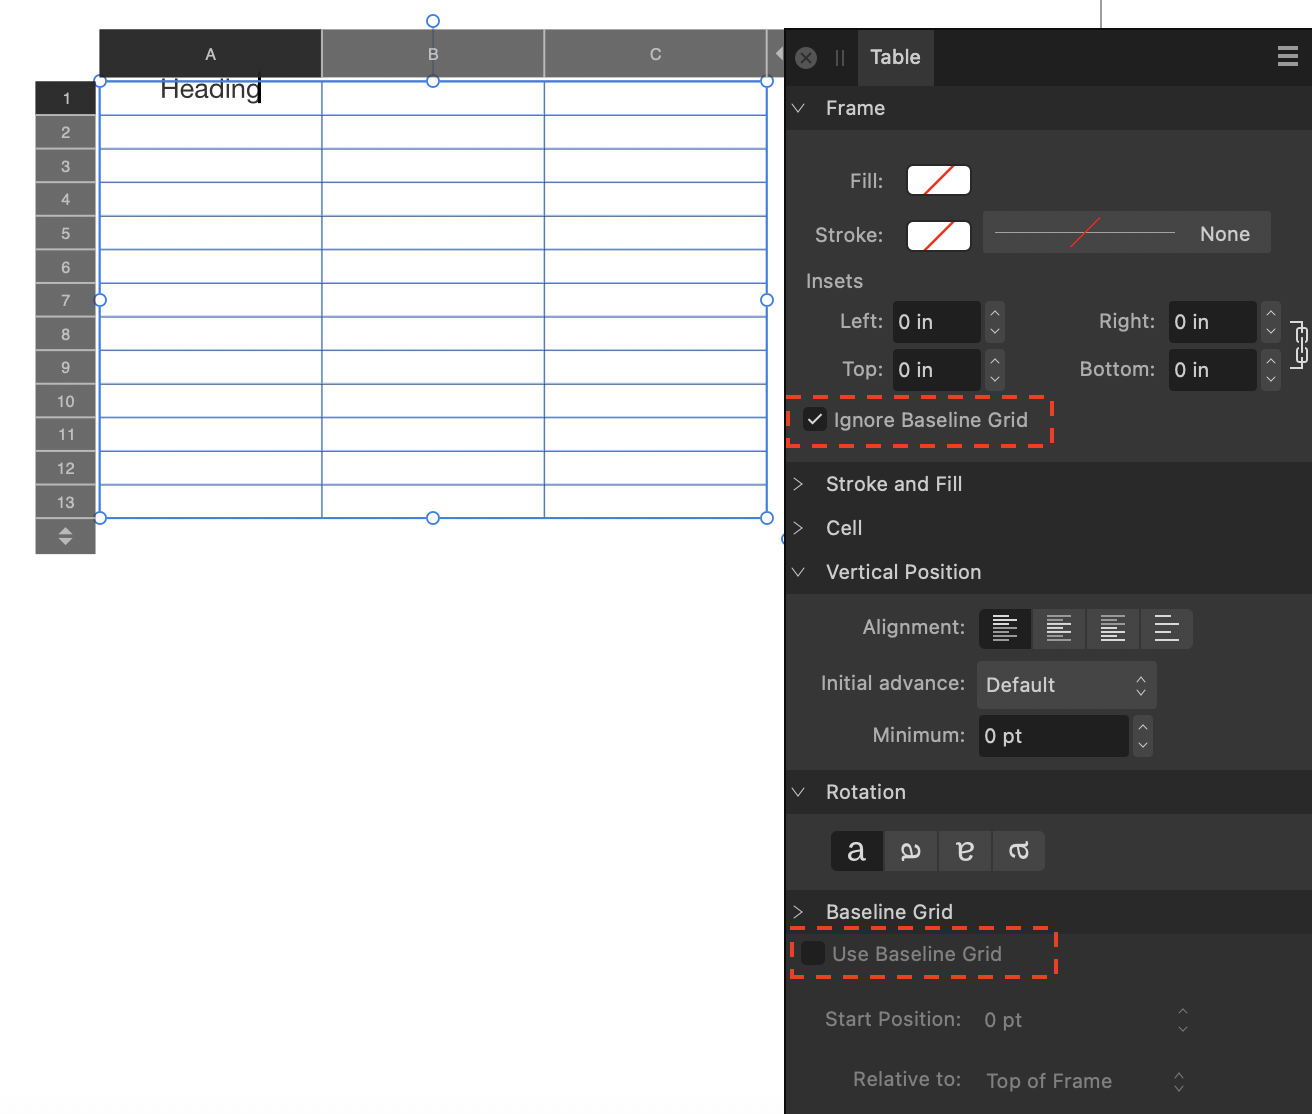
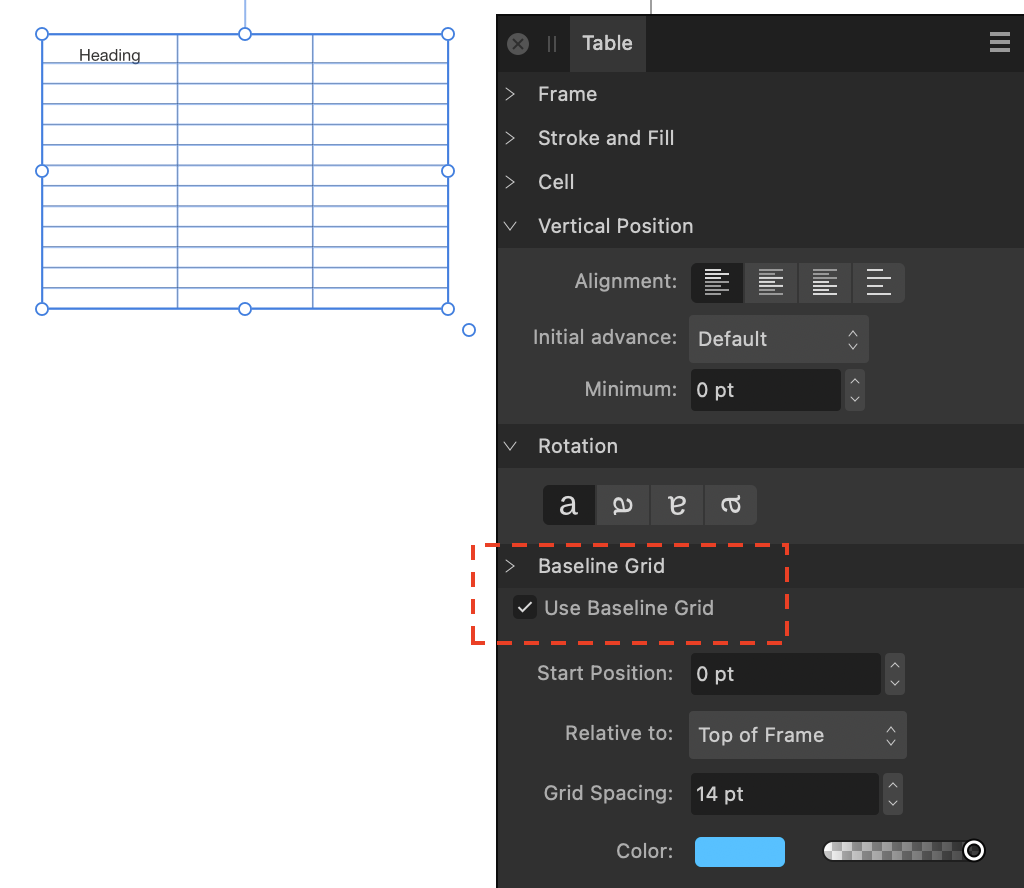
When I click on "Use Baseline Grid", the little tick mark won't go away. Is there another way to turn it off?
-
How to create a table in Affinity Publisher?
pomme27 replied to pomme27's topic in Desktop Questions (macOS and Windows)
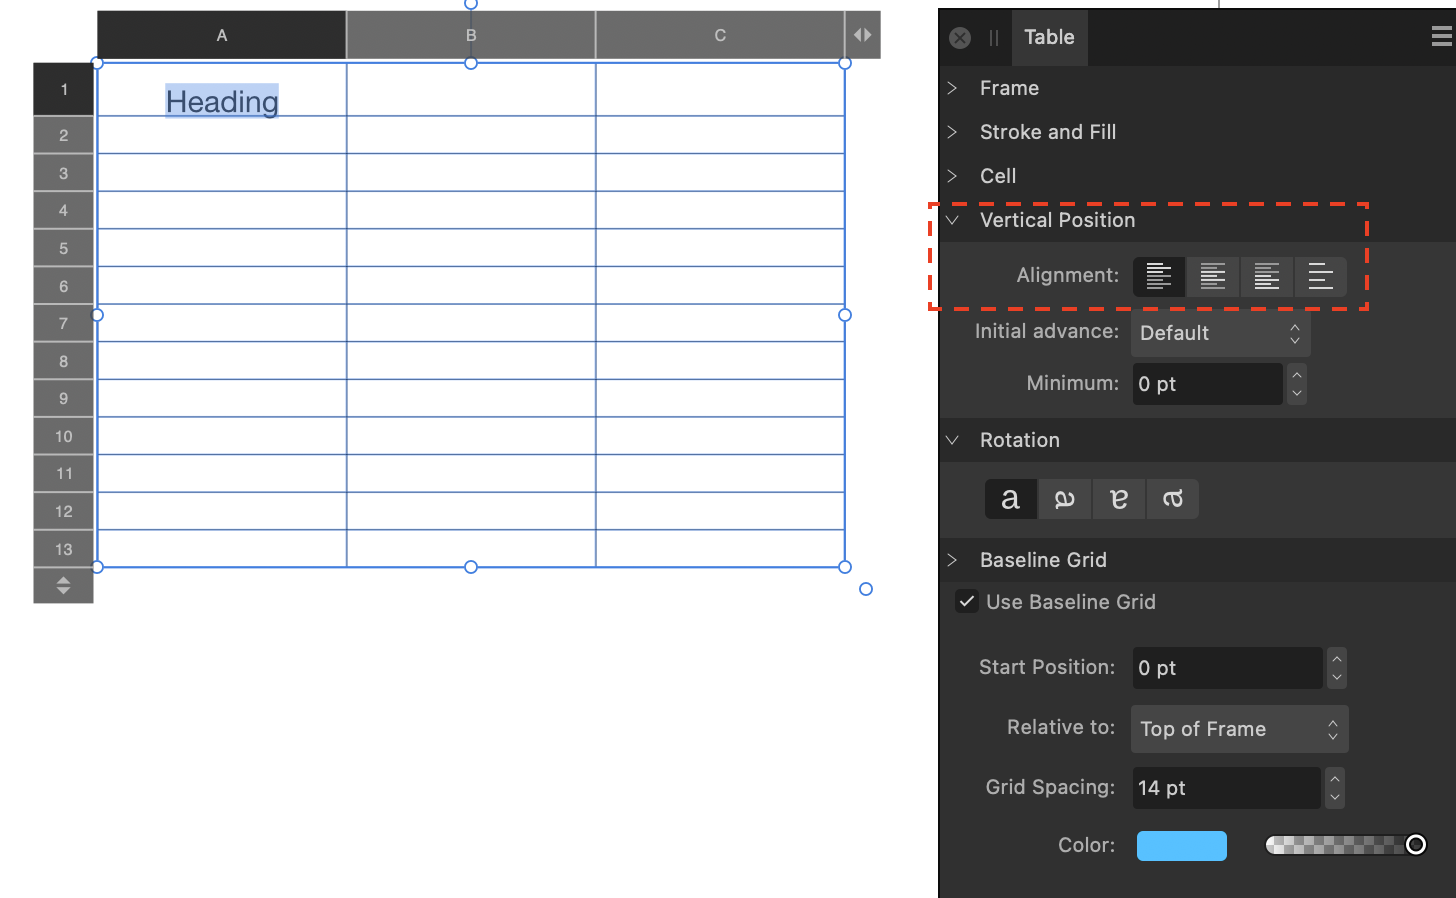
Thank you. I appreciate the help. I know a bit about Affinity Publisher, but I am new to tables. Let me ask another question. I want to center text vertically within a cell. But when I highlight the text and click the "align vertically" button, nothing happens. The text doesn't move. Any thoughts on how to fix this? Thank you?
-
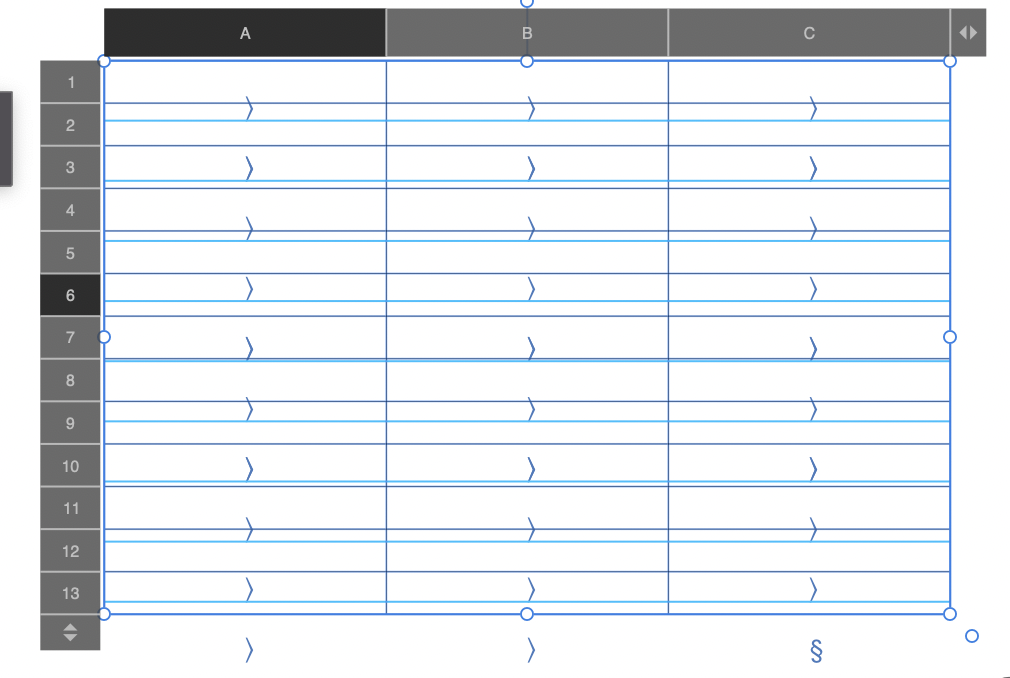
When I use the Table Tool to drag out a new table in Affinity Publisher 2, the resulting table has thin black lines to demarcate all the rows, columns and cells. So far, so good. But the table also has a bunch of light blue lines and greater-than (>) symbols. See attached image. I am creating the table on a blank page. There is no underlying text frame. What are these blue lines and symbols trying to tell me? How do I get rid of them? Thanks.
-
 Ldina reacted to a post in a topic:
How to remove background from an imported HEIC image?
Ldina reacted to a post in a topic:
How to remove background from an imported HEIC image?
-
I've now tried both solutions. Both are great. Thanks again. I appreciate it!
-
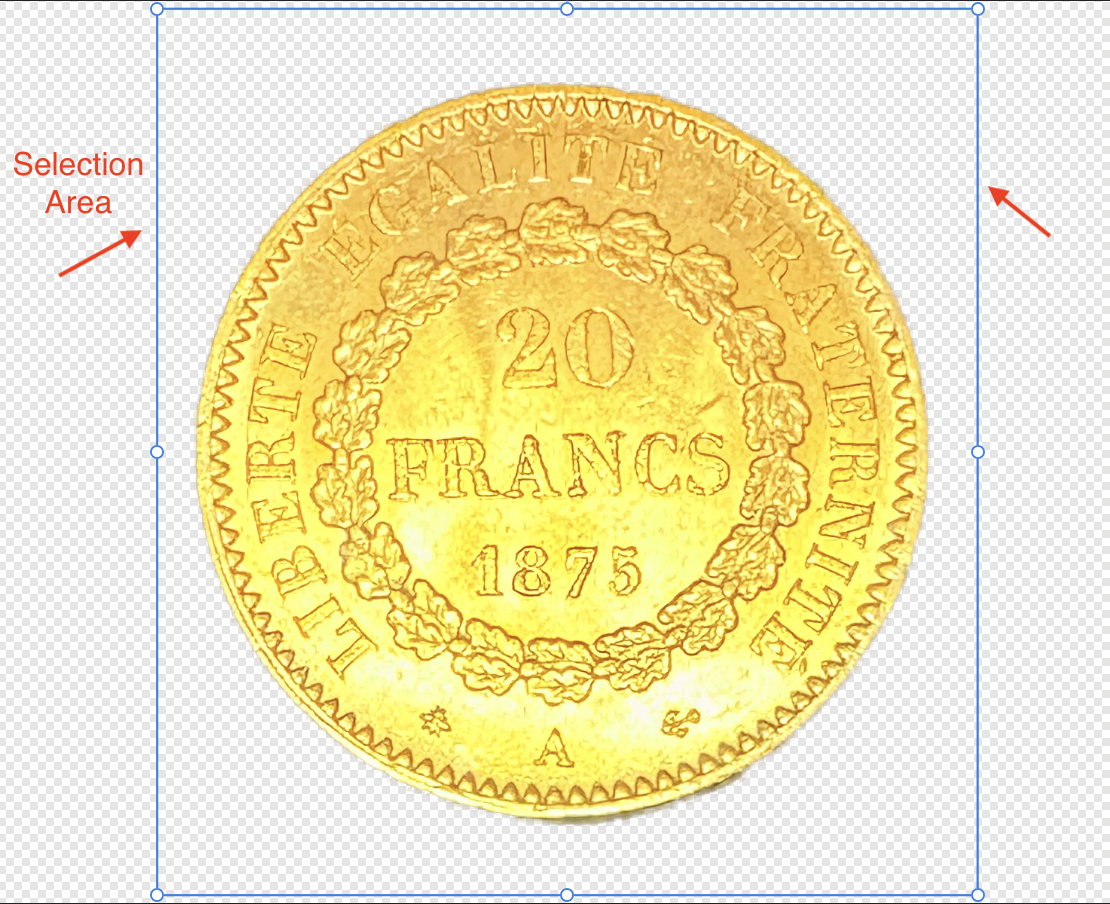
Thank you. The above method worked. I had to install something called the Segmentation Model, but once I did that, it worked. Follow-up question: After having masked the coin, then selecting it using the Move Tool, I notice that the selection area includes the brownish part that I removed (see image). Is there any way I can make the selection area be just the coin itself?
-
Hi. I am trying to edit some photos for a friend of mine. He said he originally took the photos using an iPhone and sent them to me in HEIC format. When I drag-and-drop an HEIC photo into Affinity Photo, I get the image as show in the attached .afphoto file. In Photo or Designer, what's the easiest way to fully remove the brownish background, leaving only the coin? Thank you. Temp.zip
-
Vector Brushes for Affinity Designer
pomme27 replied to pomme27's topic in Desktop Questions (macOS and Windows)
Thank you. Will check them out. -
Vector Brushes for Affinity Designer
pomme27 replied to pomme27's topic in Desktop Questions (macOS and Windows)
Thank you Walt.