Search the Community
Showing results for tags 'gap'.
Found 20 results
-
 Hi, Say I stroke a closed shape with a Vector Brush (in Designer). There is always a gap at the terminal point. Say you don't want the gap. No matter how you edit the brush's Properties – including Head or Tail Offset, Overlap, Pull, etc., – there's always a gap at the closing node. Is there a trick I don't know? (Besides opening the curve and tugging the end nodes for visual stroke overlap.) Wouldn't visual vector-brush stroke closure be a desirable feature for some/many purposes? ¿Could this option be designed into Brush Properties, in a later A.D. update? thanks in advance, – pbass
 -
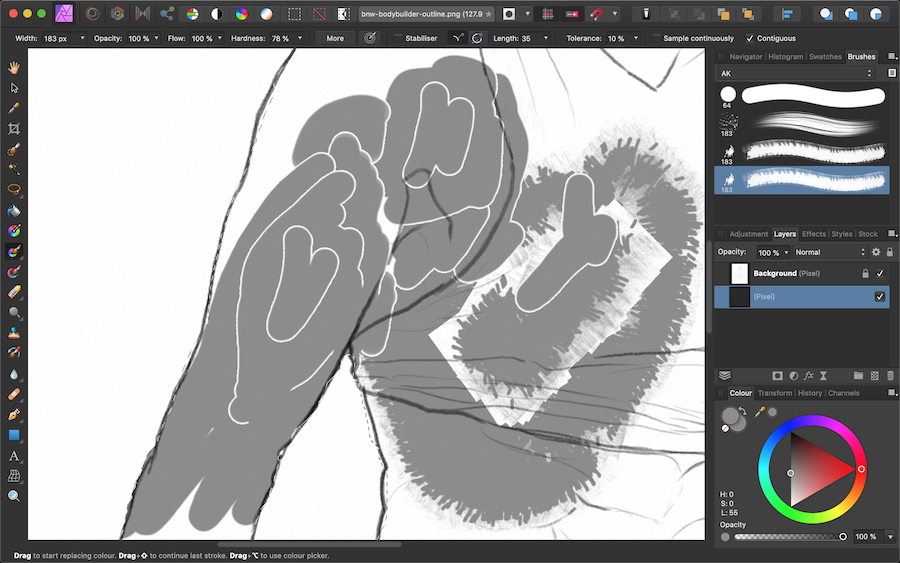
 Hi! Every brush stroke I make over a previous brush stroke, a gap appears around the past brush strokes. :(' This was even happening yesterday and then I factory reset Affinity and the problem went away, but today the problem appeared again. If I close affinity and open a fresh copy of a document or of the image and start painting, everything is back to normal. It may be happening after I make a selection using the selection brush and then, when I start painting inside, this problem occurs. Whether it be my own brushes or the default affinity brushes, once the problem occurs, it doesn't seem to go away. As you can see in the image, the selection is still active within the confines of the female figure. I just bought affinity a few days ago so I am very new to it. Please help. - Arjun
-
 It would be nice to have gap detection in the flood fill tool. Ideally, you would be able to fill areas that have gaps below a certain, user specifiable threshold.
-
- 1
-

-
- affinity photo
- flood fill tool
- (and 3 more)
-
 Working with Web design i often need to eport several different png graphics ... i would like to know if there is a way to click/select an object to create atutomatically artboards or slices in the precise dimenson of the object/group, so when i export a PNG file the image does not leaves a gap or borders. Is there a way to do this?
 -
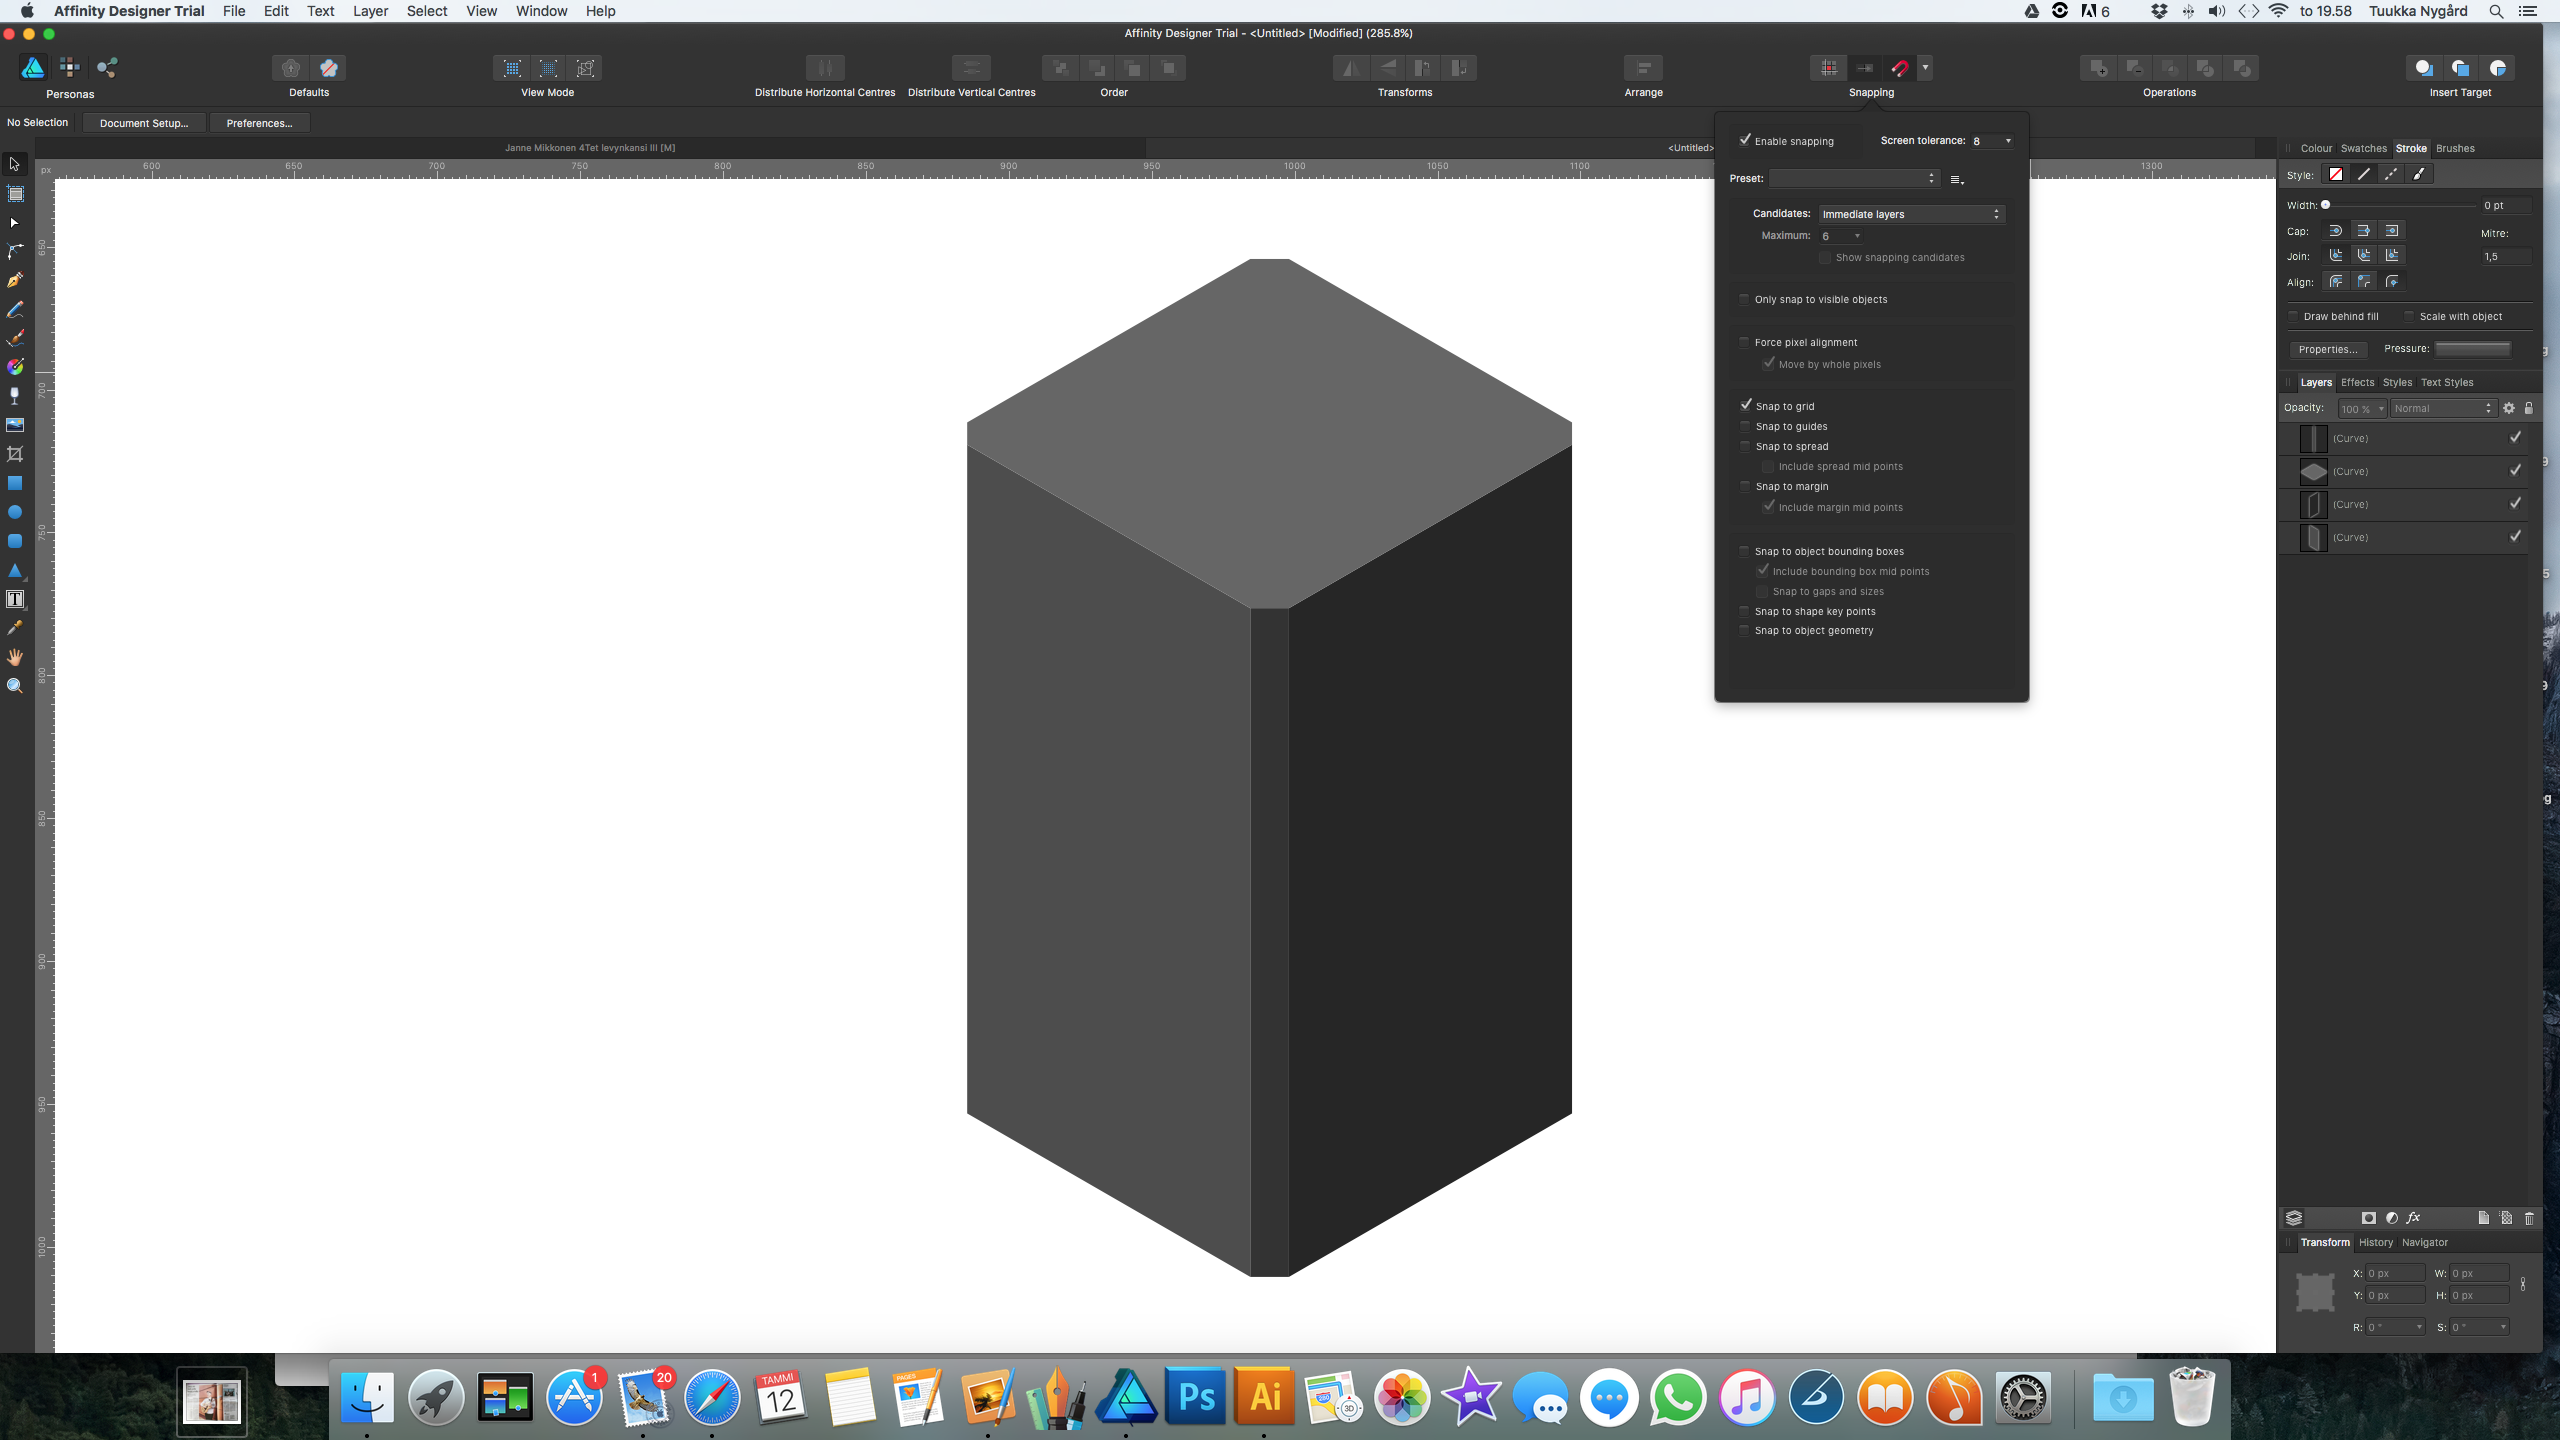
 i am attaching picture of some box in Affinity designer when i on snapping i see thin hairline between objects please help
-
 Hi everyone, For a client, I have to create a form for minutes of a meeting. Per line, I have five tabs overall. At the beginning of the tab is a word, then followed by dotted lines for handwriting. This looks a bit like this: Word.......... Word.......... Word.......... Word.......... Word.......... But for many lines, there are very varying exceptions with less than five words but with longer dotted lines, for example like this: Word.......... Word.......... Word.............................. Unfortunately, if two tabs meet each other with only dotted lines as filler, I get ugly empty gaps. Please, have a look at this screenshot: I know, I could avoid these gaps by removing the redundant tabs and extending the first tab. But there are so many exceptions per line (different amount of words and widths of dotted lines from one word to another) that it means, firstly I have to do alot of rework and secondly, if the client wishes for changes (what happens every few years), it's not easy to add or remove words, because I have to adjust the tab distances for every line. Is there a better way, to remove these gaps, without altering the tab lengths?
-
The stroke on text with particular font will be shifted when printing. I can send the font(it's a paid font so I can not upload here directly) as sample.
-
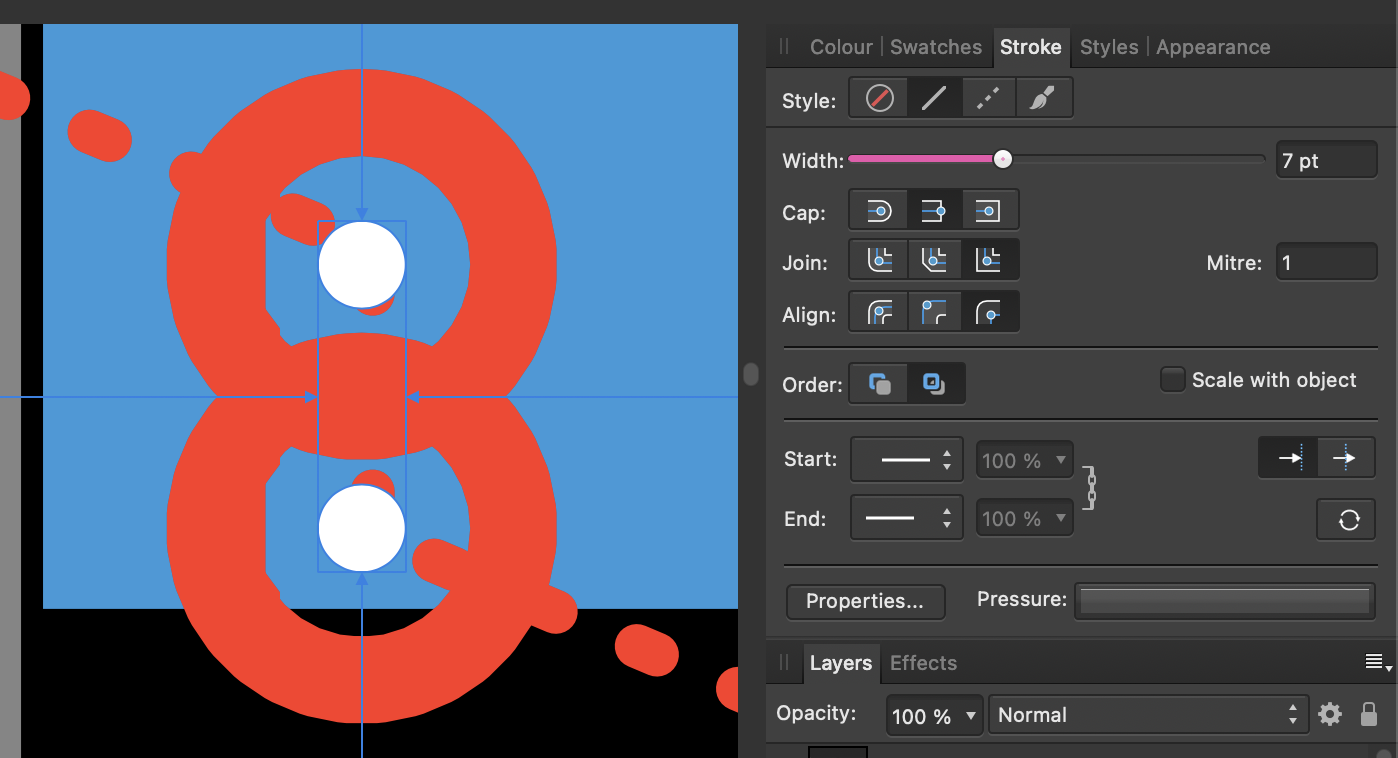
 V1.9.3, MAC OS 11.2.3, MacBook Pro 16" 2019 built-in screen, no exceptional hardware or software running. At default screen resolution. Expected: When I have a circle shape and set the stroke width to a high number, I expect the stroke to go al the way from the outside to the outline of the circles filling. What happens: A gap appears when the width exceeds the diameter of the circle. Also the shape of the stroke has different irregularities at different widths. Reproduction instructions: Create a new document. draw a circle shape set a stroke color and set the position of the stroke to outside. increase the width so it exceeds the diameter of the circle. a gap appears between the stroke and the shape.
-
 If a text is Bottom Aligned, by default, it is placed exactly on the line/outline of the selected area. This not happens when the same text is Top Aligned. How to perfectly align text to the top? text is Bottom Aligned here text is Top Aligned HOW TO ELIMINATE THIS GAP?
-
 I know seeing antialias gap between attached objects on editing screen is normal. But at least I would like you to improve gap problem on export with raster format such as PNG/JPG. (Without aligning to pixel grid, aligning to pixel grid won't work for tile pattern design/symbol sometimes) Adobe IIlustrator has no gap on both editing screen and exported raster file. What kind of magic they have?
 -
I faced the old AD problem of hairline \ gap like in I read most of such topics. any solutions works fine. Problem still exist after export. May be only "force pixel alignment" delete a few "gaps" but not all and in other situation they still visible. and of course even if some of gaps will hone after export, while working on canvas - this gaps are annoying and then try to guess how many of them will stay. This problem exist since 2015... Top app and so frustrating. Did not find any updated about this Exported png and source file for testing. Here separated white blocks, and in some cases where they snapping each other "gap" can exist after export, some time no test.aftemplate
-
 I've probably read all the posts on the forums about this topic. Even the ones from almost 3 year ago. Yet the issue still remains. Is there a way to snap objects together without having a gap between the objects? I have tried the force pixel alignment and move by whole pixels. I also find that this does not only happen when snapping shapes to shapes, but also having a shape on top of another shape. It is also visible when a shape is on the side of the art board and exported to PDF format. I also tested this in Adobe Illustrator CS6, which is old, and I don't see this issue when putting shapes next to each other and exporting the file to other formats(jpg, png). The strange part is, while writing this post, I tested it in two documents. In the one I see the gaps and then in another the gap between the two shapes are gone. Please see the documents attached with examples. snapping_test.afdesign shows the gaps and snapping_test_successful.afdesign exports correctly without showing any gaps in the exported file, only in Designer itself. Please explain this, or I would really appreciate if this can be fixed or improved with an update. snapping_test_successful.afdesign snapping_test.afdesign
 -
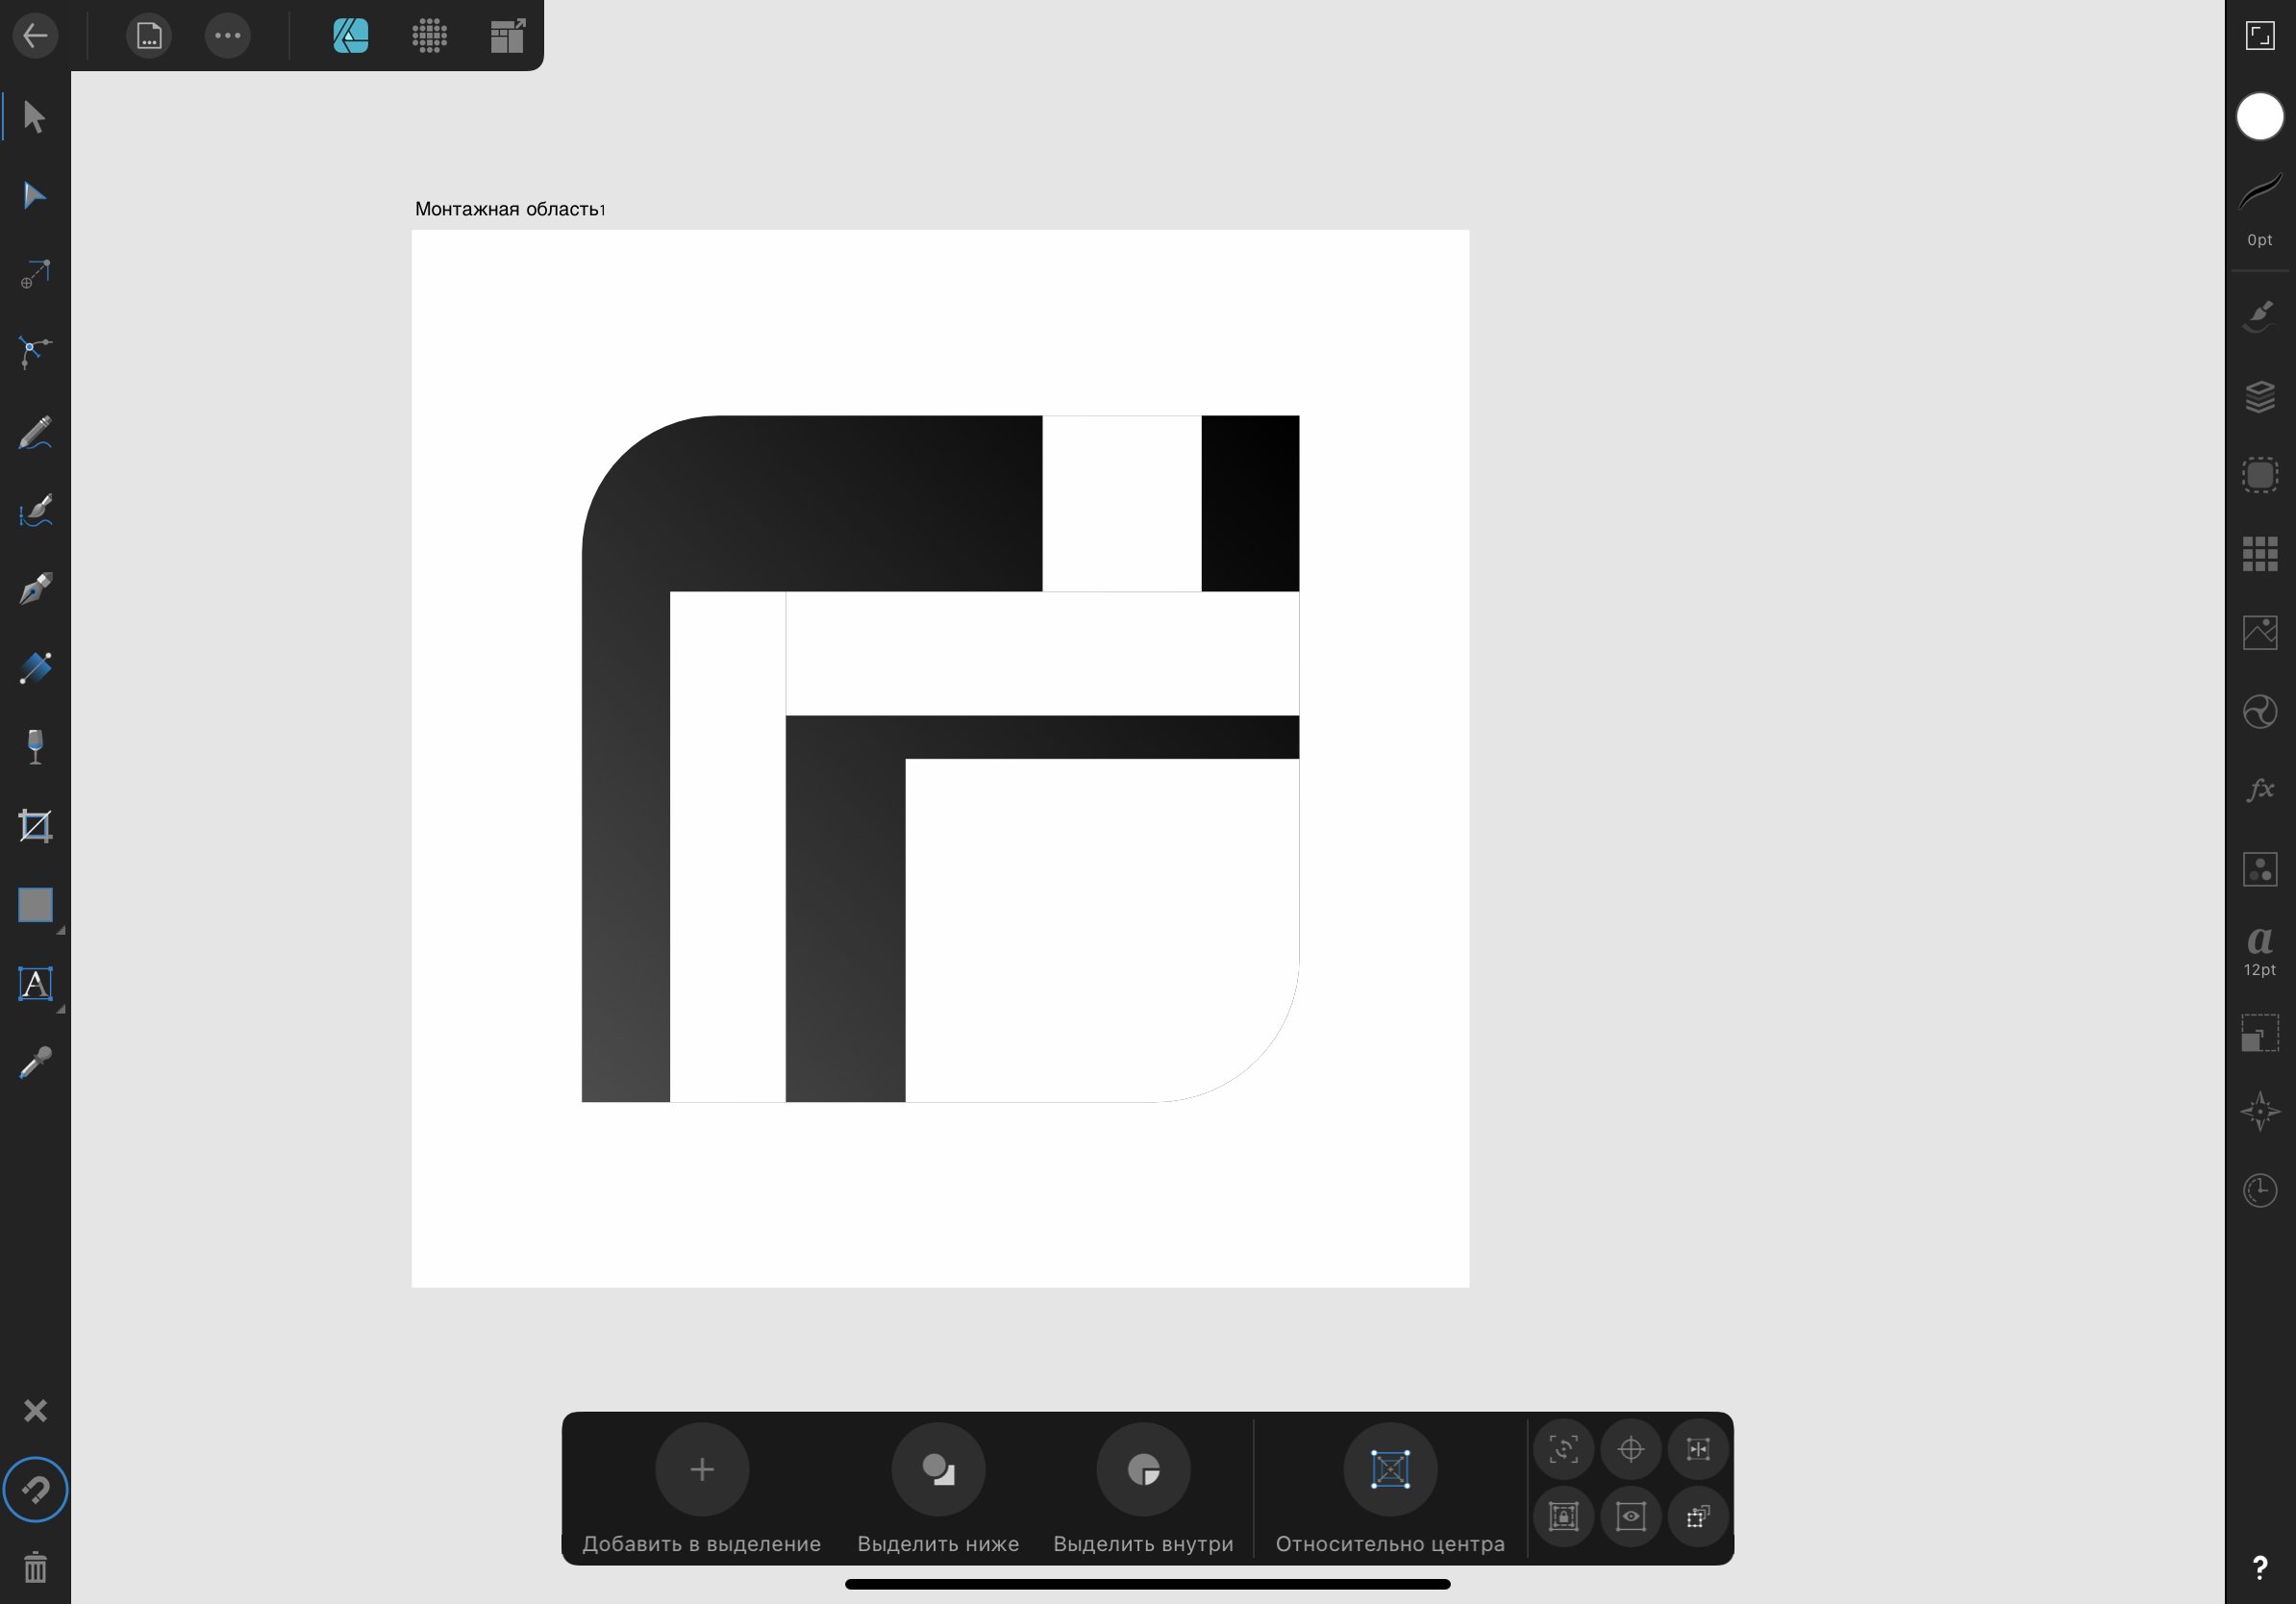
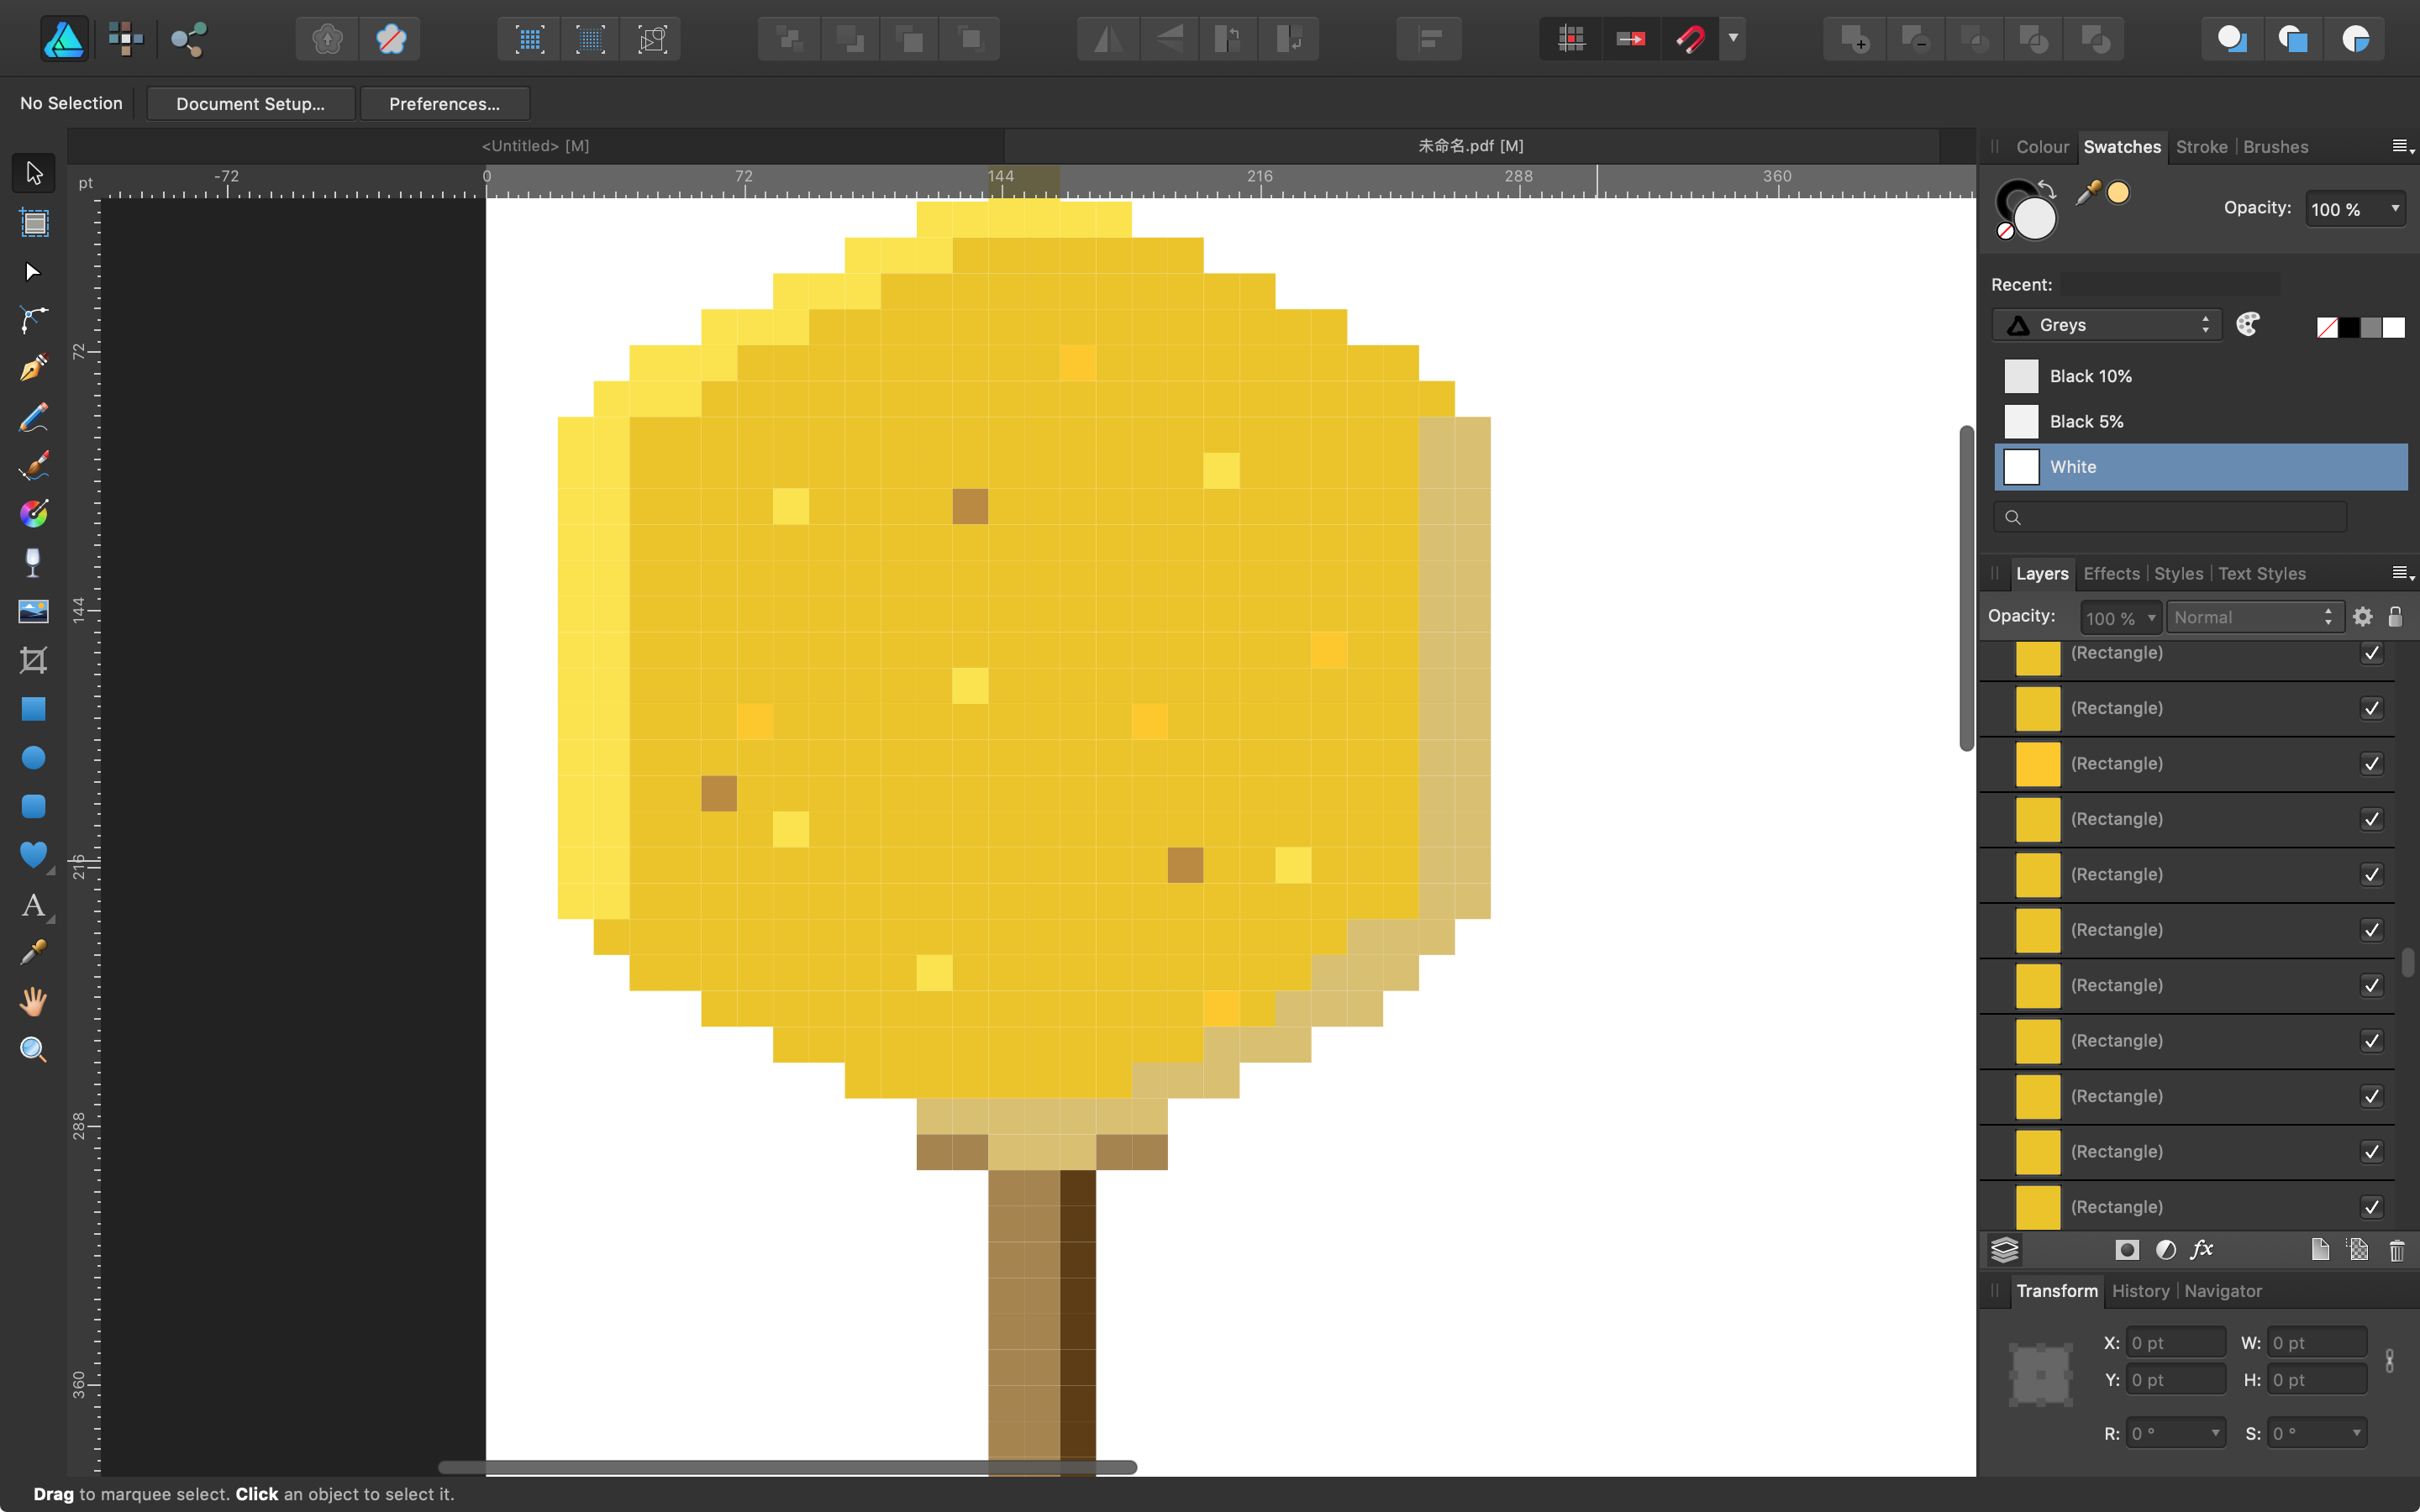
 Hi, I was trying to create pixel art objects then having problem removing gaps between squares. The thing is, after creating the squares and managed to arrange them (with snapping enabled), I found there are very thin lines between every square. And when zooming, they still exist. Which is, very disturbing. BTW, Every block is in whole pixels. Any idea how to fix this? Thanks! Tree.afdesign
-
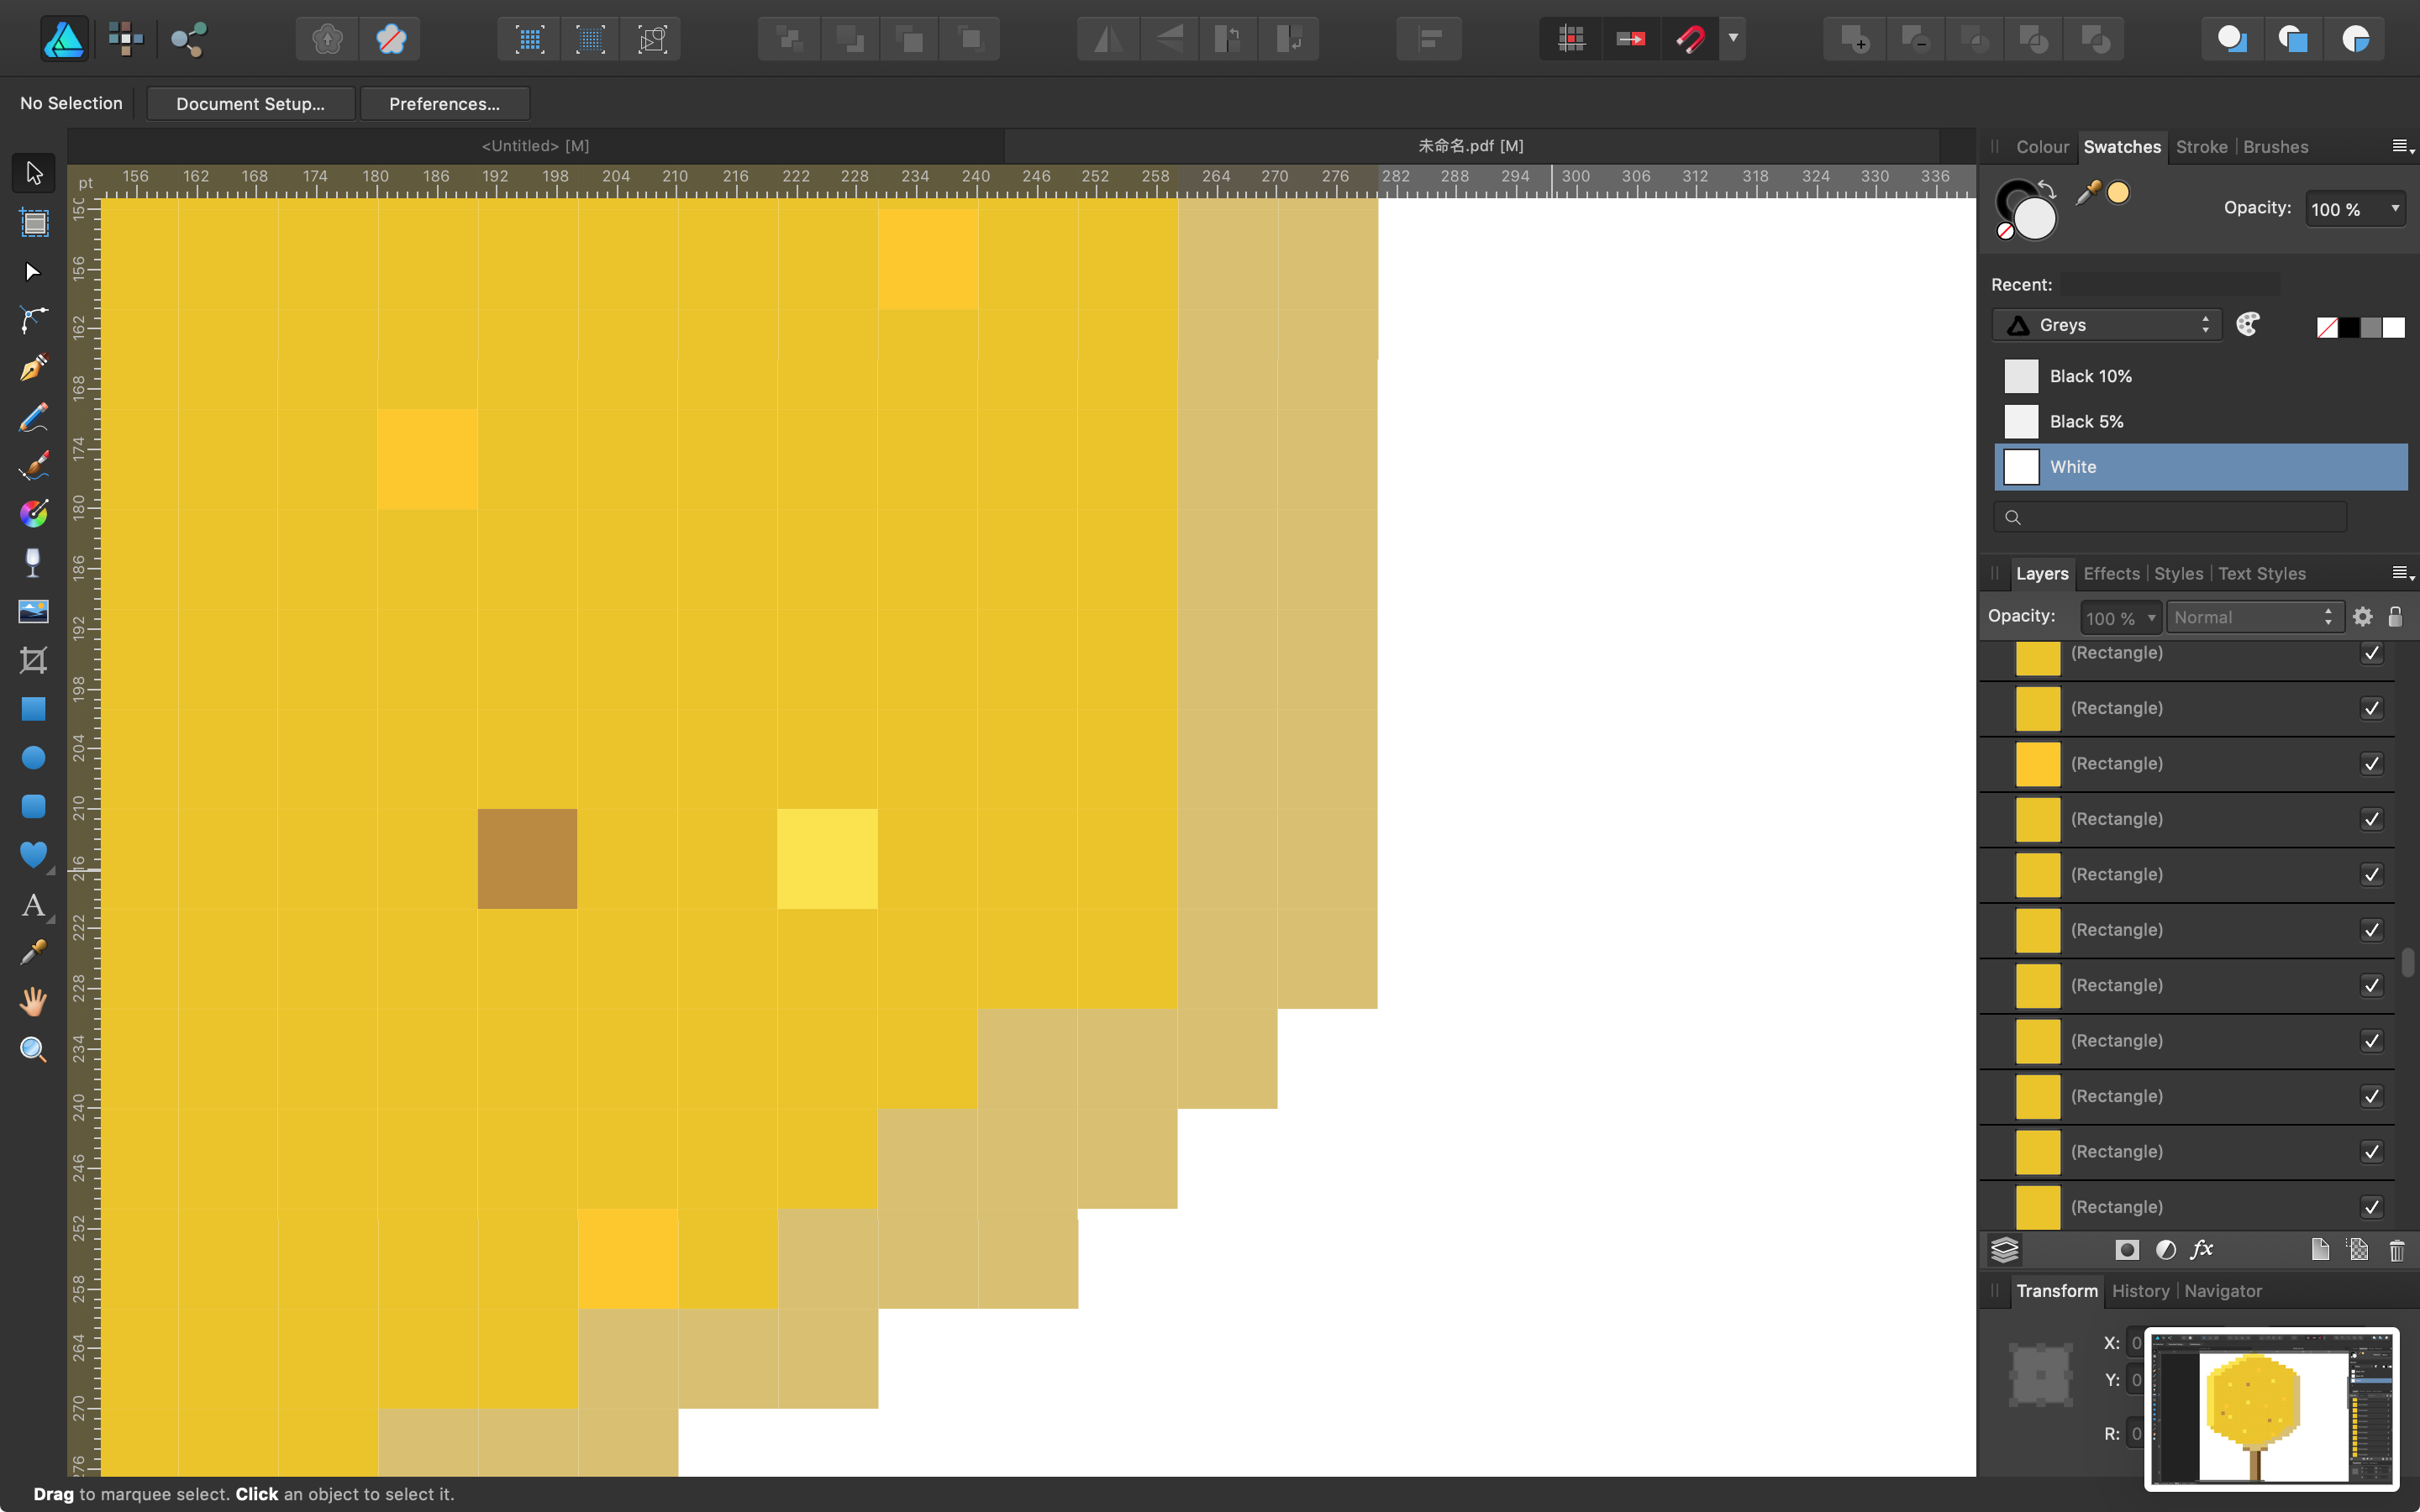
 Textured Brushes on Strokes- How do I get rid of the gap where the last curve node joins the first one? (screenshot attached) The only way I could work around it was to break the curve, however on a doc with hundreds of strokes, this would be very tedious! Thanks in advance,
-
 I've been trying to get to grips with the basics of Affinity Designer. One thing I can't find - (does it exist?) - is the ability to replicate an object one or more times to form a spaced out sequence separated by a fixed distance. For example, I might want to create a square 1 cm wide and then copy it and move the copy to the right 1.5 cm to leave a 0.5 cm gap between the two squares. Then I might want to repeat this process in the horizontal direction to produce 10 squares in a row. After that I might want to replicate the whole row of squares and copy it down 2.5 cm and shift it 0.2 cm to the right. Finally I might want to replicate the two lines of squares multiple times down the work space. I have used other graphic or drawing tools which allow this, and make it very quick and easy to produce such organised structures of objects, but so far after watching several beginner level tutorials and looking in the AD book I've not found a feature like this in AD. If it's possible I'd like to know how to do it, and if it's not possible (yet) I'd like to suggest this as a feature request. What would also be very nice would be the ability to lay out the objects in a pattern as I've suggested, but then to be able to change the base object, So one could then obtain a pattern of circles, a pattern of gingerbread men etc. Maybe that's going too far, but it's just a suggestion. In programming terms it would be like using a higher order function fo space out the objects, and then being able to specify the object to be worked on by the higher order function.
 -
 In Designer: I have shapes that are perfectly aligned on their edges but they are still showing the background behind especially when turned to raster elements. I have the points snapping to each other and have zoomed in very far to confirm that they are aligned. See attached sample. I know I can put one shape behind the other shape and then overlap them but I need to avoid doing this as I will have hundreds of these shapes and will need to delete different ones and have the space be accurate. I will be bringing the files into Photo and will be rasterizing the project at the end as well. It seems that AD is not seeing the edges as being perfectly next to each other despite the points being aligned. Even if I put a small stroke on the shapes the background is still showing through slightly. I'd rather not have to put on a stroke regardless. Is there any way to prevent this from happening? Cheers! gaps.zip edit: I've even tried overlapping the shapes slightly and the background still shows through. Seems like it might be more of a bug.
 -
 Hi. I'm doing some isometric stuff with the grid tool on Affinity Designer and when I fill the shapes it leaves very small white gaps between the shapes. They even print on to .jpeg images when exported. How do I get rid of them? I have the snap to grid-option selected in the Grid Manager tool. Thanks!
-
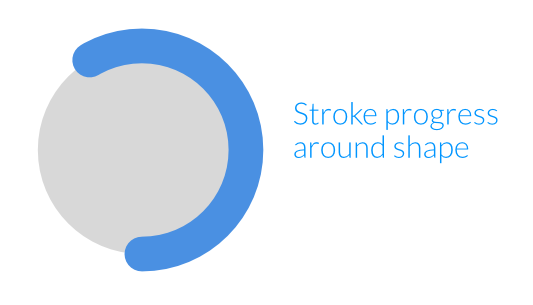
 Hi folks, I would like to be able to set much more precisely the gap value of a stroke in Affinity. There is a trick I'm using quite often (in Sketch) which makes able to finely fake a "progress" of the stroke around a circular shape. The point is to set the gap of the stroke as the exact diameter of the circle by multiplying π with it's width (for instance, 500*3.14159265359 if your circle is 500px diameter). This basically means that the gap is now equal to the perimeter of the circle. By changing the Dash value then, we can precise make the stroke grow around the circle. PreciseBorderStrokeProgress.mov Sadly in Affinity, gap value goes from 0 to 100, which simply is way less easy to fine tune, to understand, and also prevent choosing whatever stroke width we want etc. I would love to be able to adjust more precisely these values, but ultimately (and I'm sure you Affinity guys knows exactly what I'm going to say ^^), it would be amazing if you could simply provide a new setting for the stroke: "Progress". With a slider (or precise value input), we could instantly set the progress of a stroke, as well as many other options like how it is etc. Can't wait to hear your thought about it. Cheers.
-
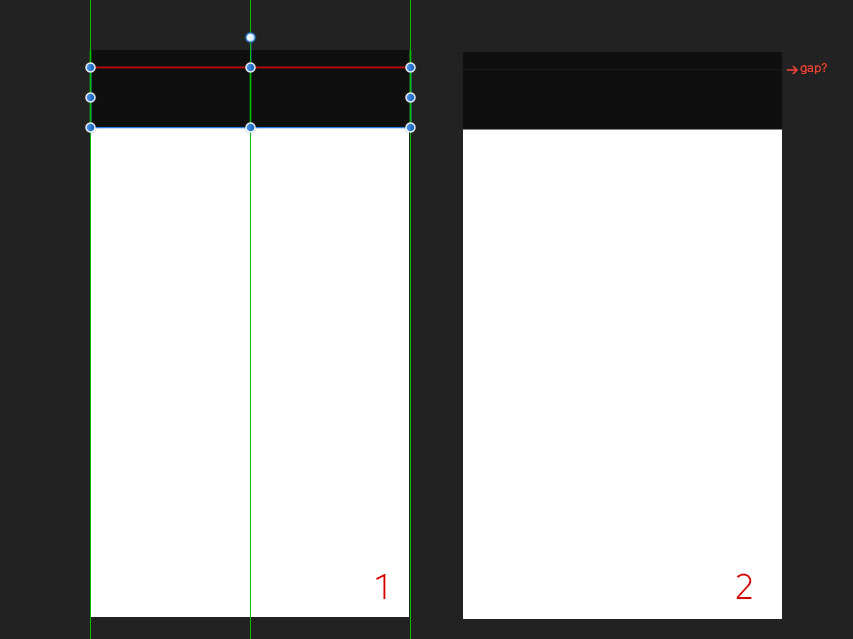
hello, i think i have a little problem here, in the first picture according to the guidelines two rectangular looks connected but in the second picture looks a little gap between them. +If I a little bit more enlarge the bottom rectangle gray line disappears. so, top rectangle fill 100% black no stroke bottom rectangle fill 100% black no stroke zoom level 100% could u examine attached the file? may be this could be a rendering problem? or smart guiding? thank you. DxDiag.txt test.afdesign
-
 I've got a couple of vector masks which are masking out two images. When I drag the masks together, with snapping turned on, they snap but leave a gap between them. A gap that's very clearly visible... what am I doing wrong? There's no stroke before you ask :D Driving me mad!


.png.0cc71ebcad9431a47d8730e0338b311e.png)