Old Bruce
-
Posts
16,998 -
Joined
-
Last visited
Everything posted by Old Bruce
-
 Hi @Mr. Doodlezz, Have you considered using the Channels panel to save the Selection? Then you can apply that to adjustment layers or other layers as a mask.
 -
You could perhaps do this better with the appearance panel. Just add two more strokes aligned to the outside with progressively smaller widths.
-
Basic drawing/layers question
Old Bruce replied to Rottcodd's topic in Desktop Questions (macOS and Windows)
I will assume you are using Photo. I will assume you are using the Rectangle Quickshape. Use the Move tool (the black arrow) to select the shape on the canvas or in the layers panel. Hold down the shift key and click on another shape or layer. You should now have two shapes (and layers) selected. Using the Layers panel you can select all five rectangles by holding down the Command key and clicking on each one. As you select or draw the shapes you should assign a fill colour. If they are clear you won't be able to see them. -
remove unnecessary complications
Old Bruce replied to Thomahawk's topic in Feedback for the Affinity V2 Suite of Products
I use the checkbox. Please don't remove it. -
Embedded thumbnail in linked RAW image
Old Bruce replied to stuartbarry's topic in Desktop Questions (macOS and Windows)
What you are asking the application to do is read the raw file (linked) in the .aphoto document (linked) and then render the image onscreen. If you then change the zoom factor the files have to be recalculated for the new zoom level. If the .aphoto document has any adjustment layers or Live Filter layers then those have to be calculated as well as the Development adjustments on the raw file. That is a fair amount of work, especially if there are more than one in the area you are viewing. -
Make sure the Wet edges checkbox isn't ticked for the Clone Brush Tool. Aside: Watch Walt ninja me.

-
100% means 1 inch (or cm) on screen equals 1 inch (or cm) in the document. Zoom to fit means the document will fit the window.
-
Hi @Gregory-CJ, I have to echo MikeTO's request for a document that shows this problem. Far too many variables here for us to try and recreate the problem.
-
The keyword being "empty" I am guessing that you have the Use Fill checkbox (in the Context Toolbar) unchecked.
-
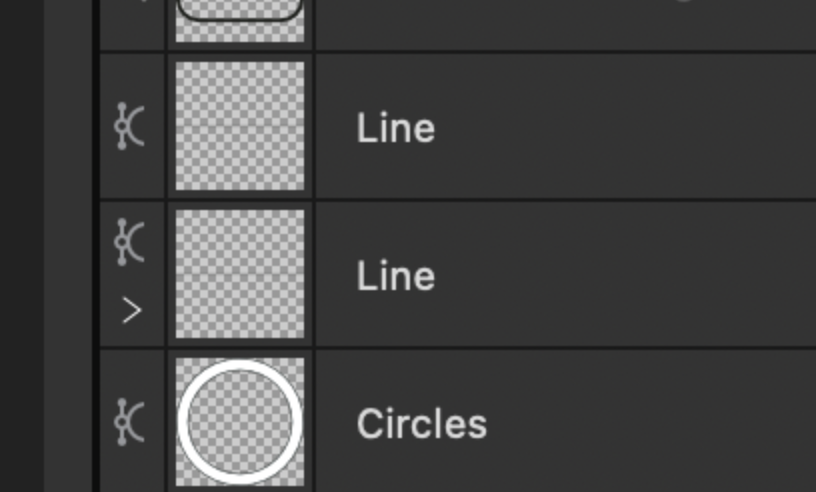
I think these two lines should be one rectangle.
-
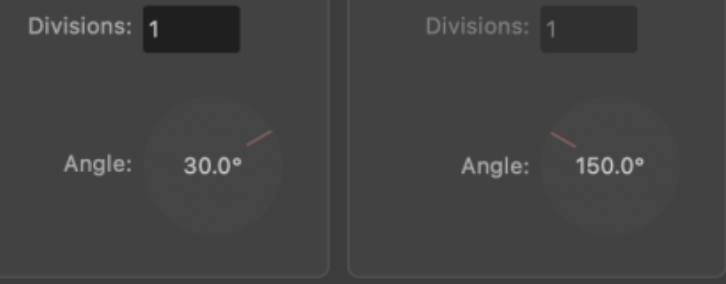
Here on Mac OS 11.7 and Designer 2 2.0.4 it works. Try toggling the Grid type: from Triangle custom to Two axis custom and back to Triangle custom again.
-
I am not seeing any Text Frames there. Isn't this thread about Text?
-
Further to what @walt.farrell has written I would think that if there are overrides applied to the text in the source document this may cause a "new" style to be created in the destination document. Plain Text text is our friend.
-
Publisher V2 spell checker
Old Bruce replied to Limolb's topic in Desktop Questions (macOS and Windows)
Hi @lonan.oisin, Text boxes as you call the Text Frames do not have any actual text attributes. The language of the text box is going to be the language of the Text it contains. In other words, use Text Styles to set the language. -
Photo: Next Tab/Previous Tab
Old Bruce replied to Steve Bishop's topic in Feedback for the Affinity V2 Suite of Products
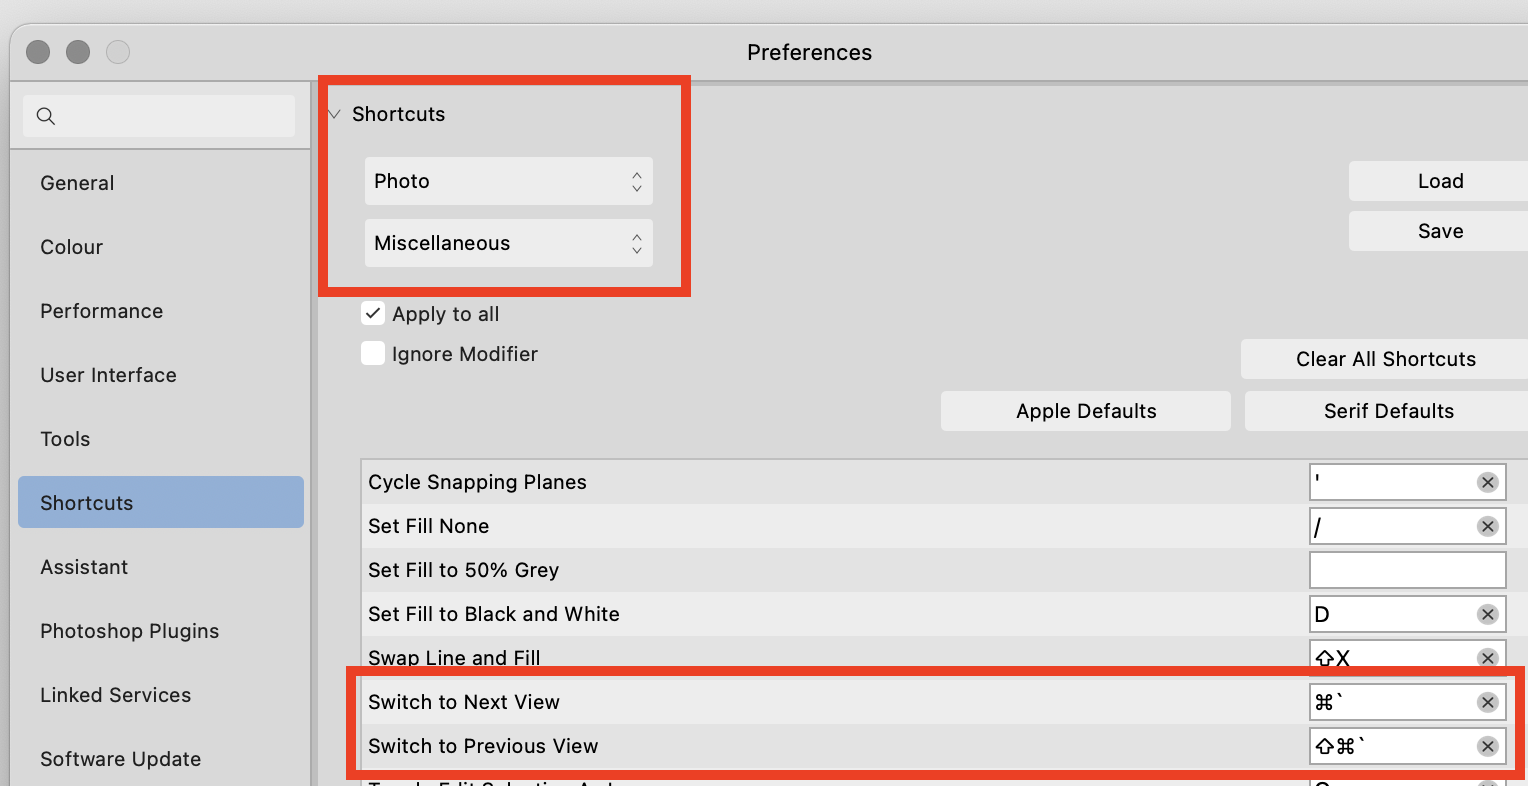
The Mac equivalent of Command + Tab is an already long established Mac OS keyboard shortcut for switching between open Applications. The Command + ` is used by other Mac applications I use as a default for switching between open windows/documents. -
Does it happen with an Embedded raw file instead of a Linked raw file? Where are the raw files kept? Are they on a networked drive or on the computer's hard drive?
-
I don't really see how making a new file from your request (for this functionality with the Add Chapter button) and just using File > New... and opening a template file. There could be a lot of problems with selecting things that are "based on" the current file, what actually is the current file? Does it include the total number of pages? Added graphics? Overrides to Text Styles? Manually made breaks in the text flow? I think Best Practice would be to make a Template file before starting on a project which is a Book based on Chapters. Just my 2 cents.
-
Photo: Next Tab/Previous Tab
Old Bruce replied to Steve Bishop's topic in Feedback for the Affinity V2 Suite of Products
Have you tried using the Affinity default Command + ` That is the misnamed Tilde key. The one under the escape key, the one one above the Tab key. <- Mac OS 11.7 defaults
-
Exporting with UI layer
Old Bruce replied to affinityenthusiast's topic in Desktop Questions (macOS and Windows)
If you only have access to Designer then your screenshot with the title "Or do I have to do this" is about the best way. I would use a Symbol (consisting of a text layer) instead of the text layers if the text is to be the same for each image. Myself having access to the whole suite means I would just use a Publisher document with a Master Page holding a Picture Frame and the Text layer above it. Make 6 or 66 pages and File > Place all the images into the frames on the different pages. Export as Pages to the various formats. -
Spike artefacts in svg and pdf export
Old Bruce replied to KuffDSchmull's topic in Desktop Questions (macOS and Windows)
I am thinking that there are coincident nodes, or nodes that are very close together. Switch to the node tool and zoom way in to the "base" of one of the spikes. -
Are both images A4 size? If they are small and you are scaling them up then their placed resolution will be lower than 300 dpi. A one inch square image with a resolution of 300 dpi stretched to fill a 3 inch square will have a placed resolution of 100 dpi.
-
This could be a screen drawing issue. Try some typing, so you have no new text showing but the cursor has moved. Now scroll or zoom out and back or in and back. If the typed text shows then it is a screen drawing problem. If this is it, then, (sadly) I have no idea of a cure for you.
-
Designer scaling & alignment problem
Old Bruce replied to EkJohnson's topic in Desktop Questions (macOS and Windows)
To me it looks like the black stroke is covering up the blue fill. That is the black stroke on the Blue and the black stroke on the p and the s. -
A Template would ideally have all the Text Styles you are going to use in the Book. It would also have all the page headers, Document Swatch colours, margins, text frames etc. in it. One template file. Take your Word file and make one word file for each chapter. Place each word file into a new from the template Publisher document. 23 chapters means 23 word files and 23 Publisher files.