TrentL
-
Posts
157 -
Joined
-
Last visited
Everything posted by TrentL
-
 Hi all, I'm trying to learn more about the Soft Proof adjustment layer, which as I understand it is a way to show a better representation of what your document will look like when printed. In practice, how can we determine which "Proof Profile" to choose? Is this something that is specified by the printer's documentation? Or the printer paper documentation? I looked around at a few common printers and the paper, even going to their websites, but it was rarely helpful. Thanks
-
Program: Affinity Designer Version: 2.1.1 OS : Windows I'm noticing a randomly appearing issue where if I try to use the Corner Tool with a shape (Rectangle, Pentagon, Diamond, Triangle), I sometimes cannot select the corner type. This seems to be more likely to happen when I've created a new document and am trying to use the corner tool with a shape for the first time, but it doesn't always happen at that time. When this happens, it allows me to change the corner using the round corner type. A workaround is to click off the shape and then try again, which usually allows me to then select the corner type. I've attached a file, although it is entirely possible it will work perfectly for you. Usually once it starts working it stays working for the rest of my session. Not a showstopper, but I thought I'd mention it. CornerTool.afdesign
-
Layer clipping is painful in many applications…but Affinity Designer makes it easy! Don’t know what Layer Clipping is? Check out this tutorial to see how it works and how you can make your designs look even more professional.
-
Positioning objects where you want them is a critical skill…and Affinity Designer makes it super easy. In this tutorial, we’ll look at snapping, guides, and grids.
-
Hi @HJayP I downloaded your file, exported it with your settings, and it looks good to me. I am using Affinity Designer on Windows, but I don't think that should matter too much. Can you attach an image of the blurry output? What program are you looking at the output file in? Sometimes file previews look blurry things like File Explorer.
-
Learn how to iterate over designs in one document, and export to multiple file formats and sizes with 1 button press! The Artboard Tool and the Export Persona in Affinity Designer can save you countless hours and clicks.
-
If you want to take your outline effects to the next level, then the Contour tool is must-know feature of Affinity Designer. This simple little tool can have some surprisingly powerful effects and we’ll review a bunch of them in this video.
-
Nice work, I really like what you did with the lighting 😎
-
The Shape Builder is a welcome addition to the Affinity Designer toolset. Learn how to use this versatile tool to speed up your workflow when creating vector artwork.
- 1 reply
-
- 5
-

-

-
contour tool and text disappears on artboards
TrentL replied to MichaelDaens's topic in V2 Bugs found on macOS
I created everything within Affinity Designer, but I probably created a normal document and then created the Artboard with the Artboard Tool. I've been playing with it some more this morning and I am finding it hard to figure out a pattern of when it works and doesn't. It seems like when I create a document with "Create Artboard" selected, the Contour Tool usually plays nicely with text. And it seems like when I create a canvas-based document and then manually create artboards, that is when the Contour Tool fails with text in the artboard. But I'm pretty sure I've experienced exceptions to this rule. -
I think it looks pretty solid. My advice for the light matching would be just to look at it visually. Maybe just add a little bit of soft light so the left side (on our left) isn't so dark. I think even with a mouse, a soft brush and the right blend mode could do the trick. The hard part is that in the screenshot of the original face, the lighting is much different than the face you are replacing. But overall I really like it. What is your ultimate goal with this piece?
-
contour tool and text disappears on artboards
TrentL replied to MichaelDaens's topic in V2 Bugs found on macOS
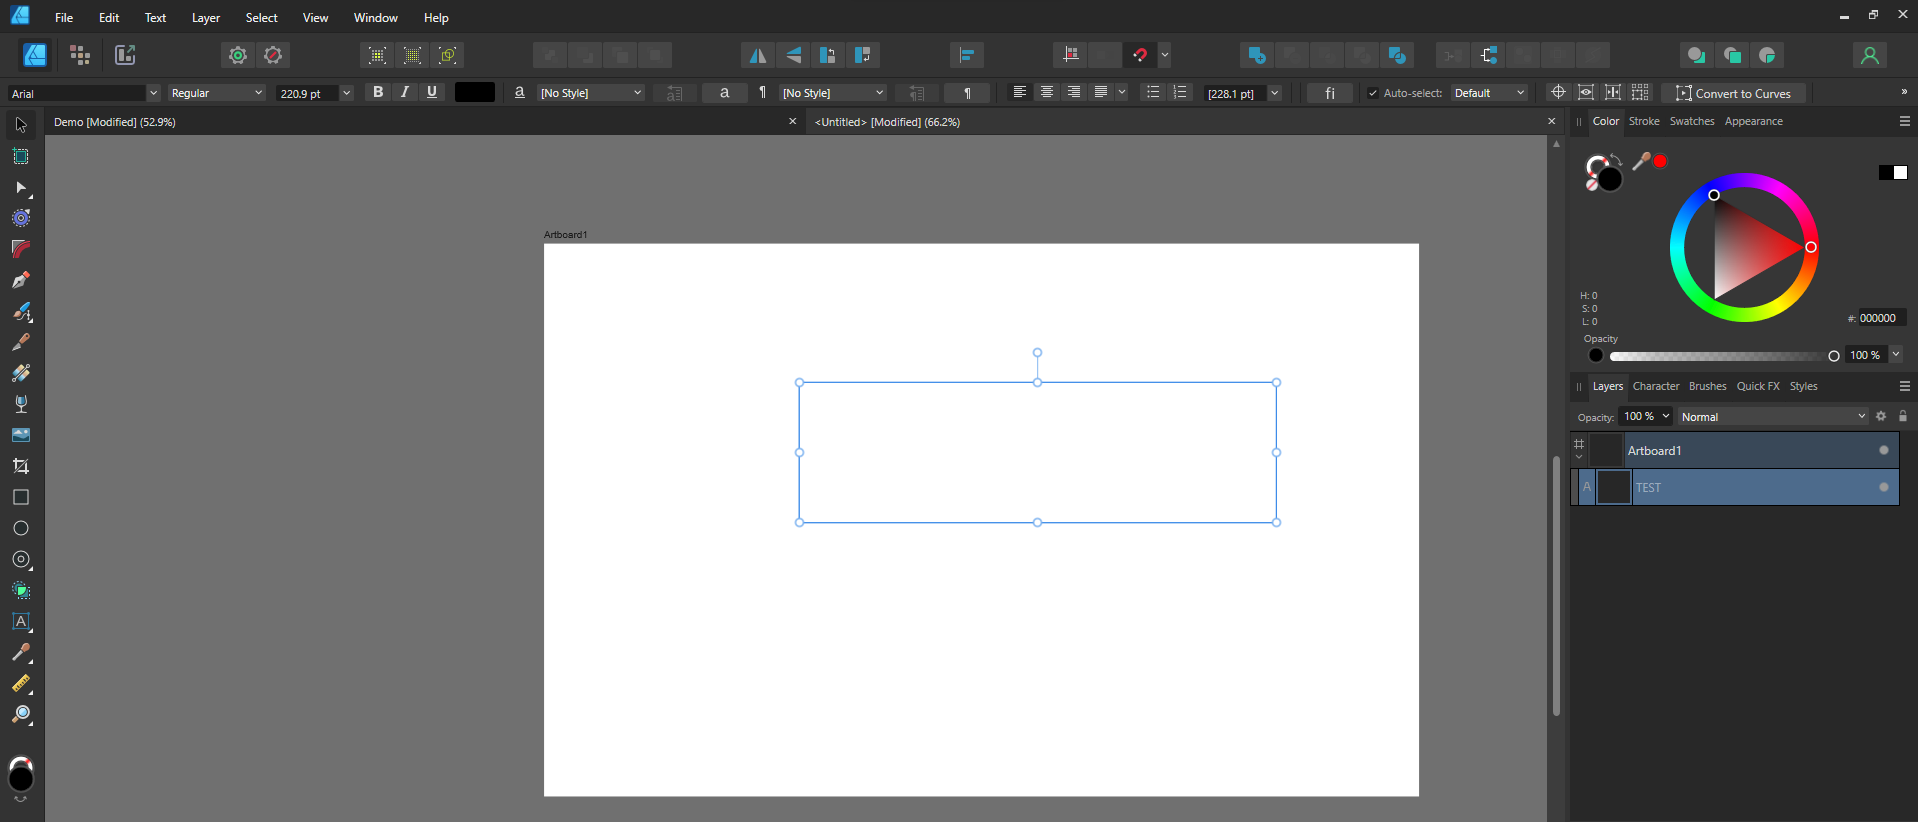
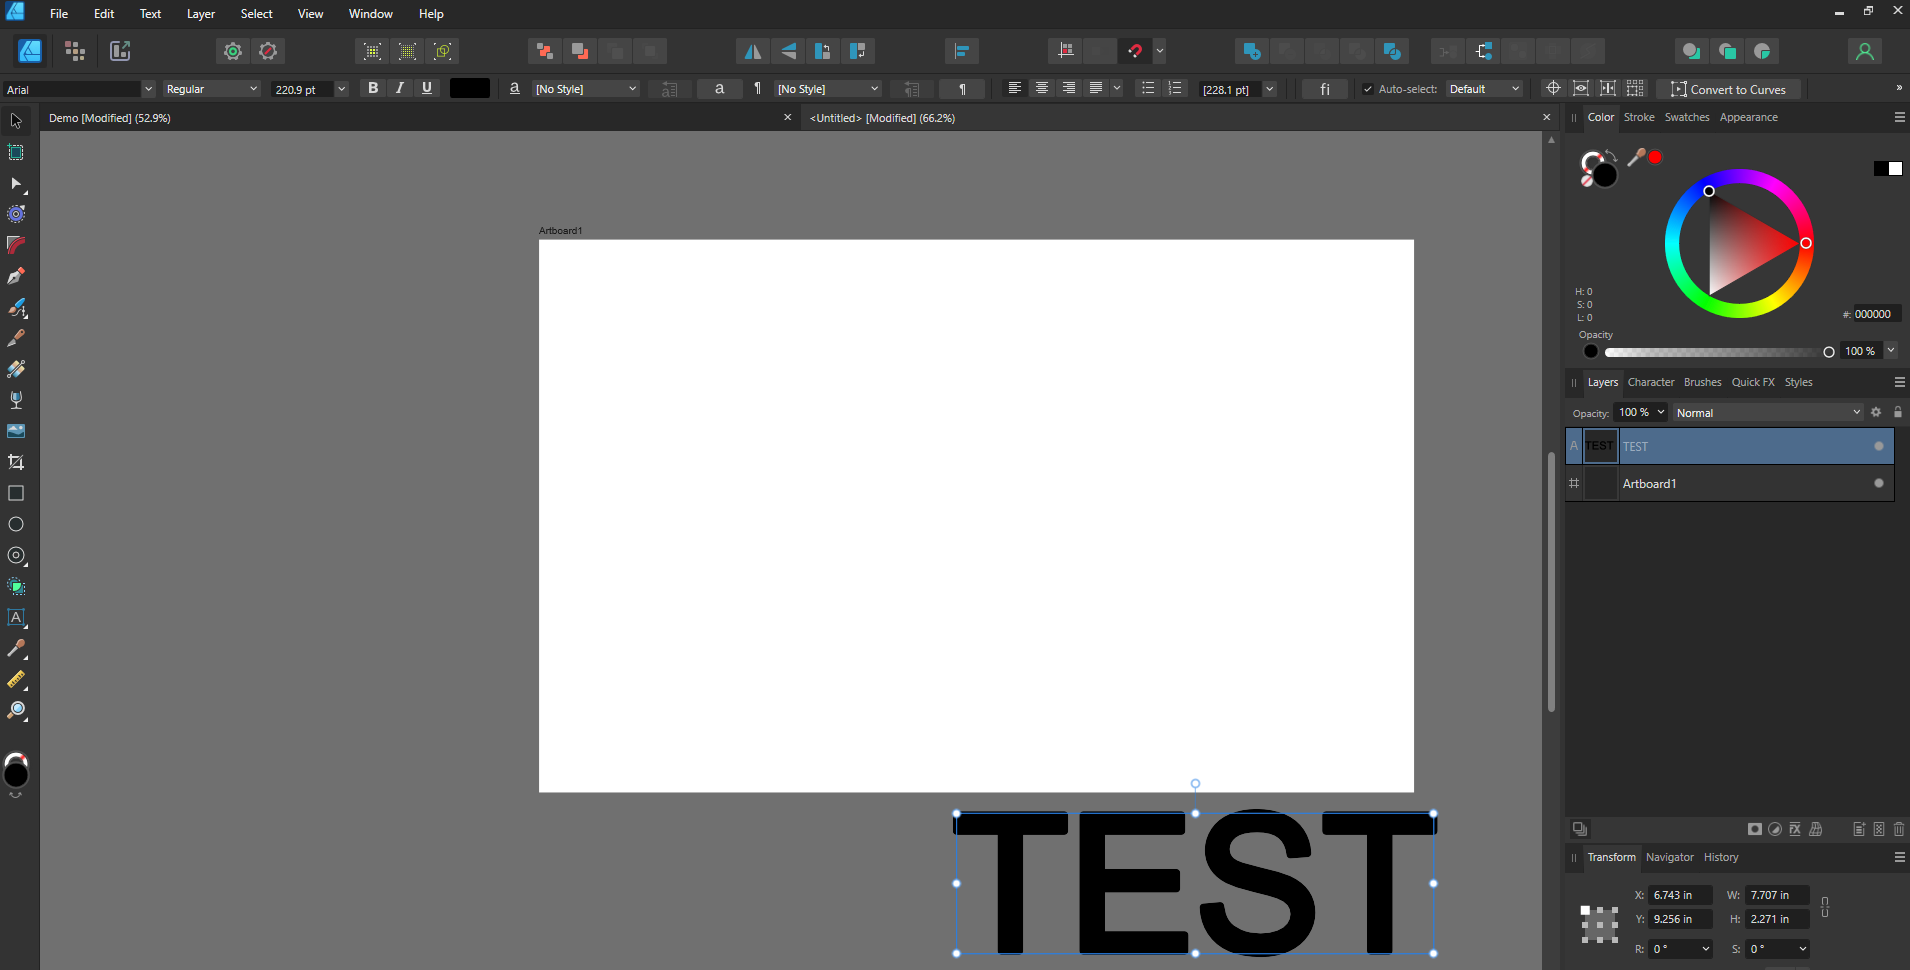
I'm still noticing this problem in Affinity Designer 2.1.1 on Windows. As far as I can tell, using the contour tool on text within an artboard makes the text disappear. Dragging the text outside the artboard makes it show up. I've attached the file if anyone is curious. Text with contour applied not showing in Artboard: Simply dragging the text outside the artboard: ContourTool_Artboard.afdesign
-
Wield the Gradient Fill Tool like an artist, adding depth, dimension, and captivating hues to your designs. In this video, you’ll learn how to infuse your designs with an explosion of colors using Affinity Designer's Gradient Fill Tool.
-
Thanks, glad you like it! I'm kind of doing a tour of all the basic tools first, and then plan to focus more on applications to graphic design + product design in the near future.
-
Slice & dice your designs with the Knife Tool in Affinity Designer. In this video, we’ll look at how to chop up your vectors with precision and style.
-
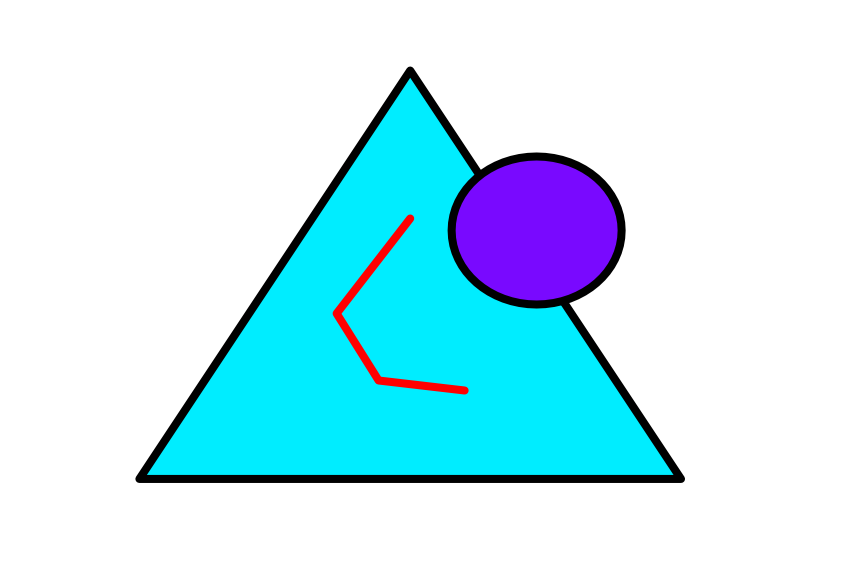
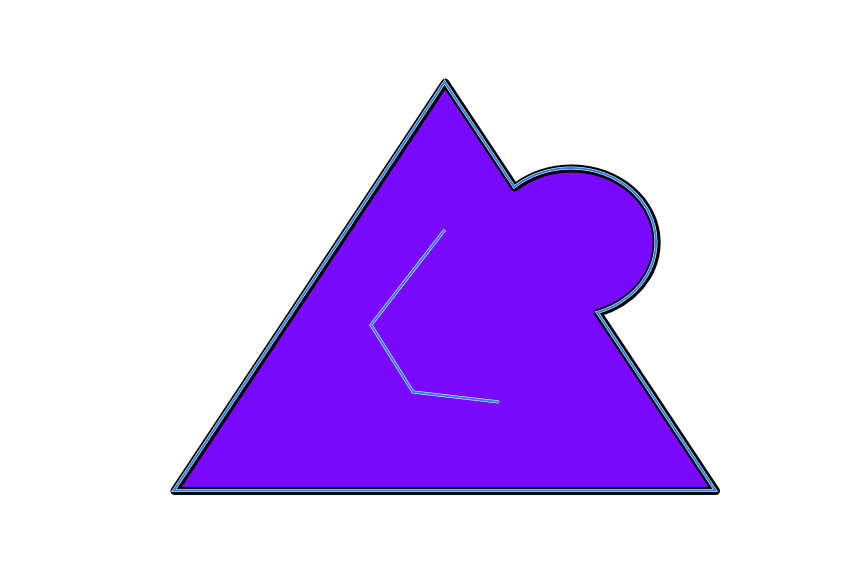
I've read the documentation on what Shape Builder's cleanup options do and I can't figure out how to actually demonstrate what it means. I can see what "All Unused Geometry" does, but what do Internal Curves and External Curves do? I would think the remove Internal Curves option would remove the red line below when everything is selected and Add'ed, but it doesn't. After: Thanks! Trent
-
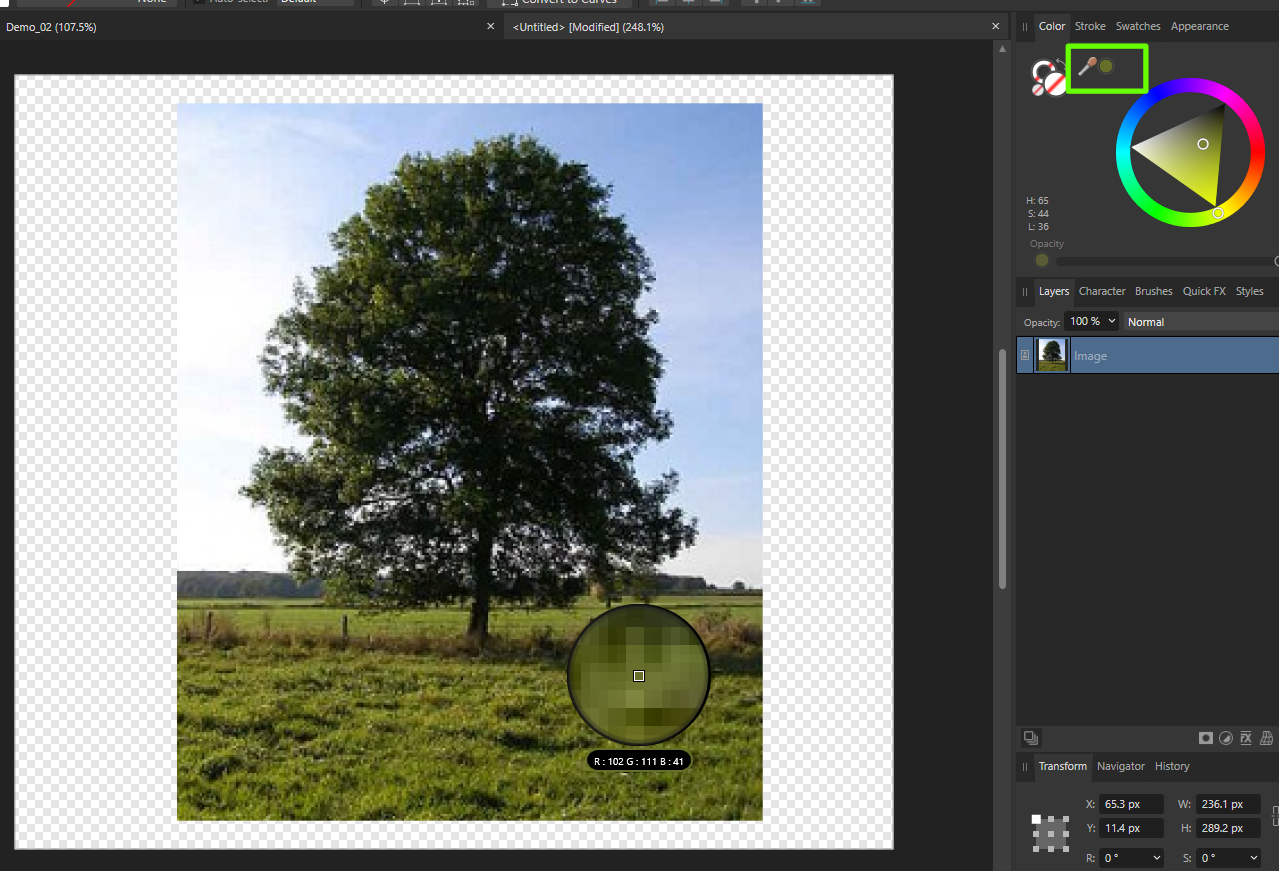
Hi bobdobbs, When you select a color, it will go to that little circle that I highlighted in my image. As you've noticed, if you click the color, it will be applied to the selected object's fill (or stroke if that is selected). While this is usually not what you want for raster images, it is quite handy for vector shapes. If you want to set the color the fill (or stroke) without affecting the current object, first click off of the object (ex: the image) so it is deselected.
-
I don't know what your original image looked like, but the teddy bear looks really good. The only thing that looks a little out of place to me is the light on the kid's face.
-
The Vector Warp Group tool in Affinity Designer is a great way to bend designs to your will…but understanding perspective can be a little tricky. In this video, I’ll go over some basic perspective theory and then show how to use the Warp Group tool to shape text and logos to fit onto objects.
- 1 reply
-
- 4
-
-
-
The closest I could get was enabling "Transform Objects Separately" and resizing all the pieces at the same time, but it doesn't work perfectly for some of the curves. The below example is after I did a little bit of tweaking, but originally a few of the curves were overlapping. Also, I don't think it's possible to get internal pieces to snap perfectly into place. Pieces with a common horizontal/vertical edge snap well, though.
-
Symbols are a great way to reuse objects in your document and make updates that can be reflected everywhere. In this video, we’ll explore how to enable symbols along with some tips and tricks for dealing with how they actually work.
-
In this tutorial, I give a crash course in how to use Adjustment Layers. I demo them in Affinity Designer, but this powerful tool is available in all the Affinity products: Designer, Photo, and Publisher:
-
affinity designer WIP: Working out a "historical" starmap
TrentL replied to DEWLine's topic in Share your work
Looks good. If you're staying with black and white, then perhaps you can consider different lined patterns for the zones. That will add some variety. Example: Also, the red line looks hand drawn and a little wobbly. I'd use some type of bezier curve to get a smoother effect. For the planets/stars, varying their size could also add some more visual interest.
-
The Star Tool is for more than just stars! In this video I’ll give an overview of the 3 star tools: Star Tool, Double Star Tool, and the Square Star Tool. We’ll also look at using shape presets to save our shapes and get ideas for new ones.
-
Photo 'Current Layer & Below'
TrentL replied to keypix's topic in Feedback for Affinity Photo V1 on Desktop
+1 for this feature. 99% of the time I am inpainting on a brand new layer to not destroy my original photo below. This tool should default to "Current Layer & Below".