Affinity Jack
-
Posts
241 -
Joined
-
Last visited
Everything posted by Affinity Jack
-
 Hello, for me, it isn't necessary to divide the OS Mac and Windows. I expect similar interfaces and functions. But one forum for one software would be better to handle. The Affinity Suite will increase. The number of users will increase. And therefore the number of posts will increase. Greetings Jack
 -
Gradient tool
Affinity Jack replied to fearofflying's topic in Pre-V2 Archive of Desktop Questions (macOS and Windows)
Hello fearofflying, I do this alway with layer masks. Click on layer mask. Fill is with a gradient white to black. White is transparent and nothing changes. Black hides the layer. Depending on your project, you need a white layer below. I used this in my tutorials. Ciao Jack -
Hi SurJones, I agree! There will be more software in the Affinity Suite and an increasing number of posts. Therefore it seems to be necessary having more categories. There was already a topic: klick for the topic: separate categories AP & AD Ciao Jack
-
Thank you Allan, I didn't know about that so far.
-
Good morning TinPianoMan, huuuaaaaa, 06.30 h in Berlin..... :blink:. It's difficult to answer, because I don't know, what do you do exactly with which software. So I will answer for Affinity Photo, but Affinity Designer works similar. If the dog is colored and you want it black & white: Adjustment layer "HSL", and then reduce the saturation to 0 If you need more an Illustration effect instead of a photo: Adjustment layer "threshold" To erase the white background: activate the original layer take the color picker and drag it onto the white until the color is chosen activate this color go to "selection-select the chosen color" then "backspace" or for more control click on mask and the whites will be erased and change to transparent Export as a png-file! Otherwise the tranparent will Change to white. Ciao Jack
-
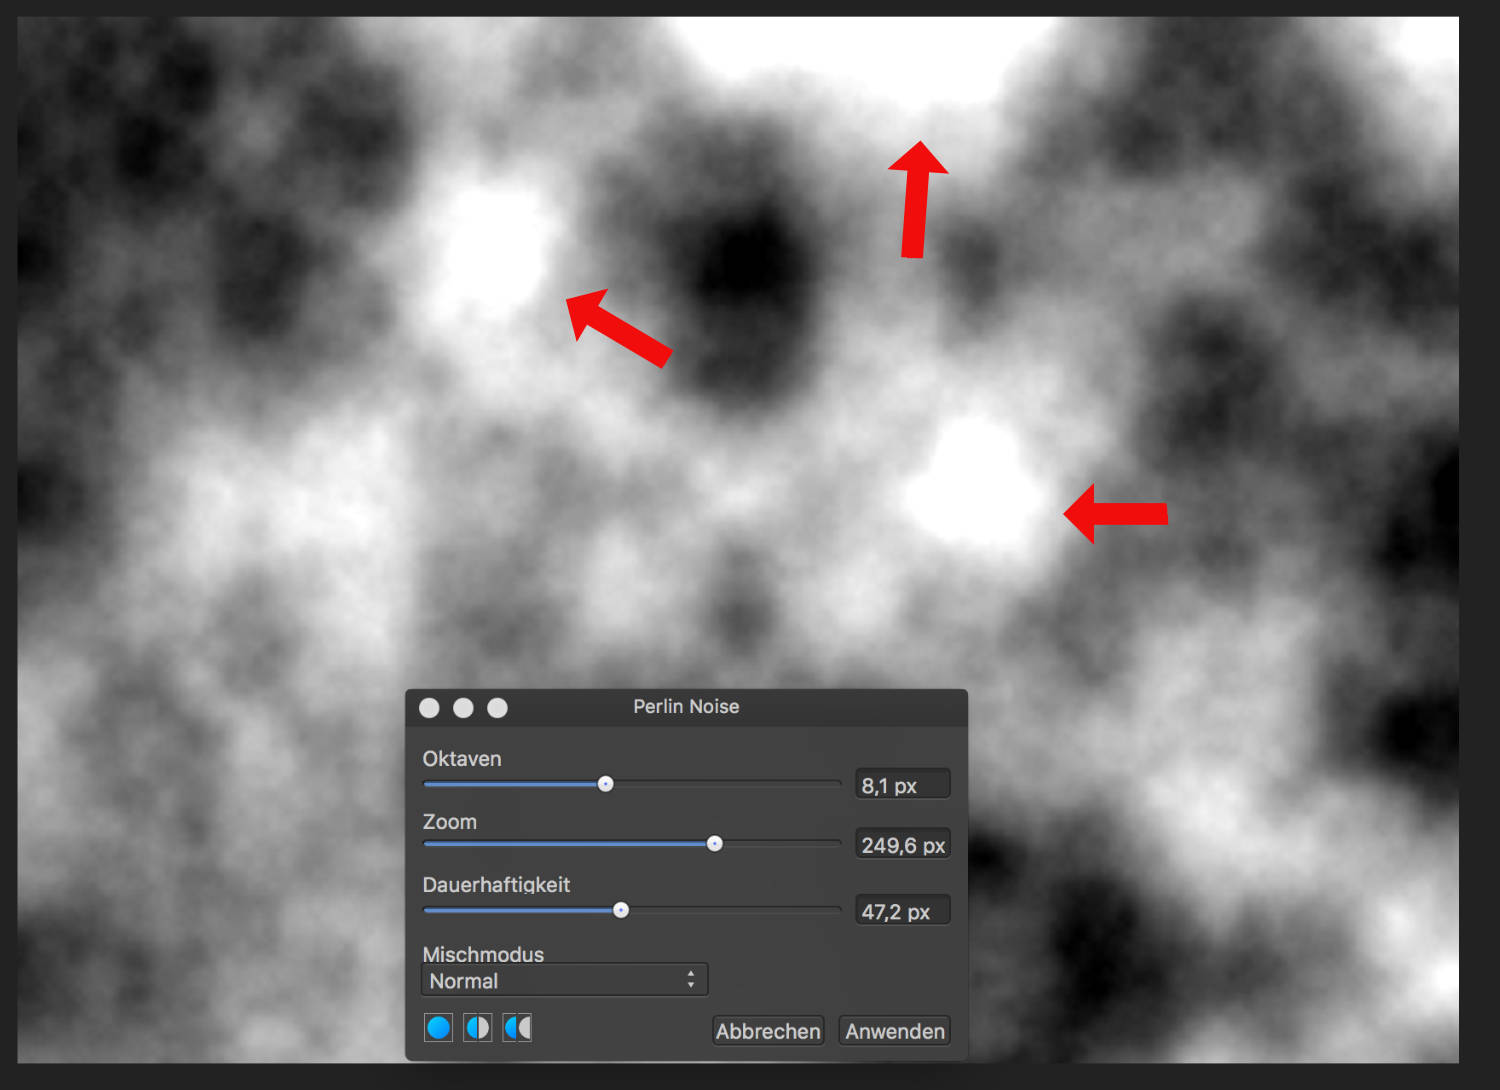
Hi, I like the Perlin Noise Filter very much! Compliment!

- 5 replies
-
- 1
-

-
- Perlin Noise
- render
- (and 2 more)
-
Hi Allan a creative solution! Thank you! I shared it on Twitter. Greetings from Germany Ciao Jack
-
Okay, funny, because this is a transition to another effect which is also in my personal schedule... :) Ciao Jack
-
riflettere
Affinity Jack replied to cenciarini claudio's topic in Pre-V2 Archive of Desktop Questions (macOS and Windows)
Salve Claudio, parlo soltanto un po di l'italiano... Una riflessione è uguale come un'ombra. Ho fatto un tutorial per fare 3 ombre in tedesco con titolare di sotto inglese. YouTube Tutorial La differenzia è: - fare una copia della selezione su un layer/livello nuovo "cmd & J" - prende la trasformazione alla sinistra e tirare giù o prende "selezione-specchiare 180° verticale" per esempio il resto è similare. Ciao Jack -
Hi TinPianoMan, this is a nice effect and I will make a tutorial about that in future. Depending upon the picture, it will be easy or difficult. The easy way (but not the best): You need a texture of your cracks. You're right. It it possible with the build-in brushes. There are several grunge brushes. Make your texture on a layer over your photo, which you want to be effected. Set the blend mode to something like "multiply". You can mask out unwanted areas. But for a complex result, you also need to enforce the cracks with curves, add shadows/contours with dodge & burn, displace to the object .... Perhaps this helps. Ciao Jack
-
black layer mask
Affinity Jack replied to rondawoolgar's topic in Pre-V2 Archive of Desktop Questions (macOS and Windows)
Hi rondawoolgar, when you click the mask icon, the mask is usually white. That means transparent. Nothing changes to the layer. If the mask is black, all is hidden under the mask. So, there are different possibilities to fill the mask with black. At first activate the mask (not the layer): - "cmd & I": for invert. That will be the fastest way - "layer - invert" - paint bucket tool, select black, fill with black Now all is hidden under the mask. To reveal areas, paint with a white mask on the mask. Ciao Jack -
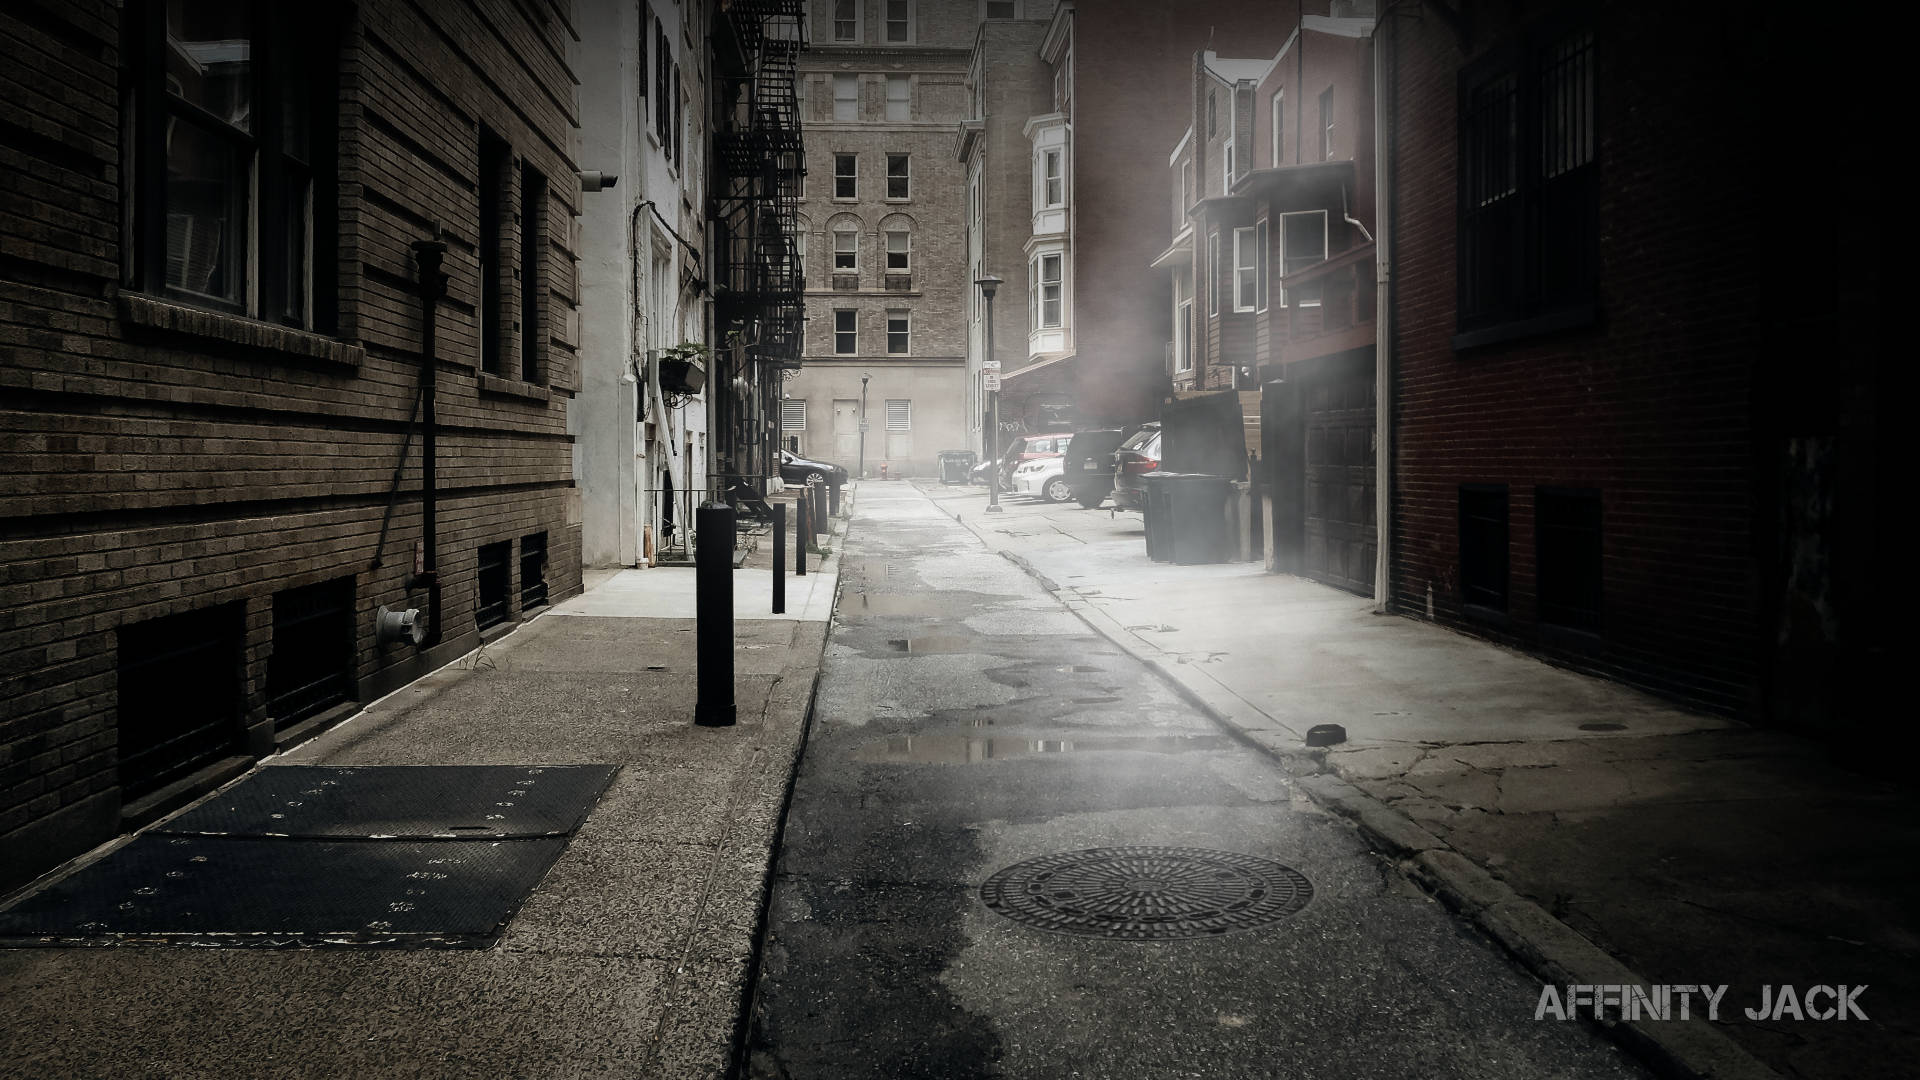
Hi, in diesem Affinity Photo Tutorial zeige ich einen dampfenden Gully-Deckel in einer dunklen Straße. Dabei wird Dampf erstellt. Die Methode bei Rauch wäre aber die gleiche. Es gibt viele Anwendungsmöglichkeiten, ganz nach Geschmack. Ich wünsche Euch viel Spaß. Ihr könnt mir Eure Ergebnisse und Ideen gerne posten. Ciao Jack Hi, in this Affinity Photo Tutorial, I show you a steaming manhole cover in a dark street. I create steam, but the method for smoke would be the same.. There are many possibilities for the application, like you want. I wish you fun. You can post your results and ideas. Ciao Jack YouTube-Tutorial: Dampf / Rauch - steam / smoke https://youtu.be/lzHKy2TFhhM
-
- 2
-
-
- Affinity Photo
- Tutorial
- (and 5 more)
-
Hallo BatteriesInc, danke schön! Und hoffentlich bis bald zum nächsten. Ciao Jack
-
Motion blur
Affinity Jack replied to Raymondo's topic in Pre-V2 Archive of Desktop Questions (macOS and Windows)
Hi Raymondo, I think, you're right. This method doesn't work well. But there are other methods. I provided a tutorial. Perhaps it helps or gives you another idea. YouTube-Tutorial: Light beams Ciao Jack -
Hello Lukenewman, I found a little article about using Astropad and Affinity Photo. (last chapter of the column). In german, but you can translate with an app or browser plugin. :rolleyes: Link to www.affinitytutorials.de Ciao Jack
-
Photo Browser
Affinity Jack replied to Mr. K's topic in Pre-V2 Archive of Desktop Questions (macOS and Windows)
Hi Mr. K, actually no. Future: I don't know. Ciao Jack -
Relative distance guides
Affinity Jack replied to hugo bertrand's topic in Older Feedback & Suggestion Posts
Hello Hugo, I know, what you mean. You are right. This would be a good feature. I tried to create DVD-covers. But I gave it up. There I need exact measurements. Ciao Jack -
How to - digital effect
Affinity Jack replied to norcoscia's topic in Pre-V2 Archive of Desktop Questions (macOS and Windows)
Yes, but I didn't found a square shape for the already installed brushes. Perhaps, you need to install a brush (www.brusheezy.com) or others. Ciao Jack -
Additional announcement: This tutorial is a variation of color splash. I have some more ideas, embedding the color splash effect in a different matter in future. Thank for your comments, also via YouTube, Twitter and directly. Ciao Jack
-
B&W Editing Tips
Affinity Jack replied to lamayer's topic in Tutorials (Staff and Customer Created Tutorials)
Hi lamayer, for a post, it's too much. There are many possibilities and there are depending on which photo you have and what action is to have. But it is a good idea for a tutorial. I think, I will produce one. But give me some weeks. Ciao Jack -
One more announcement to the topic "double exposure": Some of my followers had the wish of a tutorial with this effect. This effect offers many possibilities and methods. I decided to create one in a little different way. But I have ideas for the future. So I'll produce different kinds of using this popular effect. Ciao Jack
-
Hi CarmenCo, thank you, generally: For all your likes and feedbacks. That makes me happy and I'm encouraged to produce more and more. If you have wishes: You can tell them! Ciao Jack
-
Hello CarmenCo, thank you! I wish you a nice weekend. Ciao Jack
-
Pressure tab
Affinity Jack replied to jackamus's topic in Pre-V2 Archive of Desktop Questions (macOS and Windows)
Hi Jackamus, I don't find it for vectors, but for brushes: Click on the "brush tool" or press "B". The context menu bar appears. Click on "more". The brush setting window appears. Click on "dynamics". On the right of each parameter, you find a drop down menu, where you can choose "pressure". And nearby, you find the curves symbol. There you can choose the sensibility of the pressure. Perhaps it may help, when you make this shape as a selection to protect the outer edge, you can brush with a calm hand the inner stroke... Ciao Jack P.S.: Oh, sorry. You use AD....., my mistake -
Hi jlaval, you can customize that: 1) Tool Bar (on the left): view - customize tools That allows you to add tools, you want being in the tool bar 2) palettes & layers (on the right): view - Studio You can choose the palettes you want to be there, either with folders 3) context menu bar (on top): view - context menu (on/off) every time, when you choose a tool, there are special settings in the context 4) design & further settings: Affinity Photo - settings Here you can choose a lot of settings. The font, the size, the color, shortcuts .... Try it to find out. Ciao Jack